
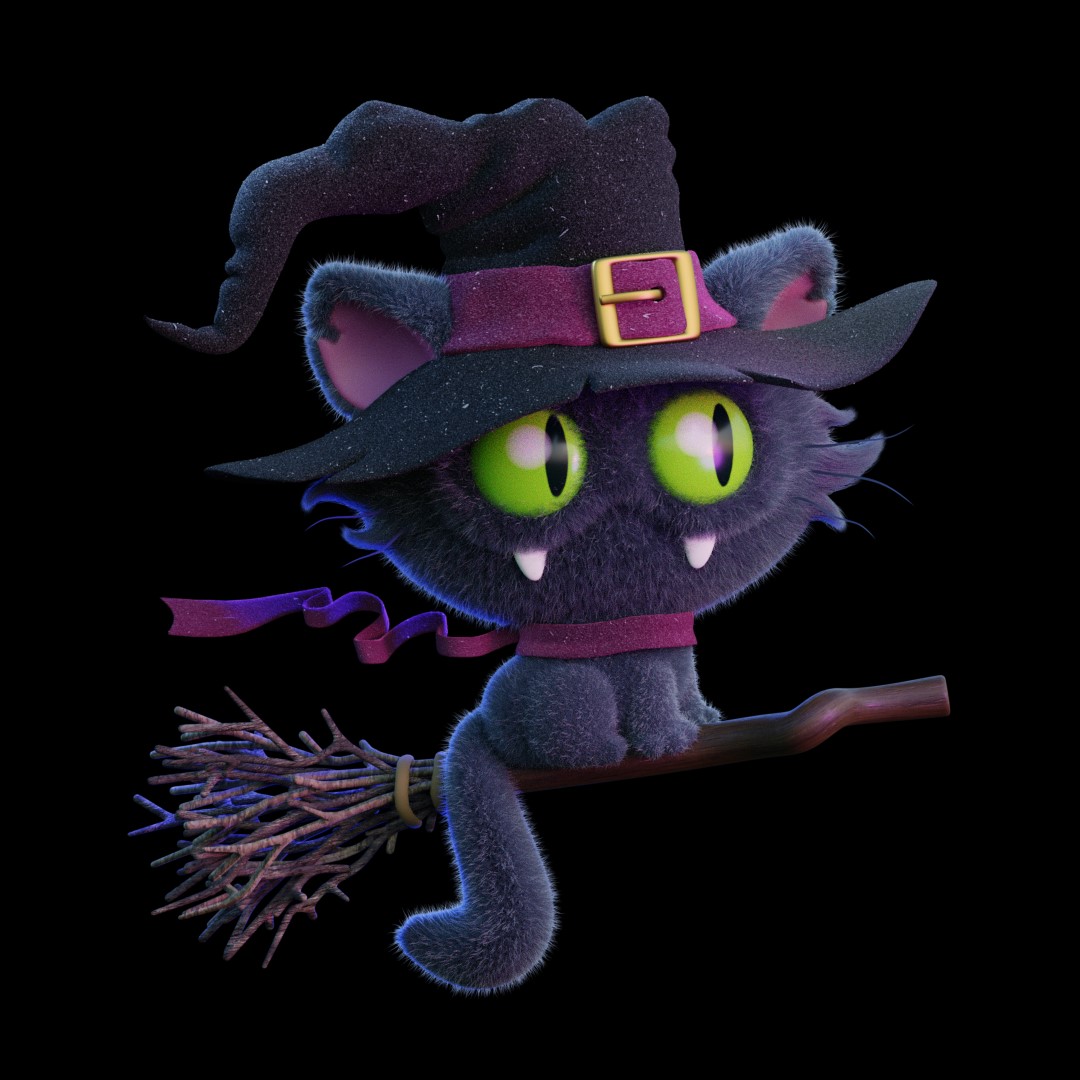
Behind the Scenes: Halloween Cat
INTRODUCTION
Hello everyone! My name is Kate and I live in Saint Petersburg. I’m a freelance artist and a teacher at Best Blender Course, where I help to create magic with 3D fur. Cute and funny characters are my passion and, for me, Blender is the best all-in-one software for creating them.
INSPIRATION
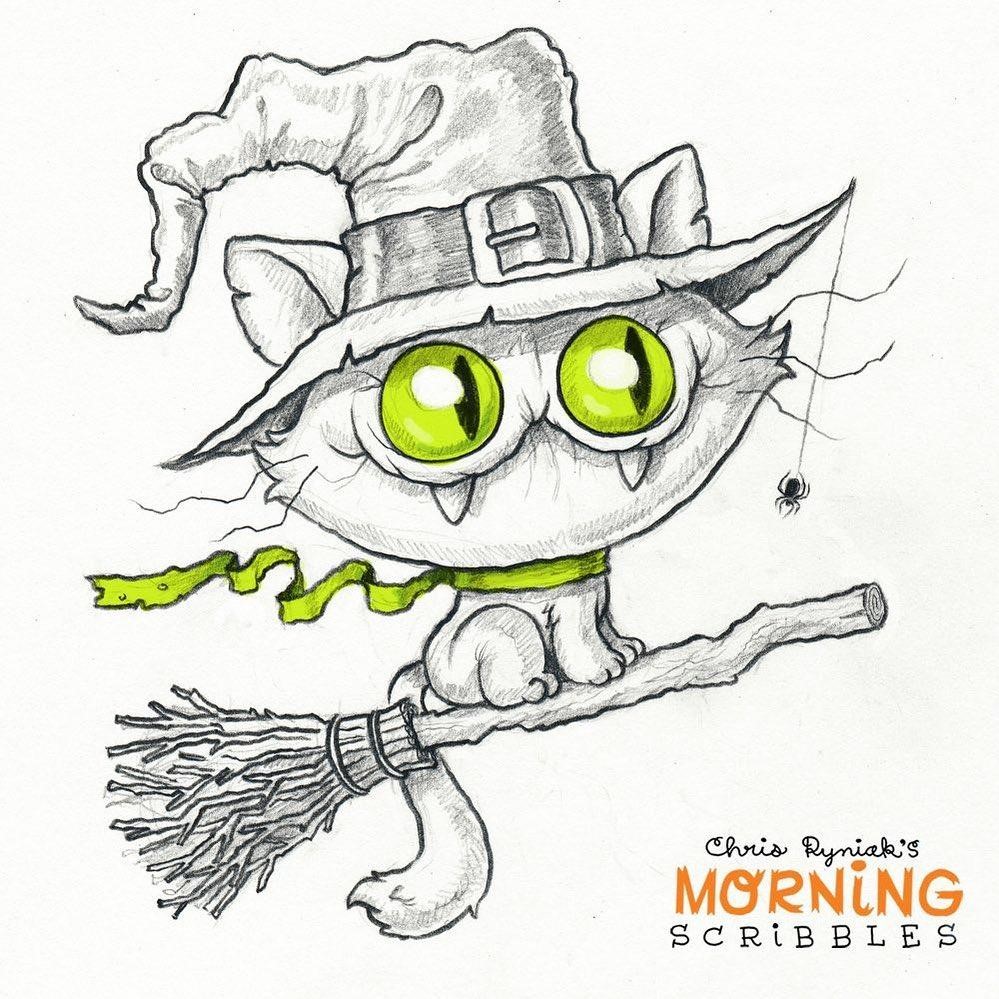
I’ve never done Halloween-themed art before, but this year I decided it’s time! Also, I really wanted to practice turning 2D art into 3D. And after doing some research, I came across a drawing by the wonderful artist Chris Ryniak, which I immediately fell in love with.
MODELING
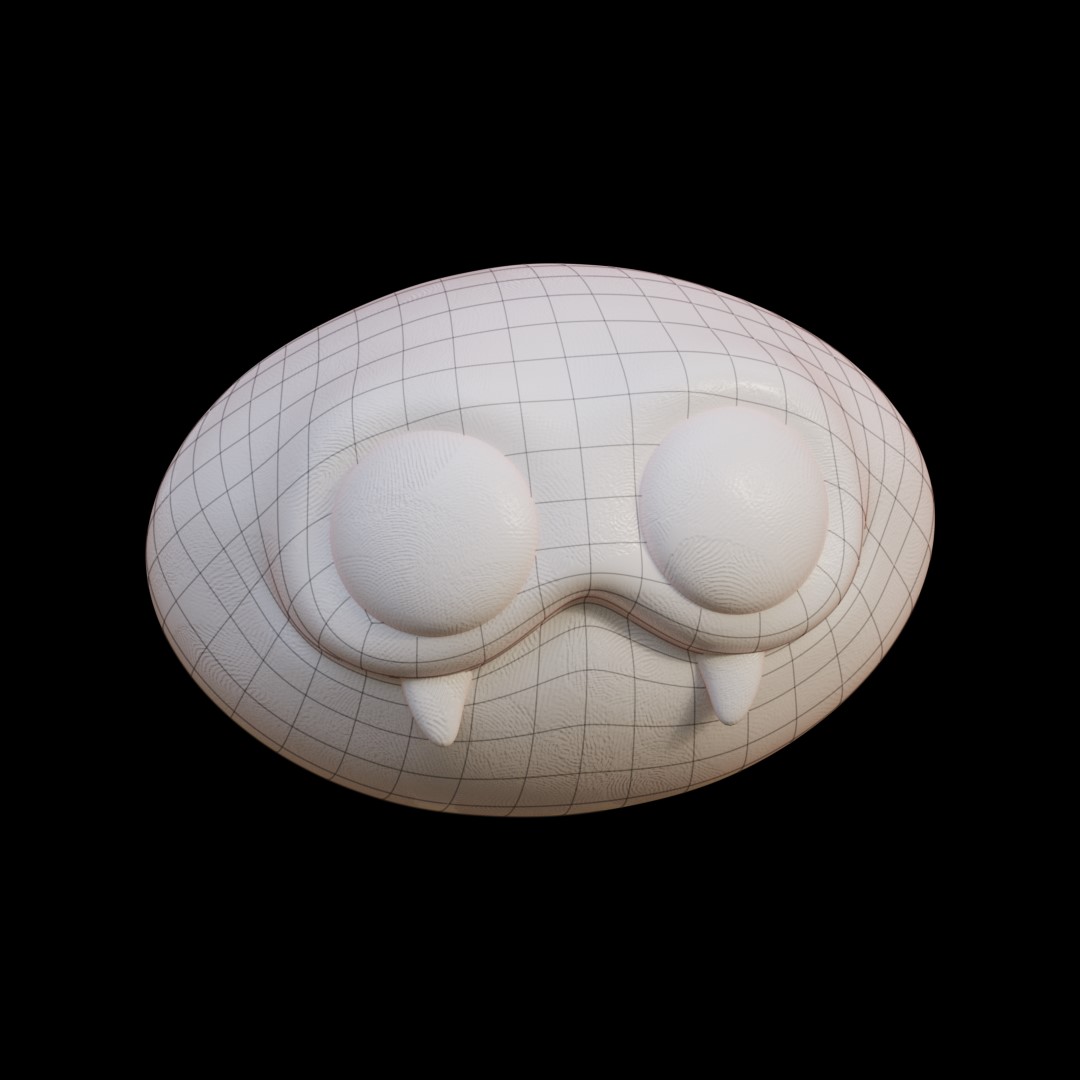
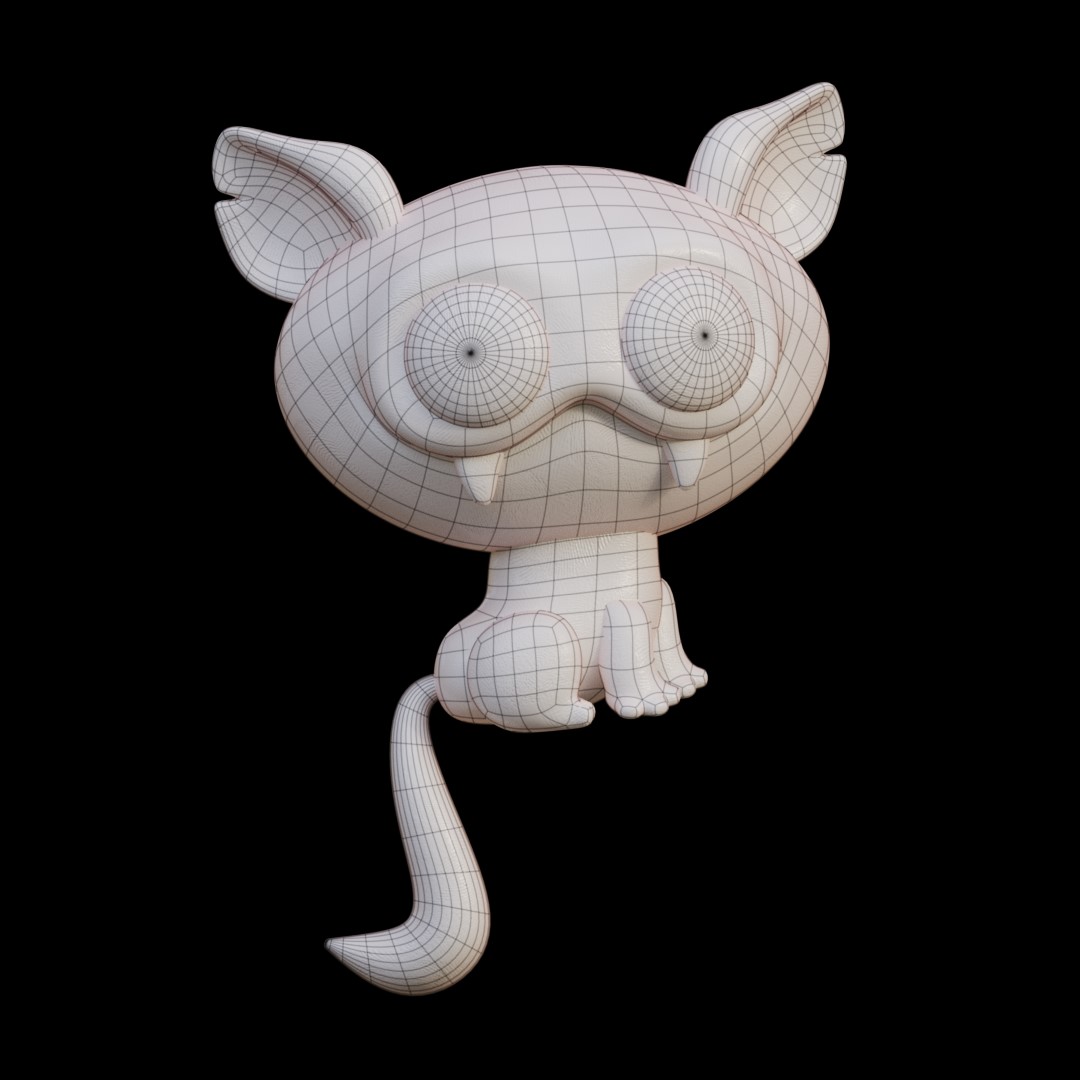
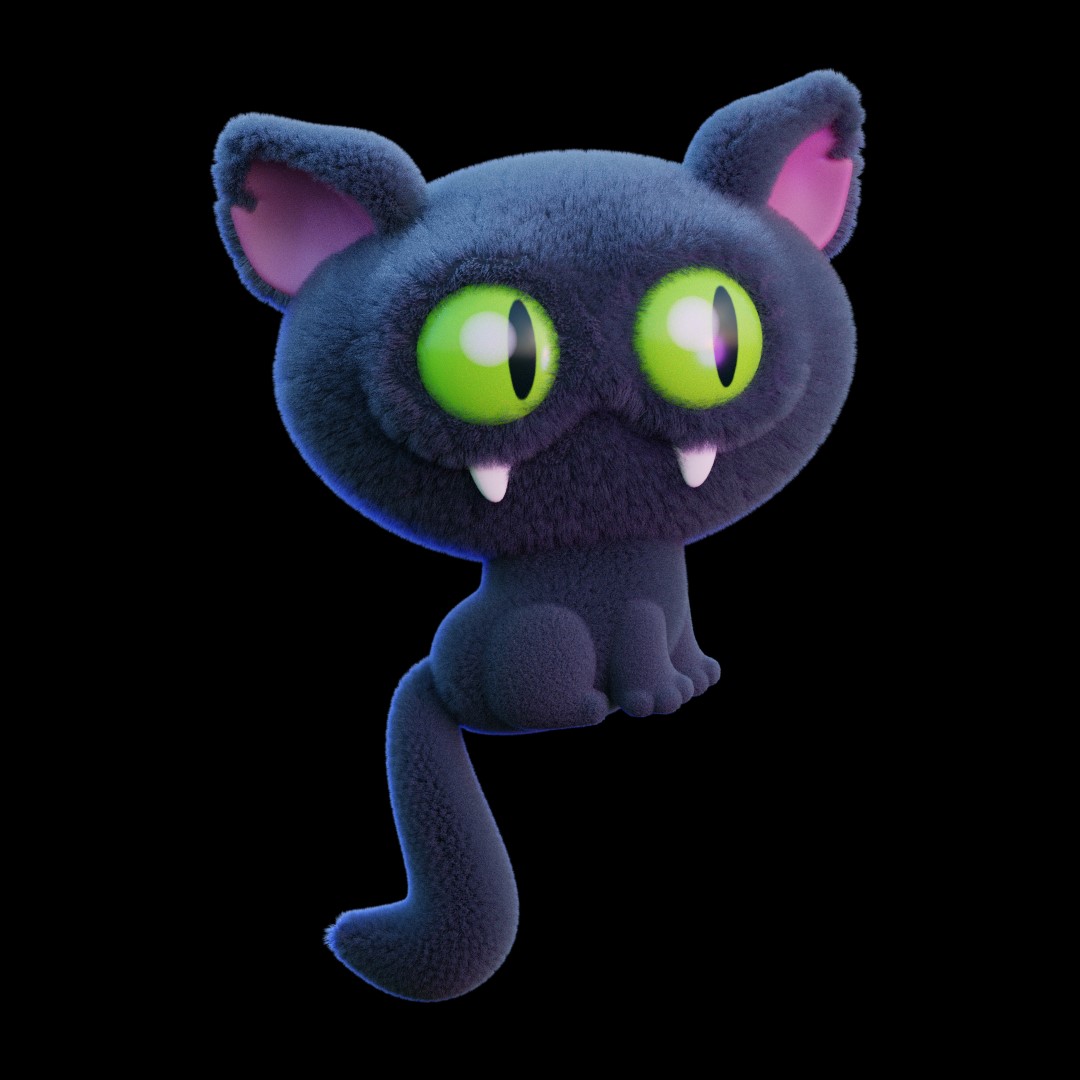
I started modeling the cat head with a round cube. Figuring out the proportions, I formed a mouth and eye sockets. Then I added eyes and fangs.
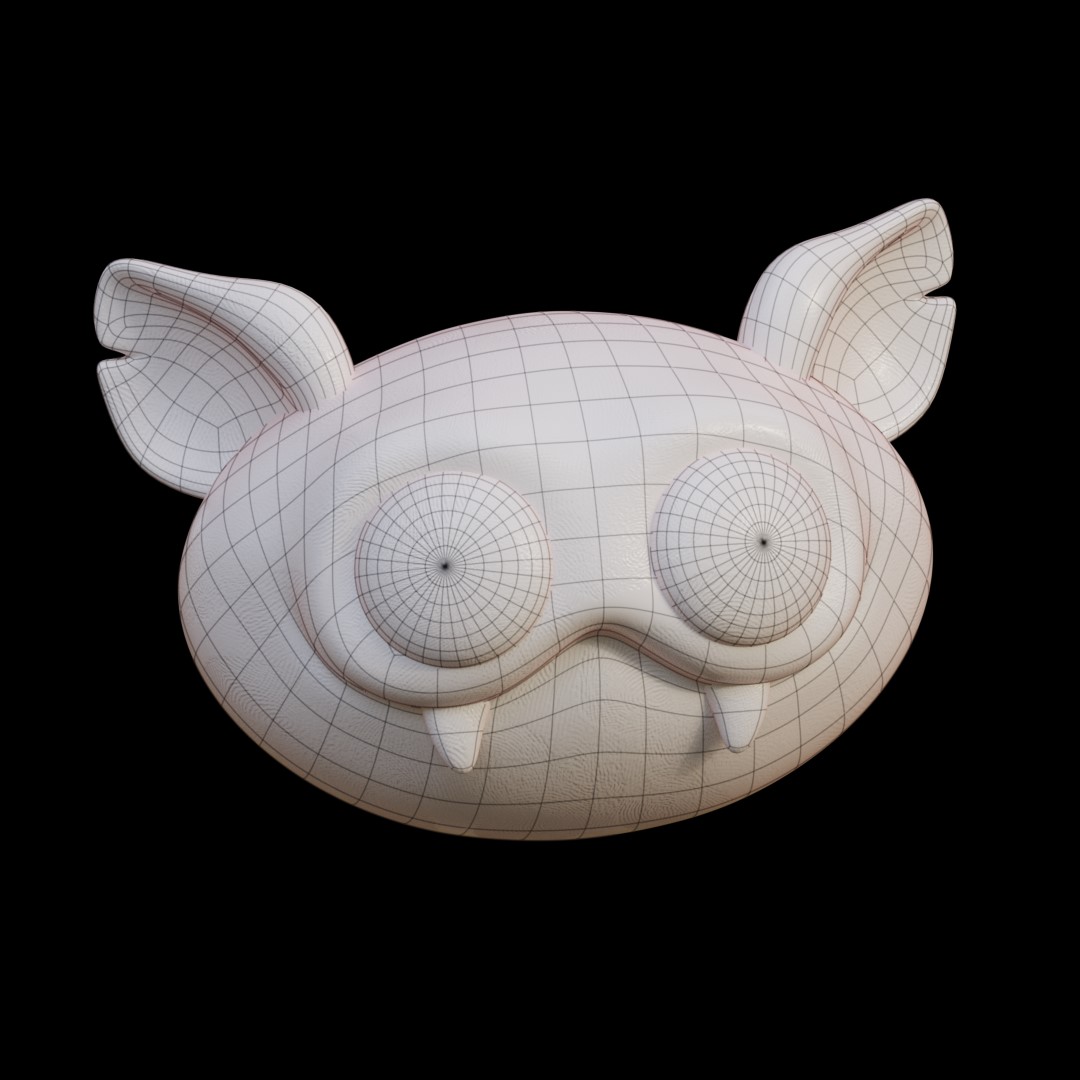
The next step was to create ears. To achieve the proper shape, I jumped into the sculpt mode and had some fun with the Draw Sharp brush and Lasso Trim. After that, I retopologized the objects with Quad Remesher add-on. It saved my time and did a pretty good job for my task.
I used a Bezier curve to make the tail and then convert it into mesh. For the body and legs, I used regular cubes, which I extruded, scaled, and got them into the right shape. Nothing tricky, just making sure that everything matched the reference.
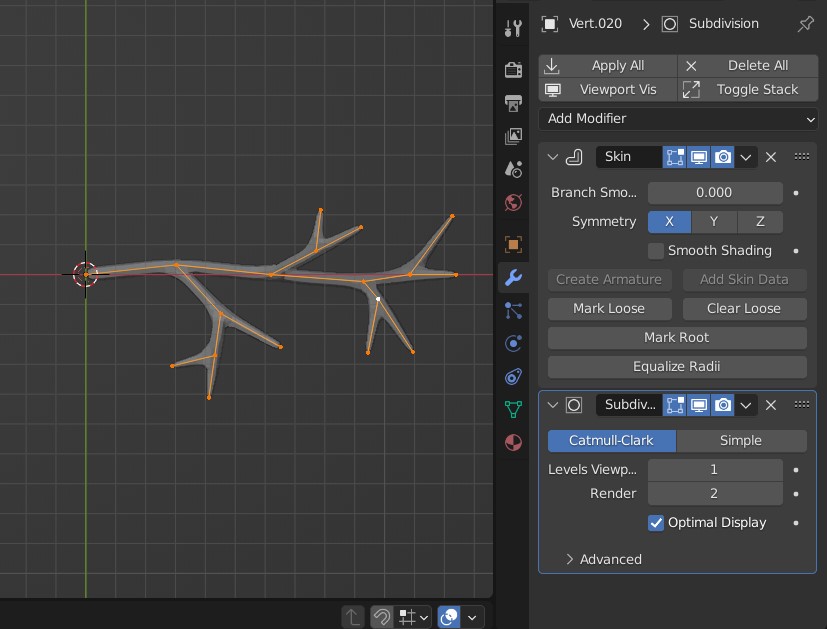
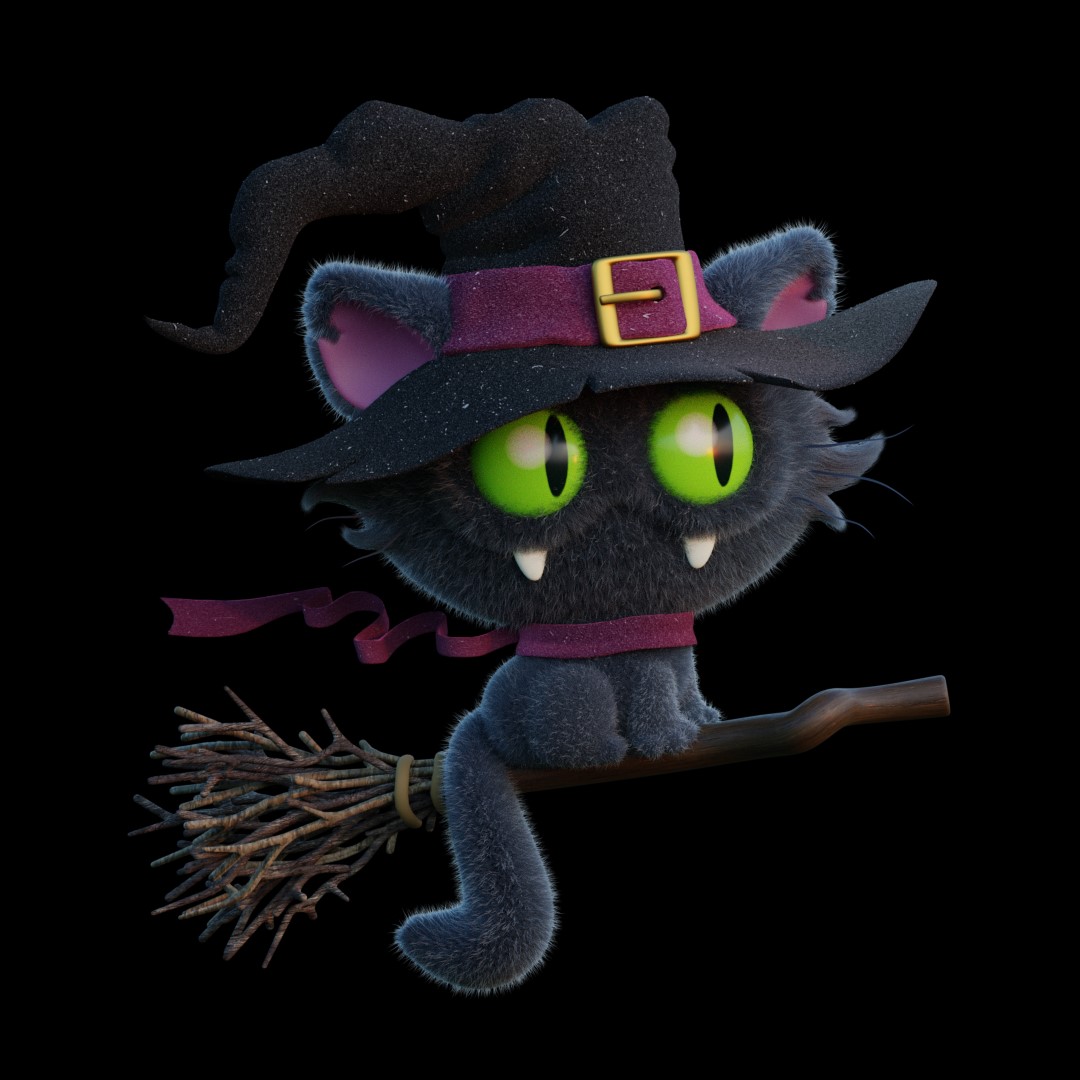
The broom handle is also a curve, and the twigs are made with a single vert using a skin modifier. I created two types of twigs, and then just duplicated and randomly rotated them.
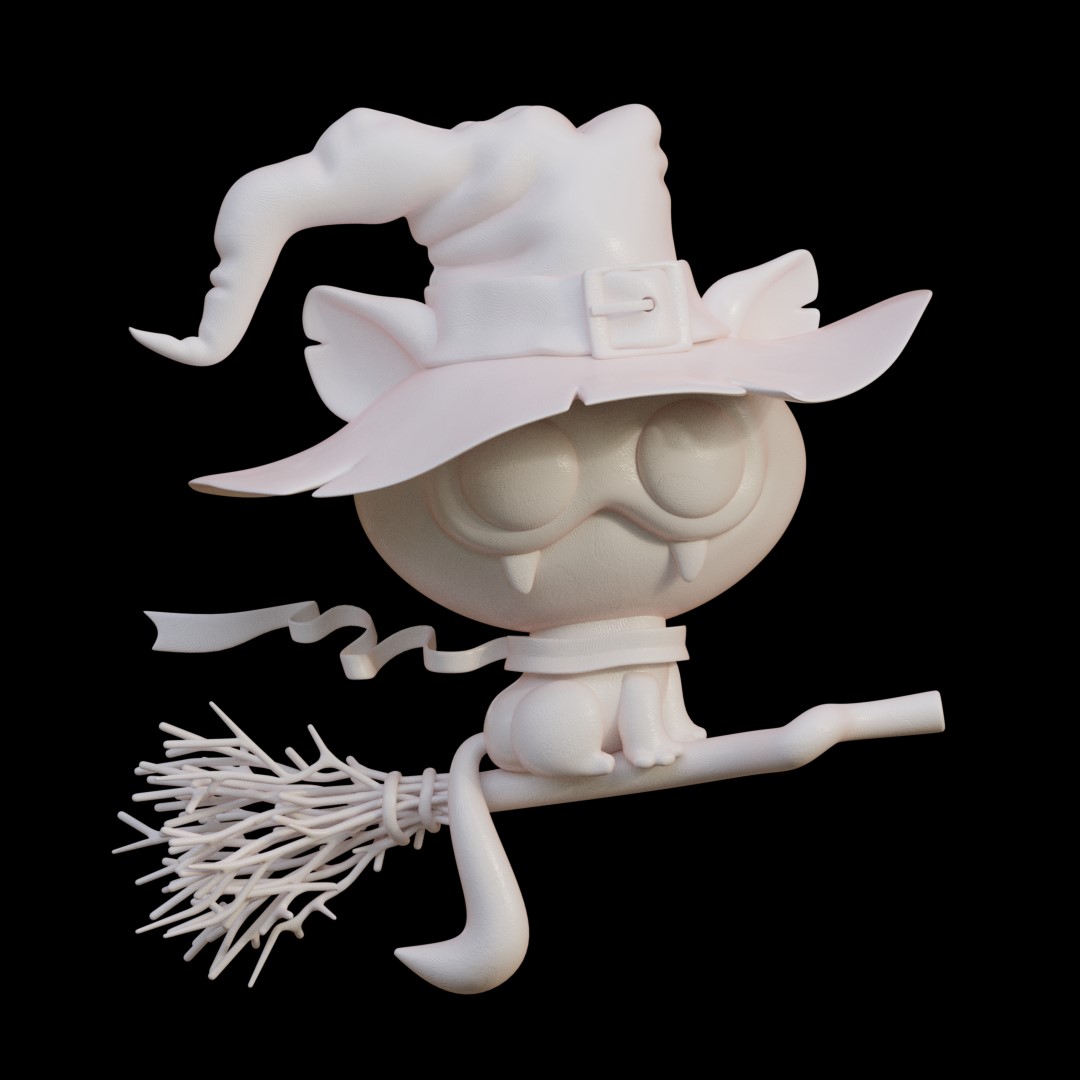
For the hat, I first made a general shape, and then I sculpted folds with the multiresolution modifier on it. The rest of the details are just simple circles and planes. Eventually, modeling was nothing but an exciting and enjoyable process!
TEXTURING
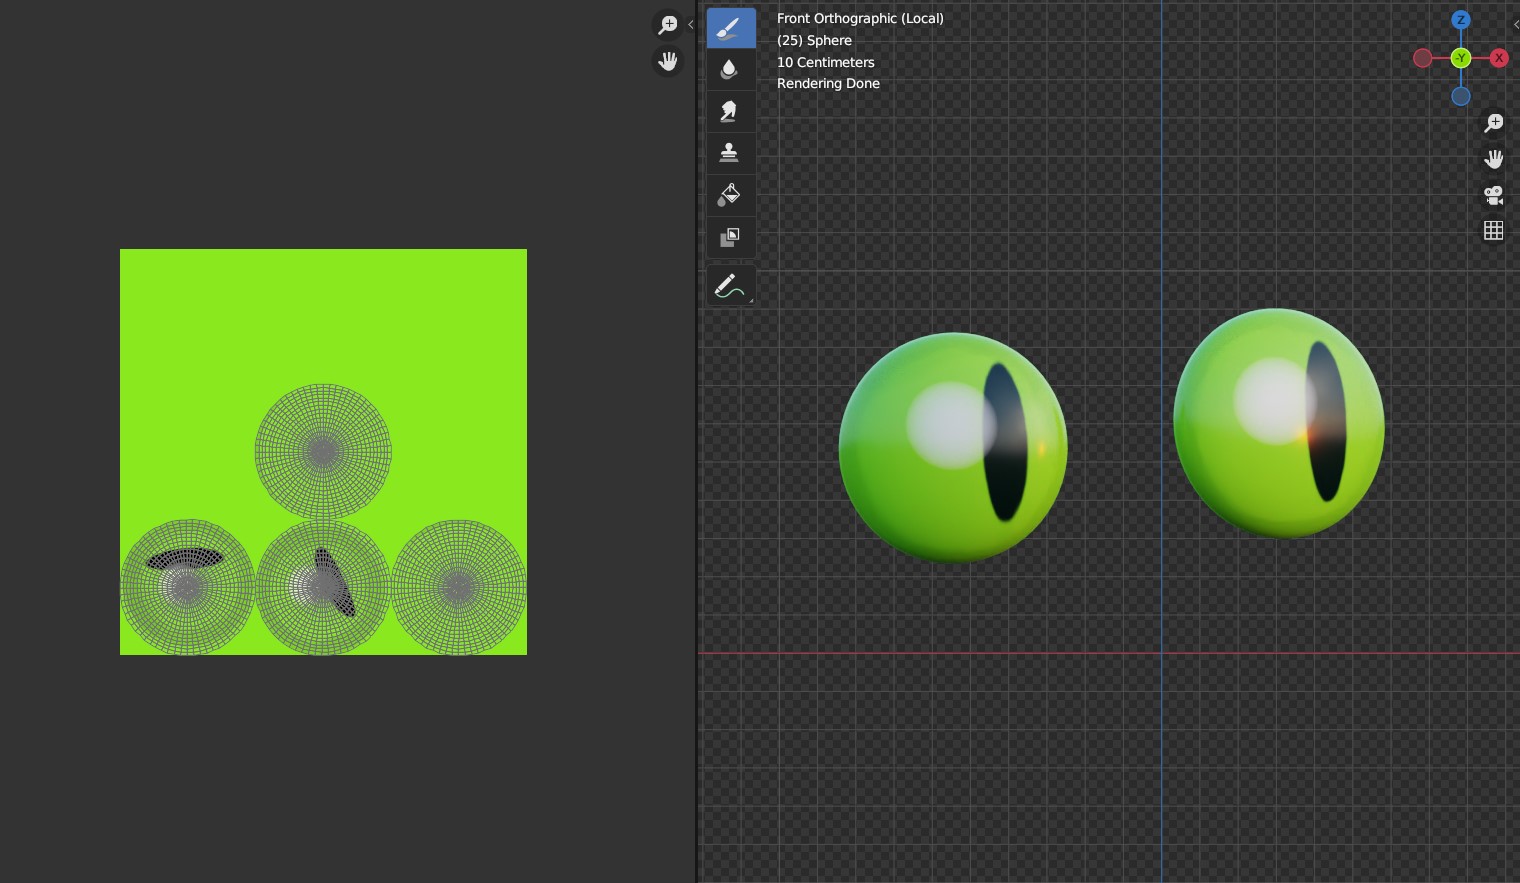
After UV-unwrapping the eyes, I painted the textures by hand.
For the cat, fangs, and the buckle, I used default Principled BSDF, changing the color, roughness and metallic settings the way I needed.
The rest of the shaders are a mix of PBR textures that I’ve collected over the past few years.
GROOMING
To create a cartoon-like but natural-looking fur, I used two particle systems. One for а dense and soft undercoat.
And the second for longer and thinner light-colored fur.
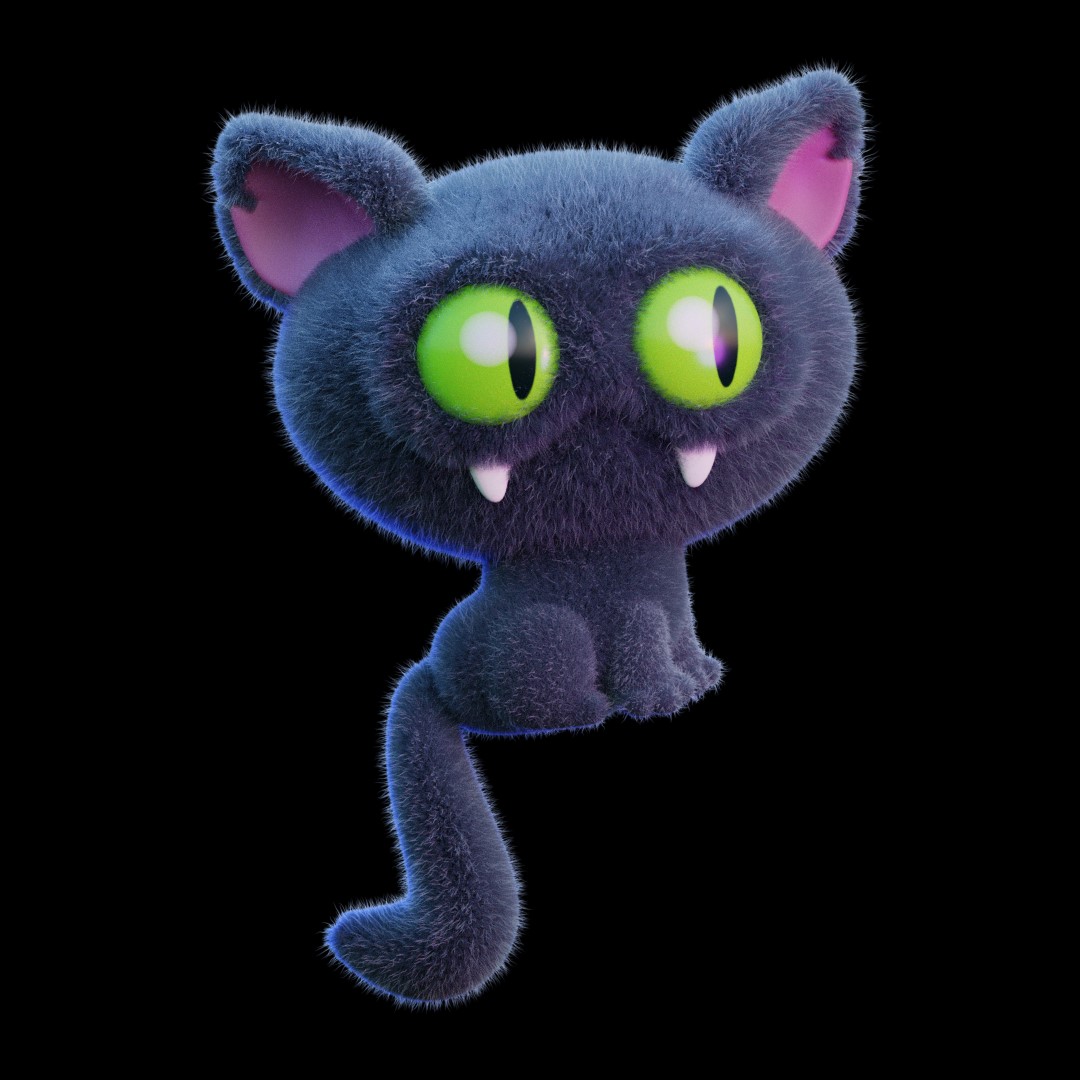
Then I added fur to the cheeks and got it to the right shape with a Comb and a Length tool. The final touch was the whiskers.

LIGHTING
To light up the cat, I added an HDRI called “Industrial Sunset” from the Poly Haven website. It wasn’t enough, but HDRIs always do a very good job for fur.
After that, I created a blue rim light to separate the main object from the background, bring color variations, and make a fairy tale look to the illustration.

The next step was to add a purple key light.
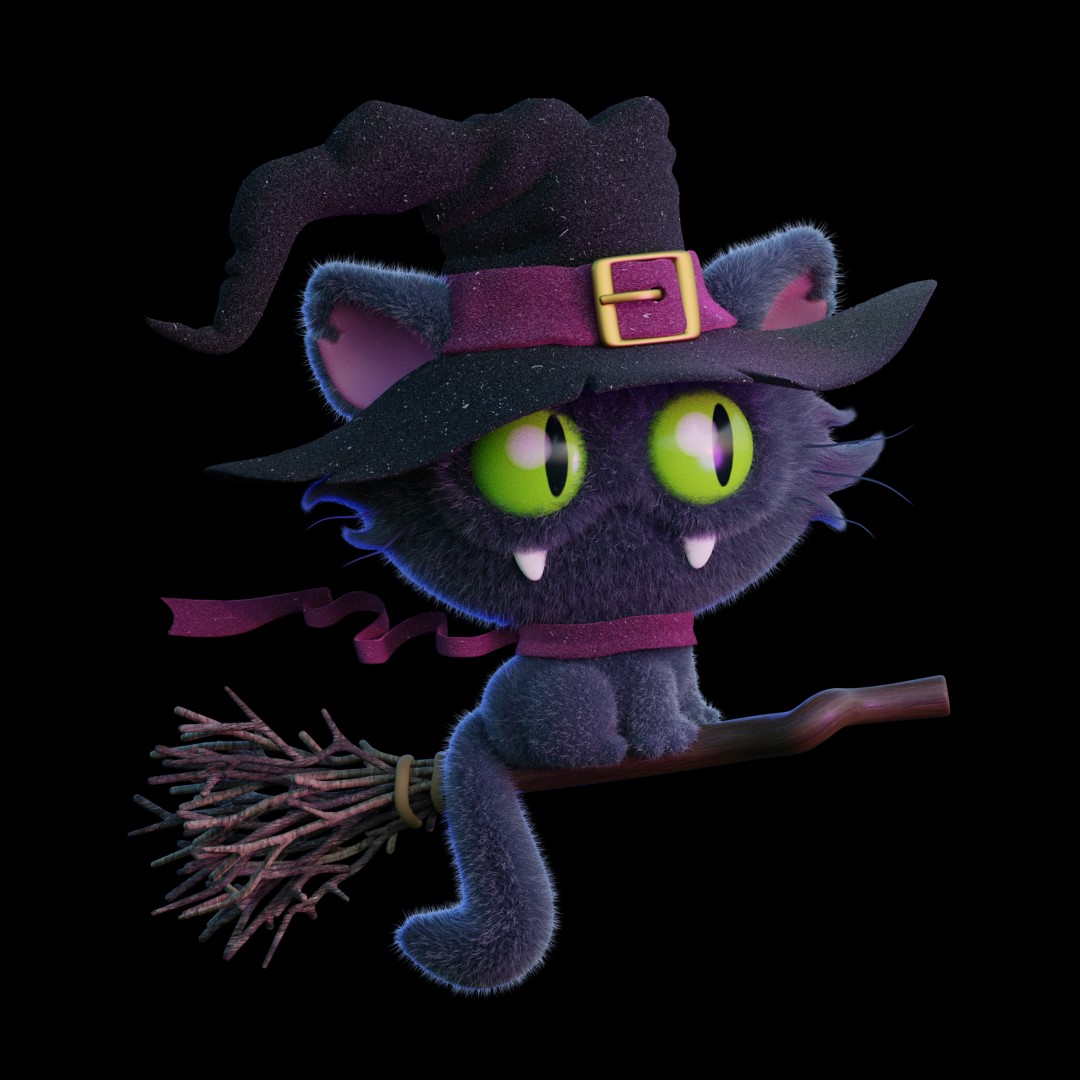
After that, I highlighted the top of the hat, scarf, and twigs by adding a small area light for each of these objects.
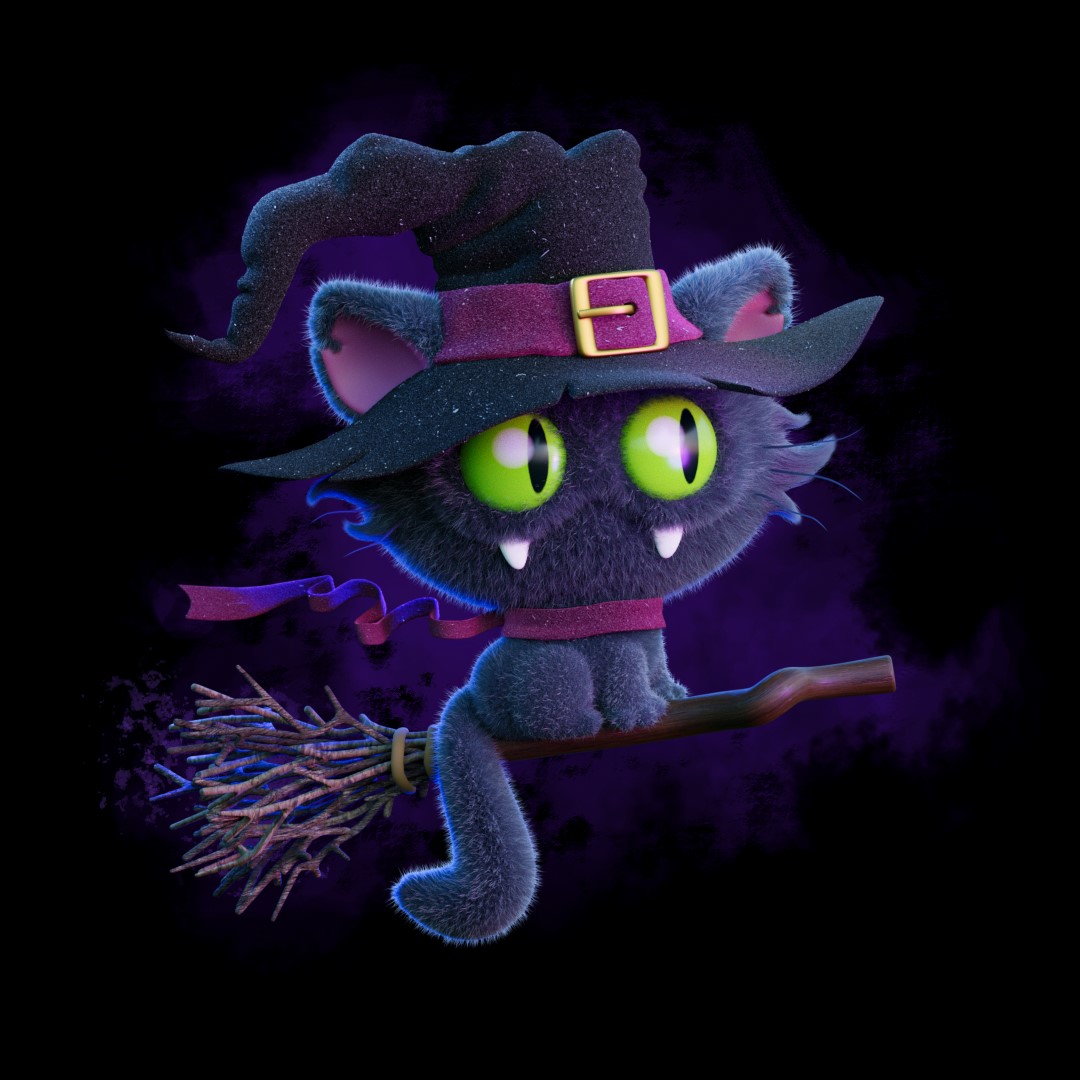
POST-PRODUCTION
I rendered an illustration with a transparent background, then brought it to Photoshop where I added a black background, purple splashes, and slightly edited the brightness, contrast, and saturation.
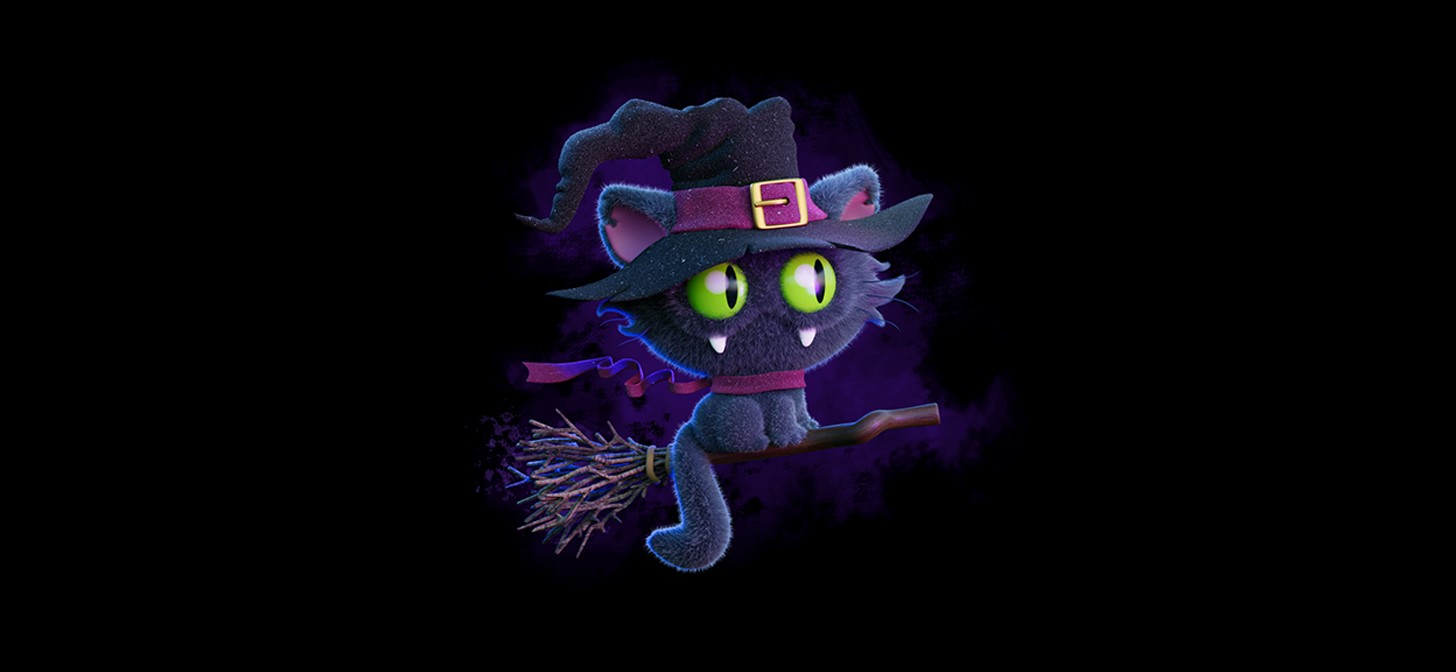
HALLOWEEN CAT
And there you have it! Thank you so much for reading this article. You can find more of my work on Instagram. Have a nice day!
About the Artist
Kate Petrova, a 3D artist. Currently a freelancer and a teacher at Best Blender Course.


