
INTRODUCTION
Hi, my name is Jose Miguel Gordaliza. I’m a self-taught concept artist and matte painter based in Spain.
Since I was a child, I have always been drawing stuff but about 5 years ago, I discovered by chance the art behind cinema and video games. I saw the artworks of artists like Dylan Cole, Jama Jurabaev, and Romain Jouandeau and loved it so much that I told myself I wanted to do that.
I learned the techniques in Photoshop, improving my skills little by little, and later I started to incorporate 3D into my workflow. I found Blender just before it was updated to version 2.8, and haven't used any other software since then.
Above all, I love making environments and creating the worlds I imagine, giving them a very cinematic look, and lately, I try to improve the storytelling.
INSPIRATION
I had been wanting to do a Steampunk themed concept for a while. I also wanted to do something more complex to learn new techniques and processes. At that moment, I came across a very interesting art contest. I had the idea, I had a goal, so I applied.
These are the 3 artworks that inspired me a lot for my project, one by Maxime BiBi and two by SiChen Wang:
Karaköy İskelesi by Maxime BiBi.

Wandering in the air by Si Chen Wang.

Real world-city by Si Chen Wang
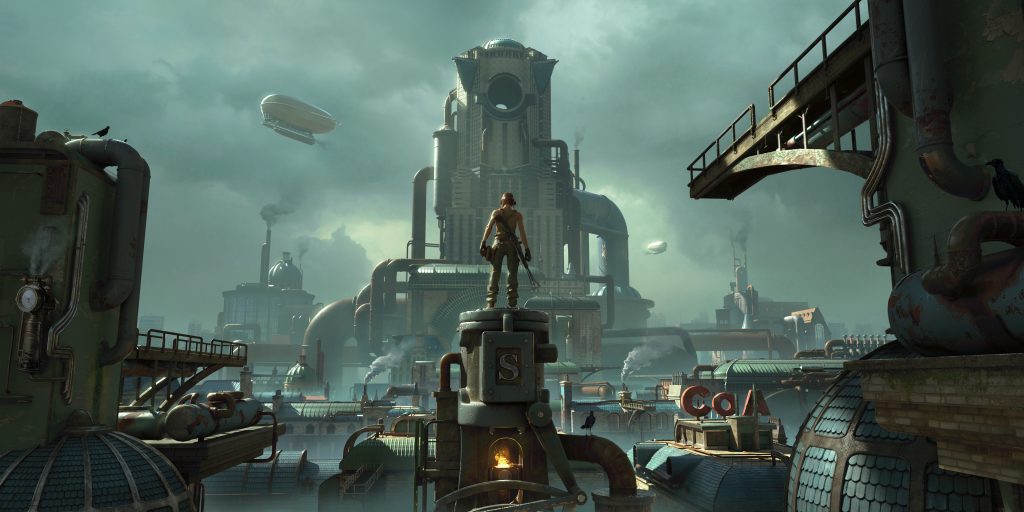
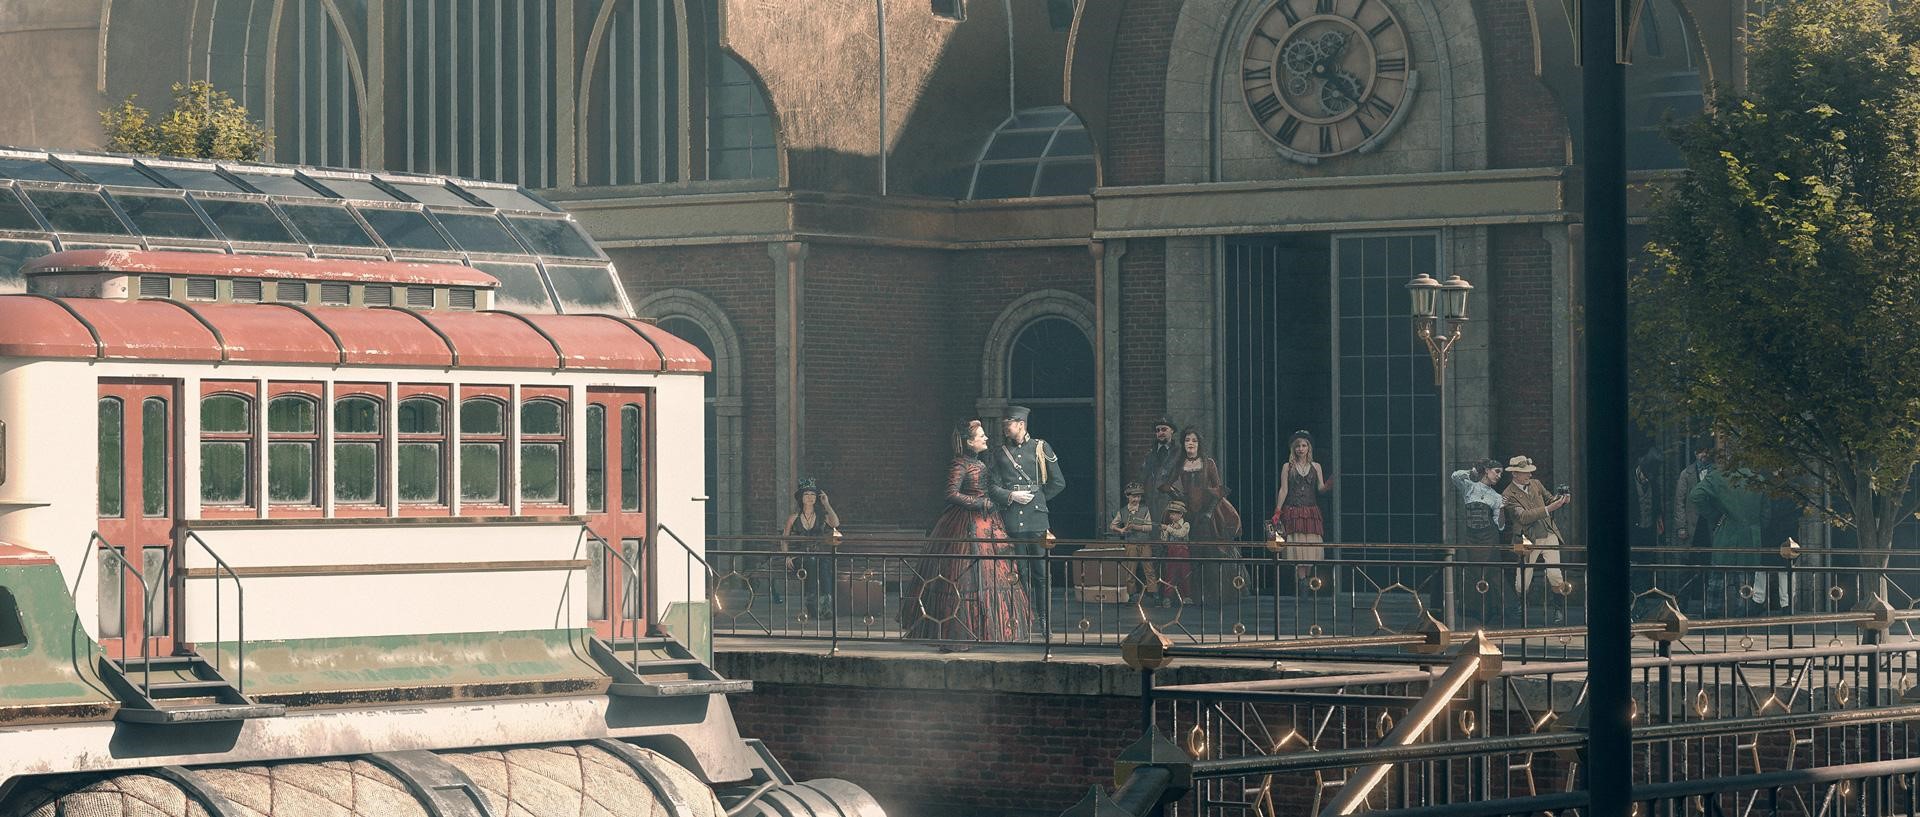
With these references, the idea was to create a daily scene, a normal day in a Steampunk environment, where a flying vehicle designed by me appeared. So, I decided to make a station.
In the end, I got a prize in second place. It was great!
BLOCKING
The first step was to focus on the composition of the image. For this, I did an initial blocking in Blender, placing several basic shapes and some reference models. The focus point had to be the vehicle and what was happening around it, so it was important that all the elements of the scene directed the viewer's gaze to this part.
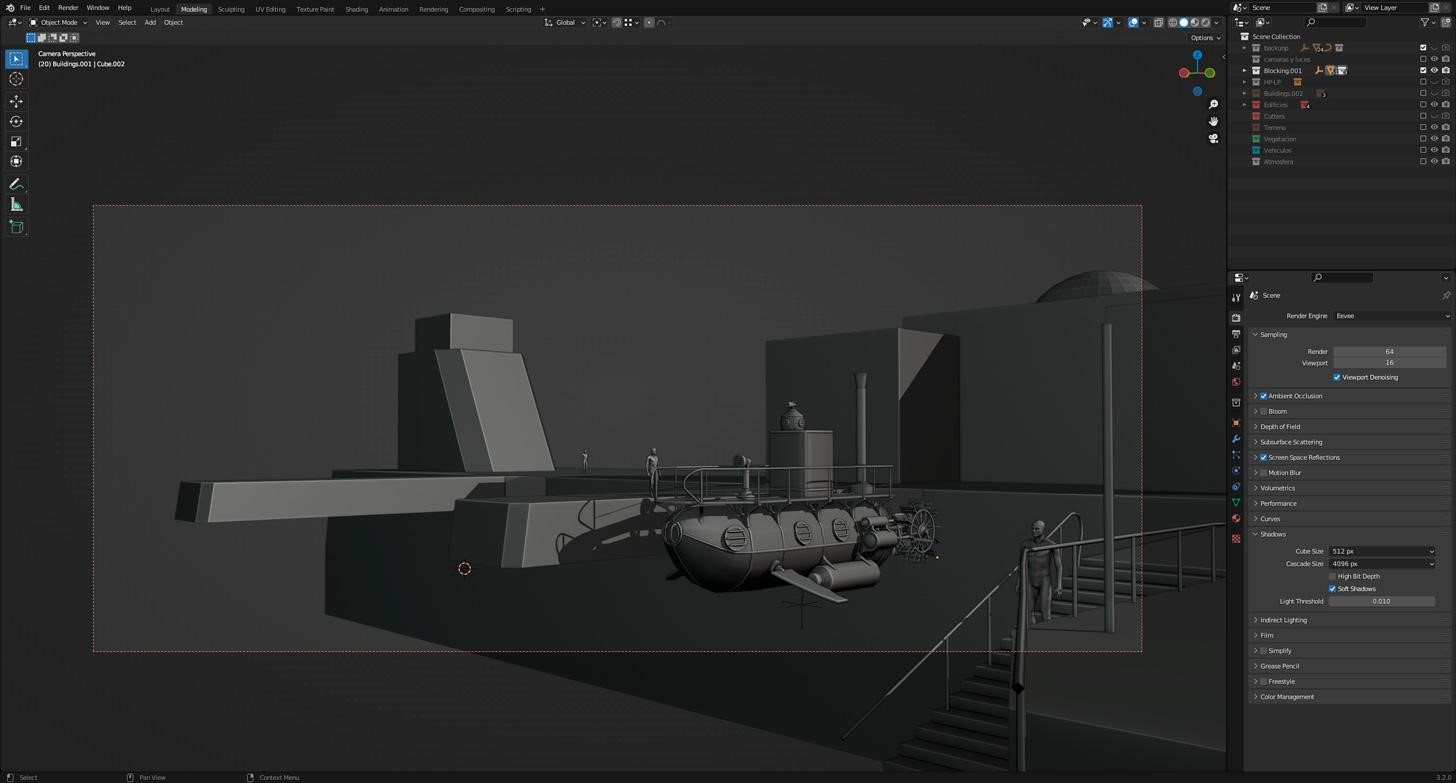
I considered the following aspects:
- Rule of thirds
- Guiding lines: The placement of the objects and their lines should direct the gaze towards the focus point.
- Light/contrast: The direction of the light and the shadows that are produced should reinforce the composition and the story.
The aspect ratio of the image is 2.35 (very cinematic) with a resolution of 7680x3268 px.
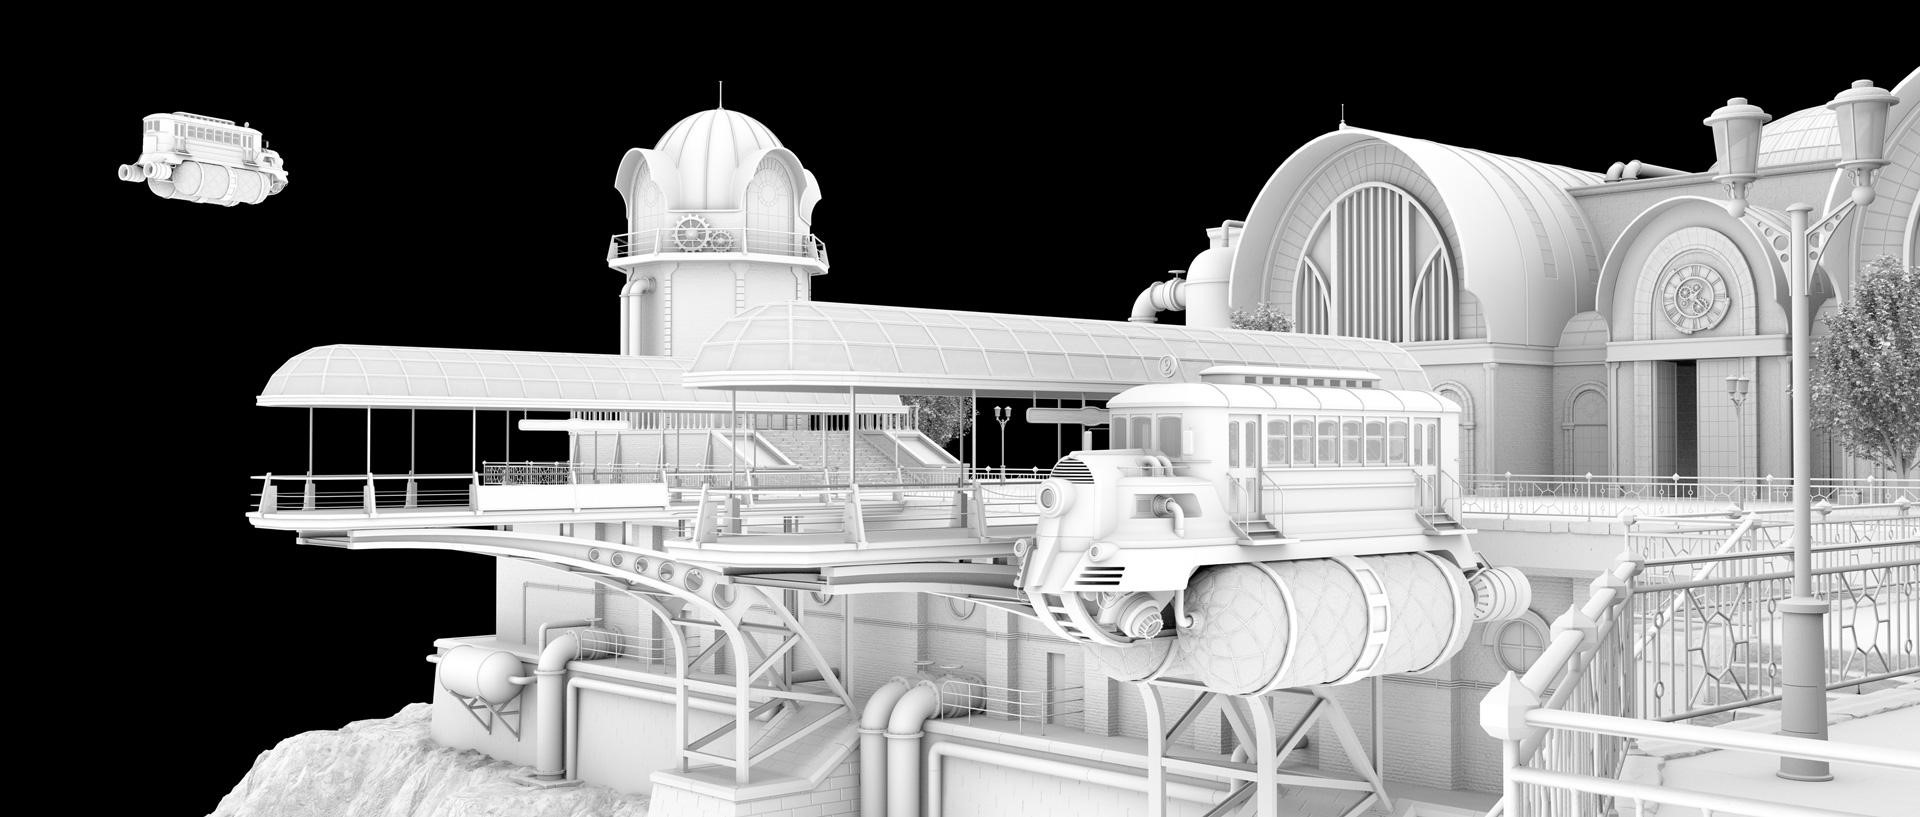
MODELING
I didn’t use any third party assets. I modeled all the objects in Blender, taking as reference the blocking done previously.
I started by modeling the lower part of the station that would serve as a base to later place the other objects.
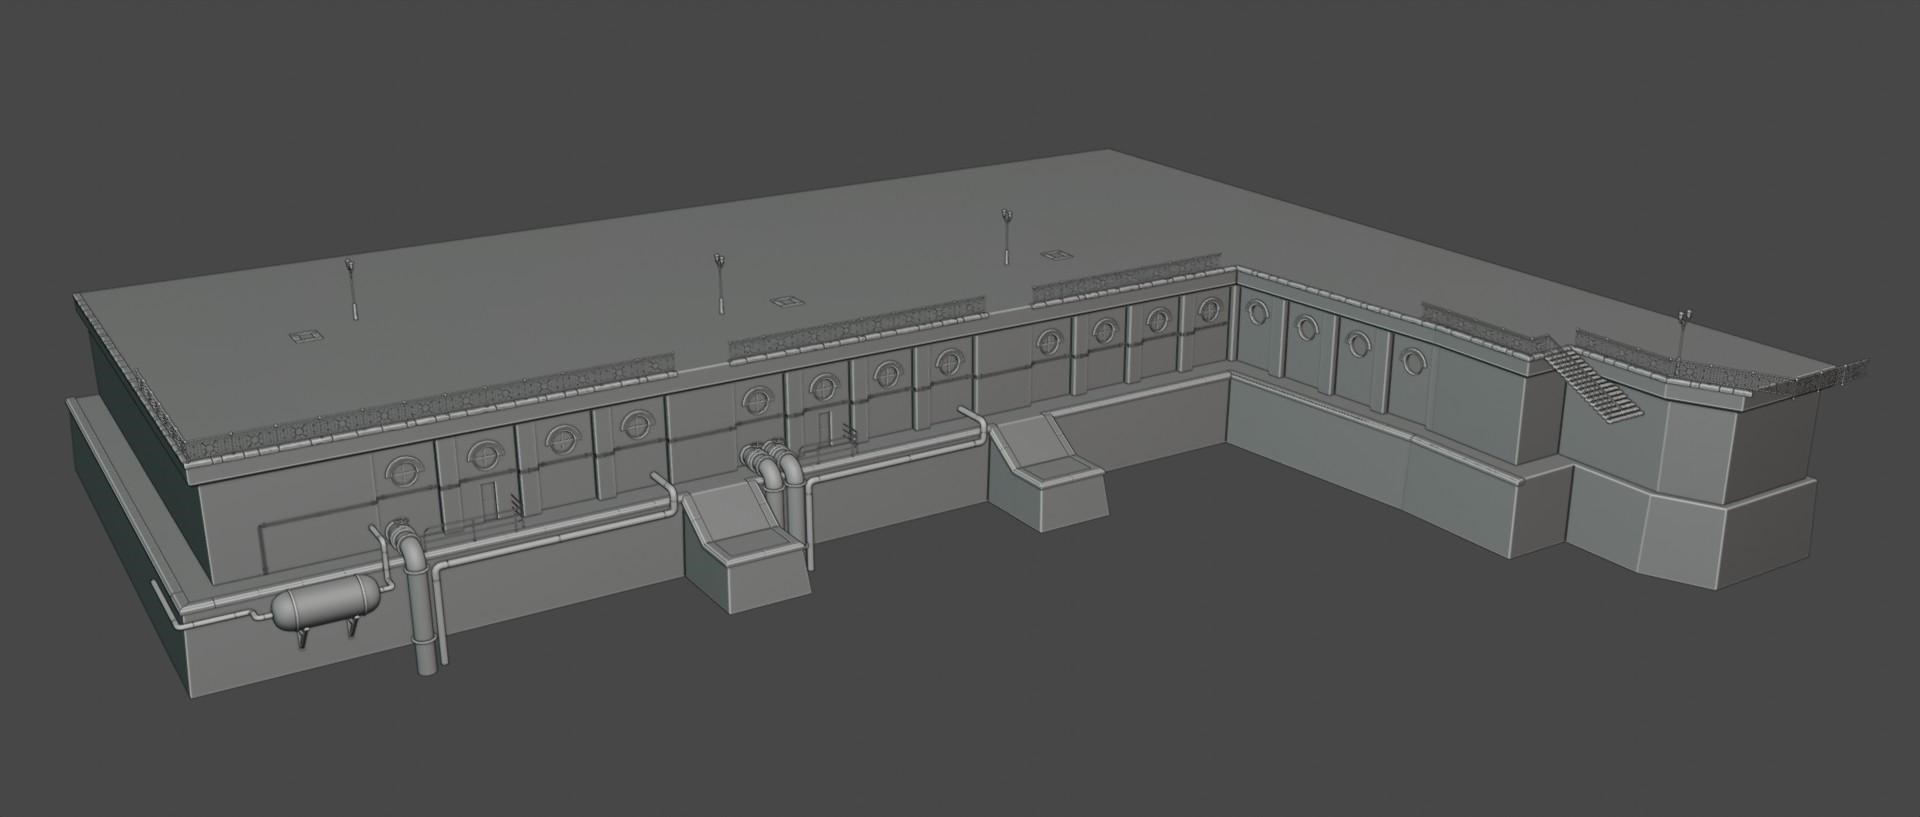
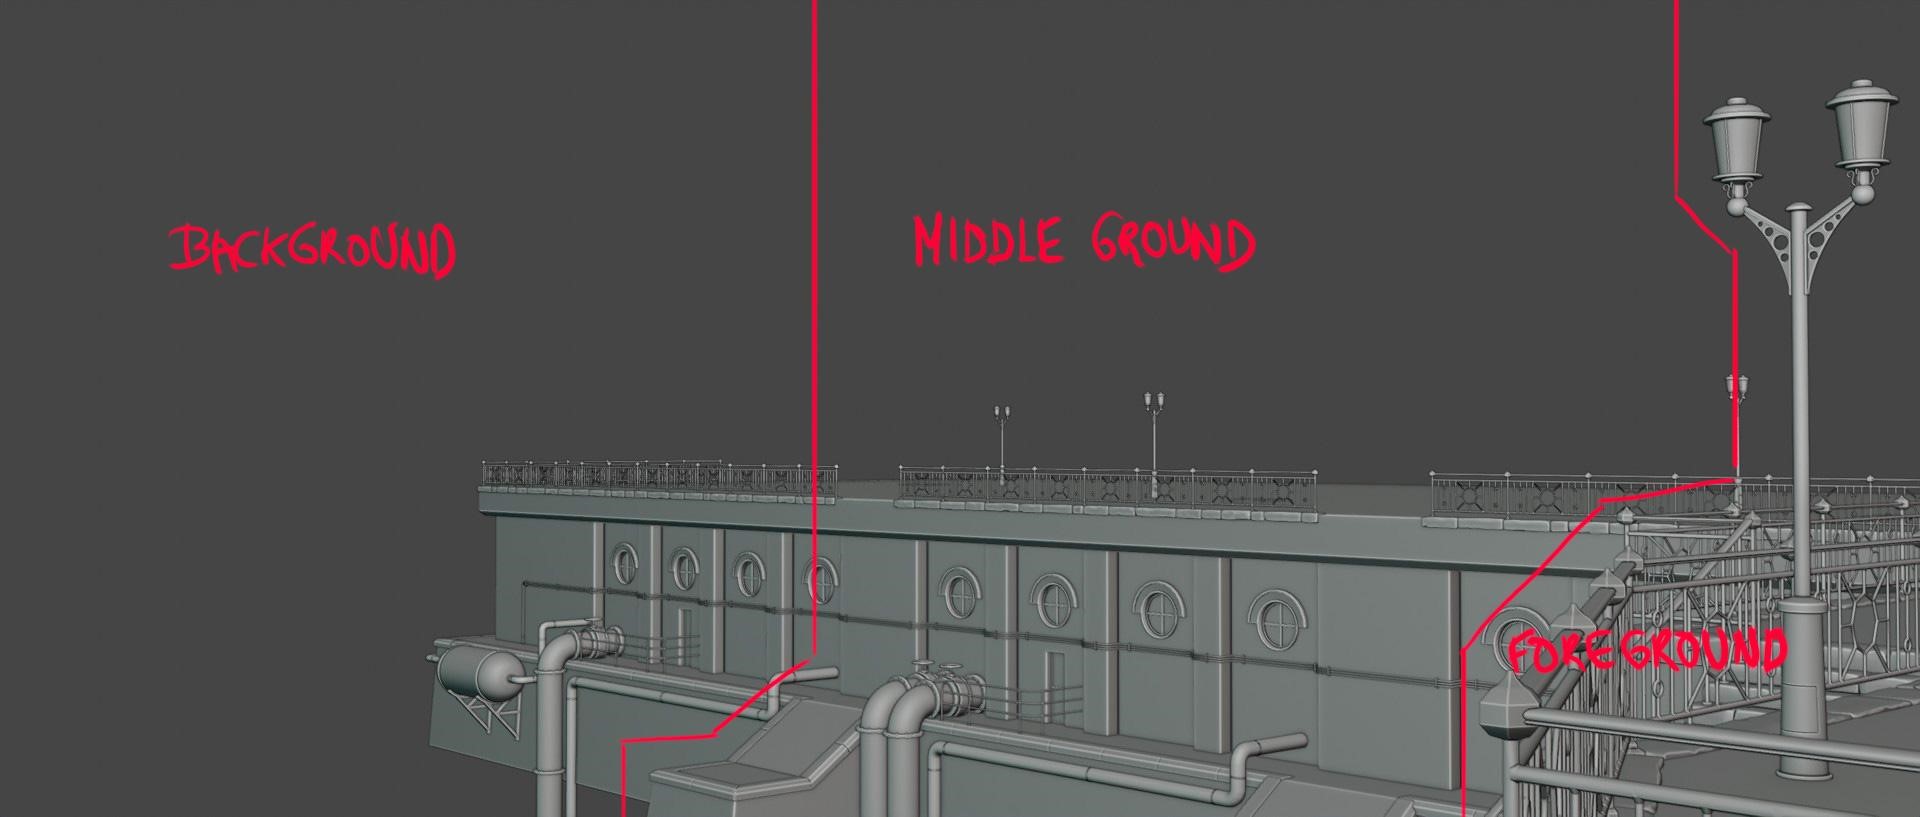
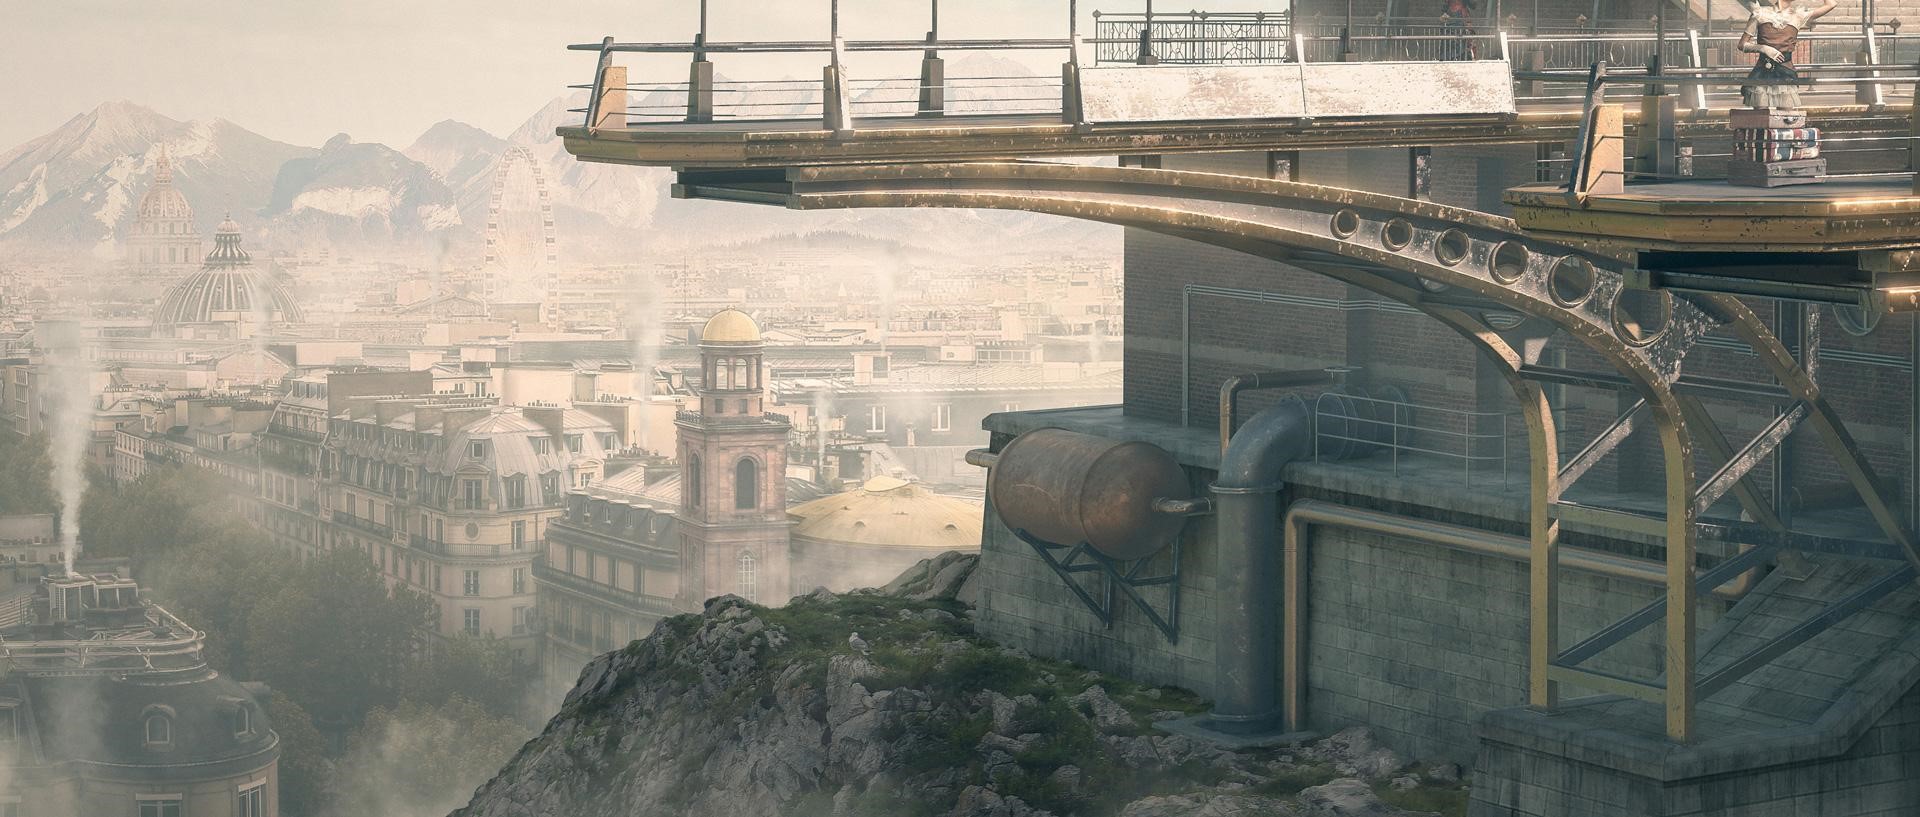
My intention here was to give depth to the scene, having 3 different planes—foreground, middle ground and background.
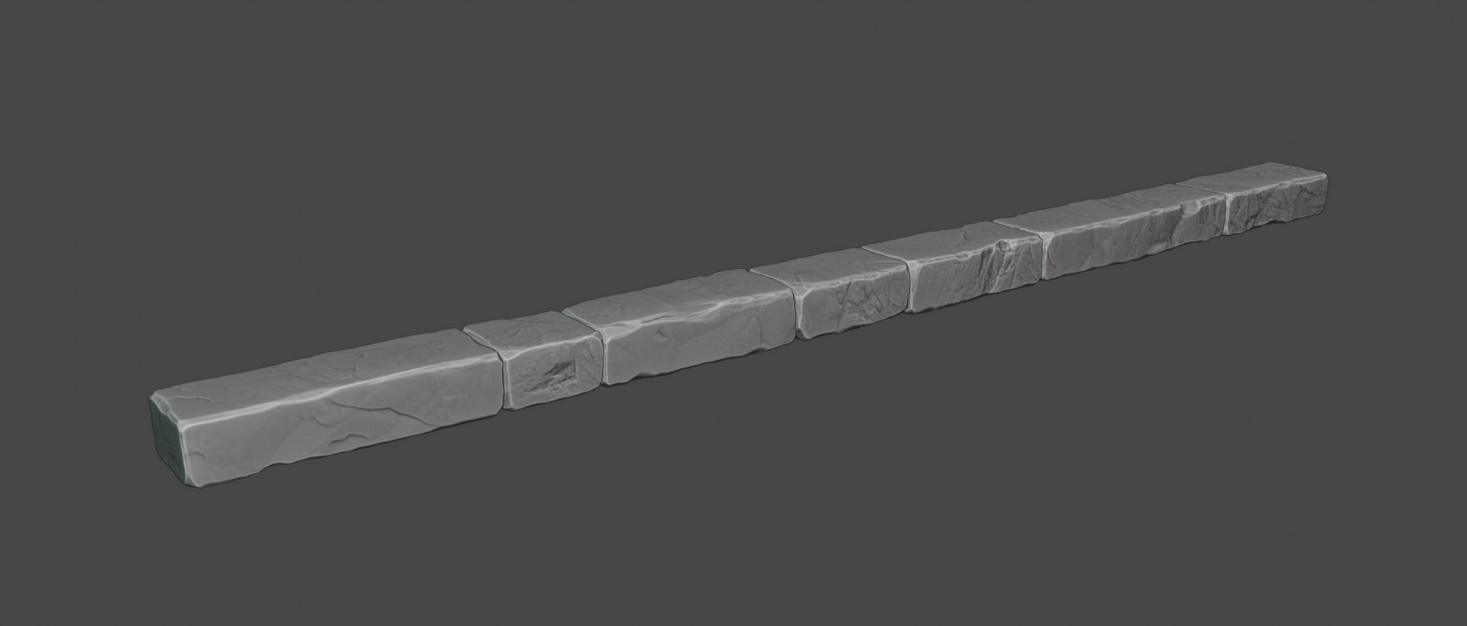
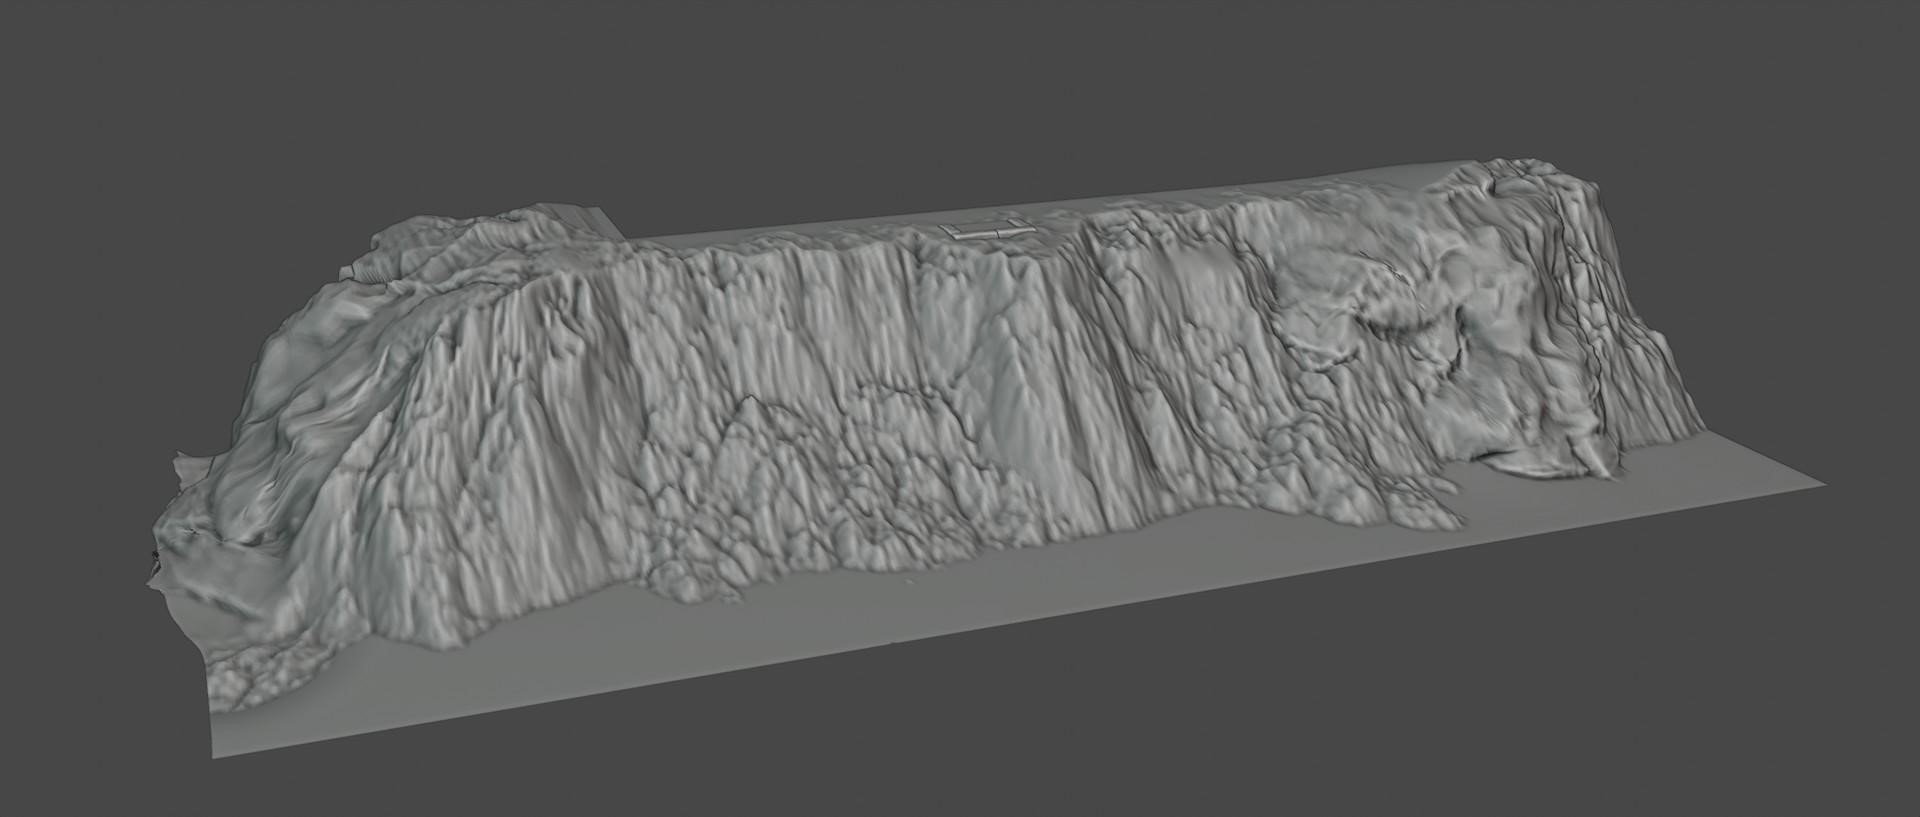
The type of modeling is quite low-poly, except for the curbs that are sculpted to give it more realism.
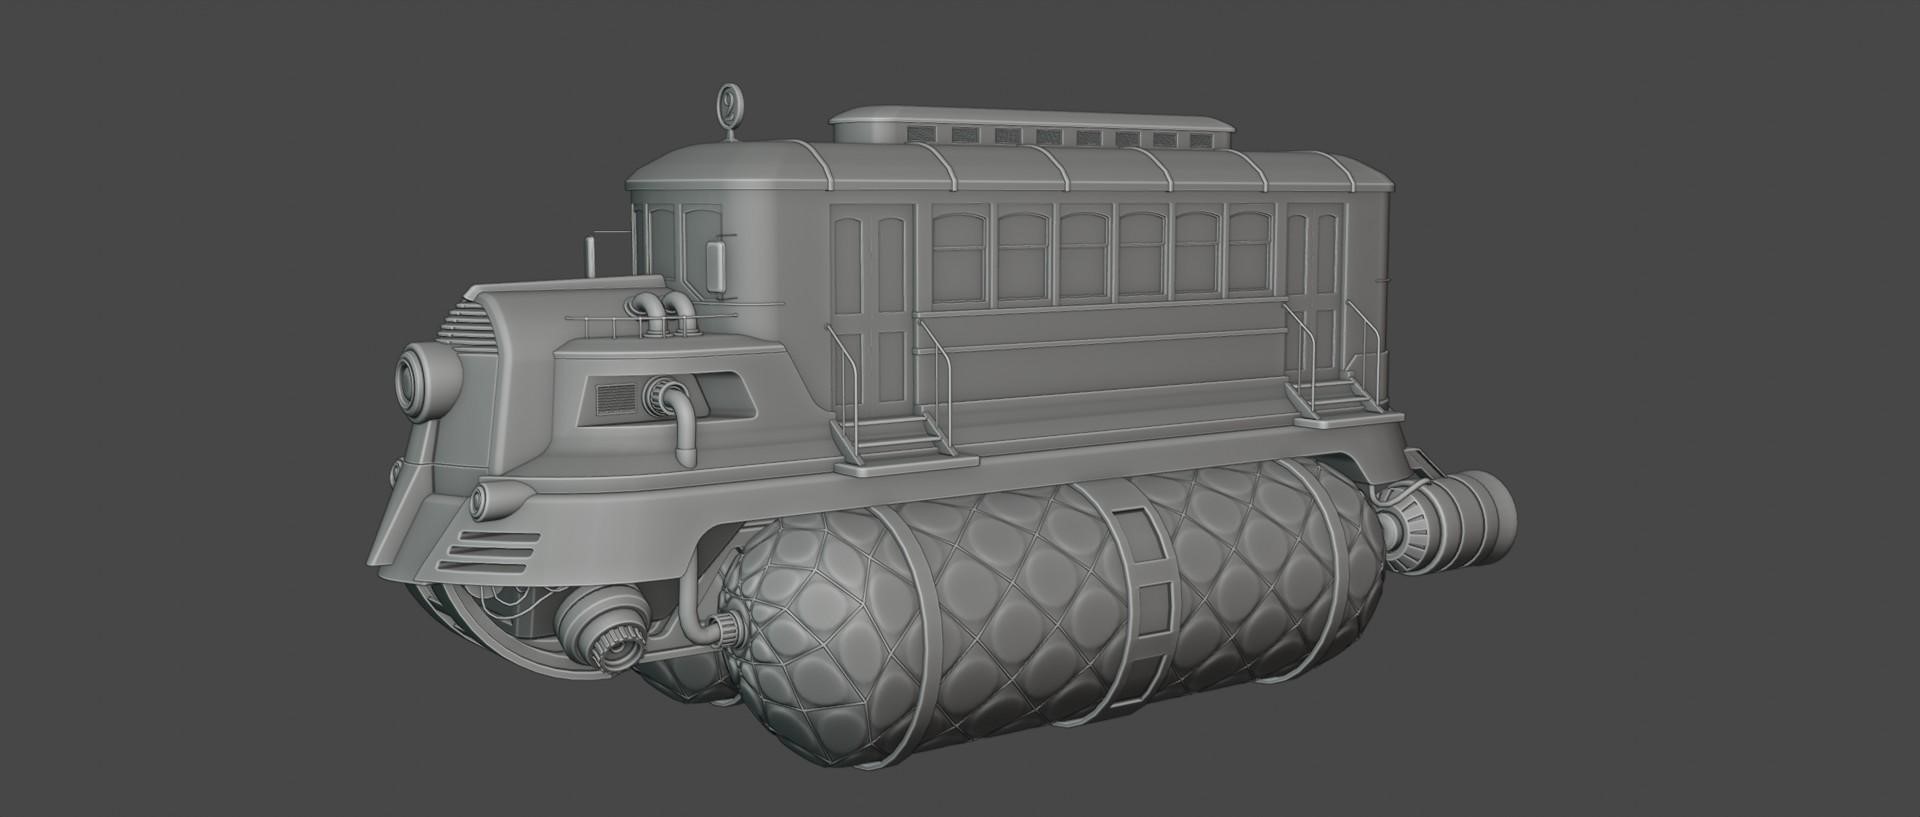
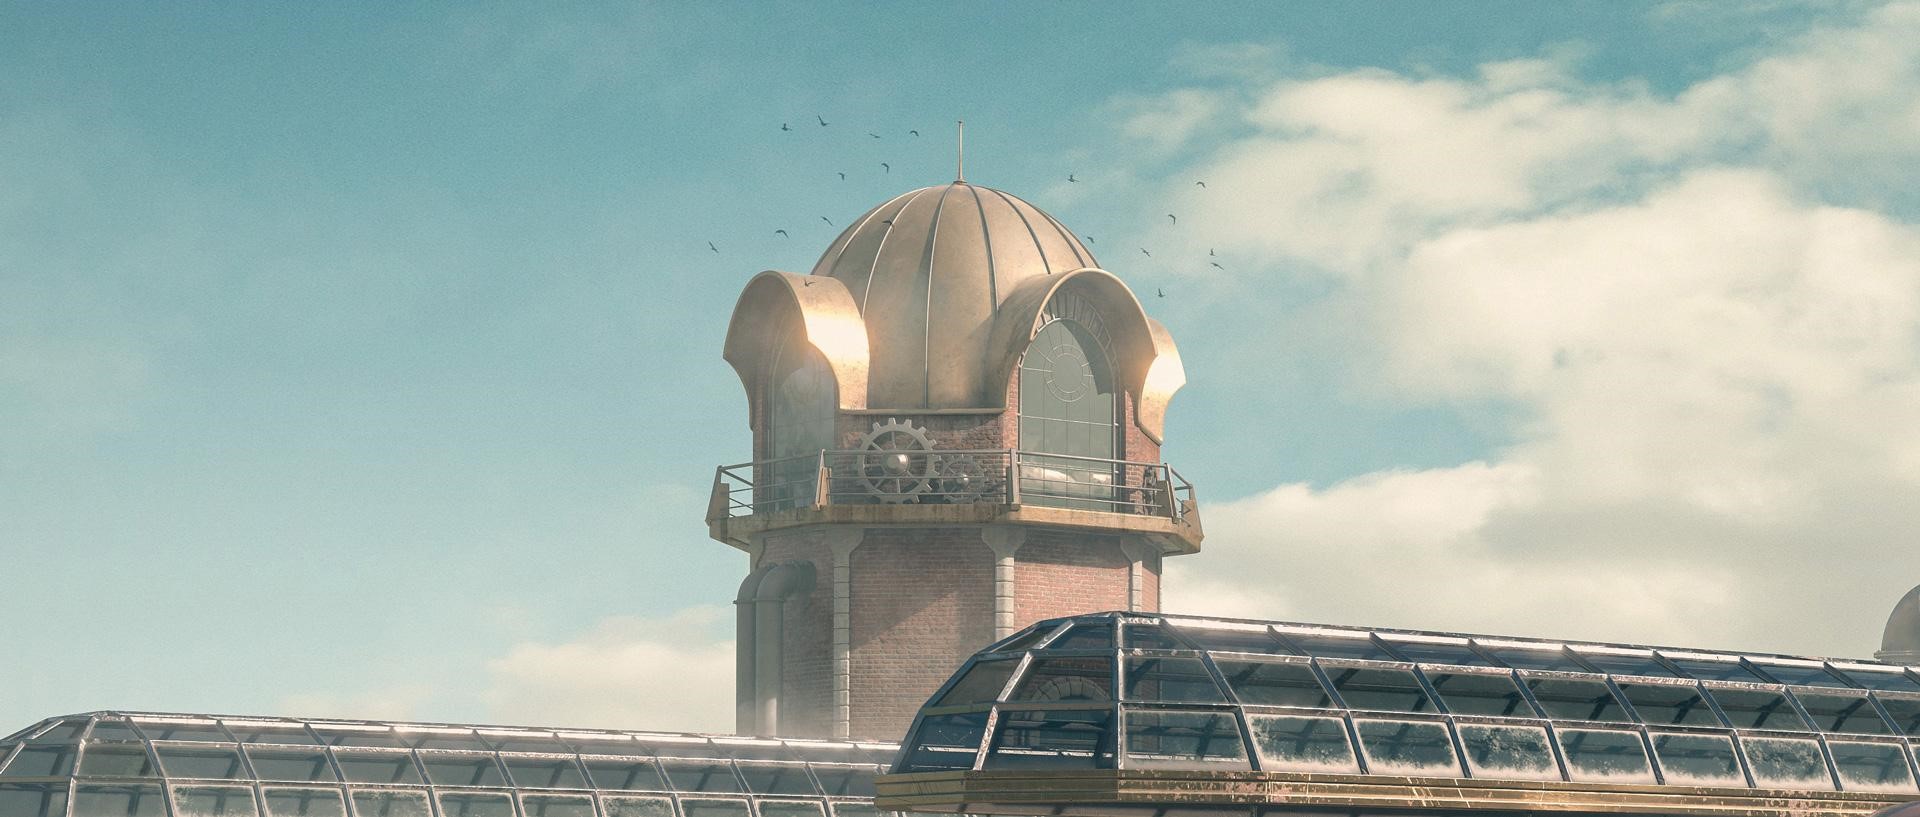
I made the buildings thinking of a Victorian architecture with touches of Steampunk, introducing metallic elements, pipes, tanks and curved roofs.


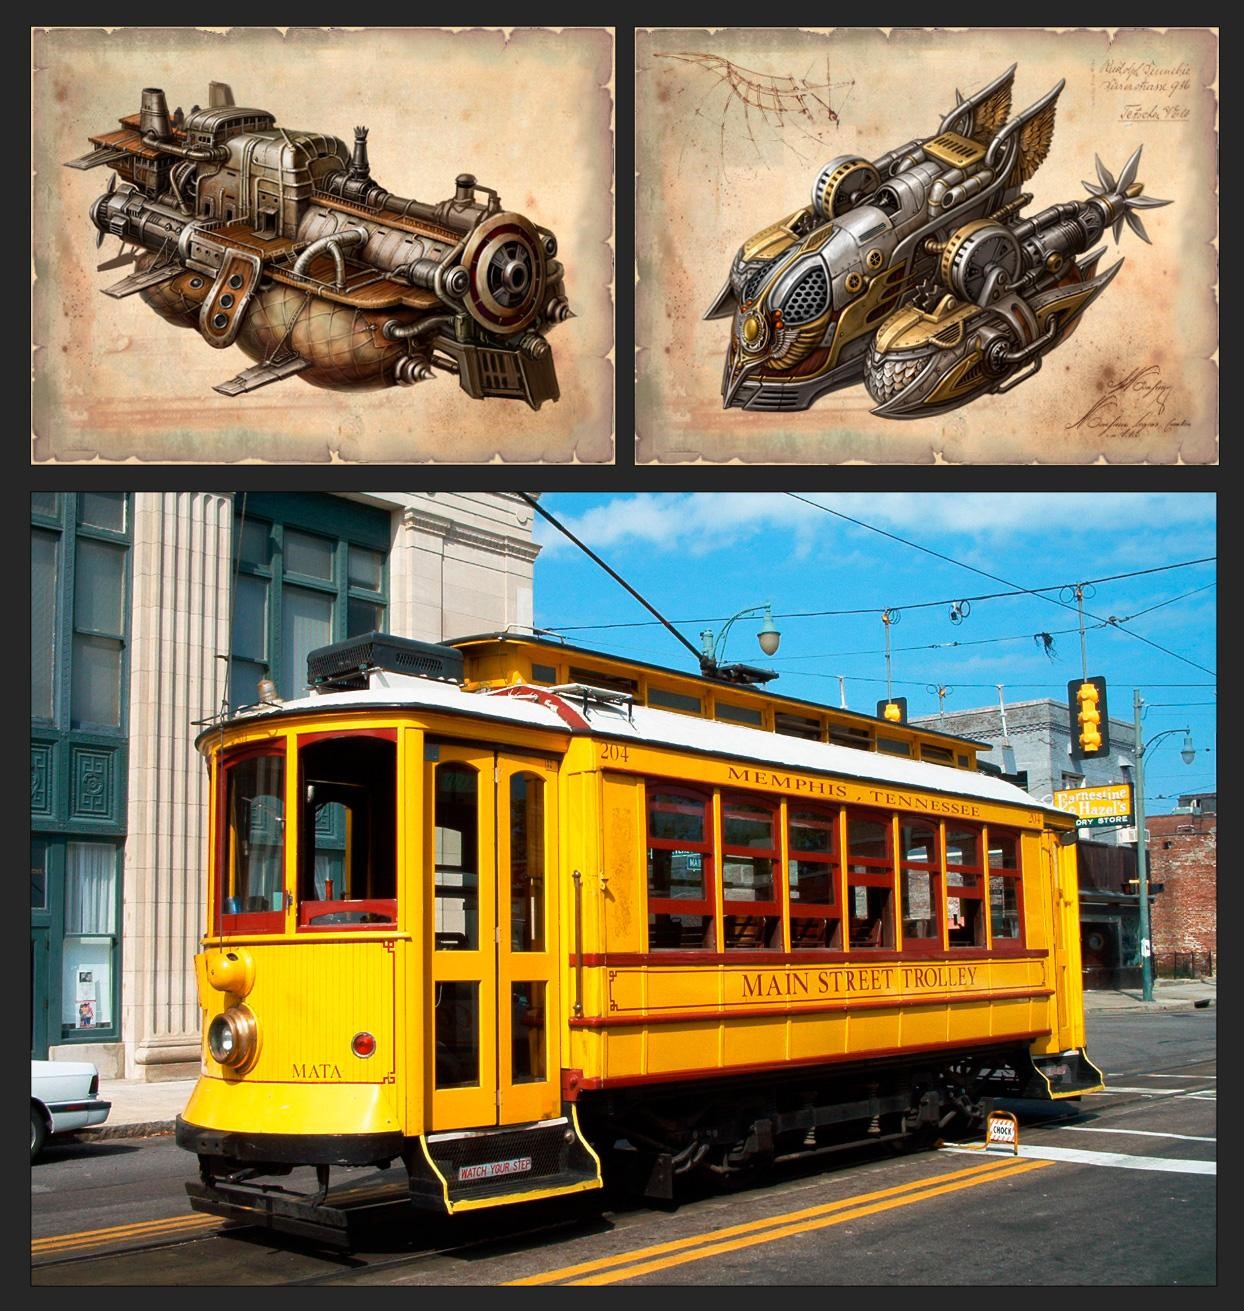
To design the vehicle, I used some references on the website Sky2fly and the Memphis Trolley.
Only the globes have a subdivision surface modifier. To model this vehicle, I used a lot of auto smooth, bevels, and booleans.
And finally, the small terrain that appears in the scene was sculpted using some stone alphas.
TEXTURING
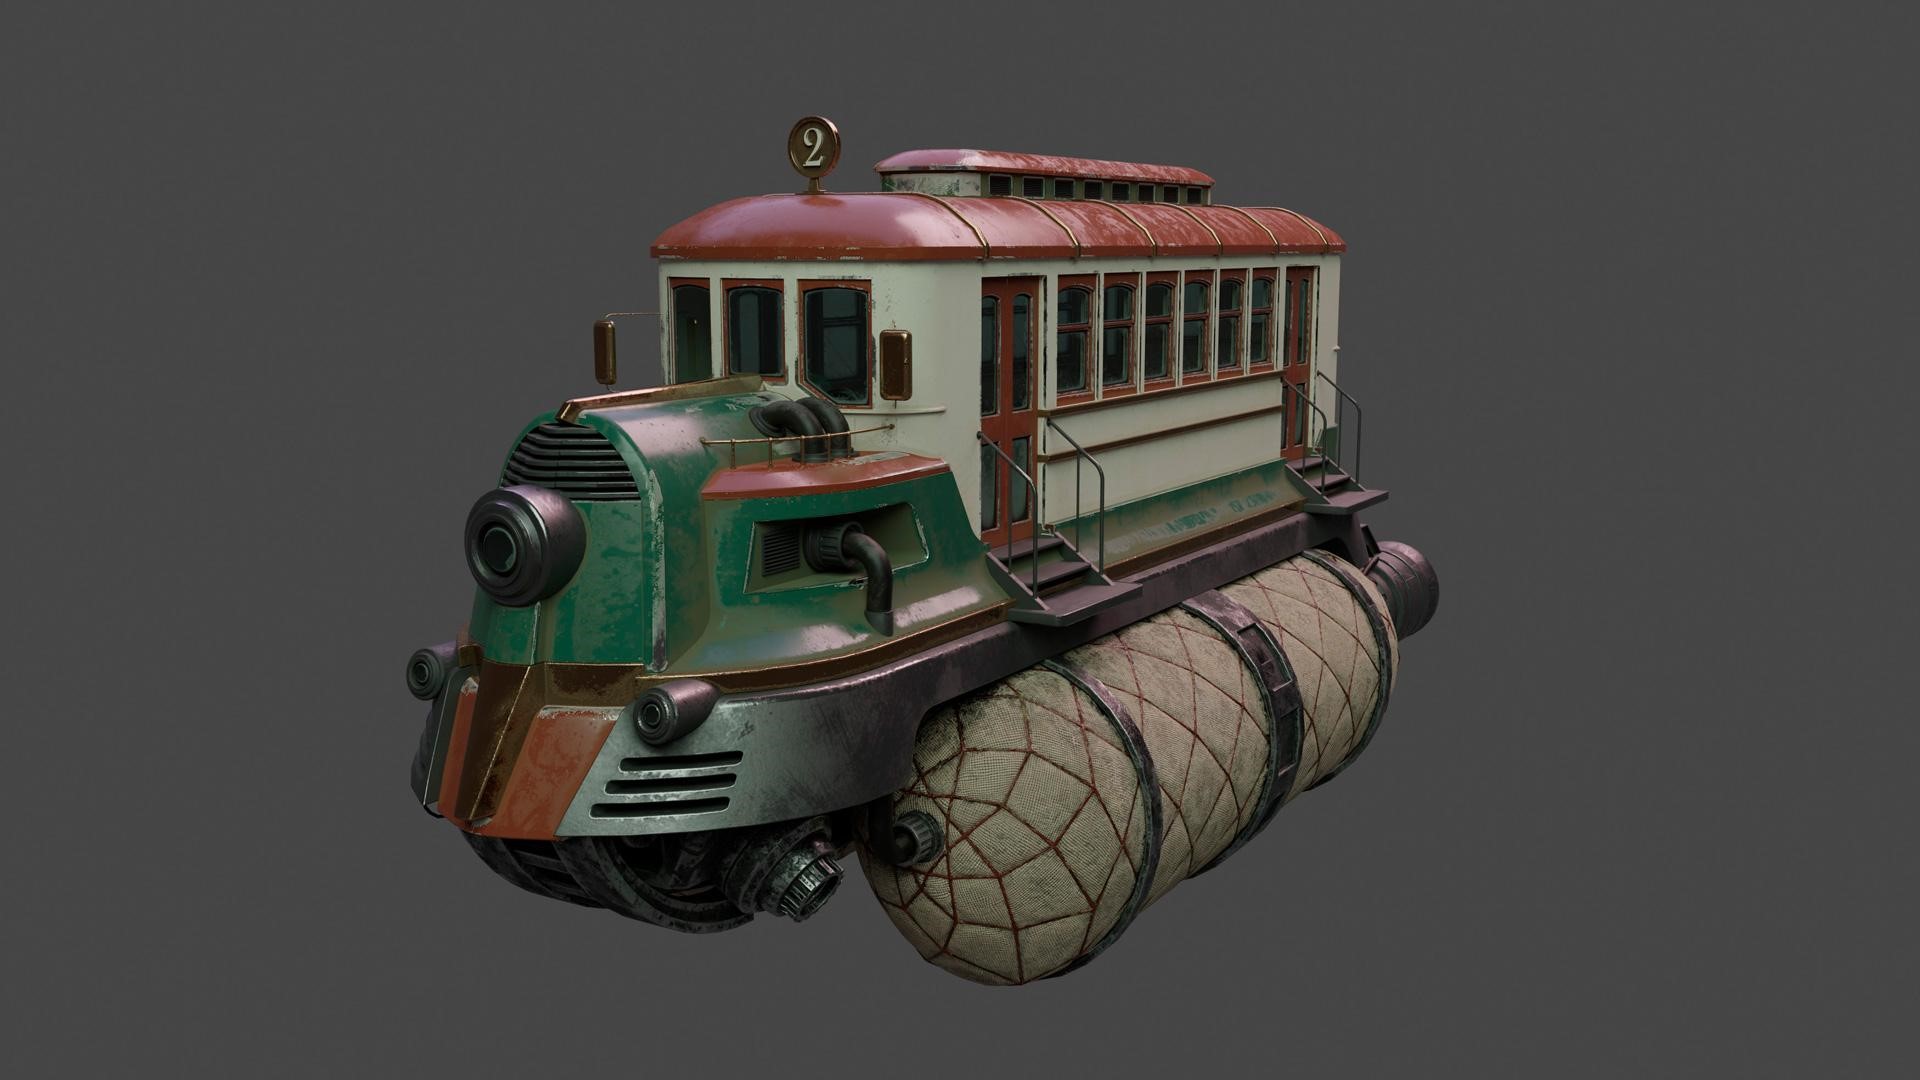
The buildings, in general, were textured directly in Blender, using textures downloaded from PolyHaven website, plus adding some dirt in the ambient occlusion areas as you can see in the image.


For the vehicle, the platforms, and some elements that required a little more realism, I tried Substance Painter and Quixel mixer. Although I don't have much experience with these software, I added some smart materials by modifying some parameters, nothing complicated.
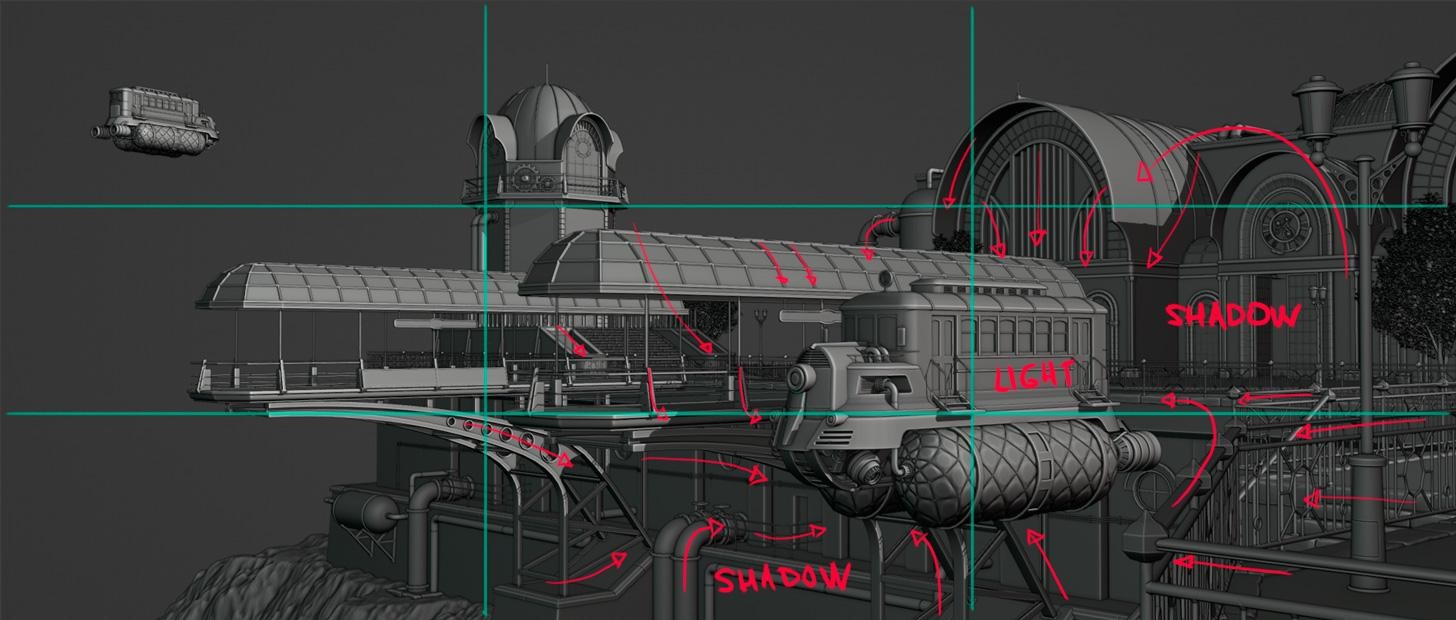
LIGHTING
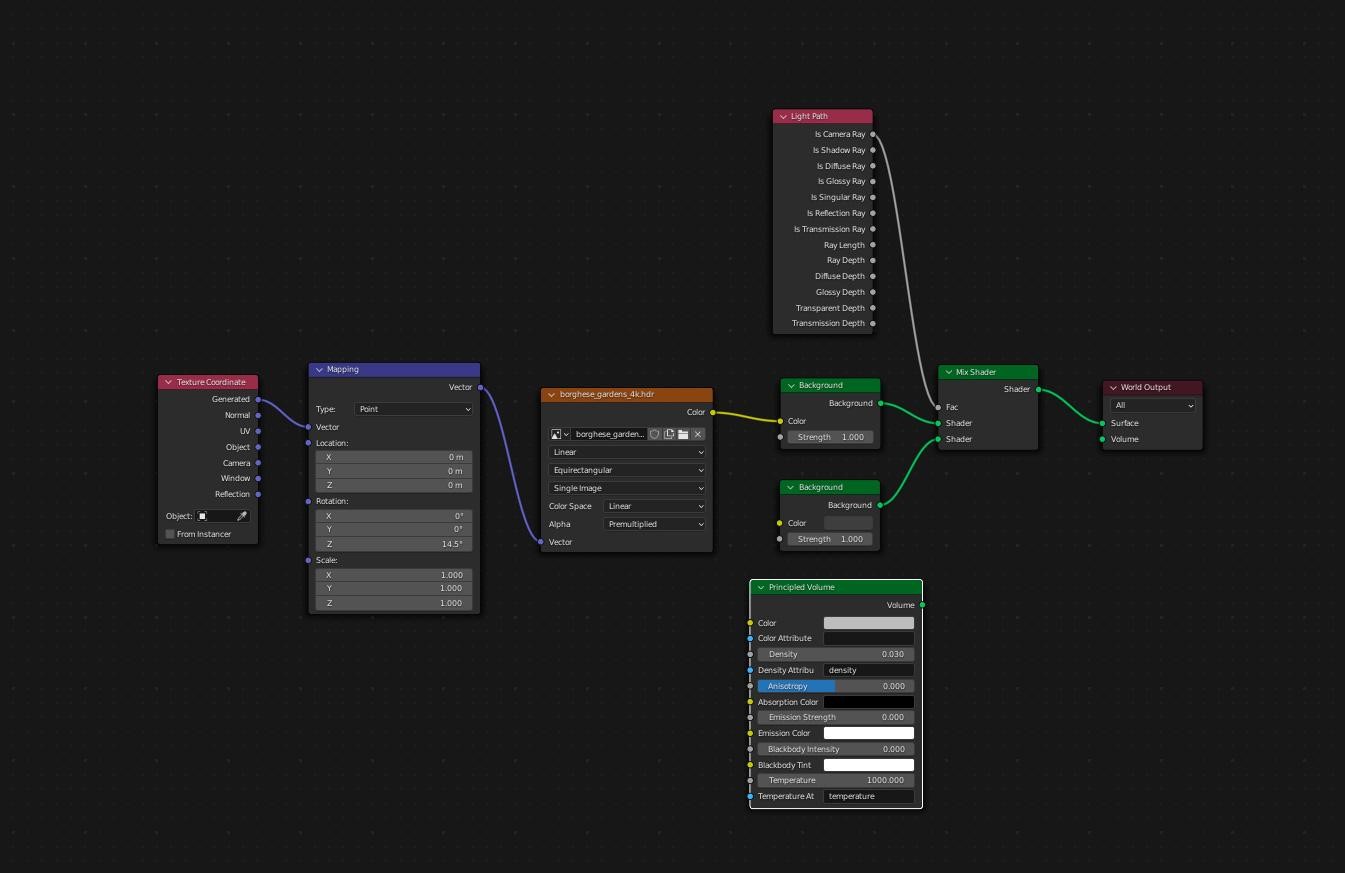
To establish the general light of the scene, I added an HDRI "Borghese Gardens" from PolyHaven website and a sun light with the proper direction to follow the composition that we had established at the beginning. I thought about adding the volume principle node to give it atmosphere but in the end, I decided that I would do this in Photoshop in post-processing.
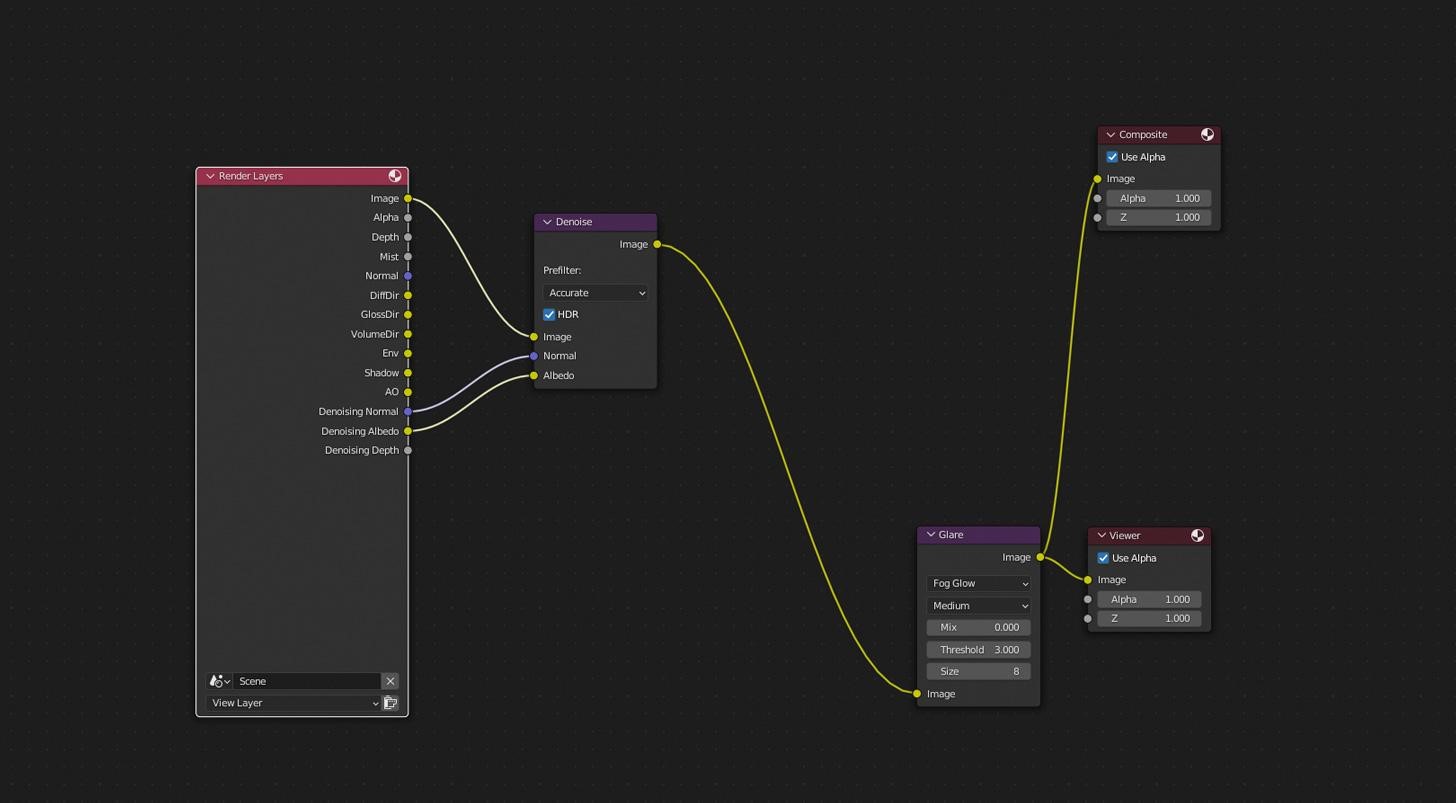
RENDERING
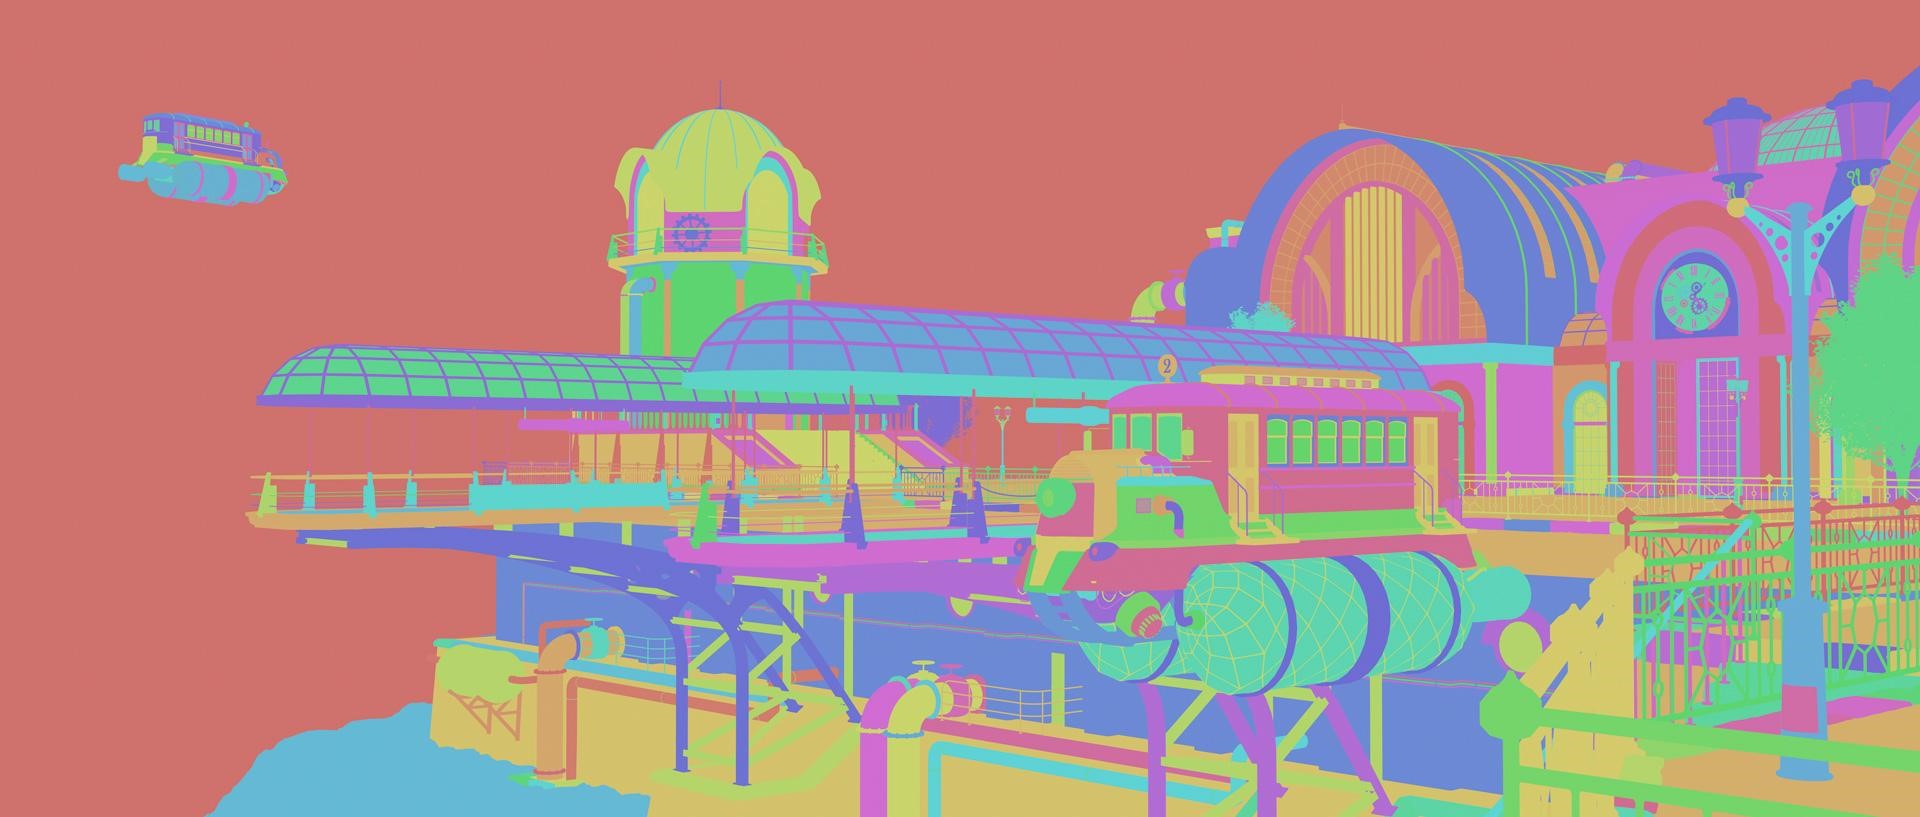
Once the scene was finished, it was time to render in Cycles. The main thing in this step was to add denoising and a bit of Glare to give realism to the metallic parts in compositing, and take out all the necessary render passes in OpenEXR Multilayer format to use later in Photoshop as you can see in the image.
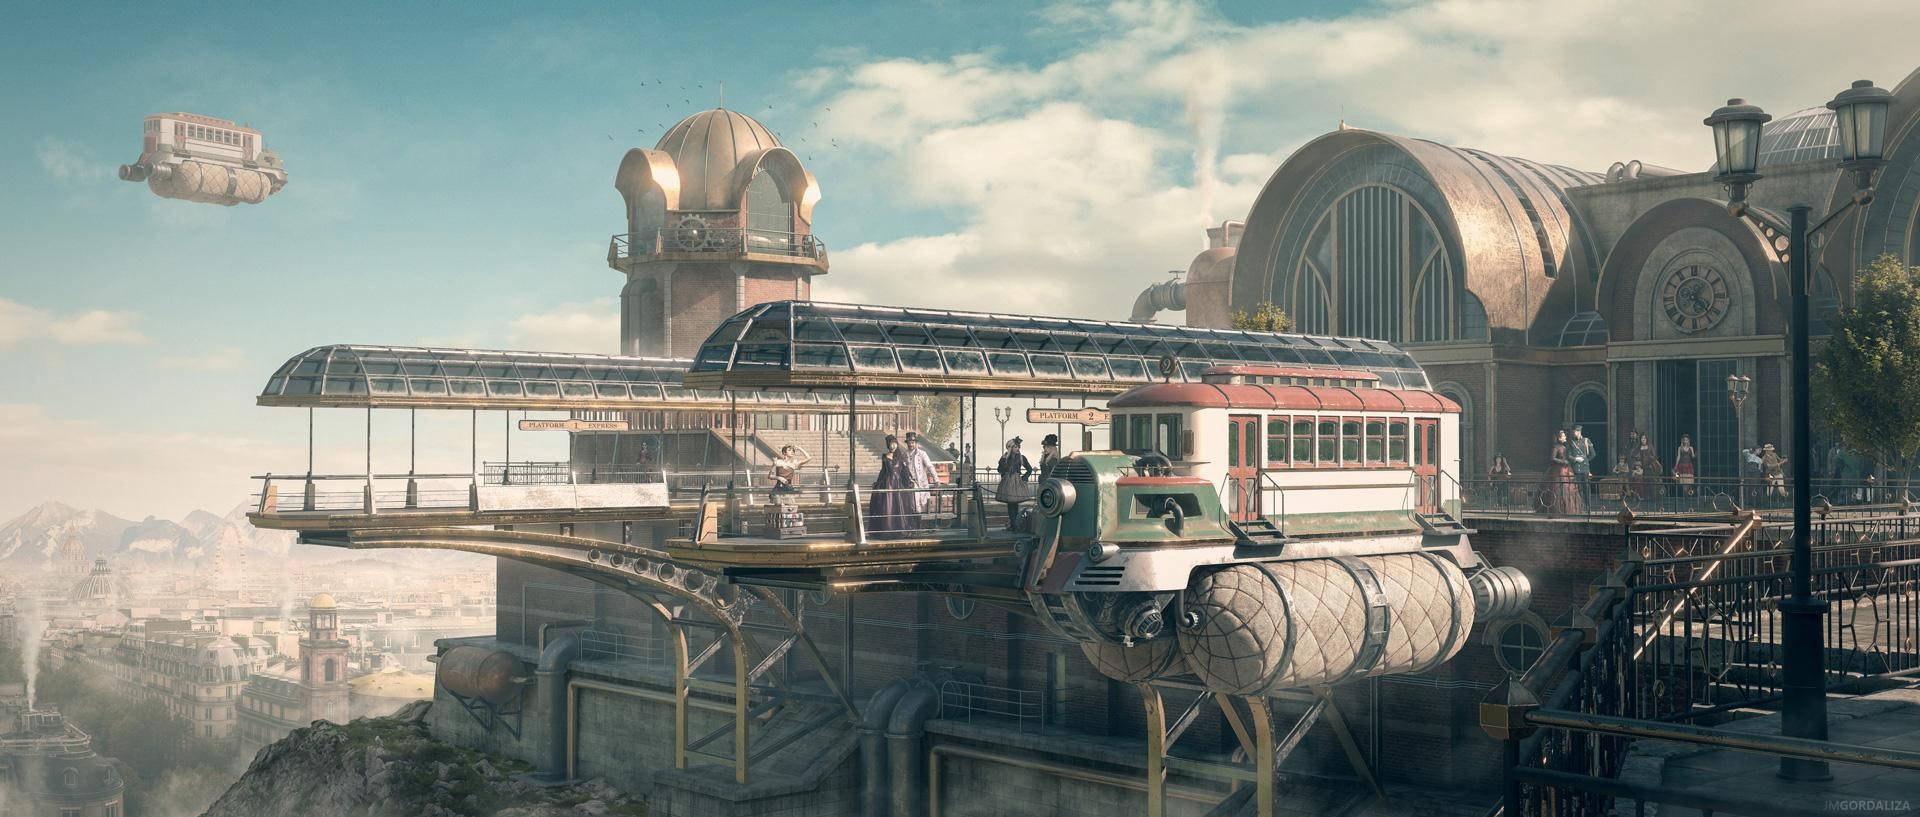
Final render

Ambient occlusion
Environment
Mist
Normal
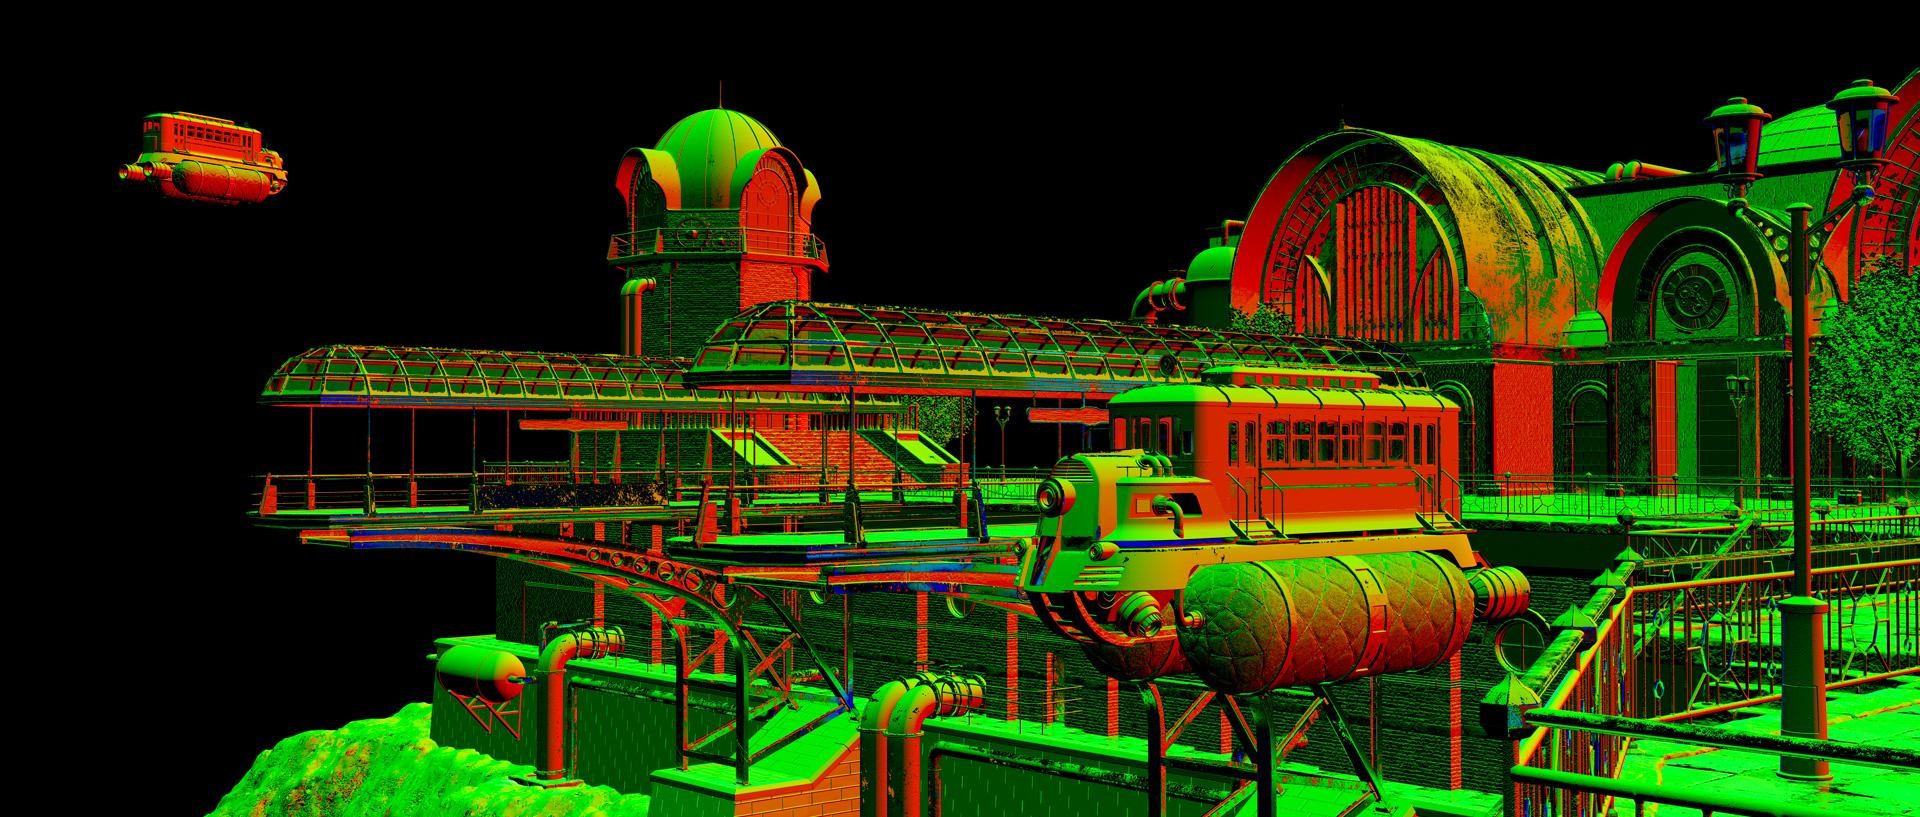
Object ID
POST-PROCESSING
Once the 3D part was finished, I made the final concept art in Photoshop, using techniques such as photobashing and paintover. I mainly focused on the background, the atmosphere, the textures, and the characters. Finally, I gave it some finishing touches to give it a more cinematic color grading.
In the following video, you can see this process:
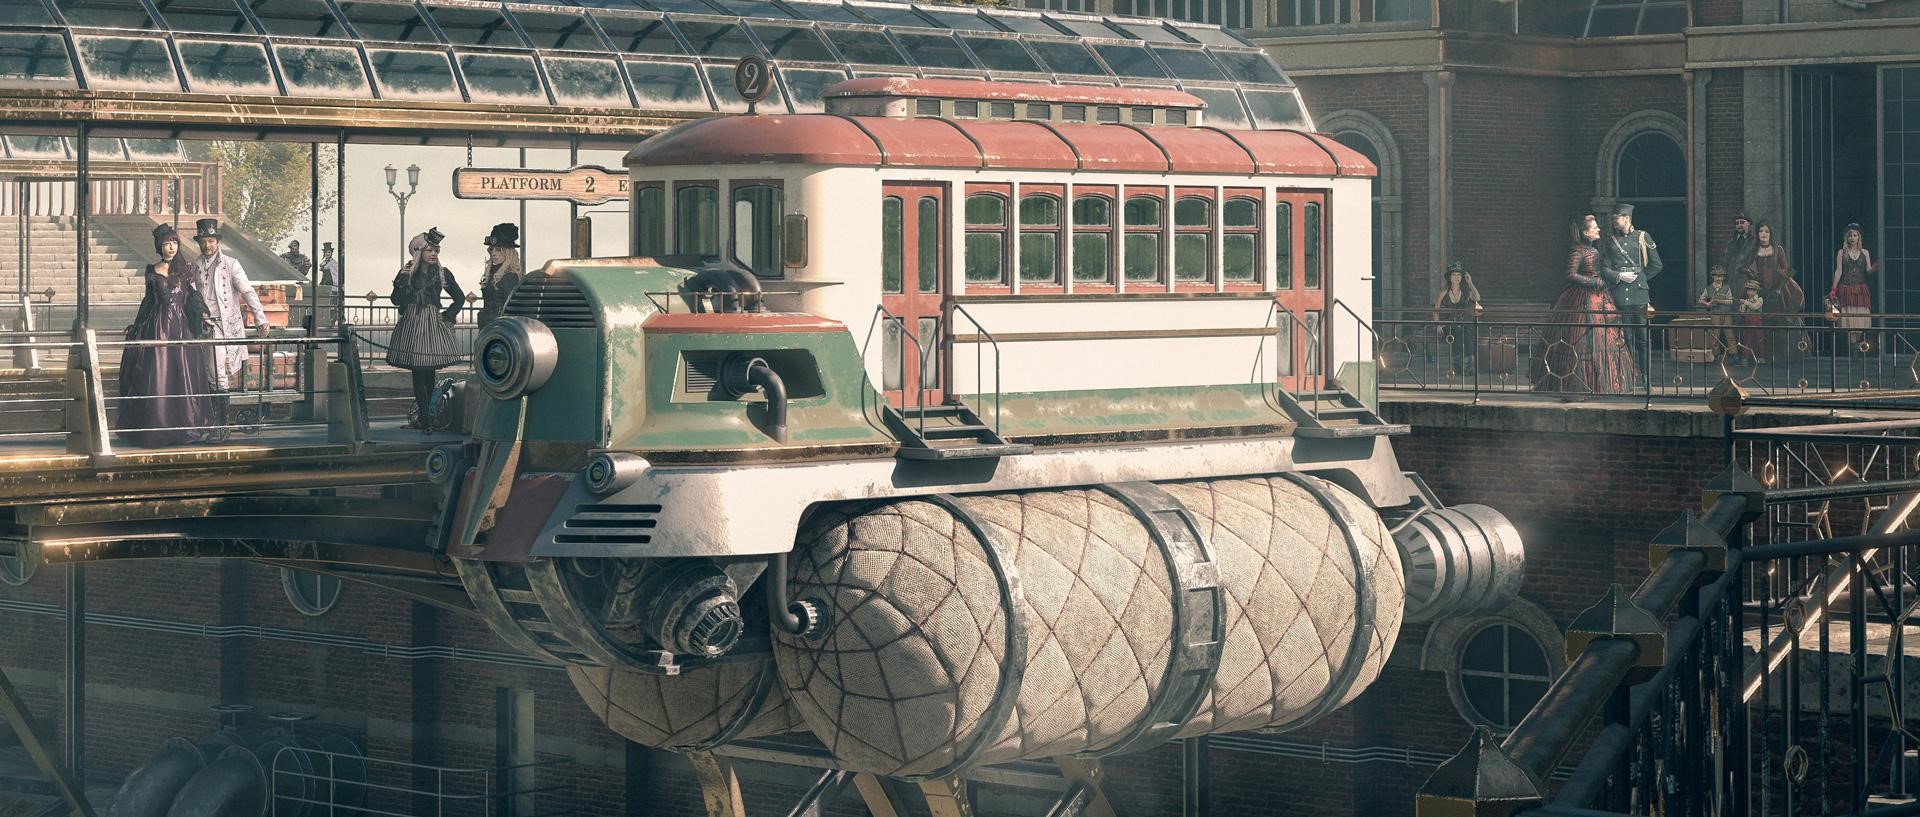
To finish, I will show the final image and images of some details.
STEAMPUNK STATION
Thank you for your time, I hope you enjoyed reading this article and learned something new!
Have a nice day!
About the Artist
Jose Miguel Gordaliza, a self-taught concept artist and matte painter based in Spain. He is specialized in environments, and is passionate about the art behind cinema and video games.
2 Comments
Nice breakdown. Thanks for your thinking and process.
Thank you so much!!