
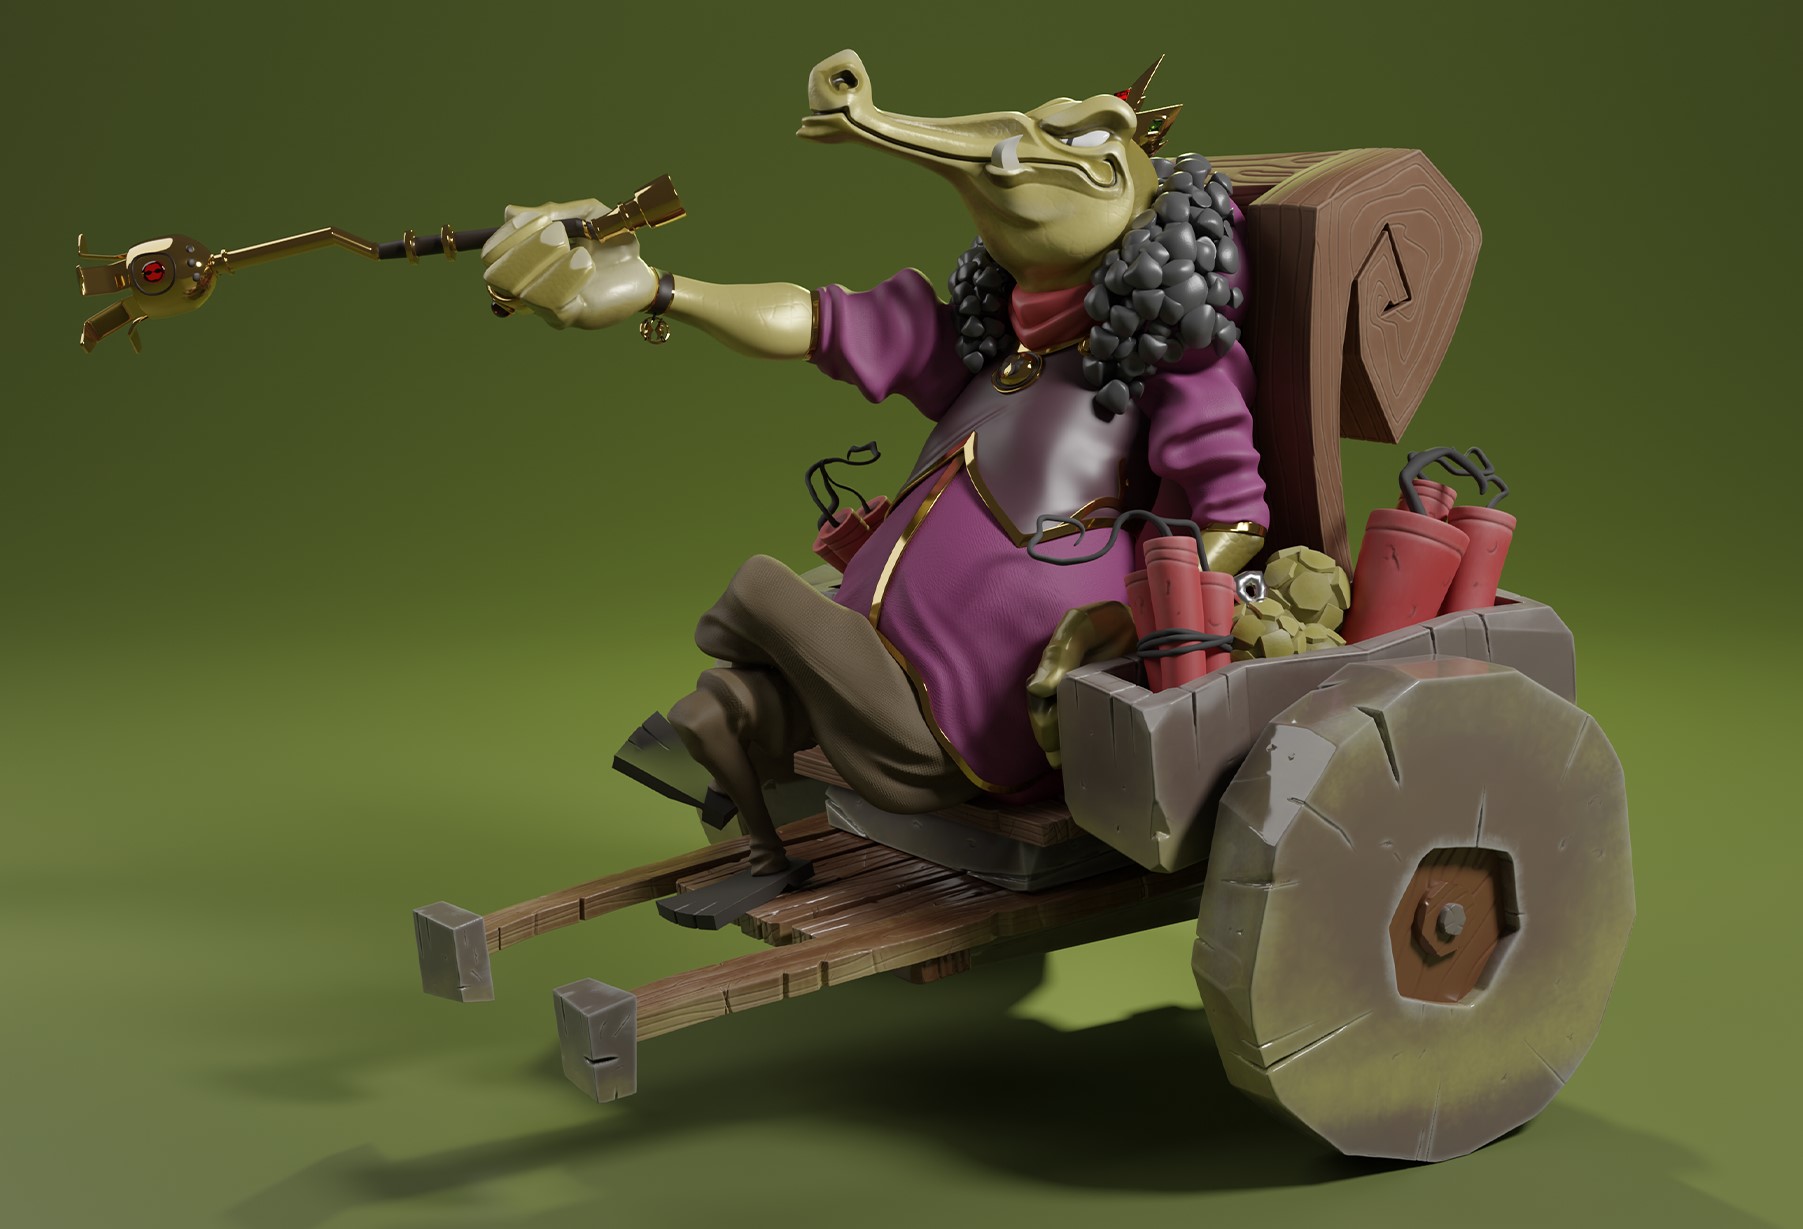
Behind the Scenes: Crile the Crocodile
INTRODUCTION
Good day, fellow artists and 3D enthusiasts! I’m Thivolan Moodley, a 3D artist with over 8 years of experience built from Mechanical, Architectural, Visual Art, Organic, and Anatomical modelling and rendering. I have helped firms create more dynamic renders and increased workflow with 3D modelling, in constant search of the best ways to achieve great results. I hope your creative journey is as zany as mine!
INSPIRATION
There are many great original 3D works but sometimes the creative juices just need a slight boost! In this particular case, while searching for inspiration, I came across the work of Brett2dBean, the Kobold King, and I knew that this would be something that I might want to tackle. I also picked this particular piece because I knew that it would be a slight challenge (I don’t normally sculpt stylized characters); one of the easiest ways to get your creative morale down is by challenging yourself with something that is a few too many levels above your current skill set. Be very wary of this.

MINDSET: Don’t try to paint The Mona Lisa on your first try….
Now before I get into the process, just a quick word about the mentality and mindset behind a sculpt…. Yes, yes, yes, I know you want to get to the picture parts but just hear me out will you? Sheez!
So what do I mean when I say, “Don’t try to paint the Mona Lisa on your first try”? Well, simply put: far too many novice and intermediate artists alike try to create a masterpiece on their first try; without any previous experience or forethought they dive straight into a sculpt or drawing with no sense of which way is up. And when they fail, which is usually the case, they have no idea how or why it went wrong. This let down is followed by a flurry of colourful words and a heap of self-criticism. This cycle can lead to major self-doubt and uncertainty, OUCH!

Death, taxes, and failure are the three inevitables. Know that when you jump into something for the first time, the odds of you stumbling are high but if you can learn from the falls on the journey, not only will the road become smoother but the views can be quite spectacular! It just takes time and a belief in realistic goals.
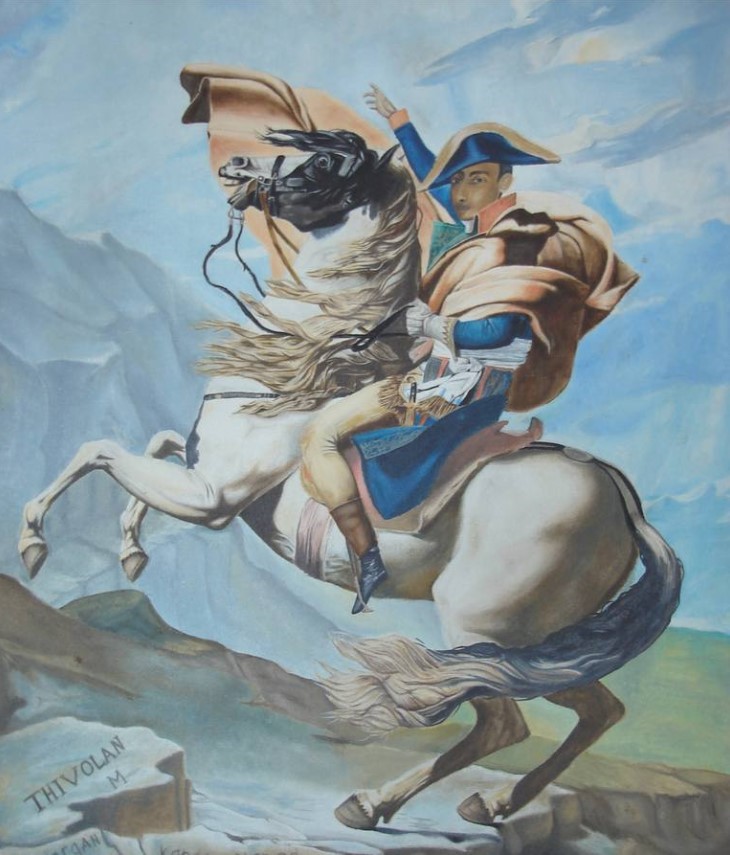
An oil painting I did back in high school. As you can see, the human part of my painting needed more work, which is why I’m currently studying the human figure!
COMPOSITION
Okay, so enough lectury-grown-up talk—time for the fun stuff!
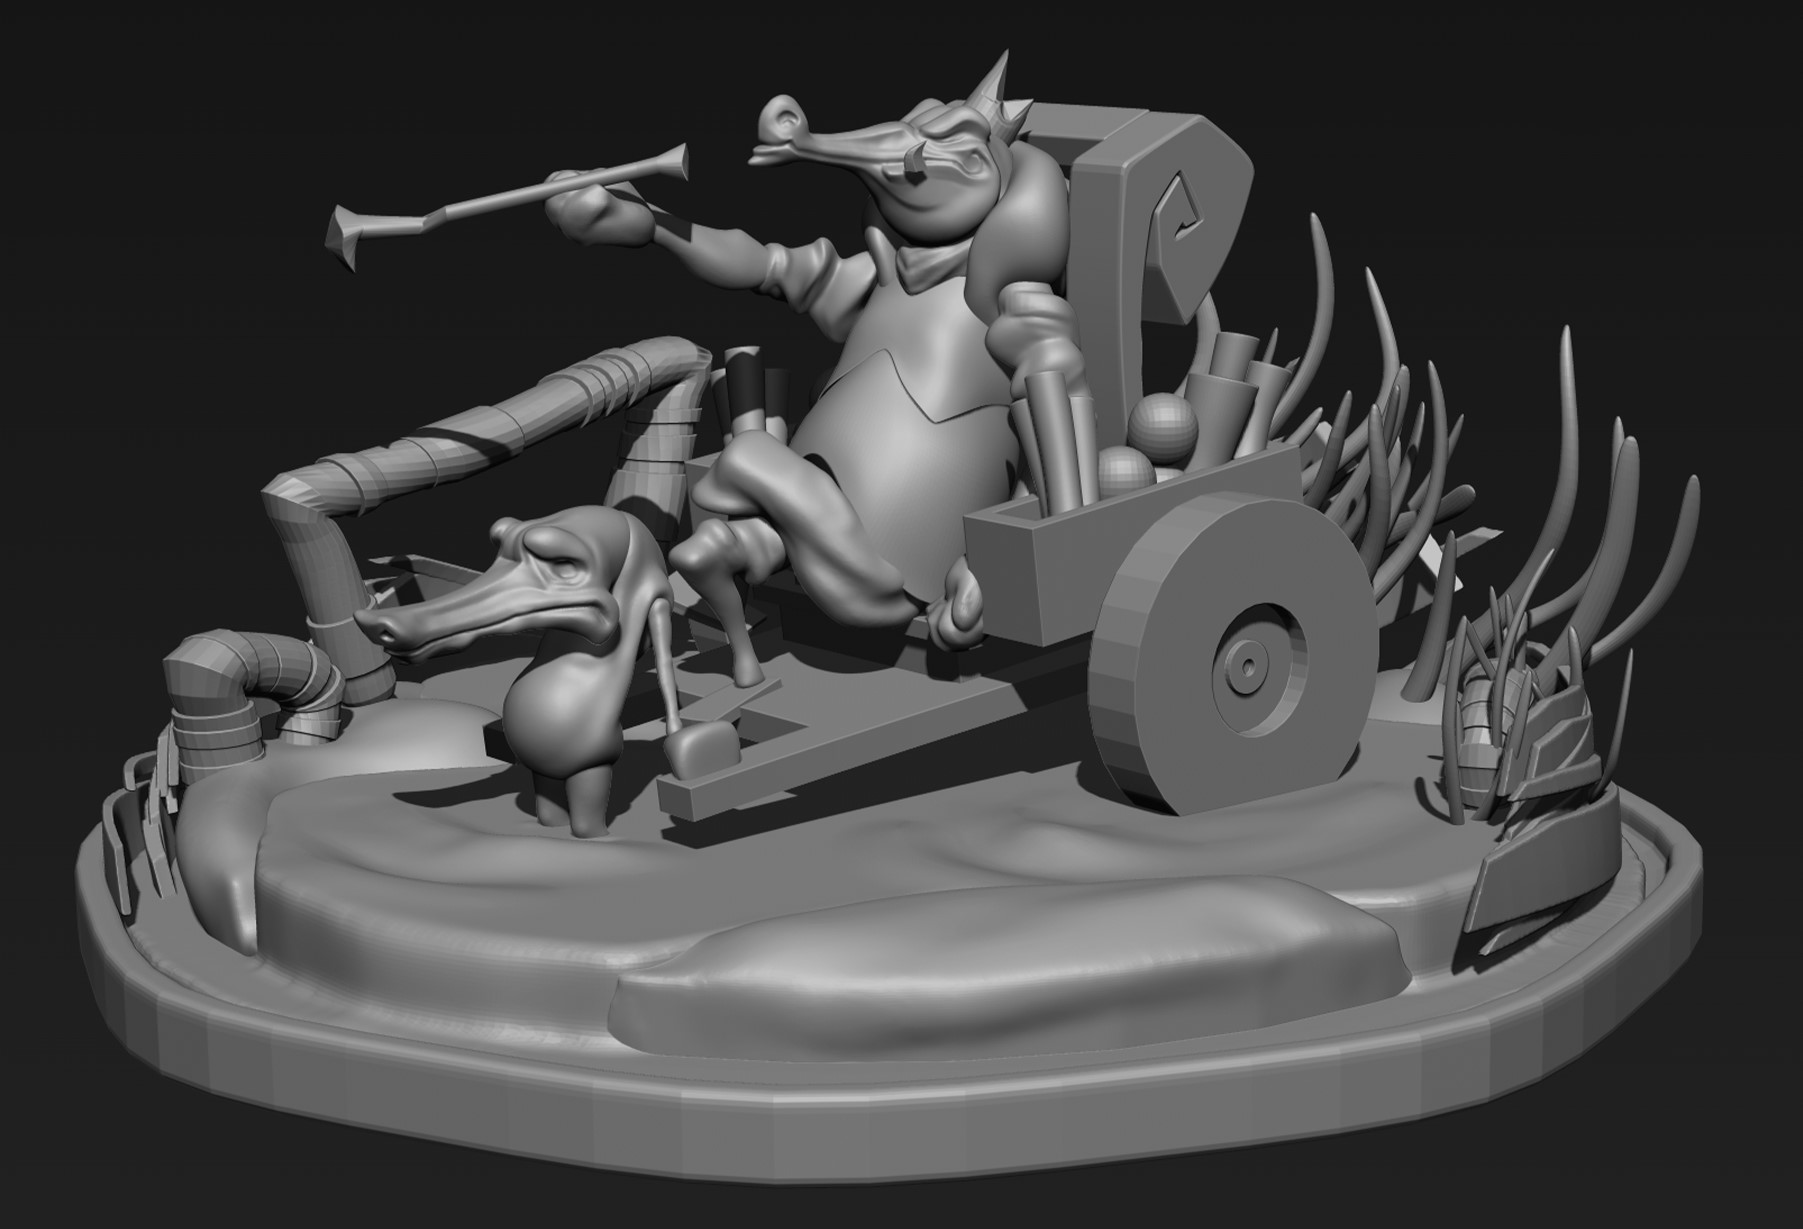
Composition… Yes that’s right, just like I droned on in the previous section, we need to set some markers here to know which way is up. Luckily for us, the sculpt already has a composition set from the reference, so let’s get a basic idea of what we want sculpted and what we want the viewer to take home after seeing our work; we can’t just copy and paste everything!
To do that, let’s sculpt out the main parts of our scene. We can add details but it’s best to keep things simple—very blocked out and rough. This way we won’t get too attached to what we’ve already sculpted, and changing it won’t make us feel bad about it. It’s only some polygons we’re moving around!
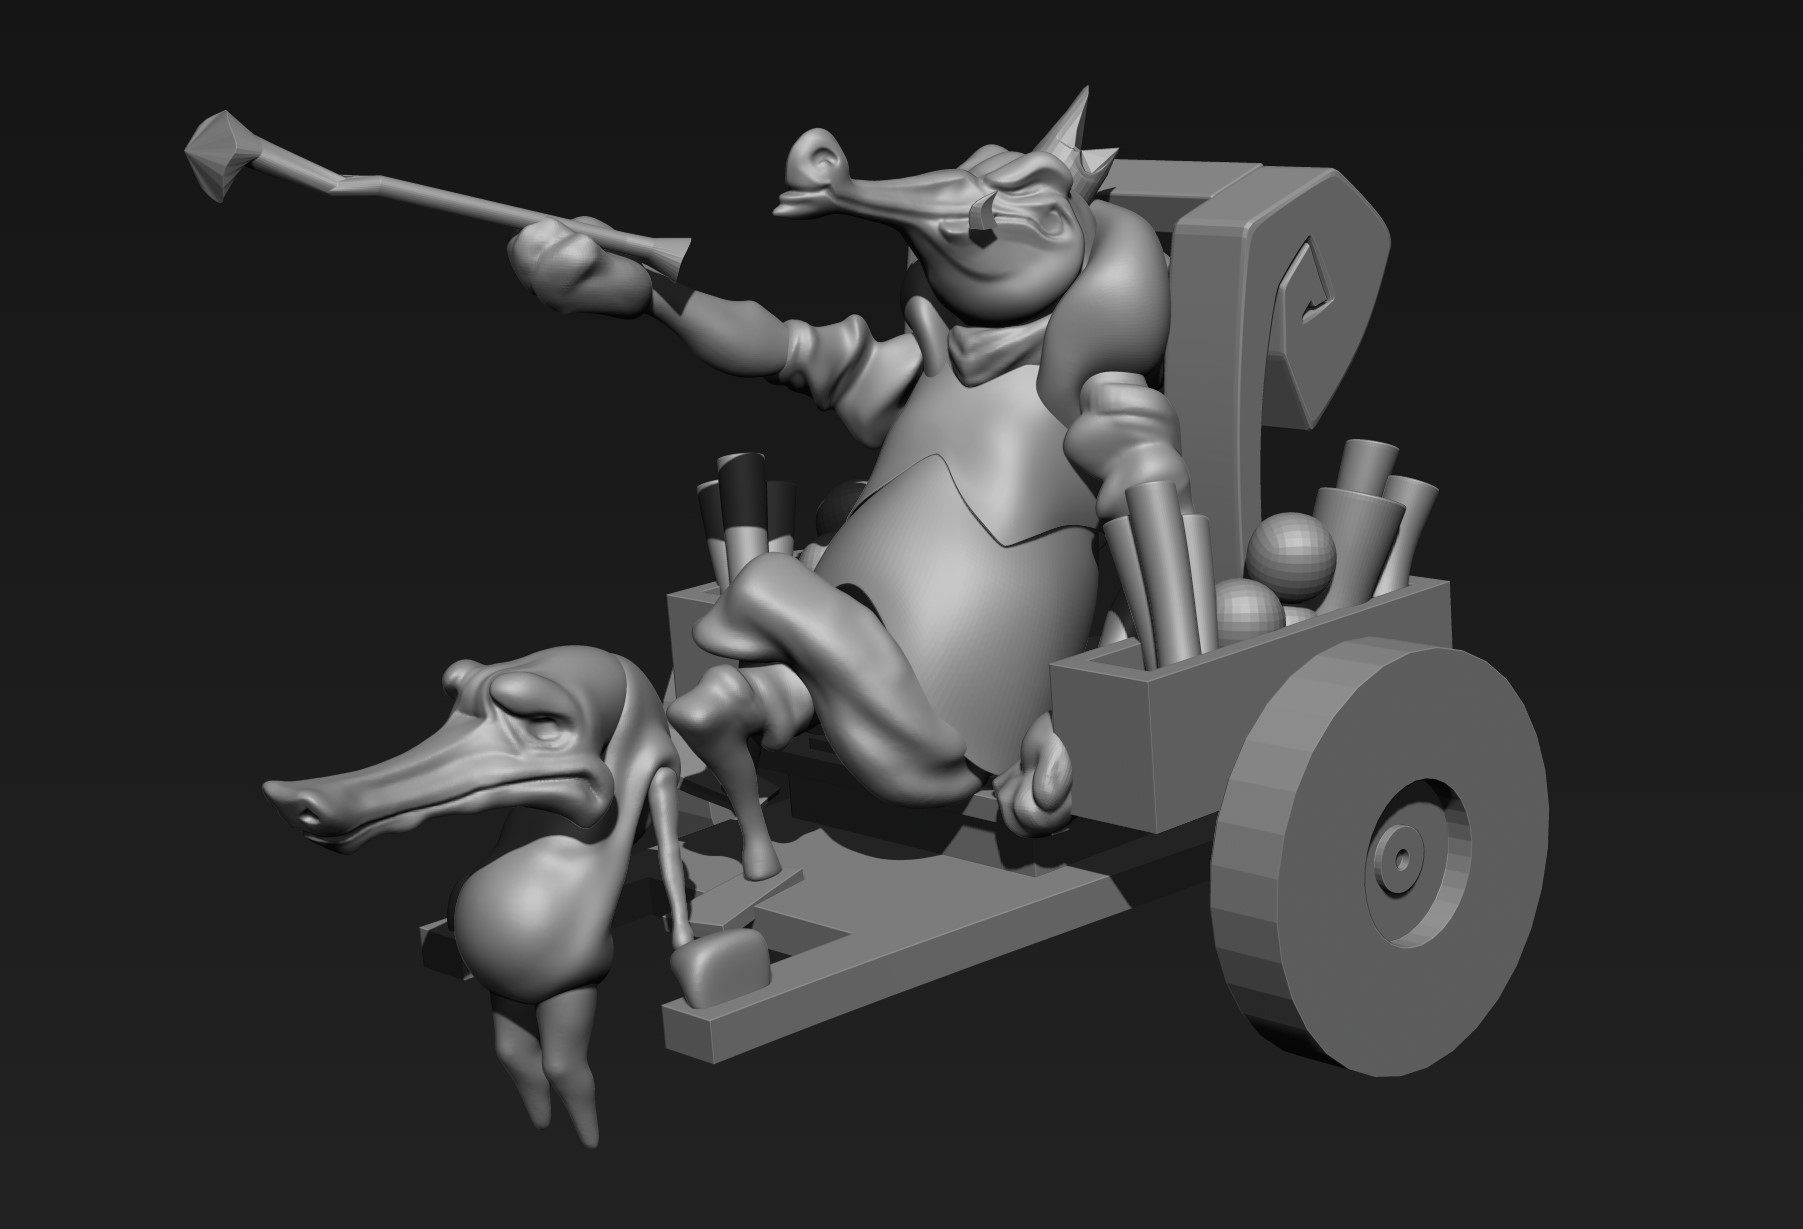
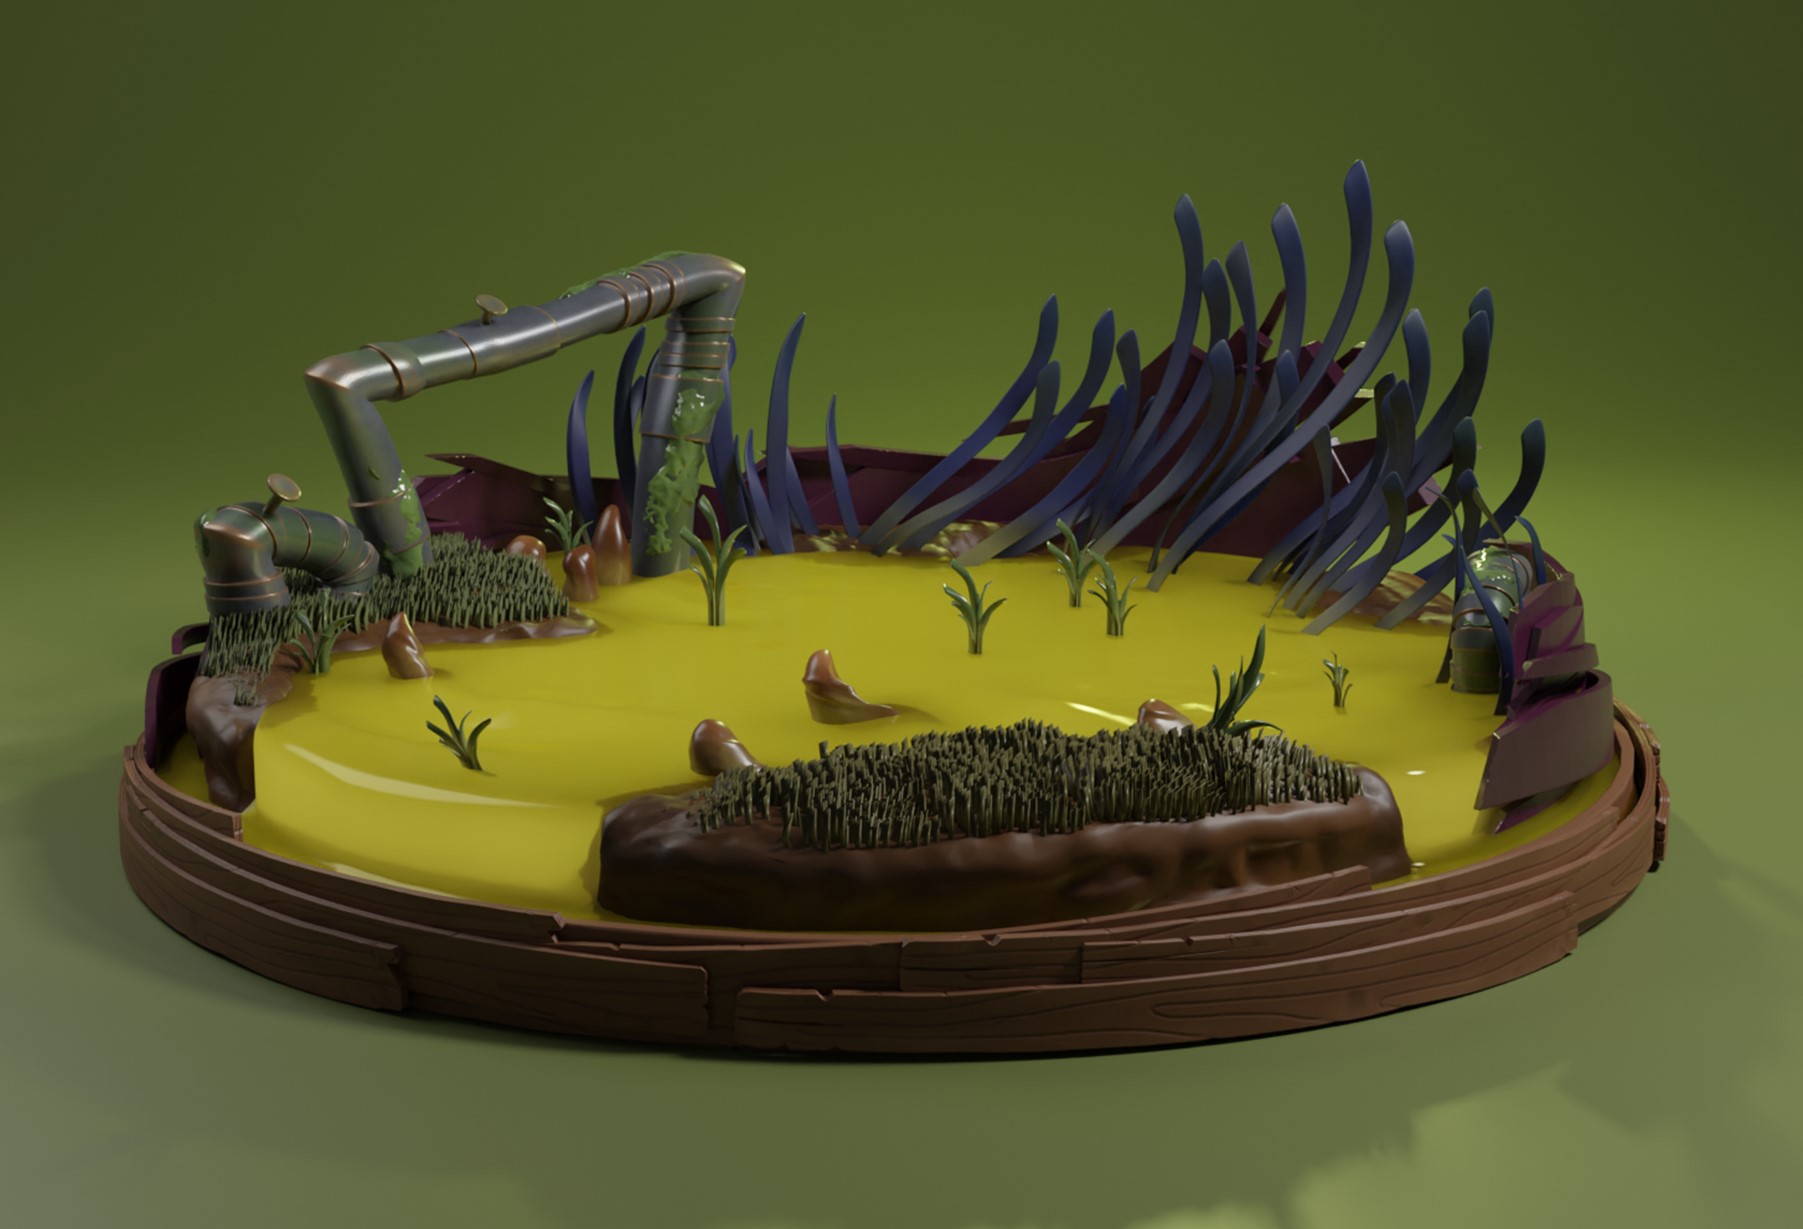
Okay, okay, that’s not too bad… Oh, what about a base!? Right, so let’s do that. I’ll block in the base and use the elements already there to capture the main characters and not take away from them. Many people sculpt a huge base and wonder why it then looks odd—it’s stealing the spotlight from your main characters!
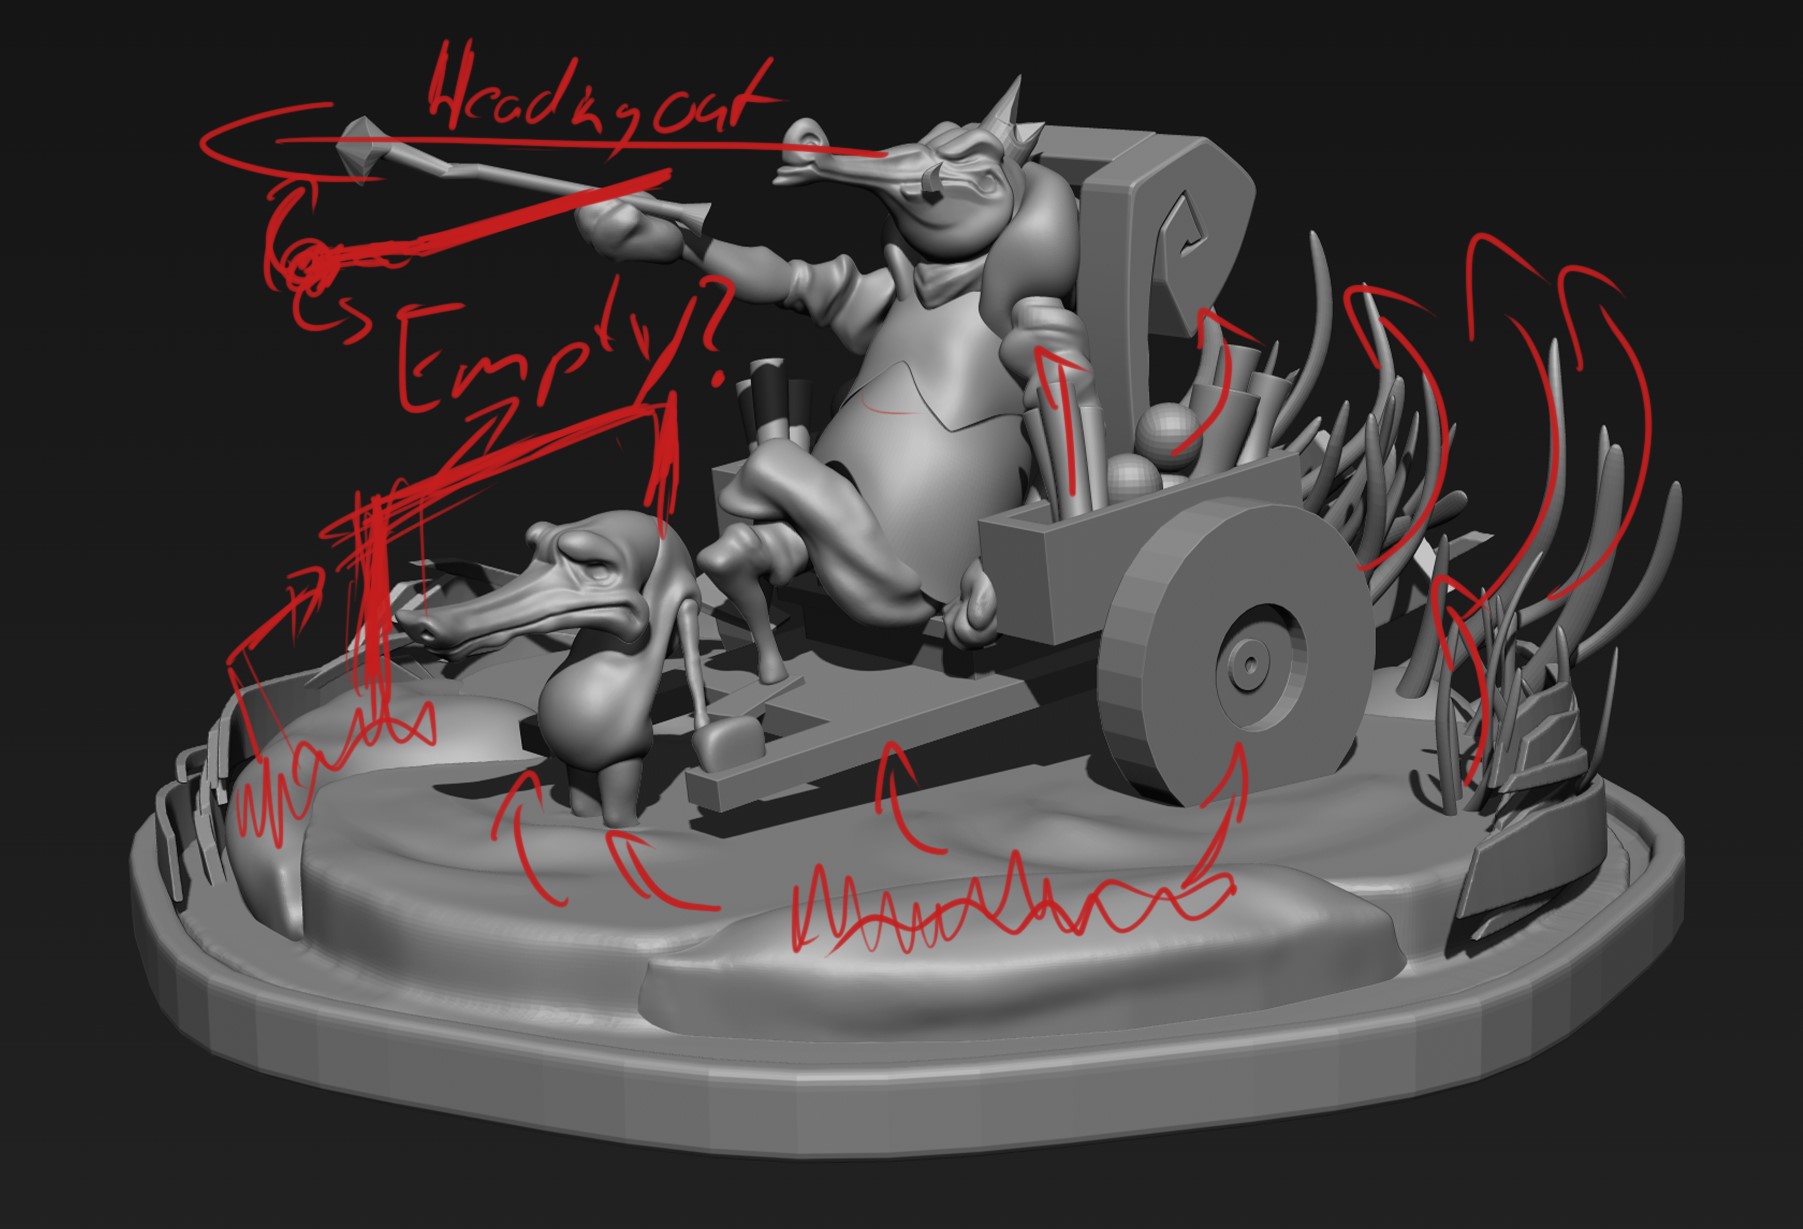
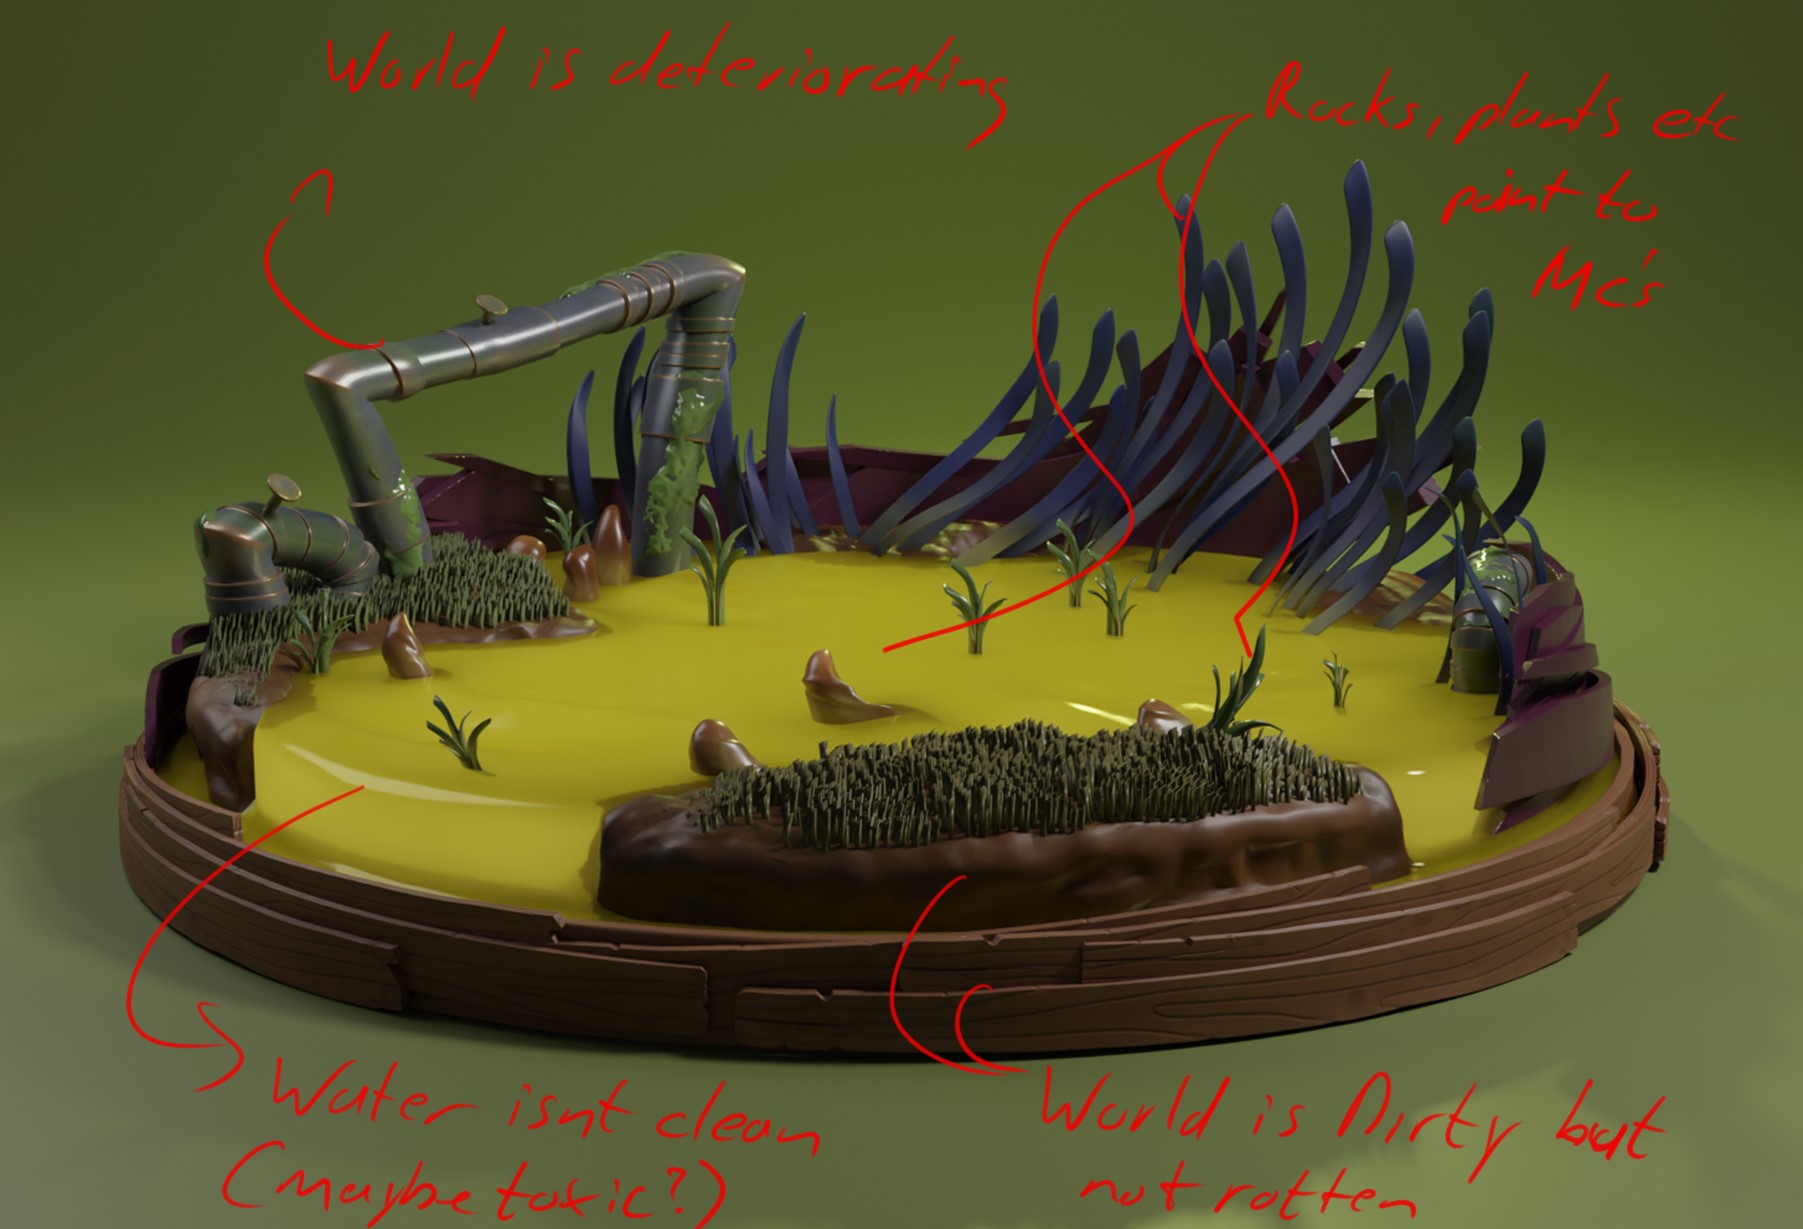
Okay, so now we have a base, but some things could use a little sprucing up. The sceptre looks like it’s pointing straight out of the screen; I want the viewer to loop back into the picture, so let’s point that slightly down maybe. I have made a few edits in the picture so let’s see if it helps.
Ahh, nice! That looks a lot better but let’s not forget that we can add too much to the scene and create chaos. So let’s be careful not to fall into that trap as we continue on to our details phase and as we texture and light this later on.
So this is a pretty good start to our (my!) sculpt. If you’re thinking that composition makes absolutely zero sense to you, don’t worry, it can be quite an advanced topic (I’m no expert at it yet), and you should definitely consider taking a few courses on it over your creative career.
Basically, I’m trying to get the most attention to our slave and Crile (the main Croc) using the lines and forms within our sculpt (thus, the arrows in my sketches).
DETAILS: Use References
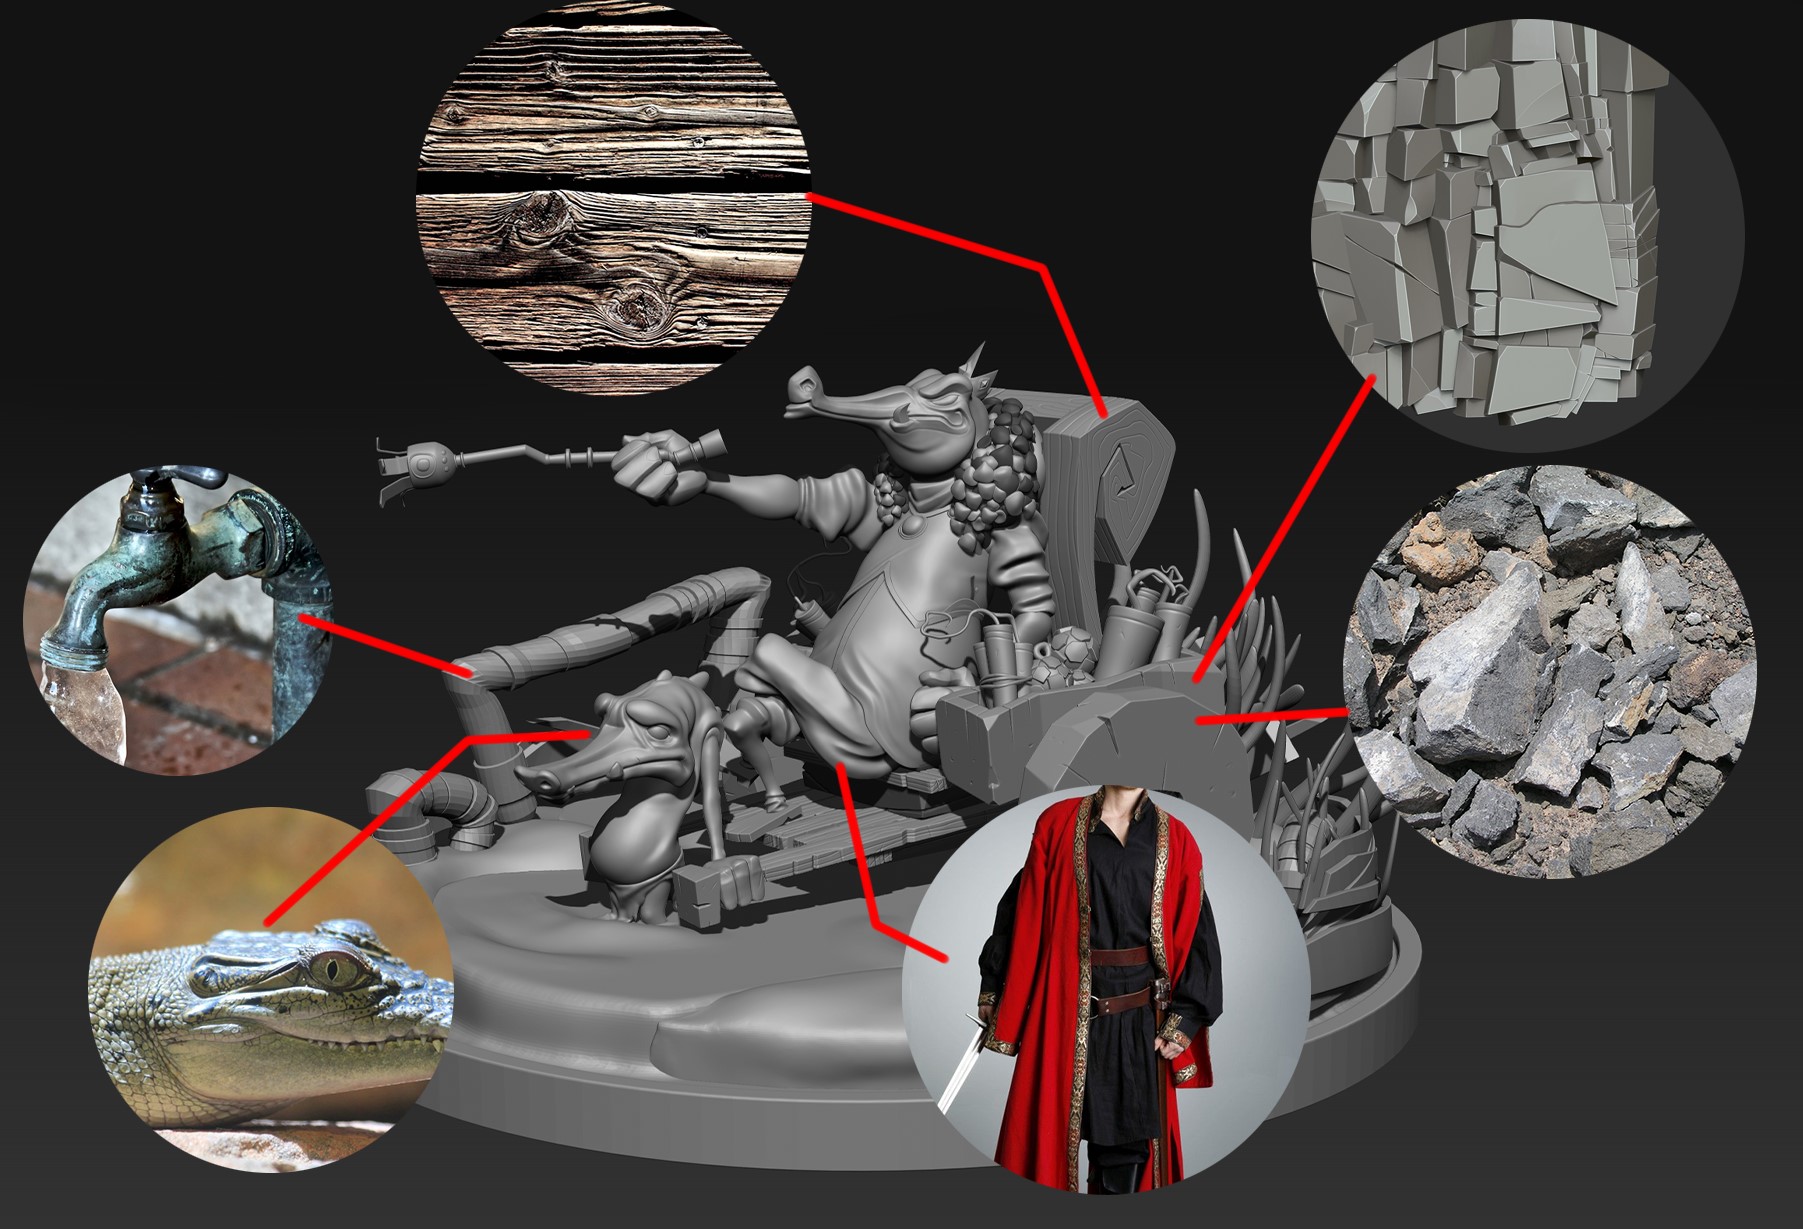
Sculpting happily along whilst whistling to the latest Taylor Swift—I mean Metallica classics is great. But at some point, whether it’s wood, metal or clothing, you will need to have a look at some references to get an idea of what goes where or how things form, etc.
For this, I simply searched for wood refs for the cart, clothing refs for the clothing, and some stylized rock creation for the stone parts of the cart. You can checkout my tutorial of those topics, and other tutorials on my YouTube Channel.
These are just examples; I would certainly use a few more to get a better grasp on the materials, etc.
Now that you have some refs, don’t just dive straight into the details; do some study sculpts and maybe more than a few sketches of the refs. This not only helps in giving you a better understanding of the material, but it also helps build a mental library so you can recall the shapes, forms, and details whenever you want as opposed to searching for images all the time.
Some quick sketches I did to get a grasp on some folds and drapery, etc.

Now that we have done some studies and have a basic idea of what we want to add to the sculpt, I can use that to drive the details phase. Again, don’t get carried away and over-detail the sculpt. Stylized work usually calls for simplicity.
So let’s use the steps we’ve established throughout this and try to finish off the details phase.
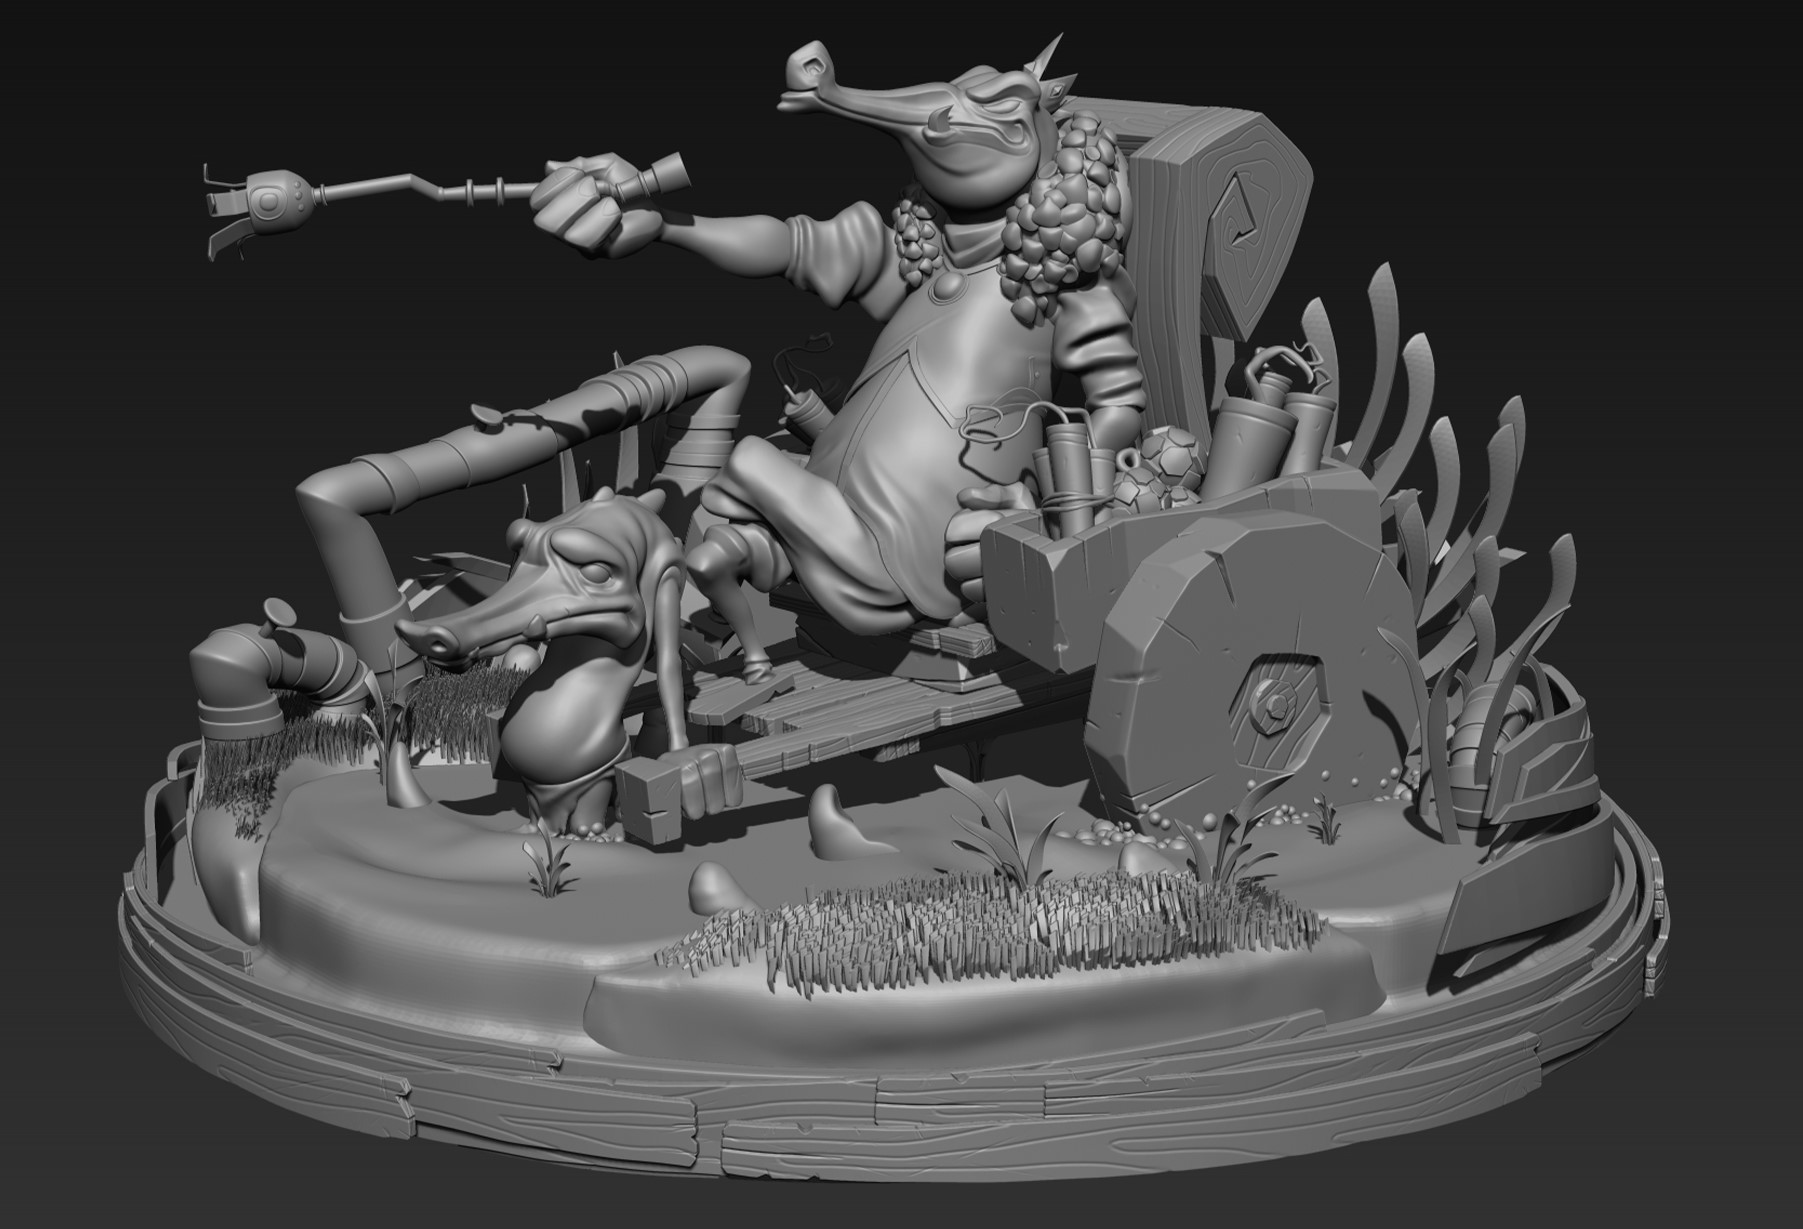
I added a base piece for our, uhh, base and also added some smaller details like the rocks and grass, all pointing towards our characters.

Whew! Now this might look a little busy in some areas but we will sort that out in our next section. Time to colour, light and render!
COLOUR: Texturing and Lighting
Having all the coolest details sculpted onto your figure is great, but if your colour and lighting is off or over-the-top, your work could look like 2012 Nicki Minaj (no offence). Again, our ref already has the colours worked out but just to check, I have some test colours to demonstrate what I mean.
Draw attention using colour.


As you can see, just from the colouring, I can draw attention to whatever area I want. I can also take away or distract the viewer with this, so be careful!


This type of mindset also translates over to the lighting part of the sculpt. Use the light to draw attention to and the shadows to keep attention from. A mix of light and shadow will create contrast—this is a really great way to draw the eye. I would definitely recommend watching the Blender Guru’s lighting series,
It’s not the end-all-be-all guide but it’s a great start. You can see the lighting mentality at work right below.
Not enough information can be perceived due to too much or too little light.
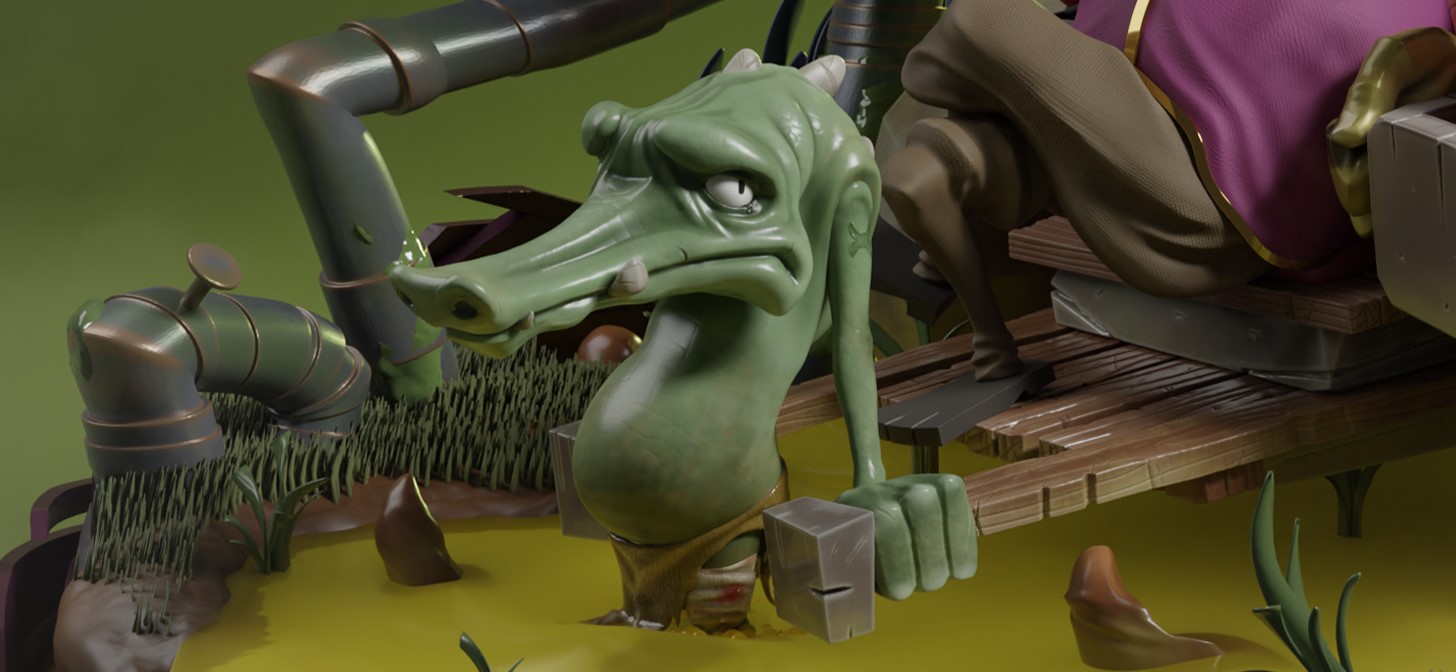
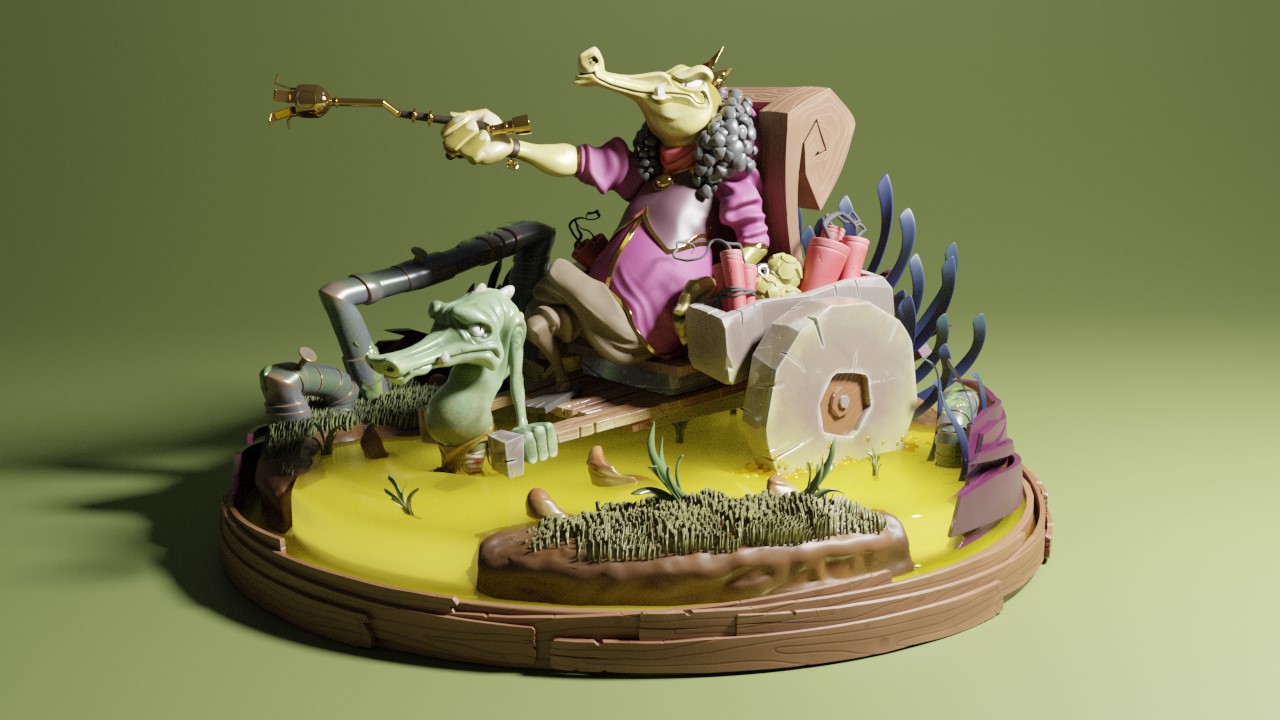
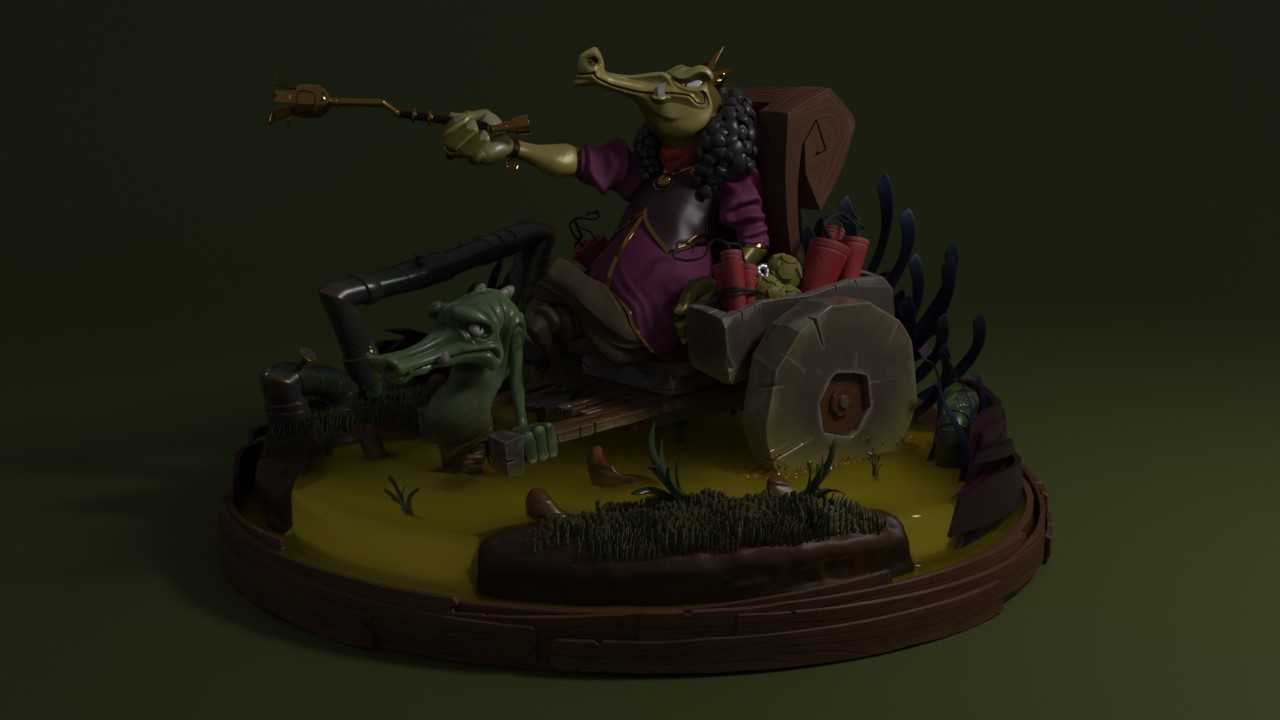
Lighting can also be used to create drama or to showcase all the awesome work you’ve done with some emphasis on the main character. This is what I did for my final render: I made sure that you could see everything but I also used brighter lights to draw attention to the MCs.

Okay, I’m pretty sure the word count is going to drive the editor insane here so let’s wrap it up with one last section.
DETAILS: Use them to tell a story
So these characters were here for a reason and that’s great, but without the finer story-telling points, the sculpt would seem somewhat lifeless. So that’s where the details will be used to further carry the believability of the scene.
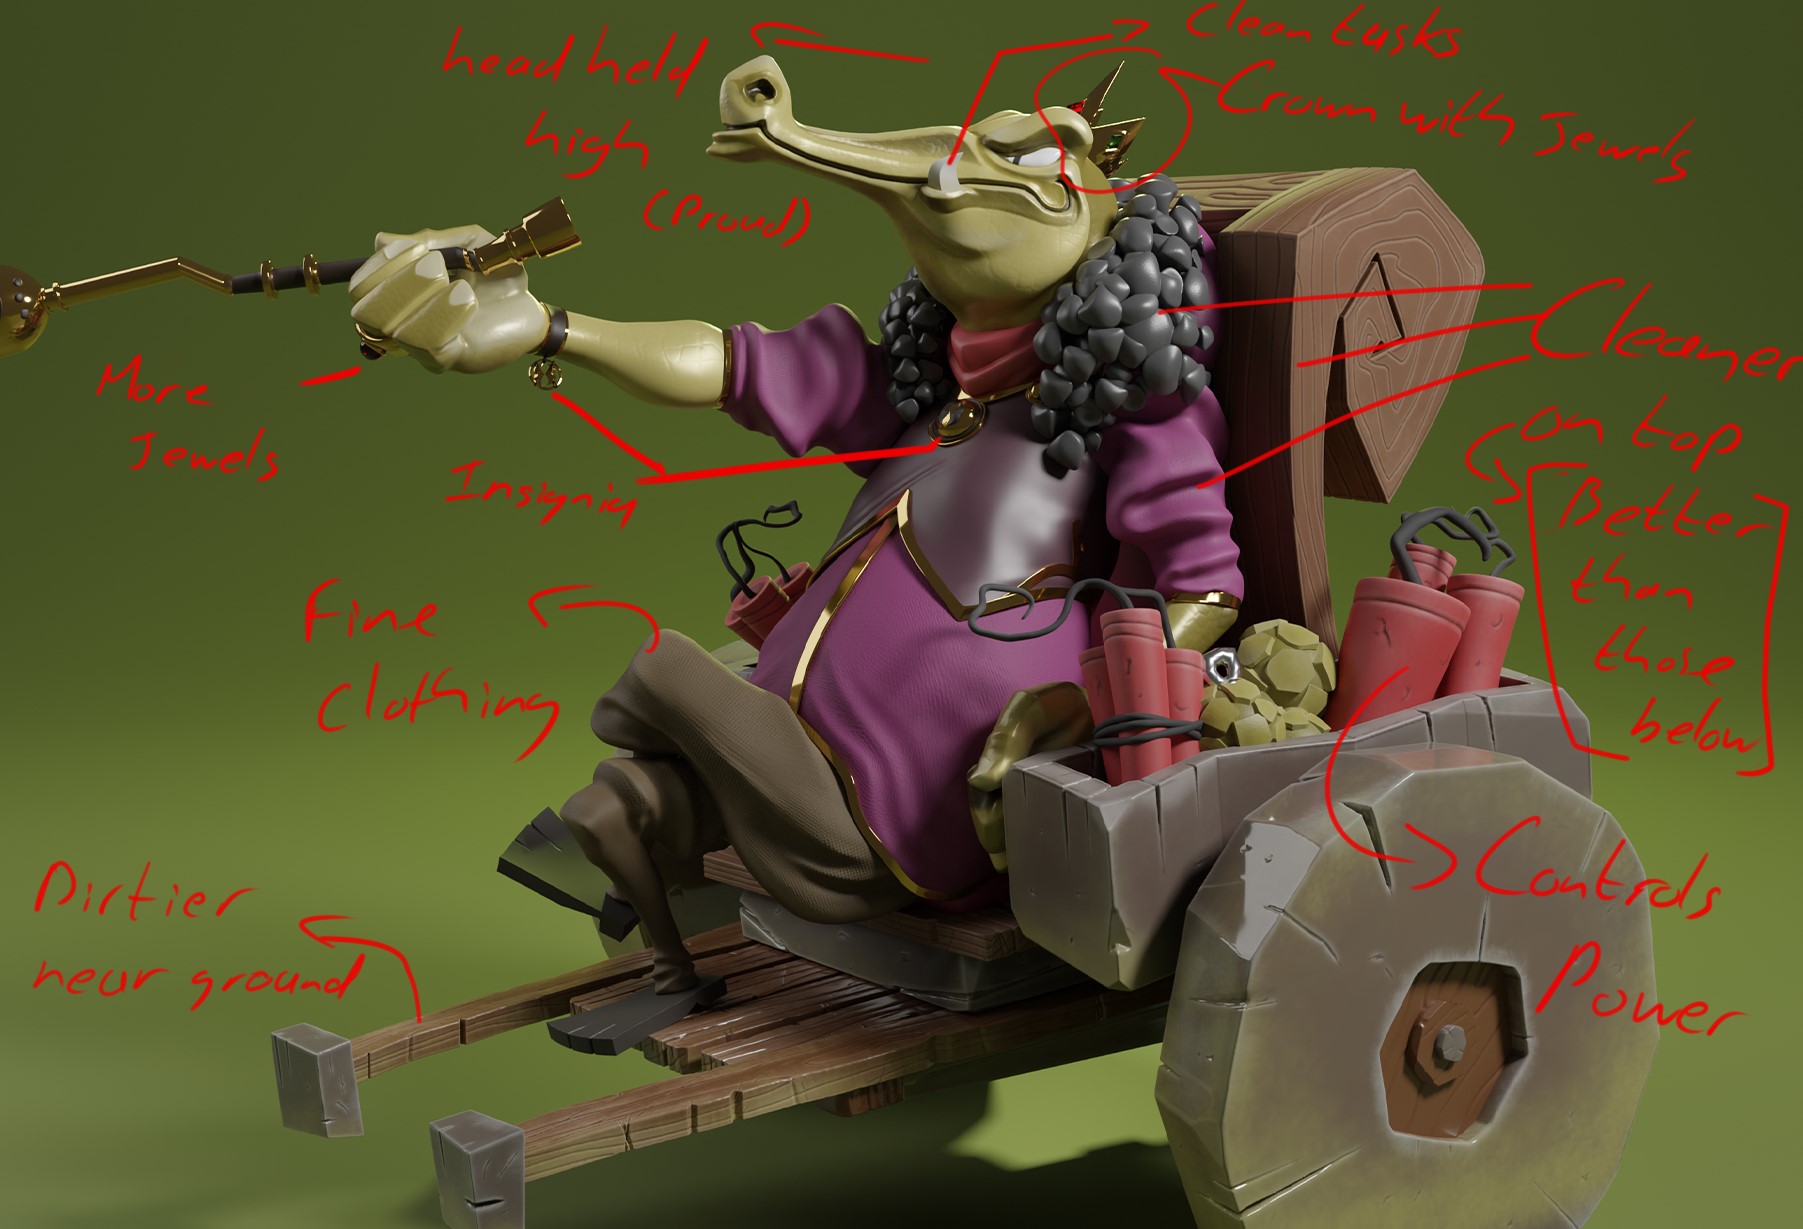
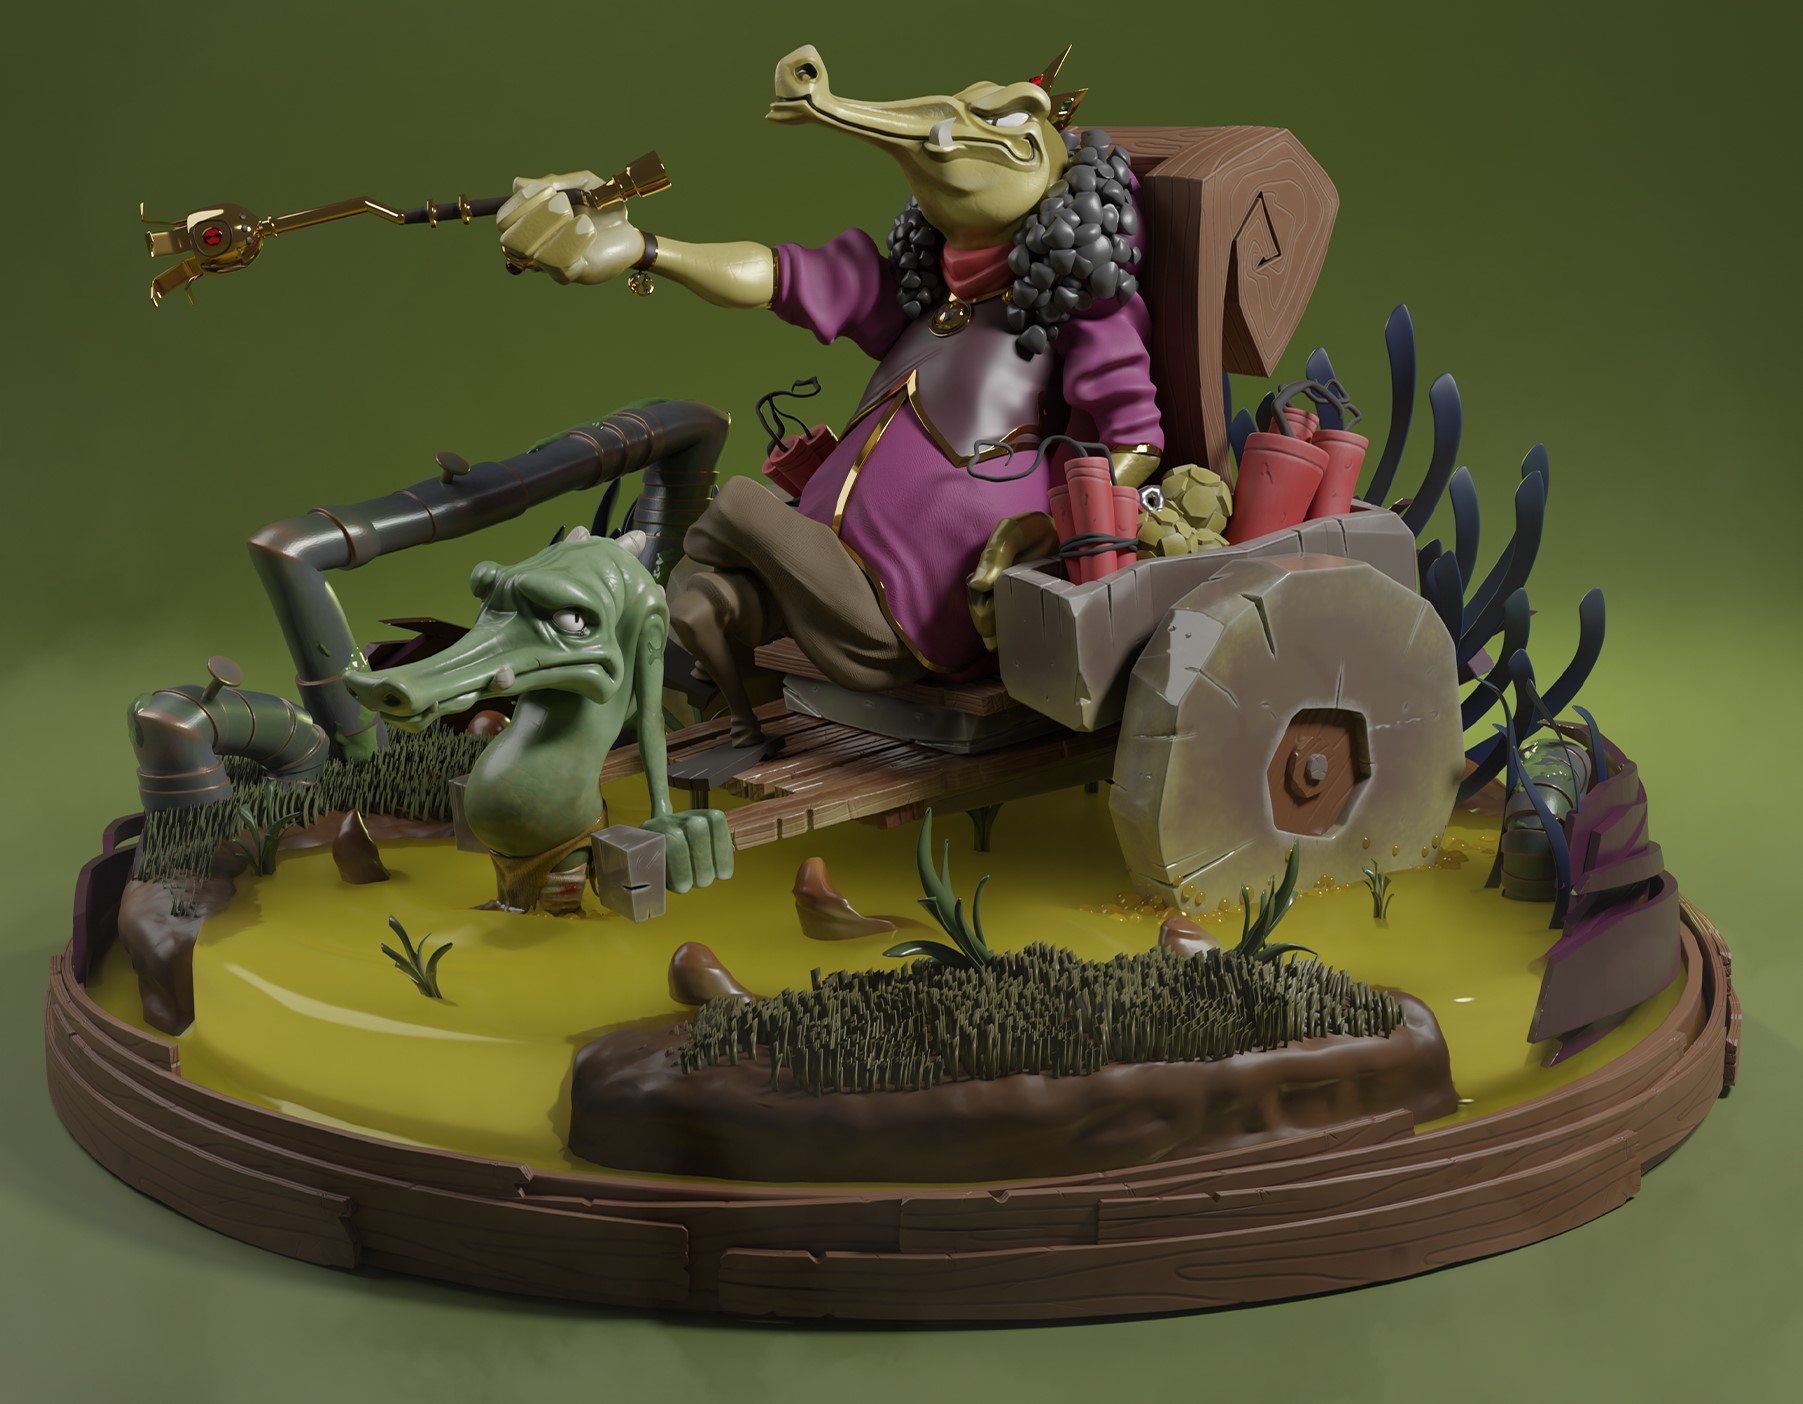
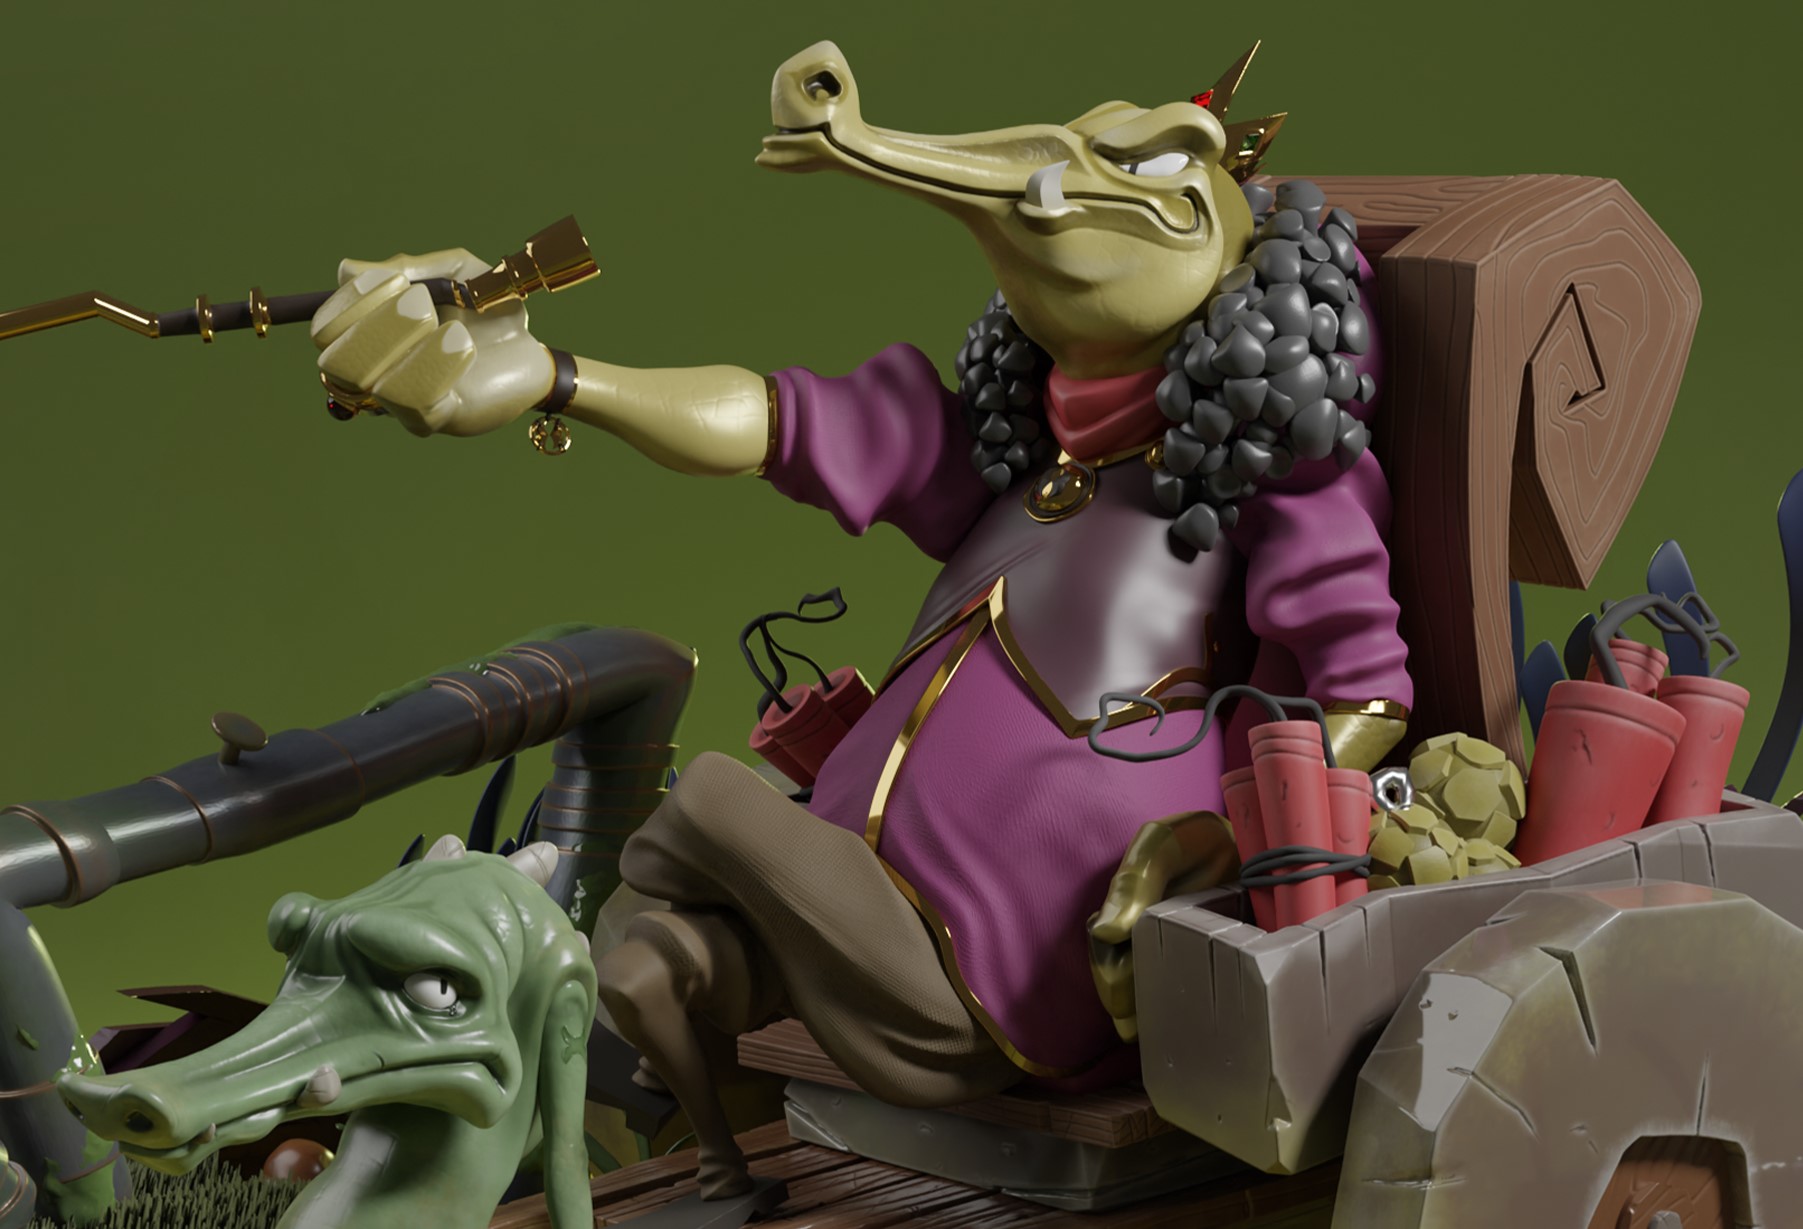
I wrote an entire story about the scene which you can check it out on Artstation. The summary is this: I want people to see the greed on Crile, the sadness and frustration on the slave and the somewhat unfortunate state of this world.
You can see the slave now has a bandage, a branding and a slight tear in his eye while Crile has more jewelery along with an insignia (which is the same shape as the brand on the slave).
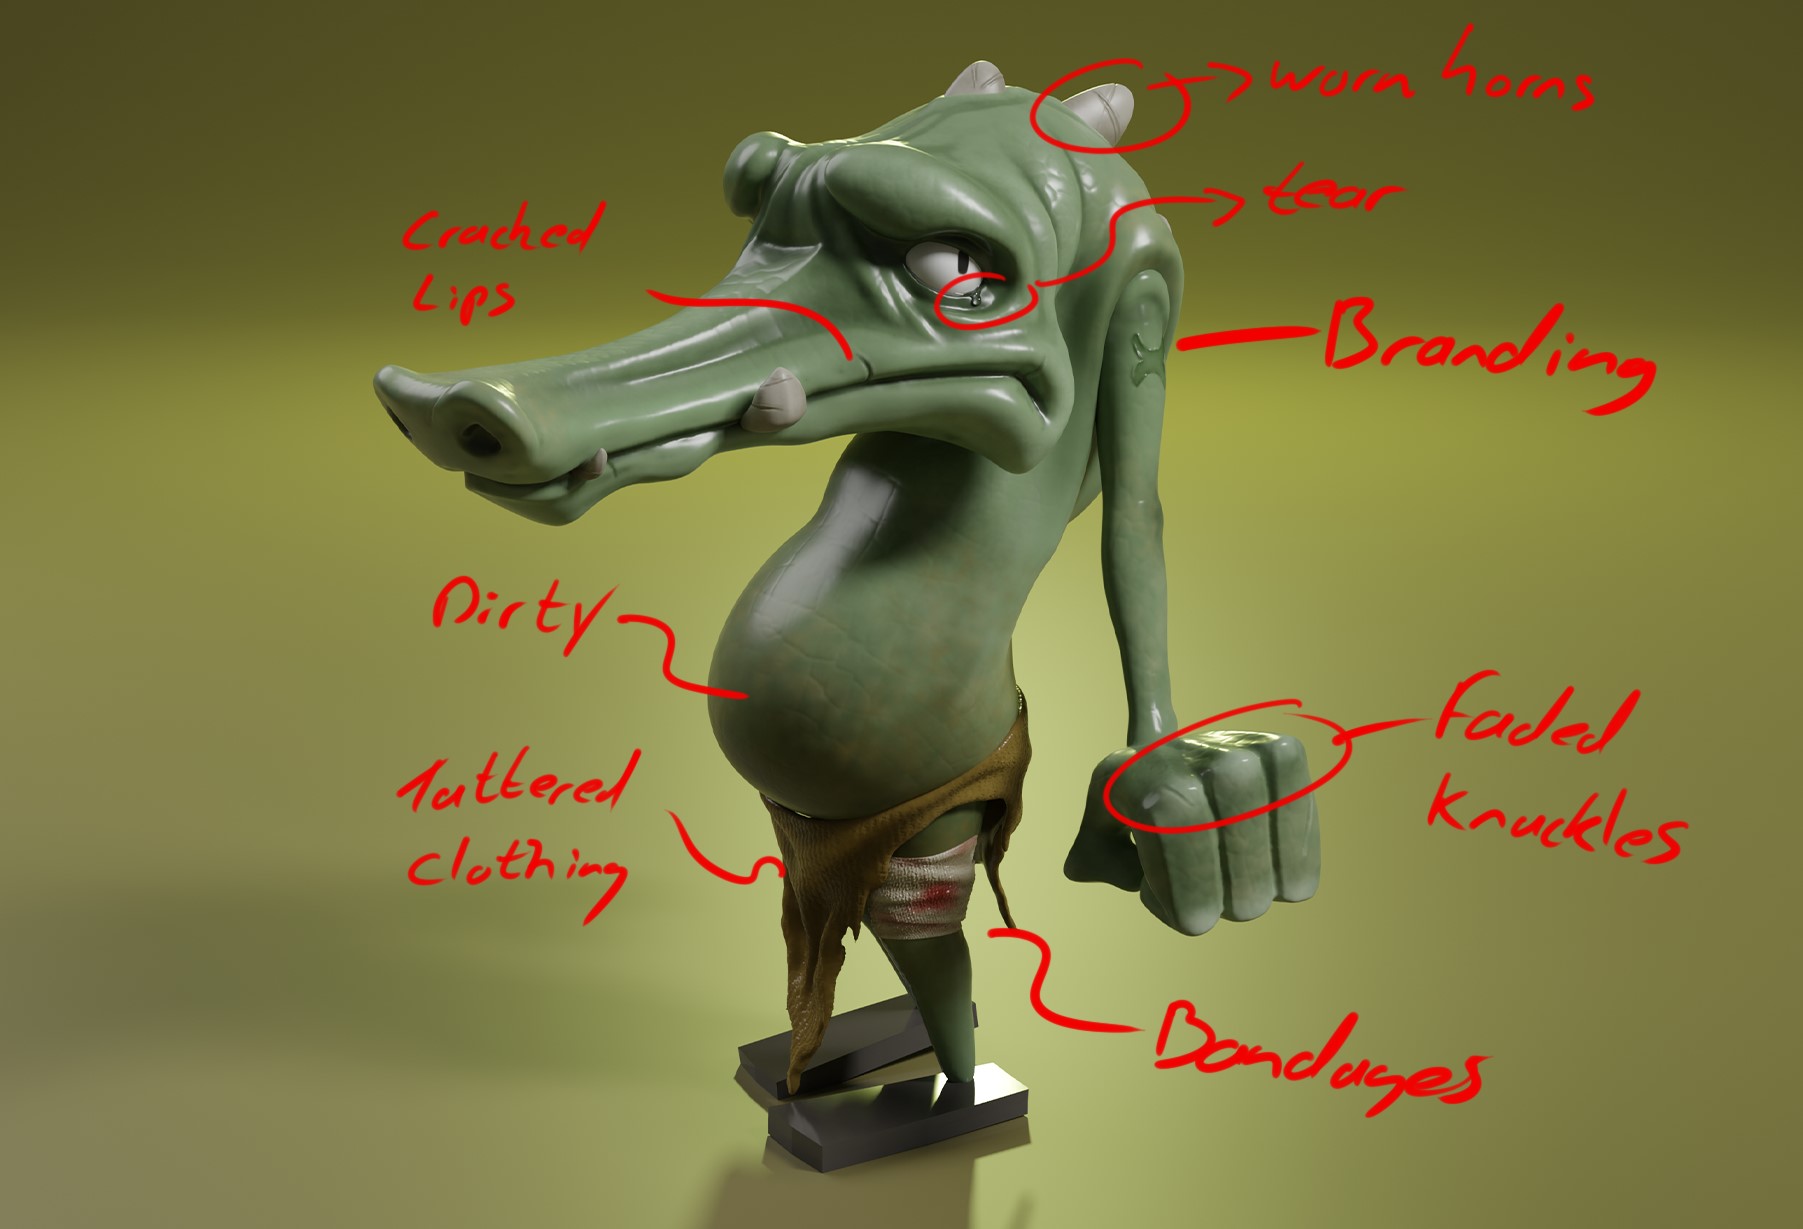
All this tells a story and draws the viewer in. They might not see it on their first viewing (and they’re not supposed to) but the longer they stay in our world, the more they discover!
FINALS: Make that Diamond Shine!
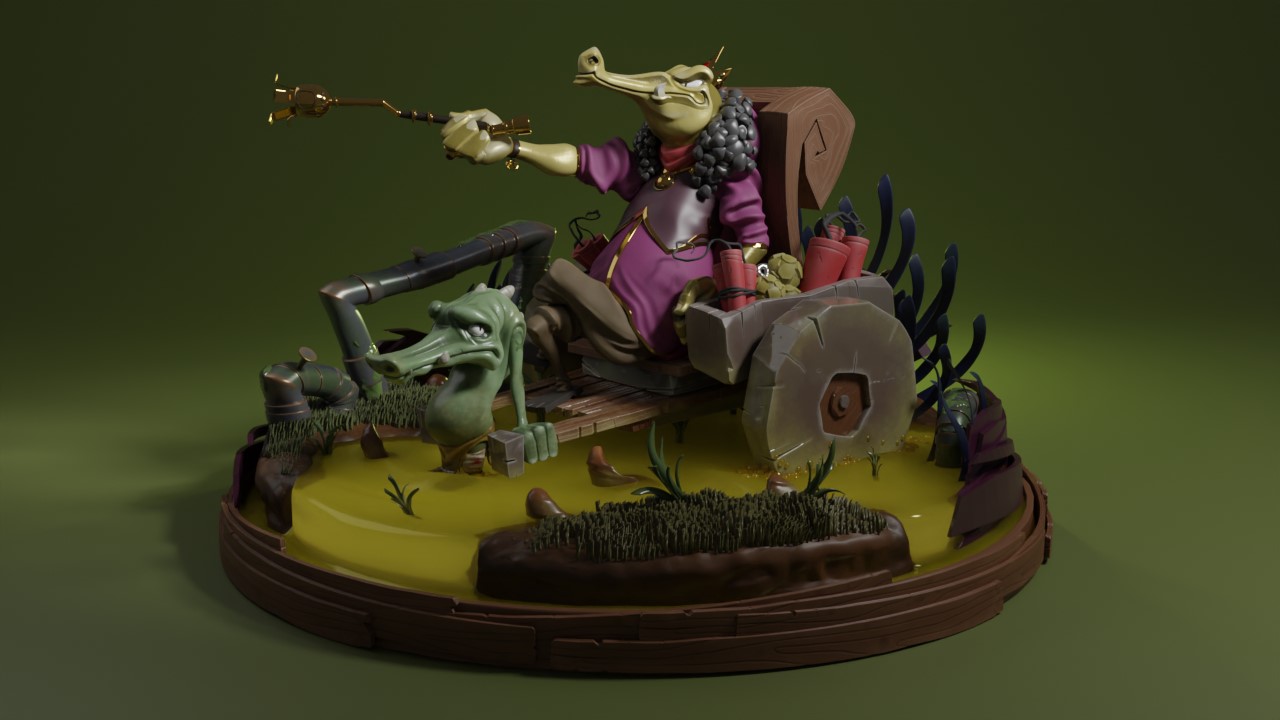
The culmination of all that hard(ish) work and effort!


Thank you for staying in my world! It’s certainly been a while since I needed my creative writing skills from English class and I’m pretty sure my teacher would give this yet another 67% for reasons I don’t get. Anyway, I hope you found something of use here and if you still wish to stay in my world a little longer, you can always visit the links down below!
P.S. I’m currently working on a free and paid beginner’s tutorial of this very sculpt which should be out a few weeks after this article is published! So be sure to check it out if you want to learn more about sculpting, lighting, etc!
About the Artist
Thivolan Moodley, a 3D artist from Johannesburg, SA. Currently working as a freelance character artist. Also creating free and paid tutorials for enthusiastic 3D artists.


