
Behind the Scenes: Fight for Light
INTRODUCTION
Hello everyone! My name is Tamás Török, and I live in Hungary. I opened Blender for the first time almost 20 years ago and started as a hobbyist. I graduated as an IT engineering specialist but got my first job as a 3D modeler. Passion matters the most and I loved to create 3D renders. I think that’s the reason why I landed in the 3D industry instead of the IT sector.
After a few years, I became a lead generalist in a company, and then I tried my luck as a freelancer.
INSPIRATION
One of my former colleagues sent me a new challenge on YouTube. It was called ‘The Moving Meditations 3D Challenge.’ I loved the previous ones so I decided to join this as well. It’s always a good chance to learn and I thought it would be really cool to reach the top 100. We get a fixed camera with Dolly Zoom and 25 mocap animation to choose one for our main character.
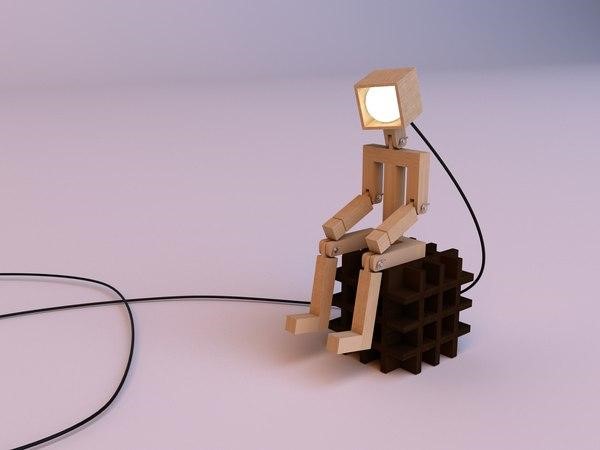
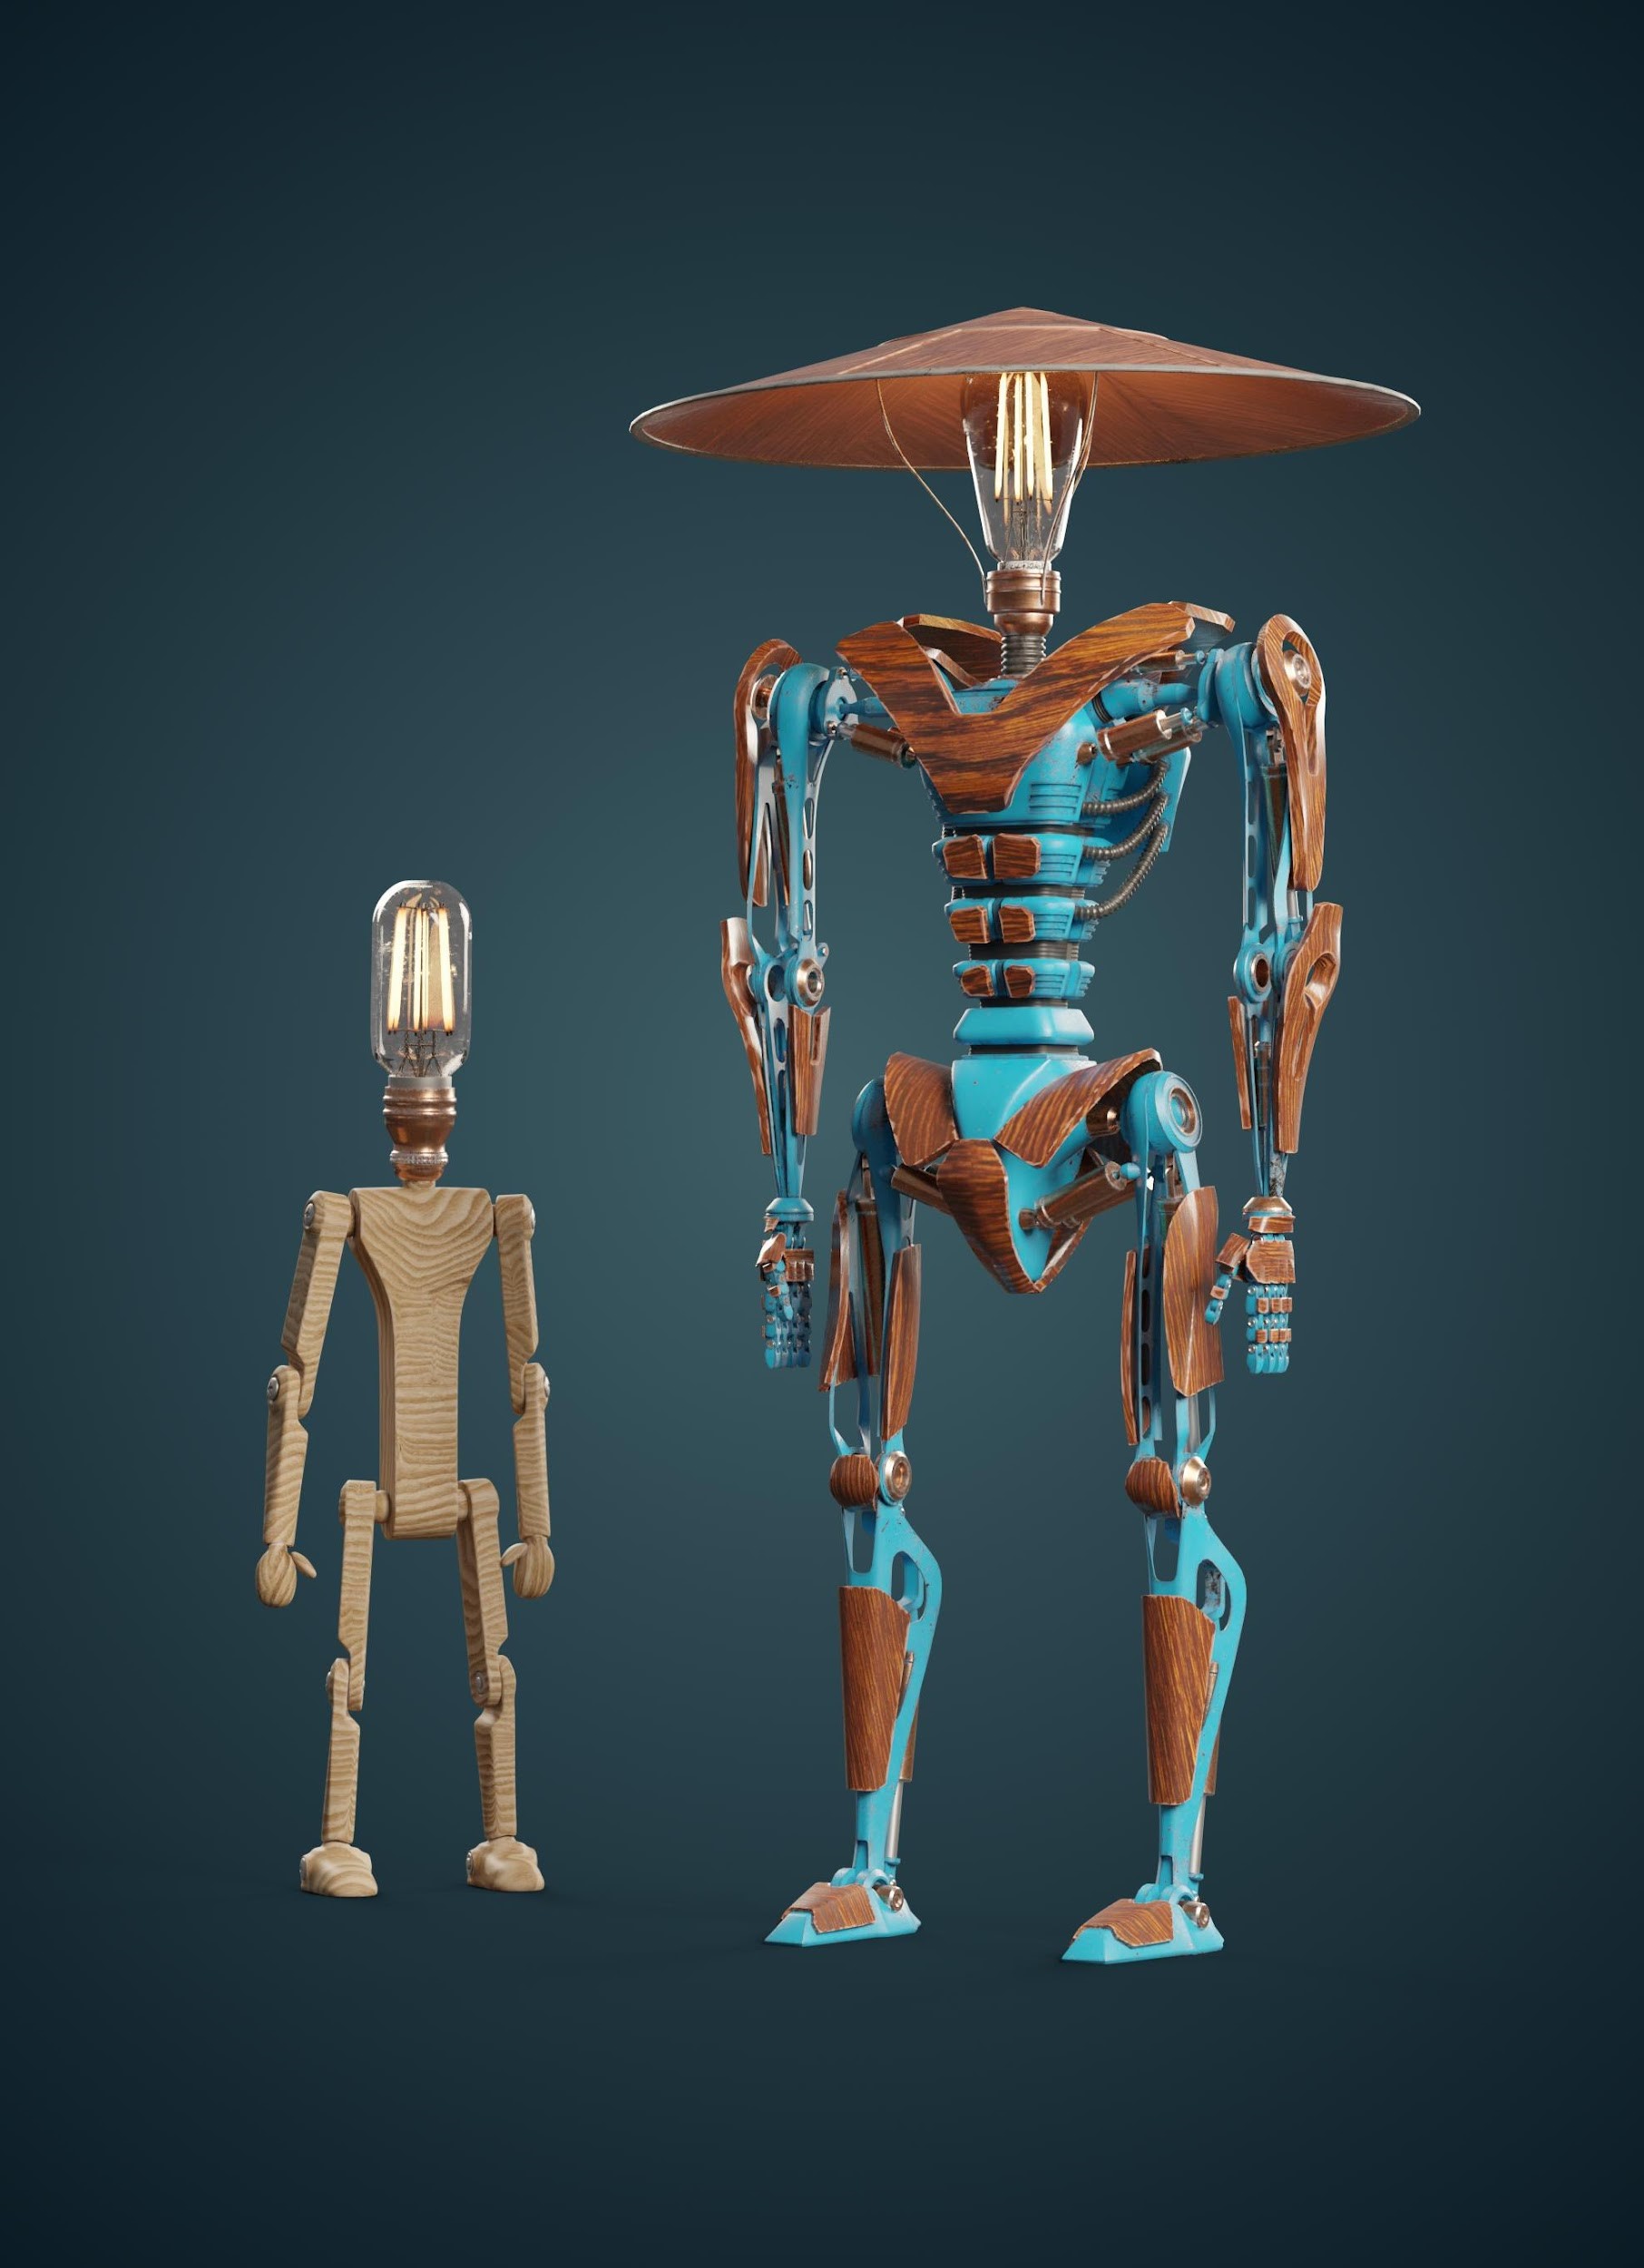
If there is an area in 3D for which I feel no urge to do, that is humanoid characters. I love to create animals, robots, and landscapes. These are my favorite 3D topics. I thought about the cheapest way to make a simple, wooden character so I searched for it on Google. I found this image and thought it was a cool idea. (credits to the real owner)
I always made lamps from everything in my childhood so I started to draw just from my own head based on the light bulb idea. The hat was the second main thing in the concept. I was thinking a lot about why I wanted it specifically when I remembered there was a huge samurai in the Sucker Punch movie with a similar hat. At least that movie was good for something :D
At first, I imagined a bamboo forest at night with moonlight and glowy Asian dragons which are fighting with the lamp robot. I changed it for a workshop because I thought it fit better with the main character and it was easier to make. I was short on time so I chose this.
As for the other robot lamps, I used a lot of images as inspiration but tried to avoid copying them as they were. I just filled the holes in them with my ideas.
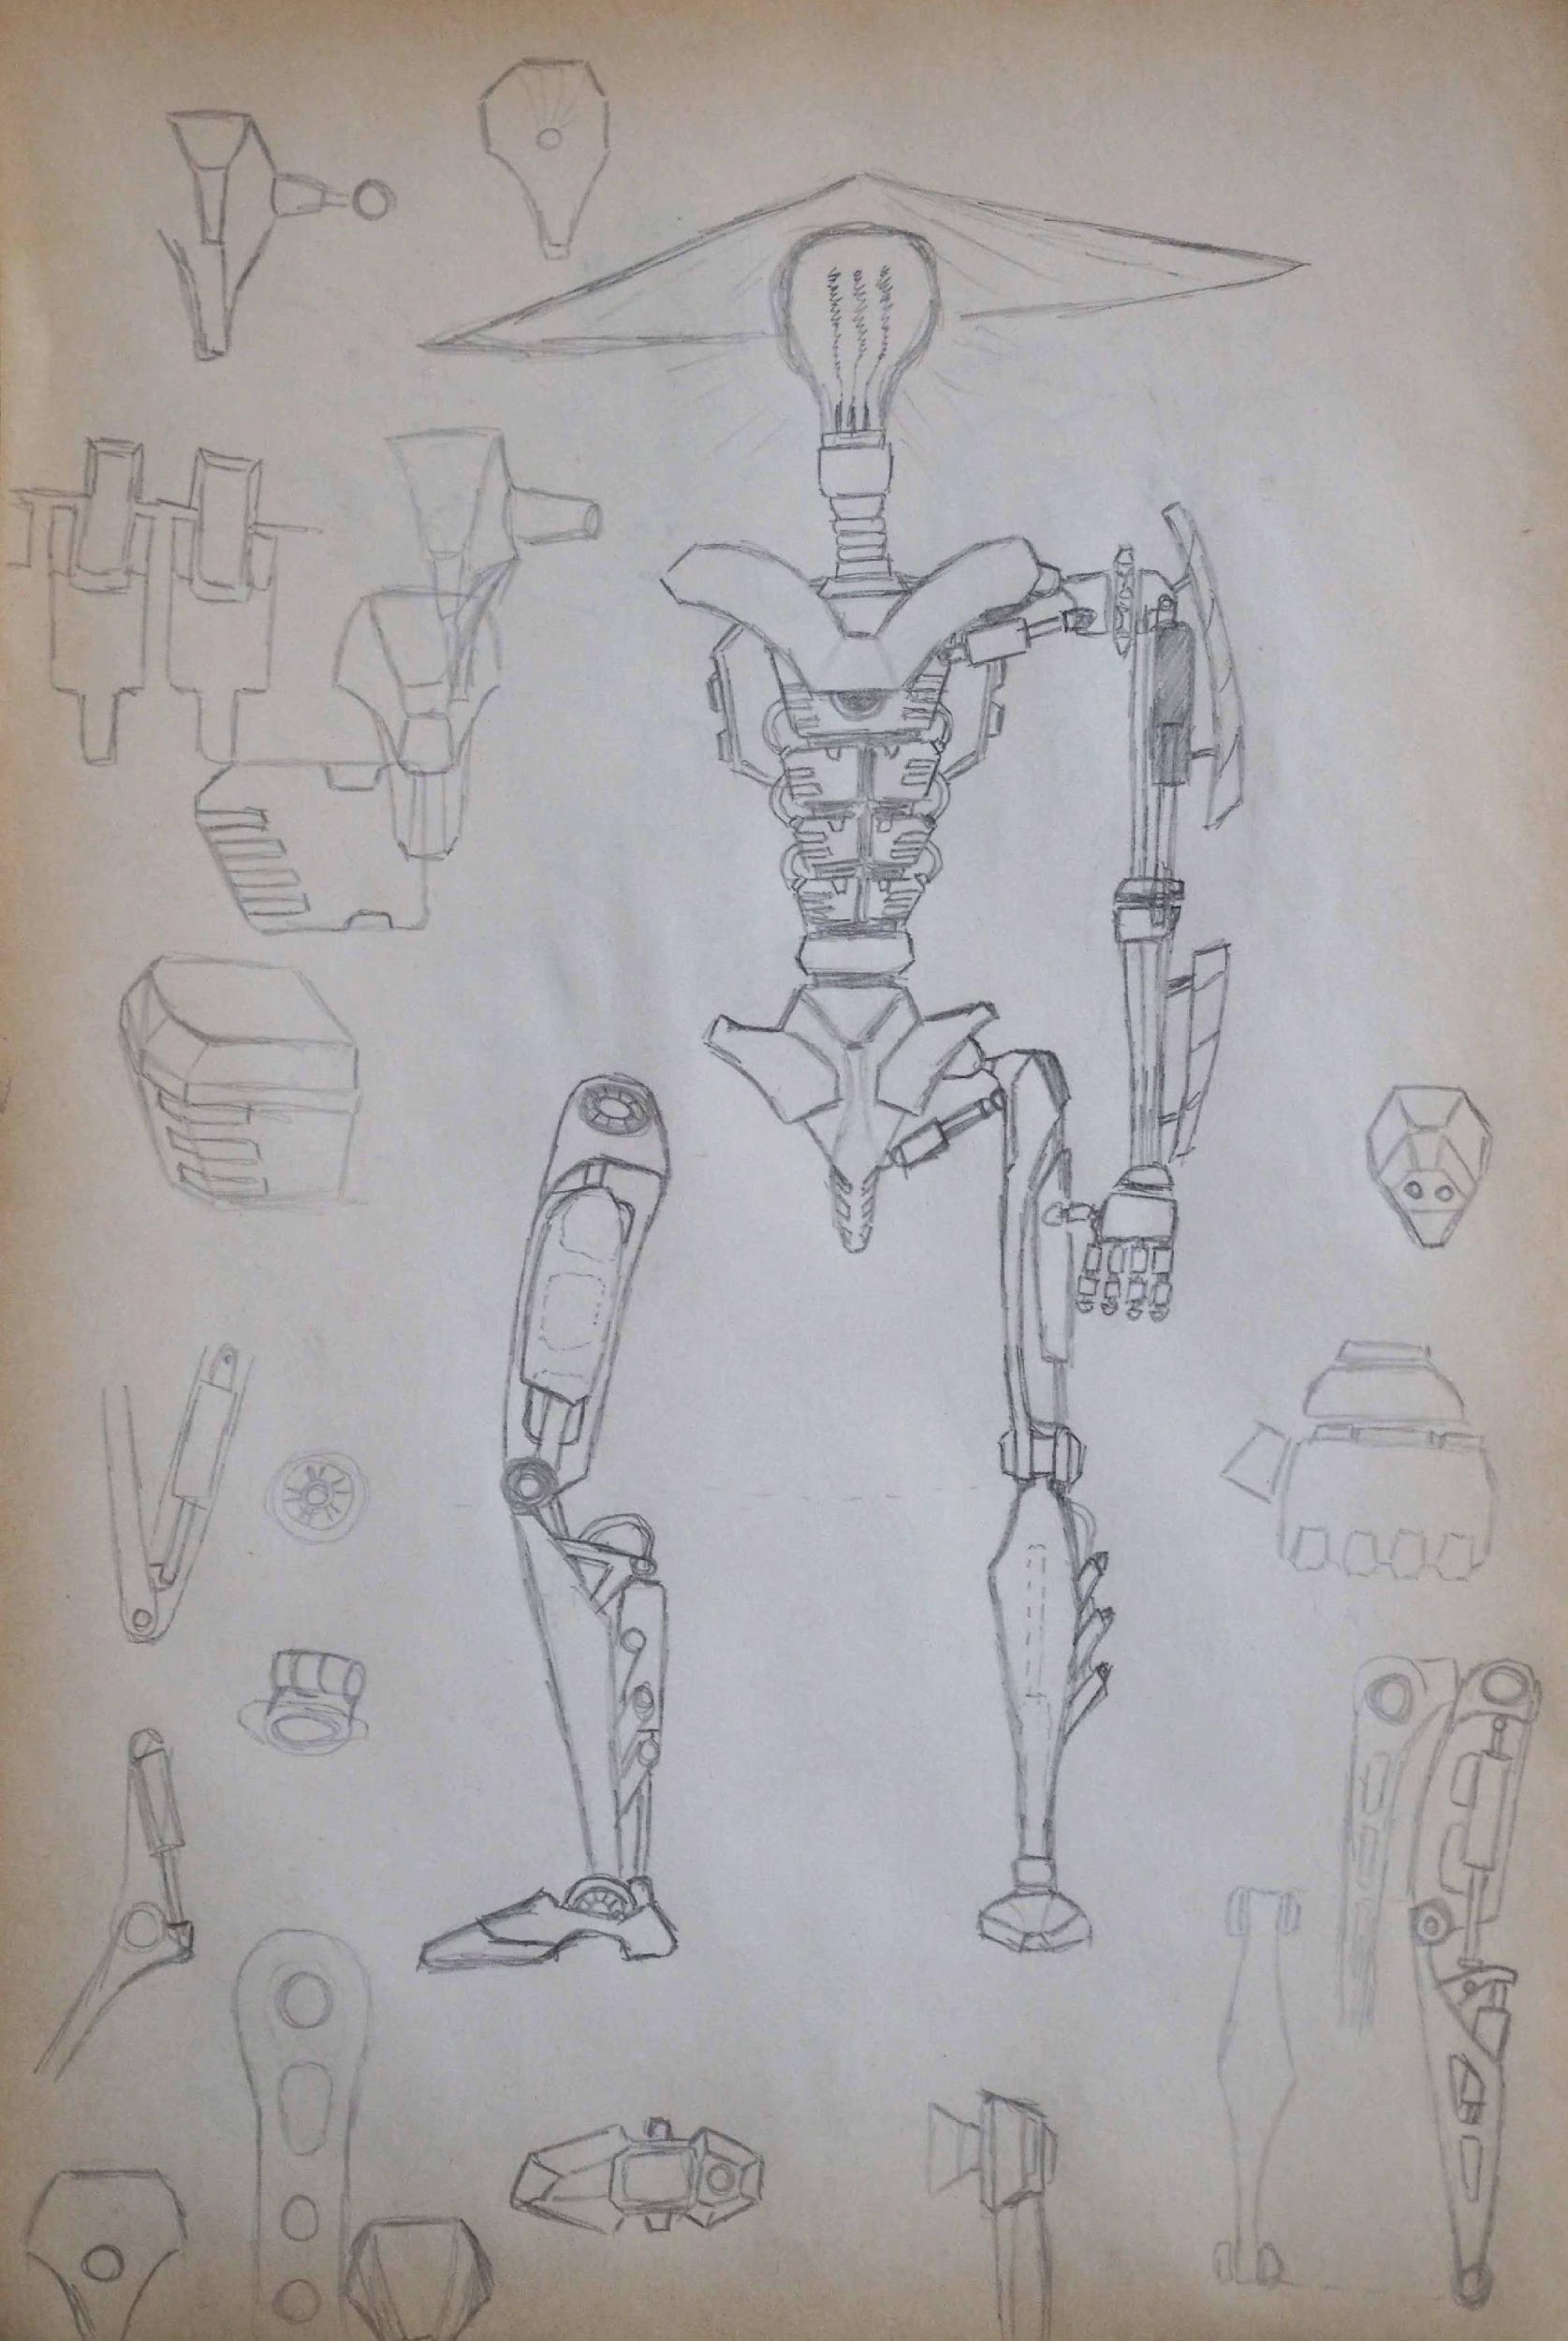
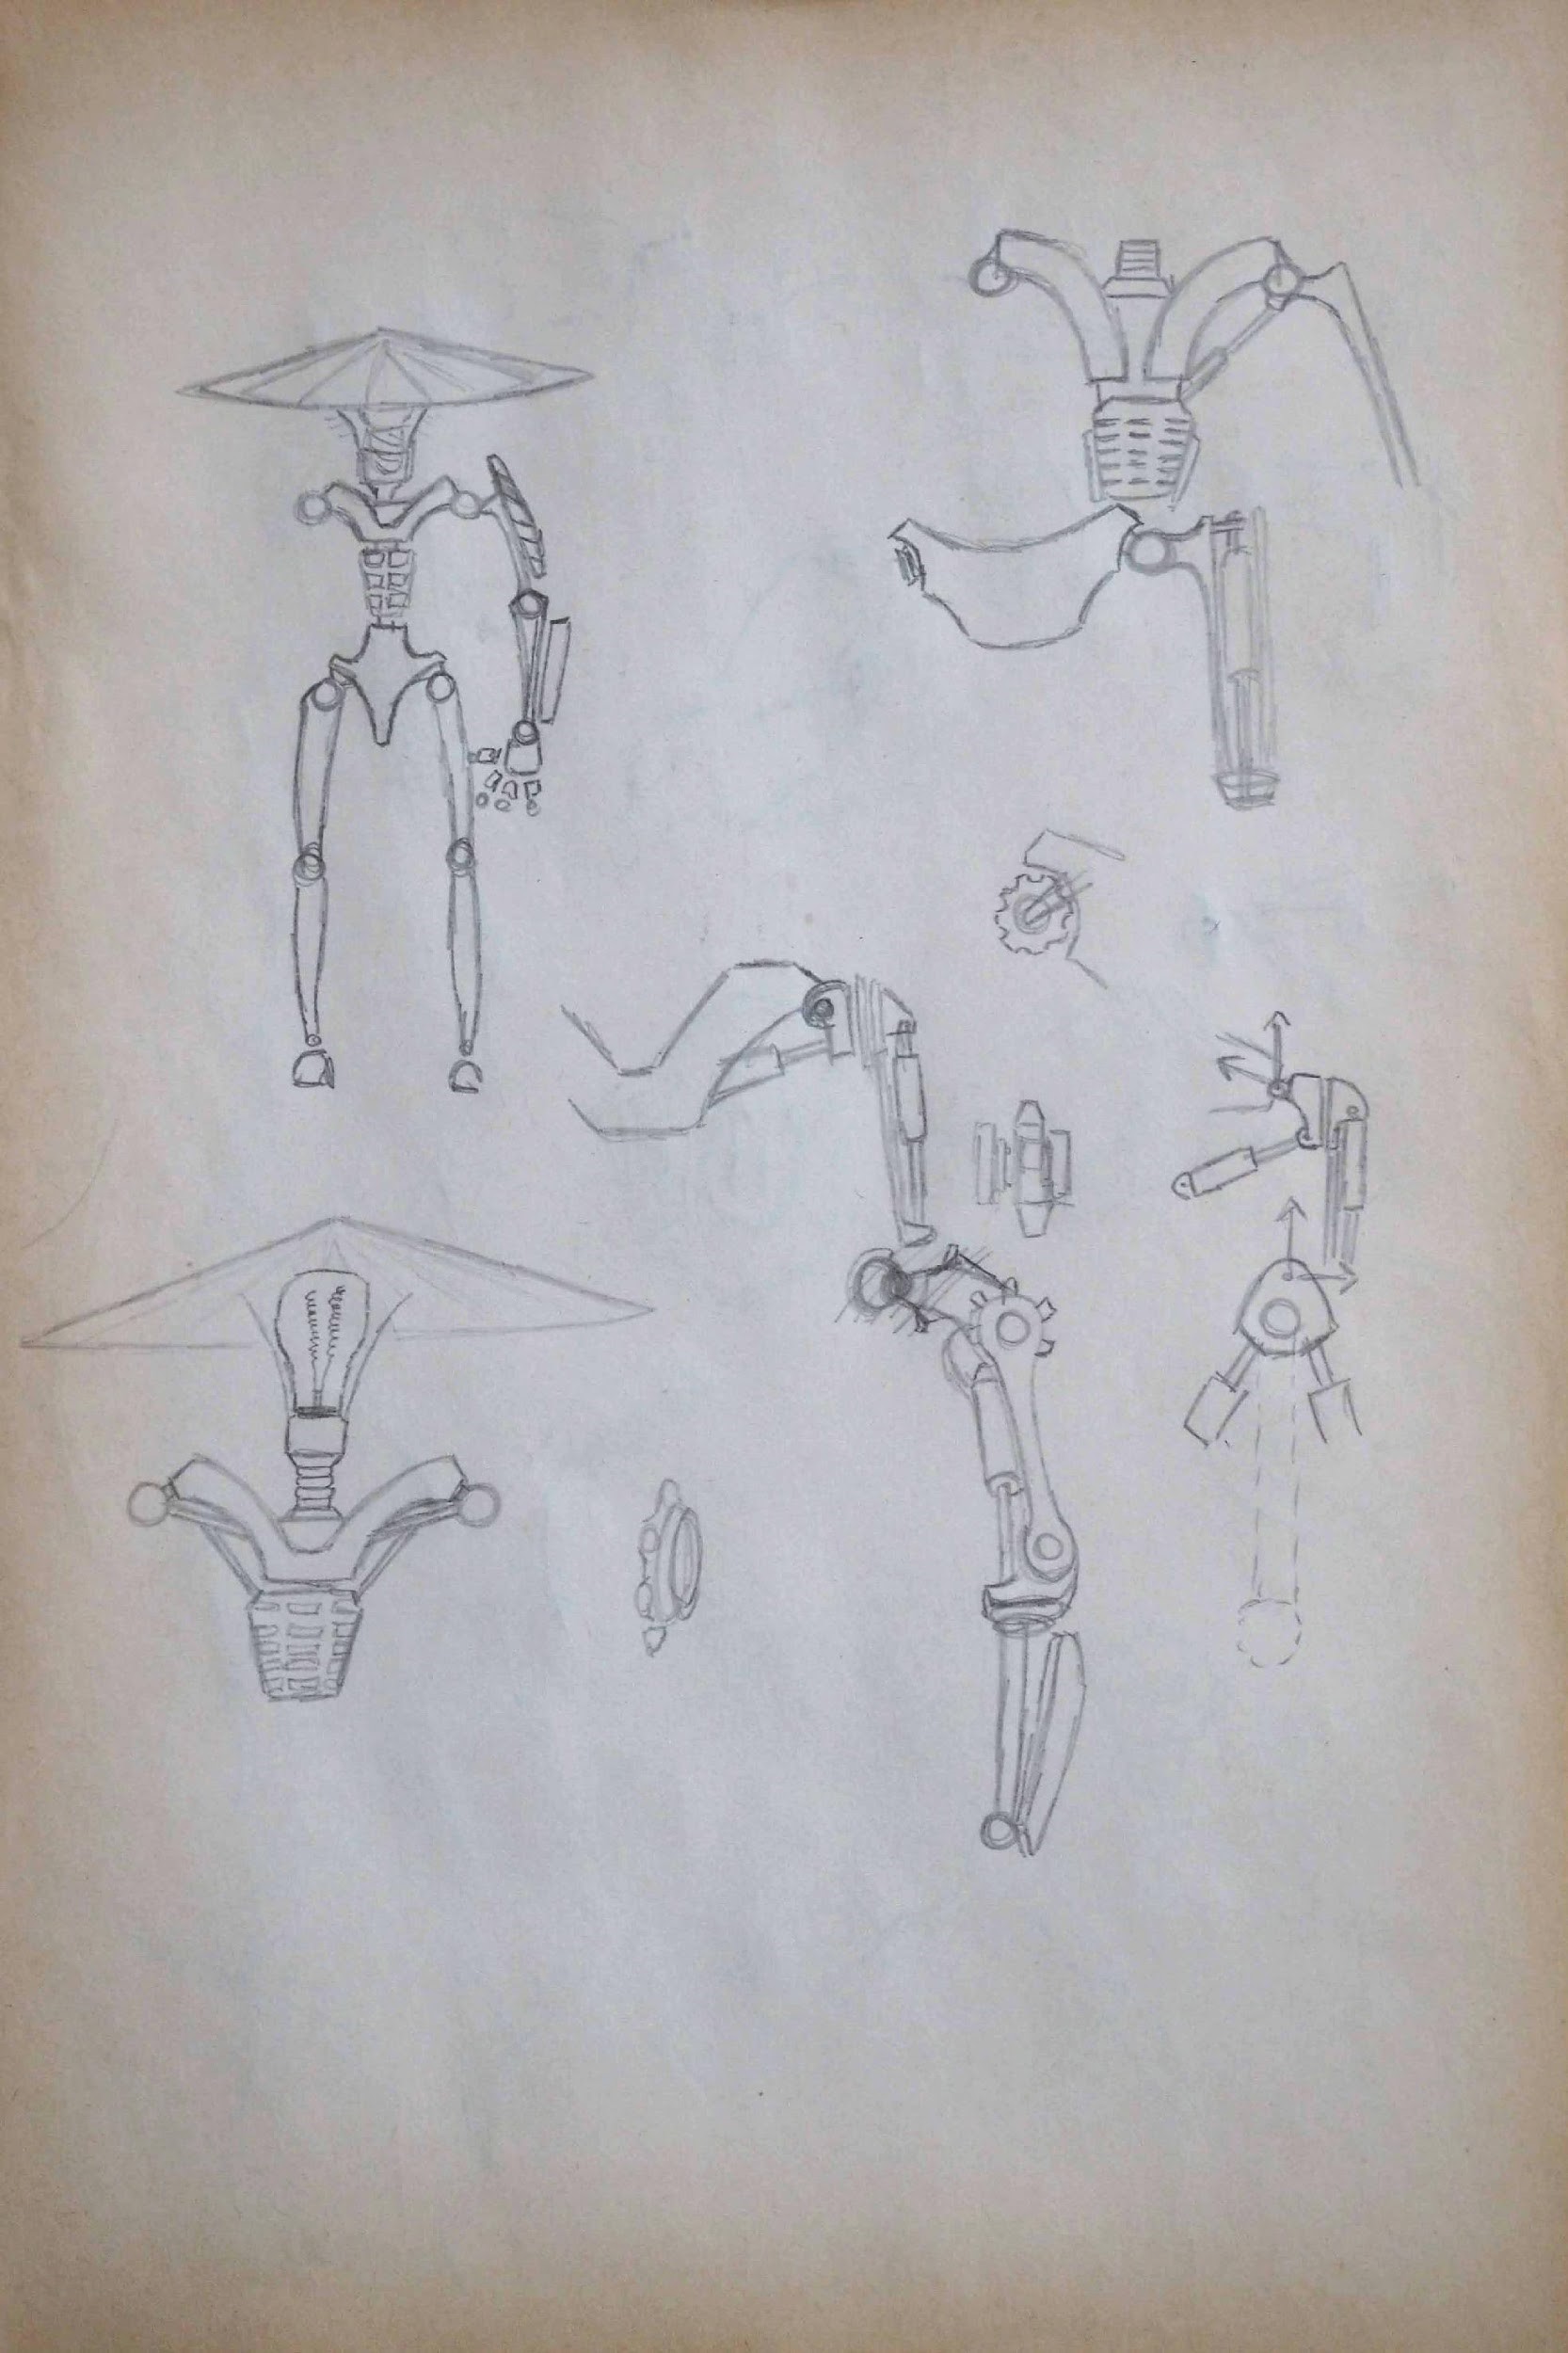
SKETCHING
I know 3DS Max but I always use Blender for a complex modeling task. I started with it and it simply fits me better than anything I tried so far. (For a moment, I thought about building the final scene in Unreal Engine but I had just started to learn it after 8 years of Unity, and so it was too early for me.)
I have fallen into that trap many times in the past—to just start modeling based on some image in my head, which is what I try to avoid. It consumes a lot of time trying to figure out the scale of different things and how those parts are connected by which you could easily lose interest in the project, and get disappointed when you spend a lot of time with modeling that may not fit with your imagined picture.
The first step was sketching. Sometimes, I do detailed sketches but the point is that you have something tangible to start with.

MODELING
During modeling, I tried to maintain the sketches but, as always, I had to rethink some parts that didn’t work in 3D, especially the joints. Since I would like to showcase this project in my portfolio, I used only my own models with a few exceptions (the pliers, saw, hammer are downloaded models but these things are mostly out of focus…)
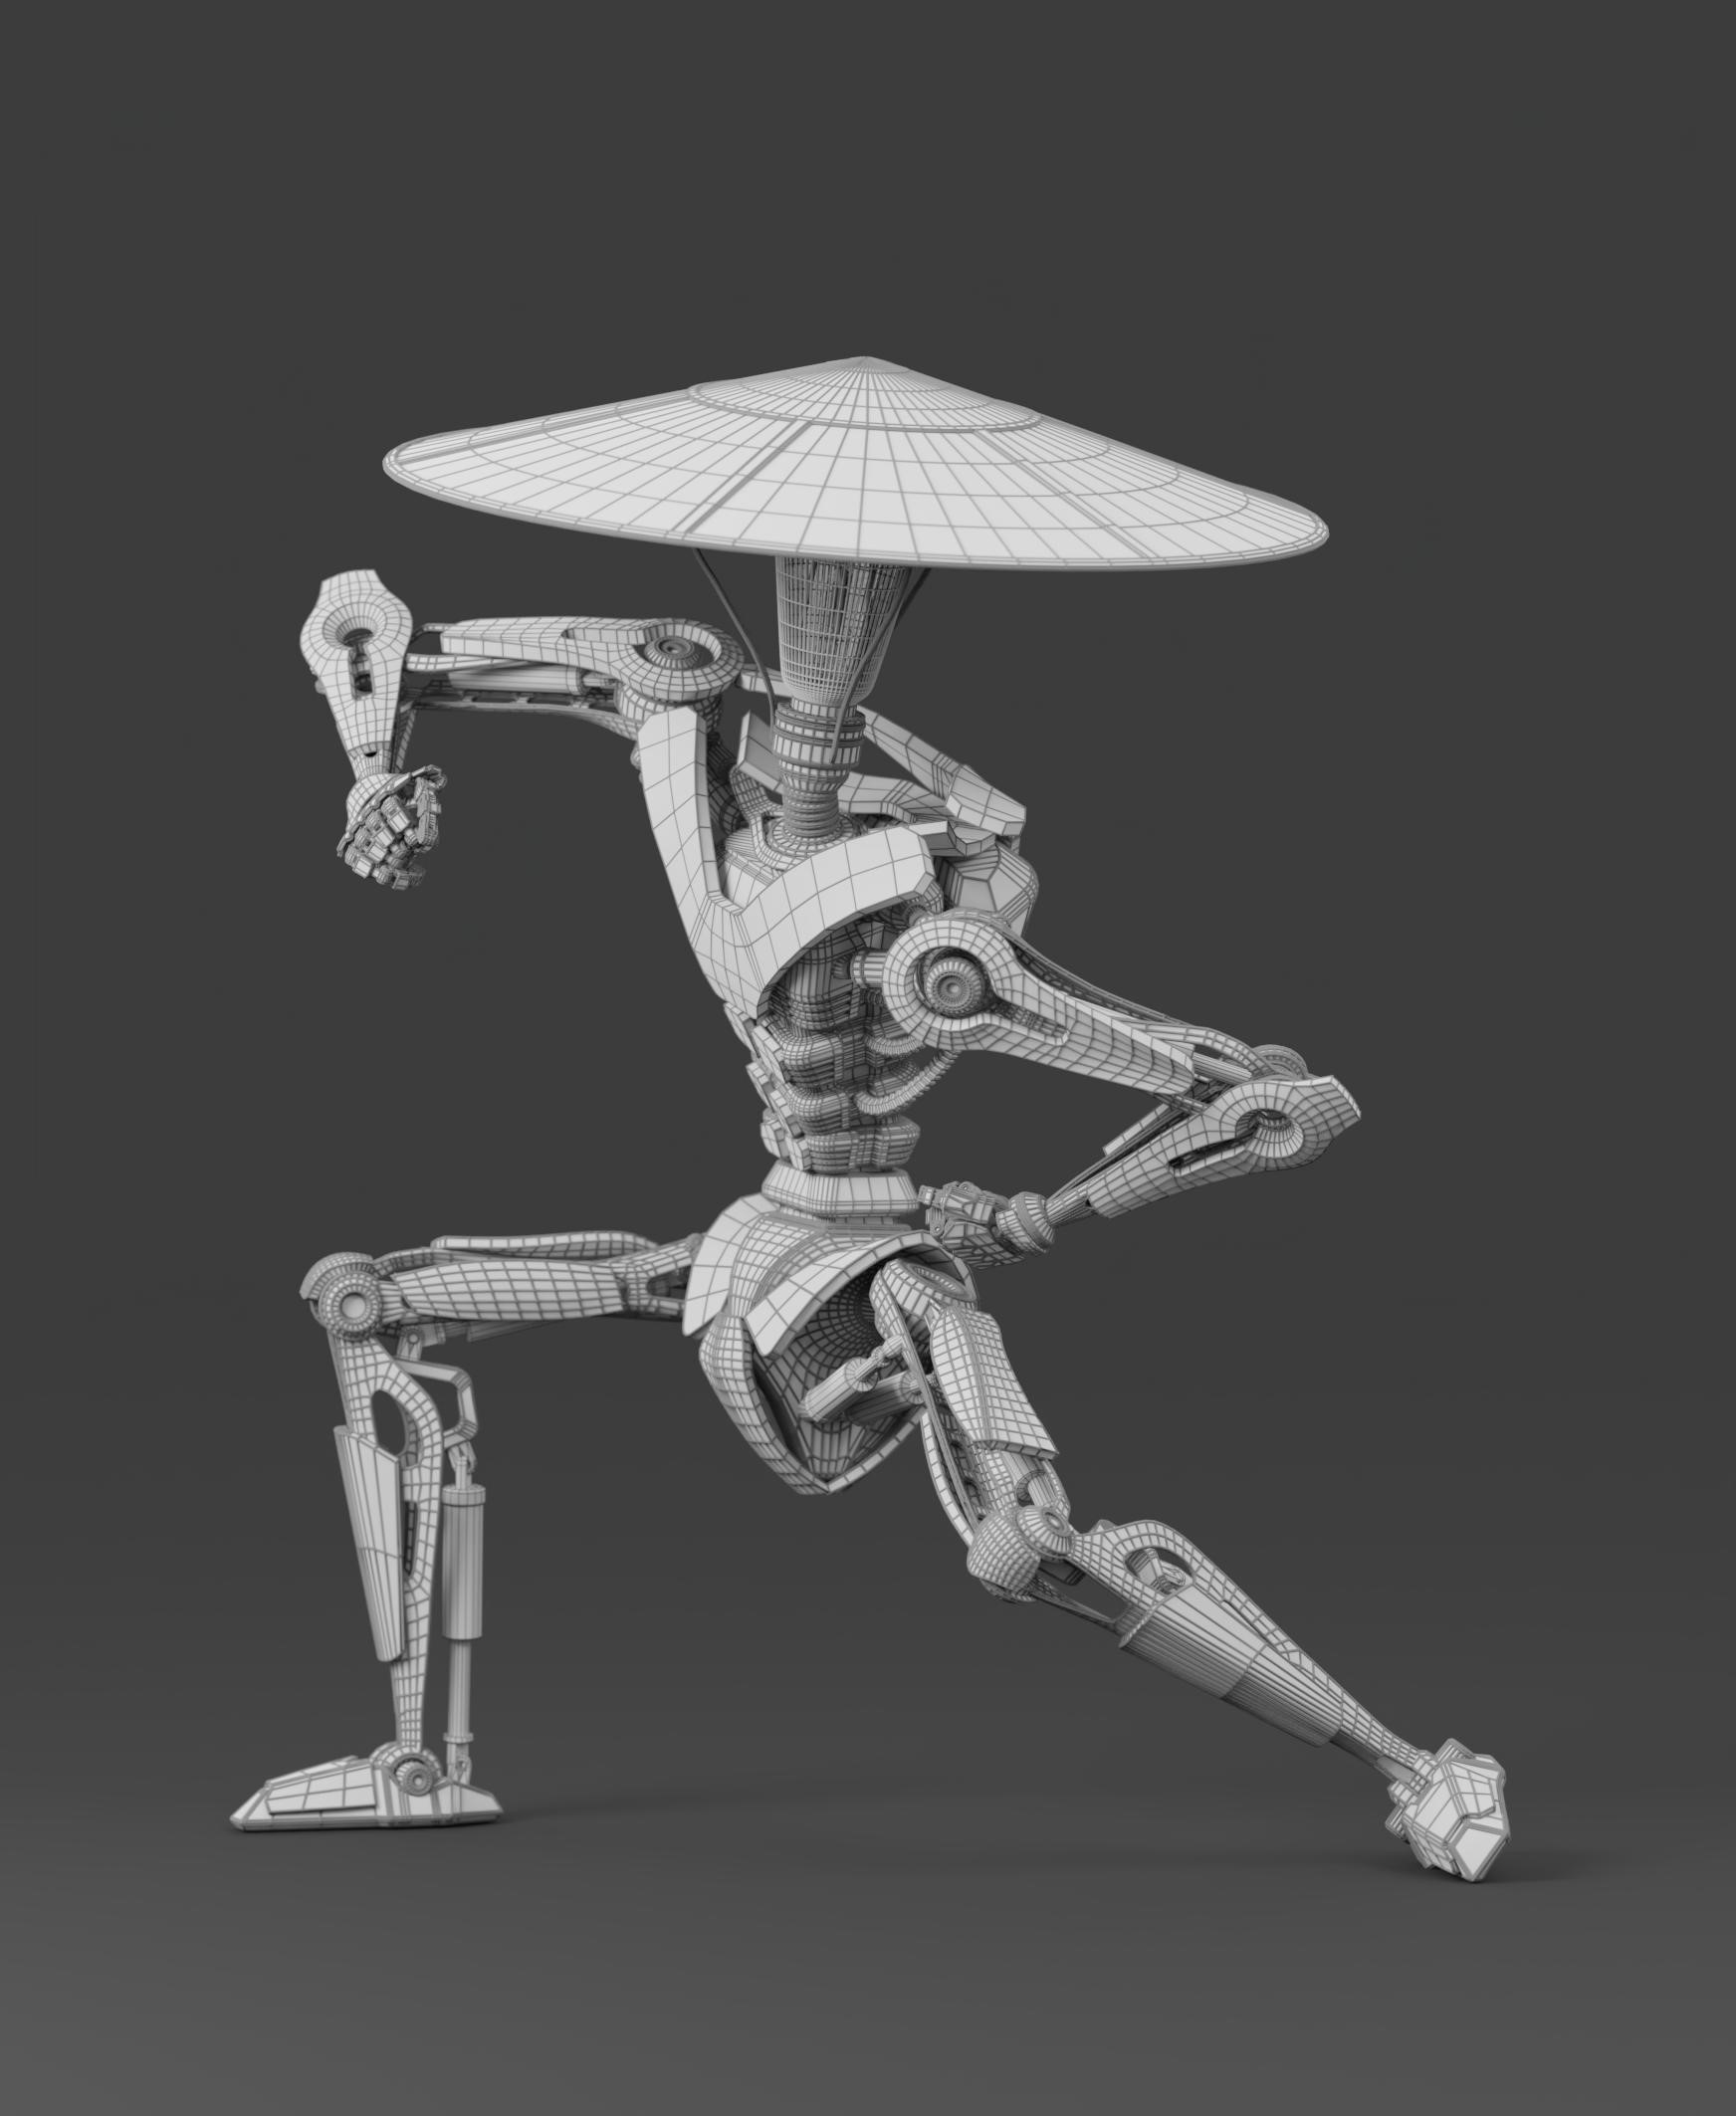
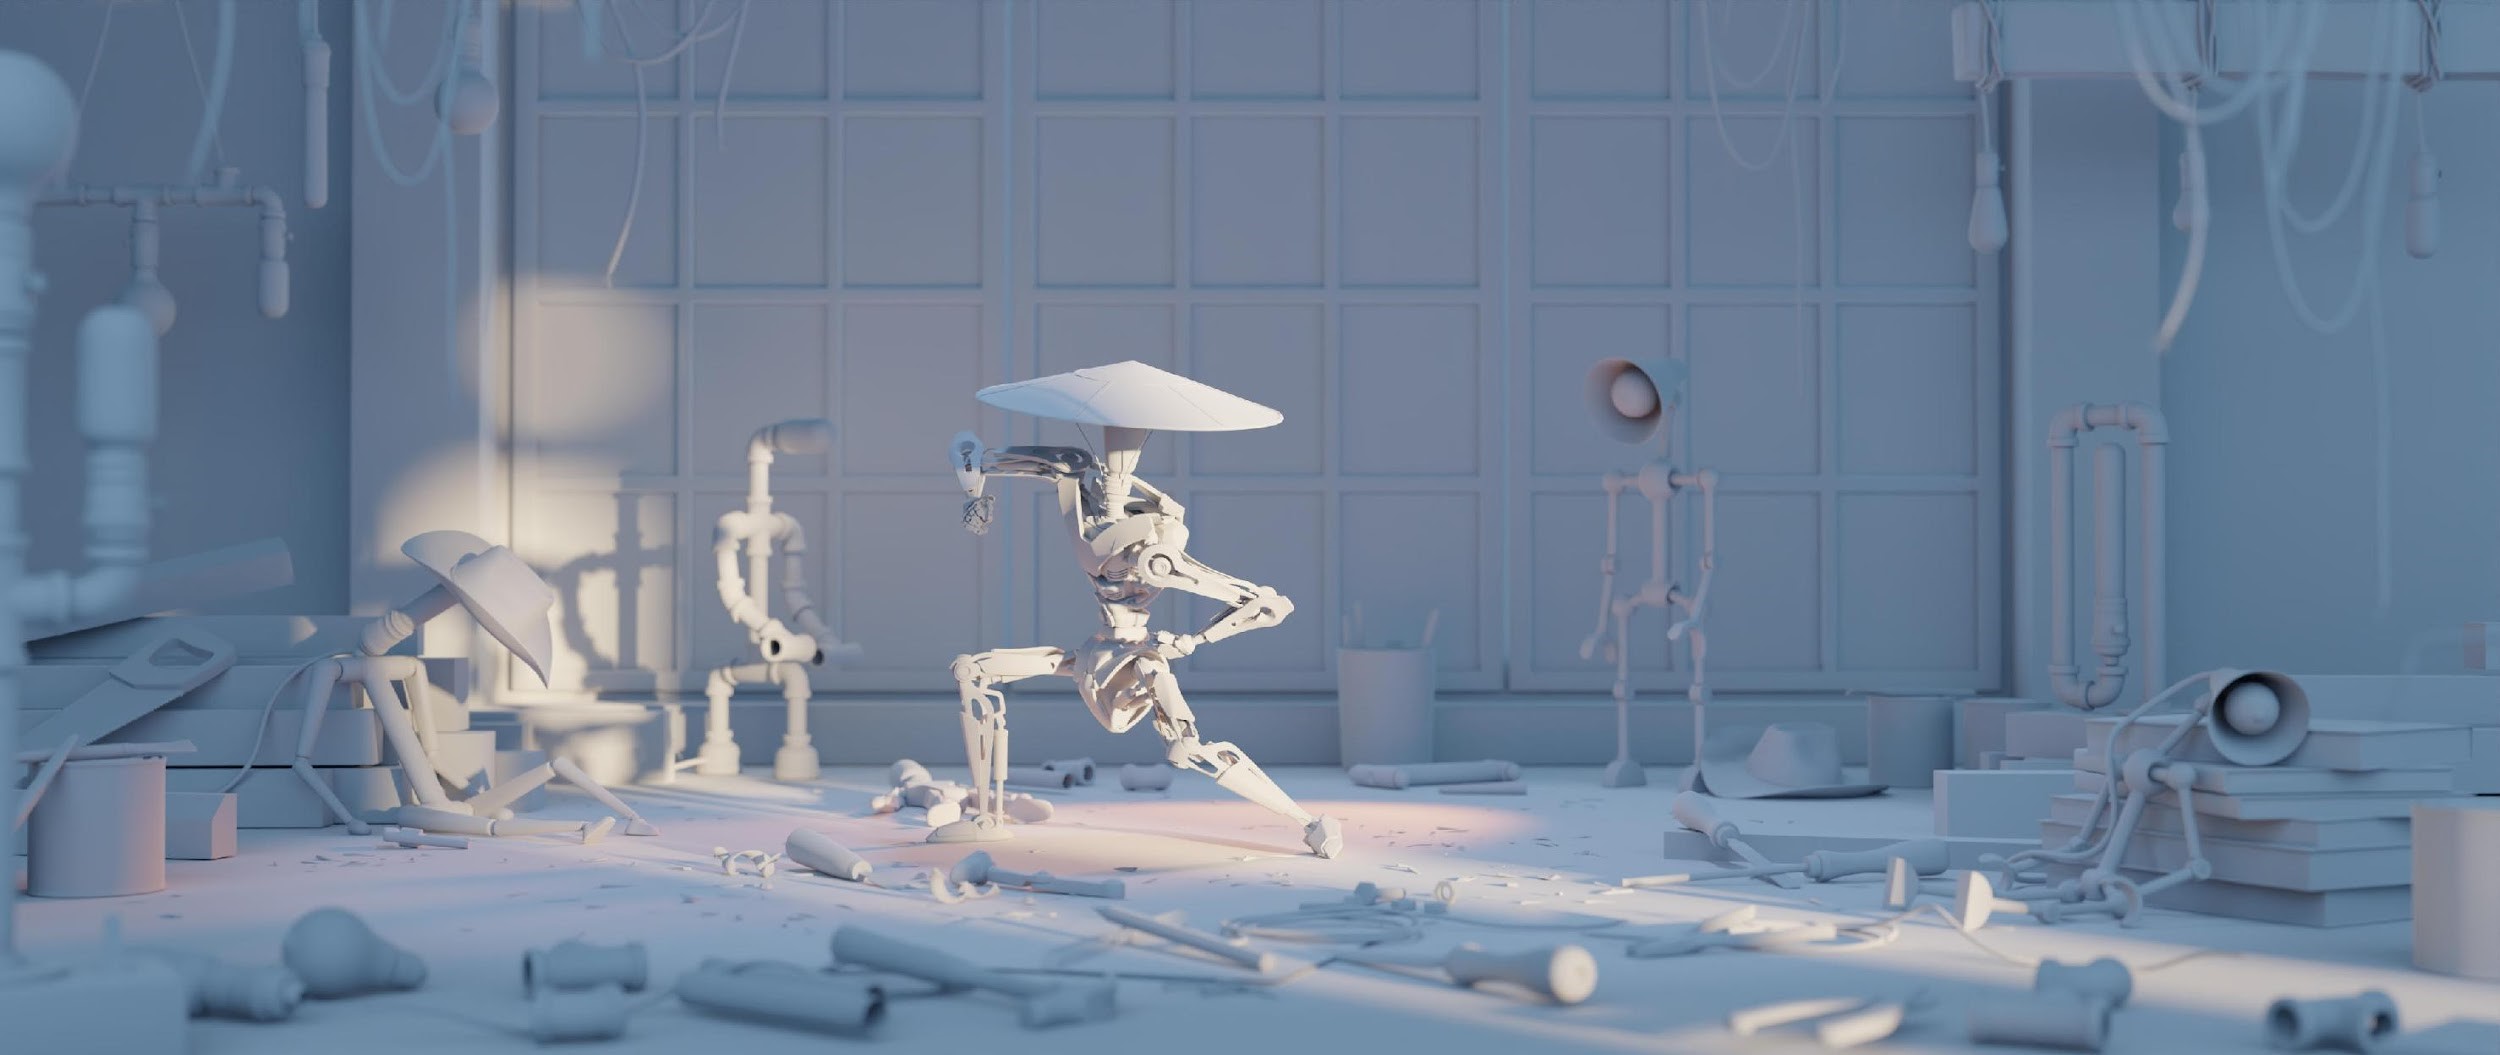
This is a solid view of the scene:

TEXTURING
For texturing, I mostly used tiled textures and instead of texture painting, I made some wear and tear in the shader editor. I have to mention this tutorial:
Riley uses a brilliant edge detection method which can be used in almost every kind of model.
The most interesting part about texturing was to find the exact color for everything. You can highlight the main character with lighting and DOF but you have to do it with the colors as well. In addition, there is a lot of wood stuff in the scene so I had to separate them both by color and texture.
RIGGING
Rigging was the hardest part of the whole project or that I sucked the most at it. My idea was to create a unique rig for the robot and use the original mocap data only as a control rig. I needed it because the joints of the robot work slightly differently than the humanoid rig with the mocap data. So I transferred the motions with constraints bone by bone but this way, I could limit motions on specific axes.
I thought this was the best way but I spent way too much time getting it to work properly and it was a nightmare. So I’m not sure if this was the right way :D Anyway, at the end, it was cool to see how each little part was moving, the little mechanical actuators and everything.
The other robot who got punched had a simple rig with IK.

As I mentioned before, the main character used motion capture data so I had to animate only the others who have simple animations.
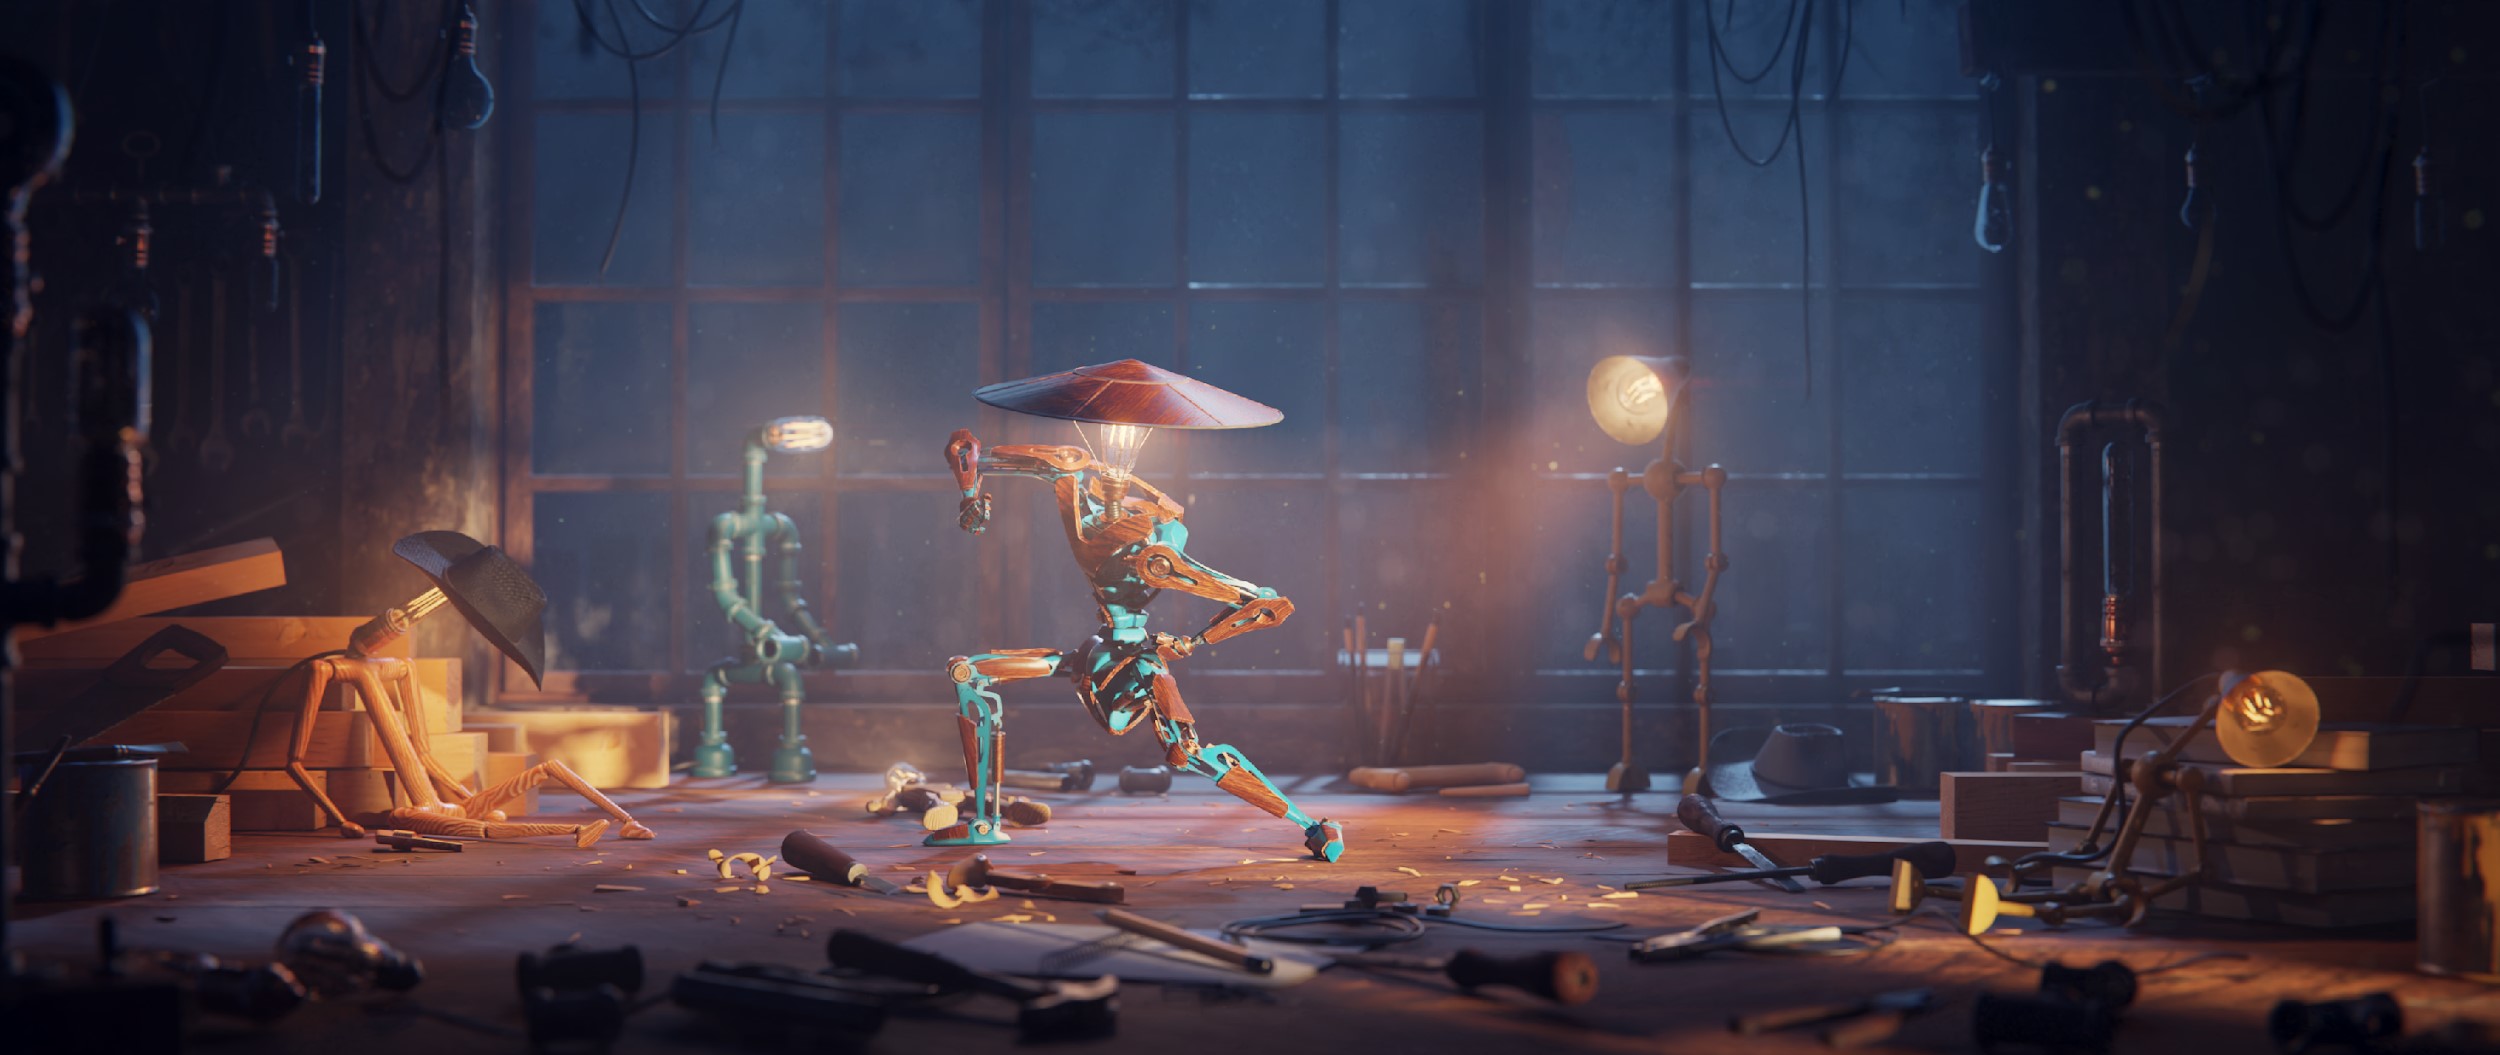
LIGHTING
Lighting is my favorite part. This is the point where everything is starting to come together (if you are lucky :D) I love to experiment with different kinds of setups, and this project was no exception. Here are some previous test renders:

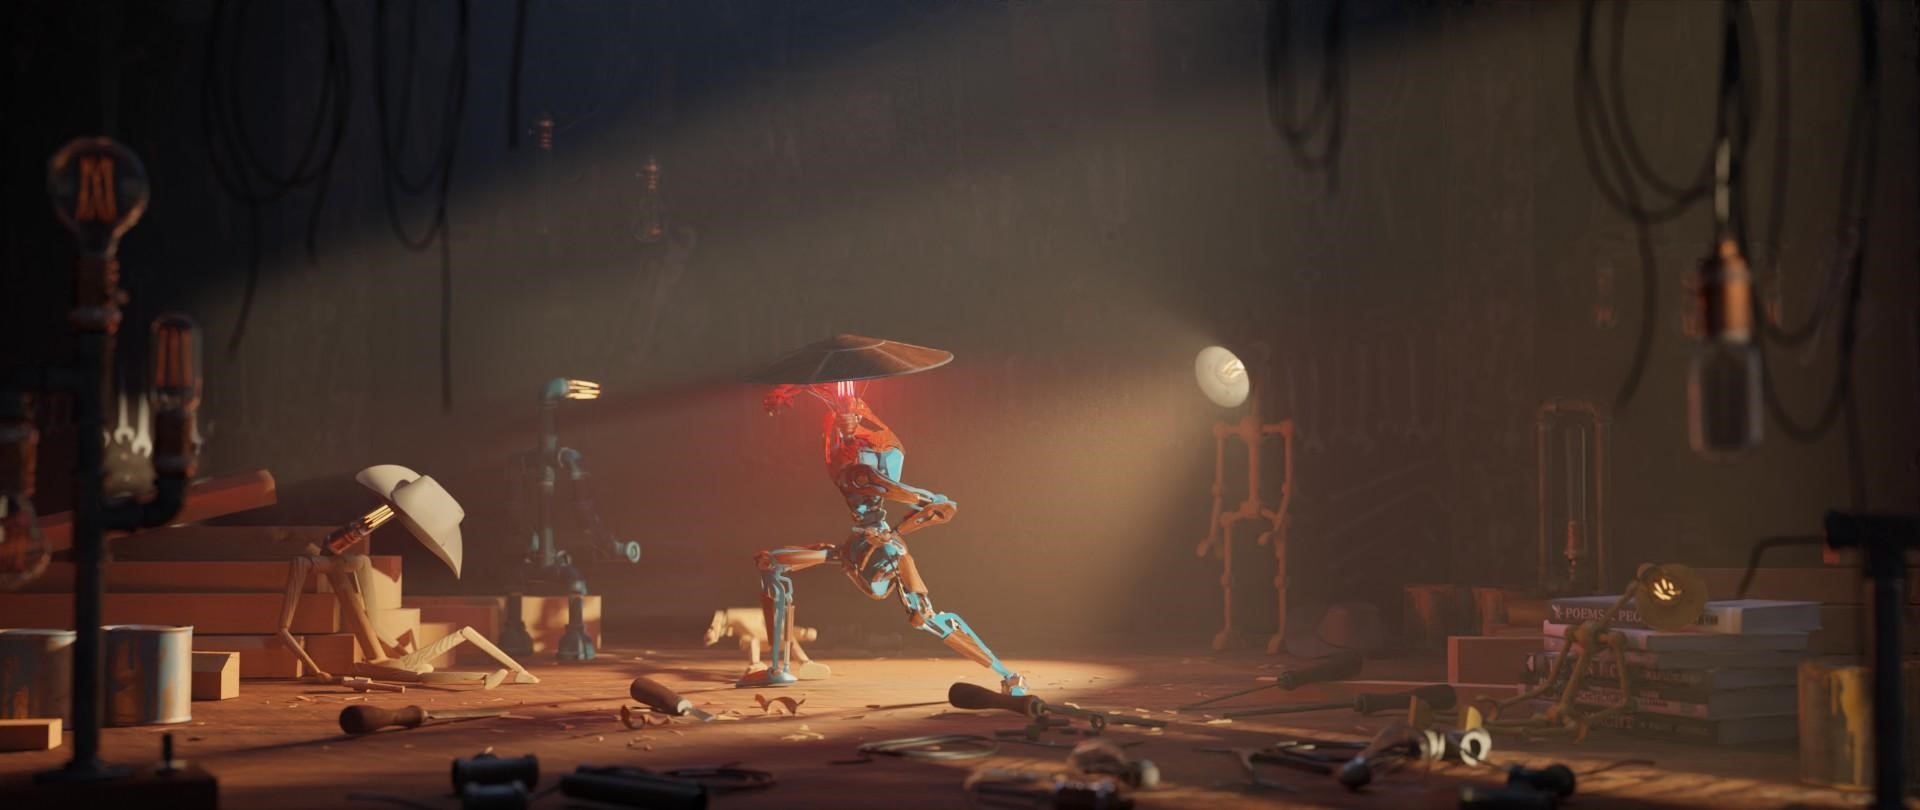
I saved almost every test render. Every day, I checked the pictures from the previous day with fresh eyes so I could decide easier which way I should use.
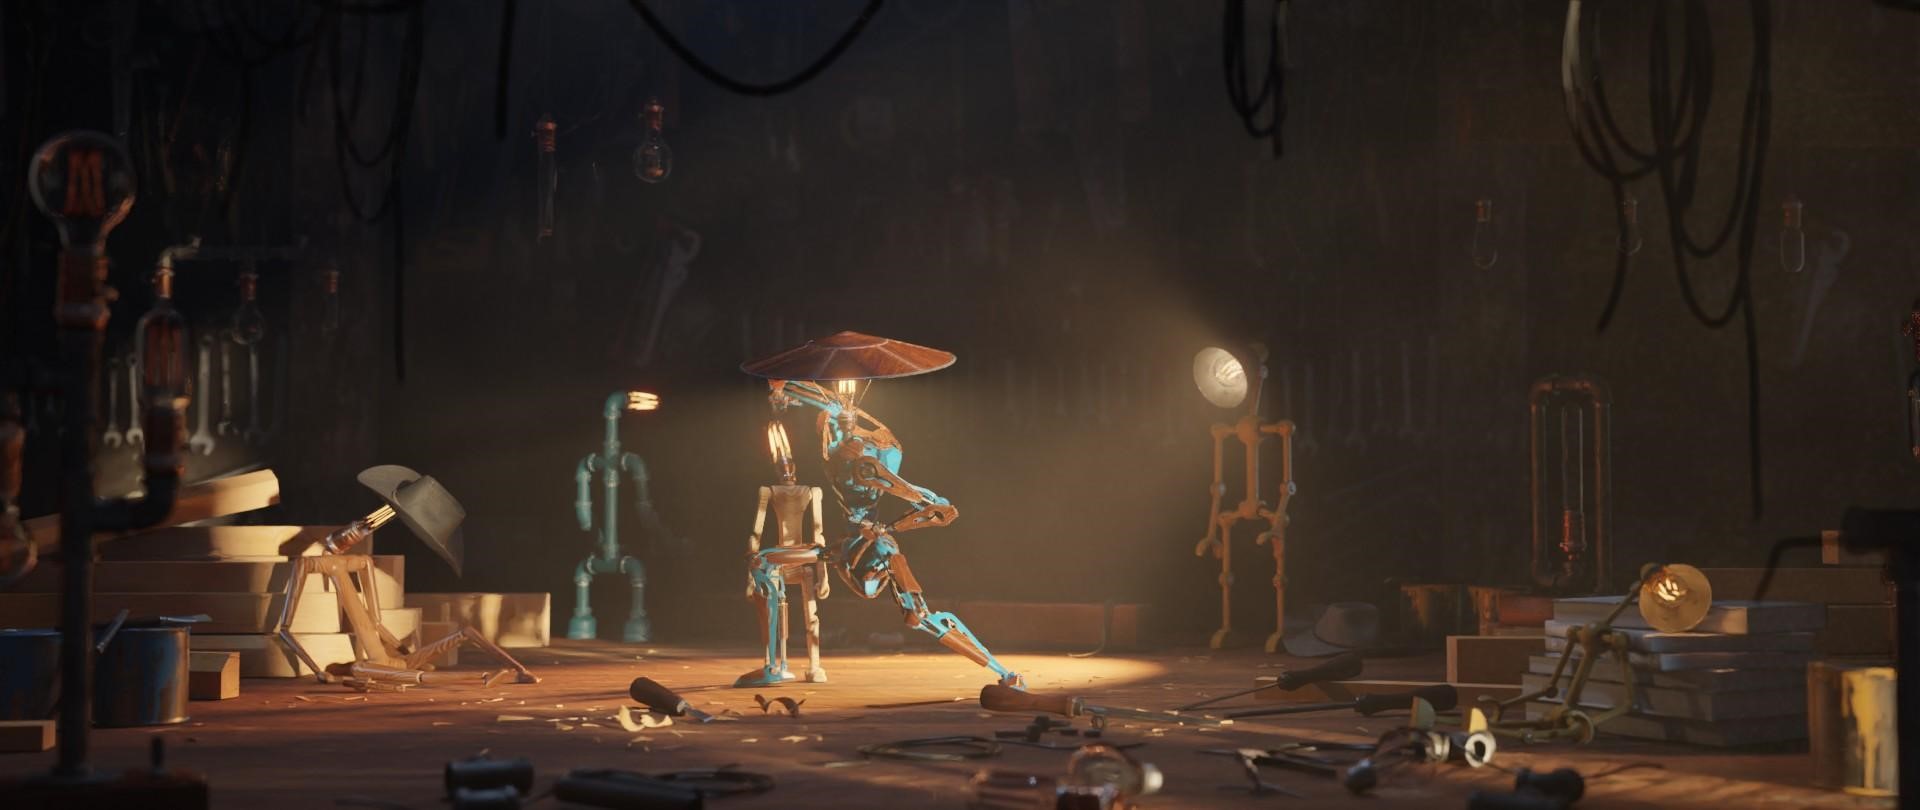
At the end of the project, I changed the background and put some windows there. I had the idea earlier but couldn’t decide whether I needed it or not. Ultimately, I made them because it gave more light and helped in understanding the scale of the scene. Anyway, looking back, I like the darker version as well. It has a warmer feeling.
So finally, I finished (or at least did everything I wanted) with the scene, but how am I going render it out with cycles :D
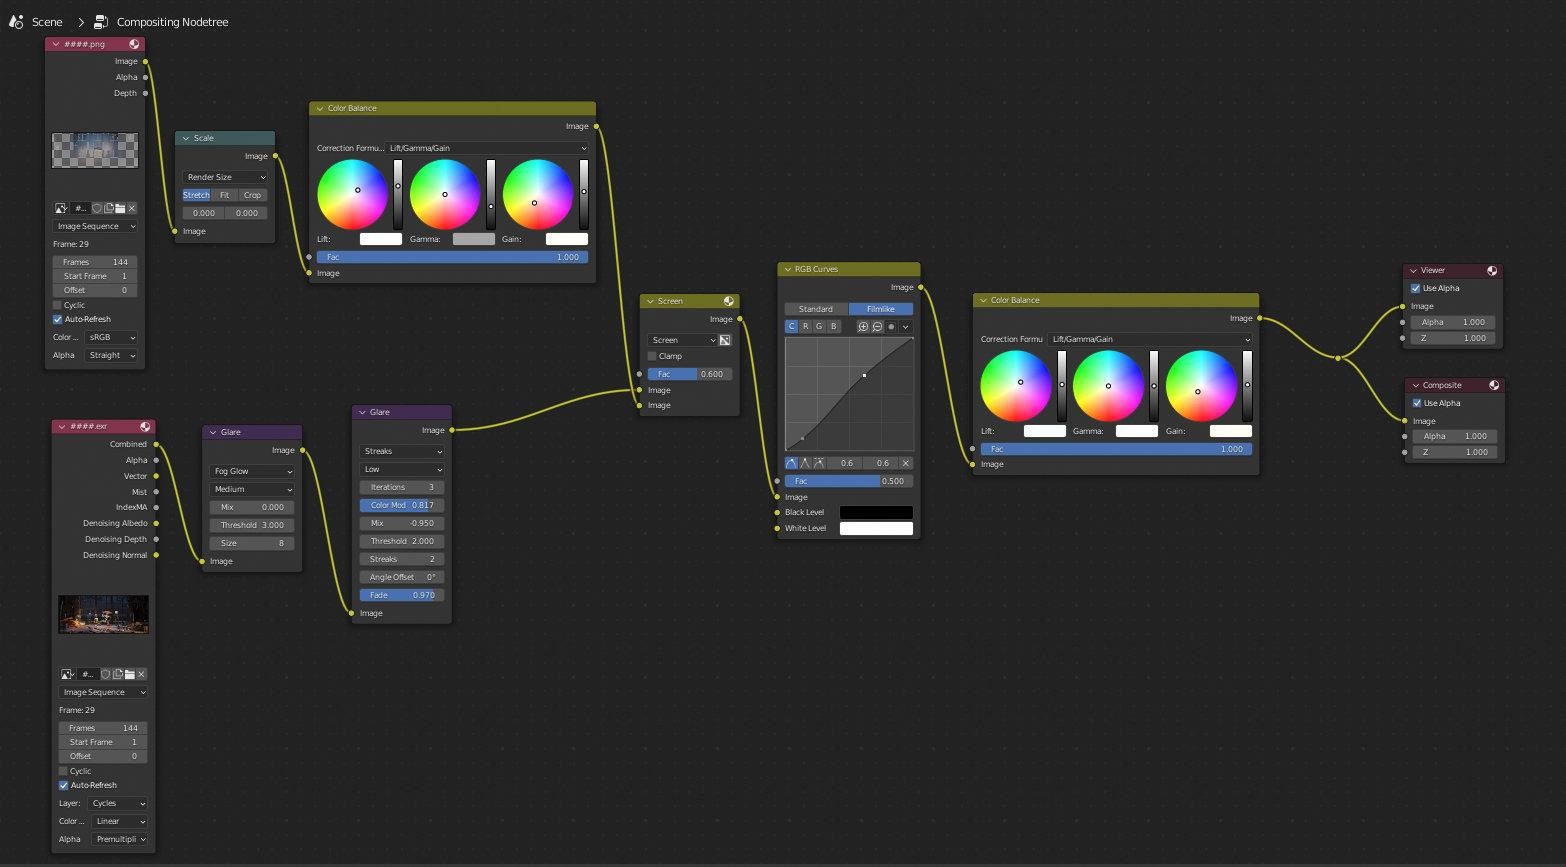
POST-PROCESSING
The main problem was the volume box which surrounds everything. Recently, I upgraded my PC’s hardware and got an RTX3060. Using it with the optix denoiser is just incredibly fast but volume is a different thing. Without volume, the denoiser works perfectly even with a low sample count, but volume needs a lot of samples. Otherwise, it’s full of glitches after denoising. (Besides this, it’s impressive that you can render out a scene like this with full volume in a few minutes; a few years ago, it would’ve counted in hours :D)
I decided to use Eevee for the volume. It looks different when you switch from Cycles but with a little work, you can set up a similar look which renders a lot faster! I used two render layers—one for the complete scene but without the volume, and another one just for the volume where most of the scene was set to holdout. I combined the two in the compositor.
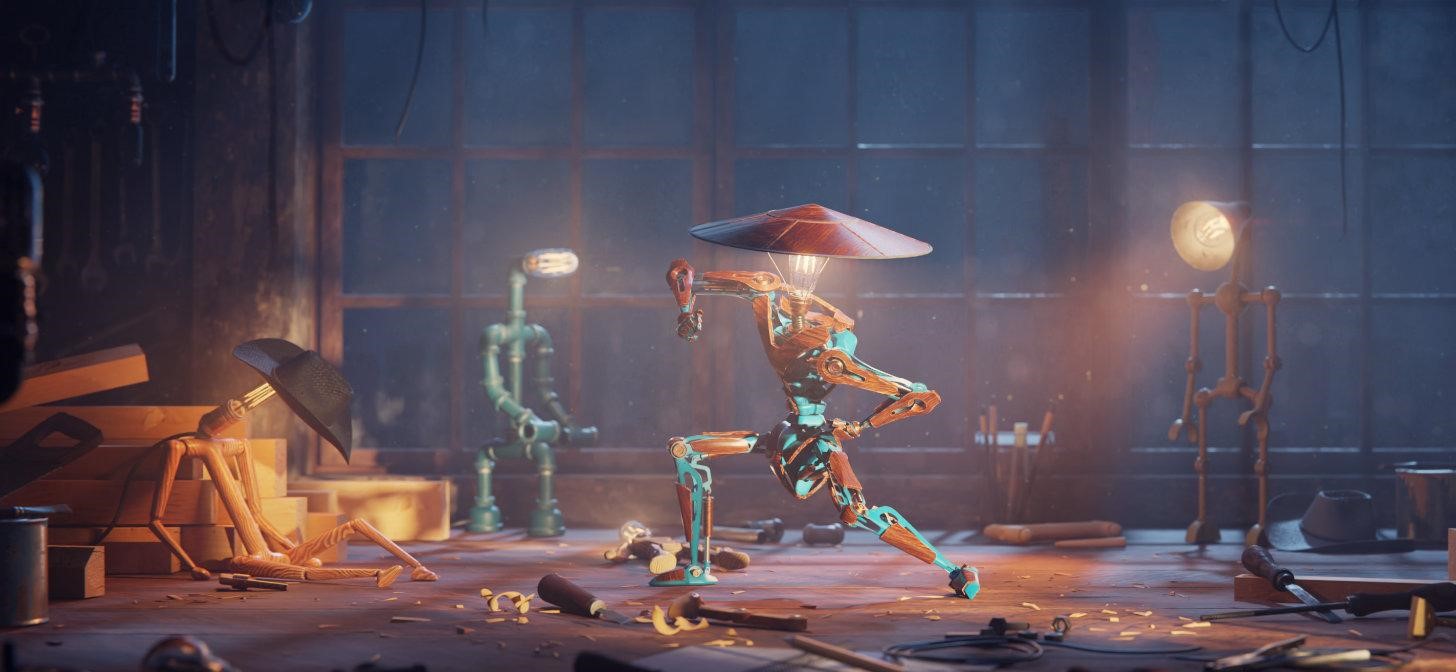
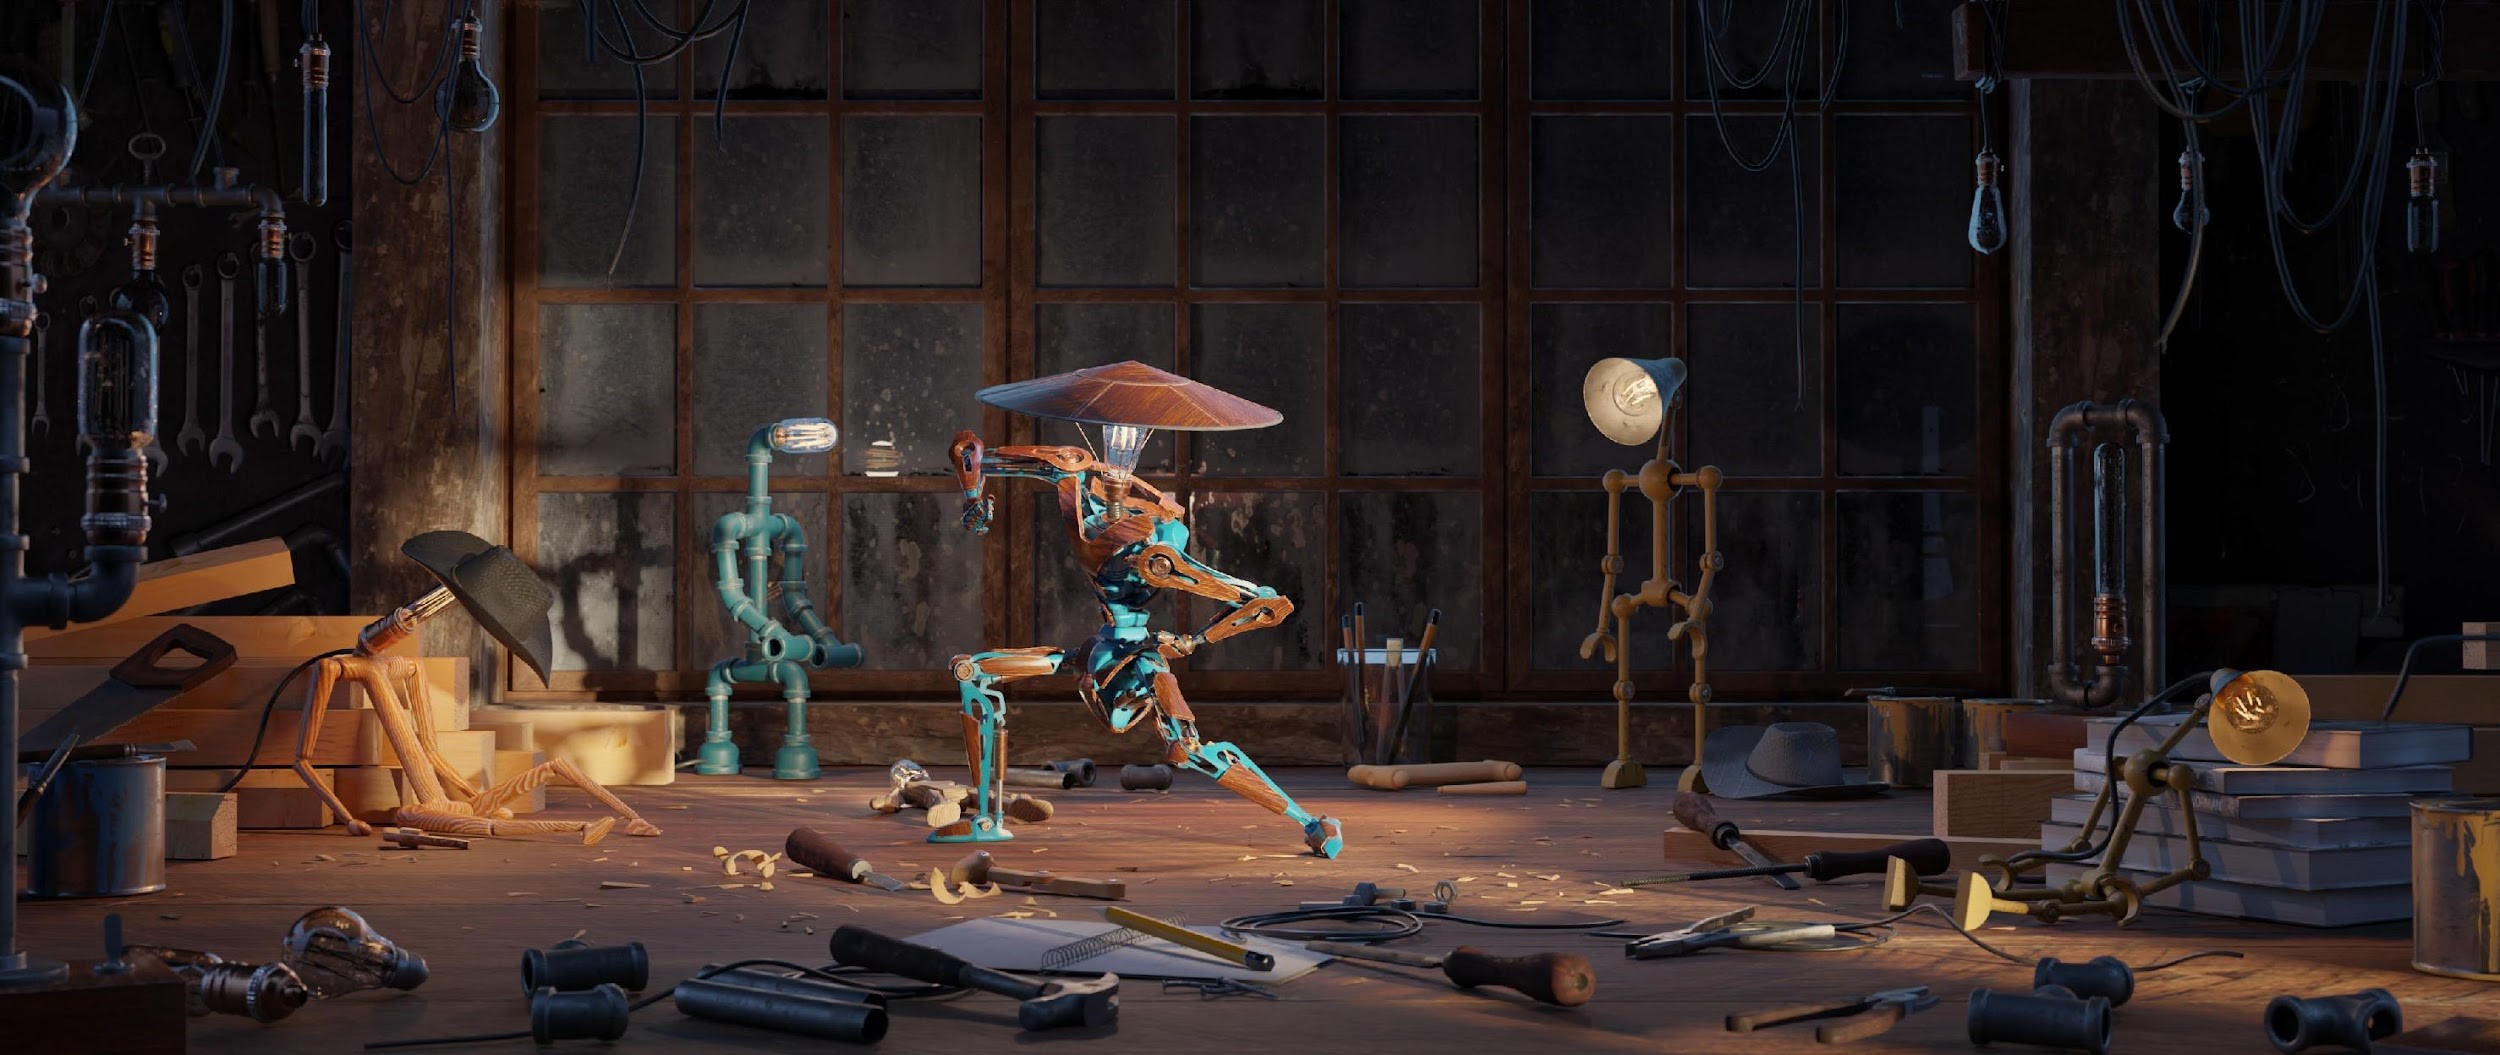
FIGHT FOR LIGHT

Thanks for reading my article!
I hope you liked my art and learned something new. Have a great day!
About the Artist
Tamás Török, a passionate 3D artist from Hungary. He worked for a company for 9 years, creating mainly realtime scenes with Blender and Unity. He is currently searching for the next challenge.


