
Behind the Scenes: No Service
INTRODUCTION
Hi! My name is Felix, aka devektiv, and I make 3D artwork and animation. I had used various 3D software very inconsistently for a long time. About three years ago, I finally got into Blender and have been actively learning since then. I have a background in graphic design, but everything related to 3D is self-taught.
INSPIRATION
There was no particular artwork that inspired me, but I was looking at a few pieces by Simon Stalenhags lately that left an impression on me. I really like his style, especially the dystopian landscapes.
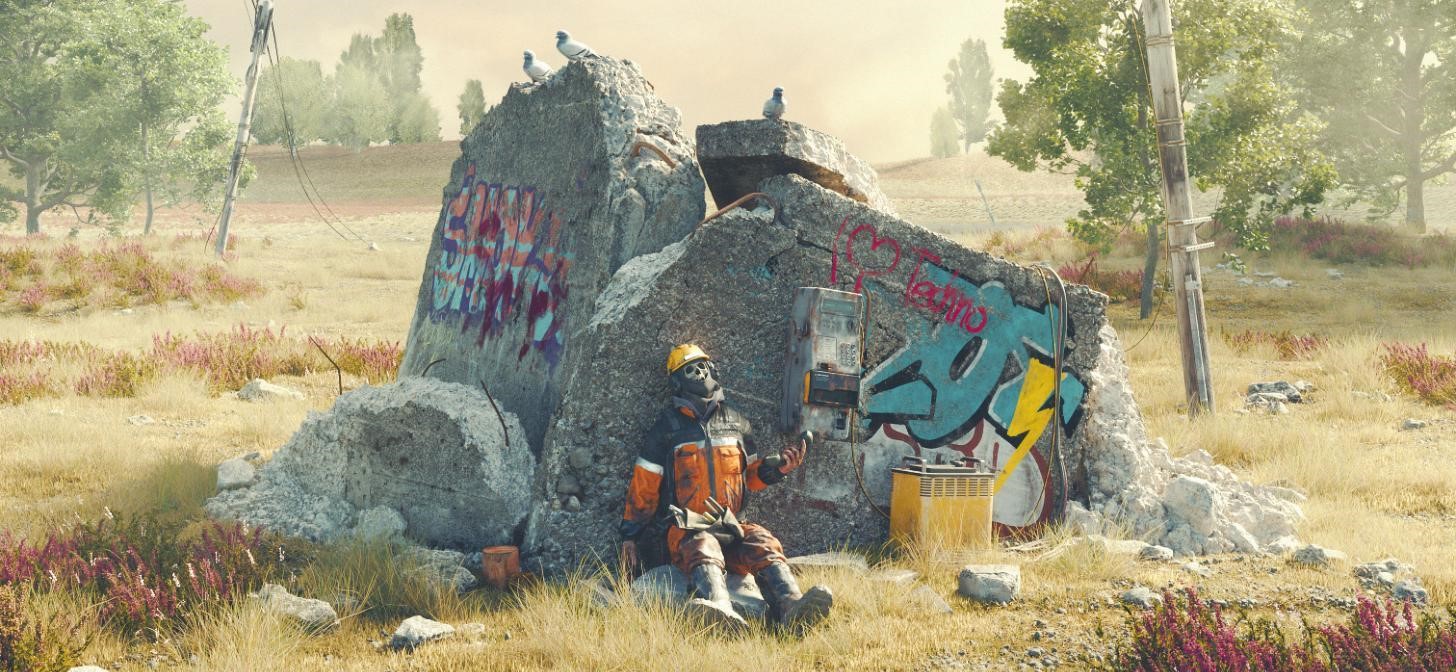
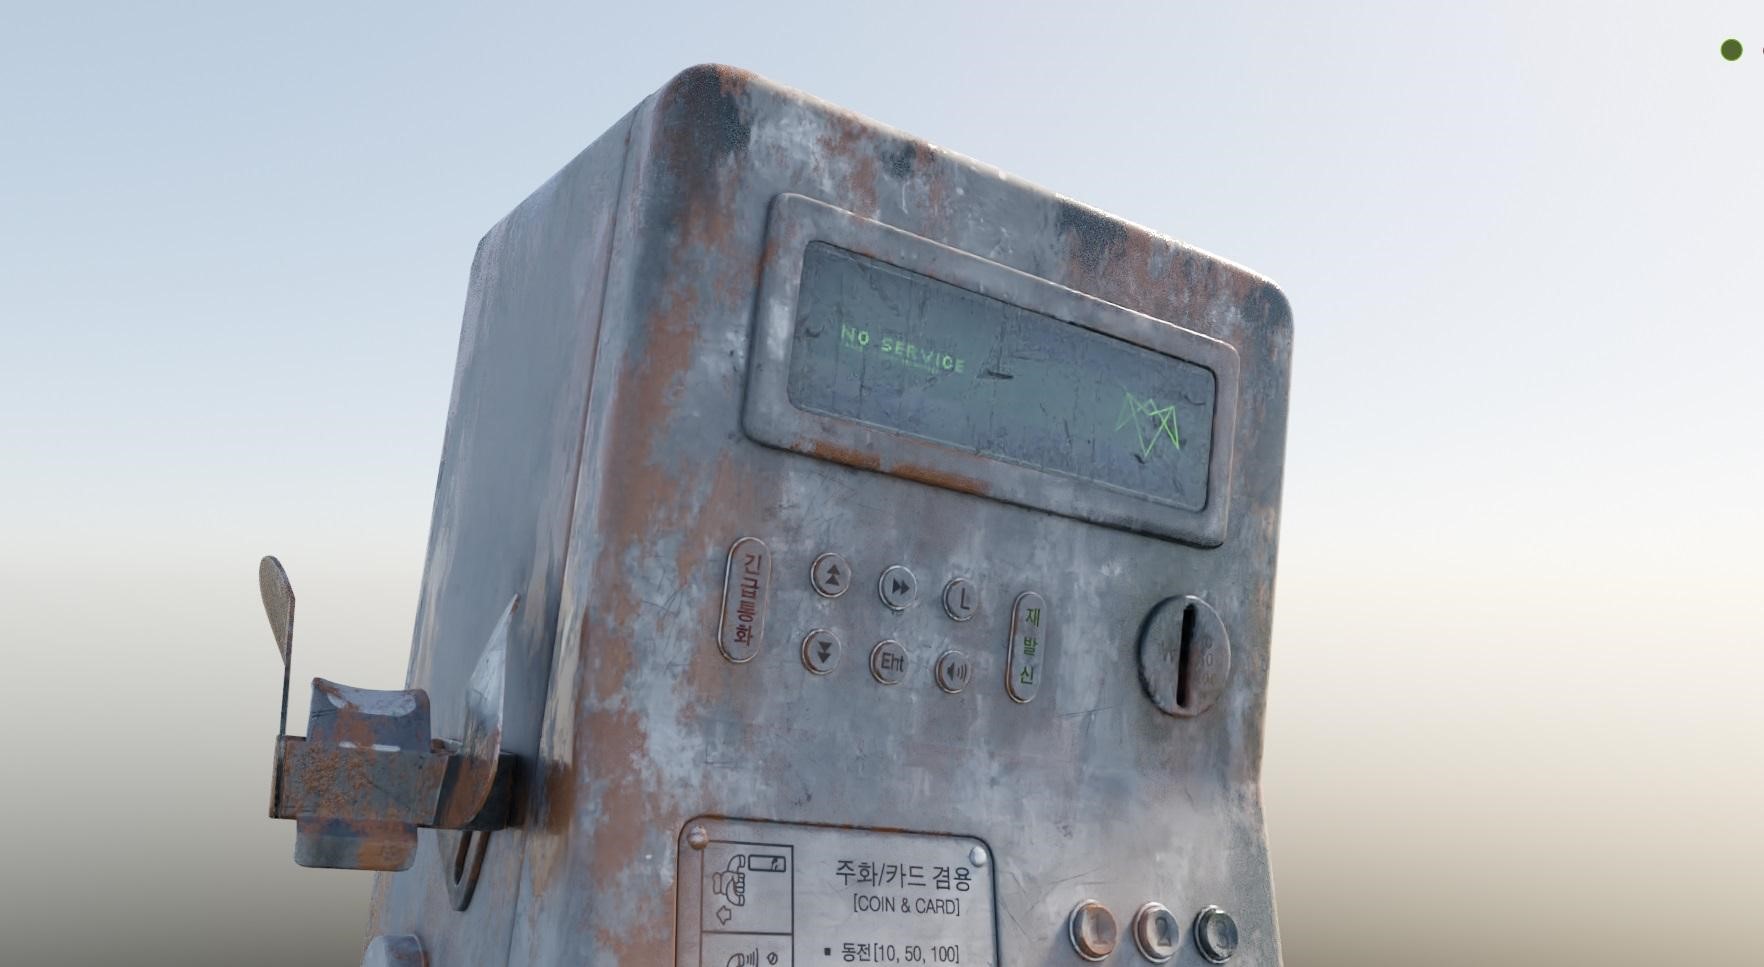
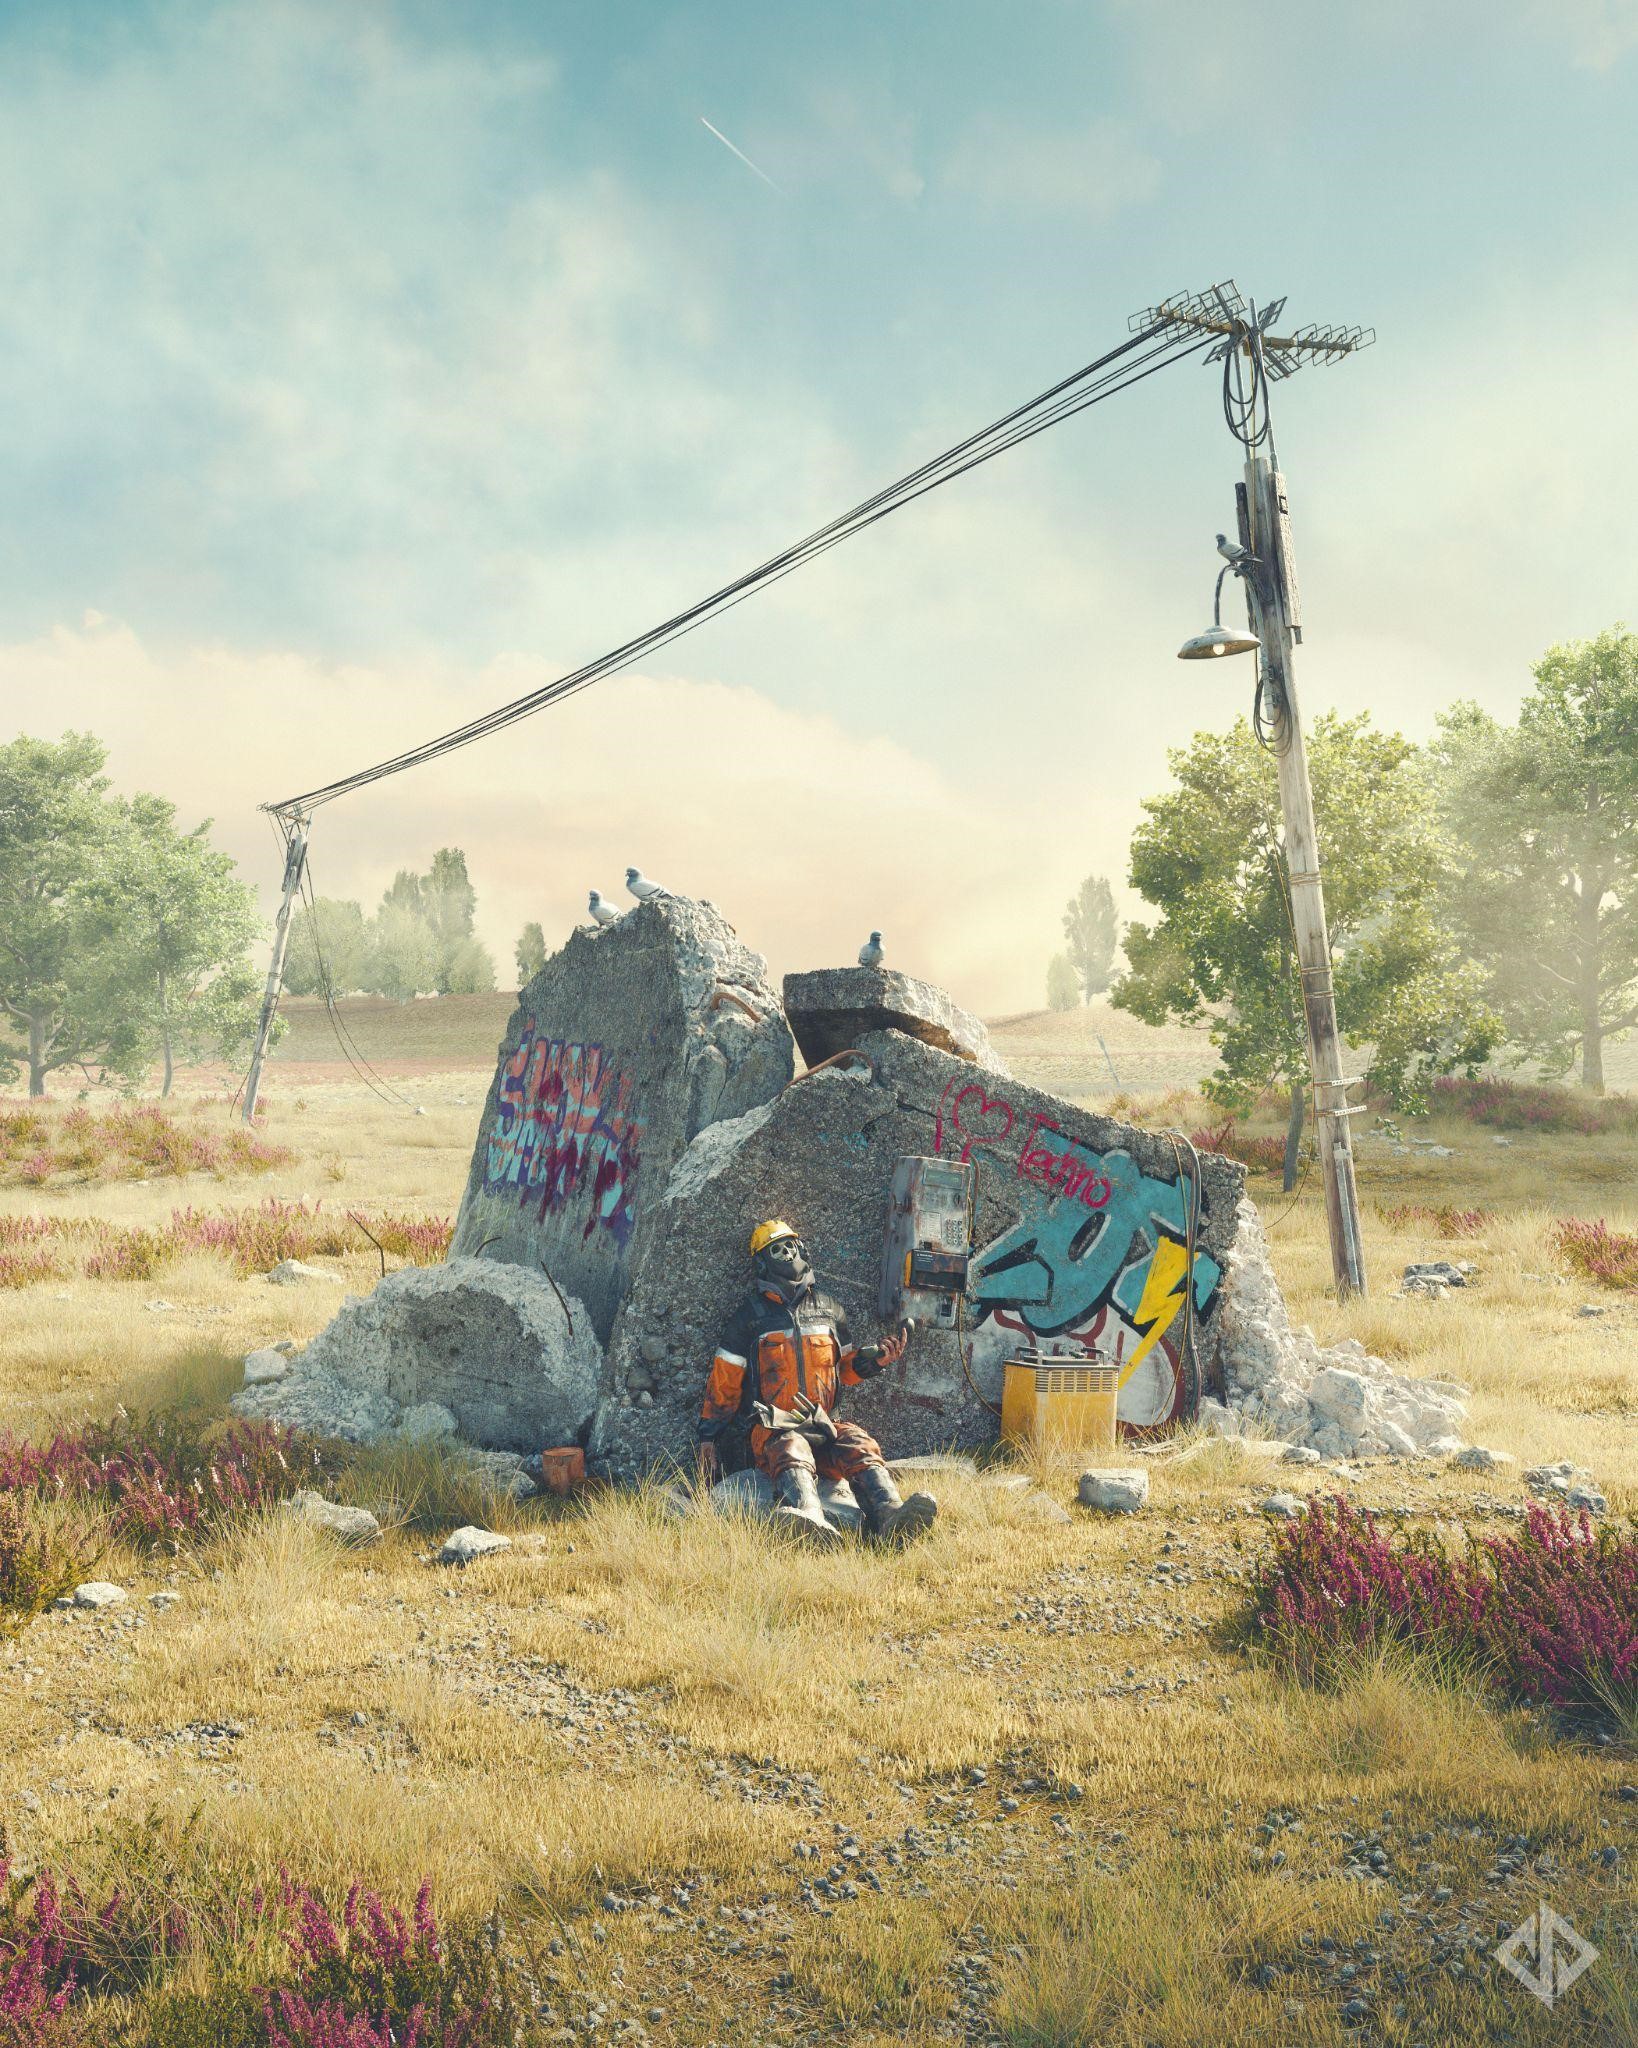
The actual idea came from a payphone model I had in my asset library. Sometimes it’s nice to just scroll through assets you already have available to you and see what you can come up with. I liked the idea of putting a payphone in the middle of nowhere and the display says “NO SERVICE.” It was pretty obvious there couldn’t be any service in the middle of nowhere, but to me it was an interesting idea—I liked the mystery behind it. I am also a fan of The Matrix, so I always wanted to include a payphone in my renders.
ASSEMBLING THE SCENE
Since the whole idea started while browsing my asset library, I already had most of the things I needed at hand.
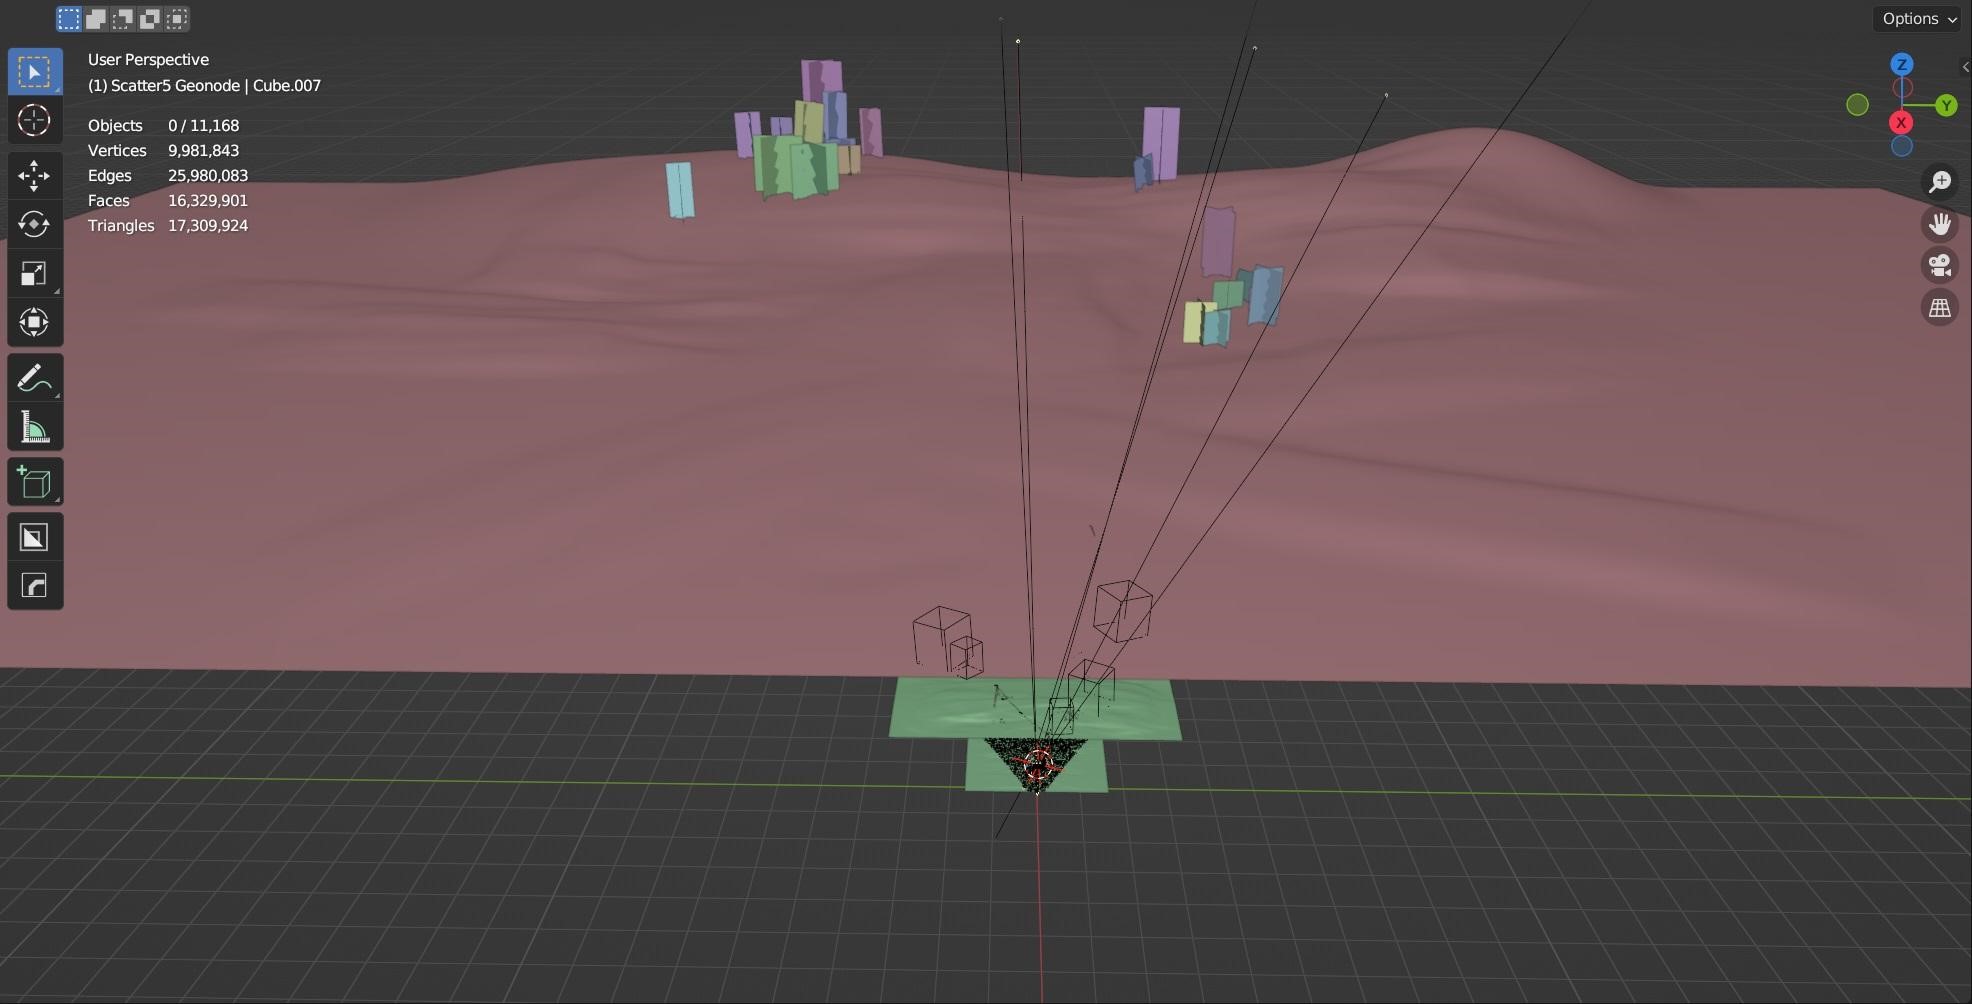
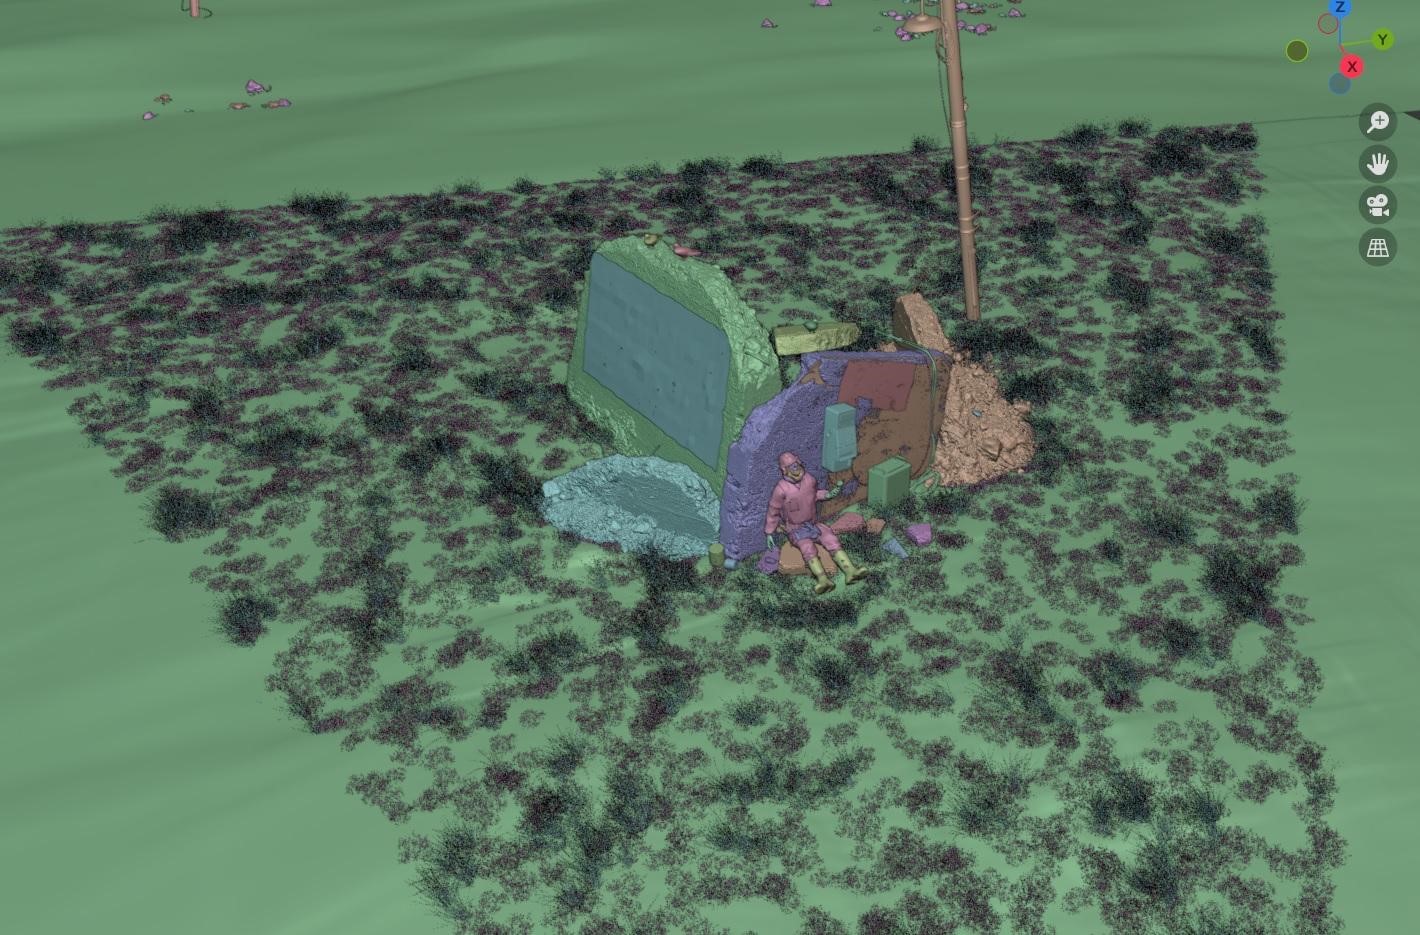
Beginning with the ground, I used 3 planes for the close, middle and background with different levels of subdivision. I used Blender’s sculpting tools, mainly the clay stripes brush, to deform the ground and shape the landscape.
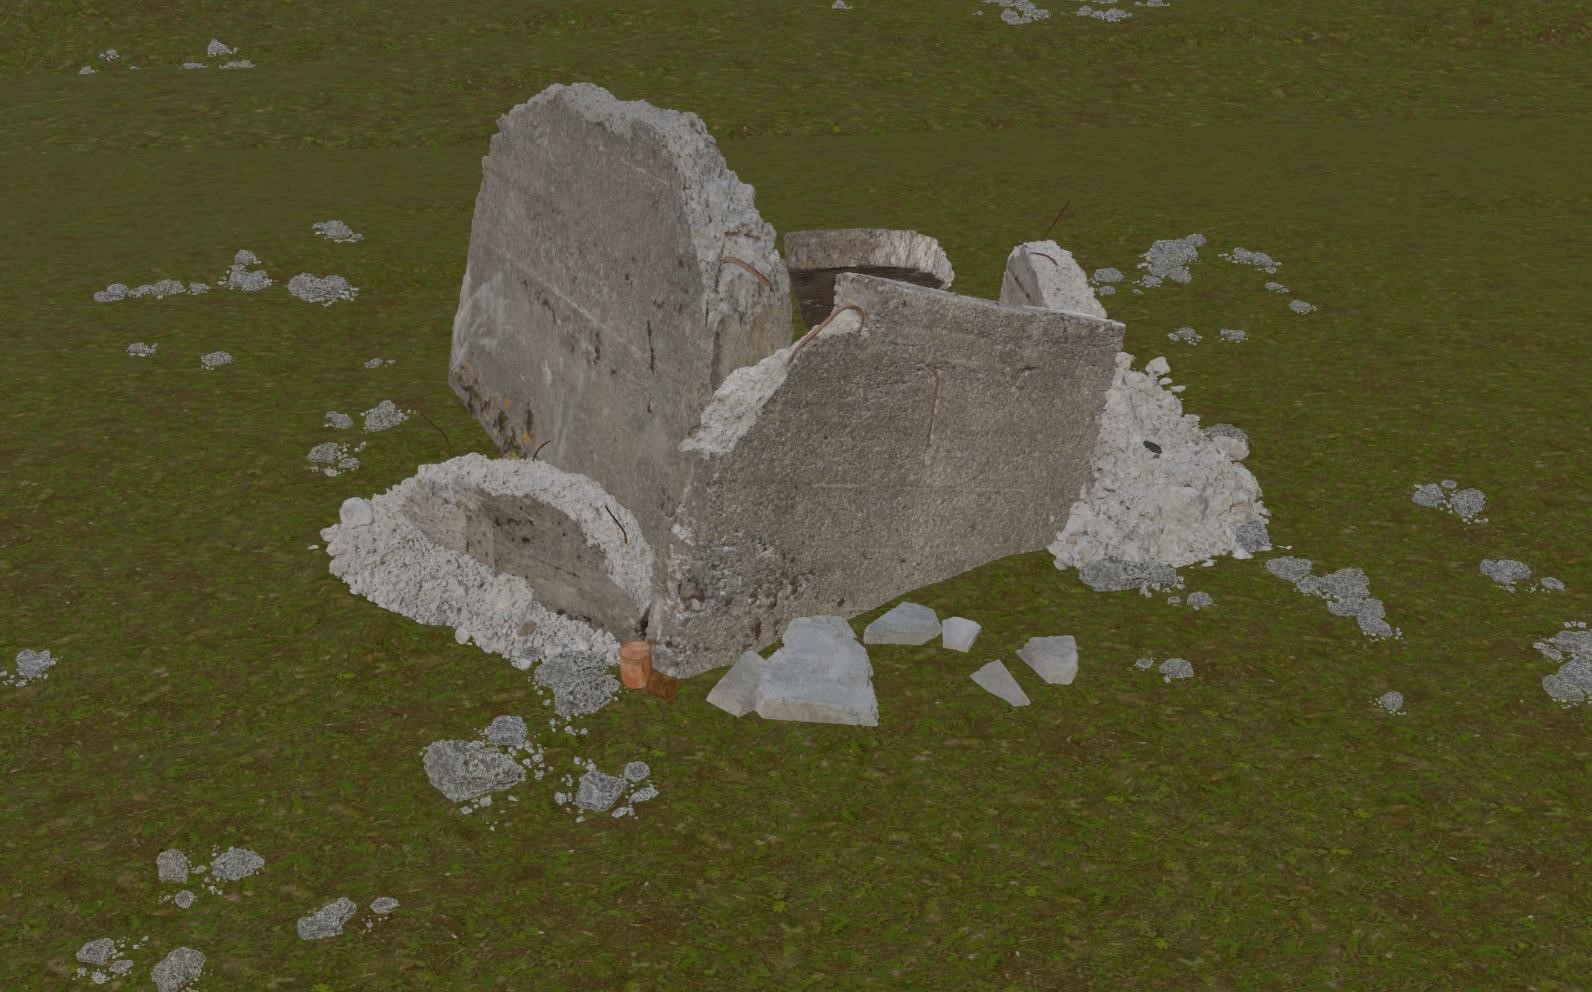
Then I assembled the broken building with different concrete pieces I imported from Quixel. I also scattered a bunch of debris and smaller scale concrete pieces around the building to add more details to the area. I placed them by hand to get the exact look I wanted.
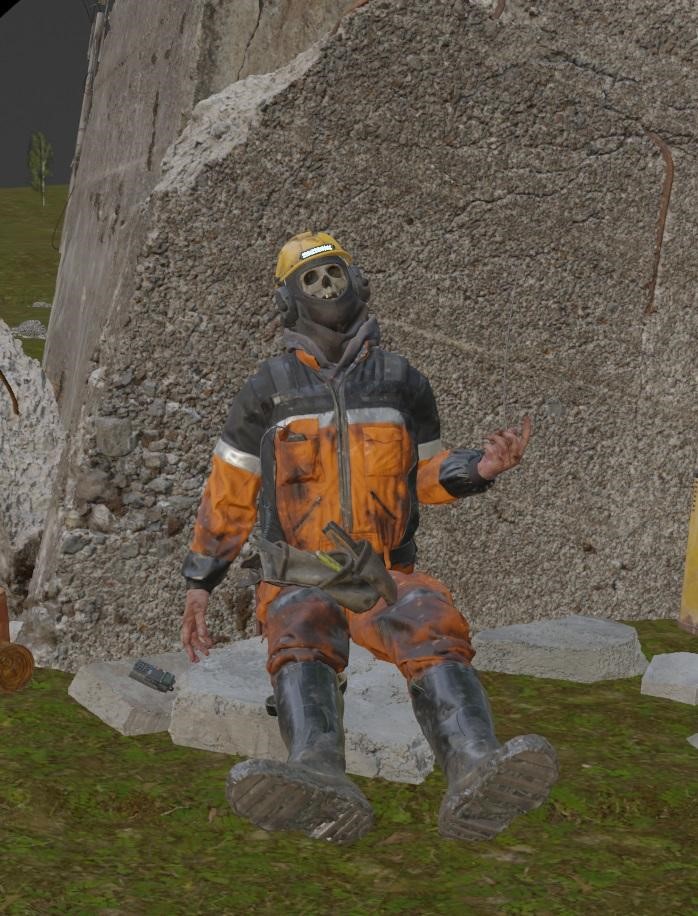
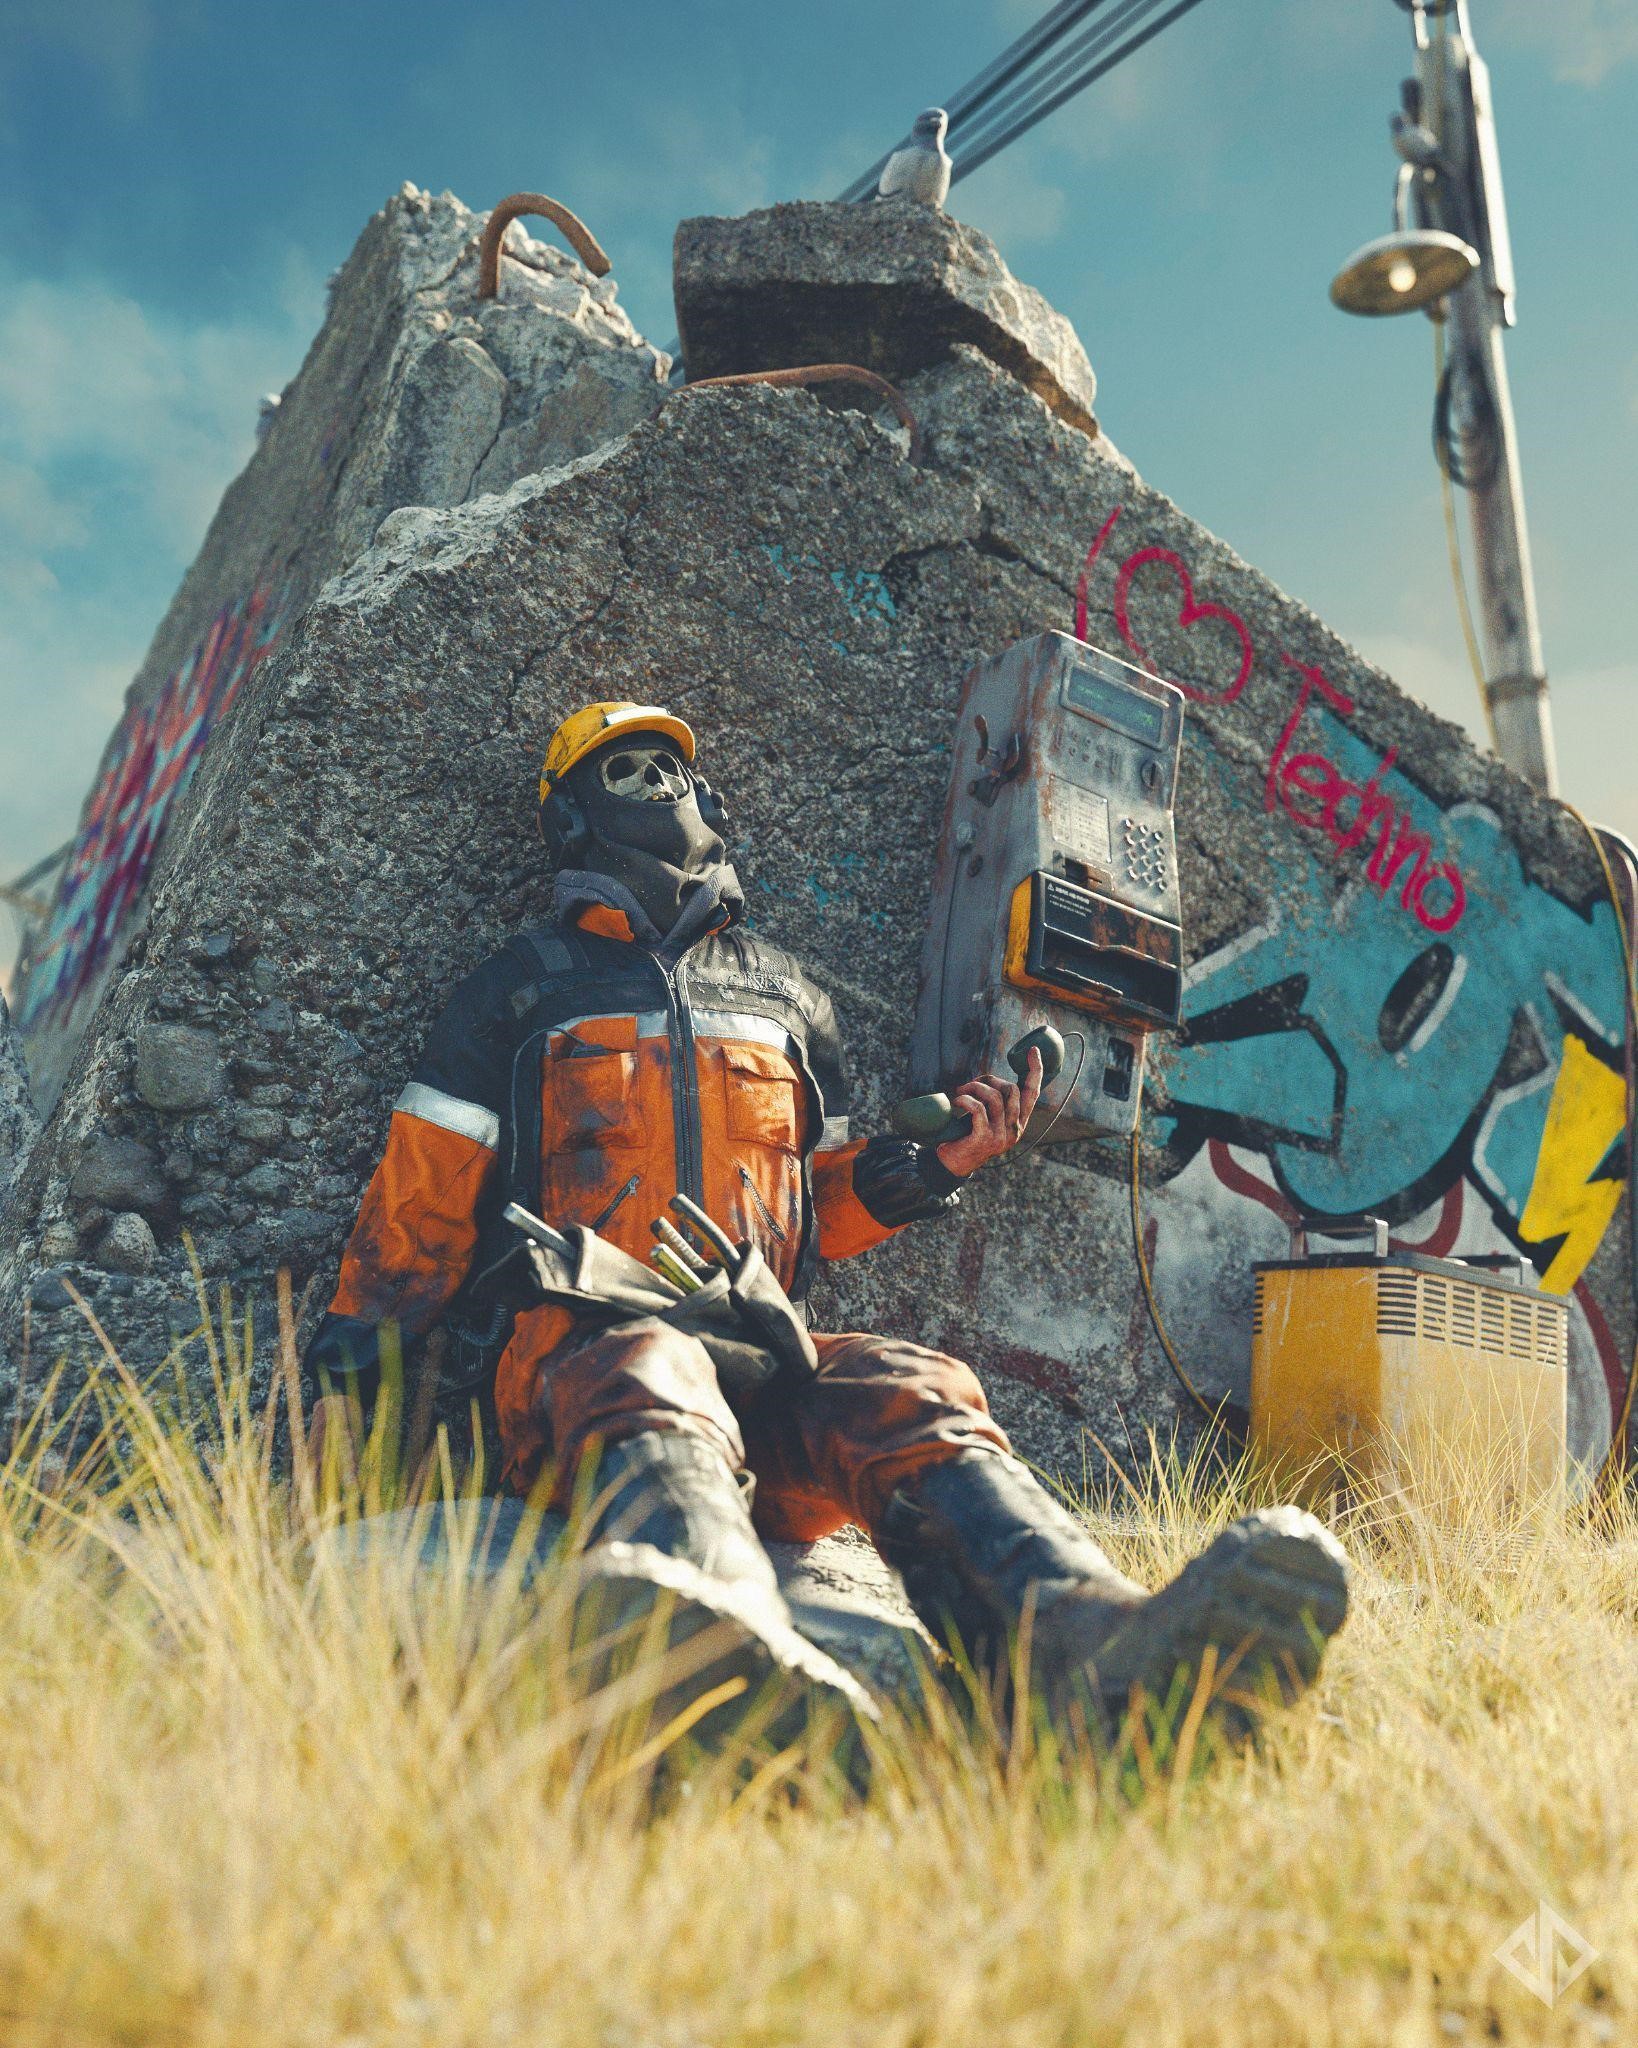
The main character is from the BigMediumSmall Industrial Zone package. The character comes rigged and ready to be posed, so I put him on the ground leaning against the wall. I also removed his gloves and put some tools on his lap. He was also holding the phone in his hand. I swapped the face with a skull model and removed a few teeth. Since the question was brought up already, I intentionally decided against going for a full body skeleton and only swapped the head. It didn’t really fit the clothing and looked off when using a full skeleton.
It is not logical why only the head would be a skull, but it also has a mysterious vibe to me. You don’t really know what happened to him. But that’s something everyone has to decide for themselves. Sometimes you want it to be real and logical, other times you just do what looks good in your eyes.
TEXTURES
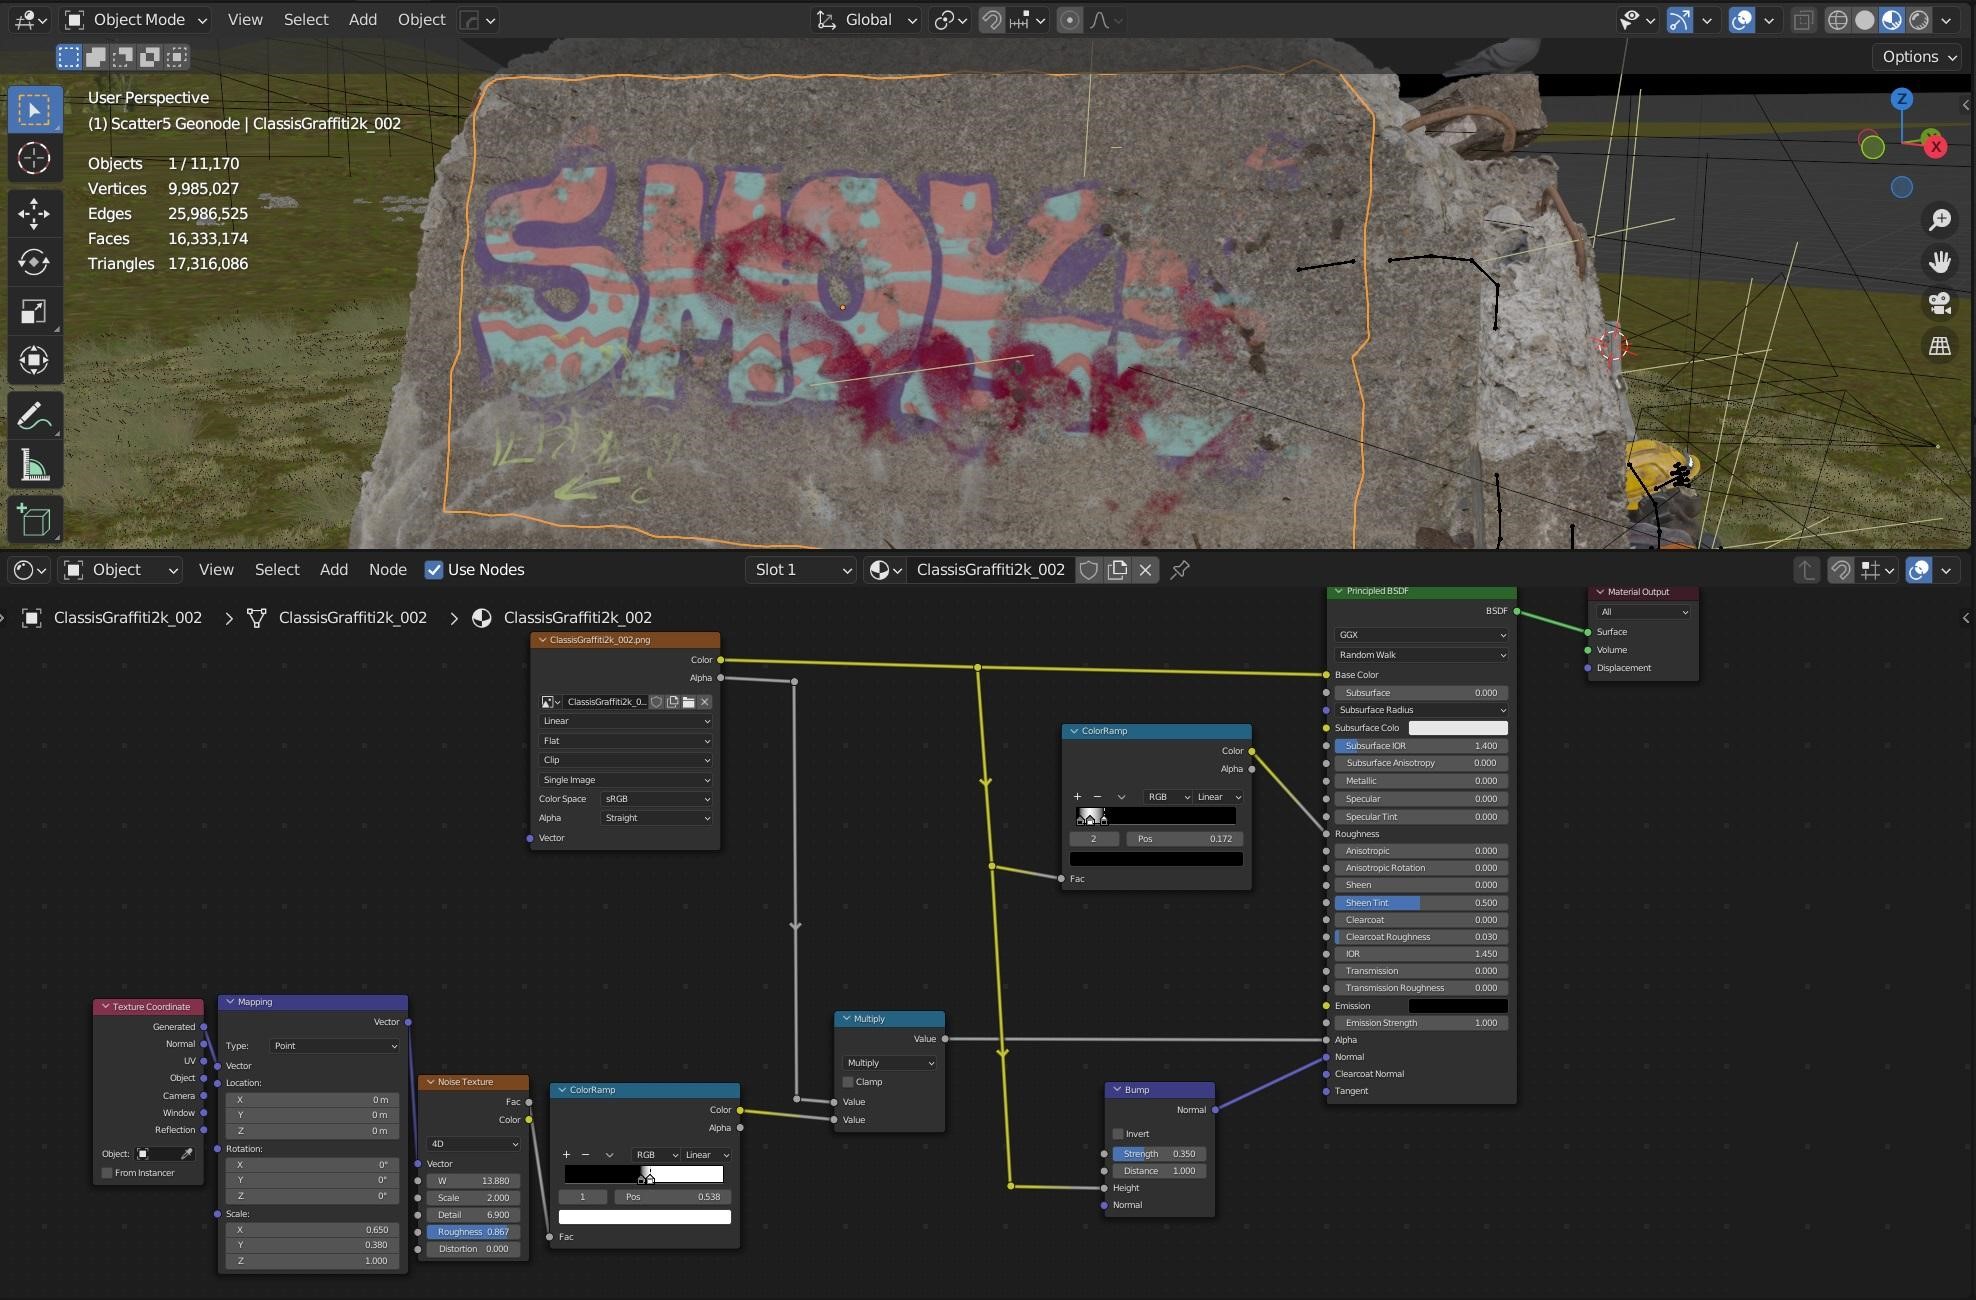
At this point, I also started putting graffiti on the walls. Those are simple PNGs I imported as planes, then I applied a shrink wrap modifier to stick them to the wall. I also tweaked the alpha values with a noise texture in order to give the graffiti a more worn out look.
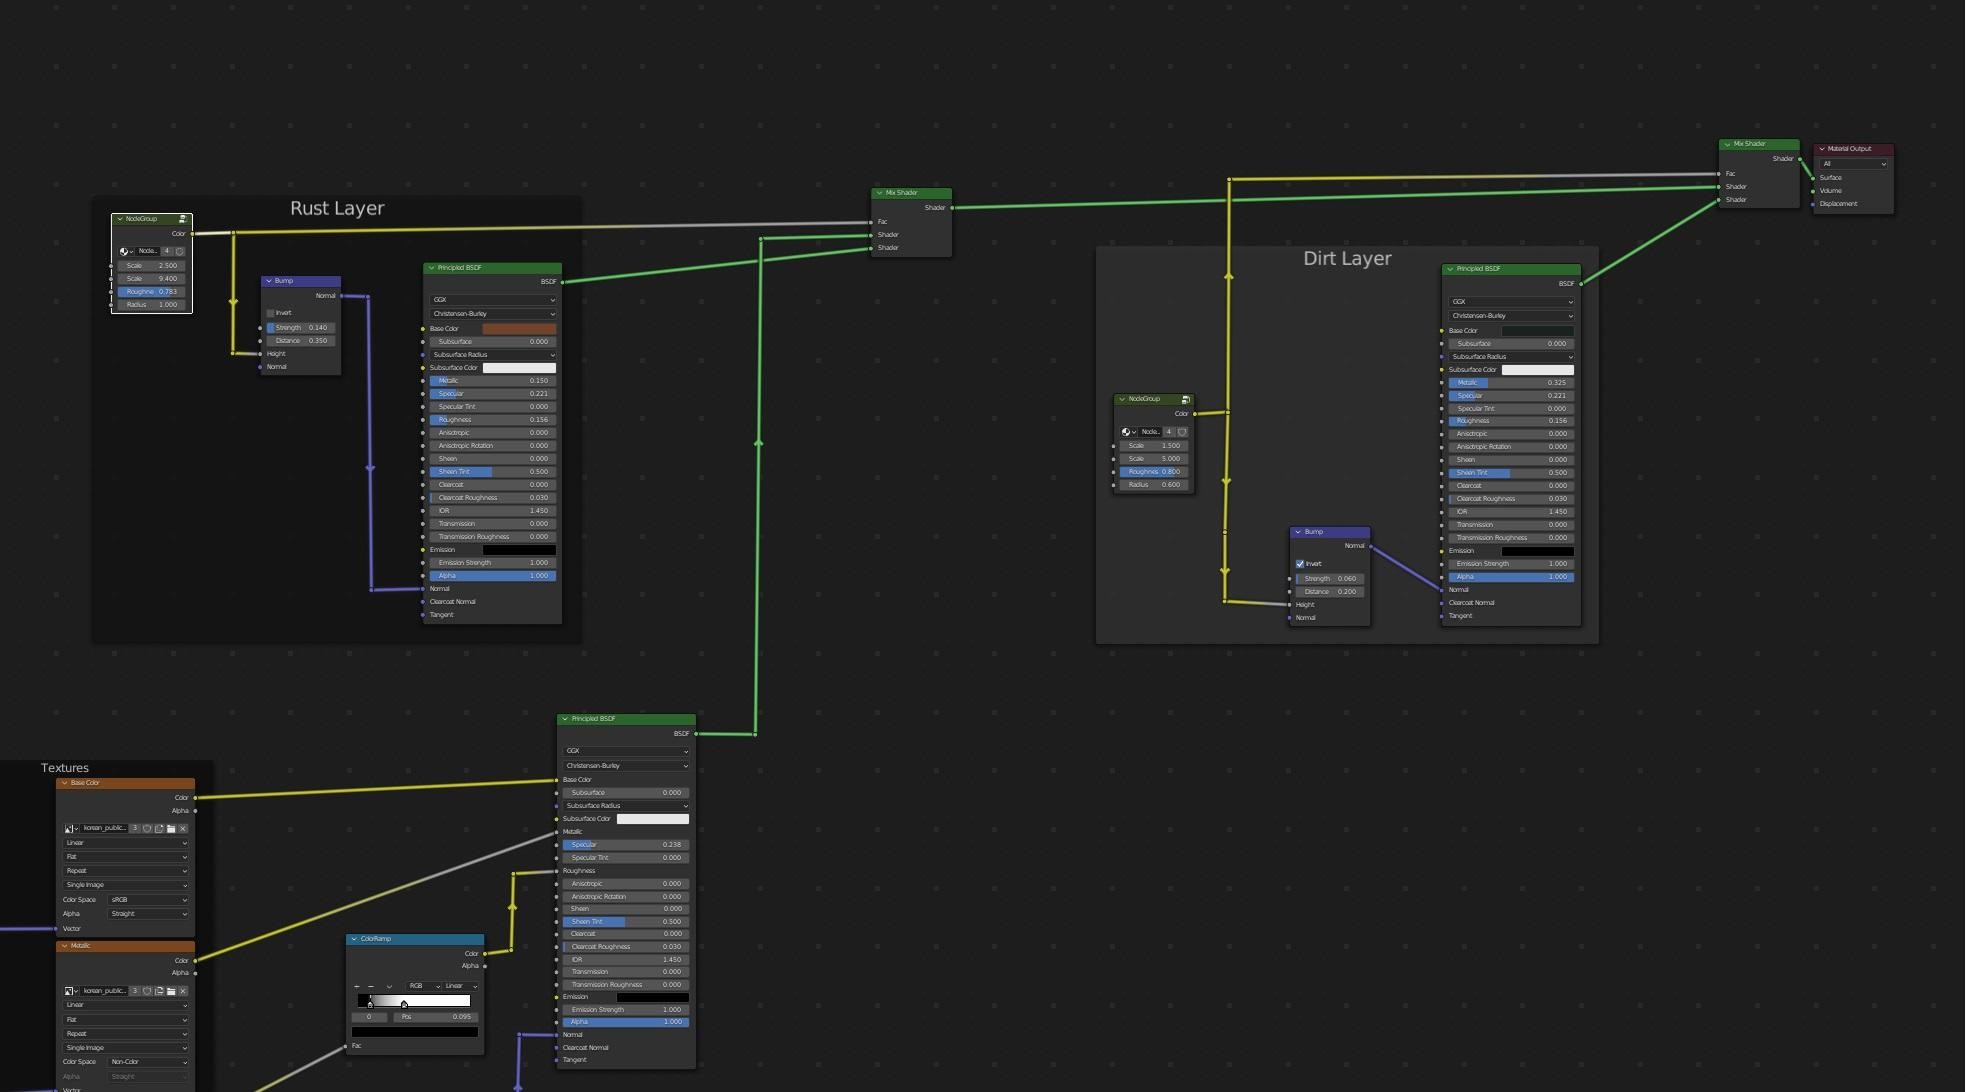
I added some rust and dirt to the phone by using voronoi/noise textures as a mask for 2 additional shaders that go on top of the original textures. One for the dirt and one for the rust.
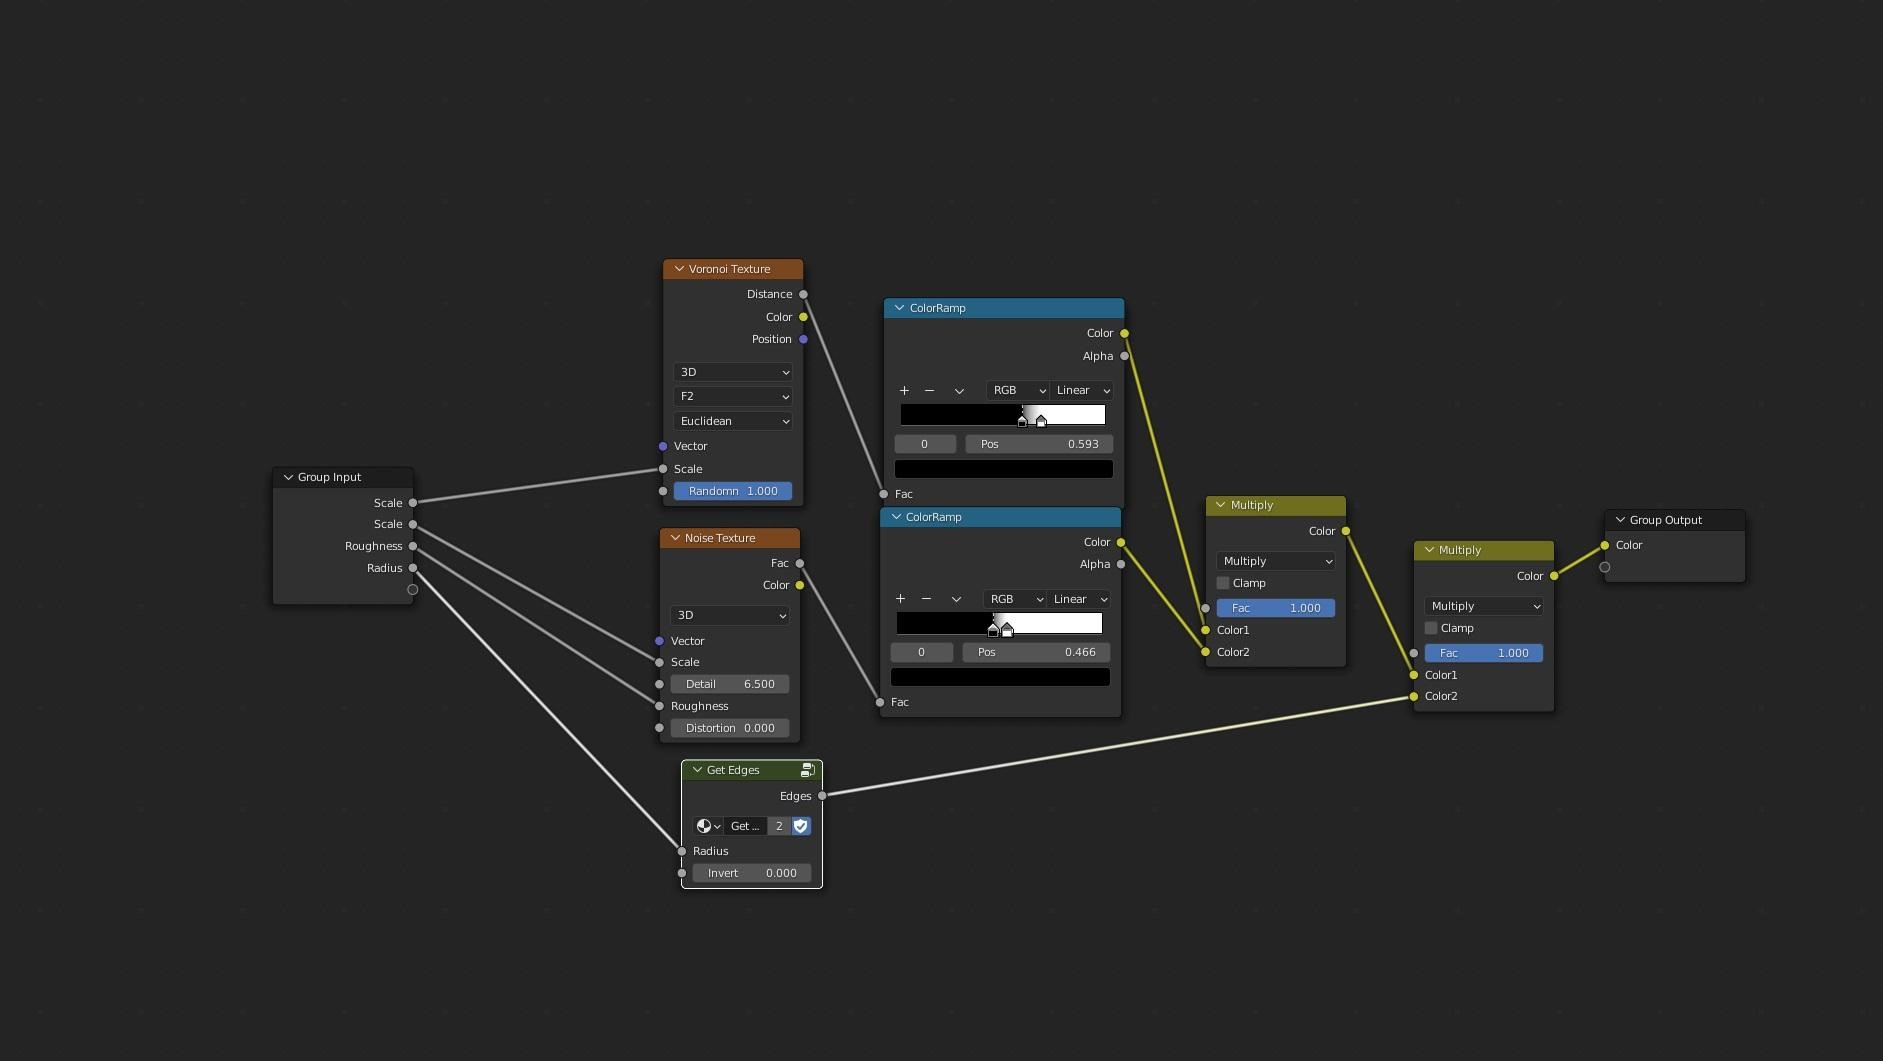
This is inside the node group I used as a mask. The noise and voronoi textures add more randomness to the “Get Edges” node. Otherwise, it would be too perfect around the edges.
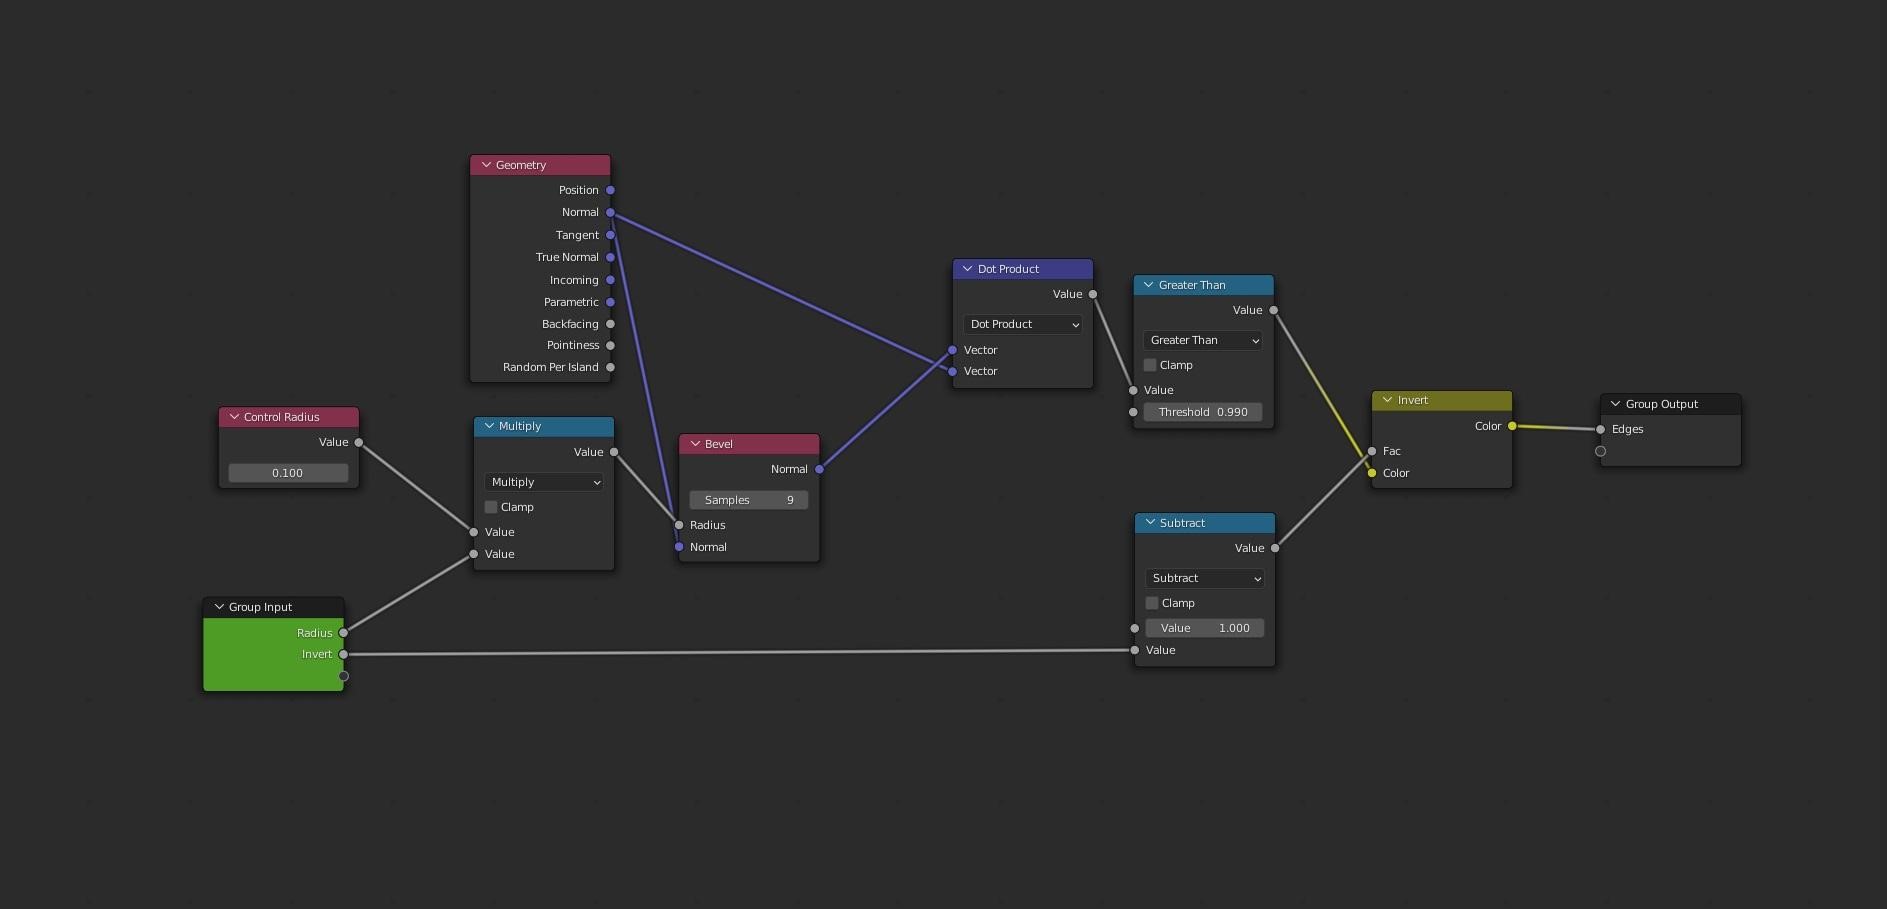
And this is the “Get Edges” node. You can also use an ambient occlusion node to achieve a similar effect.
The display is also a simple text I put on a plane behind the glass. The emissive shader’s strength was animated using the F-Curve modifiers. You can simply add a noise to the keyframe so the strength will randomly change over time.
ASSETS
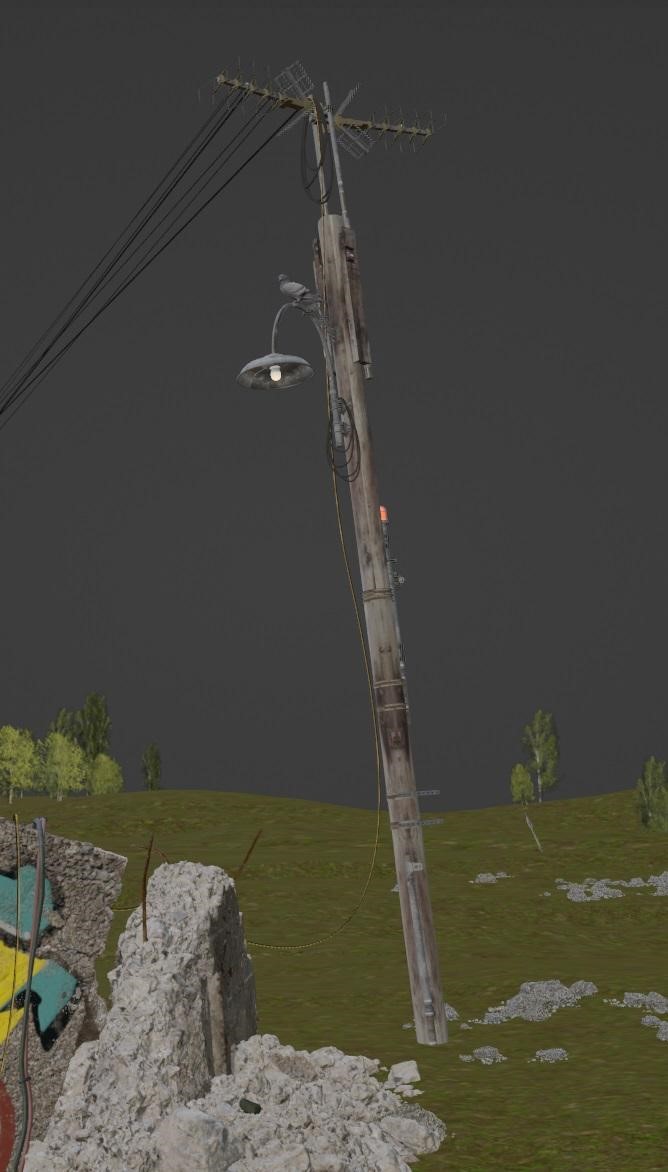
The wooden posts are from Ian Hubert’s Patreon. I added a few of his assets together to create the look I wanted. The cables were made with the Cablerator add-on. It simplifies the process by letting you choose 2 points and it will create the curve for you. It also lets you add gravity to the curves for a more natural look.
All the other details were from various plugins and resources. The trees in the front were from the Vegetation V5 plugin while the background trees were simple PNGs.
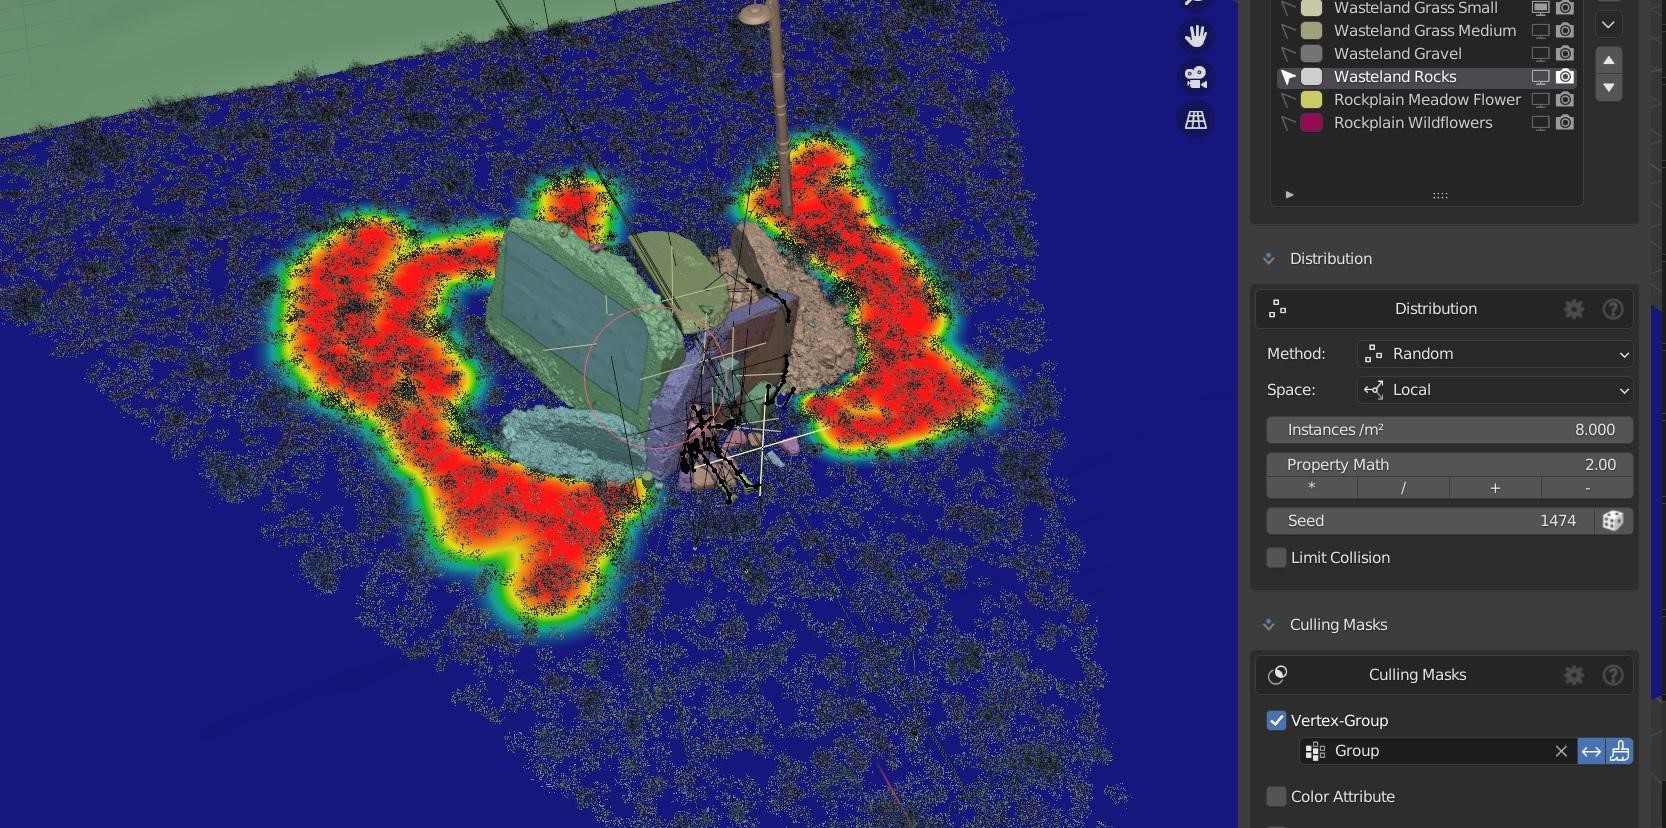
THE GRASS
One of the most important parts were the grass and the plants scattered on the ground. Thankfully, there is Scatter 5.2 which helps immensely with that. Since I use 3 different planes for the ground, I was able to lower the density and details for the background very easily to optimize the scene.
The foreground was filled with small grass clumps, dry grass, pebbles, rocks and some wildflowers that add a bit of color to the mostly dead landscape.
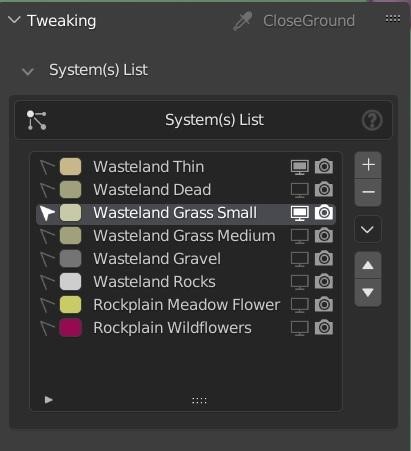
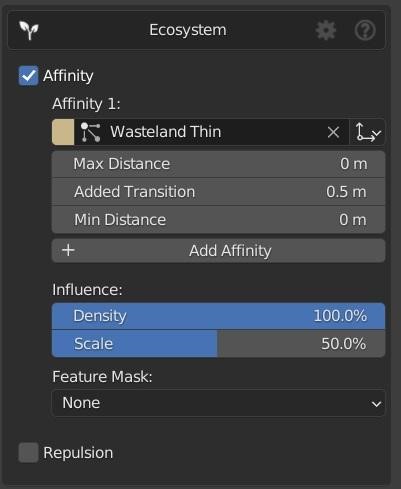
I used a combination of manually-painting vertex groups for some flowers, and the proximity/affinity feature in Scatter. These features let me choose specific collections or grass systems that affect the distribution of other systems.
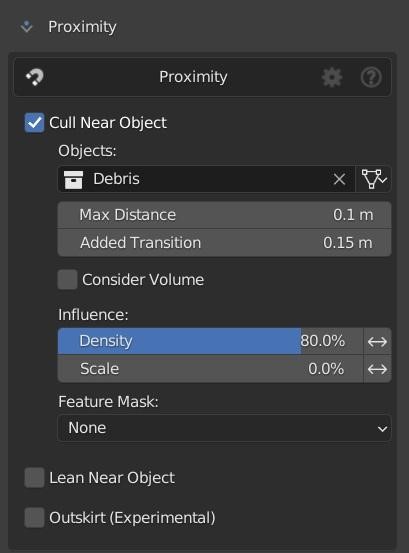
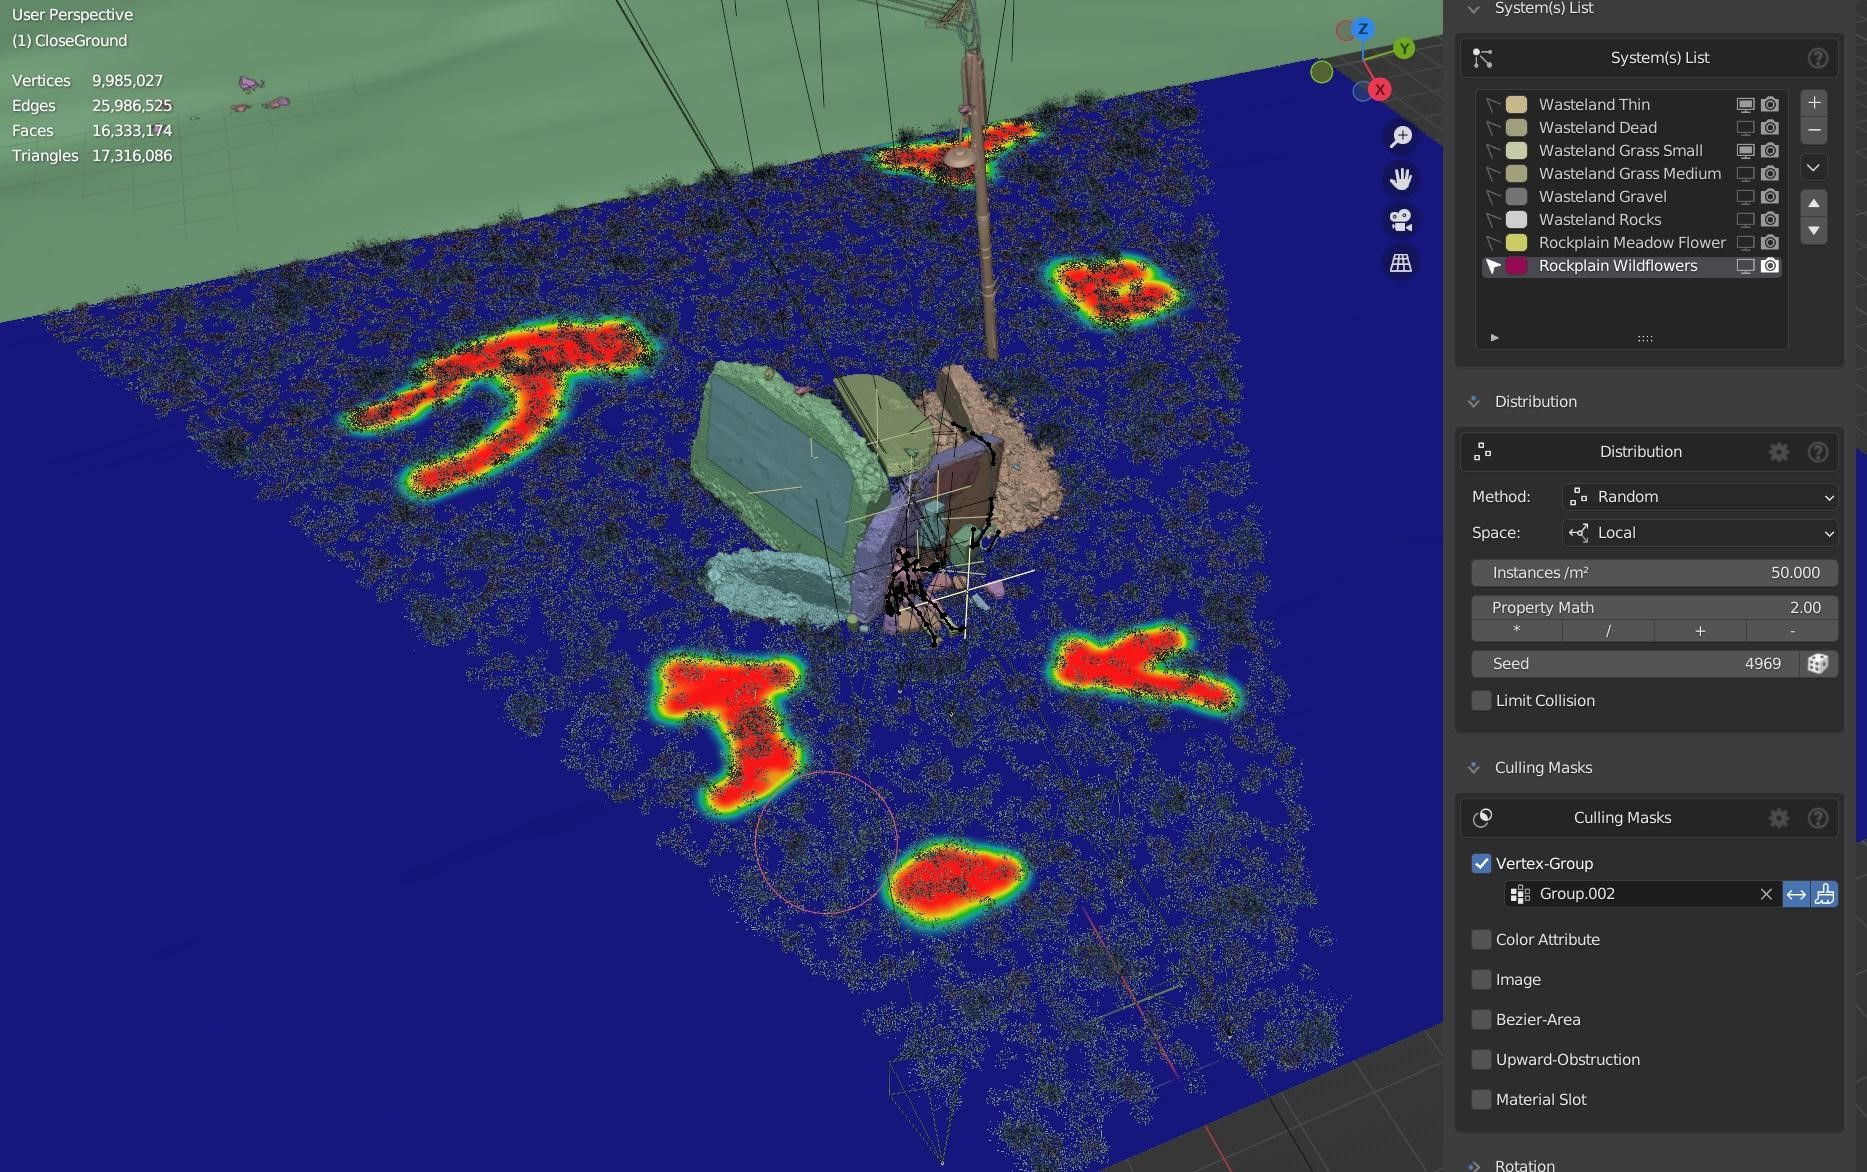
So I simply tell Scatter to not put the grass where the building is.
The scene is lit by a sky texture node and an additional directional sunlight that I aligned with the sky texture.

POST-PROCESSING
This is the final renders. It is a raw image without the background.
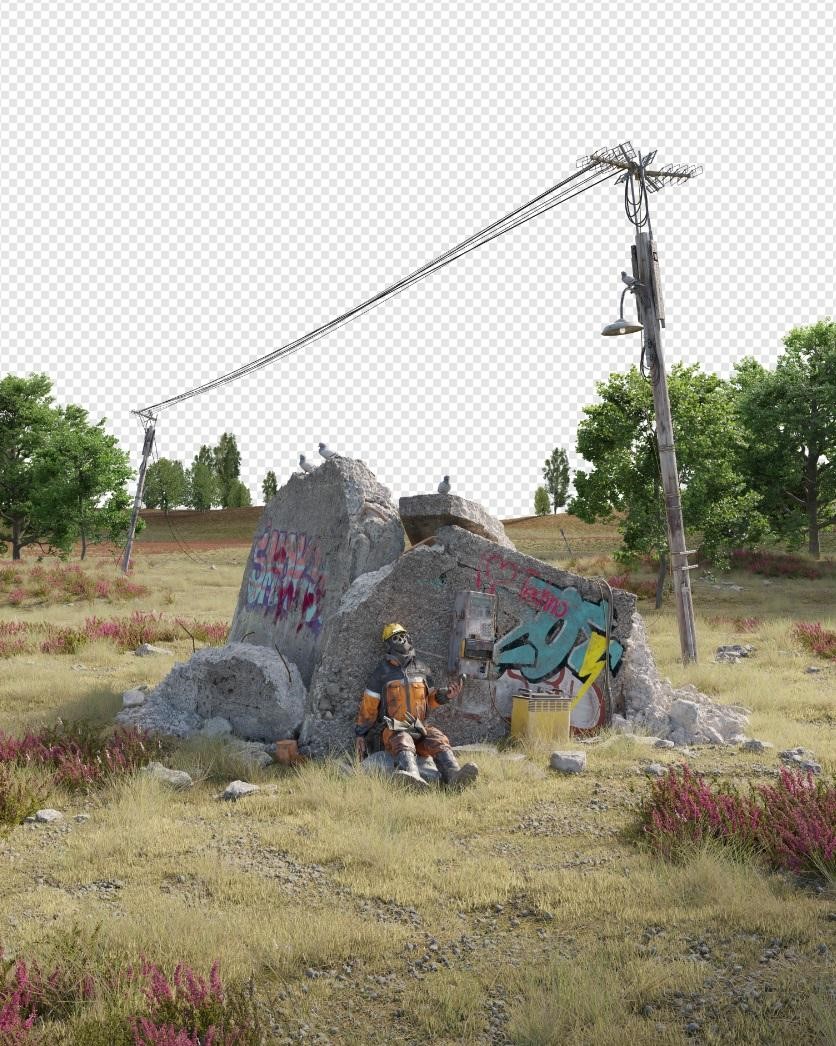
I created this mist pass to add more depth later.
The rest was done in Affinity Photo. When post processing, I mainly focused on giving the image a certain look by trying out different LUTs. I also added film grain and used a camera-raw filter to sharpen the image. When the overall look was okay, I tweaked the rest with RGB curves and regular color filters to finalize the look. To make it more atmospheric, I added fog and clouds with different brushes by painting over the image.
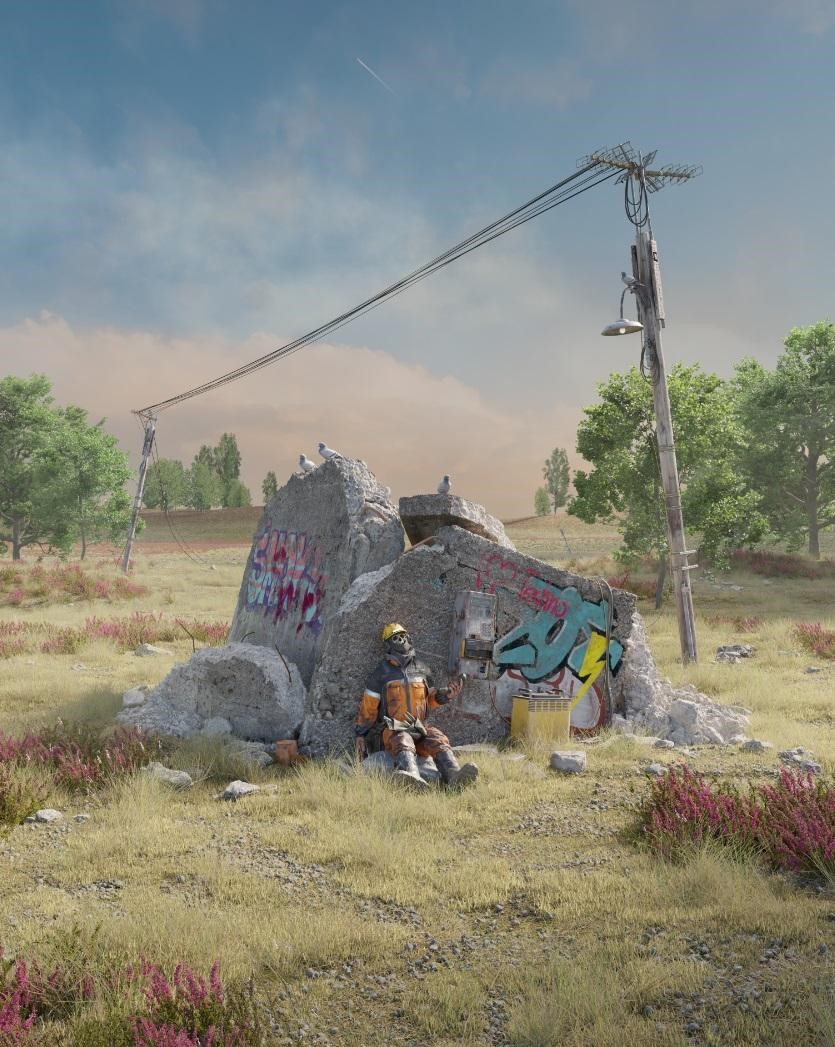
It’s often enough to lower the brush opacity a bit and set the layer to screen to achieve a good-looking effect.
NO SERVICE
I also made an animation that shows some parts of the process. It was exported from Blender as an OpenEXR sequence and edited in Davinci Resolve.
Thank you for reading!
About the Artist

devektiv, a 3D Artist from Germany. He is currently expanding his knowledge in the 3D world and has been using Blender since 2019.


