Behind the Scenes: After Thoughts
INTRODUCTION
Hey there! My name is Abir, a 16-year-old high school student from India. I make 3D art as a hobby whenever I can squeeze time out. I studied traditional art when I was young, but since then I have become more interested in digital art. I generally don’t like to use my real name online so almost everyone knows me as Xeofrios.
INSPIRATION
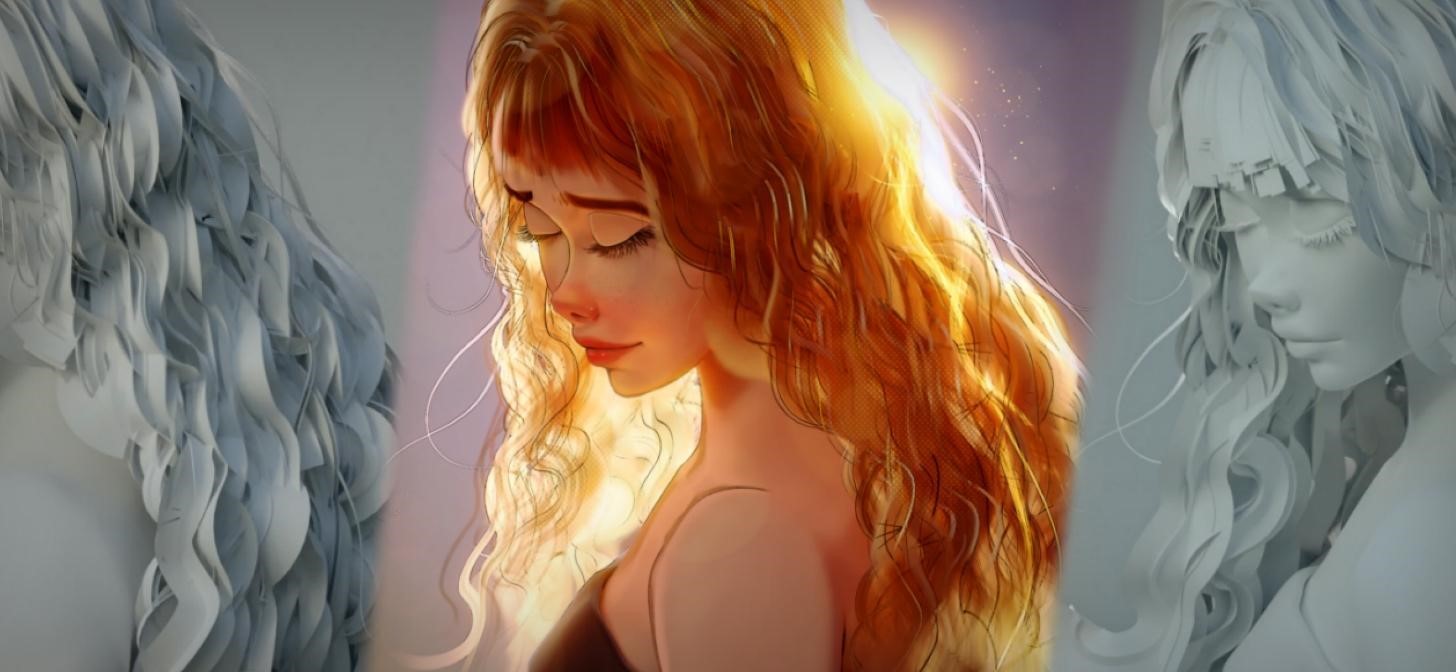
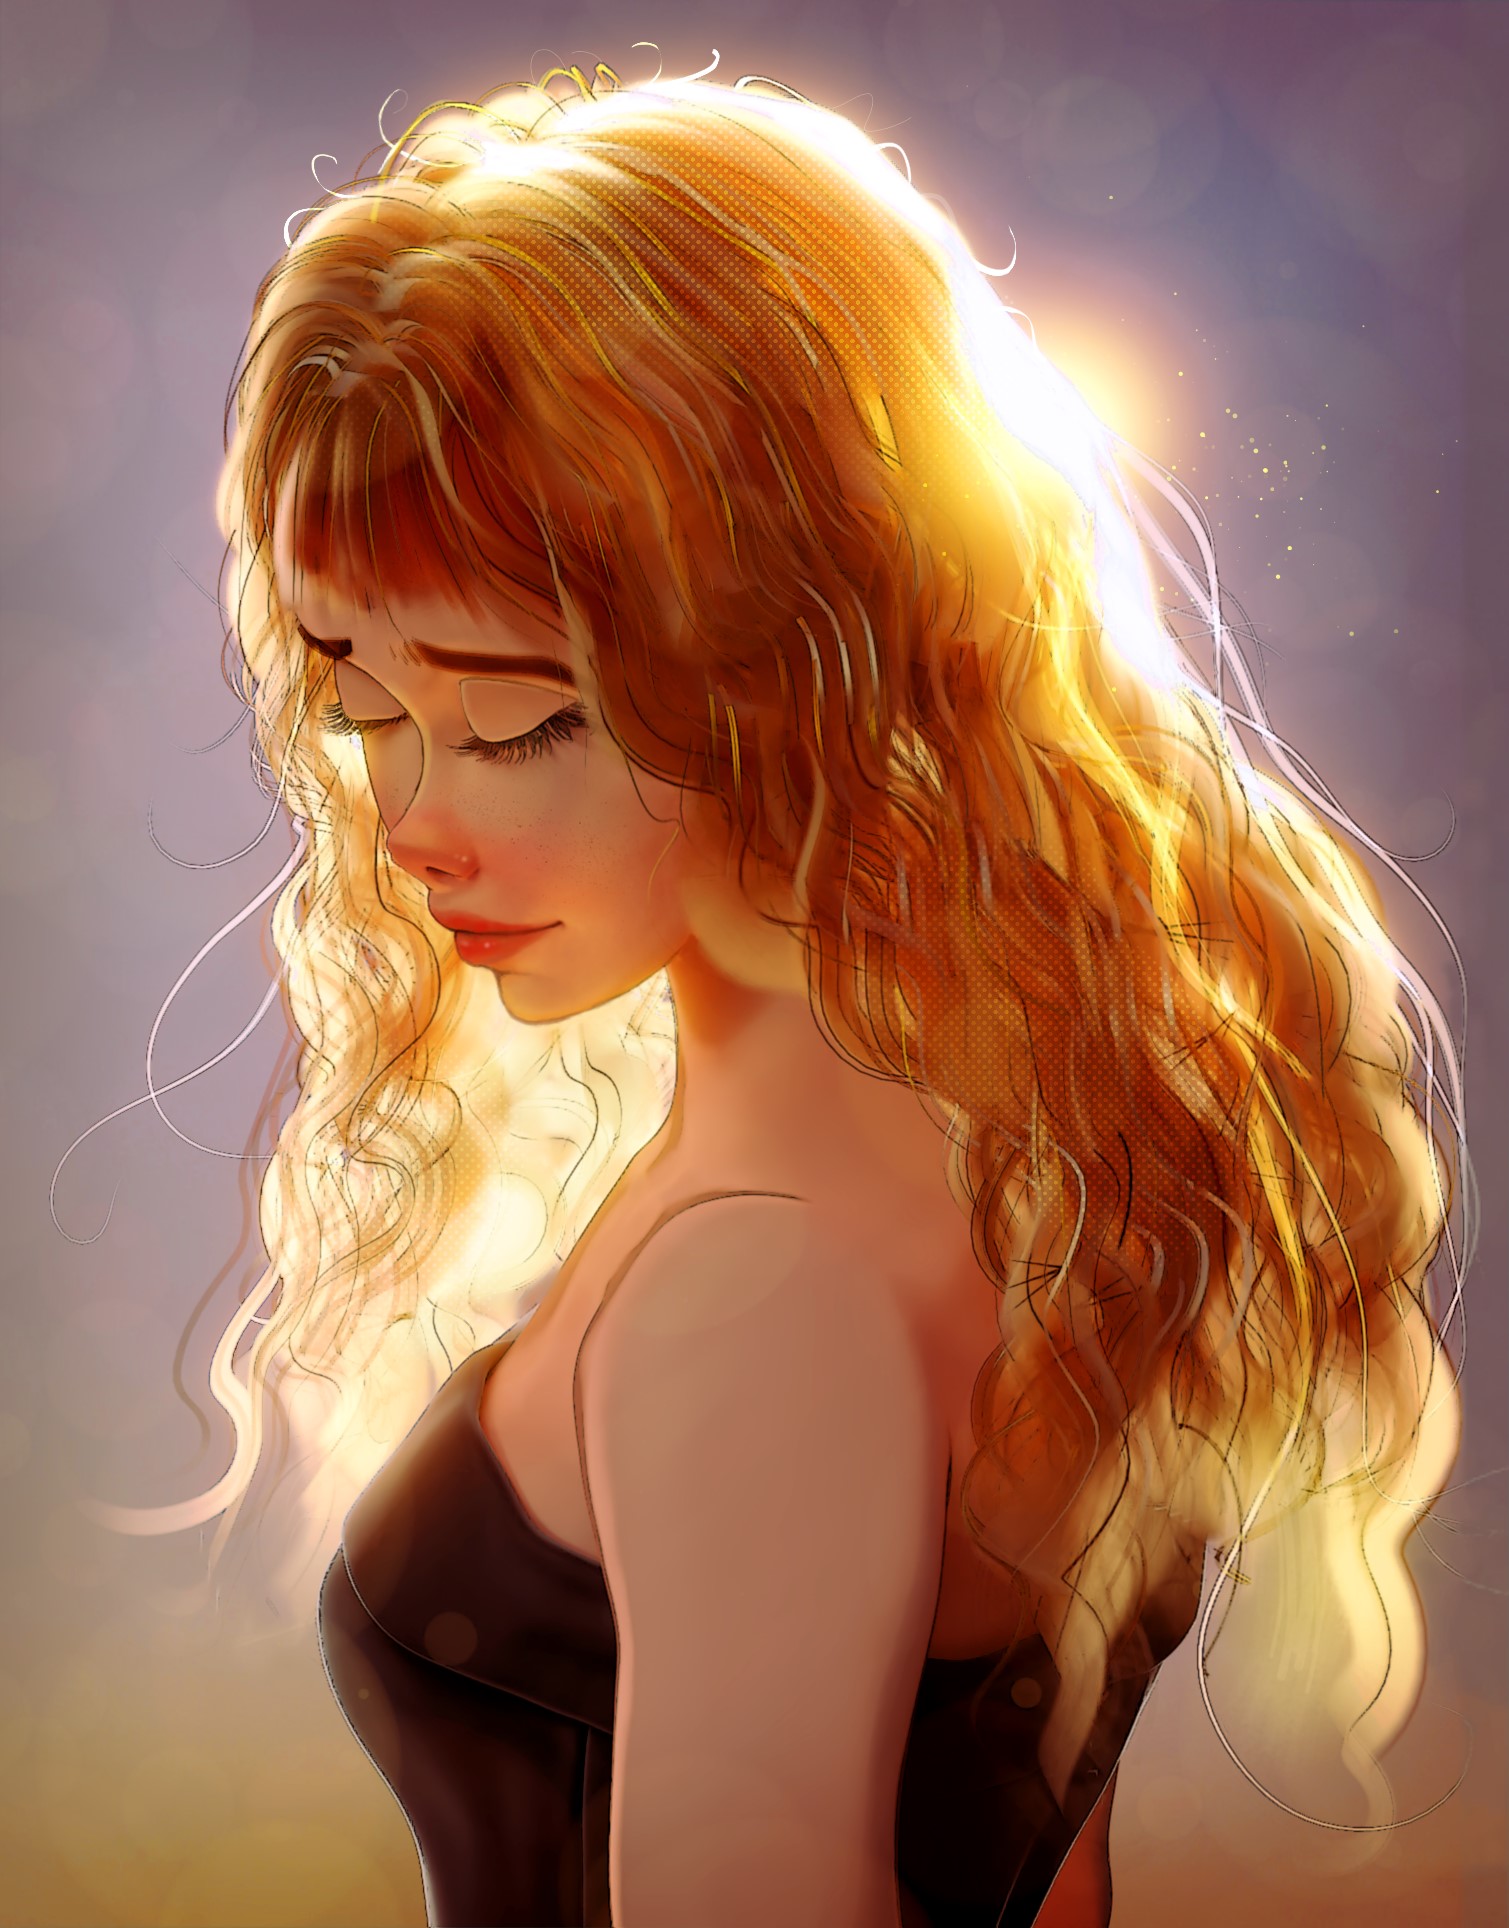
For this project, I wanted to explore how successfully I could replicate a 2D style with 3D rendering. I tried replicating the clean style of Sam Yang and the beautiful rendering of WLOP, though the final piece has its own unique style.
HARDWARE
- NVIDIA GeForce GTX 1650 (laptop)
- AMD Ryzen 5 4600H
- 8 GB RAM
MODELING
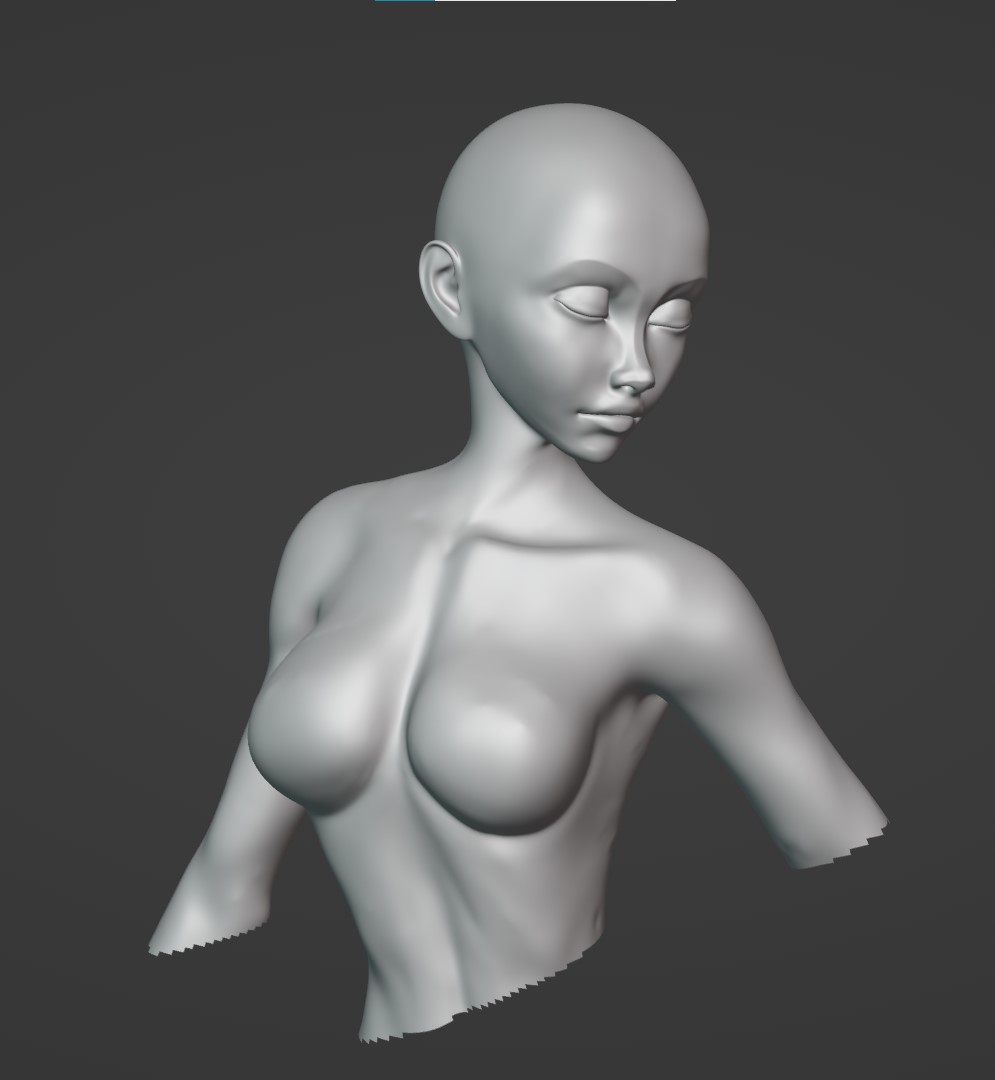
For the main model, I recycled a previous model and did some tweaking to match the relatively flat style I was going for.
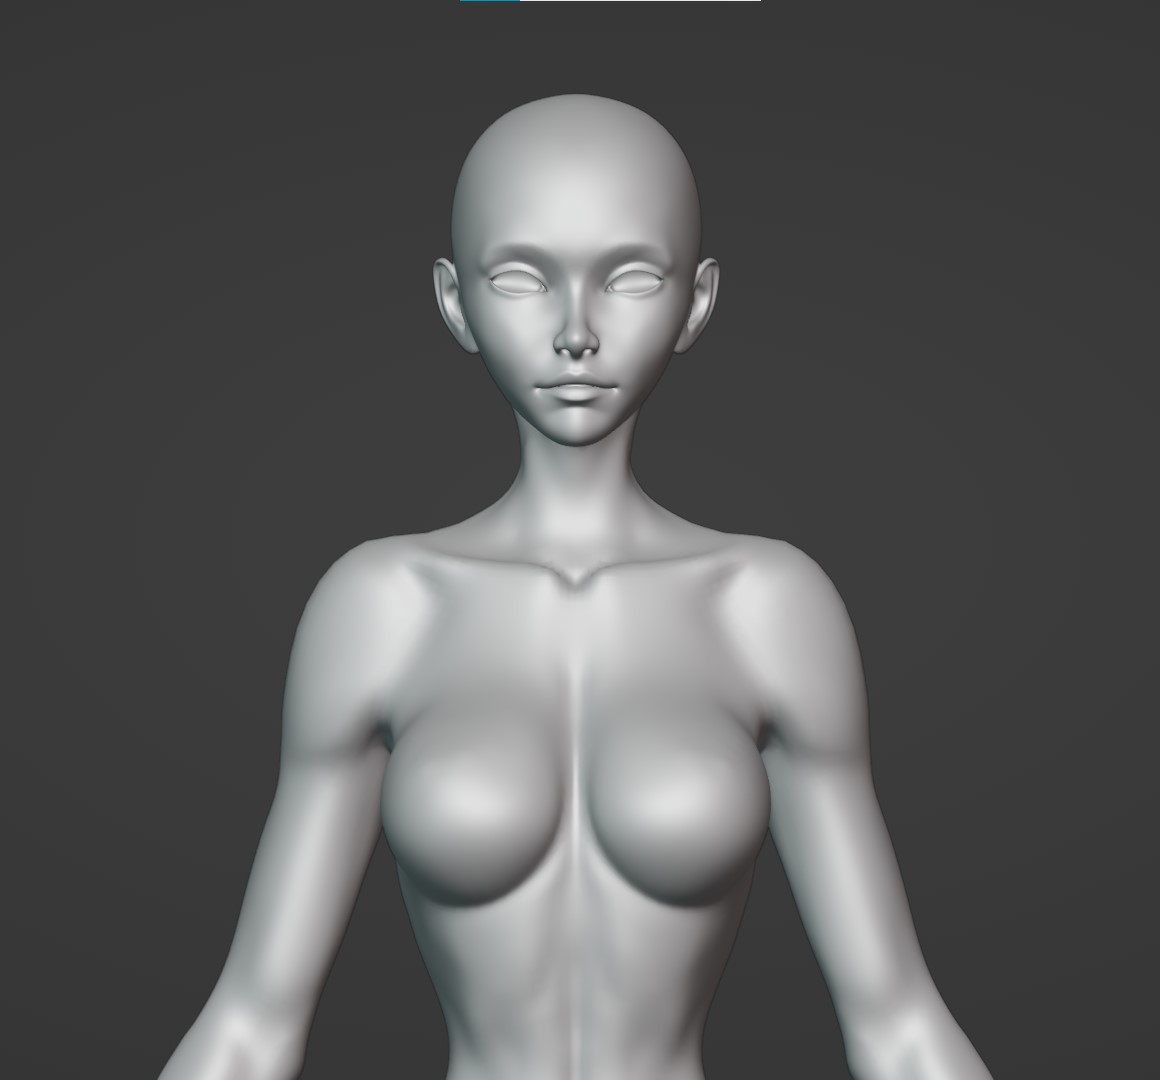
I had already figured out the camera angle so I posed carefully with the final silhouette in mind. All this while, I was constantly looking at 2D sketches and forms to get the shapes right.
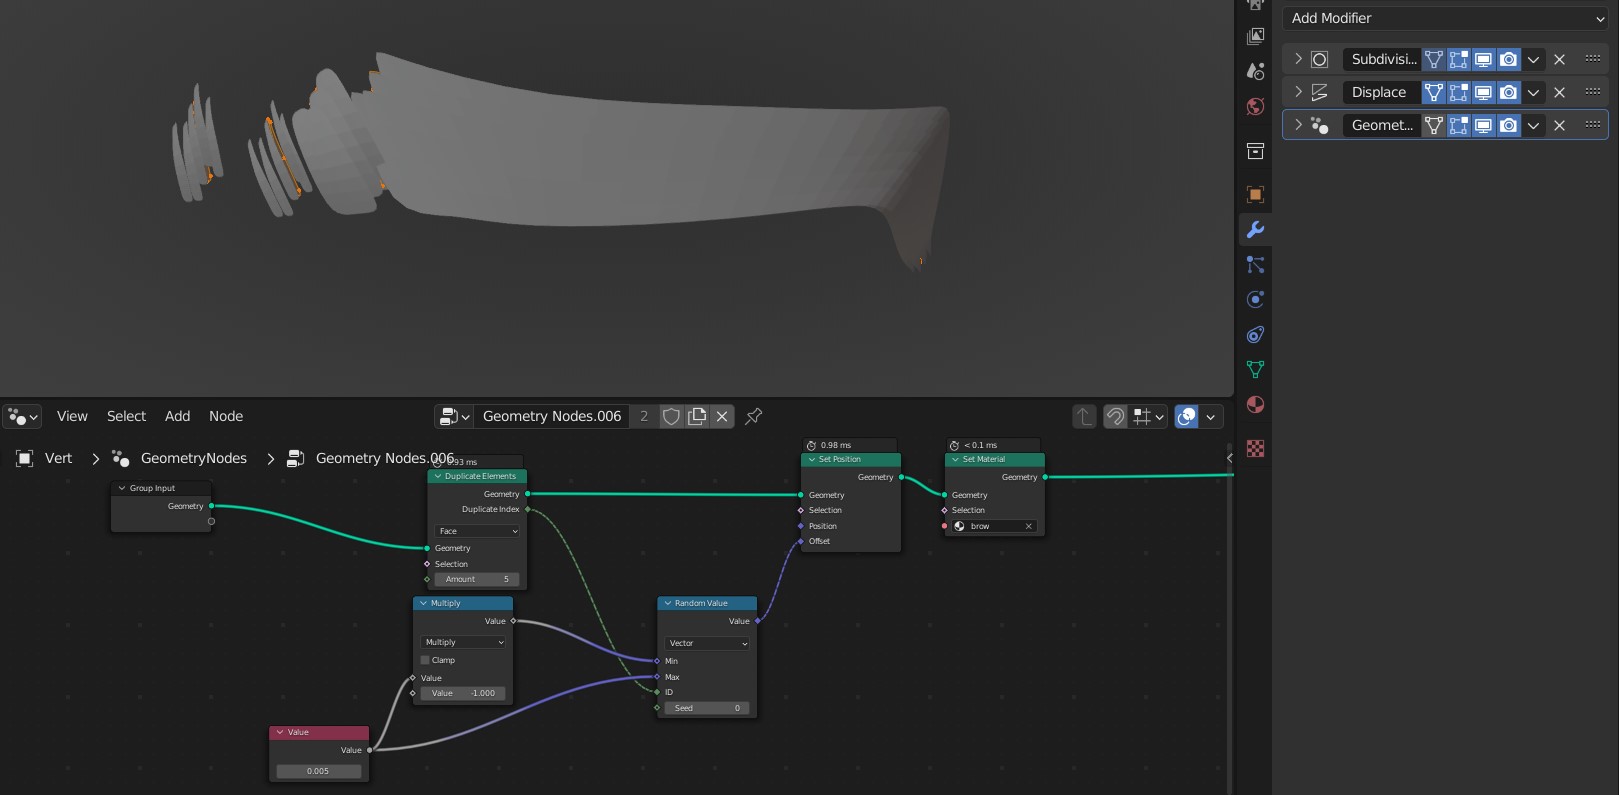
I modeled some simple eyebrows, then duplicated and moved them using geometry nodes to mimic brushstrokes.
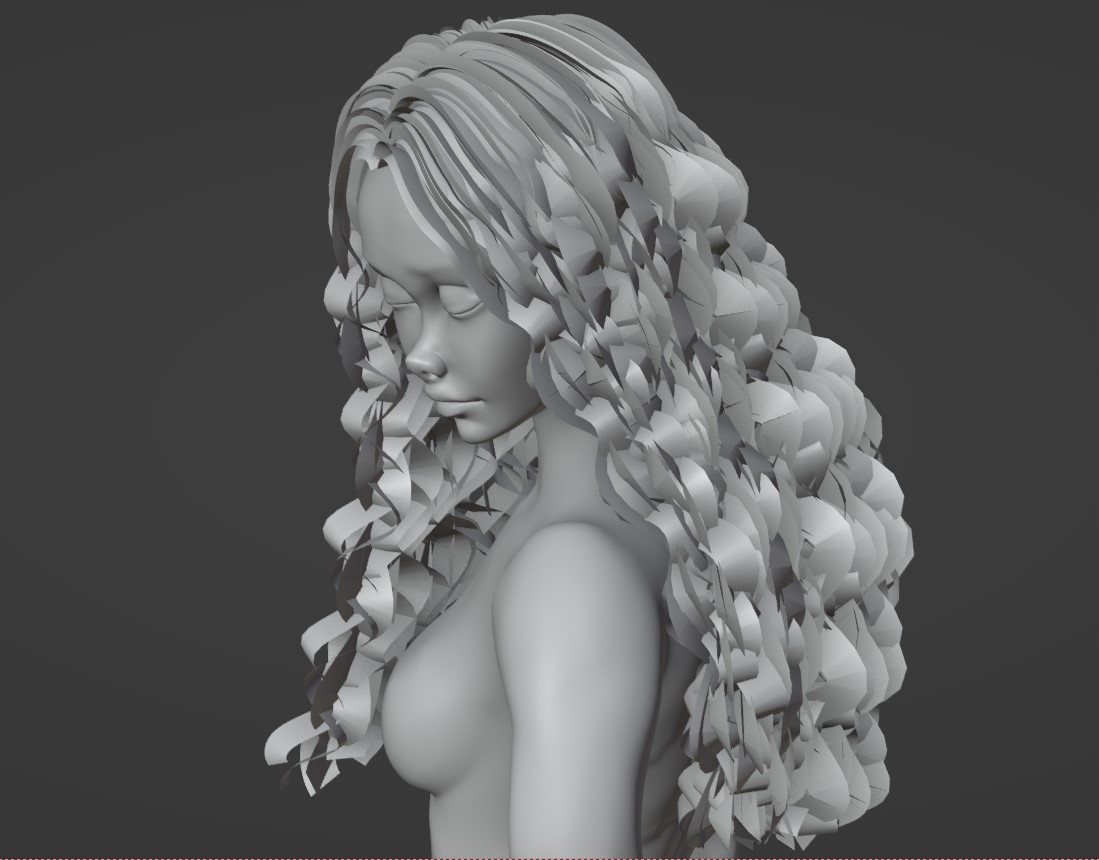
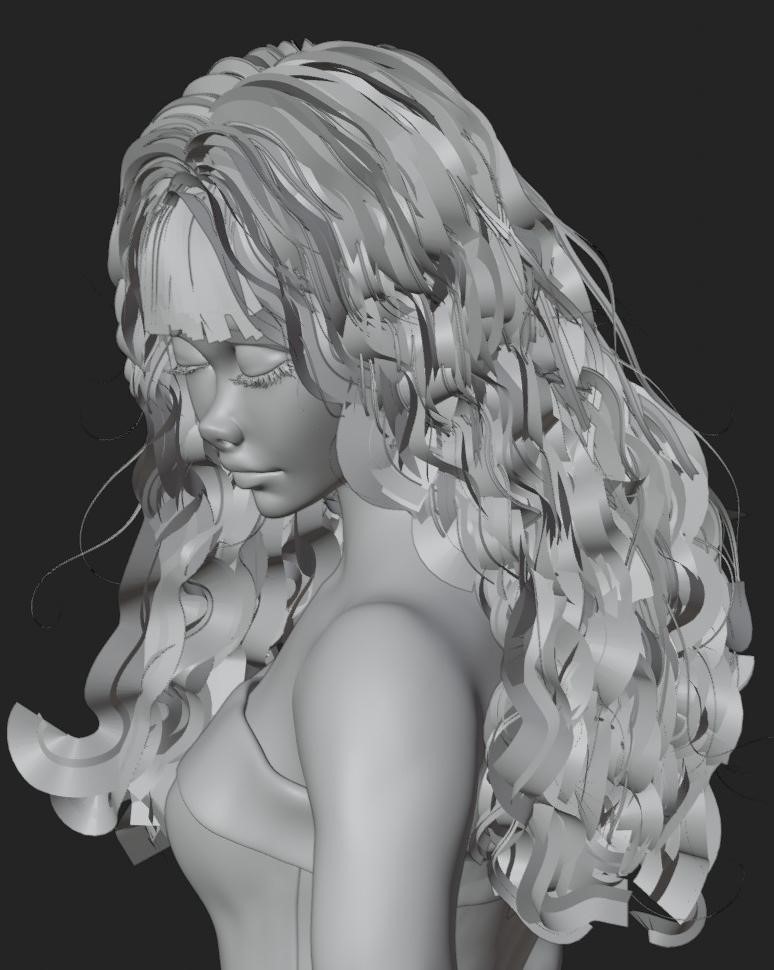
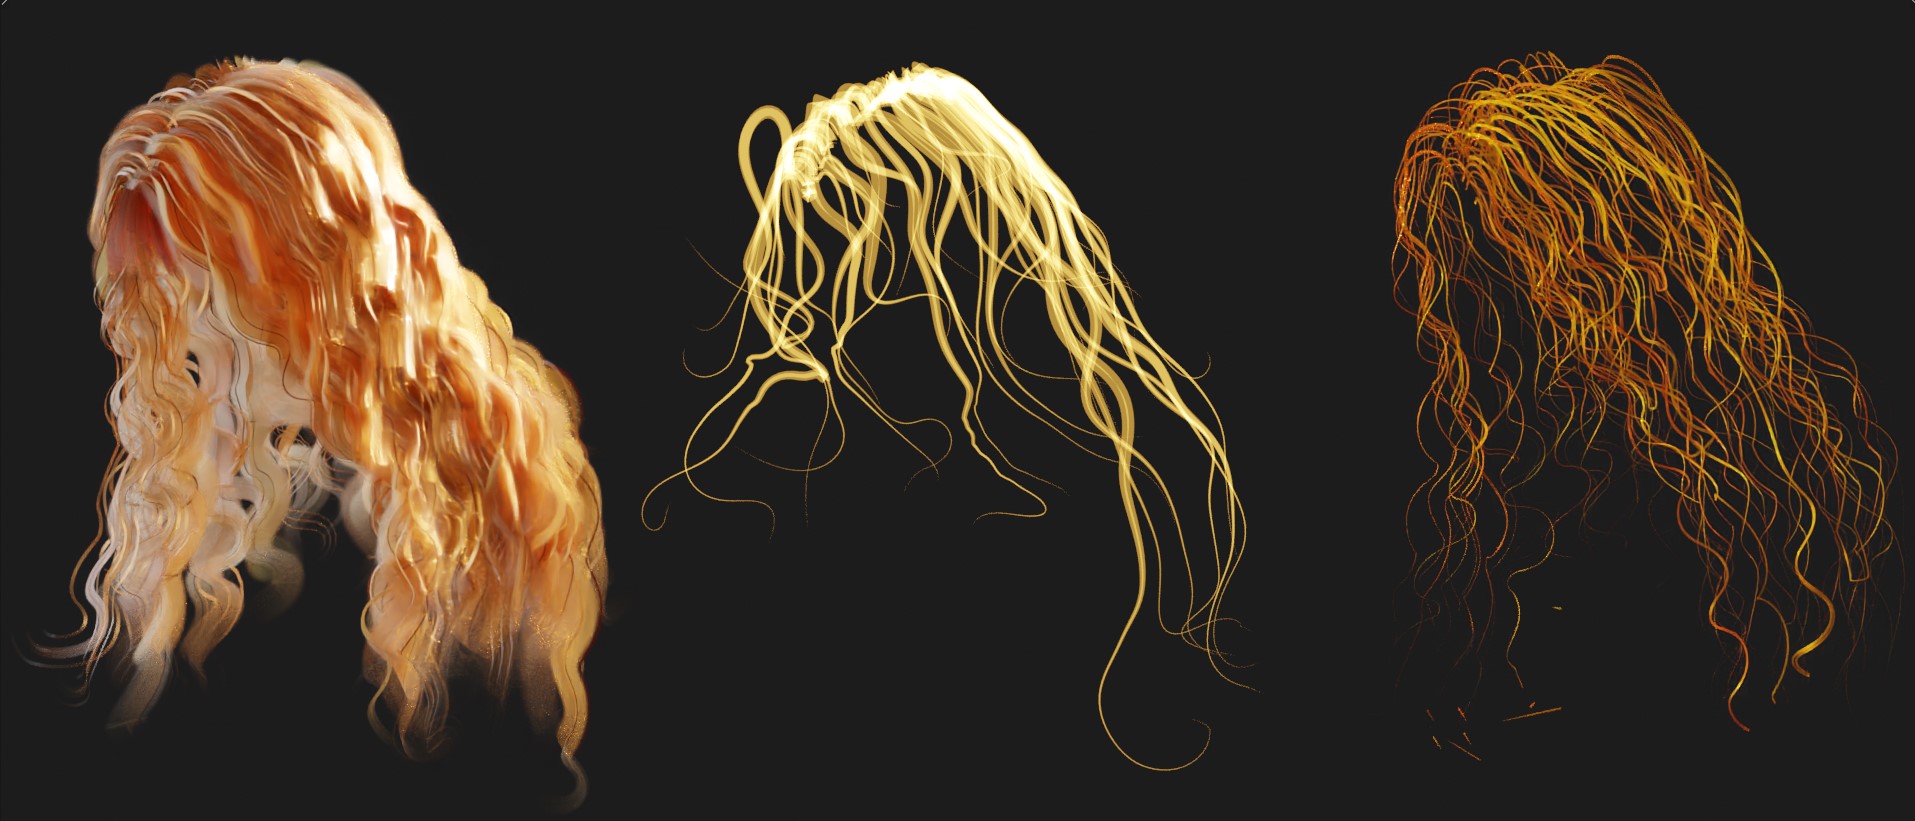
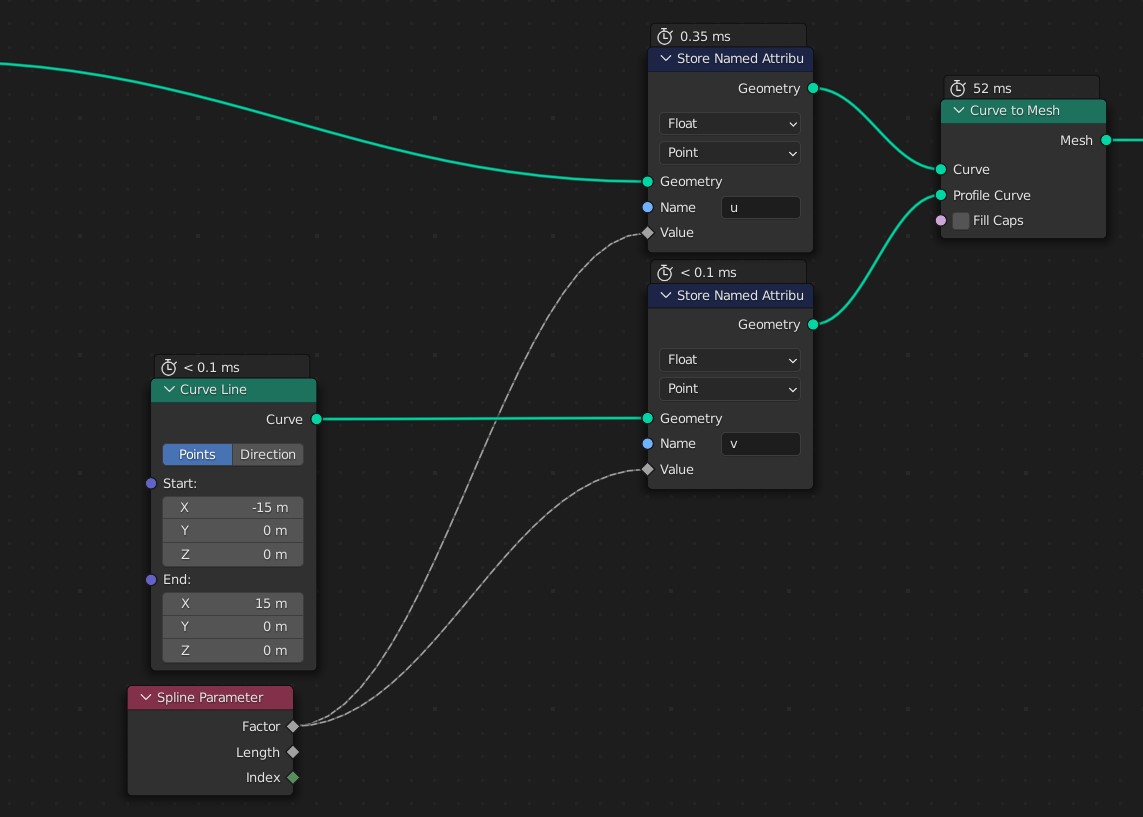
HAIR
Now coming to the fun part which is, of course, the hair. The hair was modeled using a mix of geometry nodes and the new under-development hair-grooming system. To this day, I have never been able to understand traditional particle grooming. If you are anything like me, you will find this particular method to be more intuitive and way less frustrating to use.
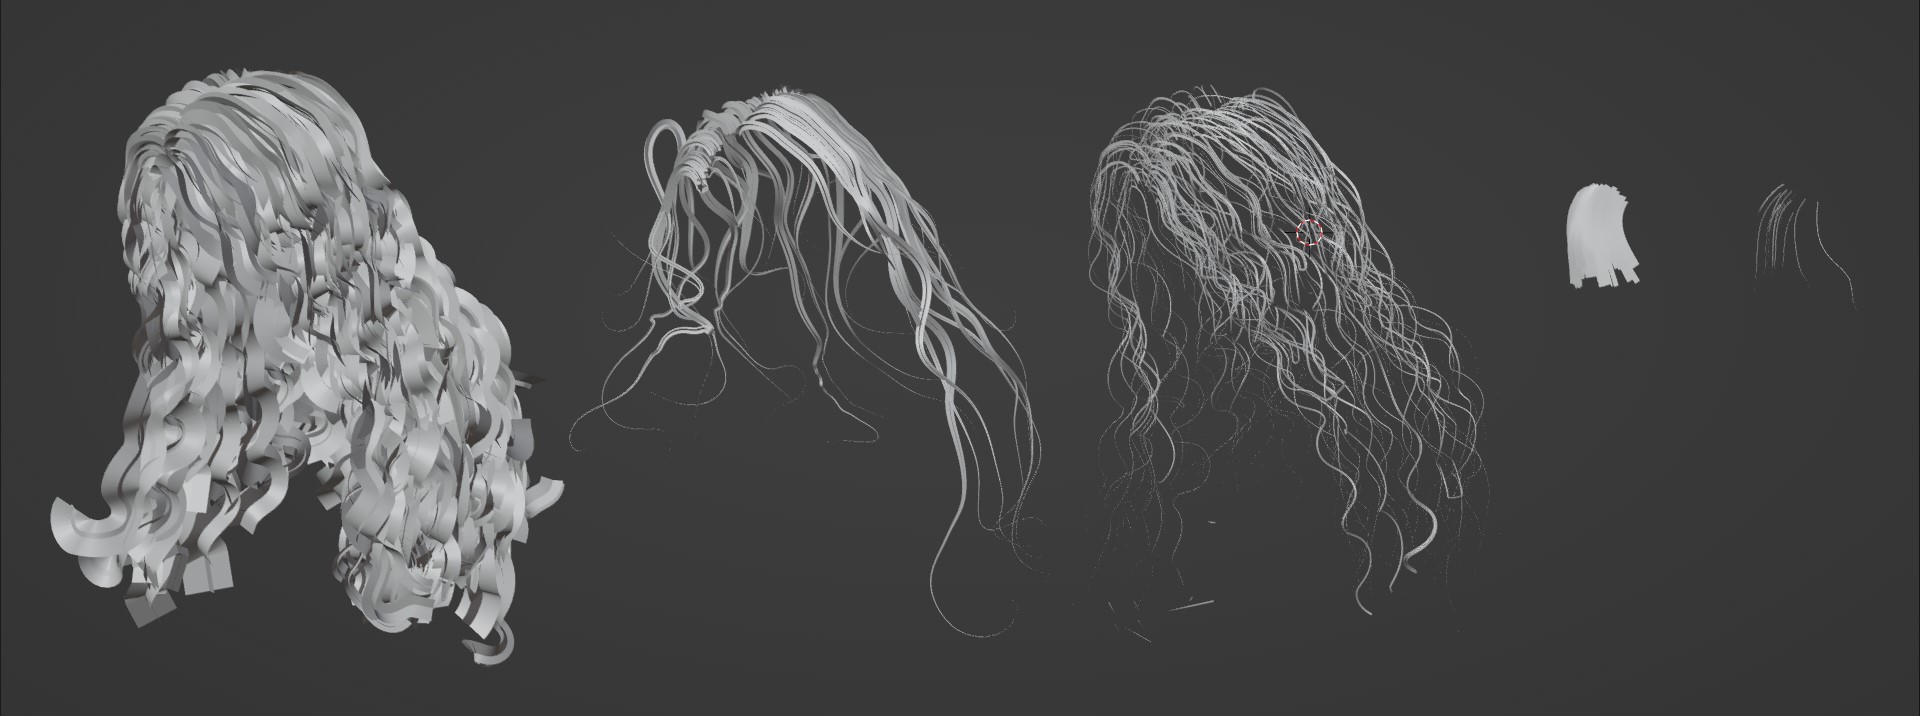
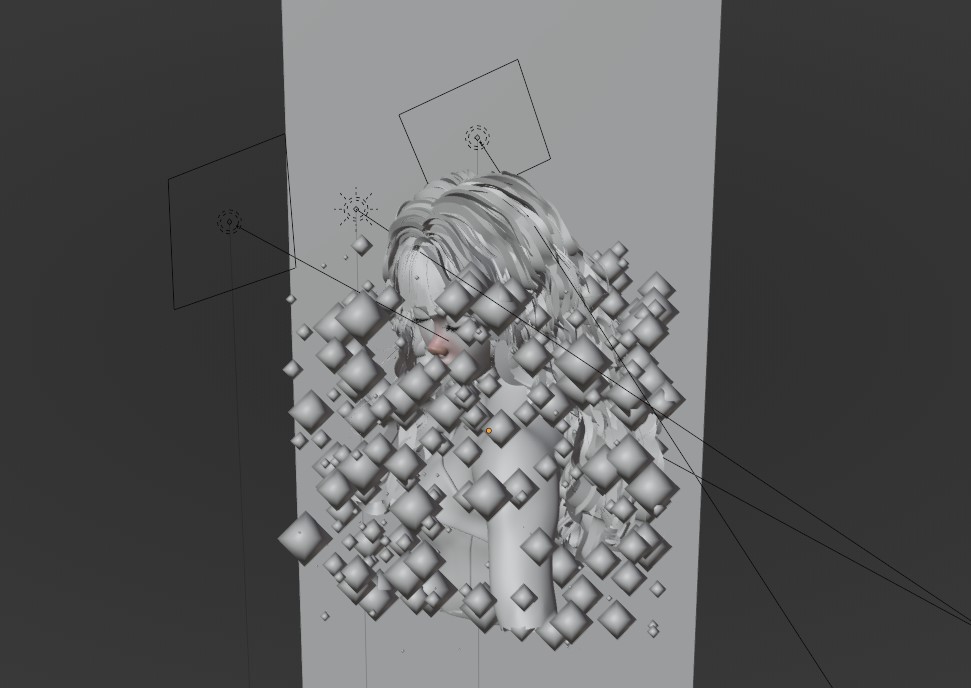
The hair consists of 5 objects:
- Main hair bulk
- Main hair secondary detail
- Main hair fine detail
- Bangs bulk
- Bangs fine detail
Let’s go through an overview of the steps involved:
- Creating the guides: This can be done in many ways. The method I find the fastest is to just poly-model and delete the perpendicular edges.
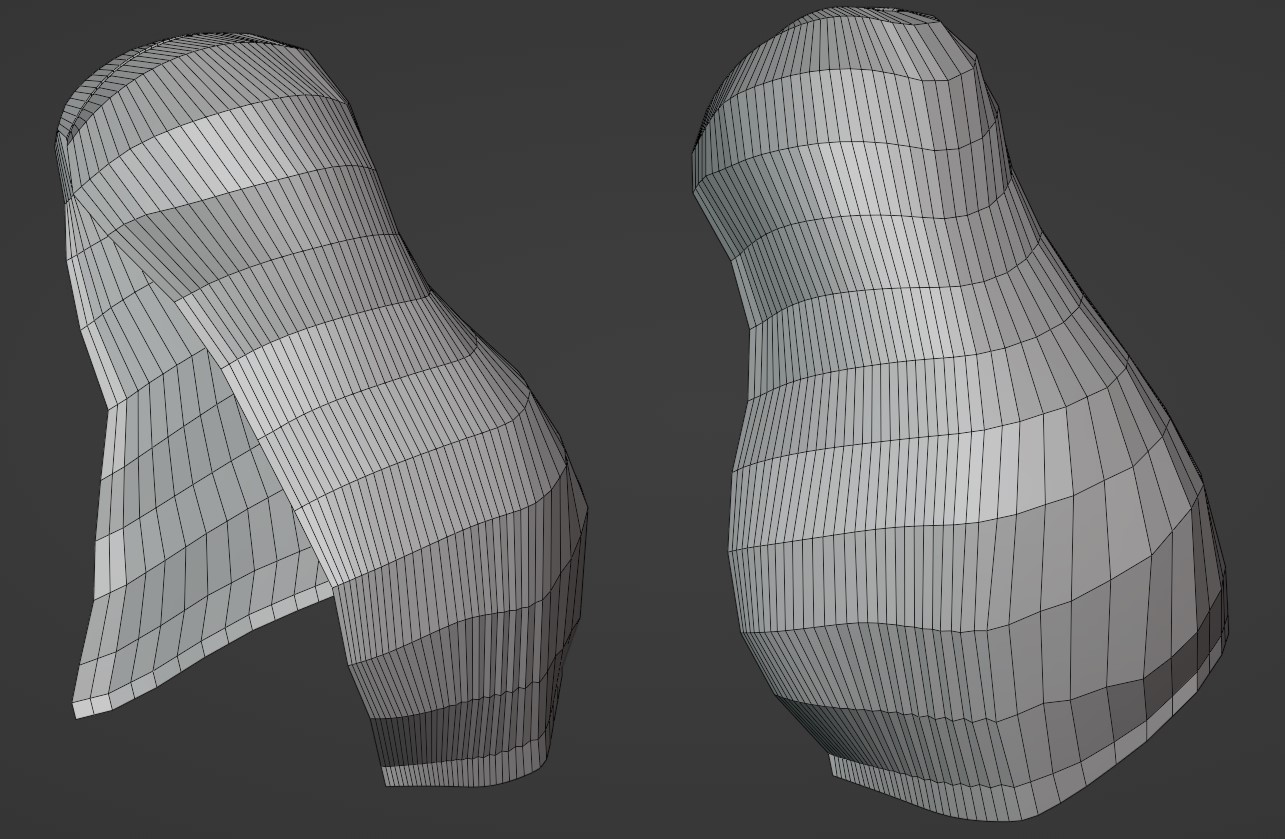
- Convert the mesh into curves and randomize the spline positions to create simple children.
- Displace the curves along the normal direction using math sine or a wave texture. You can also displace at an axis perpendicular to normal and tangent to create curls instead of waves. Make sure to add random offsets, tilt, and scale for different strands.

- Convert the curves back into mesh. I am using a curve line as a profile in this case.
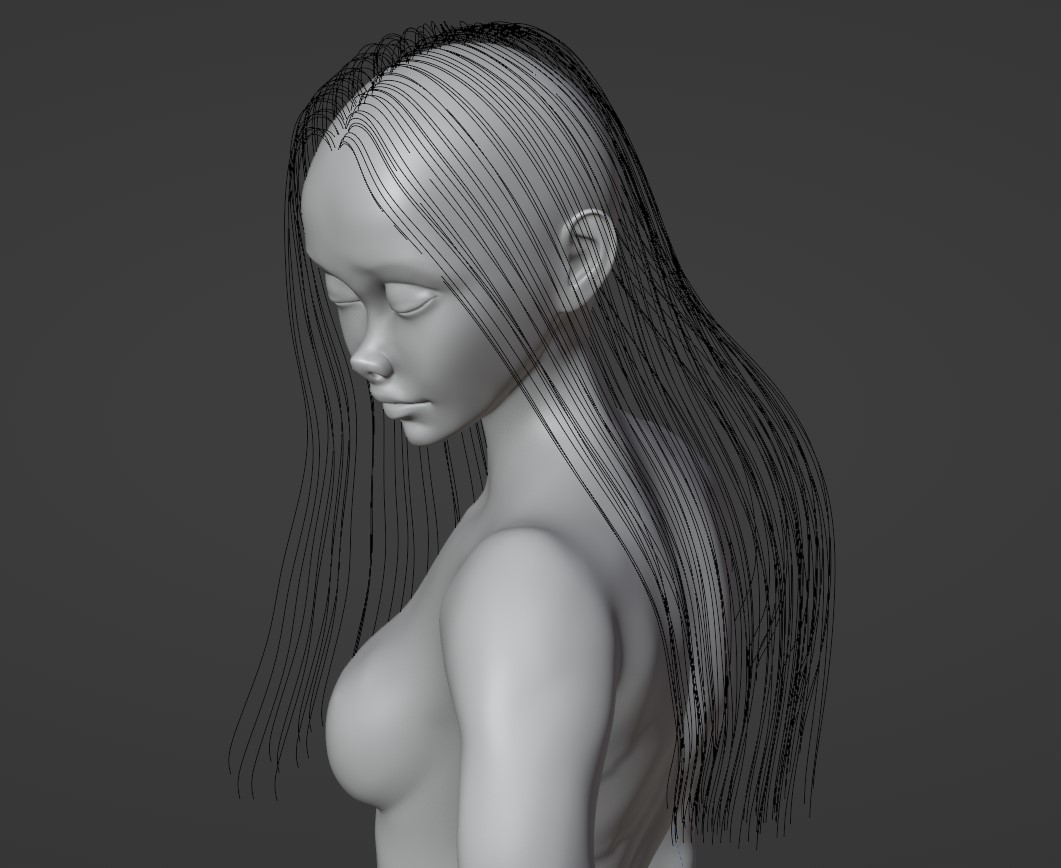
And that’s basically the bulk done! You can convert the curves to the currently-under-development hair object between steps 2 and 3. After this, you can manually edit and groom the hair. I recorded a video of creating the first layer from scratch. Set the playback speed to 0.5x for real time.
You can duplicate this to create the secondary and fine detail layers. The secondary hair has more thoughtful grooming, while the fine layer contains more strands. Have a look at this time lapse too:
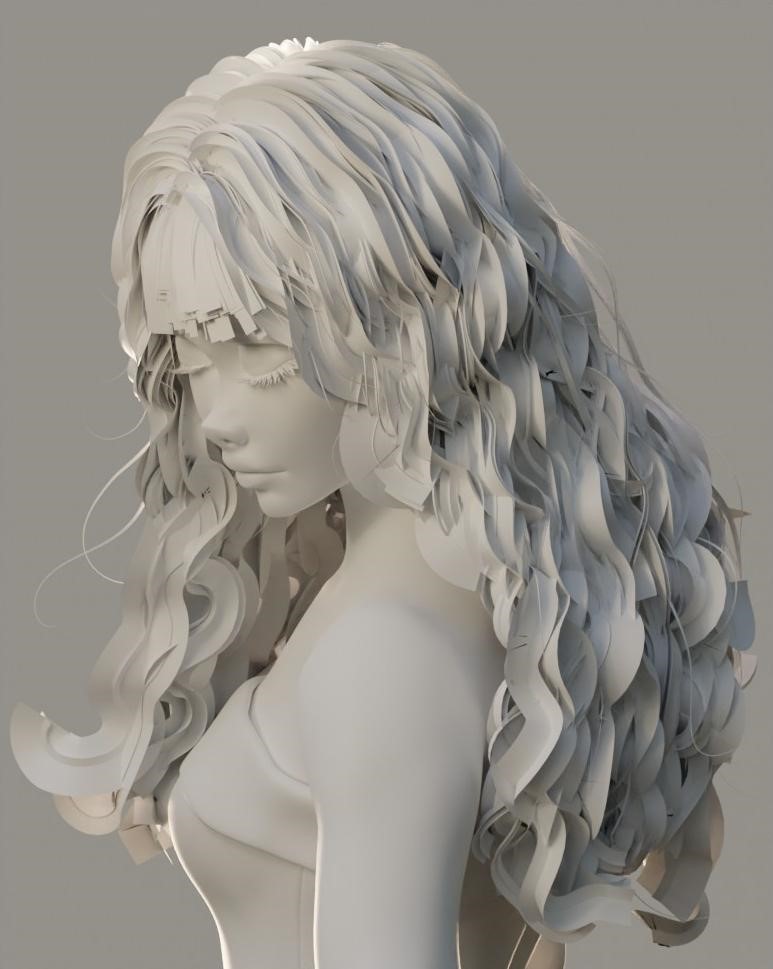
Here is the final model:
SHADING
I wanted the hair to be the main focus so I kept the skin and cloth shaders quite simple. The skin made use of the inbuilt toon shader in Blender. I wanted a bright ground/bounce light but I wasn’t actually able to position a light below the face. In the end, I decided to fake it in the shader itself. I used fresnel for the contour and outlines.
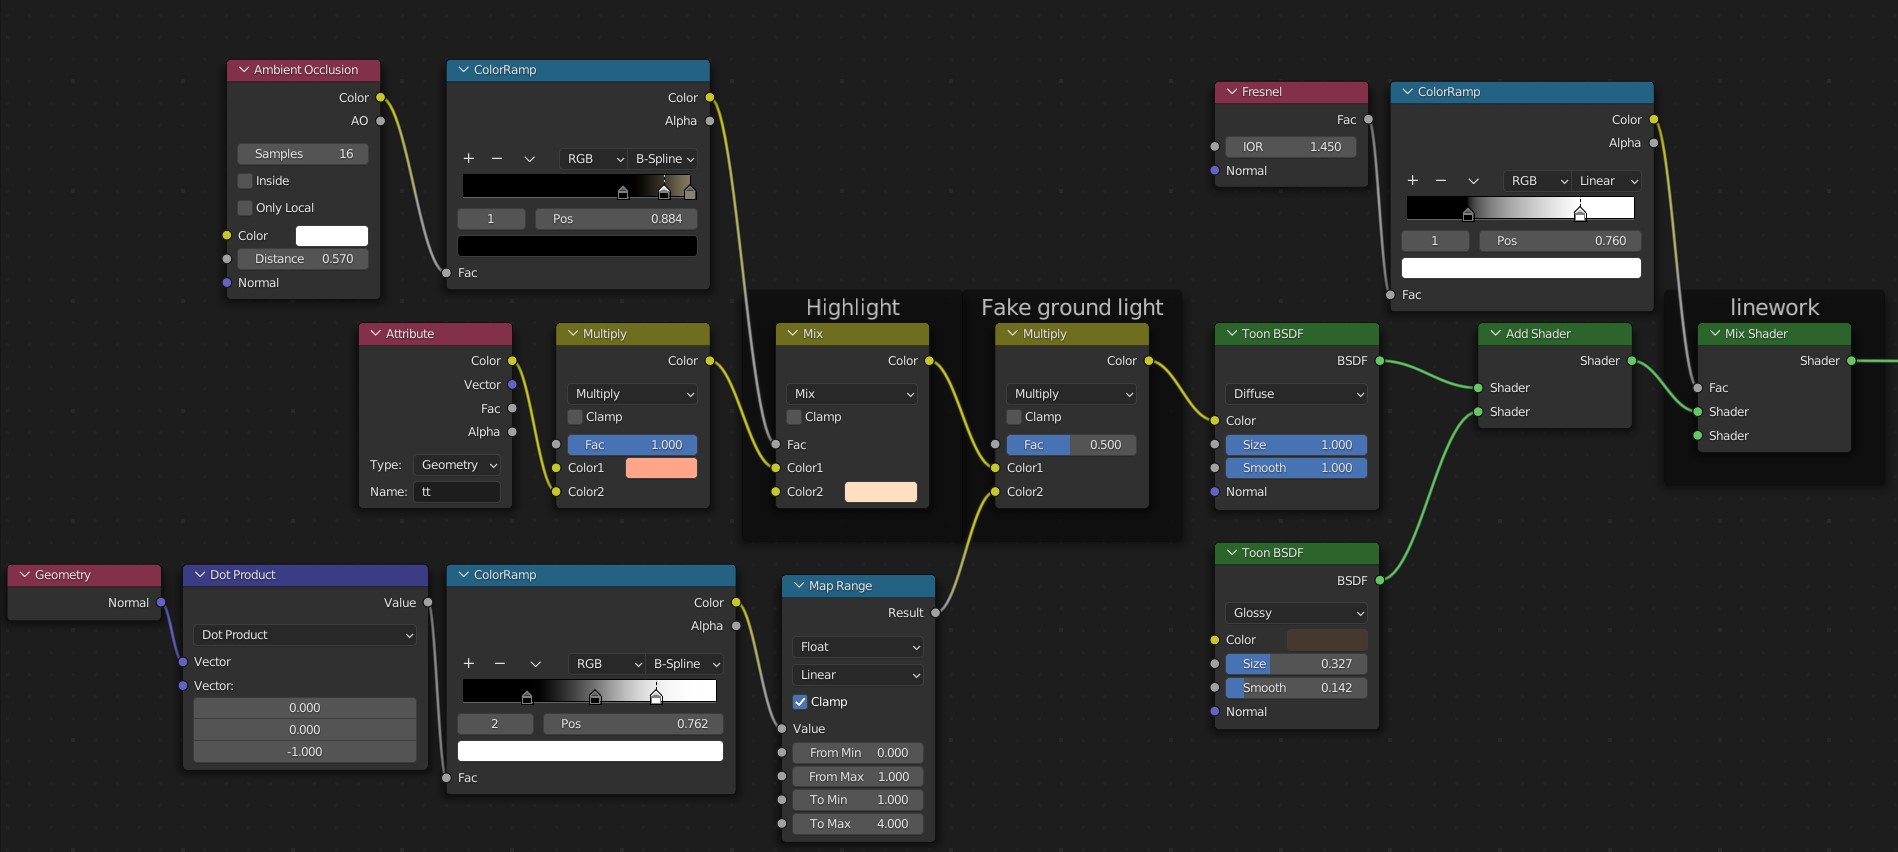
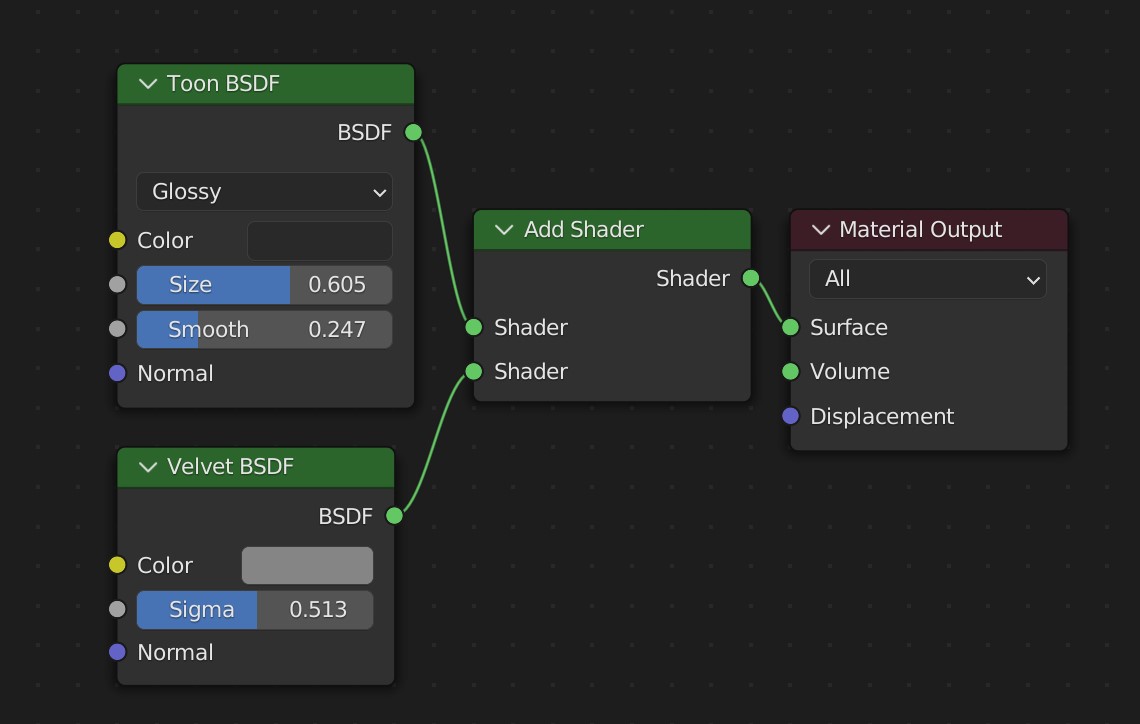
The dress is just an addition of toon and velvet BSDF.
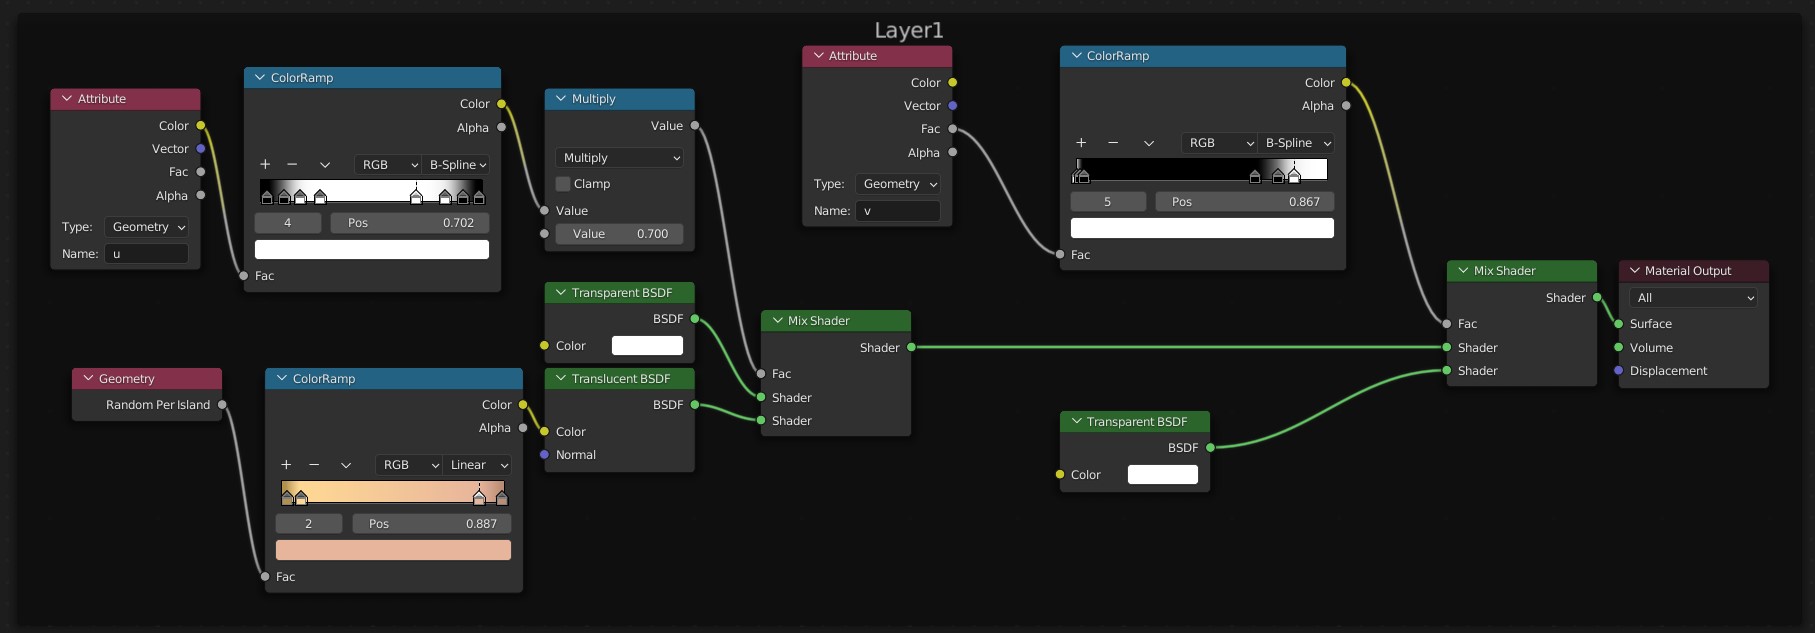
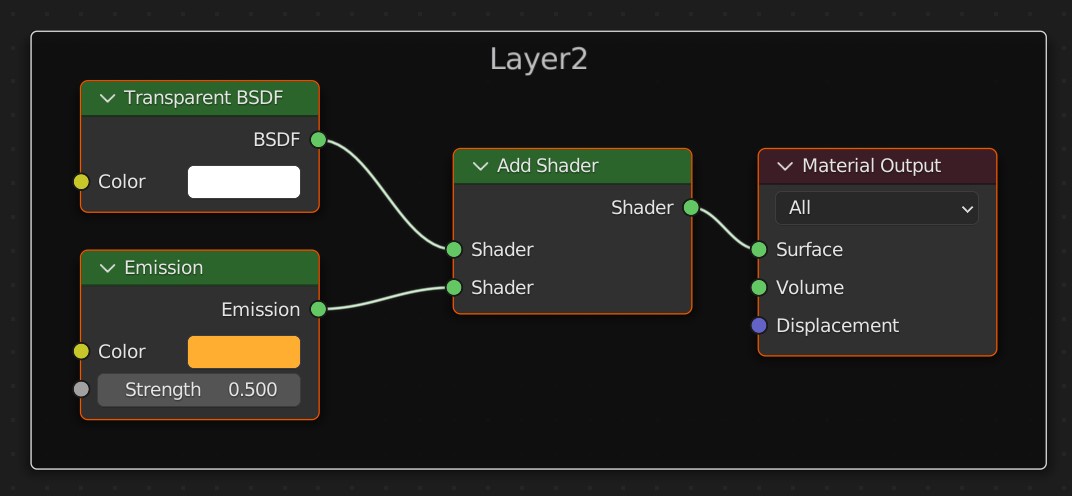
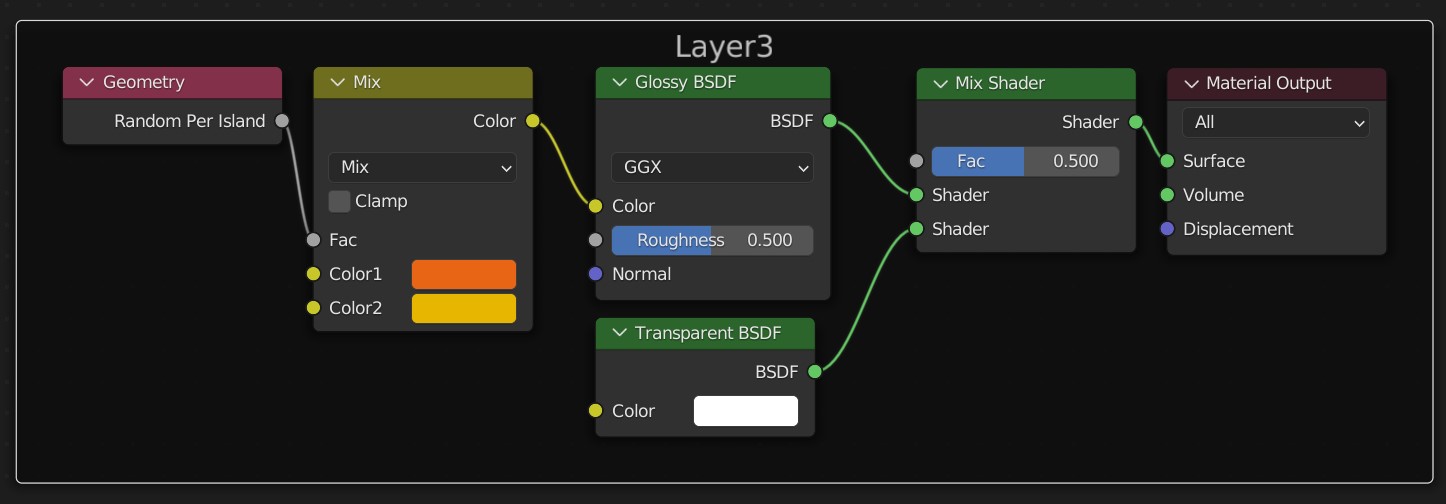
Each of the three hair layers has its own material:
The base layer makes use of a translucent BSDF with fading at the ends.
The secondary layer has the effect of getting brighter every time the mesh overlaps.
The final layer is just a glossy BSDF with transparency.
Traditional curve modeling automatically creates a UV Map for the shading. When using geometry nodes to create geometry, you need to manually “store” the texture coordinates. This will be used for mapping images, gradients, etc. during texturing.
LIGHTING
I only added a single key light as I tried to keep the scene as simple as possible. Other than that, one of the most important parts was an extremely bright backlight. I also added another area light over the back of the hair. The bokeh effects in the final render were not composited but were an actual point cloud in the scene.
The background is an image on a plane. The camera had a long focal length which was supposed to give the final image an “elegant” look.
For the final render, it is important to increase the number of transparency passes to avoid black artifacts in the hair.

Post-processing
All compositing was done in Blender with some overpaint in Krita. I tweaked the colors to match the mood I was going for. Finally, I added some glare and more linework using the sharpen filter in Blender.
AFTER THOUGHTS
Thanks for reading my article!
I hope you liked my art and learned something new!
About the Artist
Abir Dutta better known in the community as Xeofrios. He is currently a high school student, exploring Blender and procedural art during his free time.


