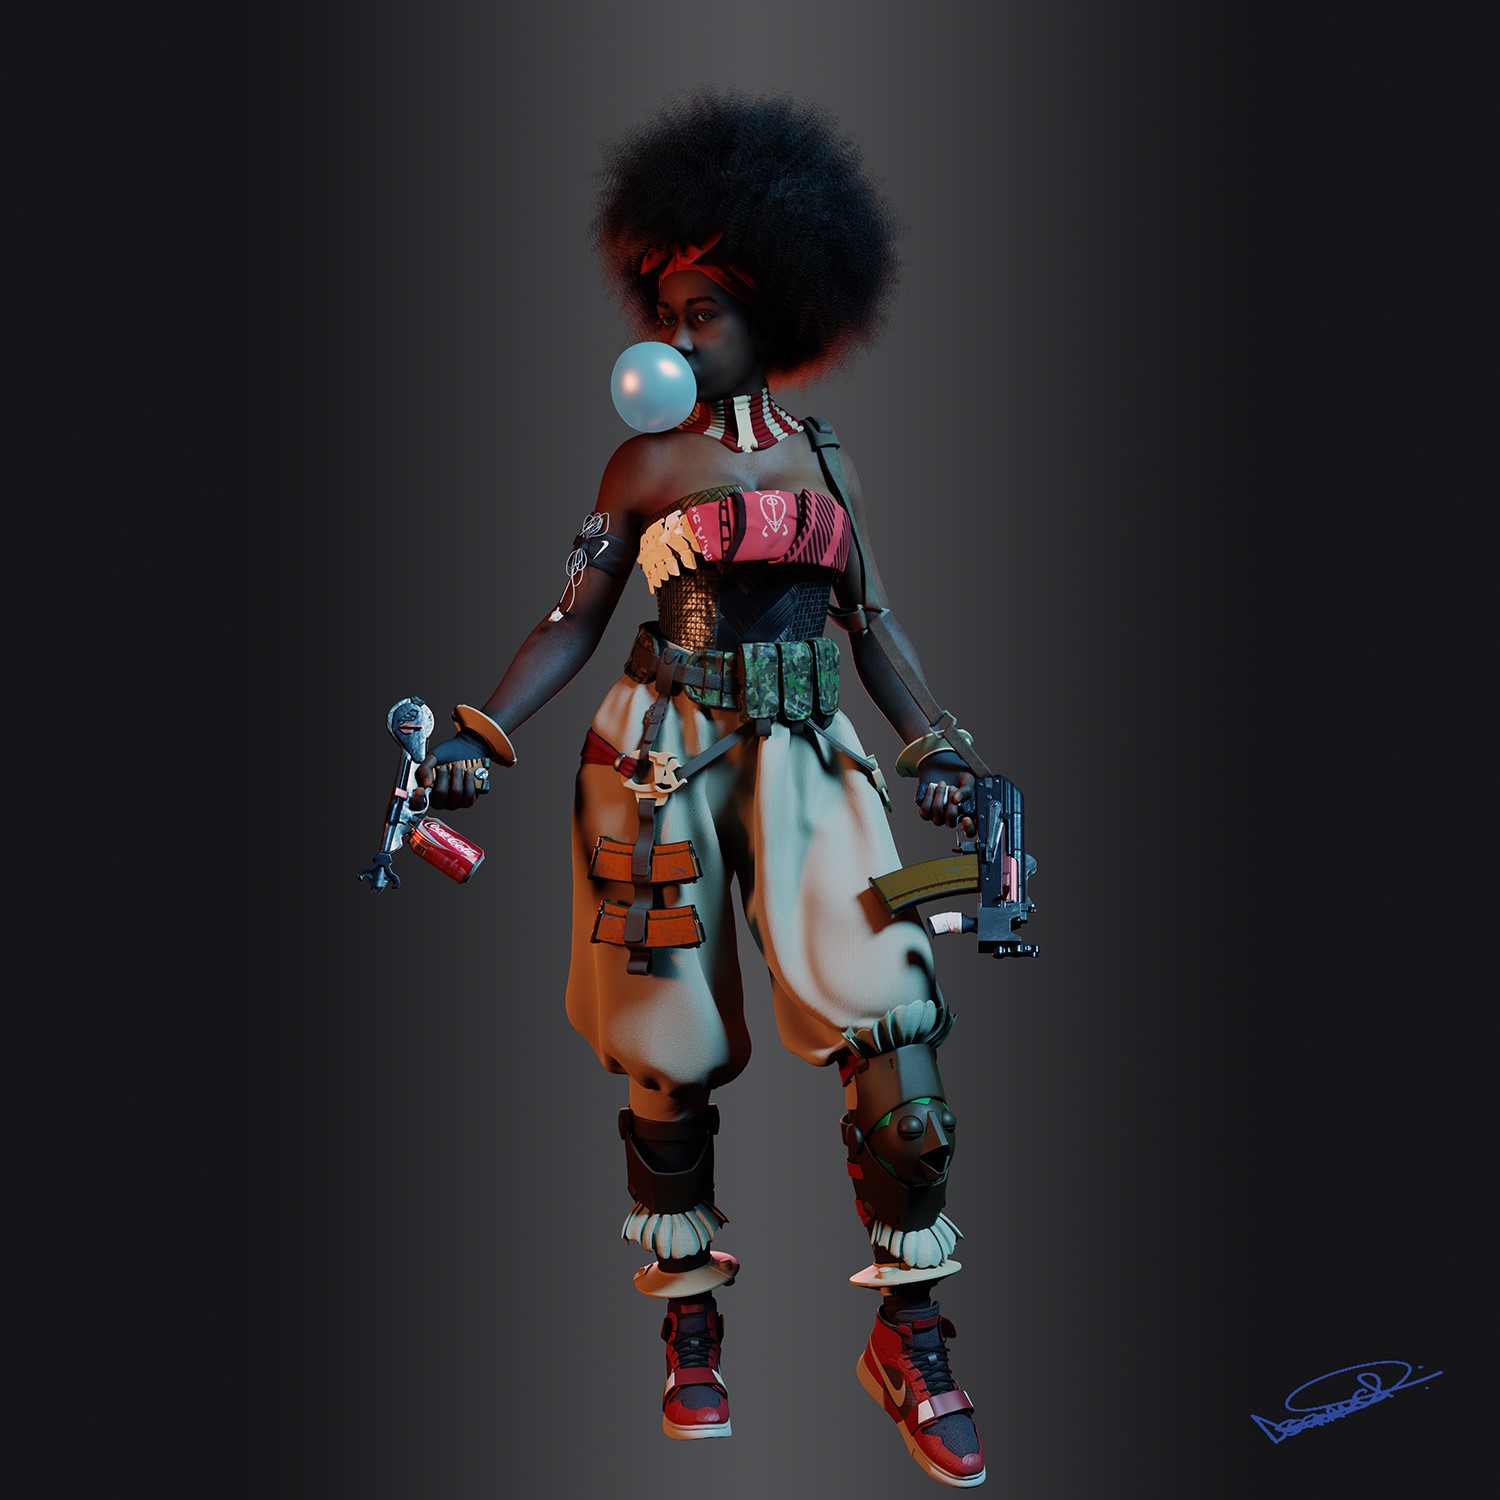
Behind the Scenes: Post-Apocalyptic African Female Warrior
Introduction
Hey humans, my name is Isaac (I am also a human in case you are wondering.) I am a freelance 3D character artist living in Dubai, UAE. For some reason, other humans pay me to make digital characters which I find cool! How do you make these characters? You might ask. Well, it is all thanks to Blender and a couple of other 3D software out there. I could talk about the whole 3D character creation process but that would take all day. Instead, I will take you through the process of creating one of my older pieces which is on the Blender Nation website.
Inspiration
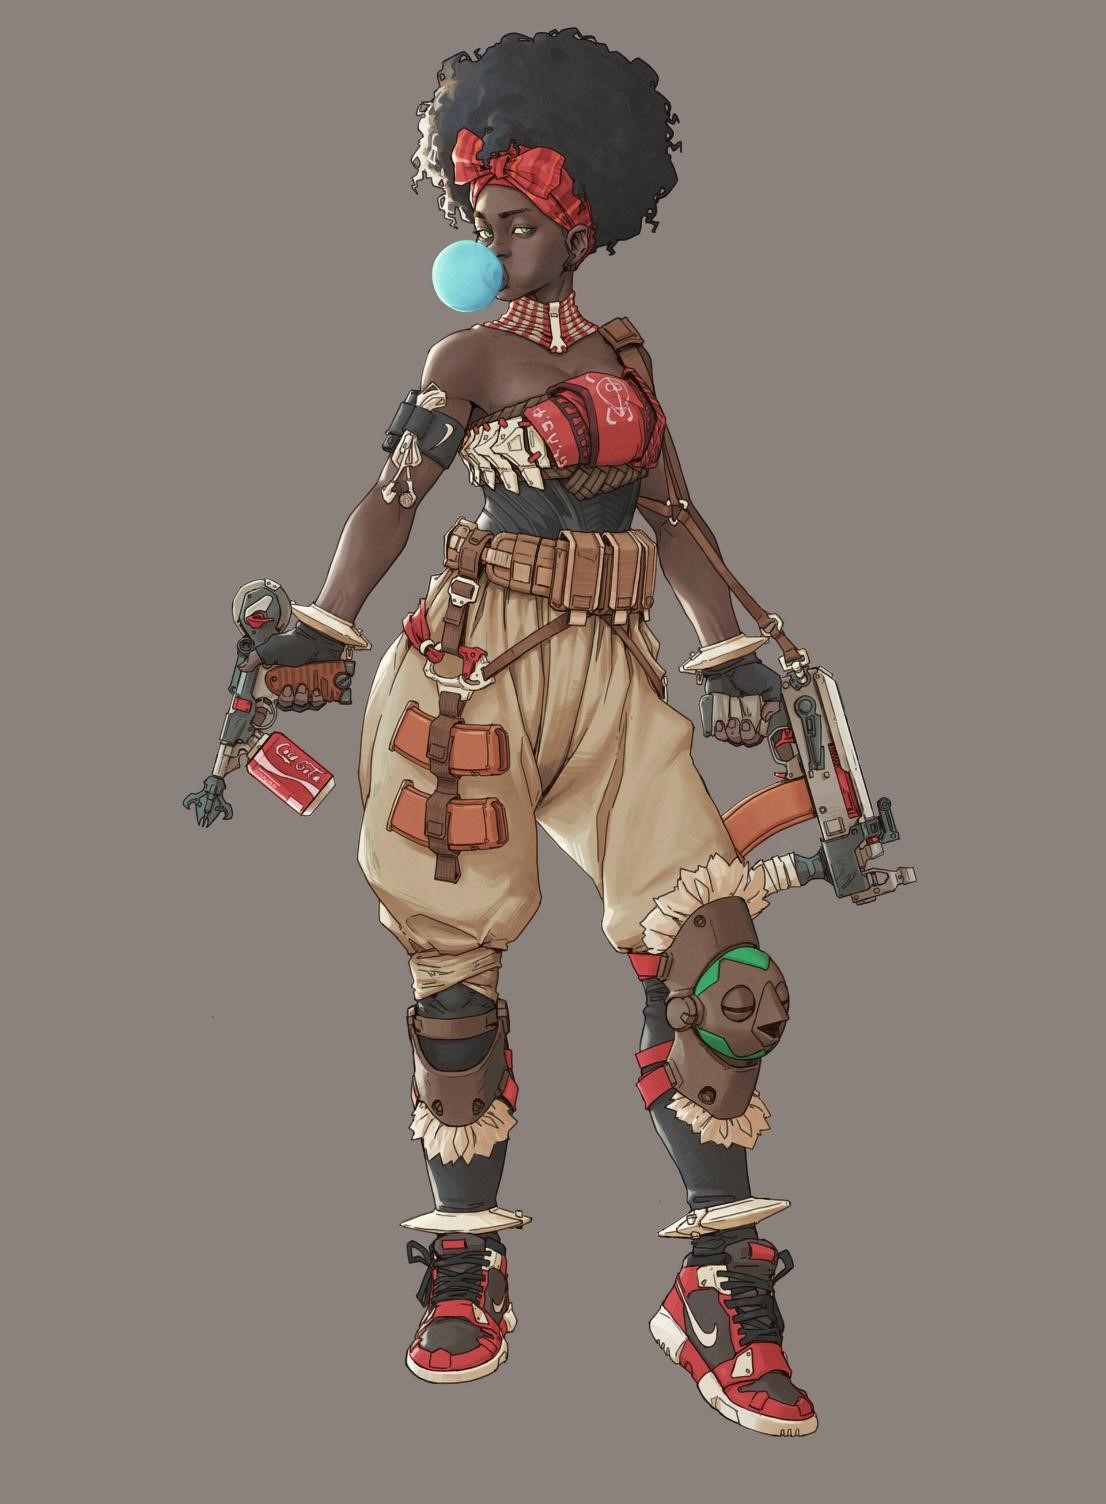
Inspiration is derived from a multitude of sources, ranging from platforms like Instagram, ArtStation, Google searches, experiences, movies, and even dreams. Sources are limitless. For this particular character, I came across a concept art by the artist Seonhyeok Jeon on Pinterest. For more details on the concept, check out the his ArtStation profile.
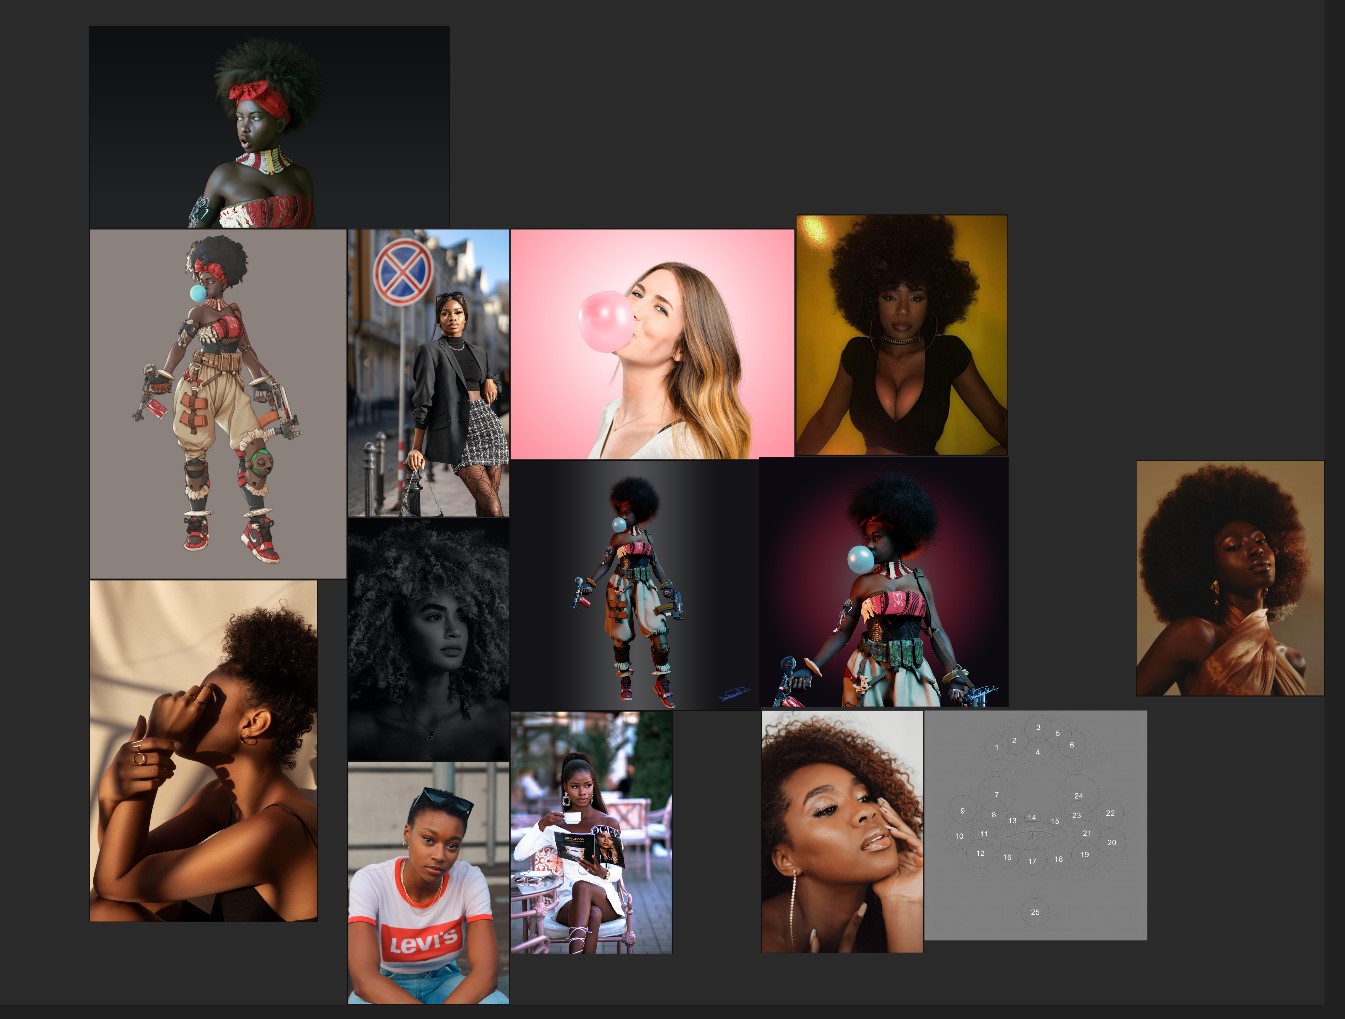
I also gathered more images online as references to help me picture the character in 3D.
Modeling
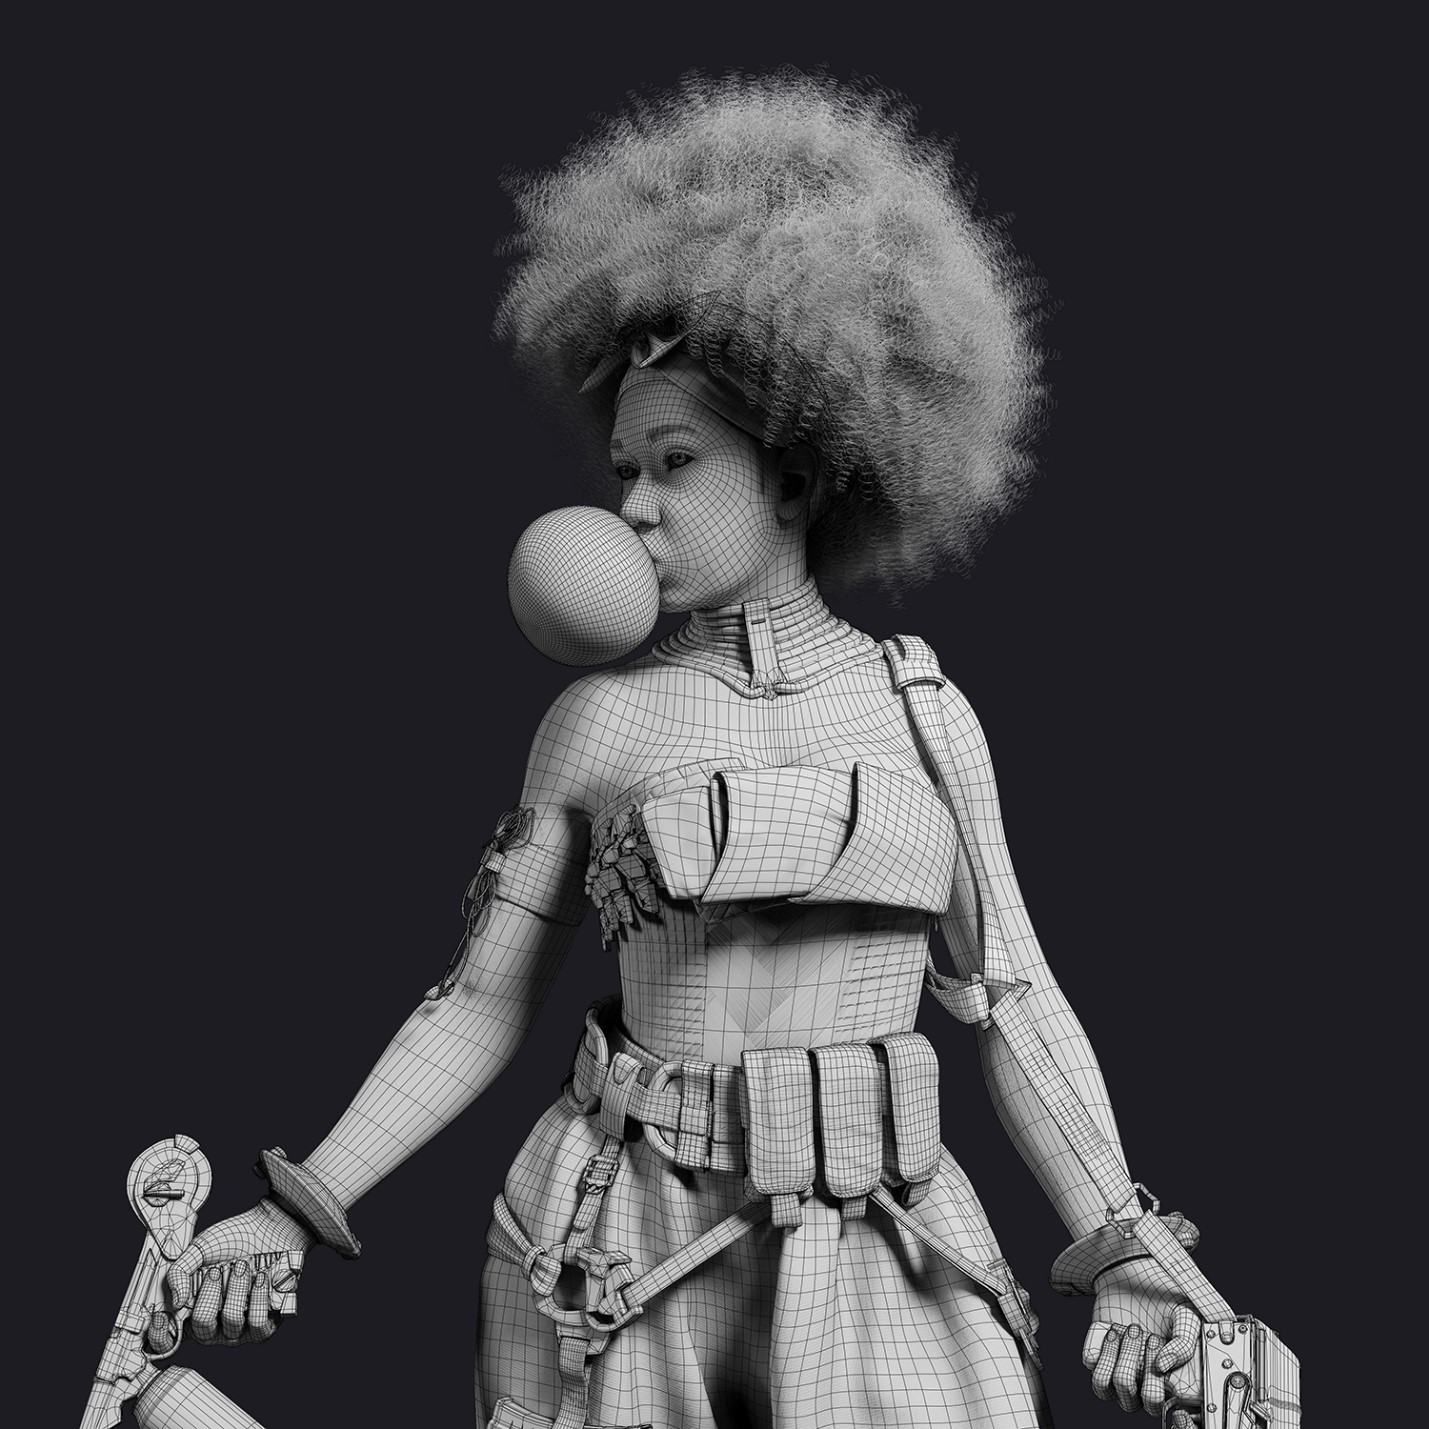
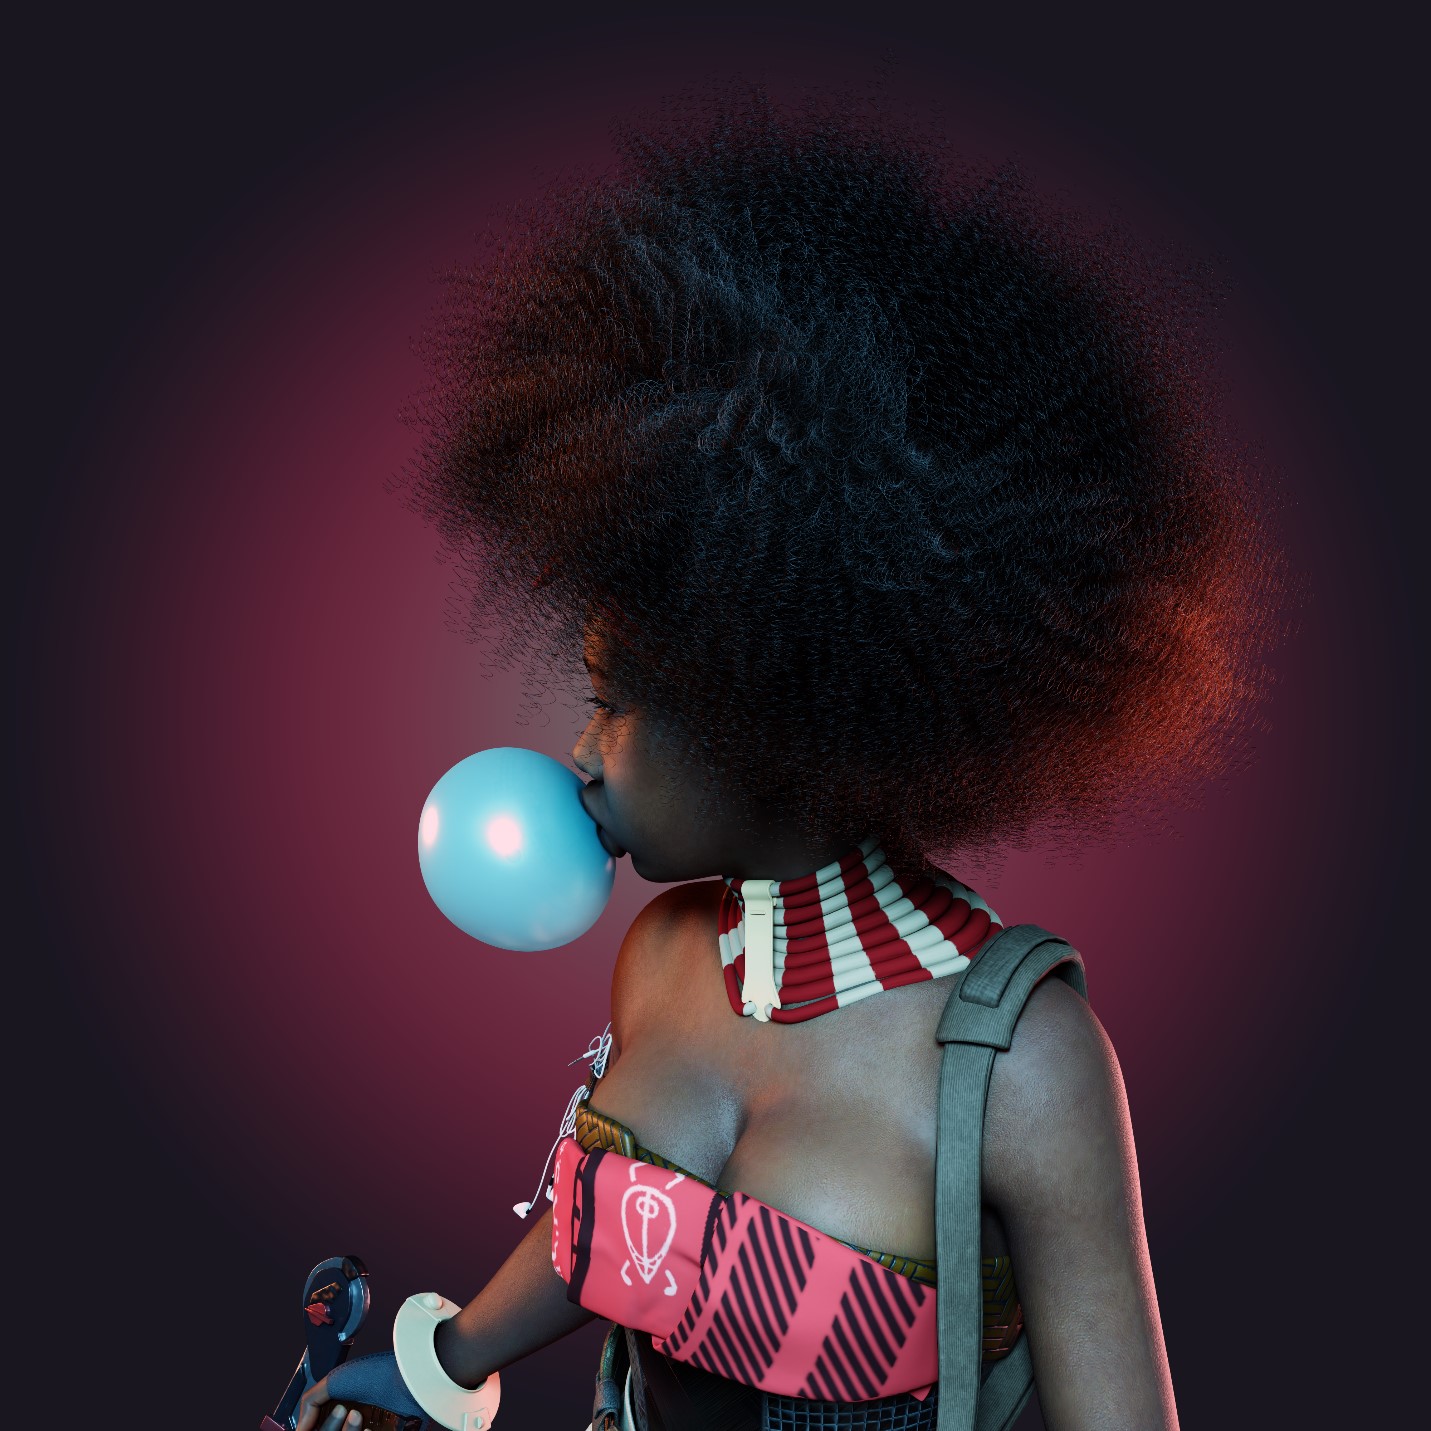
In this process, I started by posing a default Genesis 8 female character from the Daz 3D software so that I couldn’t be bothered to pose afterwards. Using GoZ, I exported the Genesis 8 female base to ZBrush and started sculpting using the references I had gathered. After I deemed the base model somewhat okay, I once again exported it to CLO 3D where I made the clothes.
After that, I worked on retopology and UV’s of the clothes. Making use of the GoB Blender addon, I started working on the assets (guns, shoes, masks, belts etc.), moving back and forth between ZBrush and Blender.
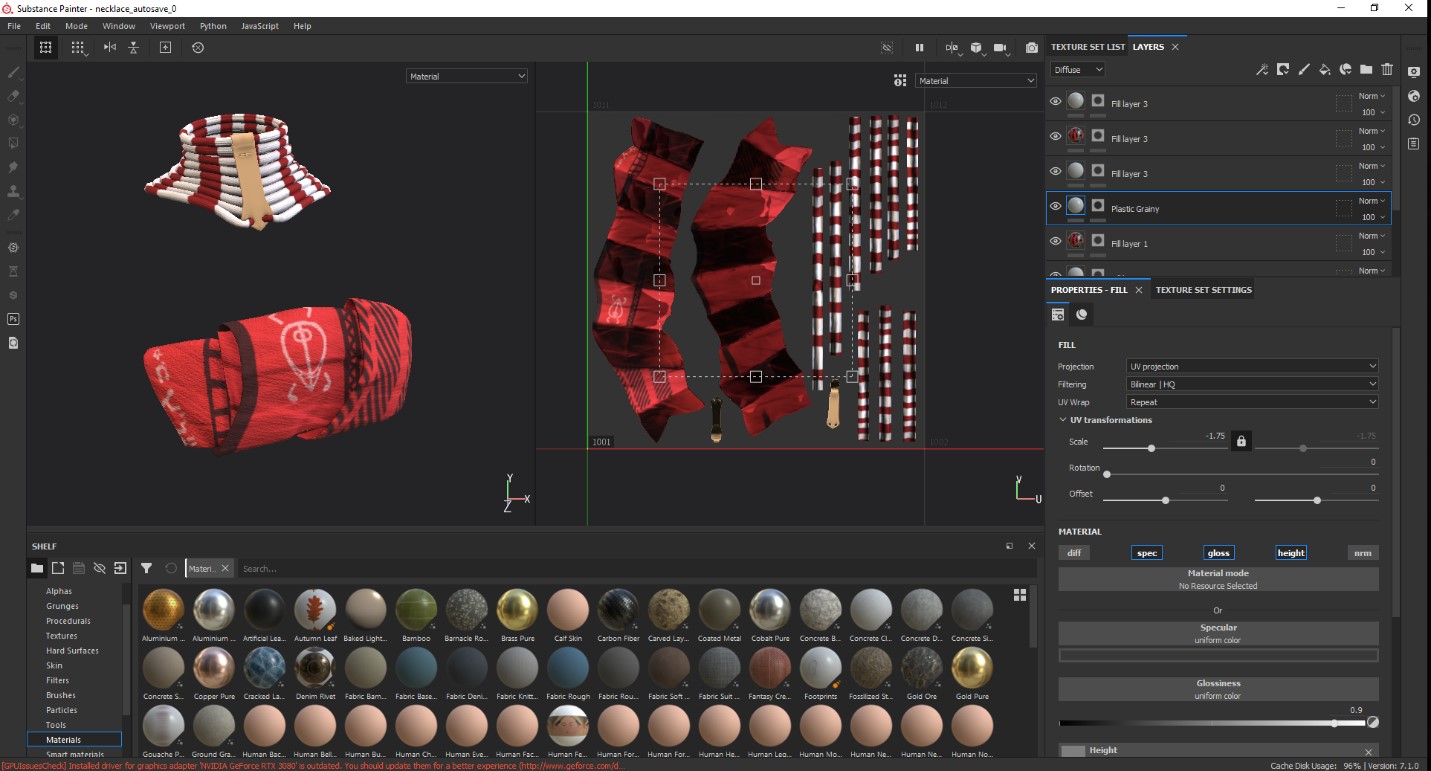
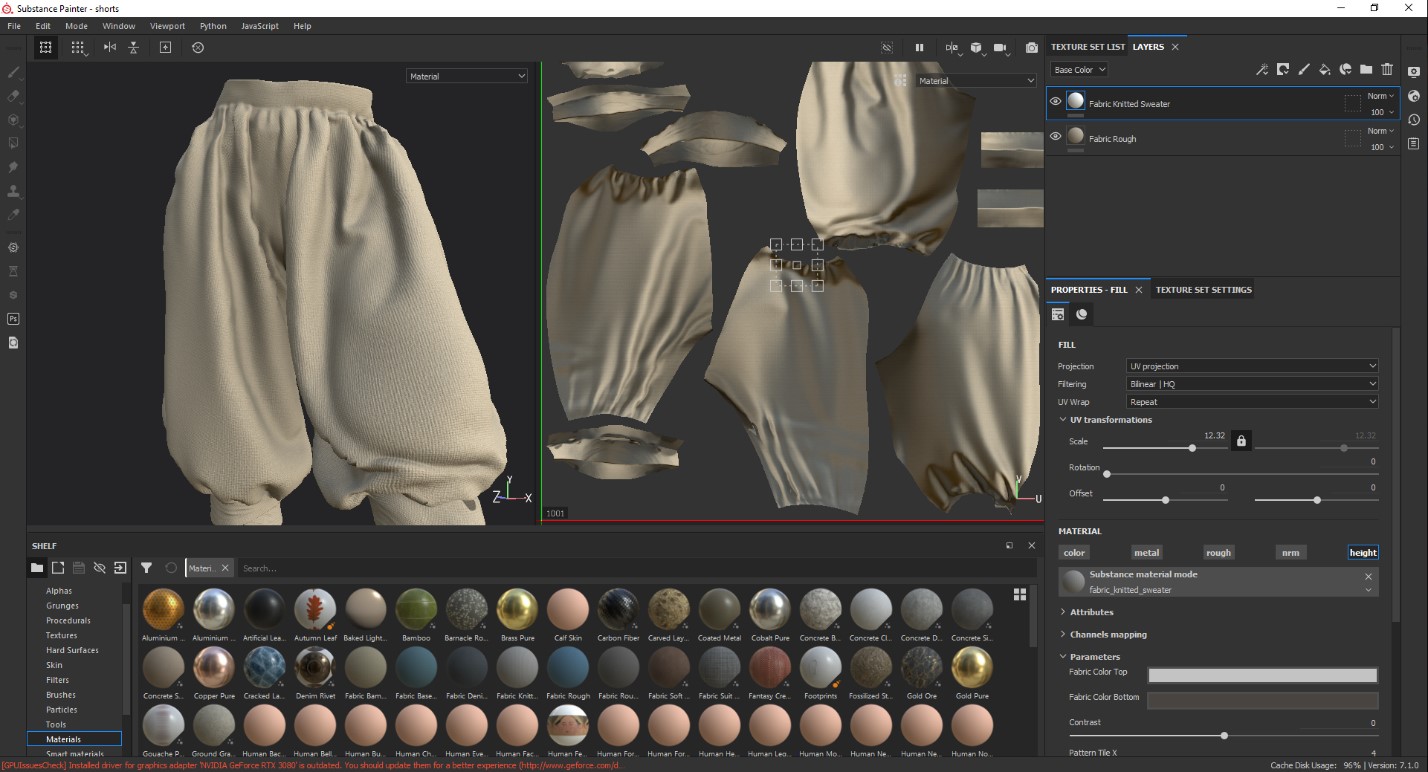
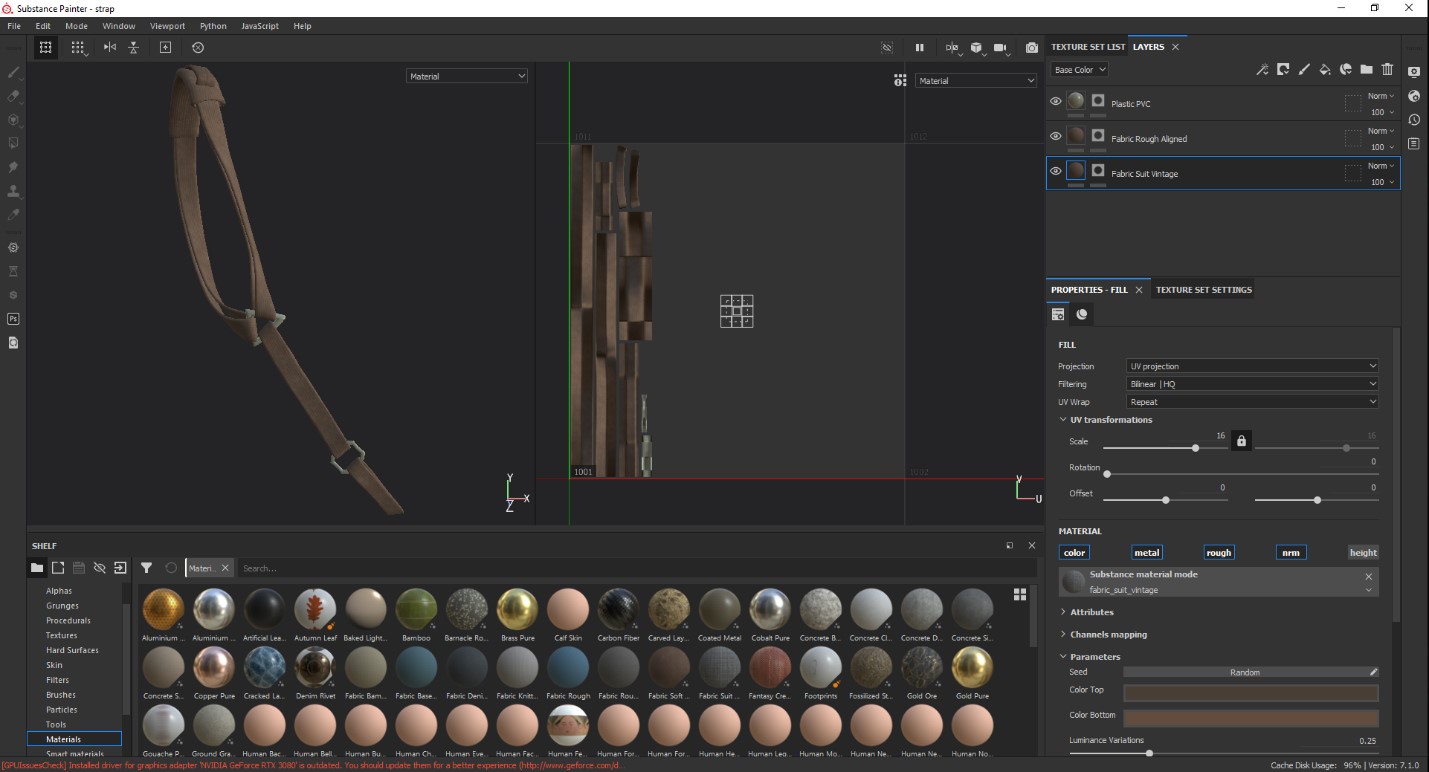
Texturing
After all the parts were made, I textured the body using TexturingXYZ maps in ZBrush. There are definitely other ways of texturing using TexturingXYZ maps in other software like Mari and Substance Painter, but I am the crazy person that prefers using them in ZBrush. That is the beauty of this line of work—there is no one way of doing something. Whatever works for you, works as long as it gets you to the desired result.
I already had a pre-made 3D eye model from a previous project. I just had to swap out the eye albedo texture.

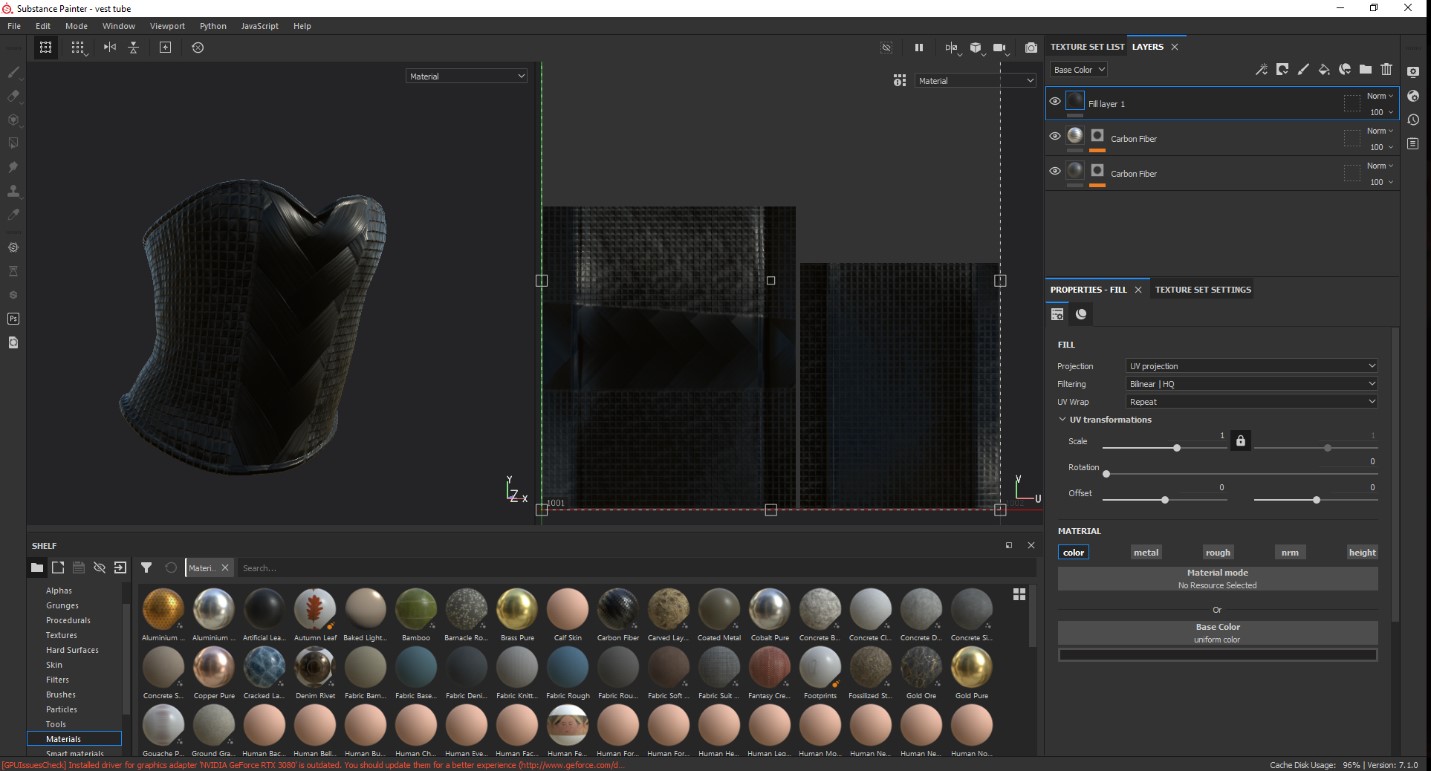
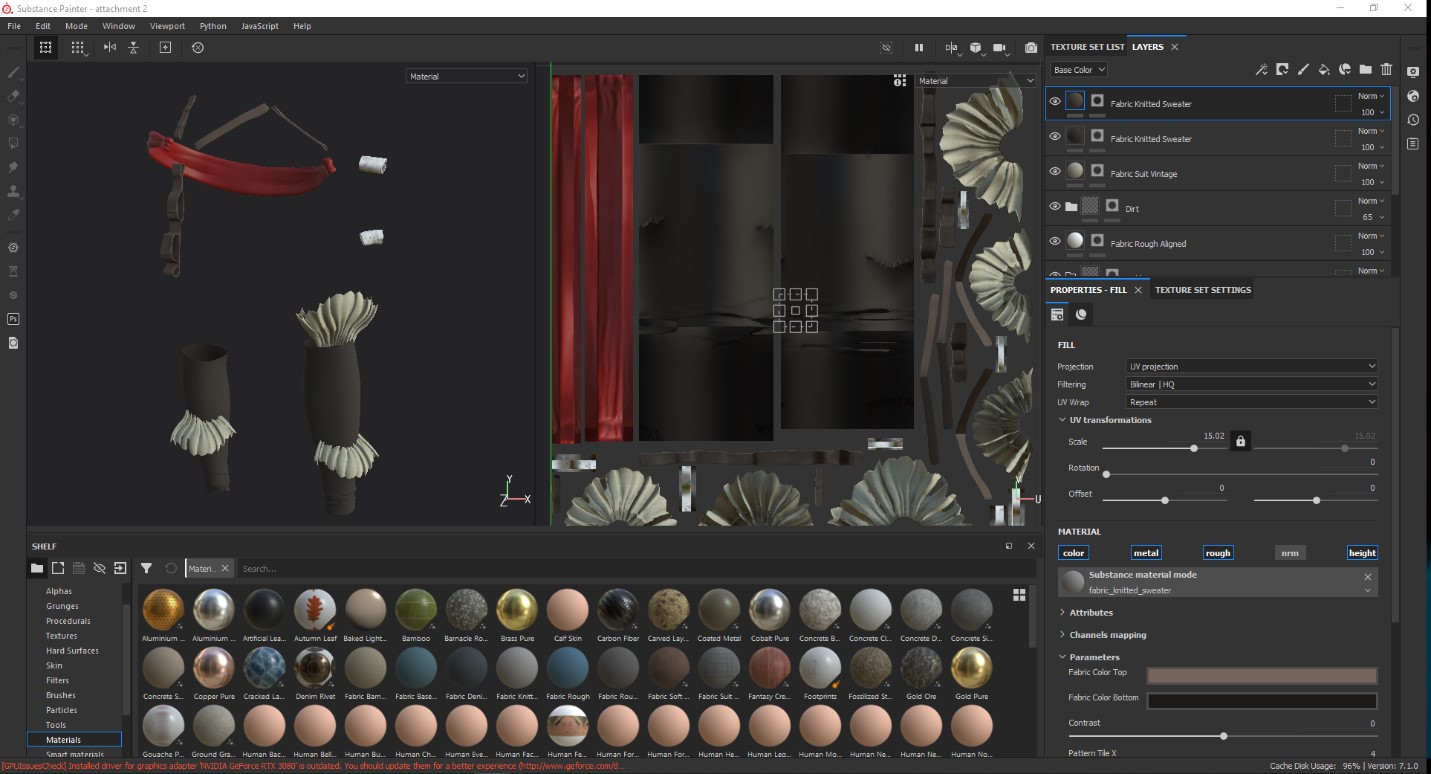
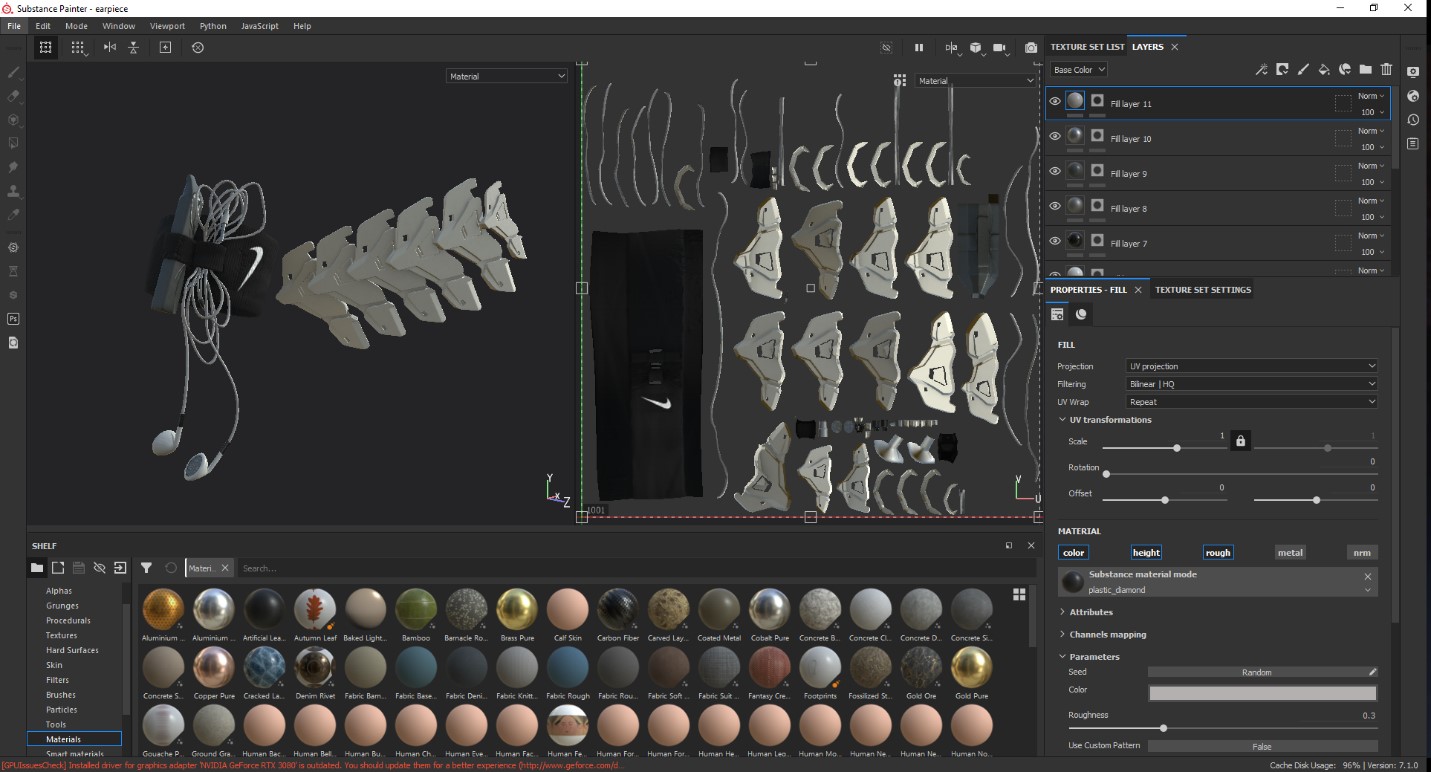
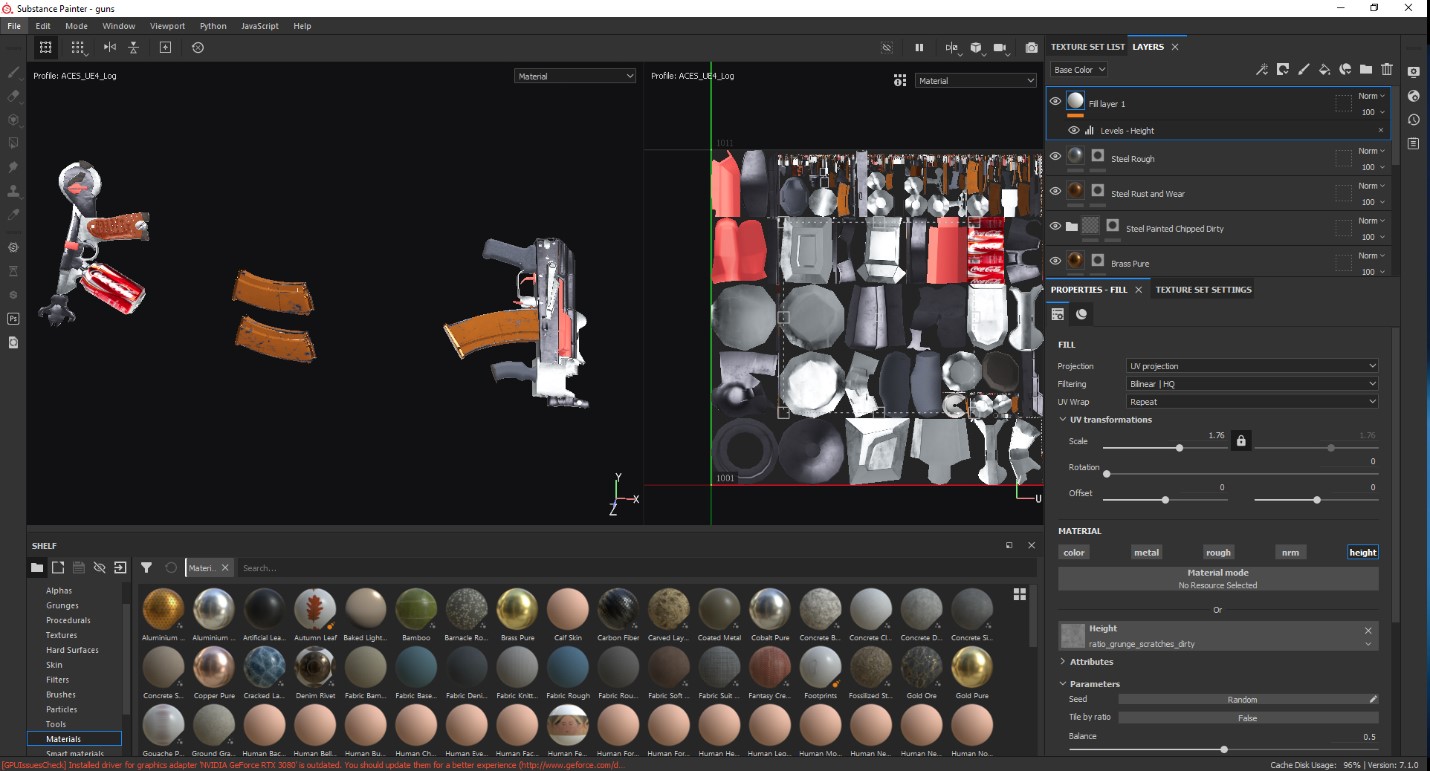
Having created the low poly version of the clothes and assets, I took the models to Substance Painter for texturing. My texturing setup in Substance Painter was pretty basic but it got the job done.
Lighting, Grooming And Look-Dev
These should be three different sections but I always go back and forth between these three so I would just address them together.
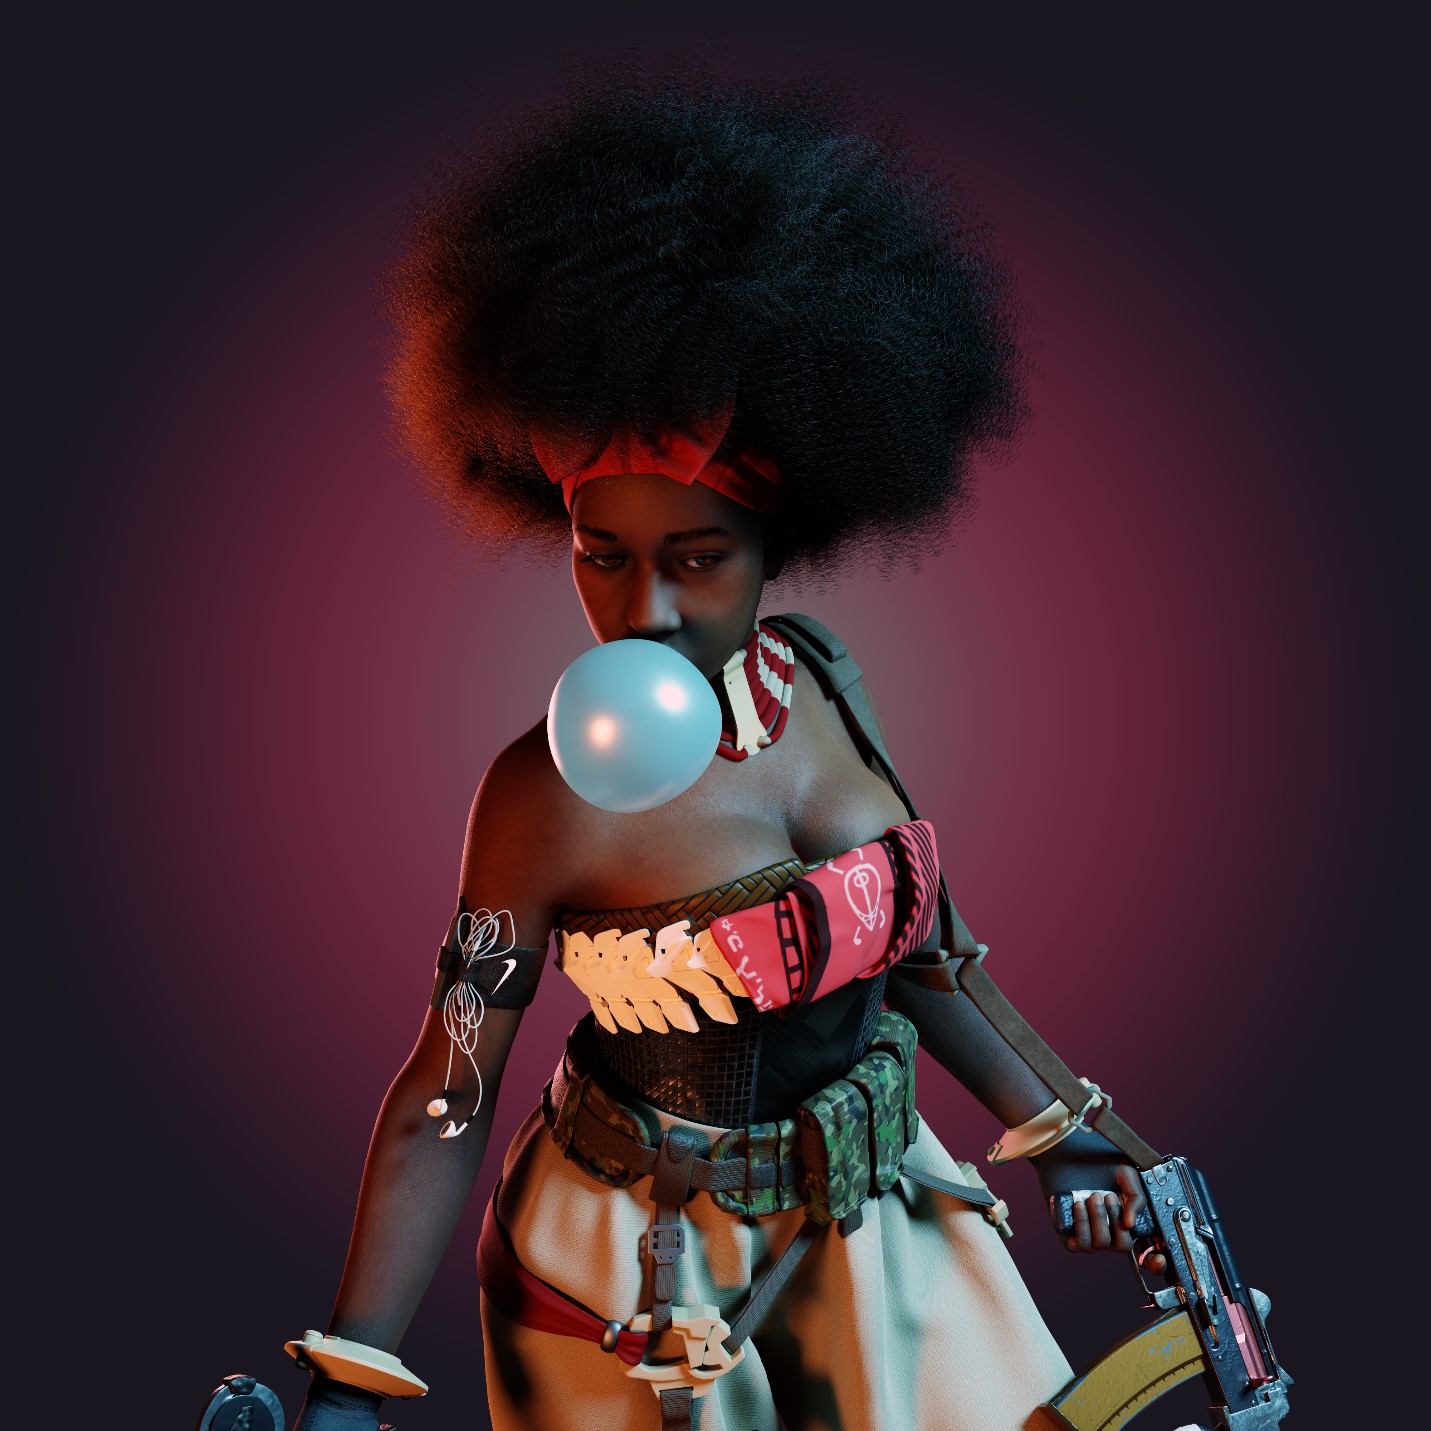
After the body and assets had been textured and all maps exported, I went into Blender and began importing and assembling all the pieces together, while playing around with the light and camera angles till I got my sweet spot.
My lighting setup was a mix of Blender area lights and HDRI from Poly Haven.
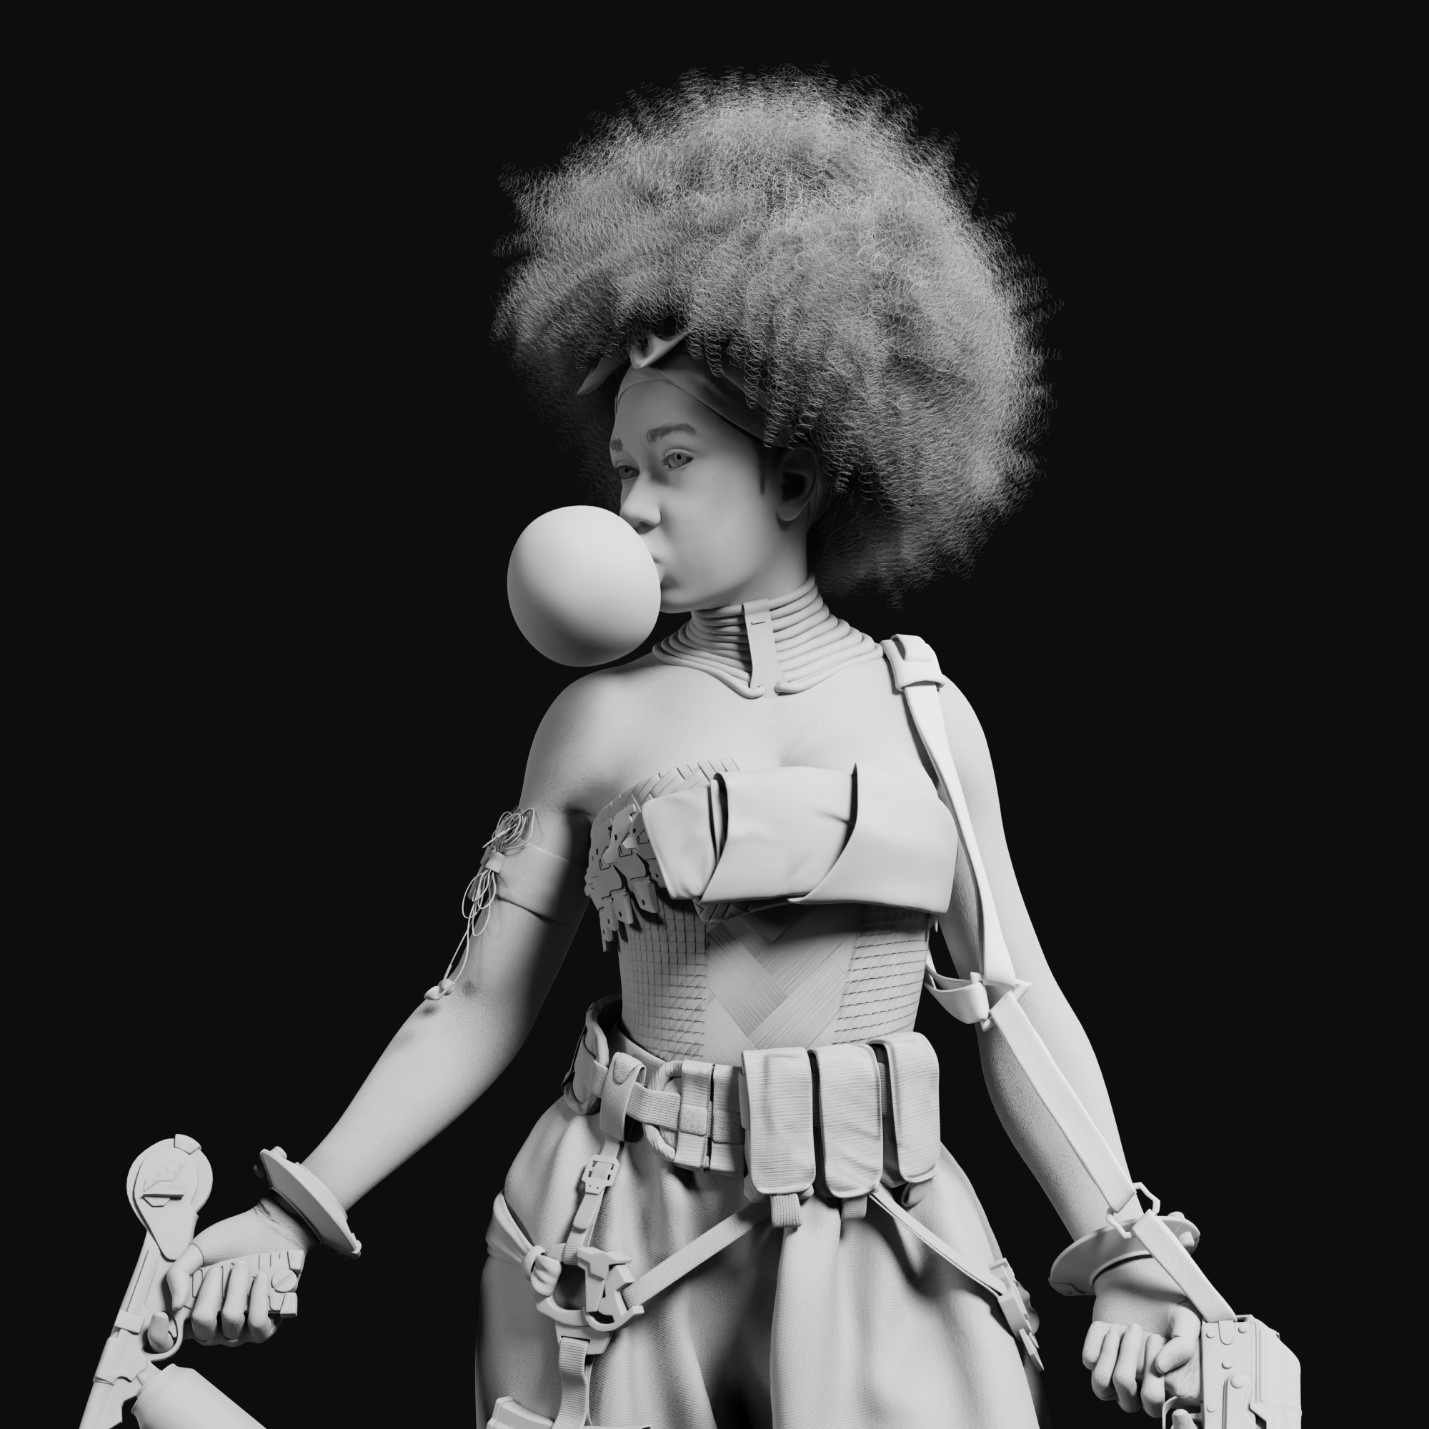
The hair grooming was created with the Blender particle system. Grooming is a whole process on its own that needs constant practice to perfect. You can always find tutorials online or check out my videos on creating ‘black people hair’.
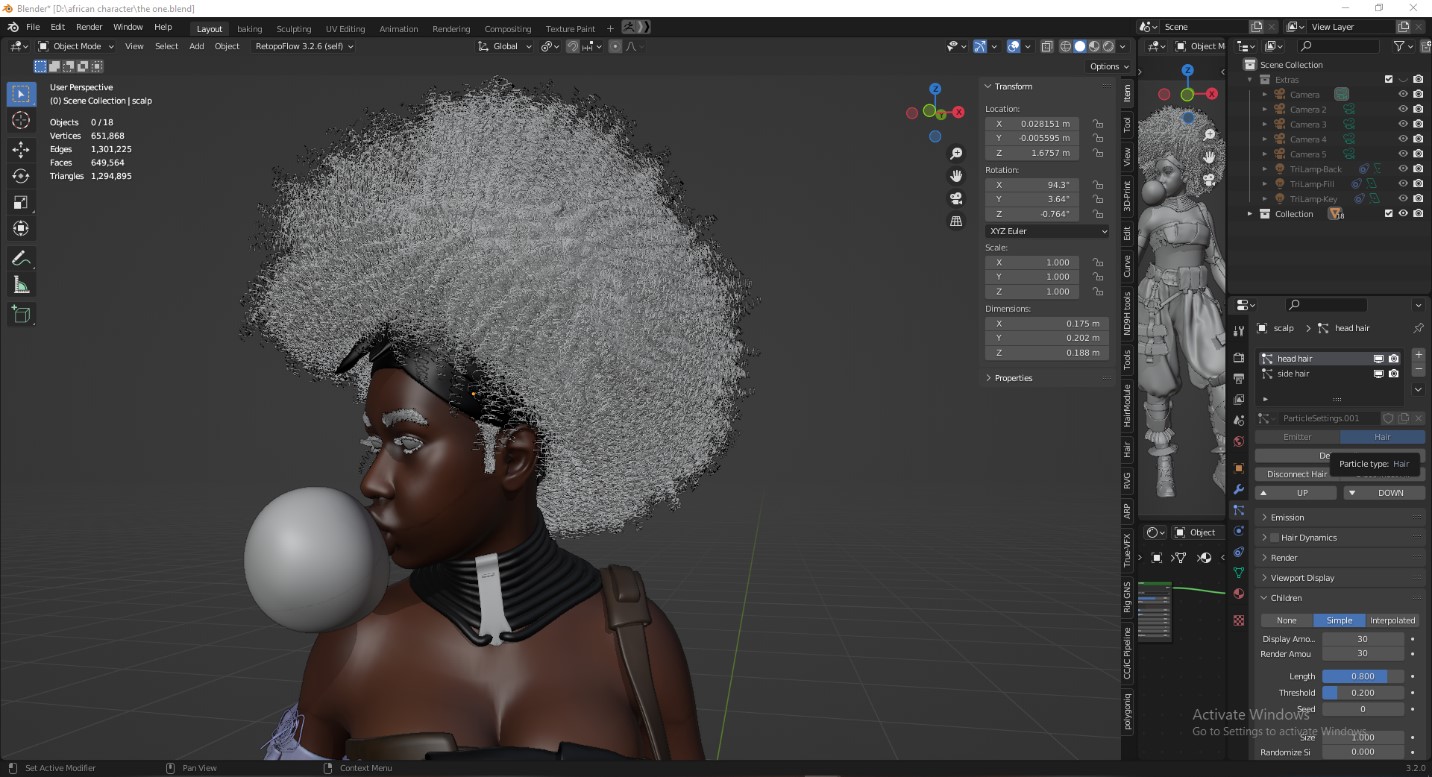
A tip I would give is to start small and build as you go while grooming. I would also recommend the Hair add-ons by VFX Grace. They have really good stuff for hair.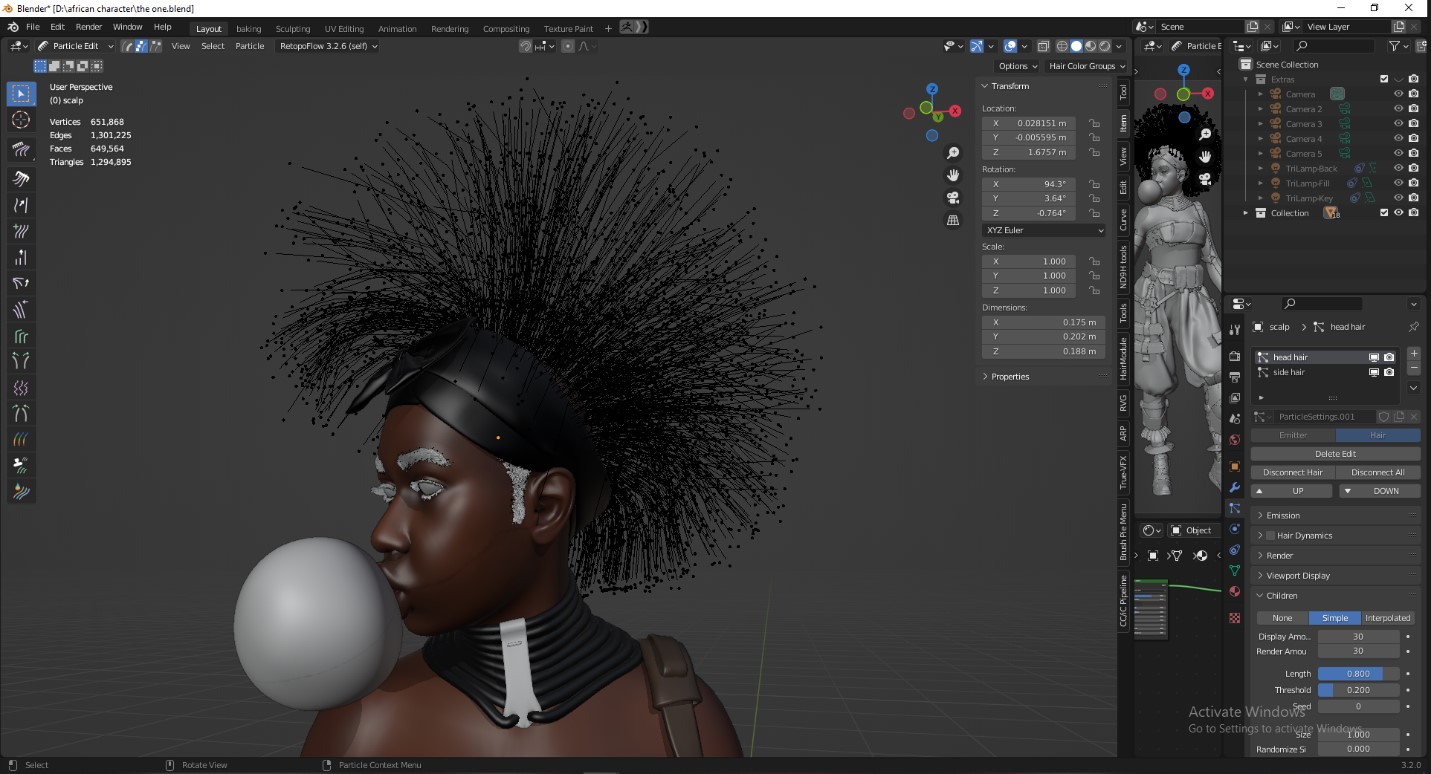
Final Render And Composition
Once I was happy with how everything looked, I made a render in Cycles. (I’m an Eevee hater, and almost never switched to that. No hate to the Blender foundation.)
My render settings aren’t complicated. I rendered on experimental for close-up renders, with my sample size at 500 samples or more with the noise threshold turned off. I like to render as clean and sharp as possible (I denoise during composition). Light paths were set at full global illumination. The color management was set to medium-high contrast for this project. All these settings are subject to change depending on whatever project I’m working on.
Compositing was an easy set-up as well. I just had to denoise and composite the ambient occlusion in Blender. The render was made with a transparent background, taken to Photoshop where I made the gradient background. After compositing the image, I made use of the “Auto Tune, Auto Contrast and Auto Color” button in Photoshop (I’m a lazy ass, couldn’t be bothered with color correction.) Finally, it was done!!!
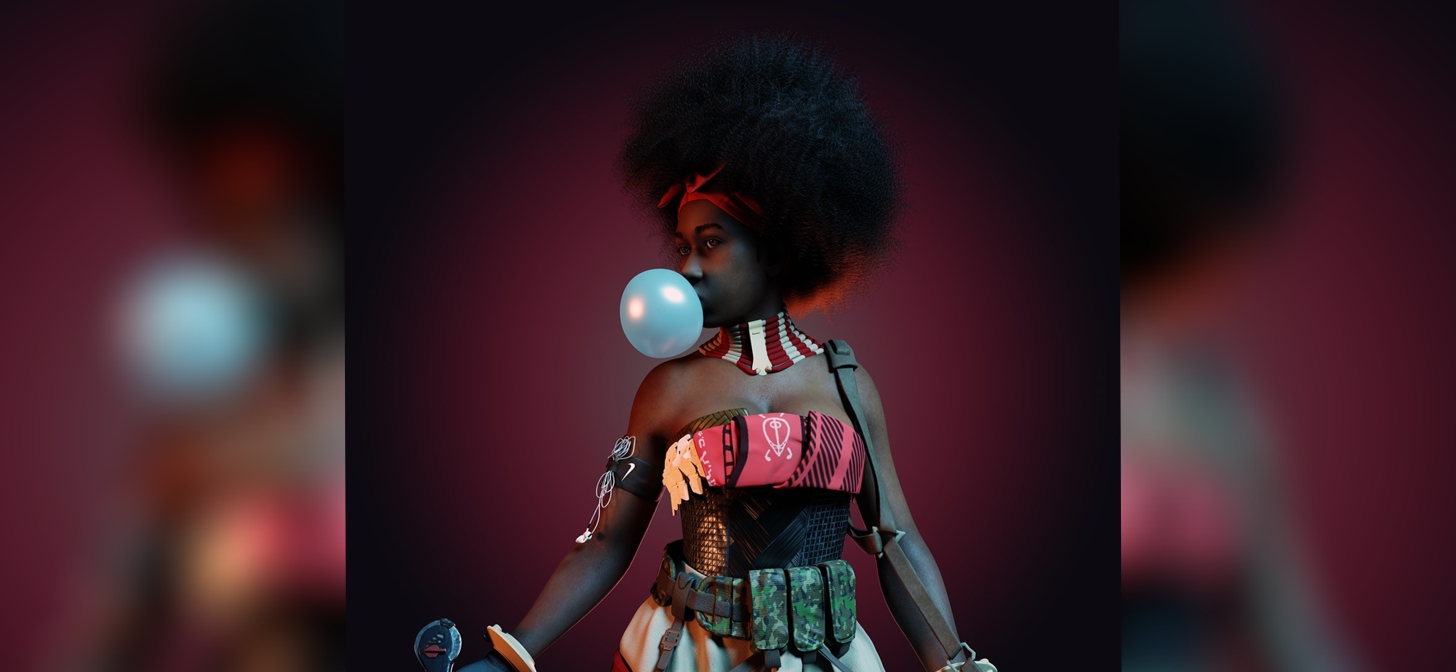
Post-Apocalyptic African Female Warrior

Thanks for reading my article!
I hope you liked my art and learned something new!
About the Artist
Isaac Daniel, a freelance 3D character artist currently based in Dubai, UAE.


