
INTRODUCTION
Hi, I’m Denis from Belgium. I started my journey with 3D and Blender almost 20 years ago. I first used CAD and ray-tracing as part of my engineering studies, then modded open source games for a while and now, I am concentrating on the more artistic side of things.
INSPIRATION
While visiting the Belgian Ardennes and staying in the lovely village of Maissin, my attention was caught by a German-French cemetery from World War I. It was unusual to see soldiers from opposite sides resting together.
I learned that someone from the village had decided to pick up and bury the bodies together as “none of them wanted to be here in the first place.”
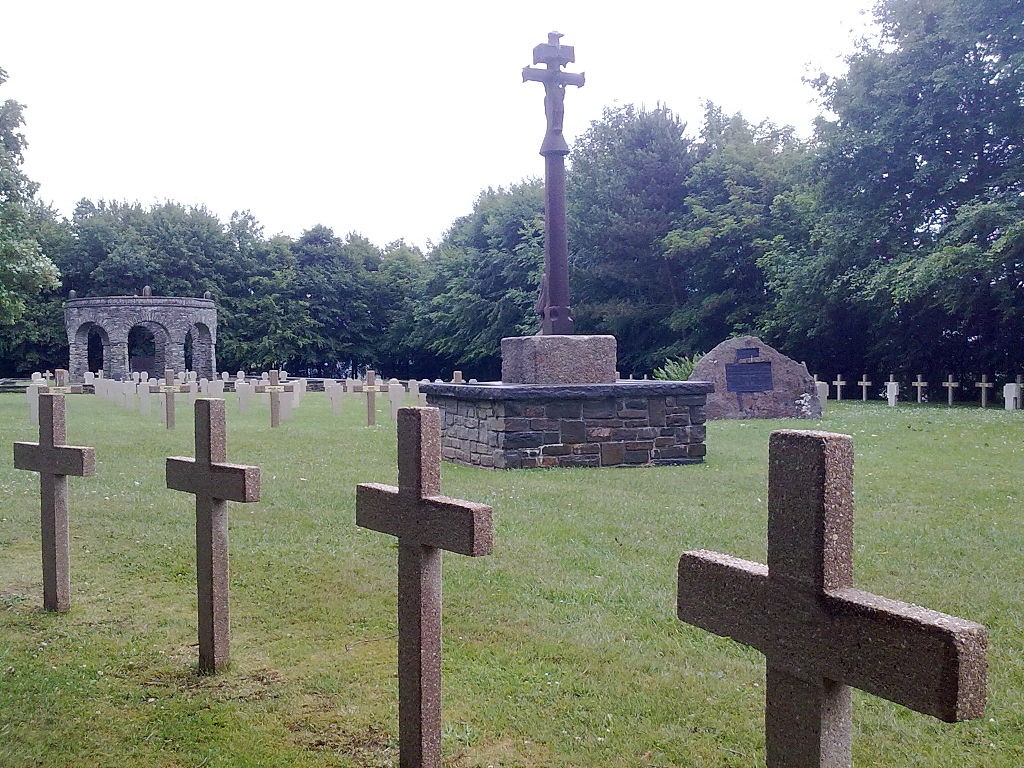
(photo credits: Olnnu under license CC BY-SA 3.0)
I went to visit the cemetery that evening. It was a lovely, peaceful place.
The tombstones provided details on the ranks and functions of those resting there, in their native languages. It moved me, seeing all those lives lost and reading their names.
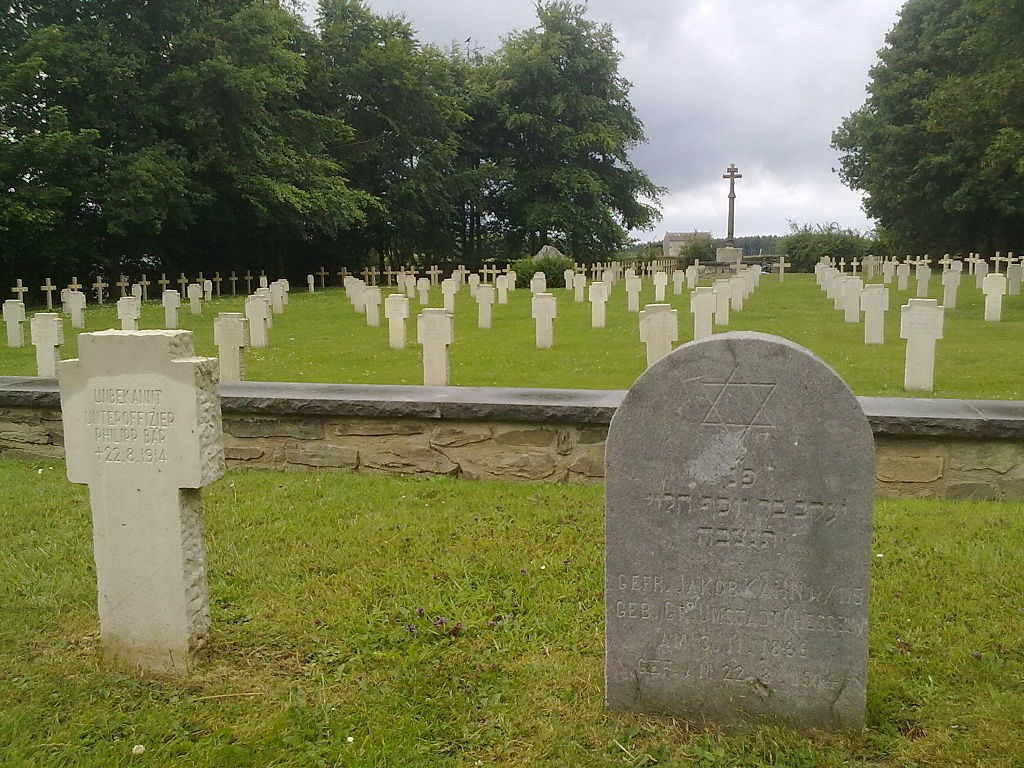
(photo credits: Olnnu under license CC BY-SA 3.0)
I thought that all of them have much more in common than they have differences.
I wanted to do a piece that pays homage to these fallen soldiers, but also denounces the absurdity of war.
Rough composition and title
To convey my feeling, I wanted the following elements to be featured:
- A group shot, reminiscent of classroom shots, highlighting unity
- At least 3 different nationalities, highlighting the universality of war
- Positioning the characters in the shape of a cross, highlighting death and faith
- Surround the characters with flowers, highlighting respect and beauty but also death
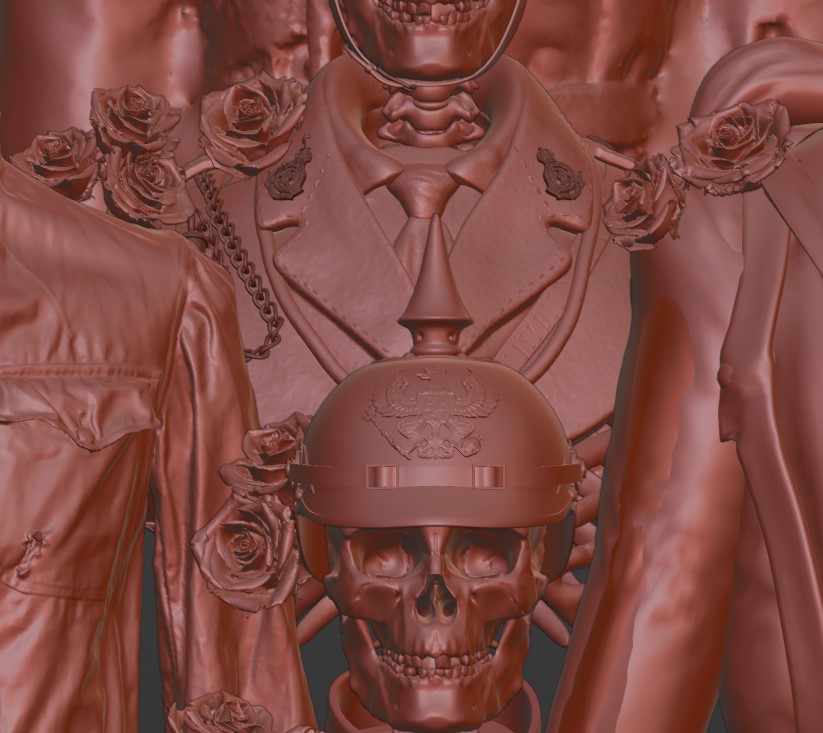
- A pickelhaube, of course…
I did an initial sketch that night.
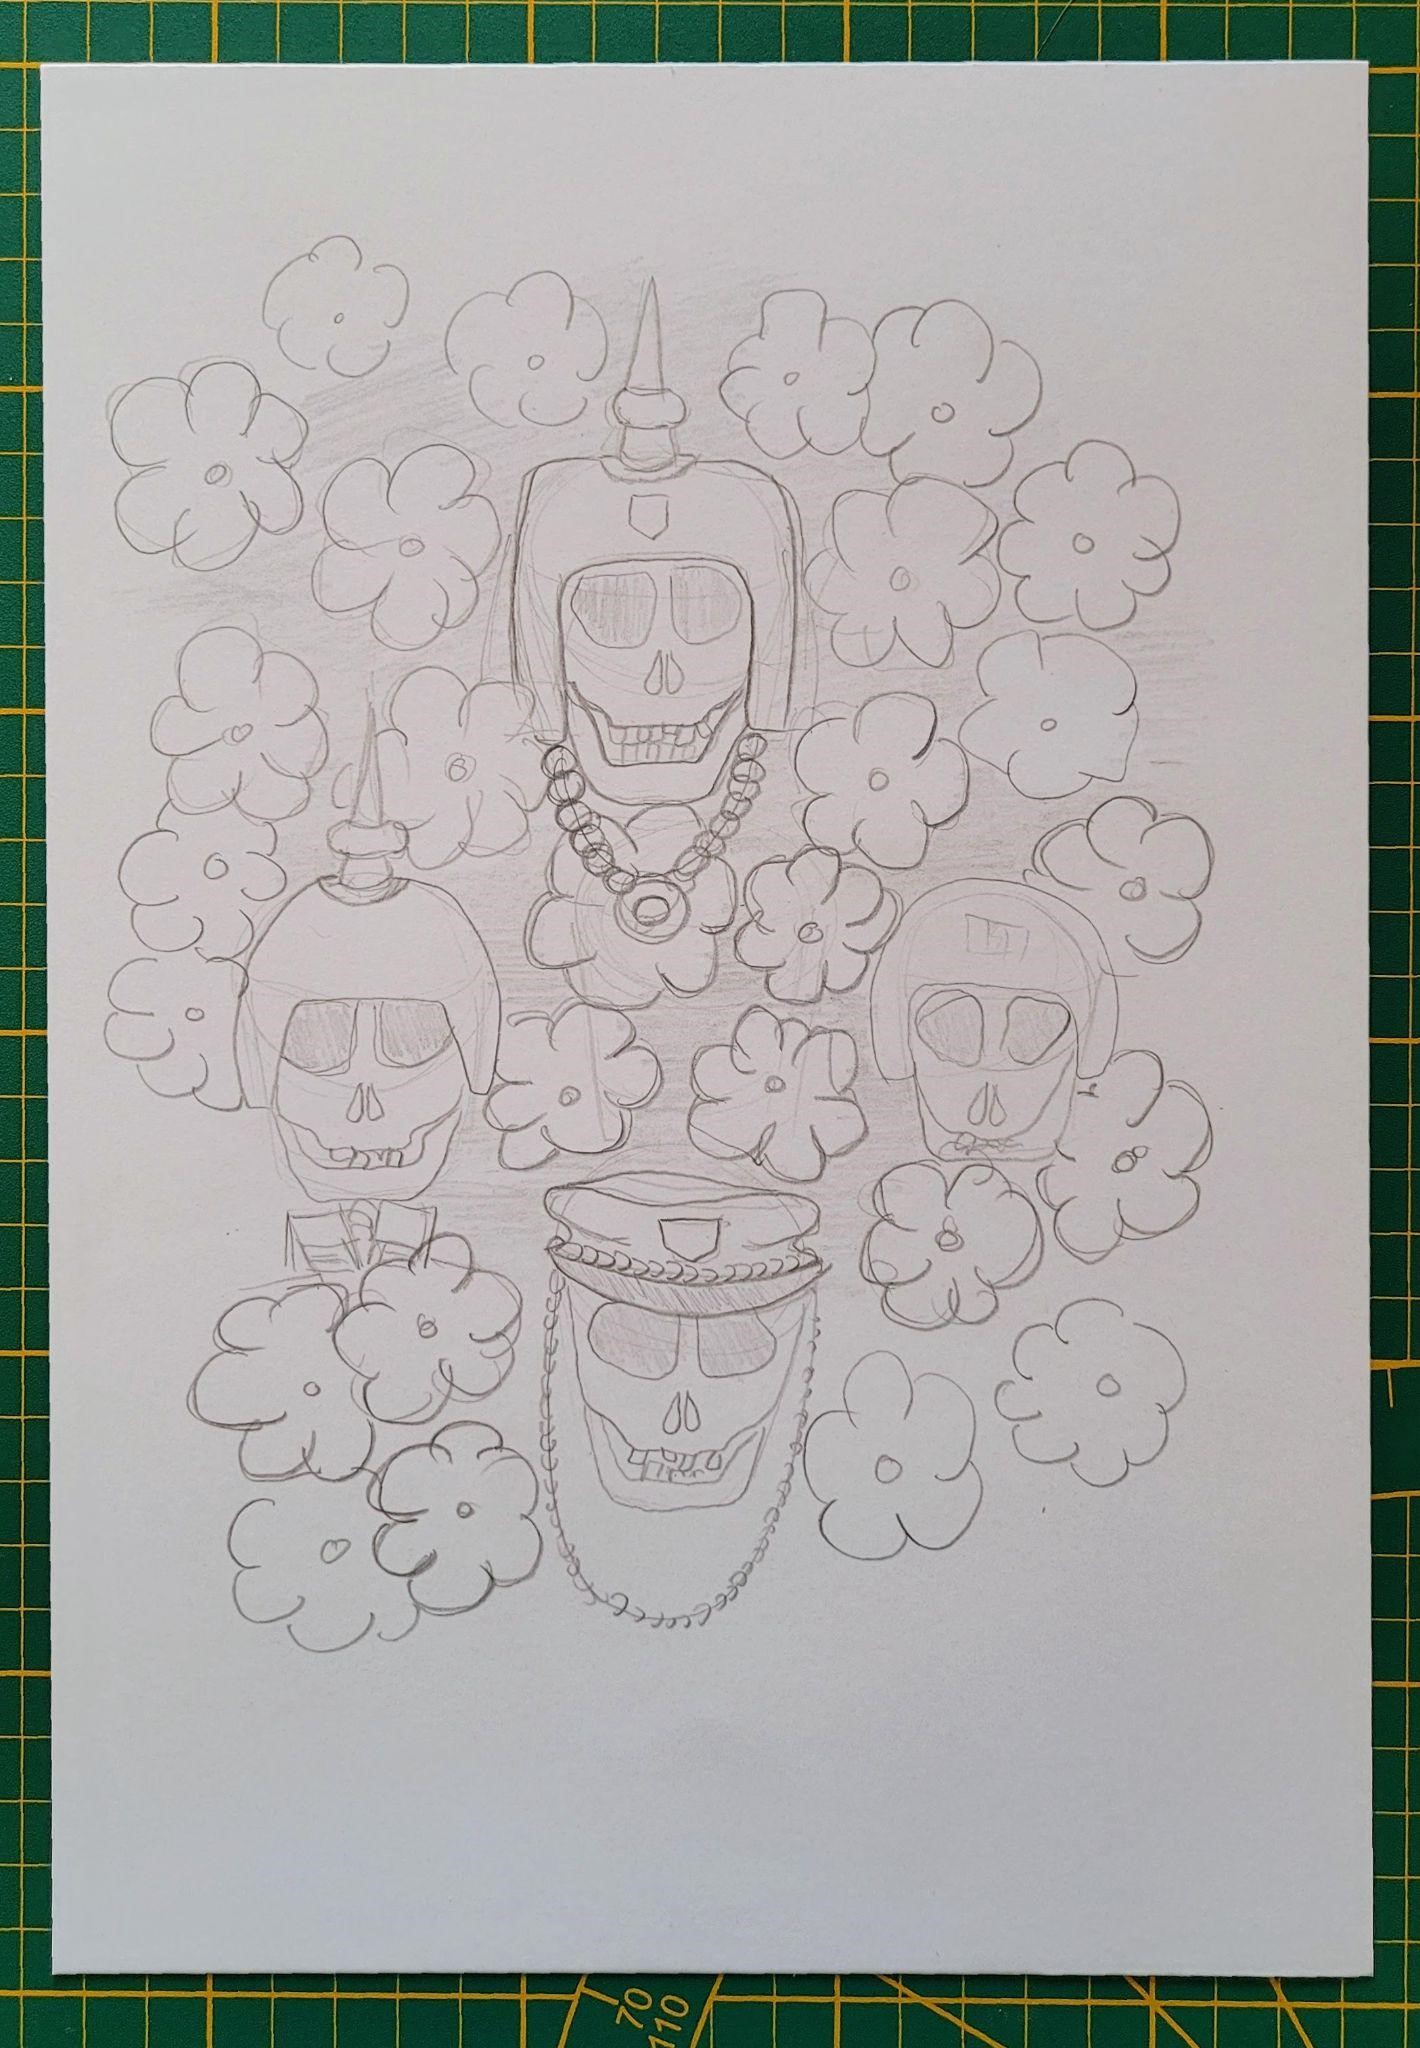
My drawing skills are really bad, but it allows me to get ideas out of my head ;-)
I ended up with the title “United at Last” which I thought conveyed unity, love, death and passing time while contrasting with the war imagery.
ASSEMBLING ASSETS
Asset Collection on Sketchfab
I decided to rely on existing assets for this piece, as modeling from scratch would be a huge task. That is usually my approach when I don’t need anything very specific. There are amazing artists out there who make their work available for free!
I started with searching “WW1 helmet” on Sketchfab with the license filters set to show only CC0 and CC-BY licenses.
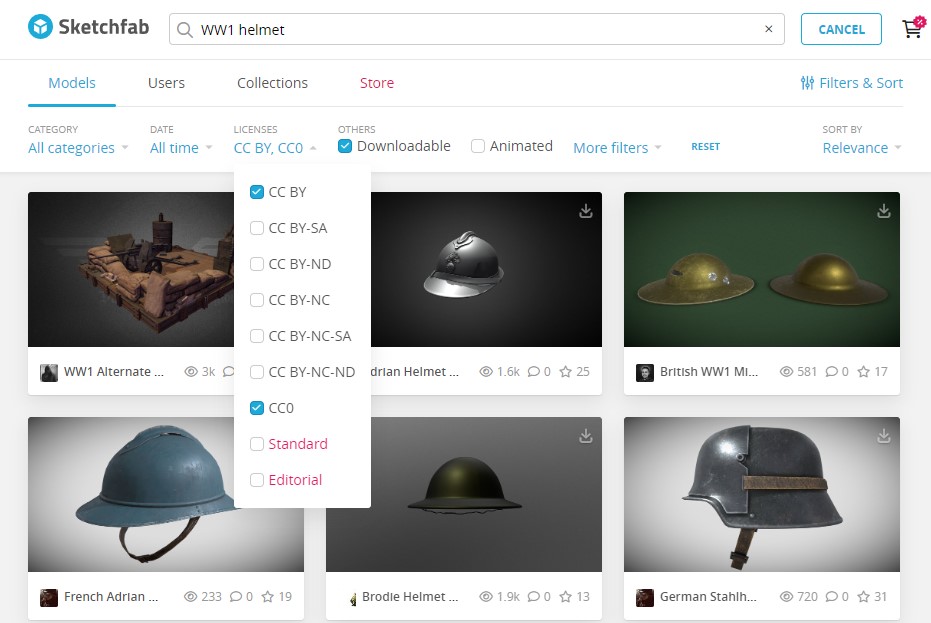
For every new piece using creative commons assets, I start with a text file where I save all the credits for the assets (super important). I kept digging to find hats, busts, clothes and accessories.


Assets Used
The clothing assets were German medic, WW1 Jacket, French helmet, German Stahlhelm, Cavalry Saber, Cavalry Officer, French Infantry, Prussian General and Machine Men by Gabee.
The flower assets were Dry Flower and Rose Scan.
The skeleton asset was Skeleton (Esqueleto).
Asset Trimming
Now comes the tedious part, cleaning up those assets. I usually follow this workflow:
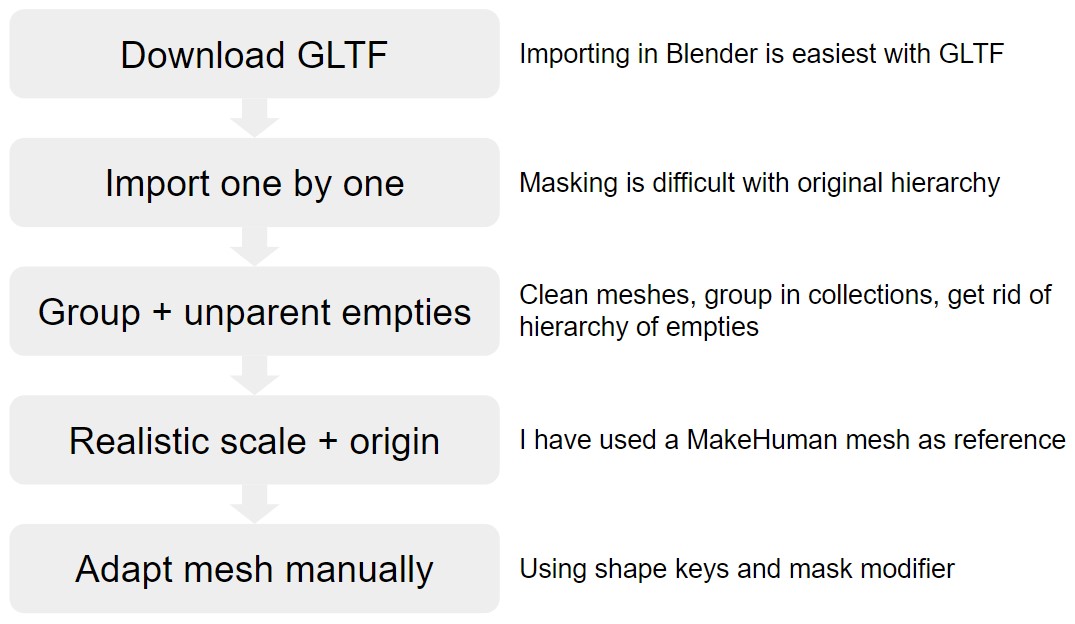
This workflow allows me to use the imported assets cleanly and easily.

PERFORMANCE MANAGEMENT
At this point, my computer wanted to unionize—I was quickly running out of memory, and most textures had a 4K or 8K resolution.
To overcome this issue, I packed all the files in Blender and then unpacked them all in a specific folder.
I backed them up and used a free image resizing software to downsize them all to 2K or even 1K. Even like this, it is hard on my computer but more manageable at least.
COMPOSITION
Camera and proportions
I started by setting up my camera to look straight at the central skull with a focal length of 100mm. I did not enable depth of field here, since I wanted everything to be in focus. I tended to boost the focal length for portrait shots to minimize the distortion.
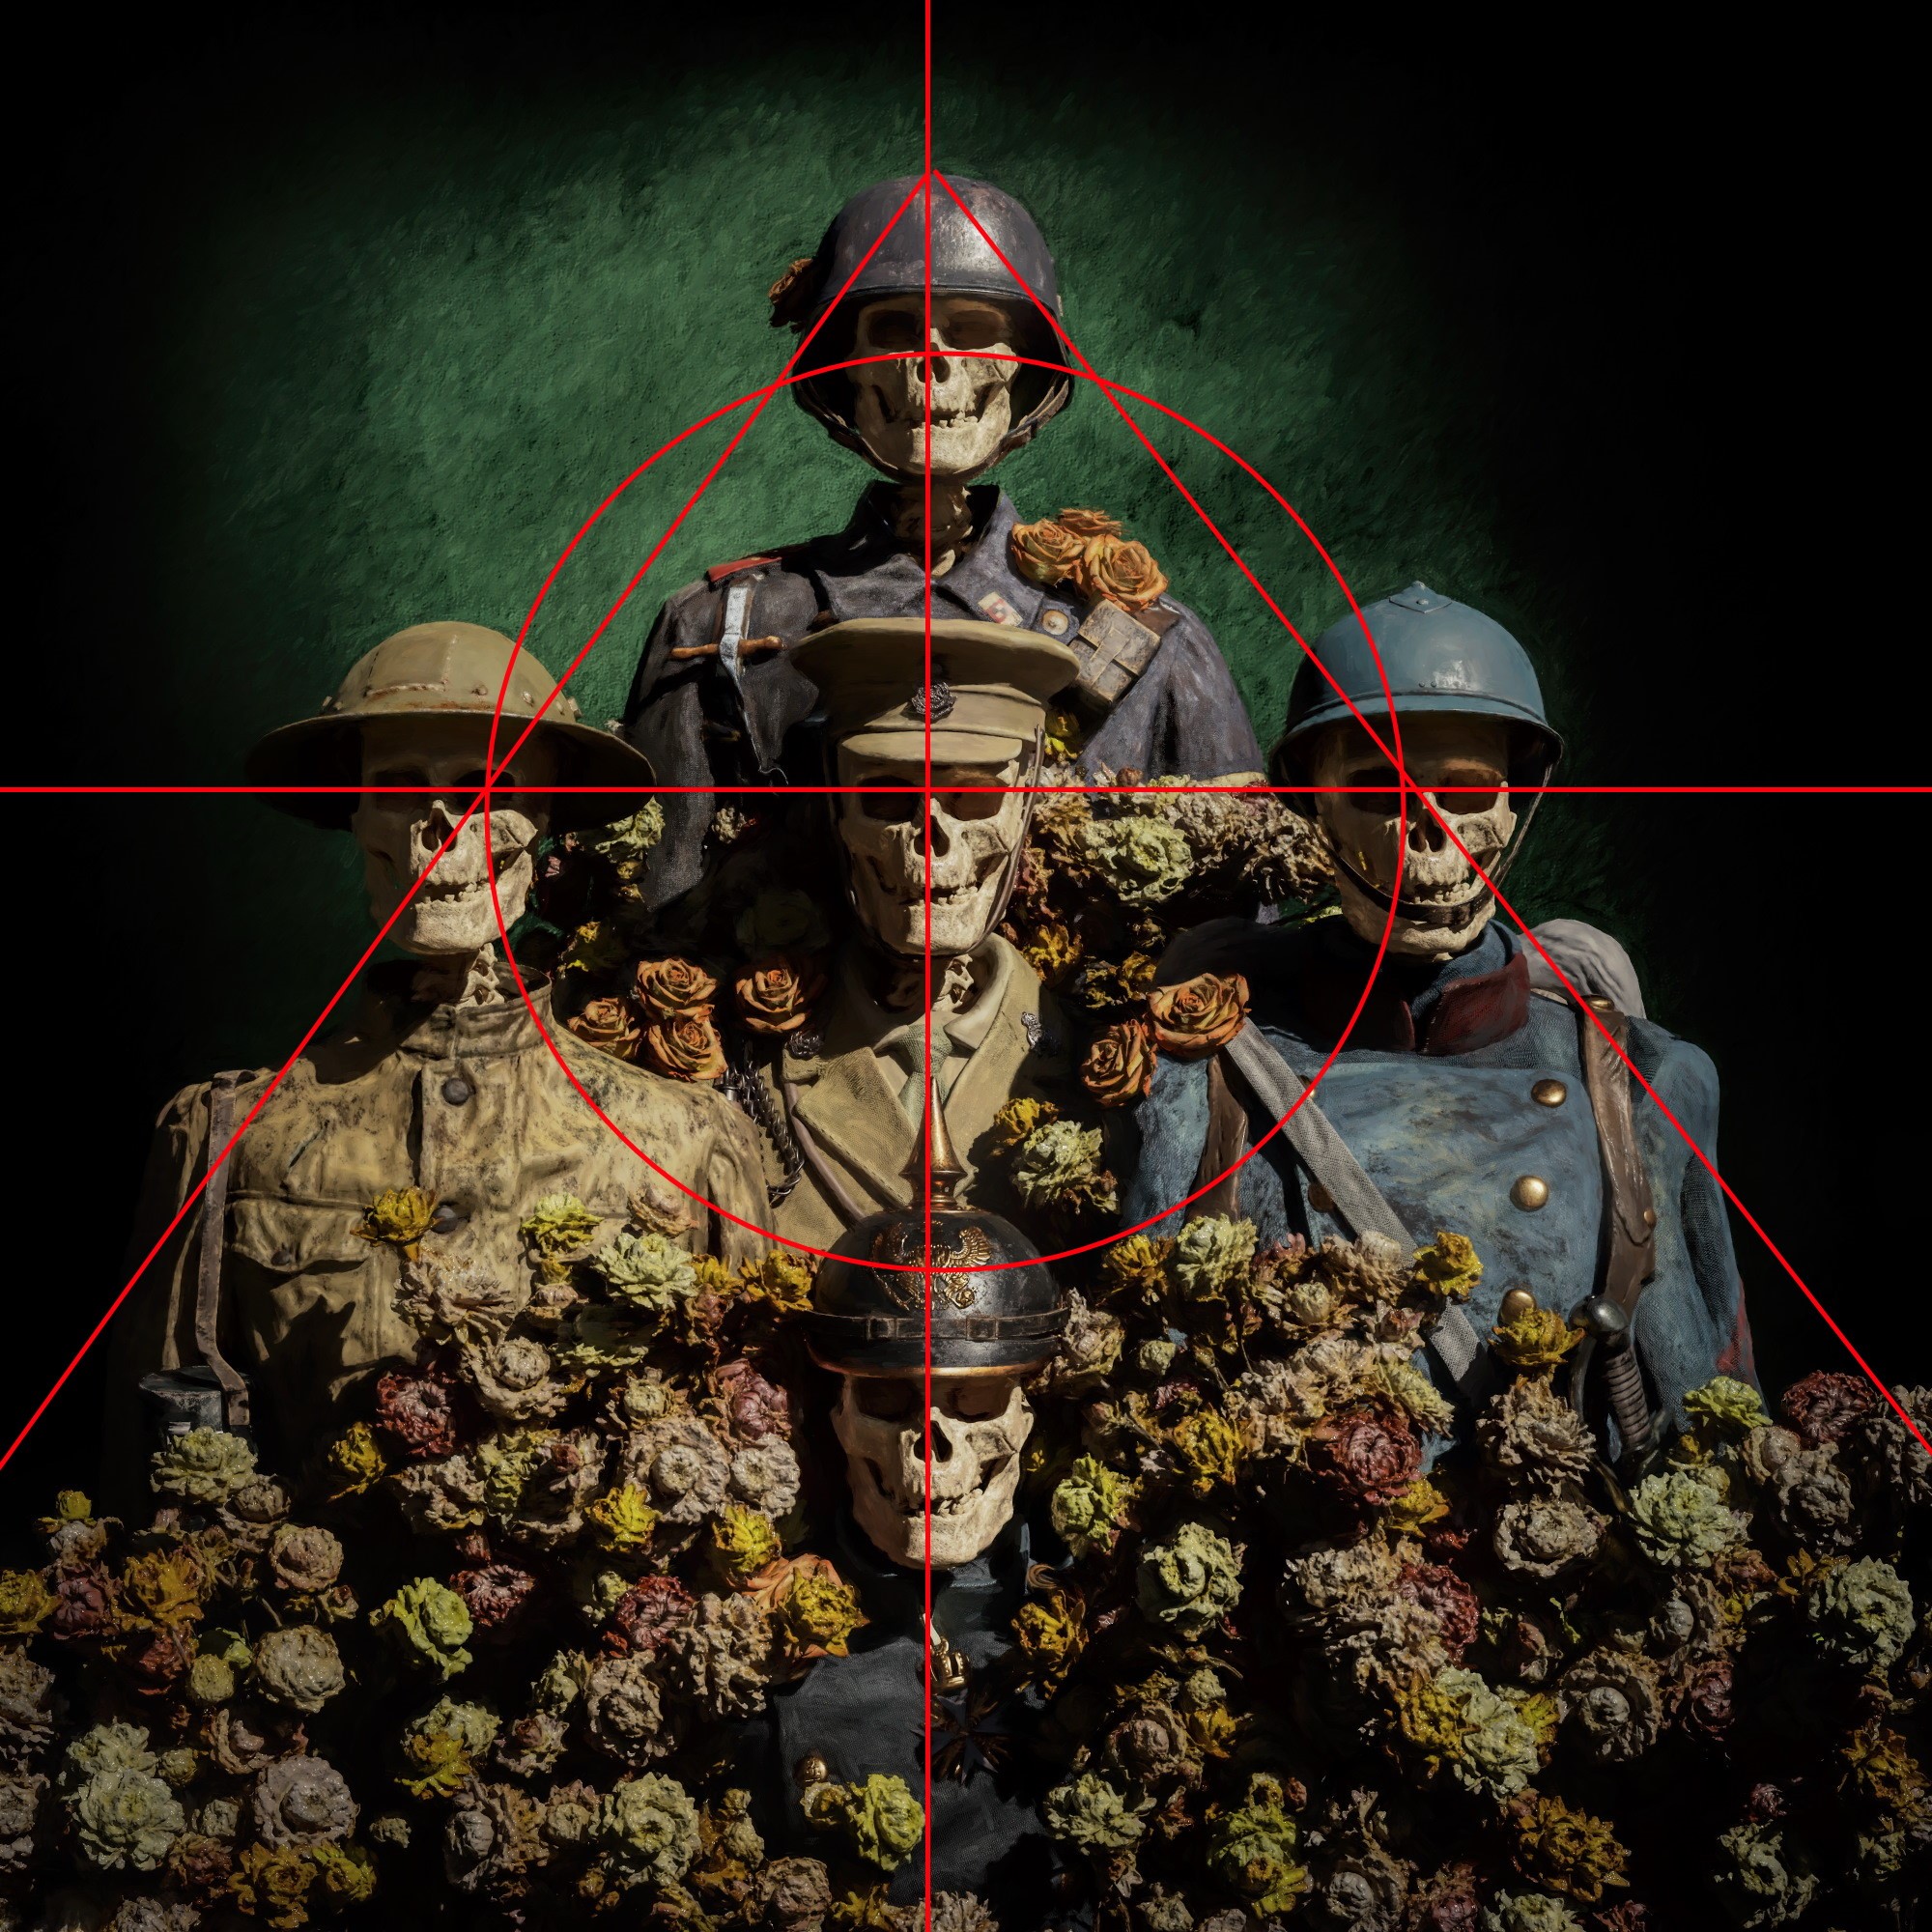
I have represented the main guides for the composition below.
Characters
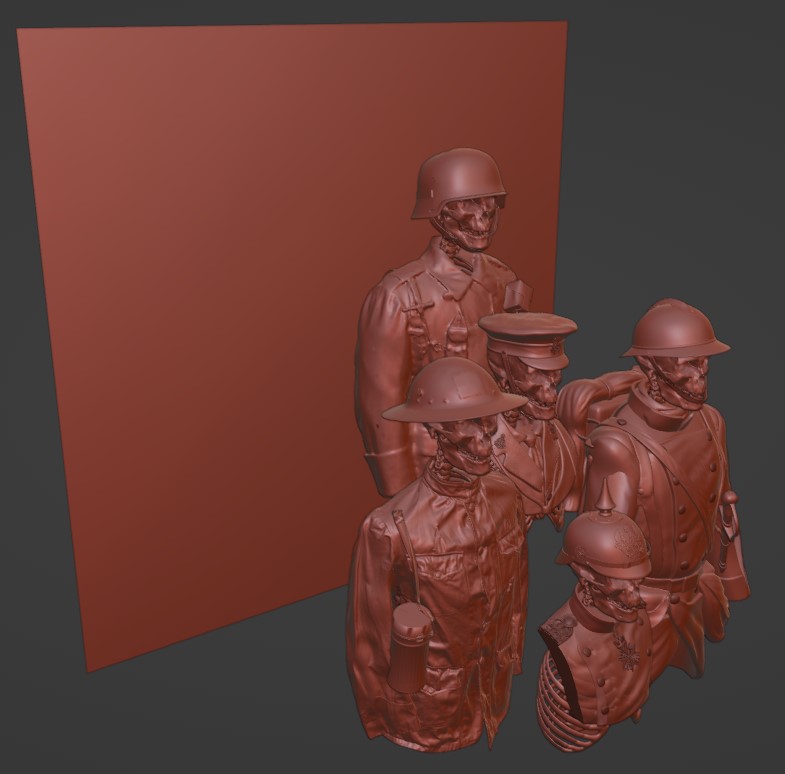
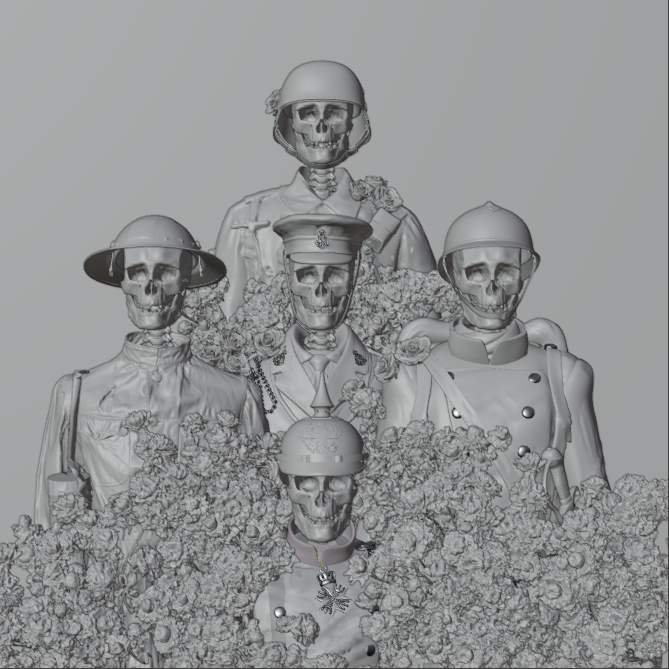
I placed the characters in the shape of a cross, lower ranks on top. I kept the faces distributed along a circle centered on the central face.
Flowers
I used 2 models of photo-scanned flowers; a bouquet of dried flowers for the bulk, and an orange rose for the detail.
I positioned the bulk so the edges of the busts would not show. I started by filling all the empty space with flowers, but finally reduced the amount to get the triangular shape in composition and better the readability.
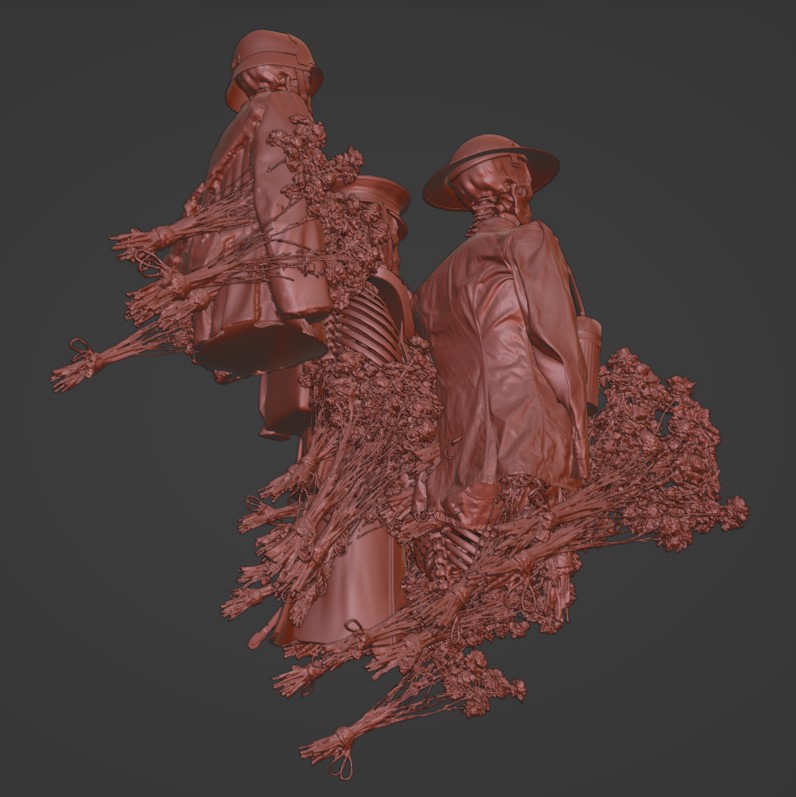
I placed the roses carefully around the main points of focus of the composition.
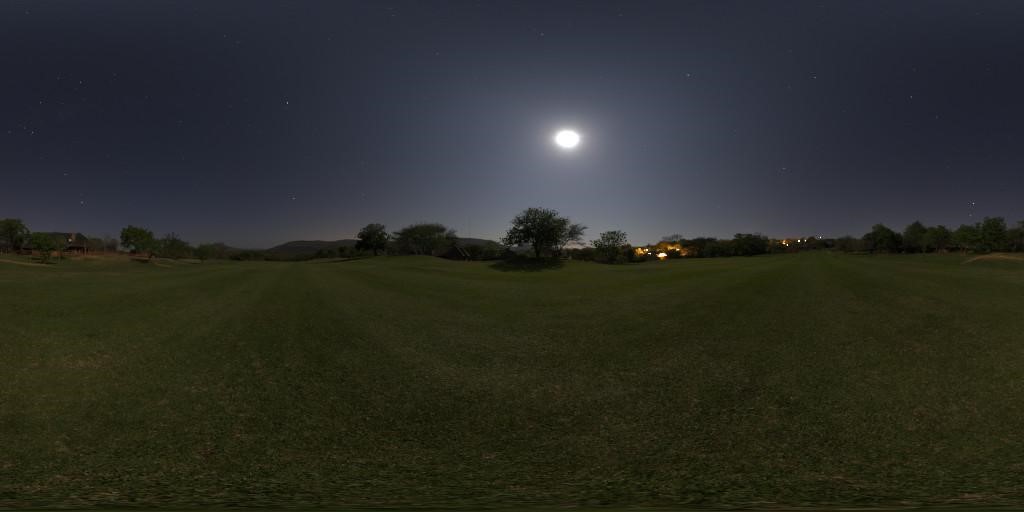
Lighting
I kept the lighting very simple with a moonlit HDRI from Polyhaven which I rotated in the shader editor until I got the shadows I wanted.
I like working with moonlight since it gives sharp shadows, high contrast and a sprinkling silver light. It also provides elements to reflect on glossy surfaces in a subtle way.
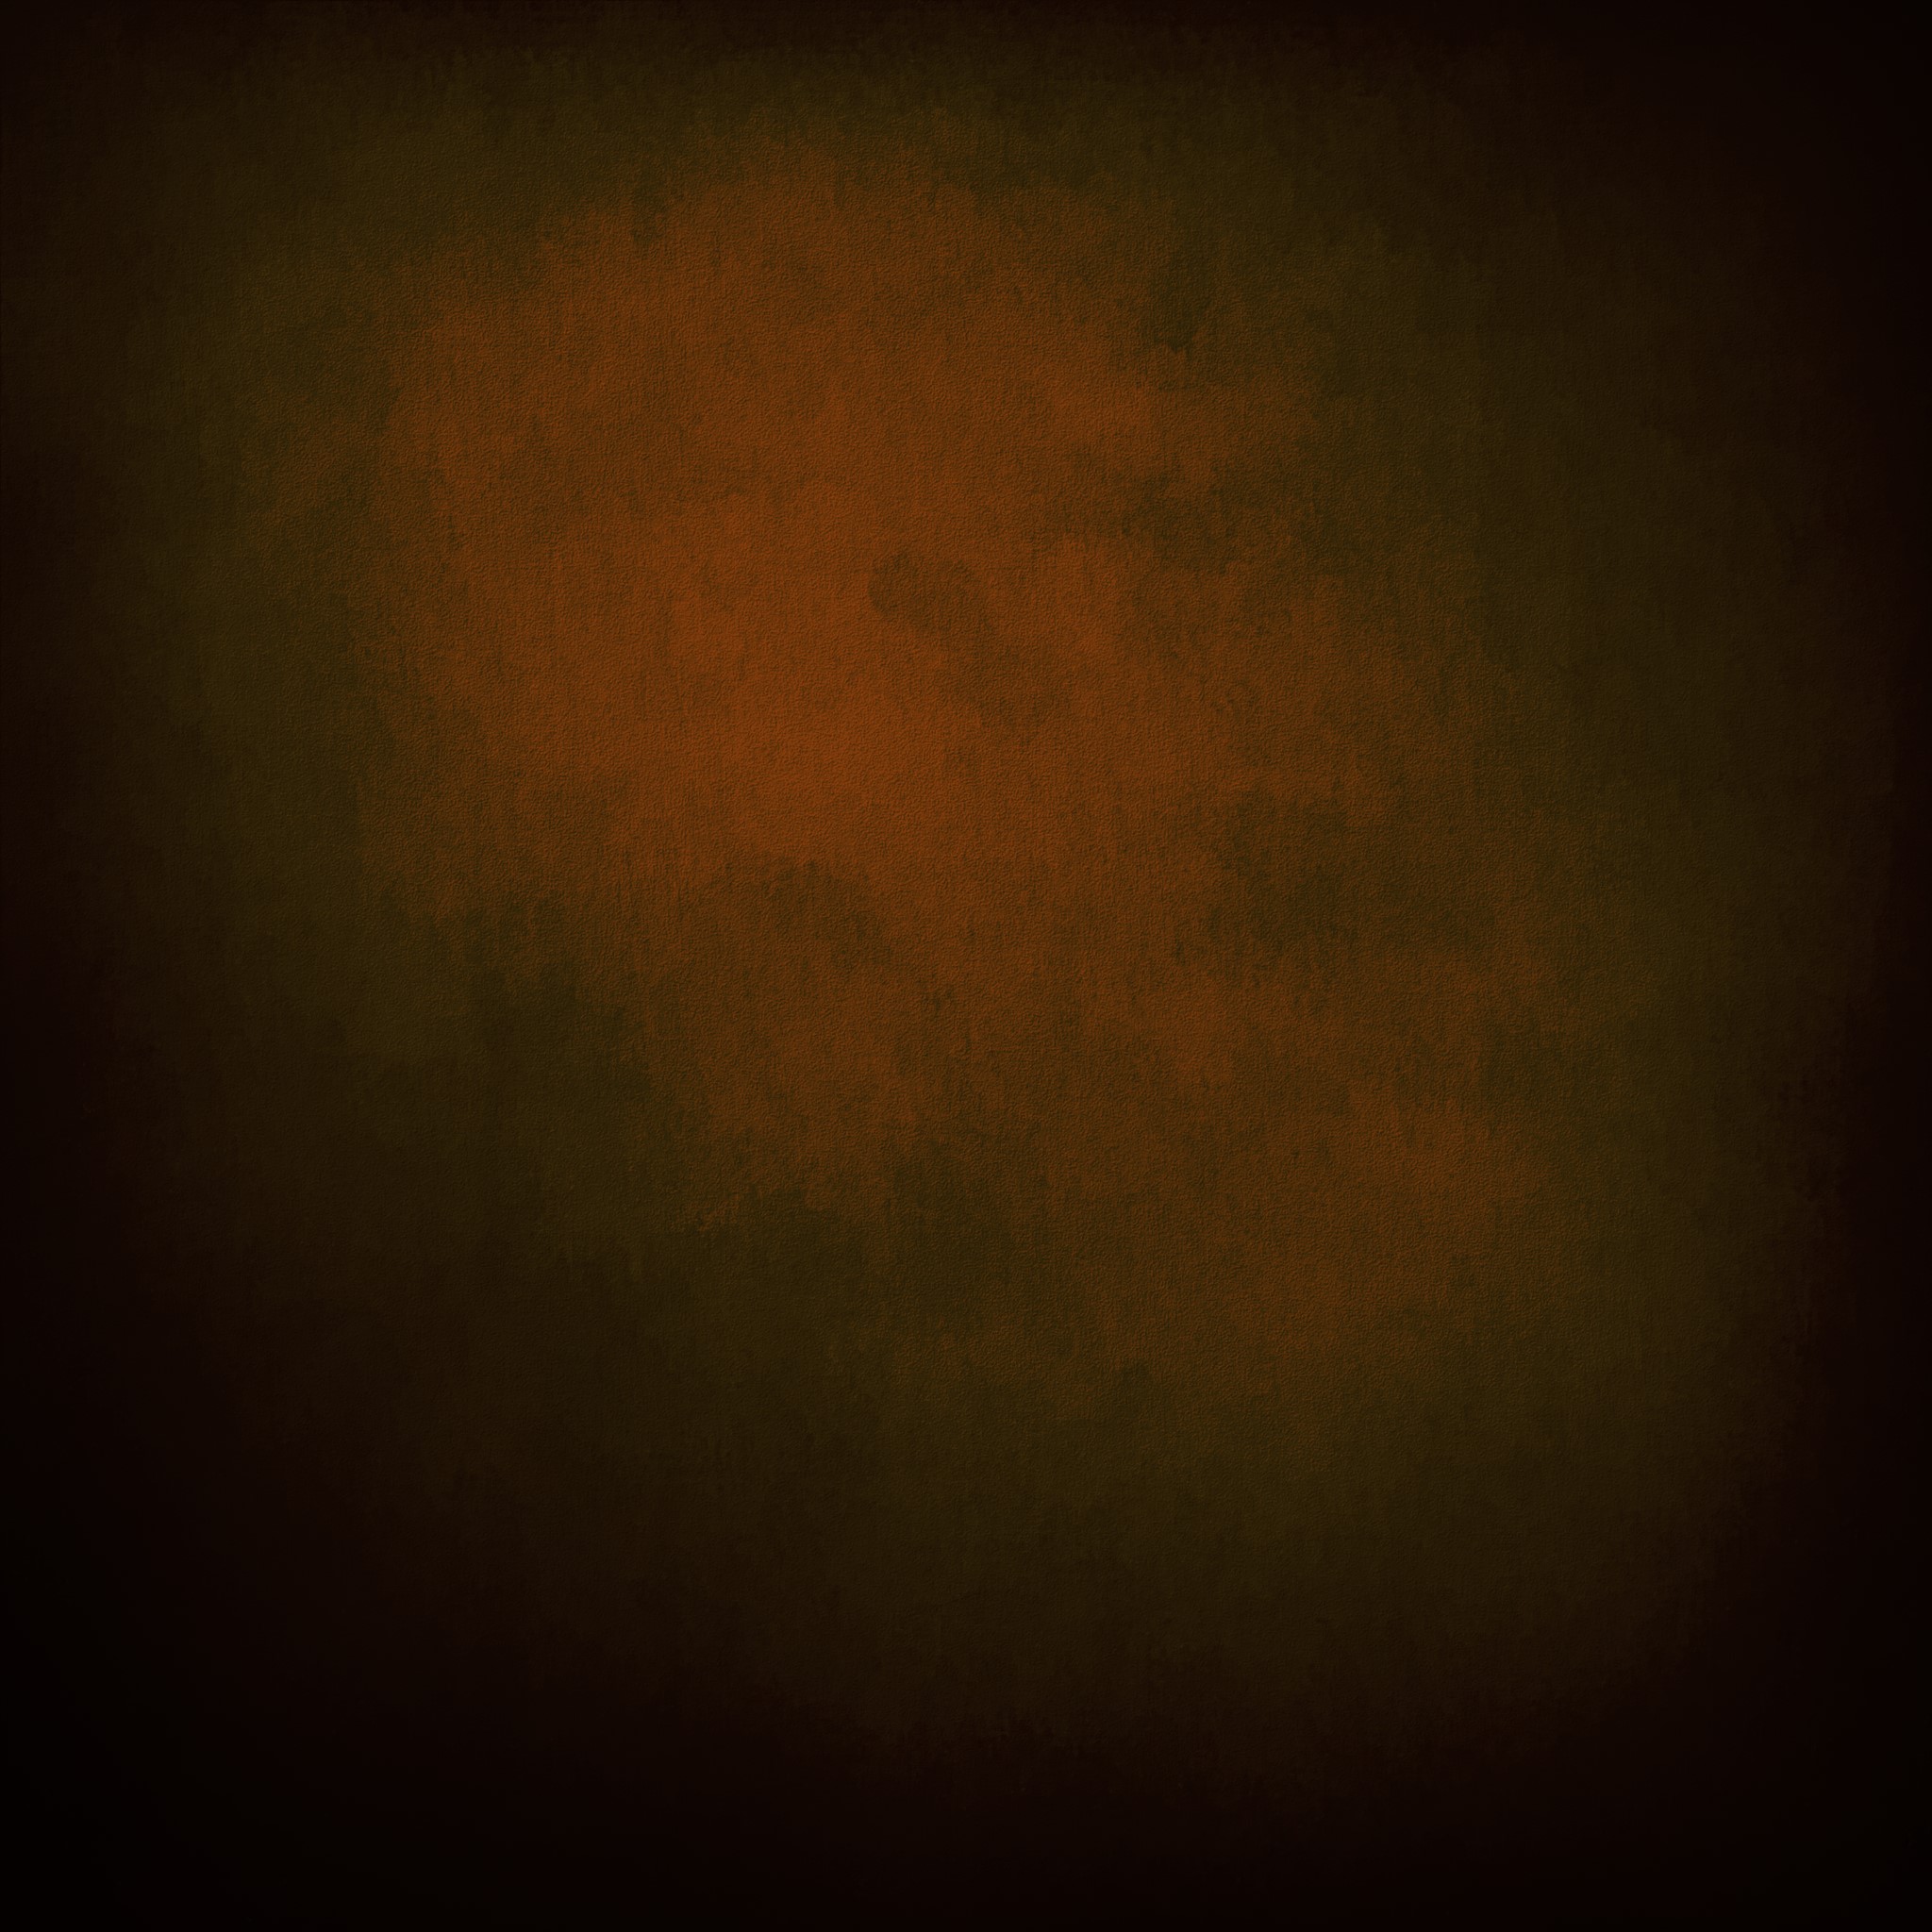
Background
The background was a simple plane with a bitmap I created earlier, based on real portrait photography backgrounds. I modified the hue and the value to get the dark green tone which I often use.
Center of attention, tones and consistency
When throwing in the flowers, I realized that they were drawing all the focus. I modified their value, hue and saturation to ensure that the skulls stood out as the brightest elements of the composition.


Before and after (Eevee viewport).
SHADERS AND MATERIALS
Harmonizing
Most of the assets are very disparate. The authors are different, and so are the techniques i.e. sculpting, photo-scanning, etc.
They really came together when harmonizing the materials. I changed all the metallic materials and the leather ones so they would look consistent.
These materials are not intended for super close-up shots, but they do the trick at mid-distance, I think.
Cloth Material
I started with harmonizing the colors (hue, saturation, value mostly). For complex cases, I create masks by decomposing the RGB or HSV channels to get further control on the tones.
On top of the base color and normal maps coming with the assets, I added a fabric pattern and some layers of grunge.


Skeleton Material
The skeleton material is fully procedural.


FINISHING TOUCHES
Extra detail
I added details to make the composition more interesting to look at, and also to mask areas where the base models had flaws (the photo-scanned assets can have a very inconsistent quality).


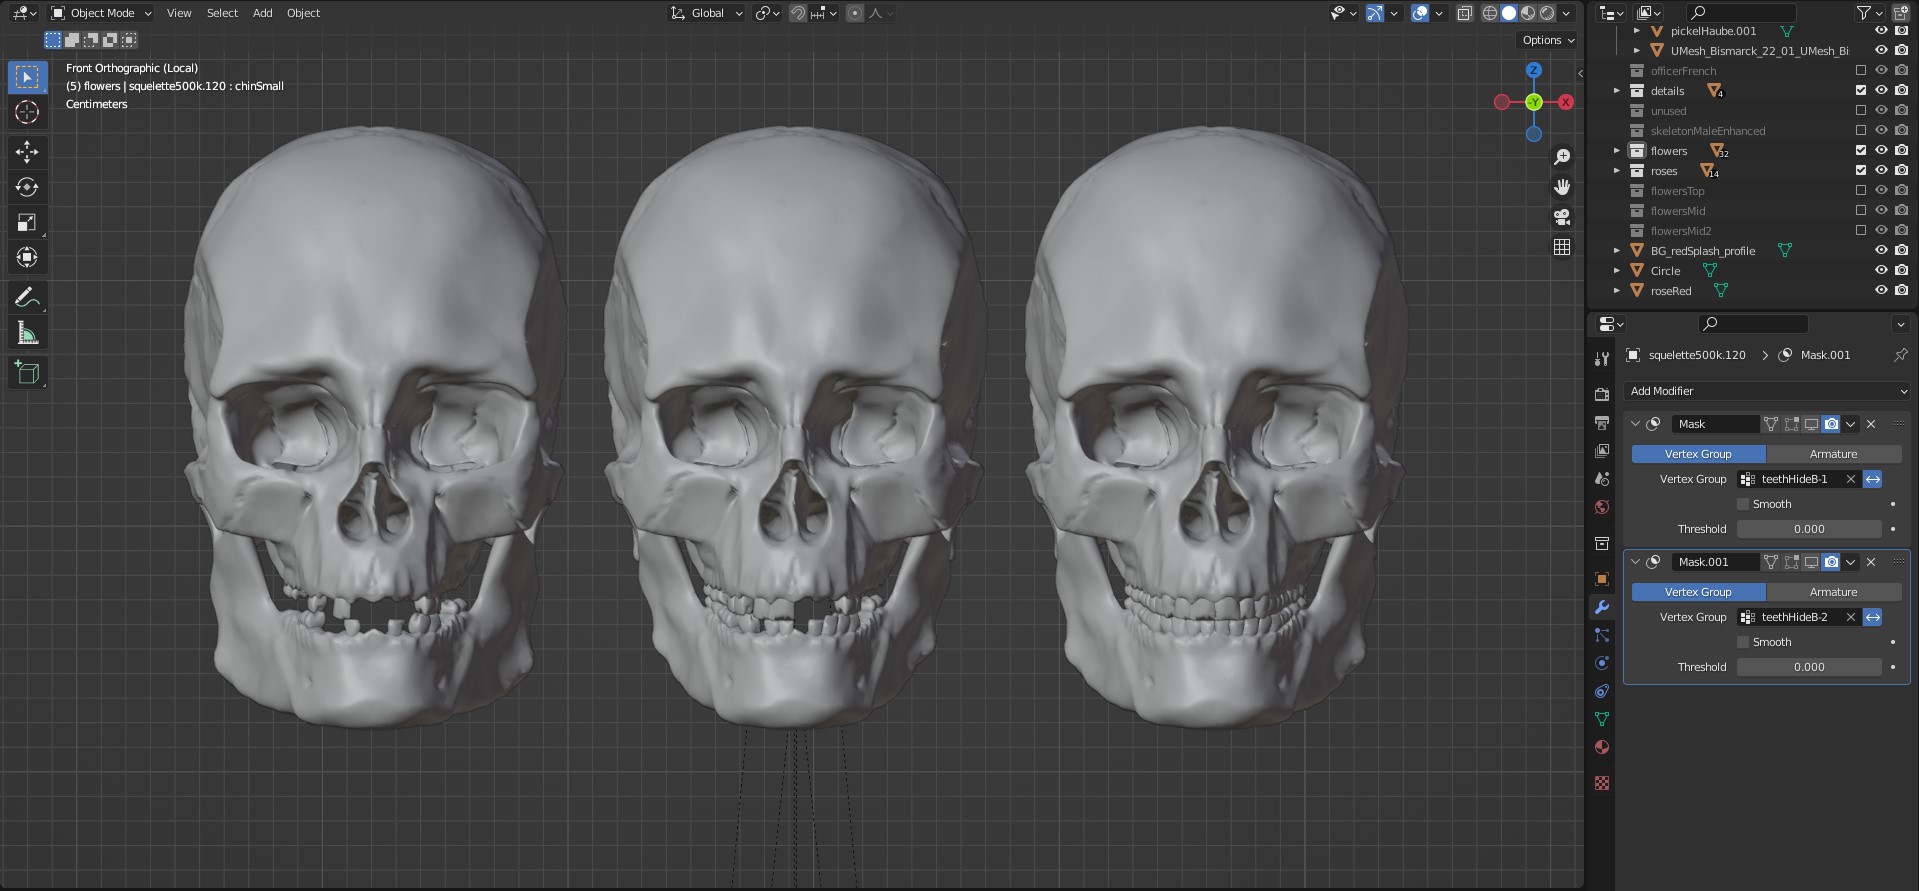
Skeleton variations
Through the use of masking and shape keys, I introduced little variations in the skulls—the remaining teeth, the size and shape of the jaw, and the size of the orbits.
Rendering
I rendered the image in 4000*4000px with cycles in Blender 3.0.
I usually set up the render settings on “preview” with denoising. For a large print, I would definitely increase these settings and handle the denoising manually, but for publication on social media, that’s good enough as it renders fast.

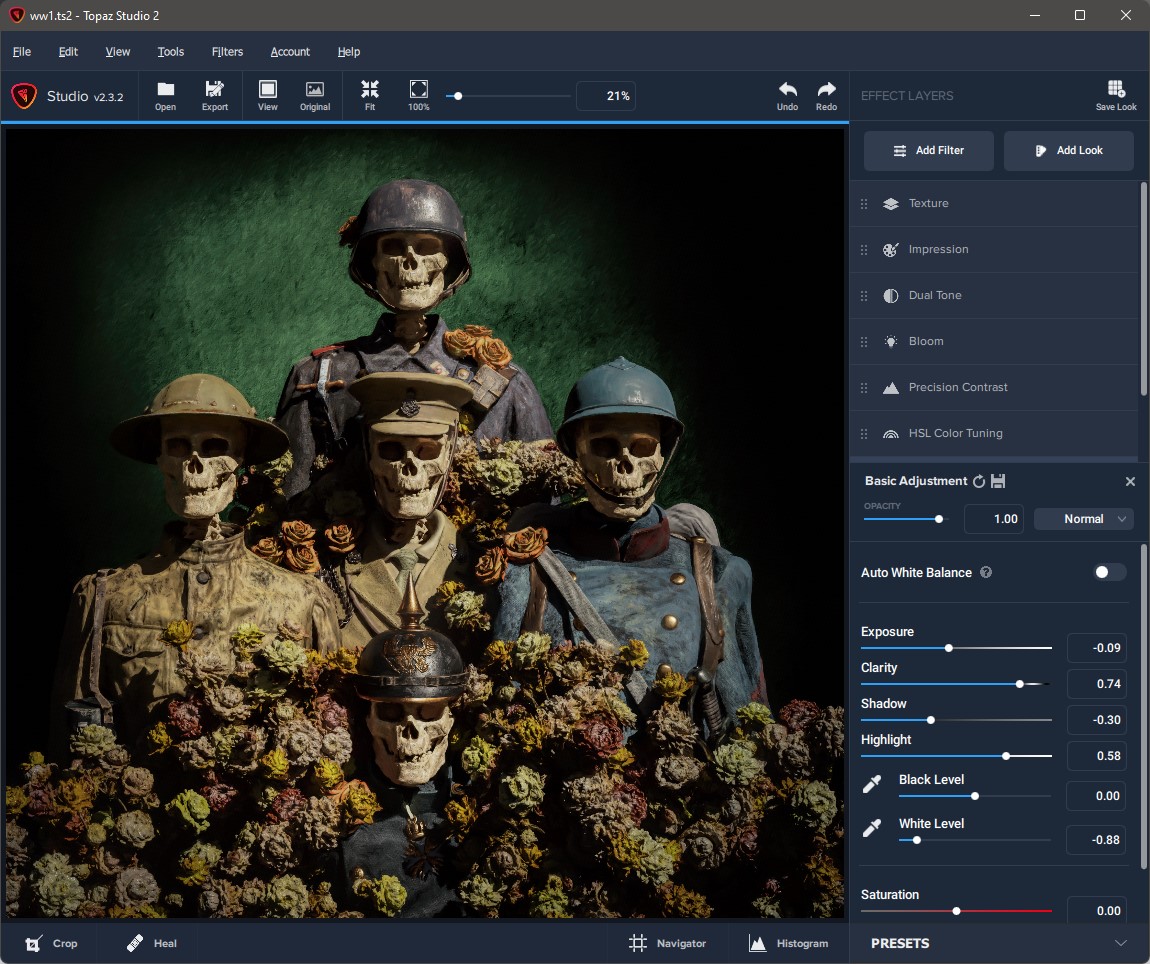
Post-processing
I always process my raw renders with Topaz Studio 2. I spend a lot of time in there, with the following workflow:
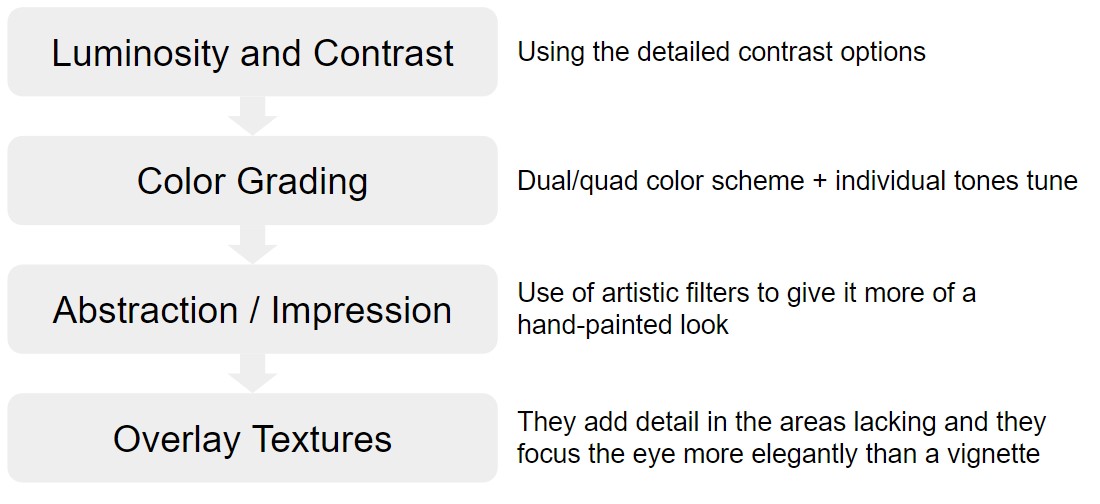
I wanted to accentuate the shadows and get rid of the too-fine details while boosting the medium ones (like the grunge on the skulls).
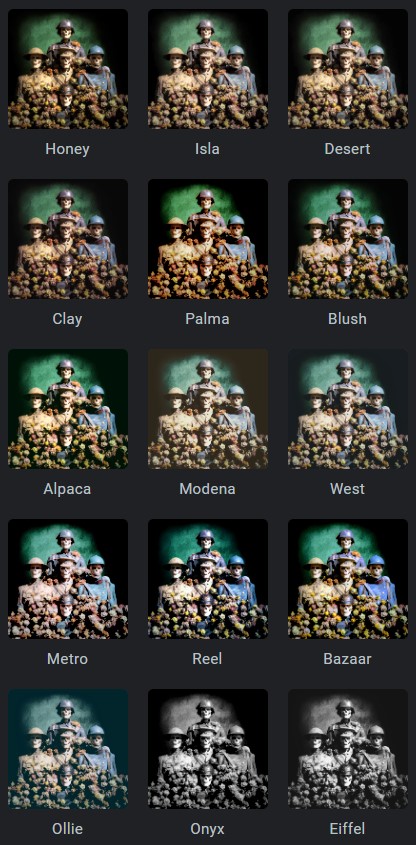
I uploaded these to Google photos, and I’m often giving them a quick last adjustment, since the controls are very intuitive there, and the thumbnail view gives a different perspective.
UNITED AT LAST
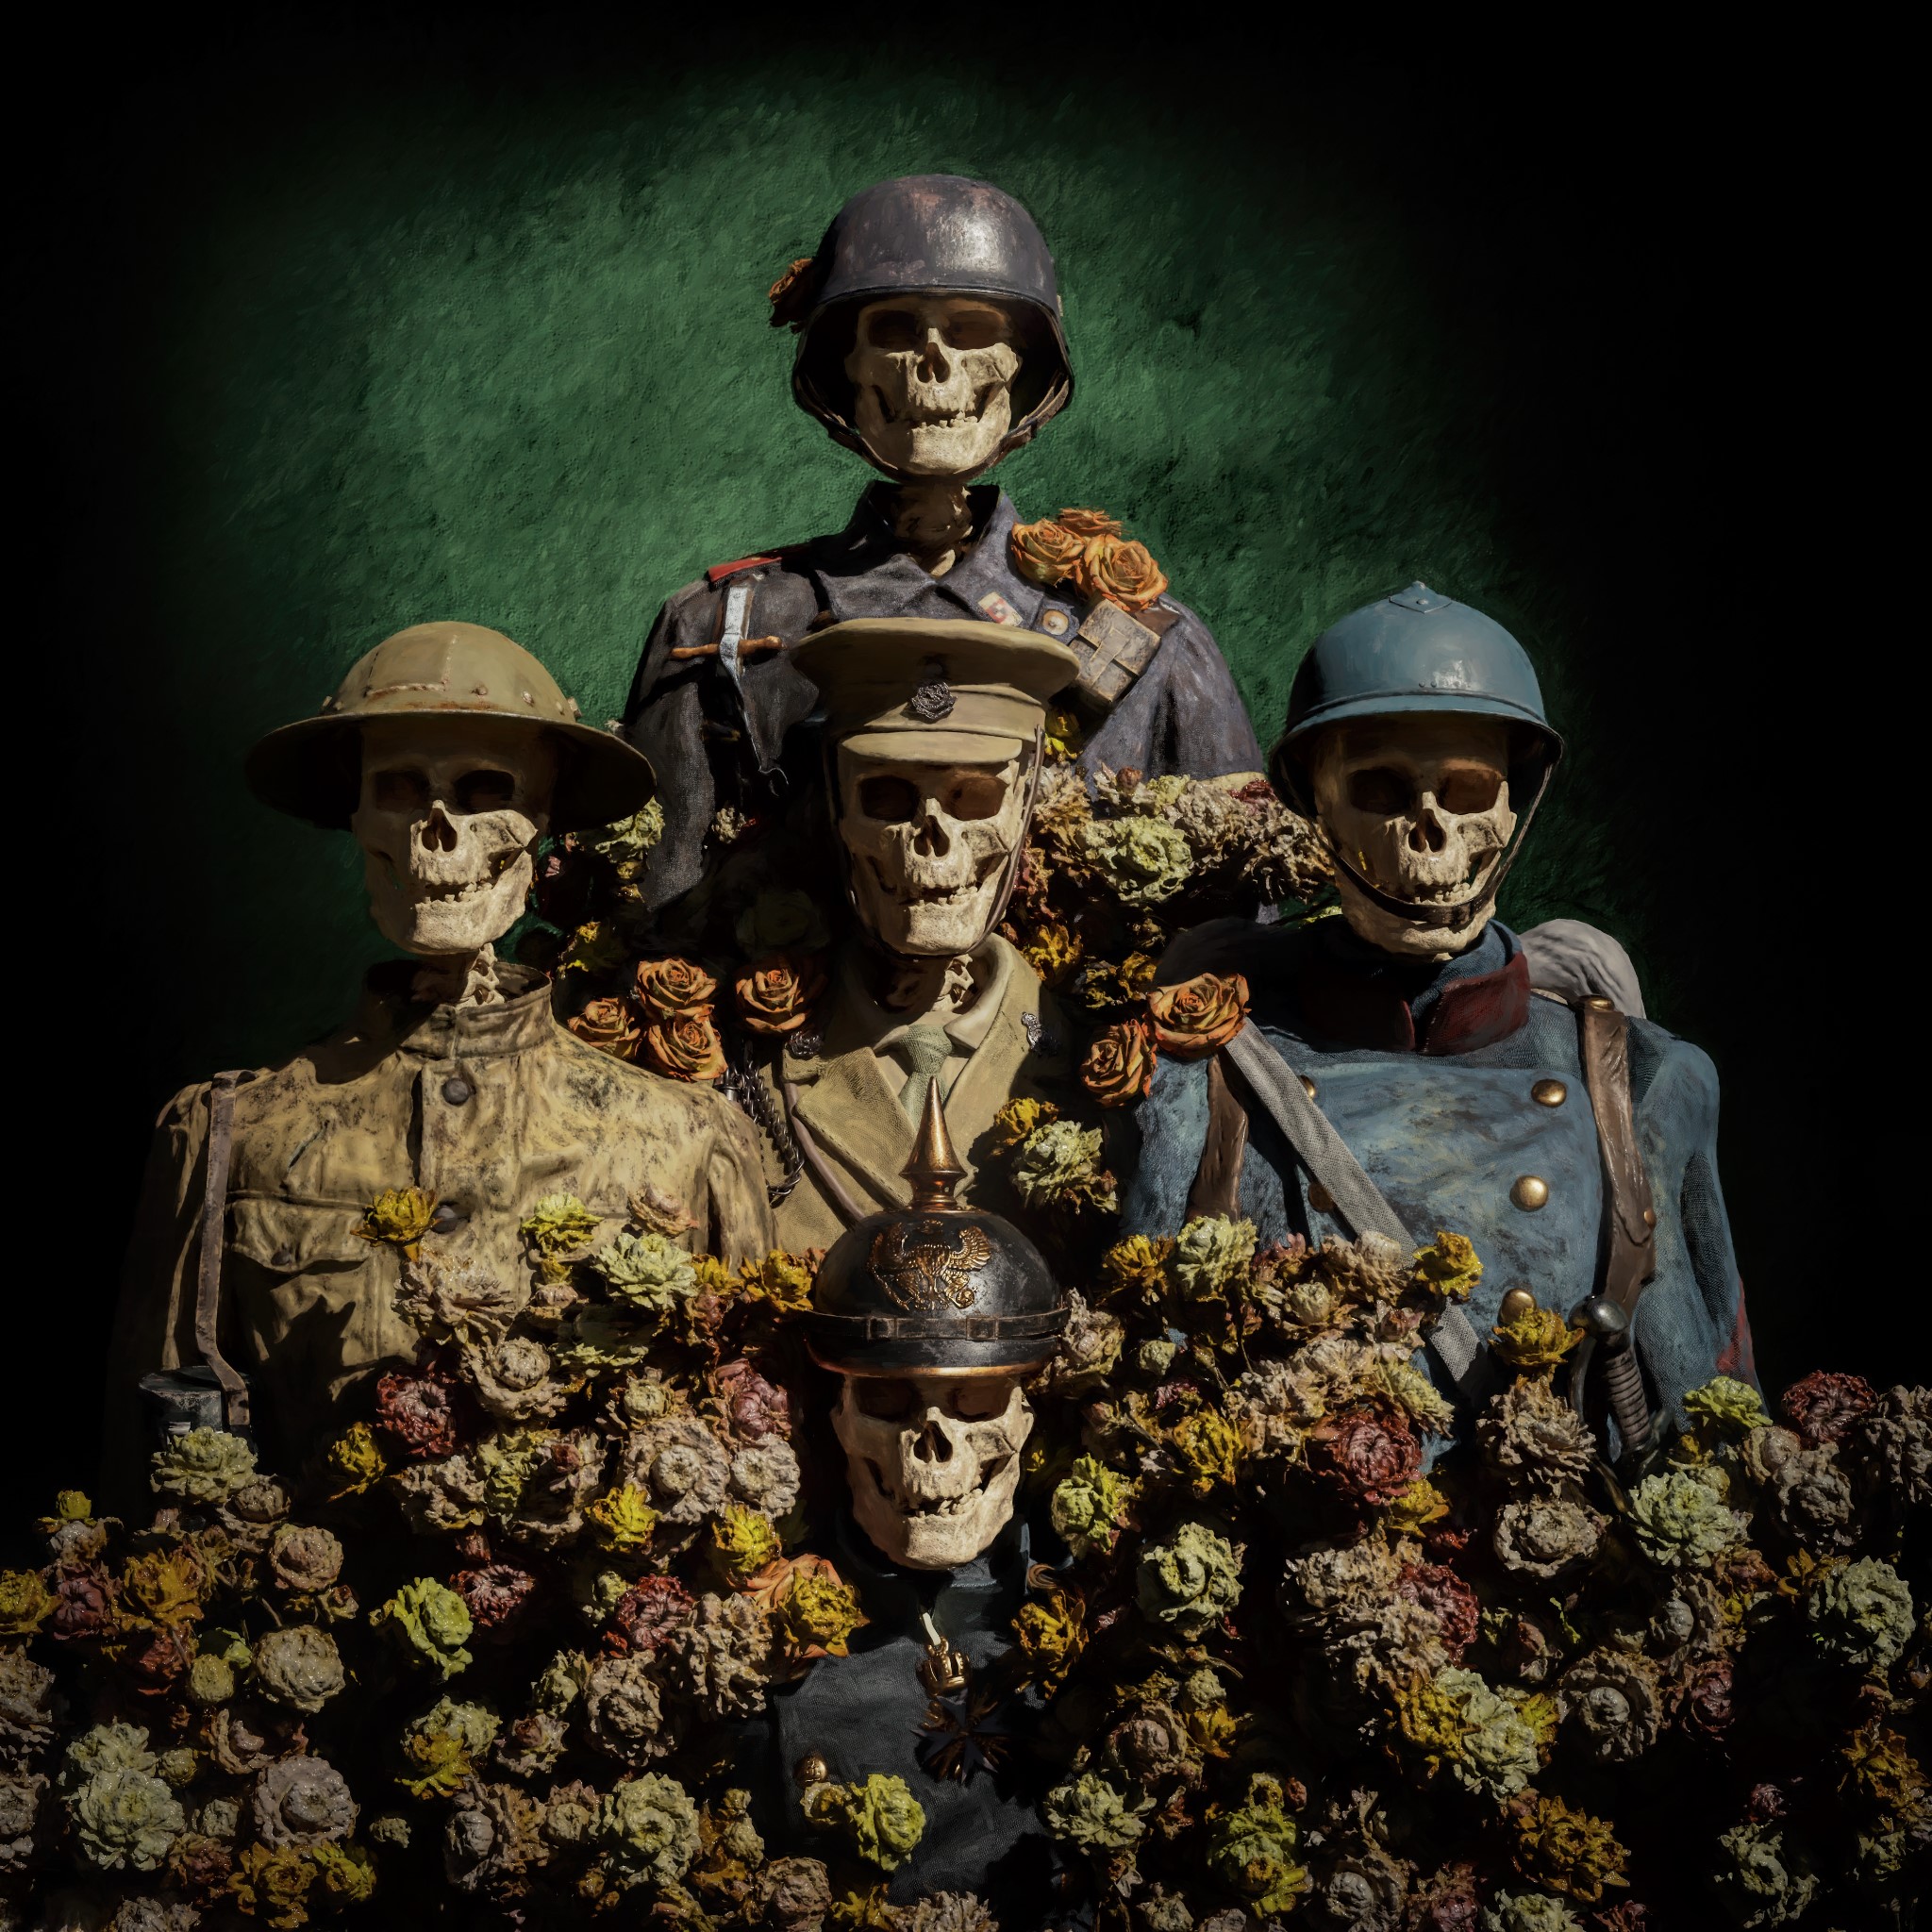
Here they are, united at last!
I hope you enjoyed reading the article. Feel free to comment or ask any questions down below. Have a great day!
About the Artist

Denis Gauder, a 3D artist from Belgium. He is focusing on producing thought-invoking pieces, with a dark twist.
2 Comments
Let's hope that the folly of man cannot reach them ever again, wherever they are, or aren't.
Excellent work and an idea with depth. I would have added some „pal/buddy“ arrangements: arms around the neck, German placing bony hands on the shoulder of the British soldier.