
Behind the Scenes: Rustic Interior Window

INTRODUCTION
Hey folks, my name is Juan and I am from Bogotá, Colombia. I am a graphic designer and 3D artist. Right now, I am developing a course of Archviz for interiors and working with a 3D design company.
My main focus is architectural visualization. I think I have found a zone in which I can move comfortably and enjoy each part of the process, especially the texturing and lighting part. In the future, I would like to start exploring the creation of landscapes and environments.
INSPIRATION
I always seek inspiration on popular websites like Pinterest, Behance, and Instagram. Especially in the case of Pinterest, I am constantly creating boards with different styles of looks and things that inspire me to create my scenes. These things could be images like photos, textures, or objects.
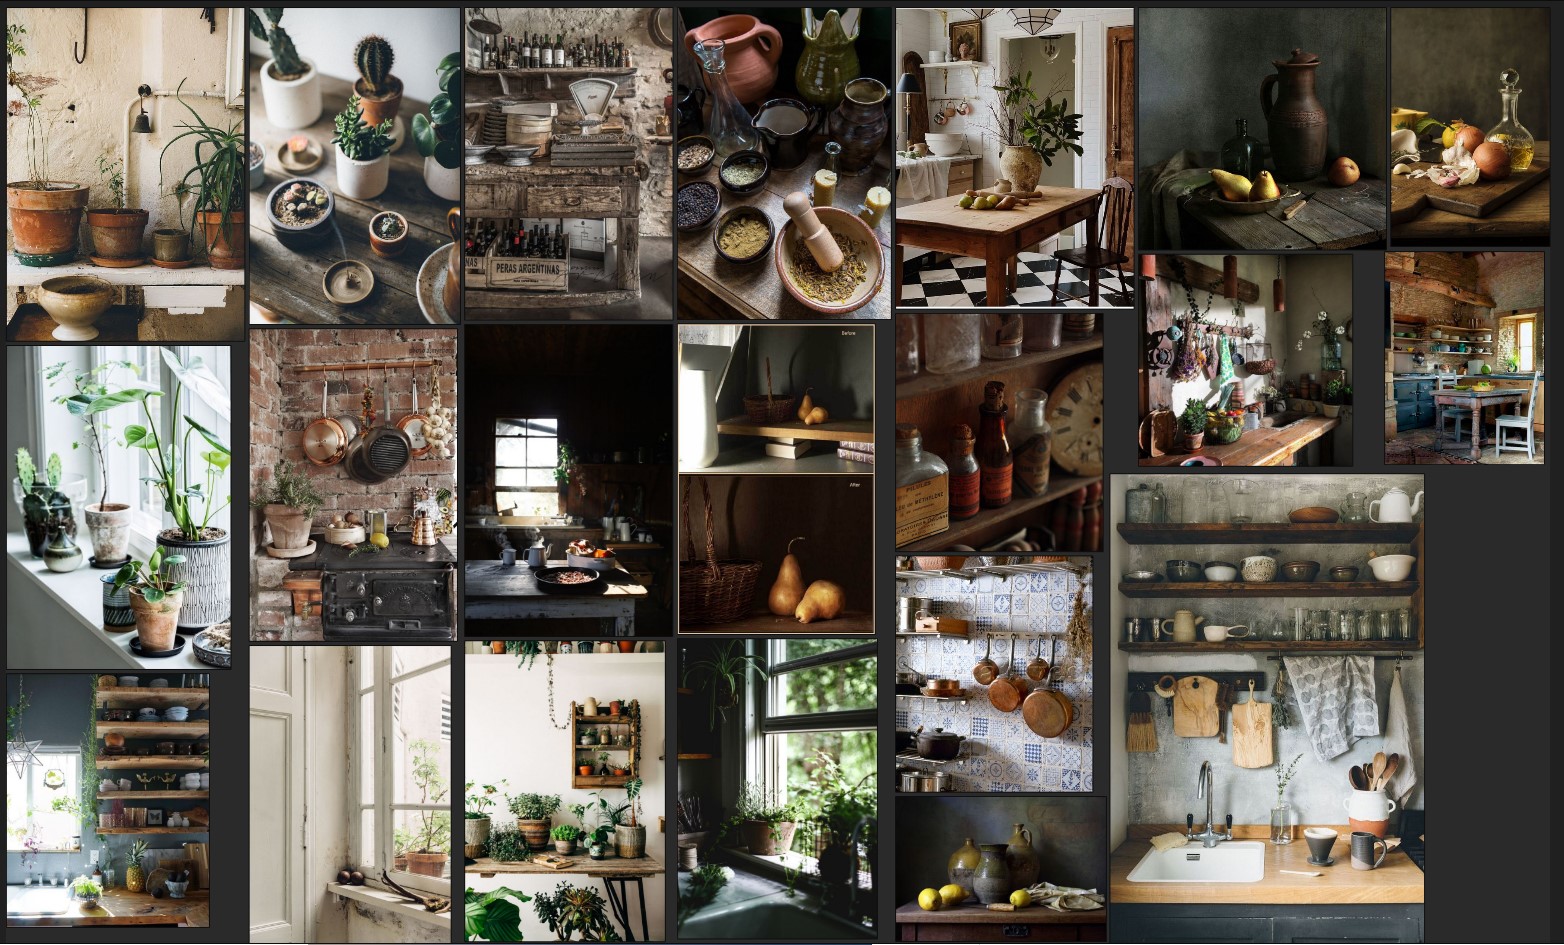
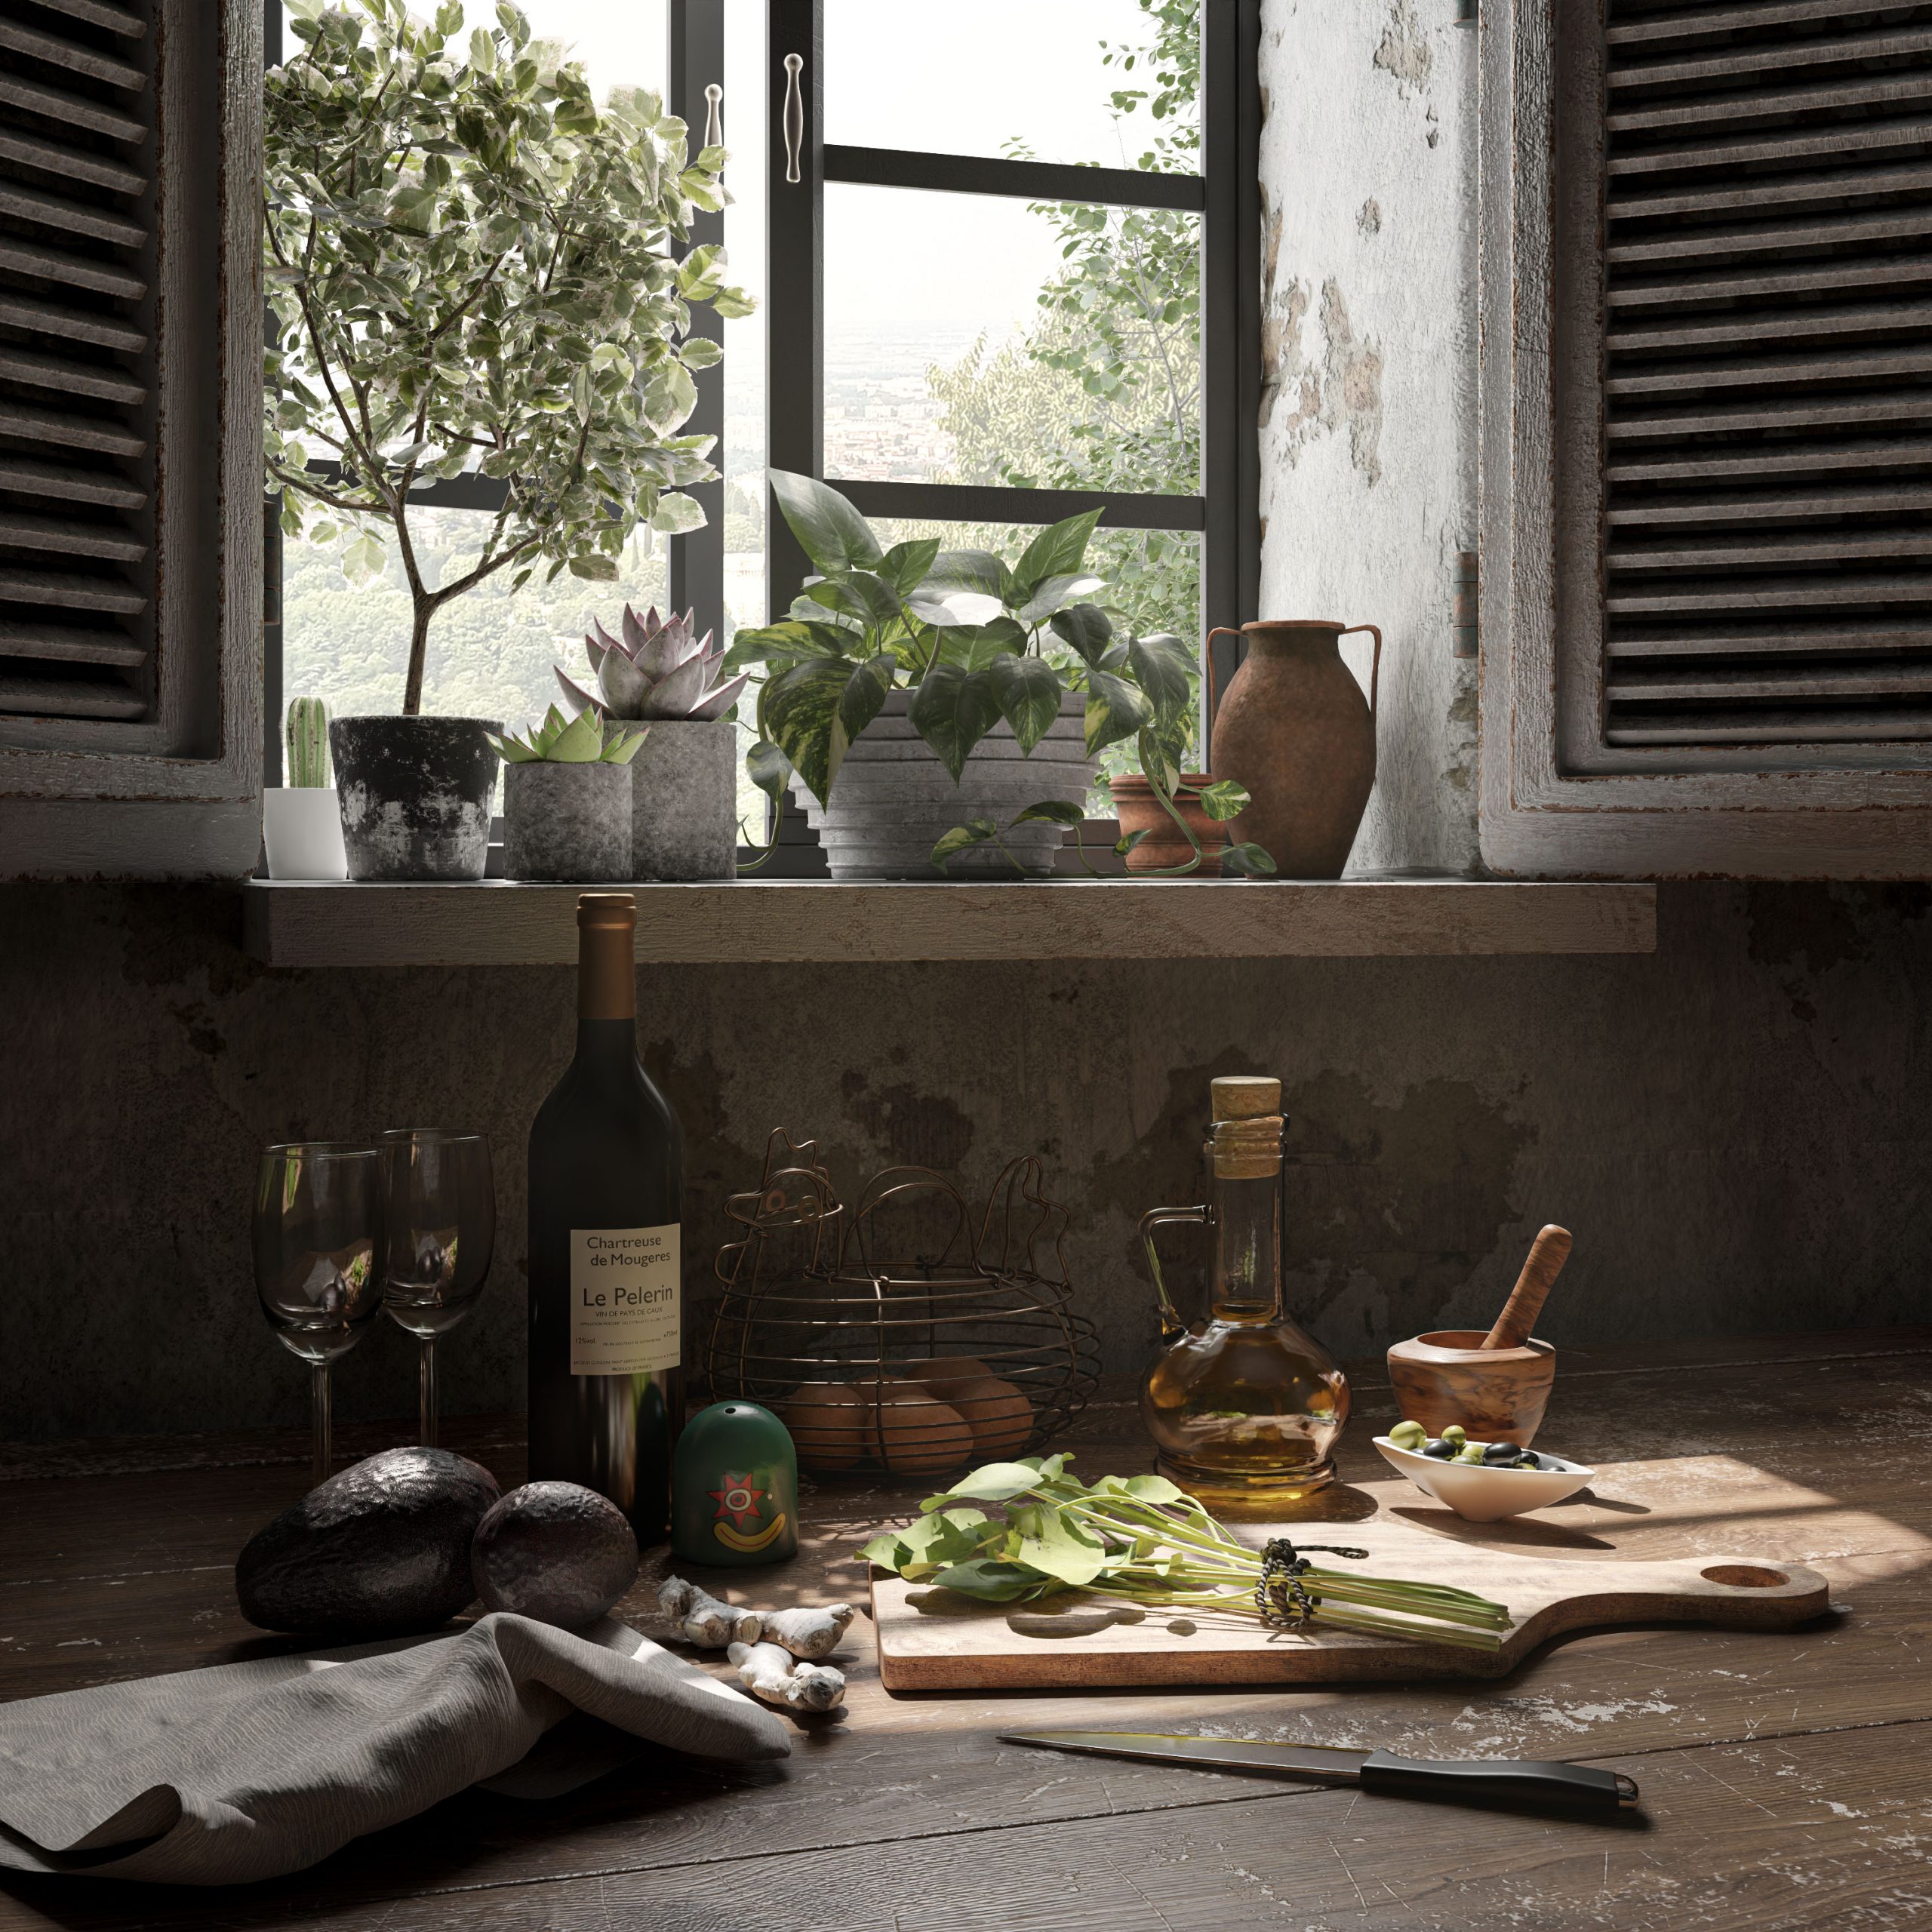
For this particular scene, I got my inspiration from different photographs of food, still life paints, some memories of my school best friend‘s house and its rustic style.
MODELING
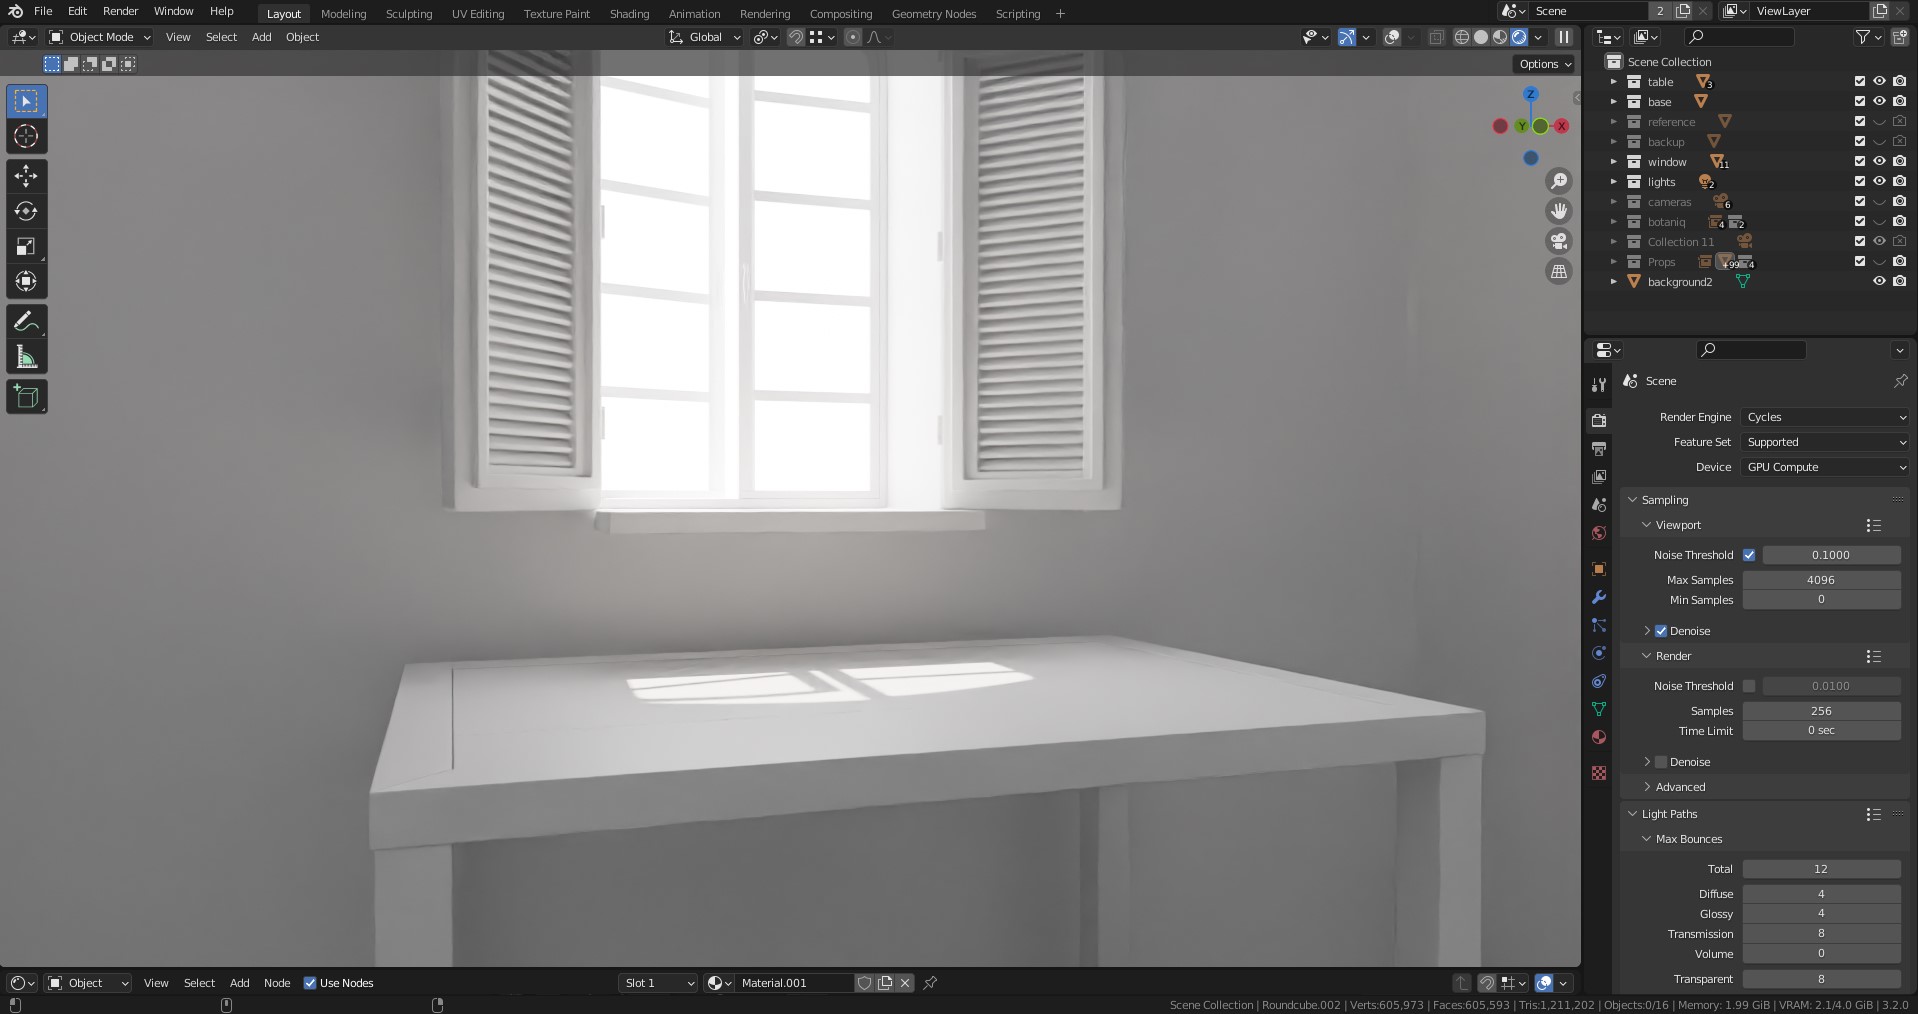
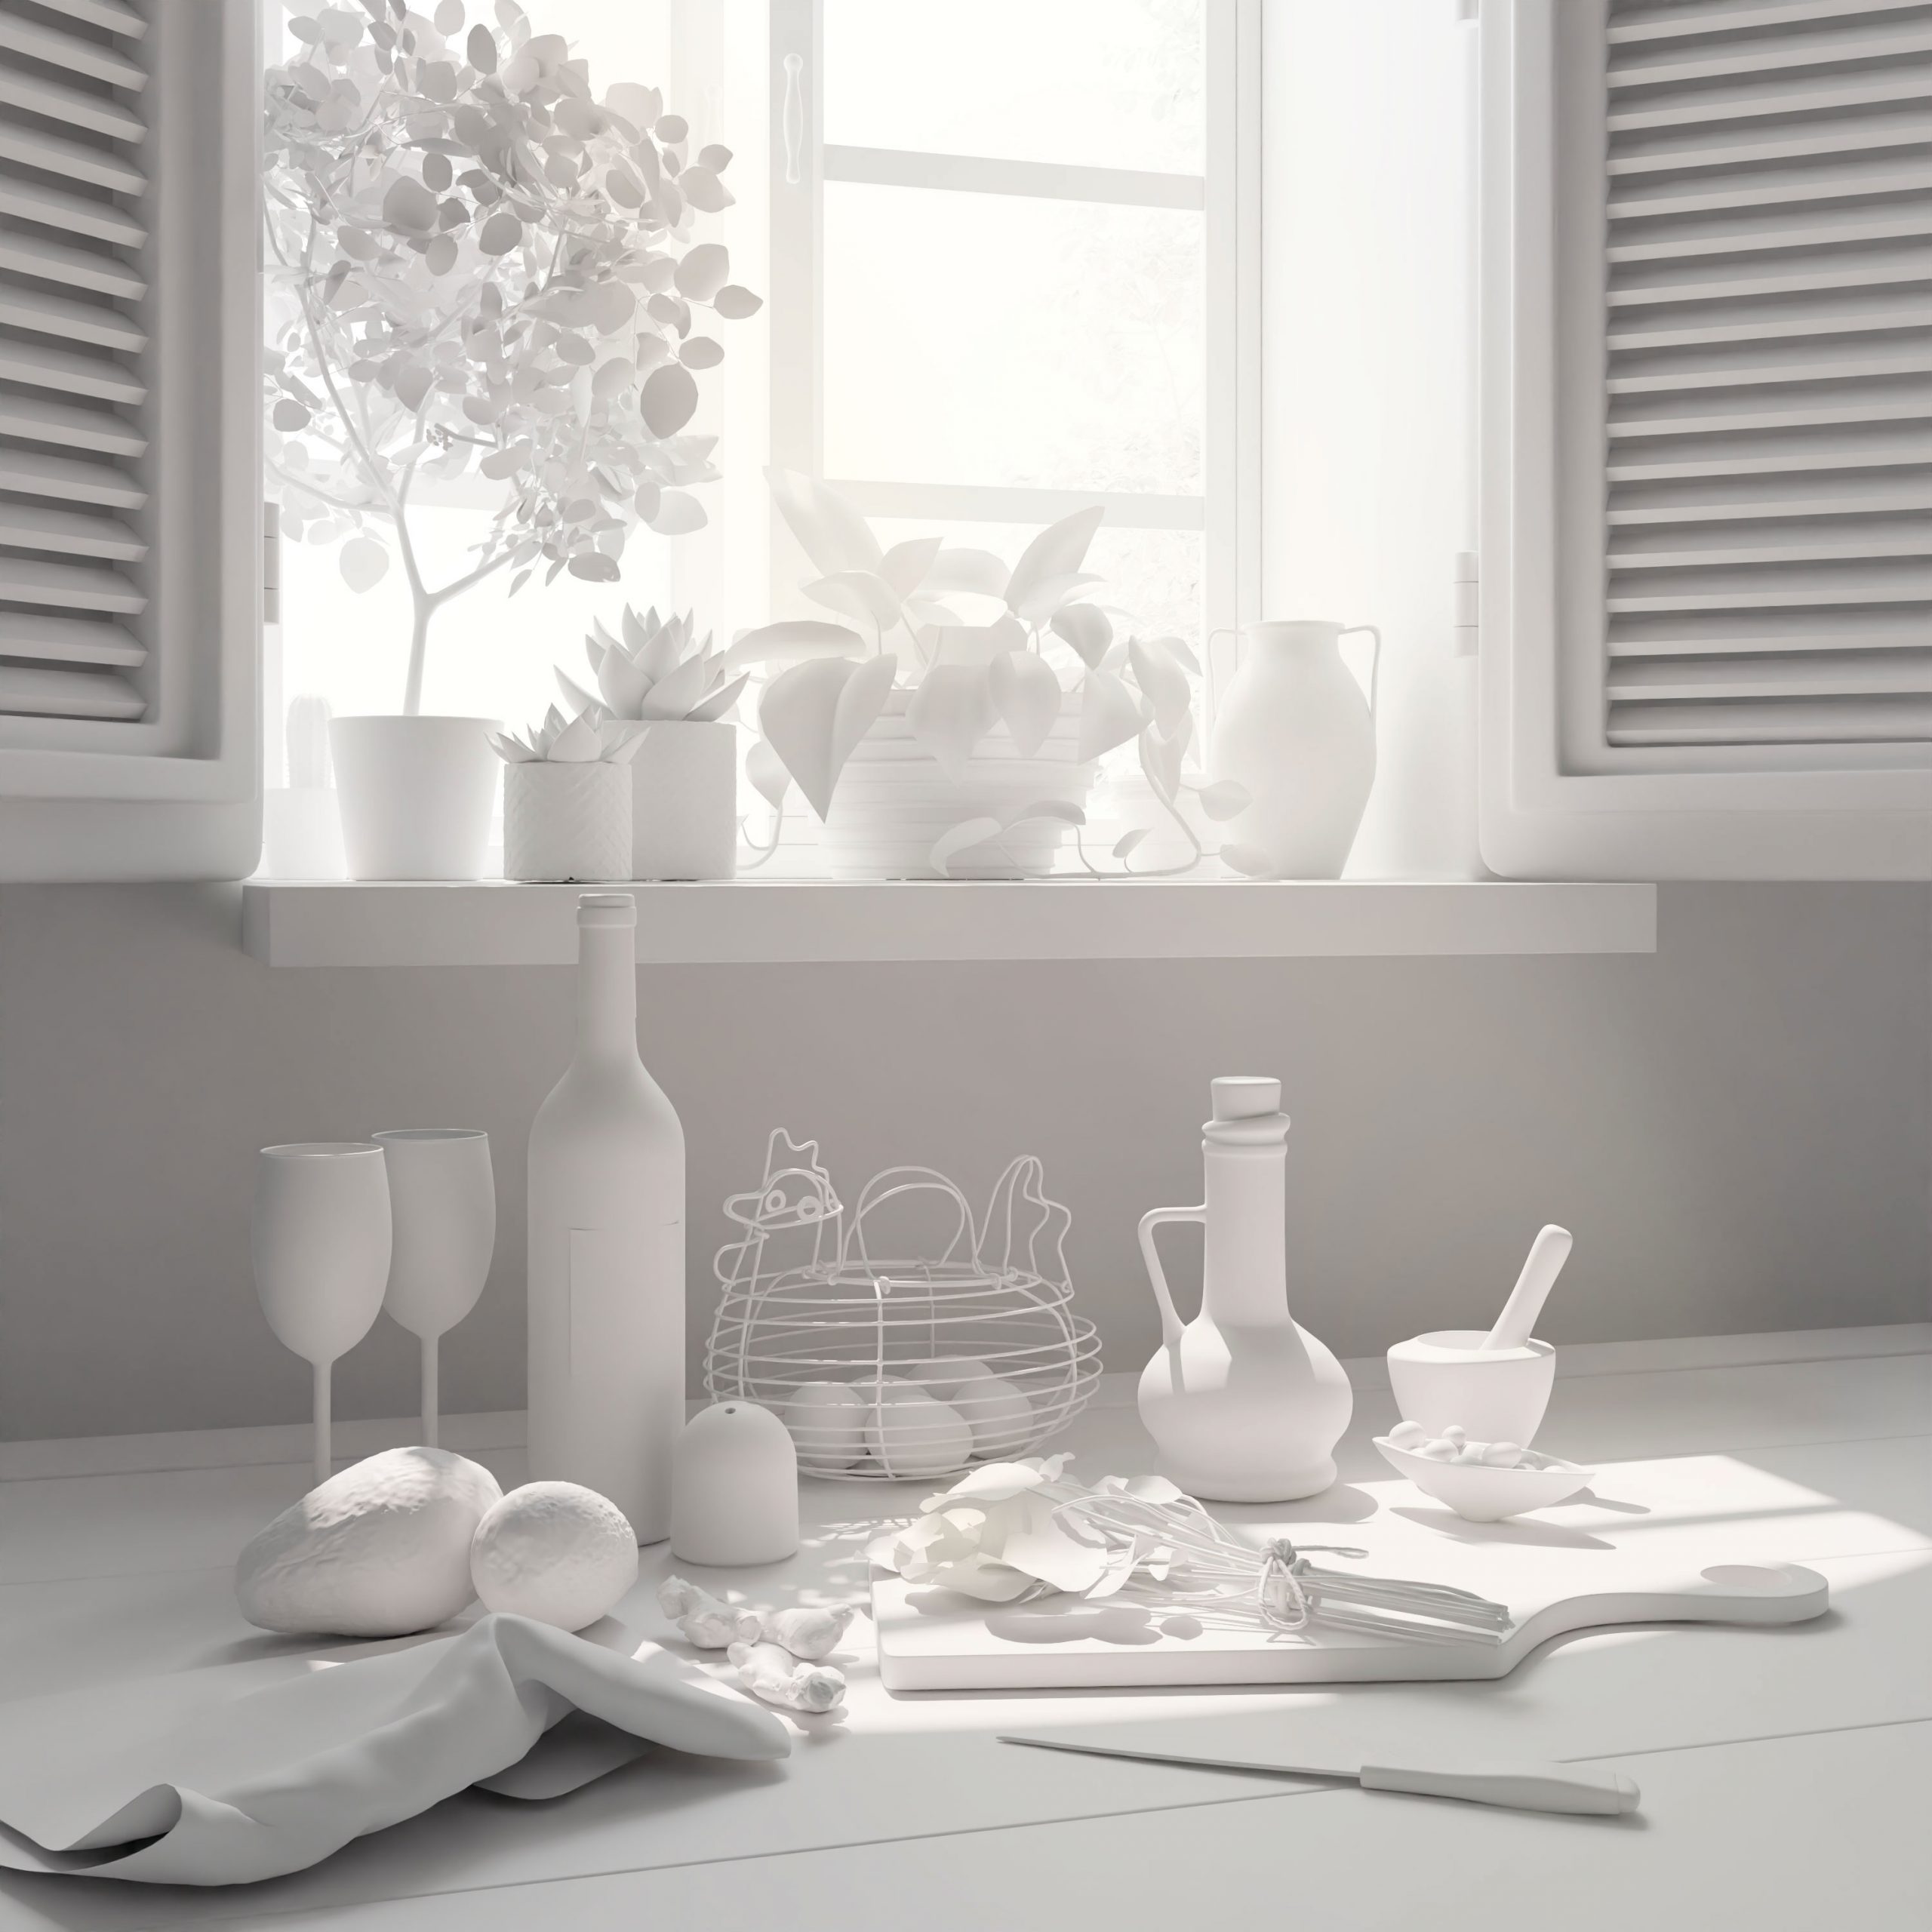
For the modeling process, I began to model the base structure of the interior and the window, with all the details that I wanted to start to see some significant progress in the scene.

Once I modeled the base structure, I started to model the main table where the still life would be placed according to my references and the style of assets that I wanted to achieve.

When I am comfortable with the modeling process of the interior looks, I always start with basic UV mapping, texturing, and lighting settings before moving forward with the process. This is the method that I learned, and I feel very comfortable with this way of making my 3D scenes because it lets me explore and test different textures, material, and see if they work or not. Finally, I looked at the scene, took a deep breath, and was happy with the modeling process.
LIGHTING
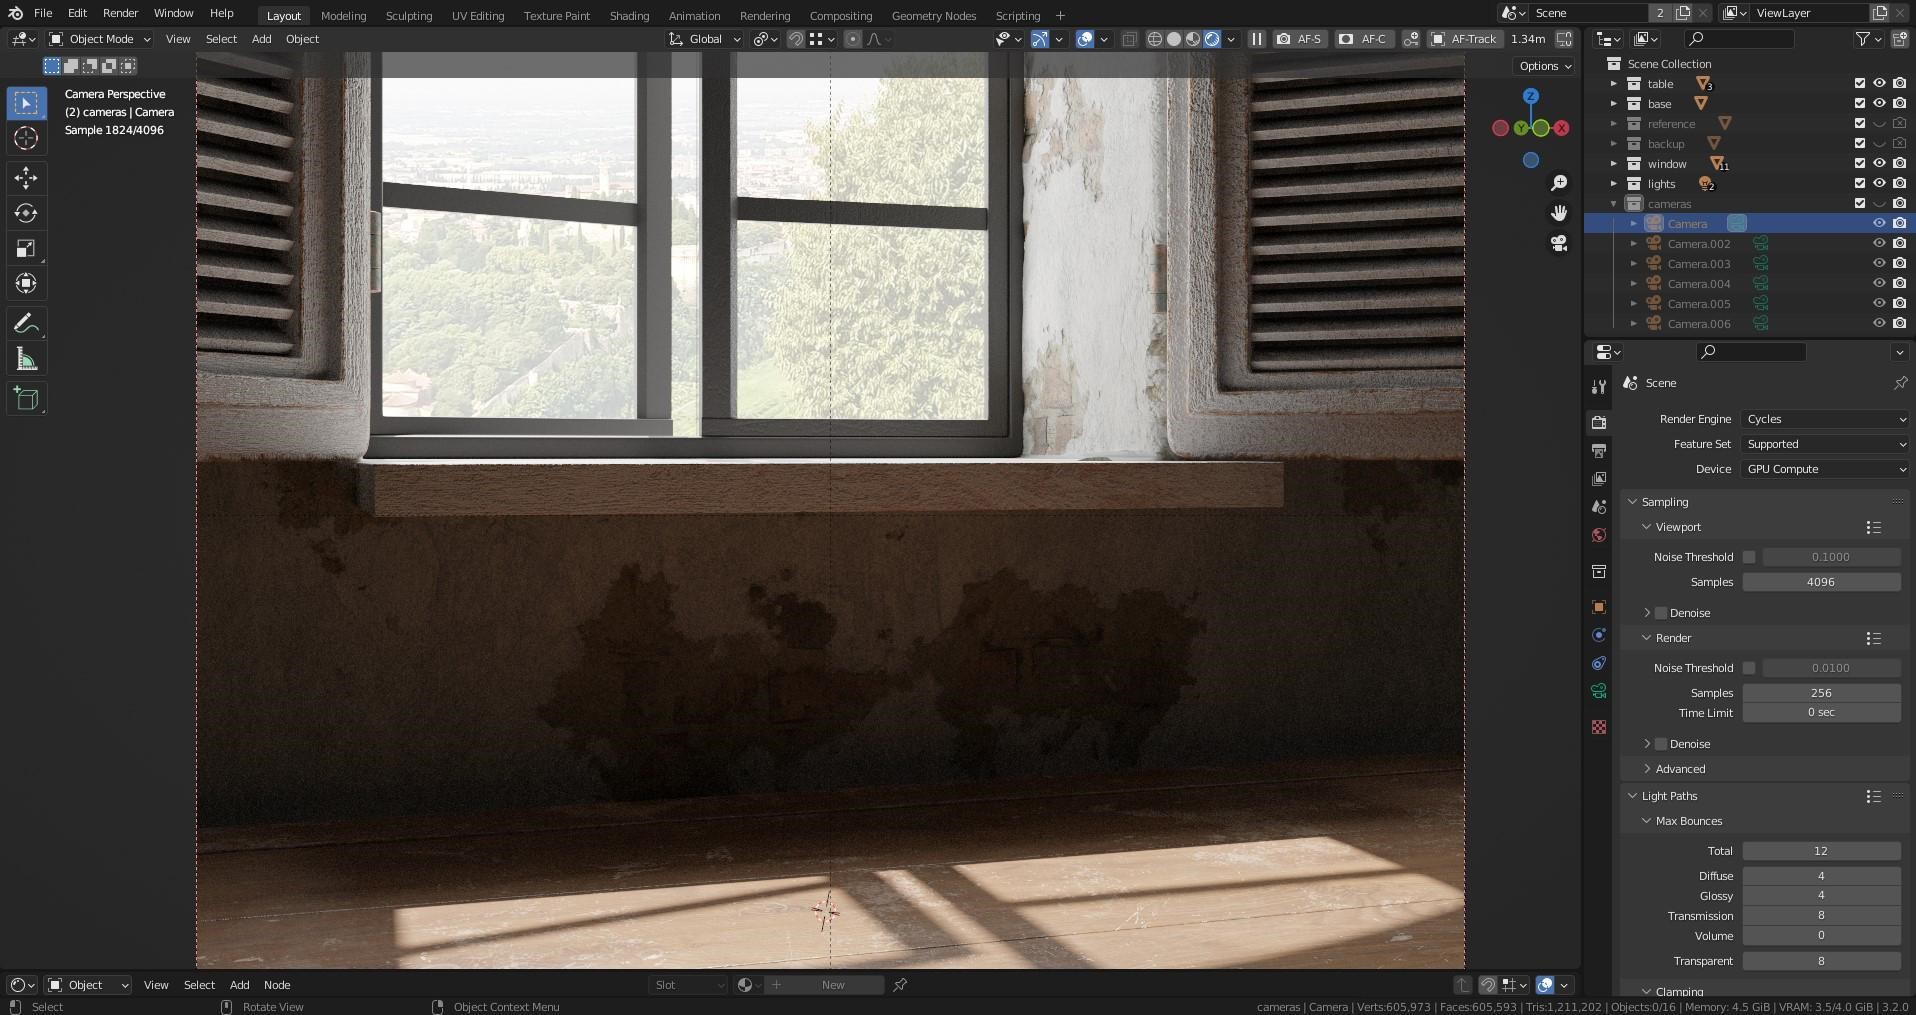
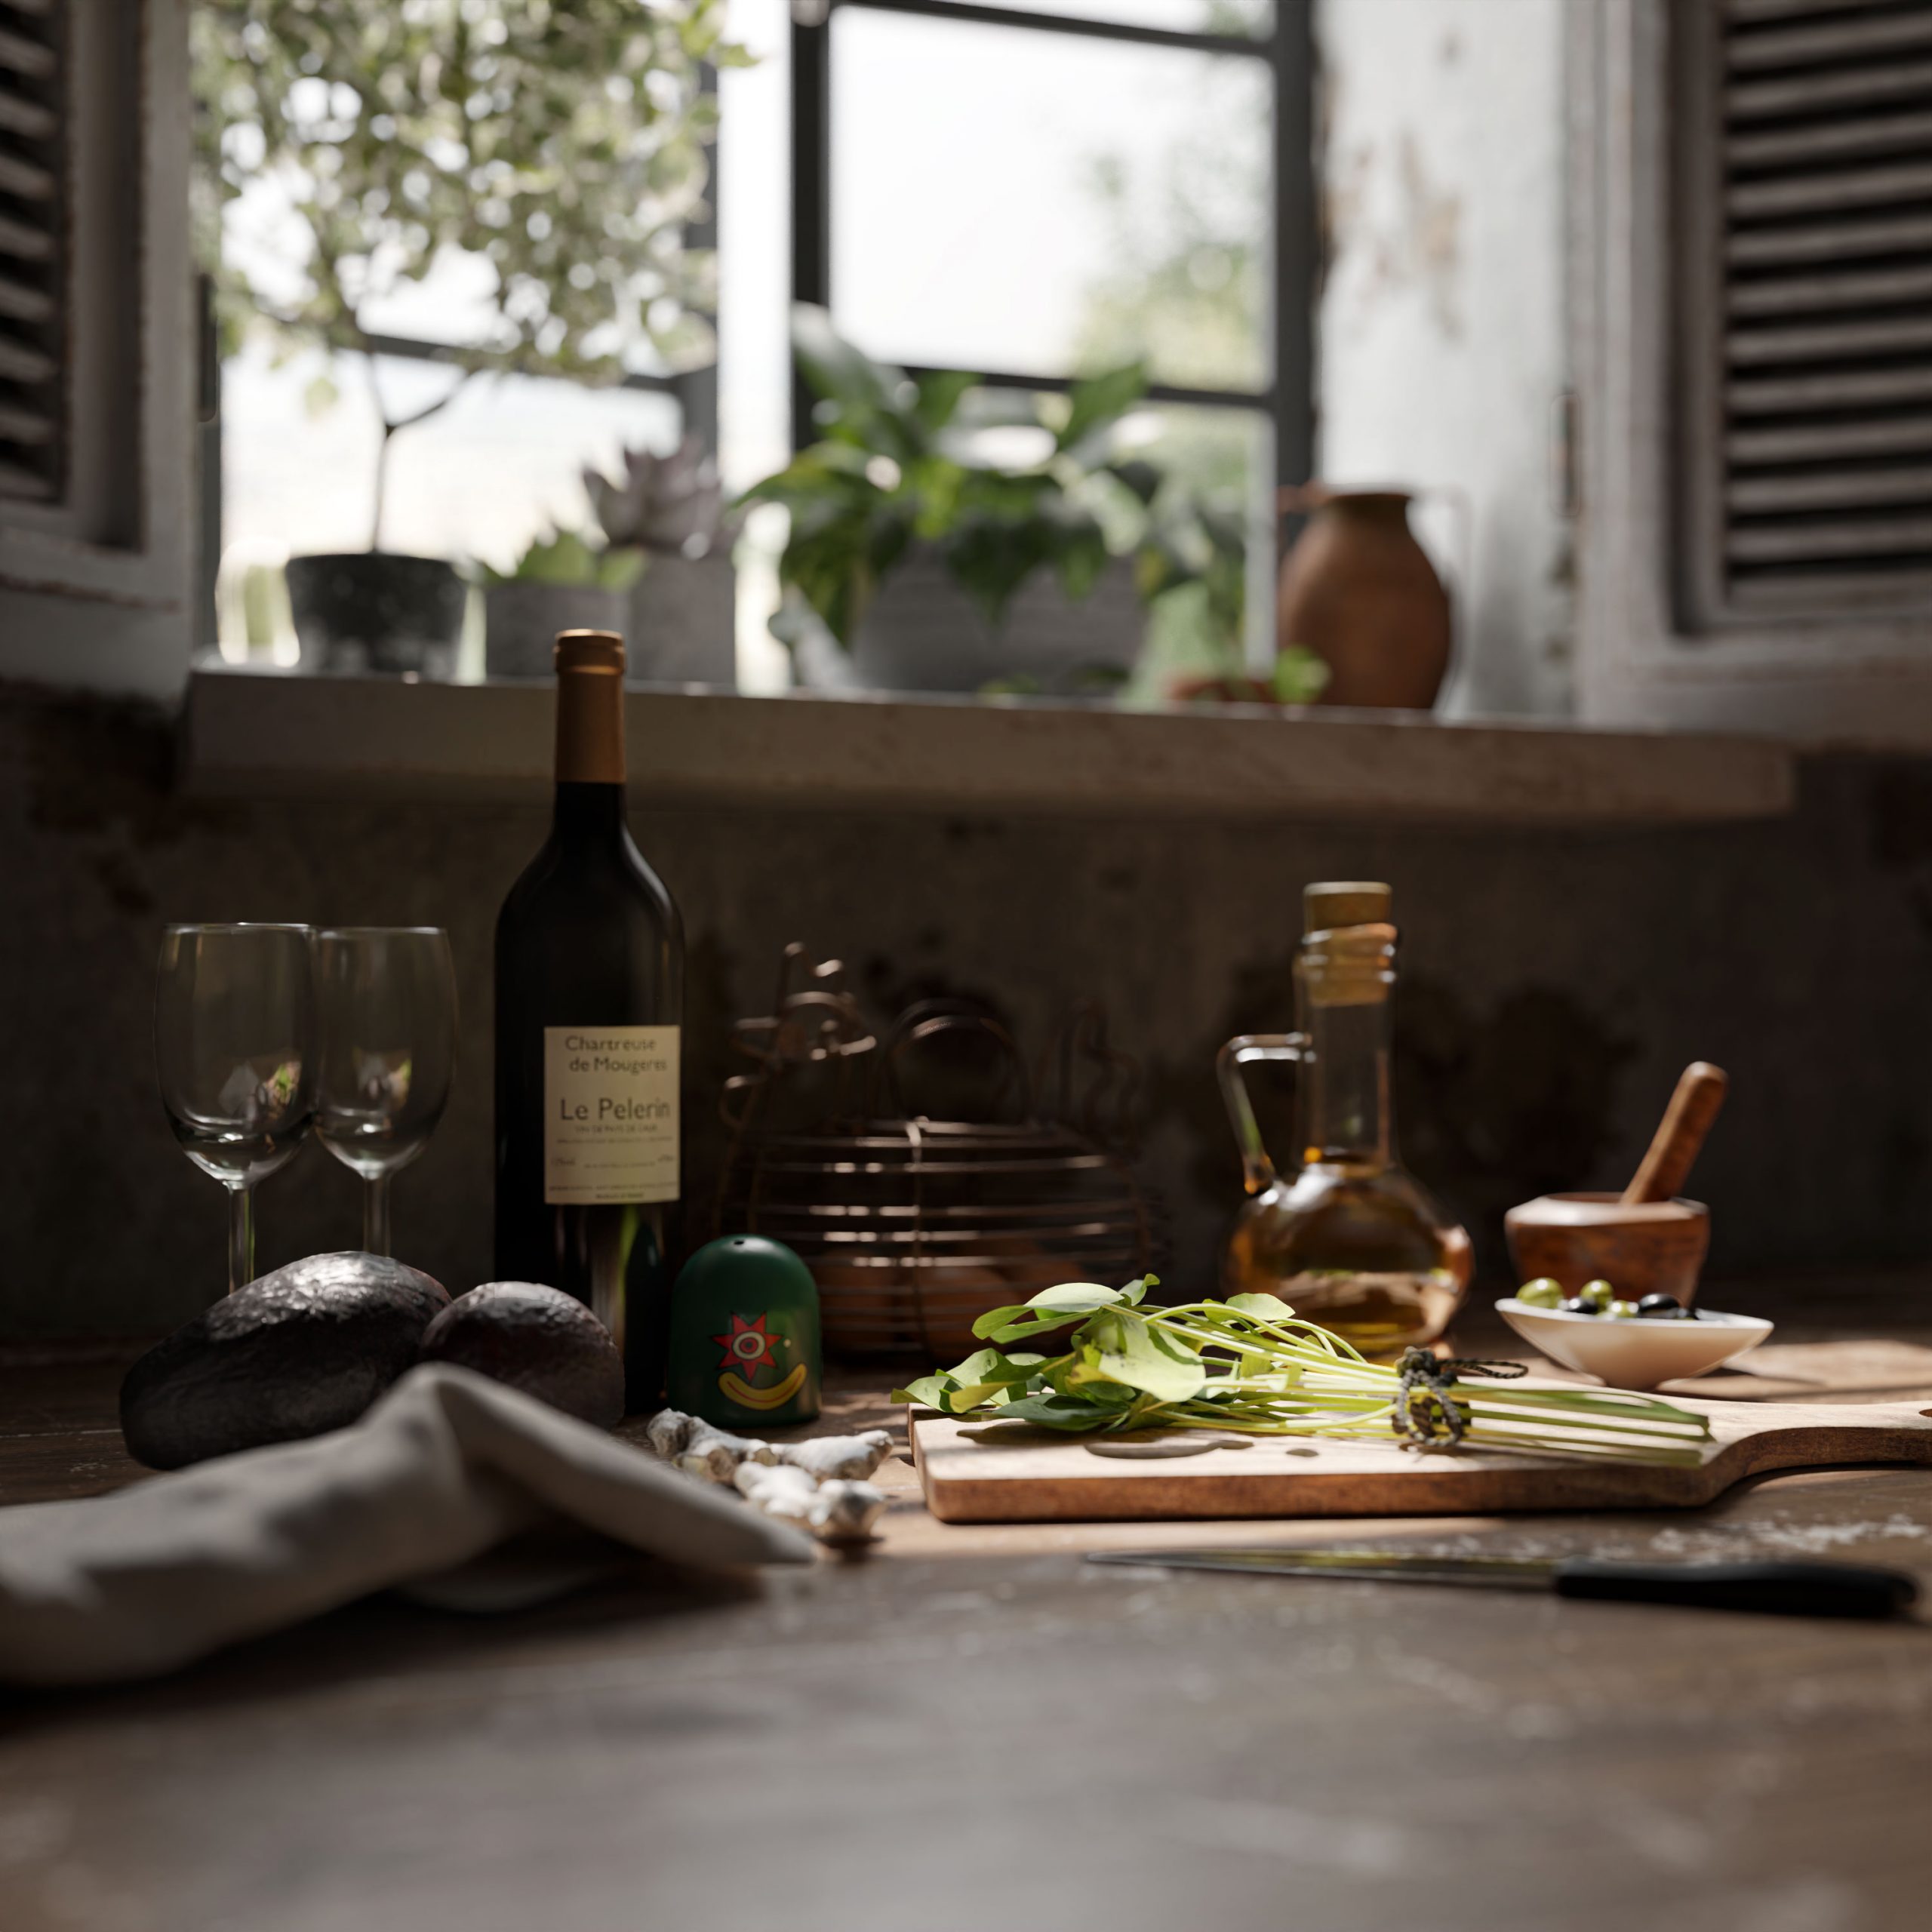
I added a simple lighting set up for the scene, which included two light sources, one illuminating the room from the interior side and one sun lamp from the outside.
TEXTURING
For the texture of the walls, I used a basic PBR texture but I supported my material aspect with the micro displacement to get a more realistic look.

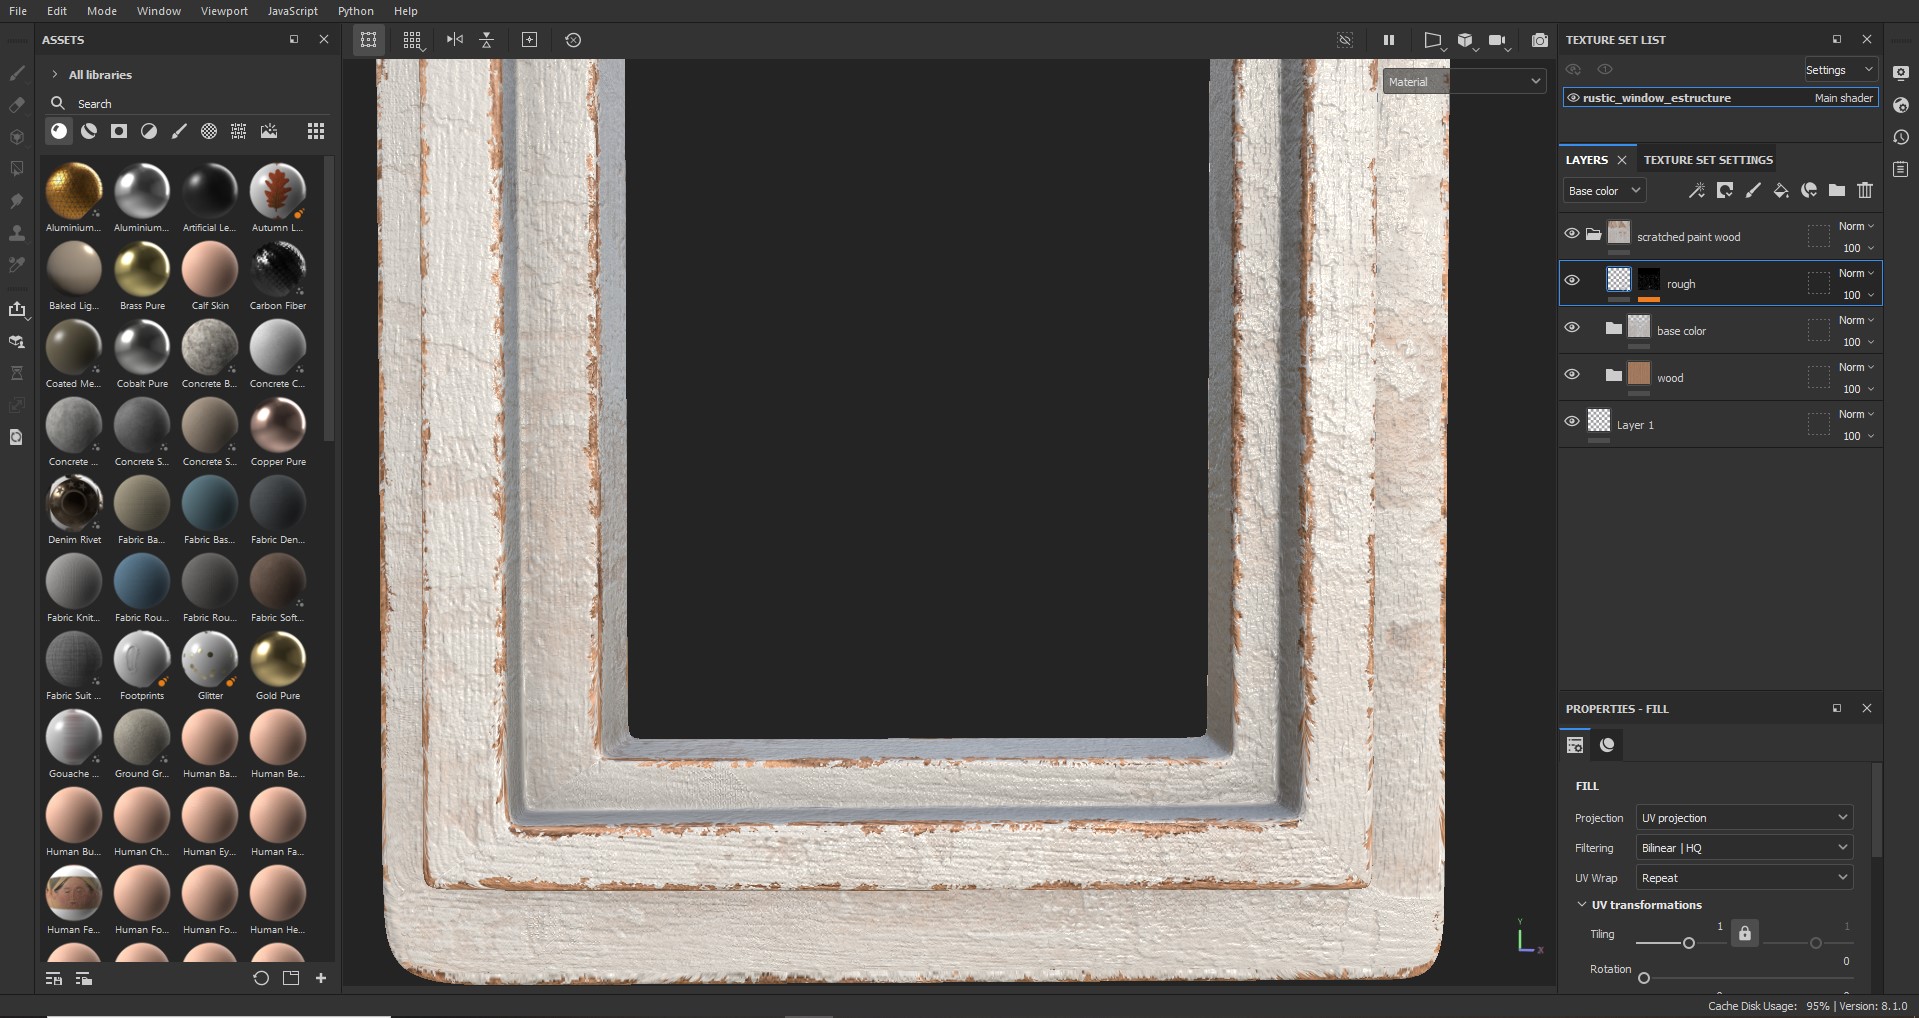
When I was happy with the texture of the walls, I continued with the texturing of the table. That texture was one of the things that I was most interested to do, and for that, I used Substance 3D Painter which is another software that I really love.
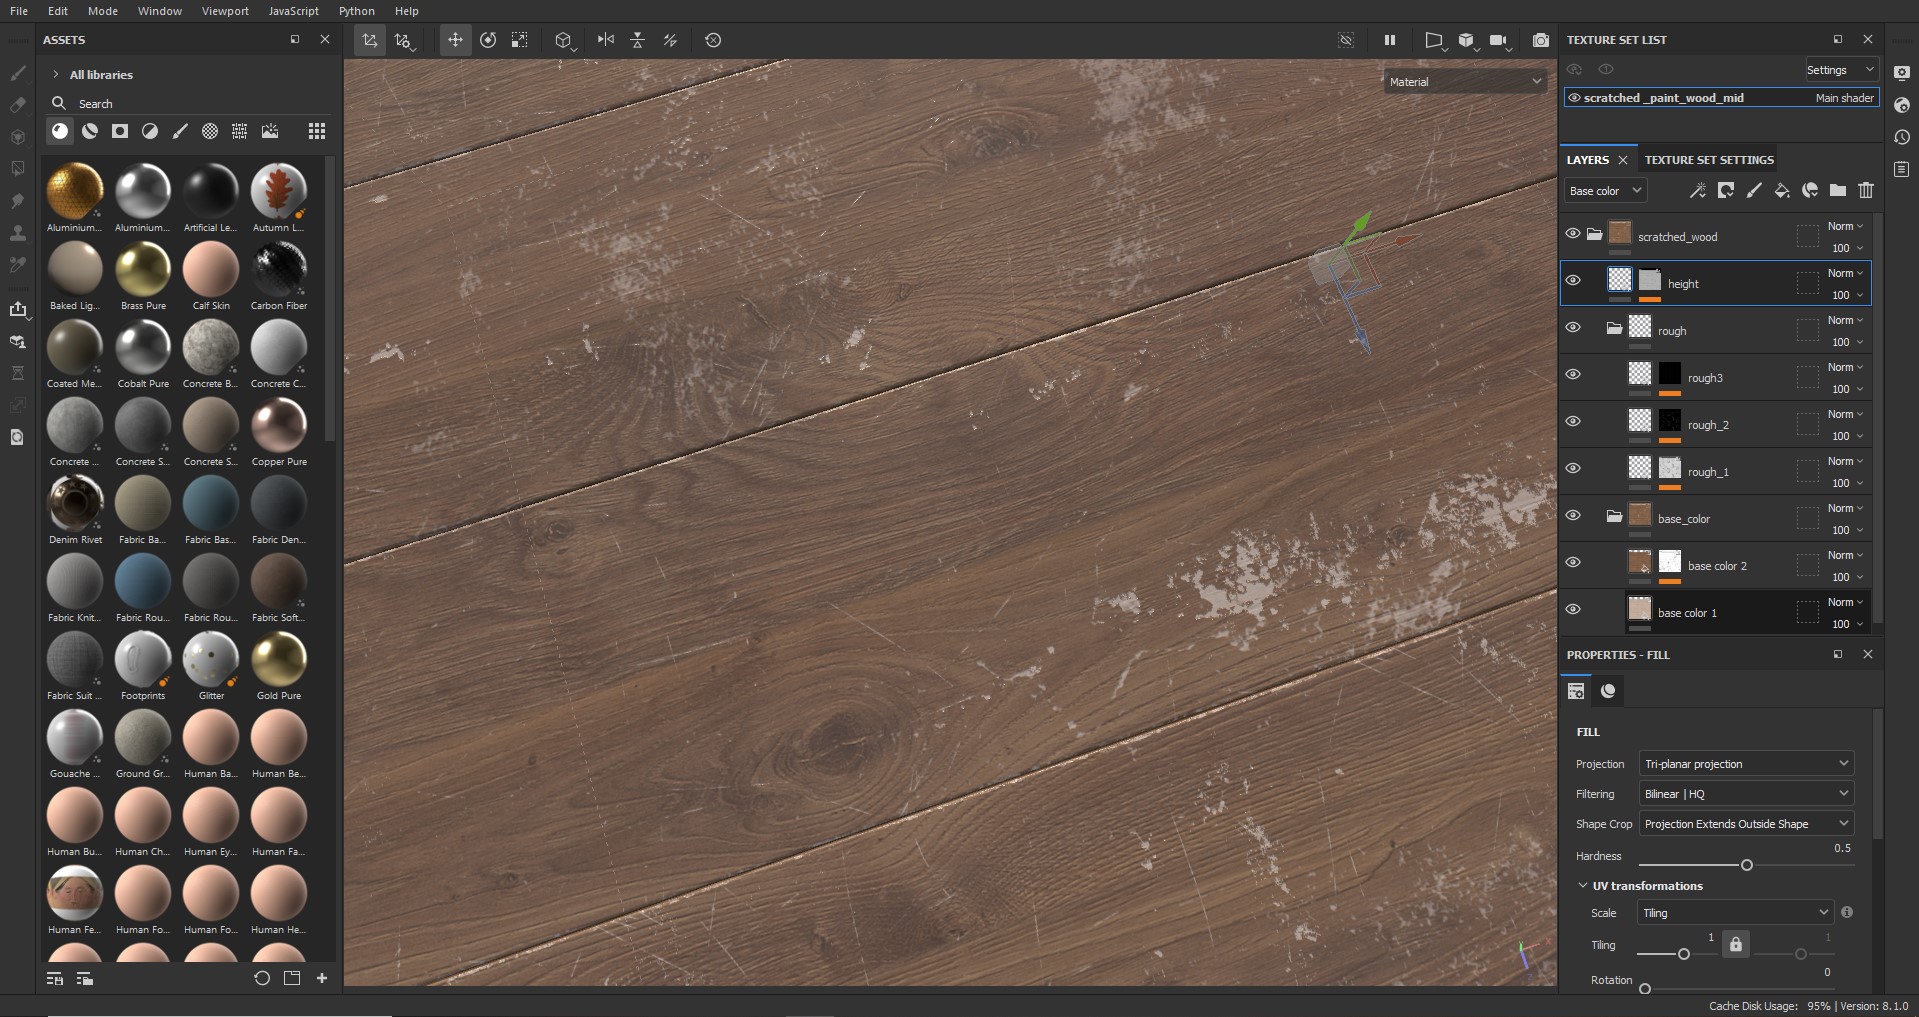
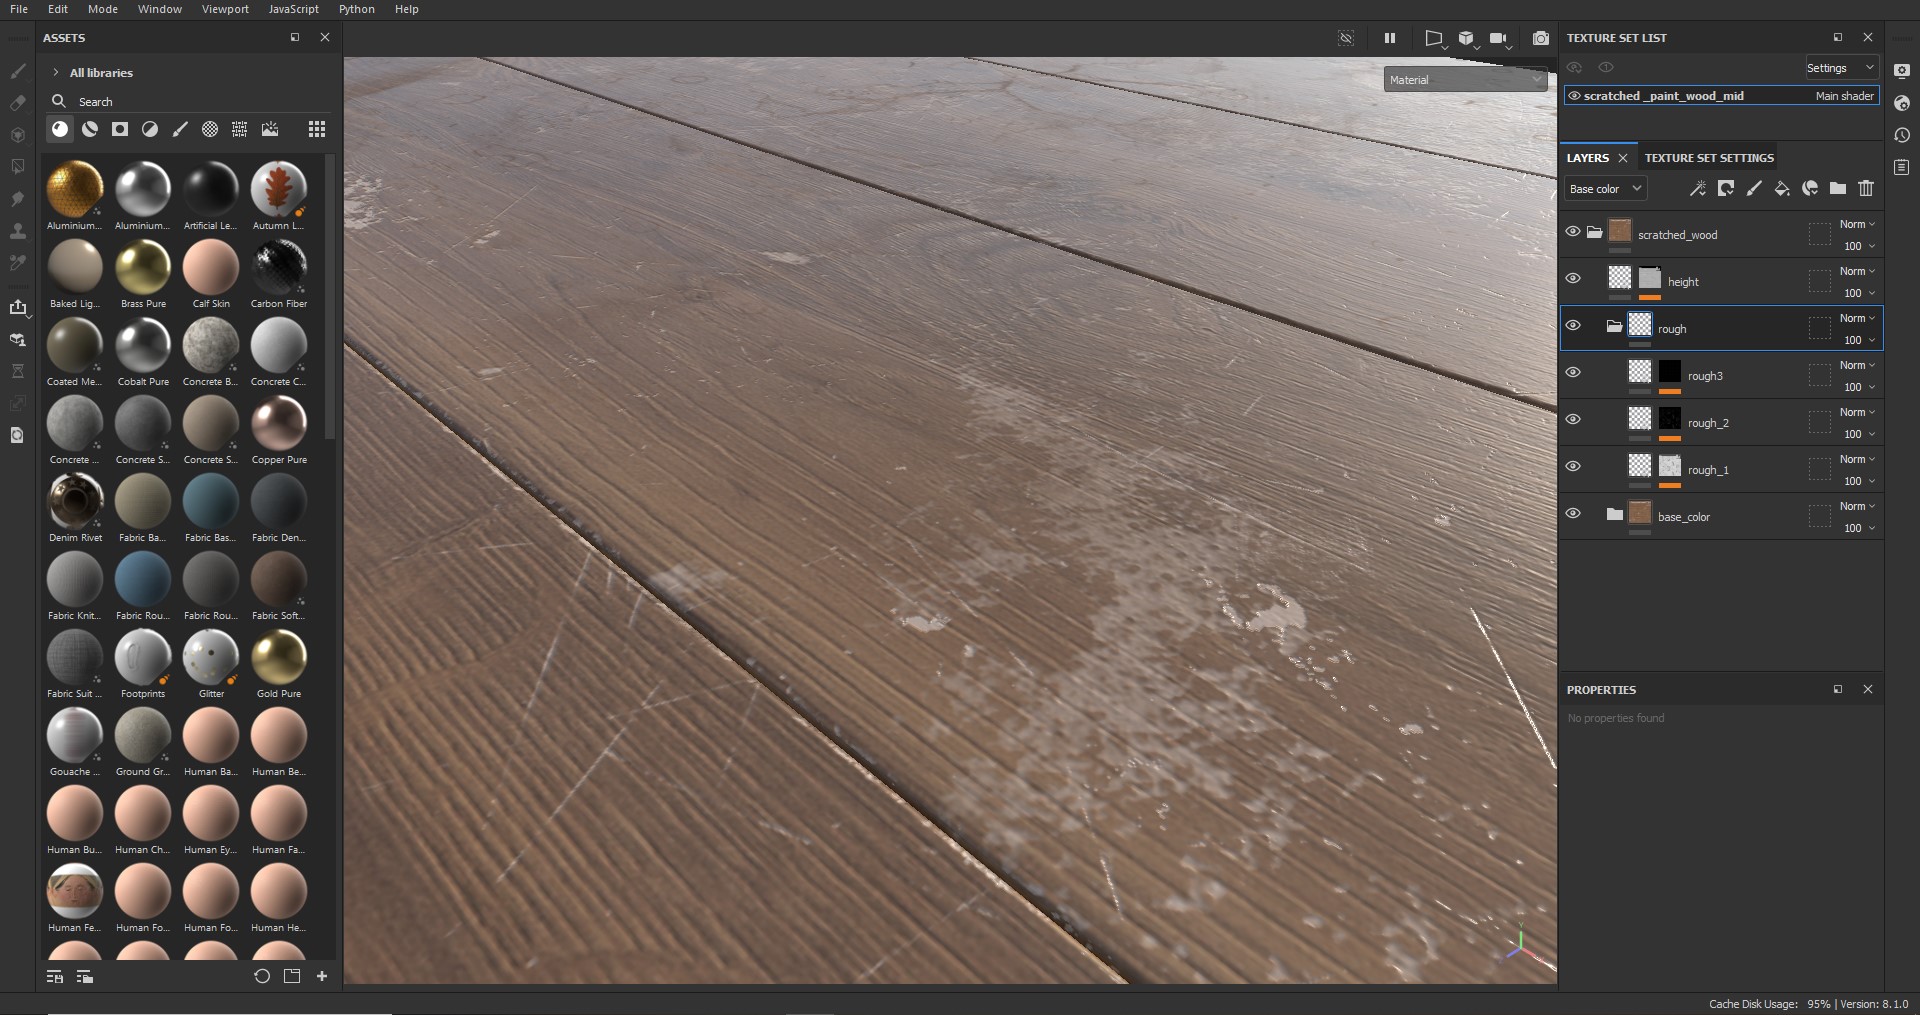
In Substance Painter, I created a smart material based on a PBR texture that I bought, and the smart material is composed in the next order: two layers for the base color, one for the wood natural color, and the second for the scratched paint. For the rough, I created three layers with three different grunge maps to get the dirtiness that will accompany my base color, scratched and old. The height of the material is the default bump map of the PBR texture mixed with the scratches and grunge of the base color layers.
For the doors of the window interior, I also created a smart material mixing a PBR texture for the natural wood color and another material that I created for the white paint. All the imperfections and scratches on the paint were made by mixing grunge layers and a generator of metal edge wear with a painted mask to personalize it.
For the divisions of the window, I used the same smart material that I created before for the structure but added a generator of dirt in a new layer to obtain the dirtiness in the mid of each one.

To create the material of the hinges, I mixed two smart materials with a mask filled with a grunge map to get that aspect I was looking for, something like ruined cooper.

This is how the textures looked like in the end.
DRESSING THE SCENE
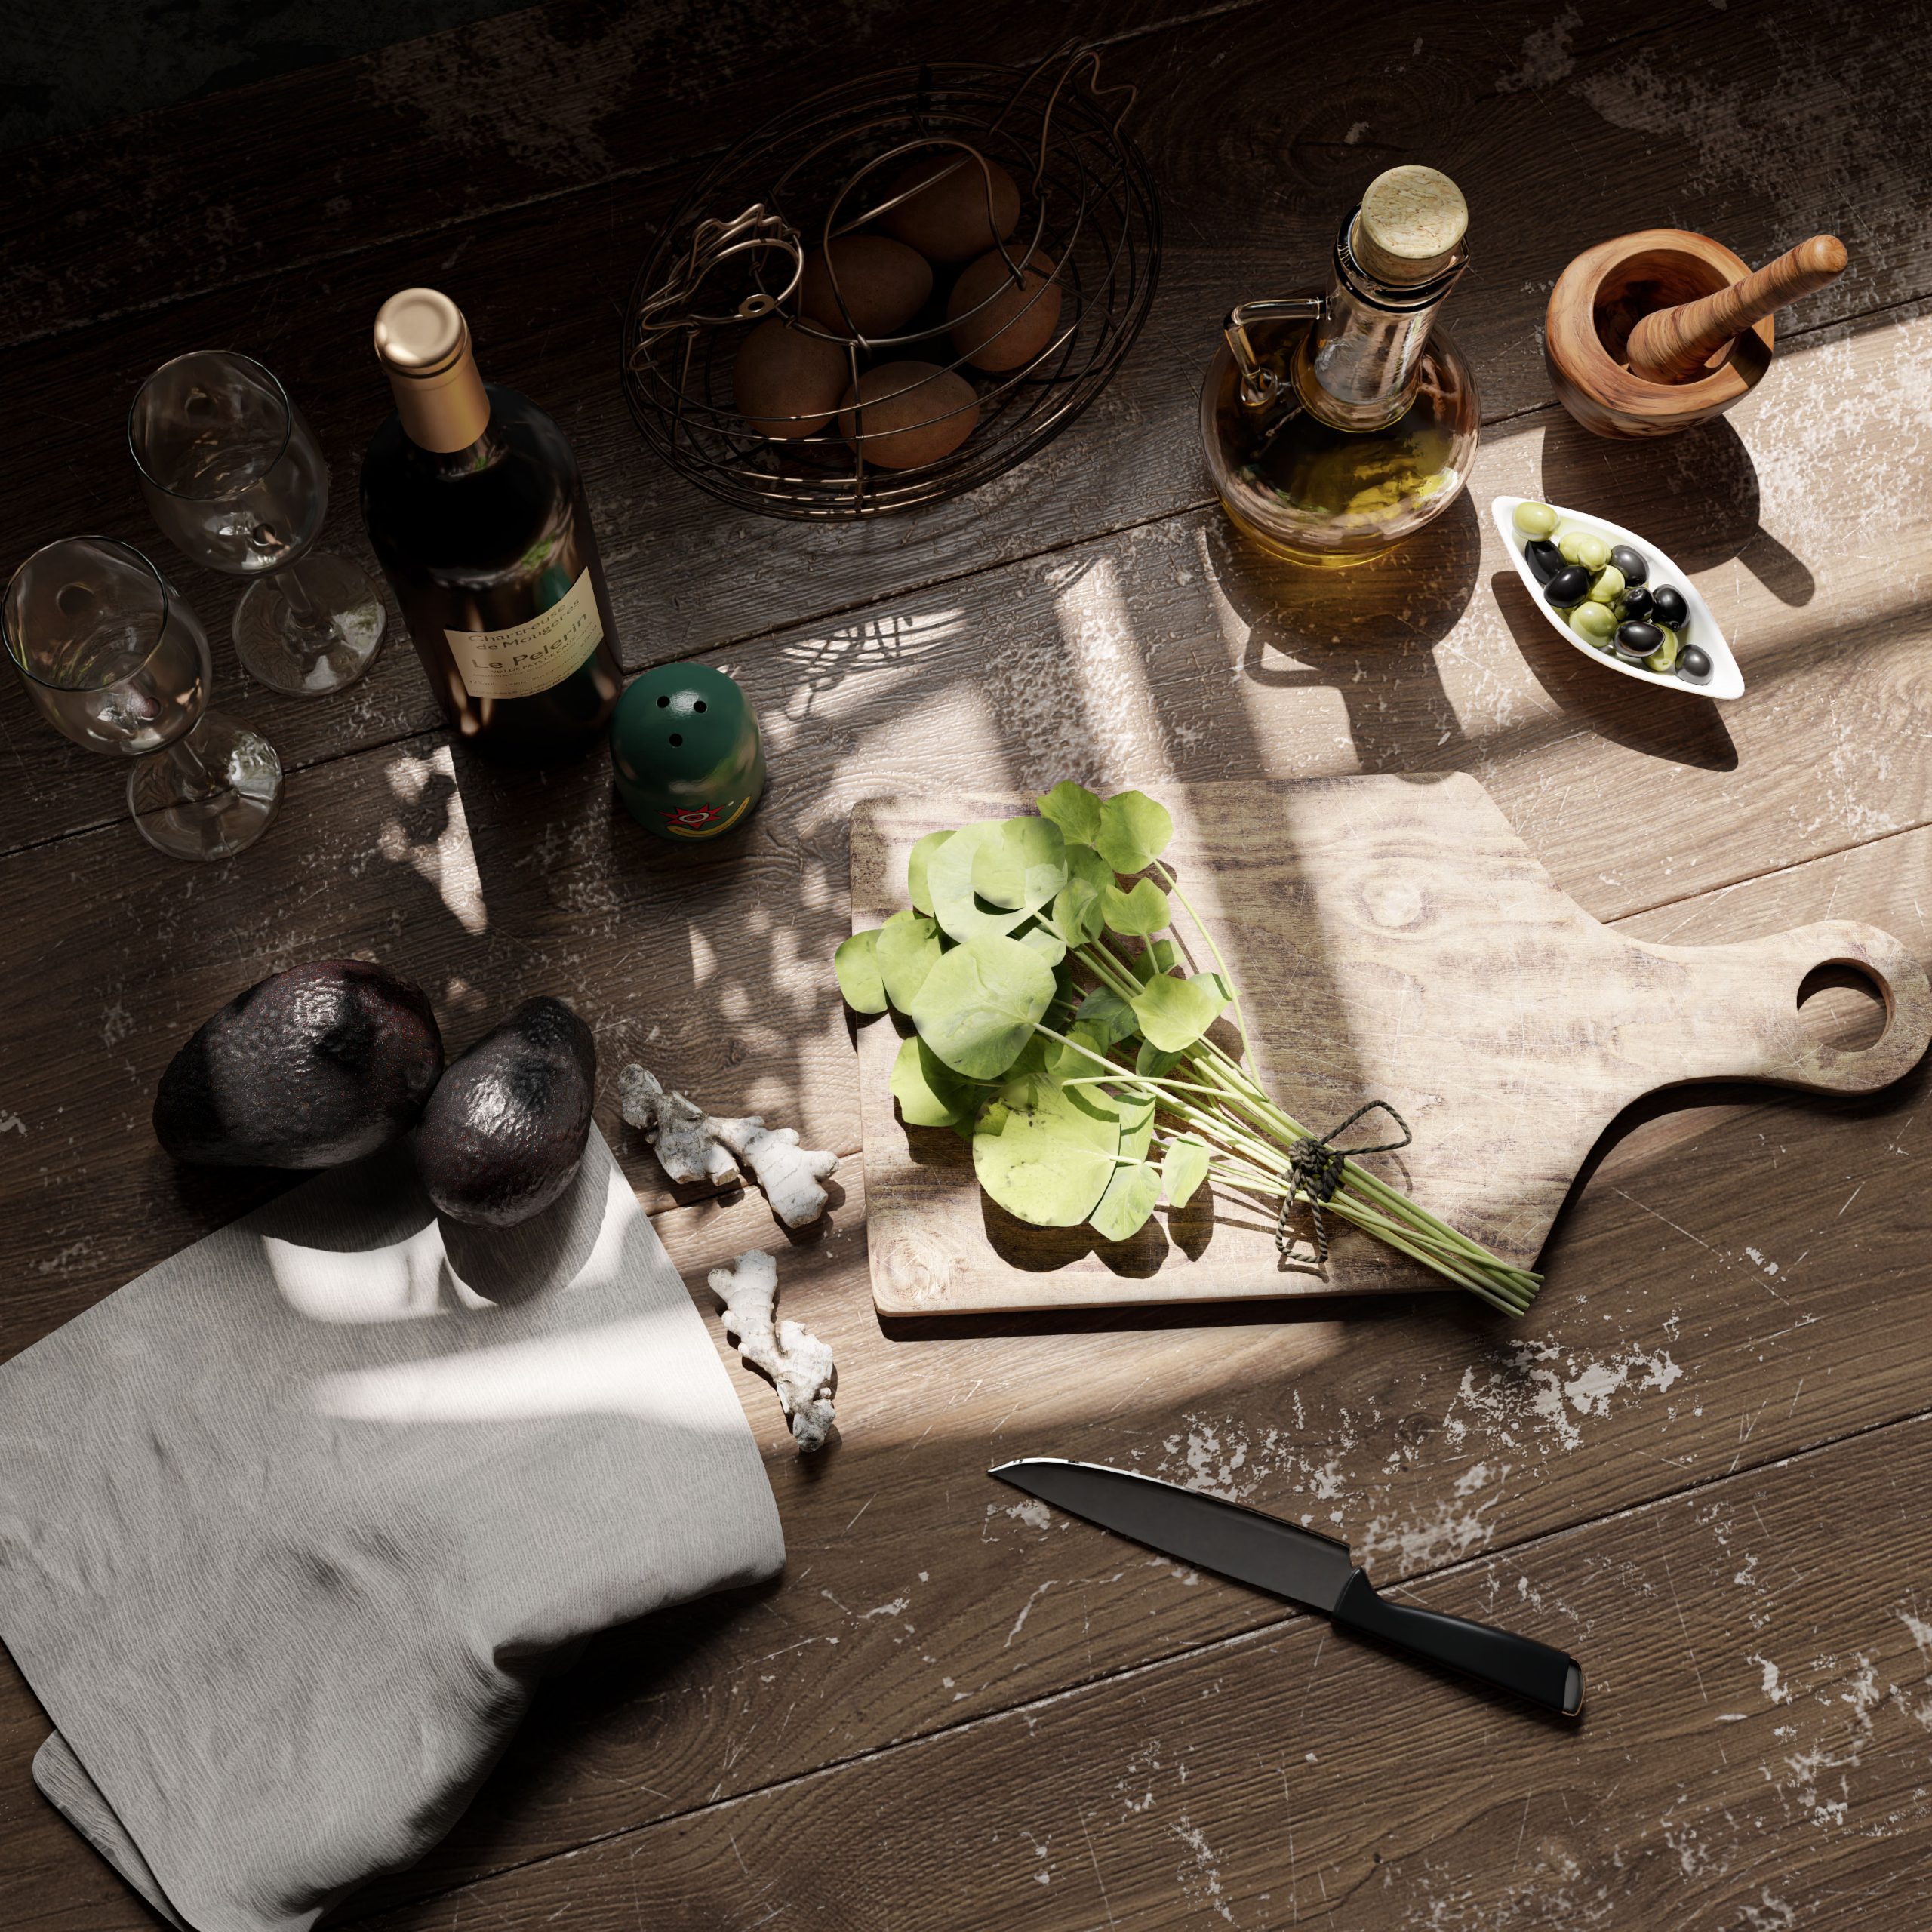
Once I got the textures that I wished for, I started to decorate the still life scene with my asset library. On the other hand, I was looking for specific kinds of assets like the plants on the cutting board, the kitchen towel, and that specific kind of cutting board. For the food items, I went to look for them in Quixel, the amazing photo-scanned asset library. In case of the cloth, I made it in Marvelous Designer with a simple simulation and for the cutting table, I modeled and textured it at the final setup.
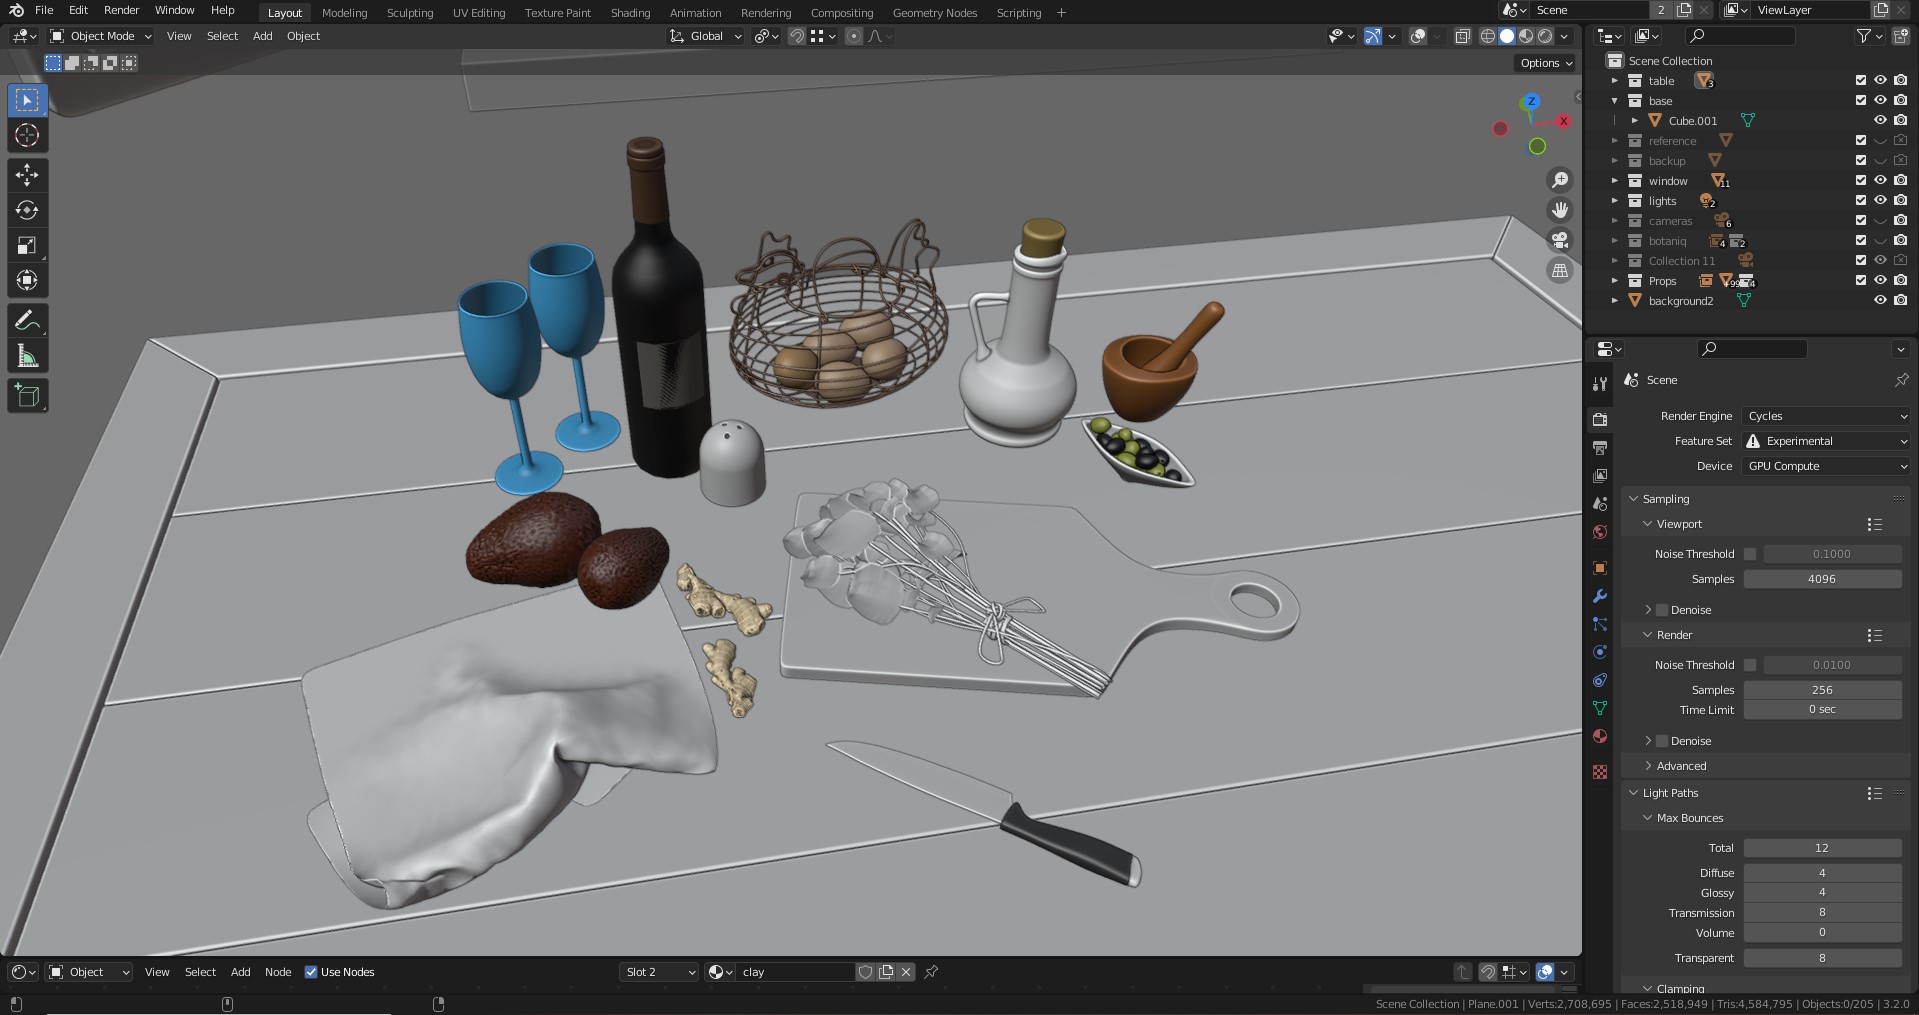
For the plants, I used a mix between my asset library plants and the Botaniq add-on.
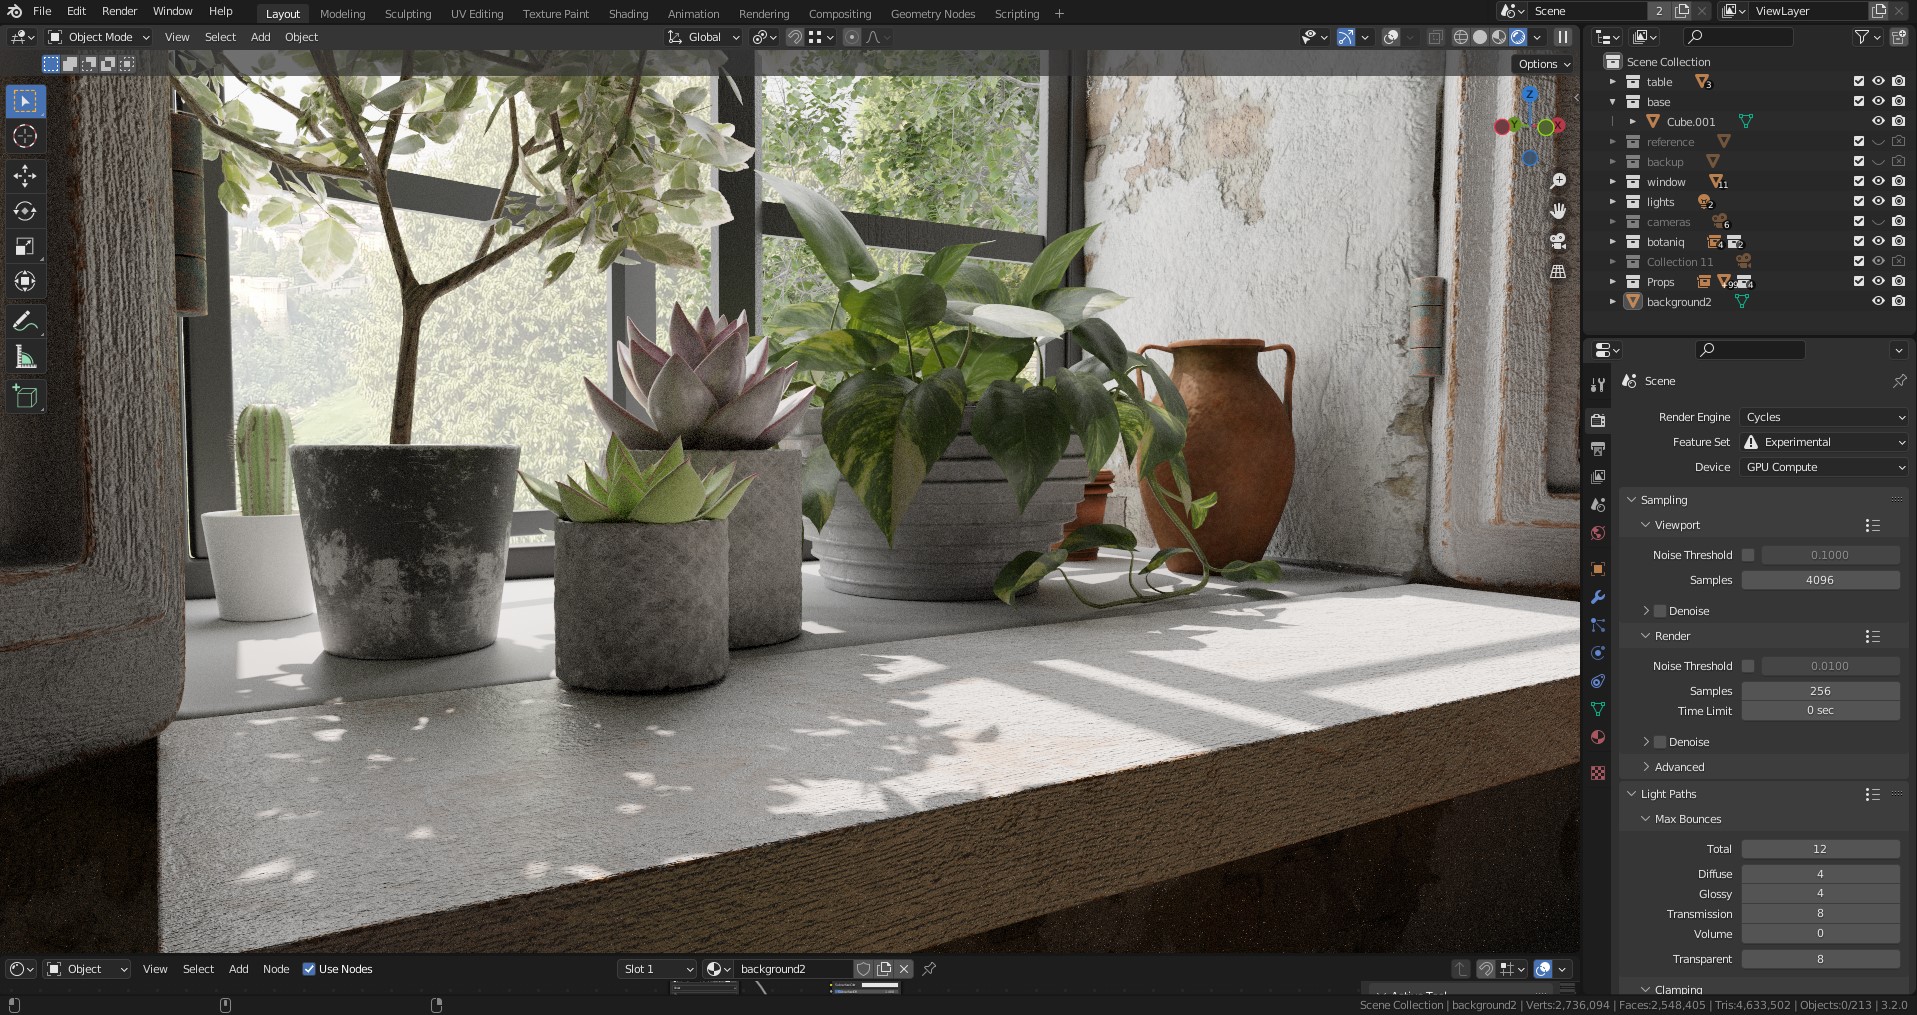
Here is the scene with all of the models and the lighting.
FINAL LIGHTING
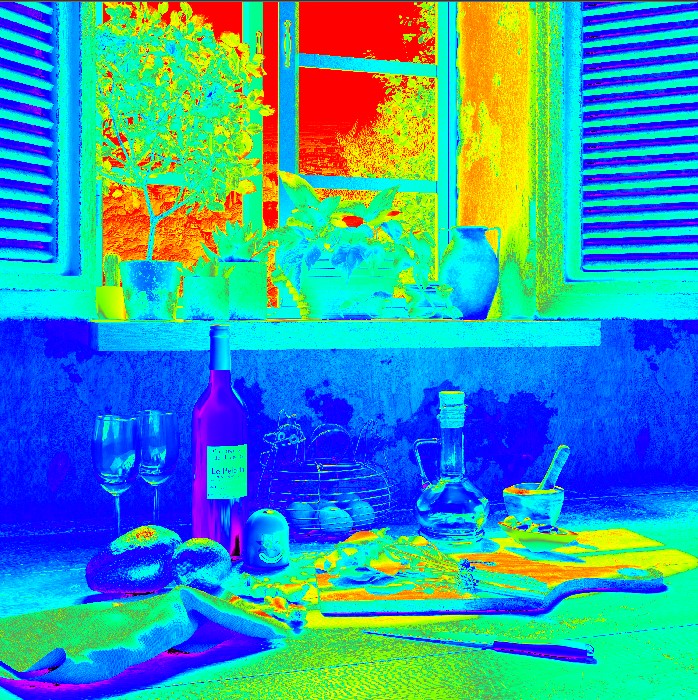
To get the correct exposure and levels in my lights’ intensities, I supported myself with the false color tool. It is a very useful tool to control your exposure and lights’ levels, and get the correct lighting in your scenes.
COMPOSITING
The first step I always make when I get a render is denoising it with a simple node combination. That lets me clean the noise in the light passes and maintain the details in passes like the diffuse, without using the denoise node in these.
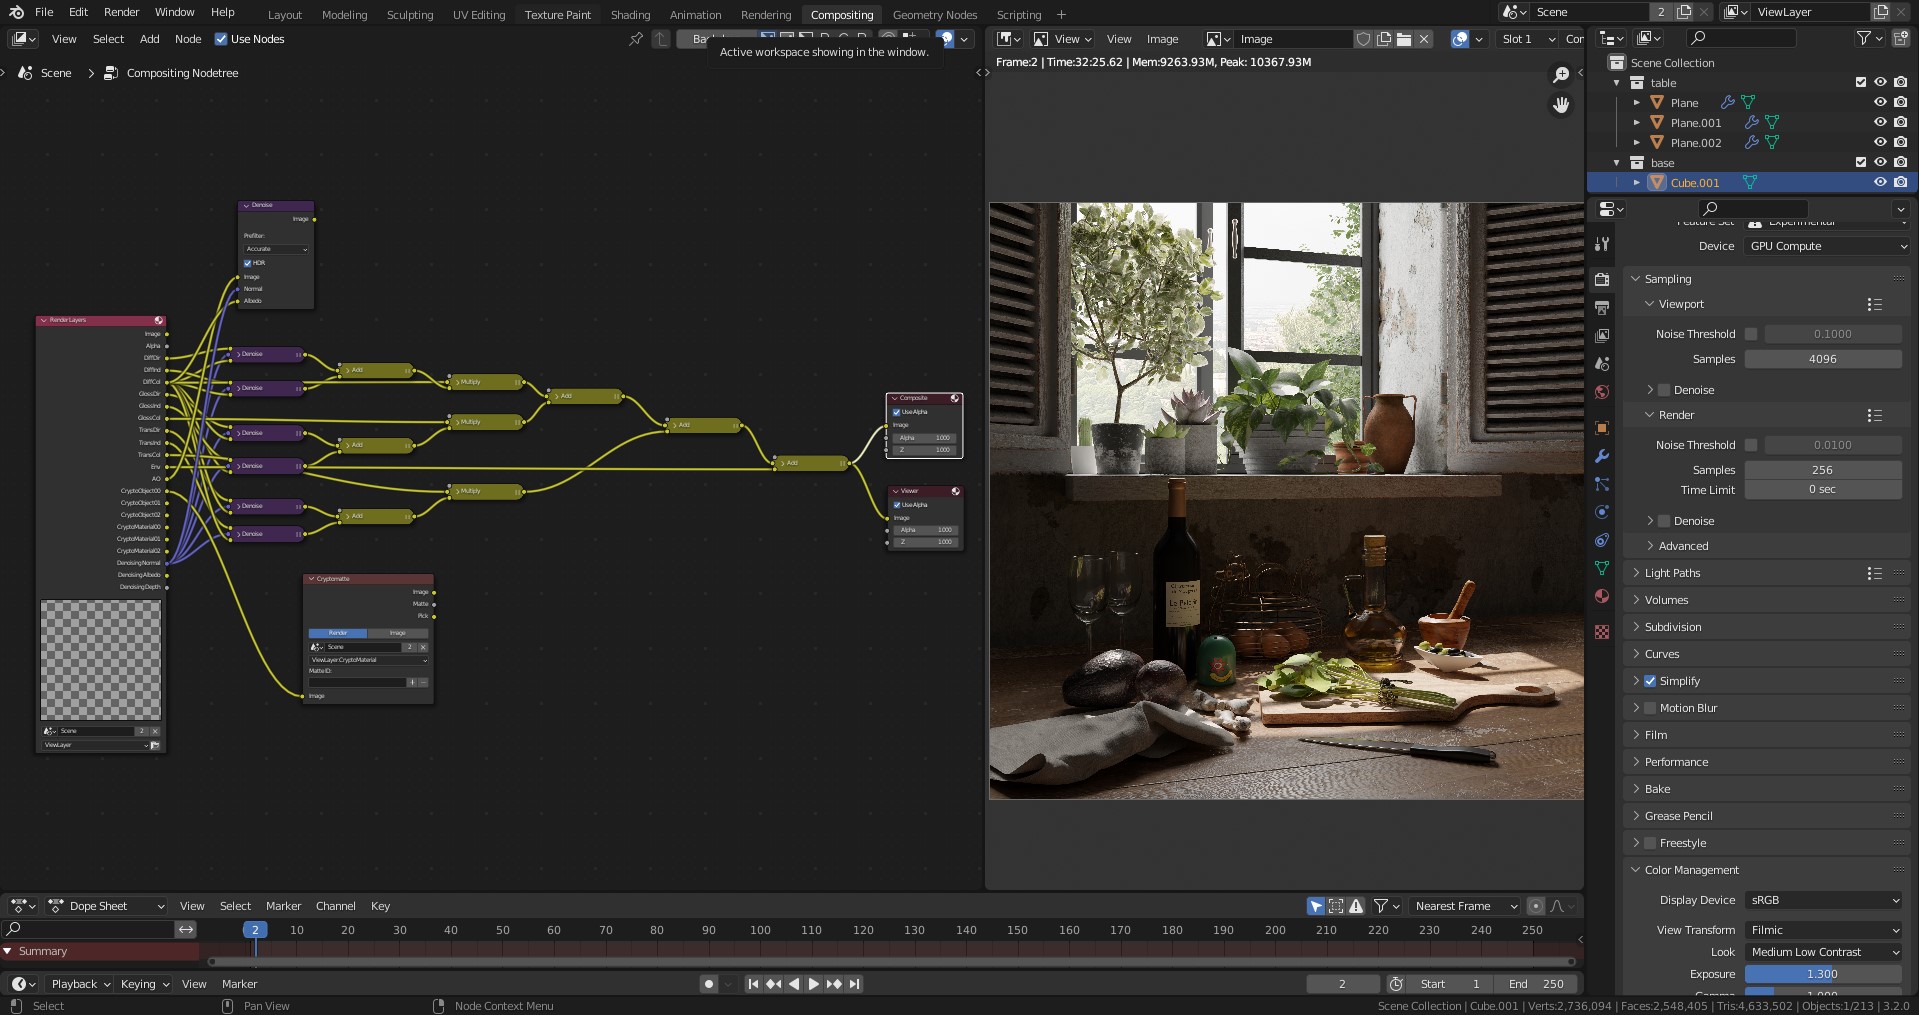
I used one additional denoiser node to take my ambient occlusion pass and another node of cryptomate to take my object and material passes. These last two passes let me create masks in photoshop very easily.
FINAL COMPOSITION
To get the final touch in my renders, I imported my render passes into Photoshop. I usually use the diffuse pass, Ambient Occlusion pass, glossy pass, Direct and Indirect light passes to compose my image, and the cryptomate, material and object passes to create my masks.
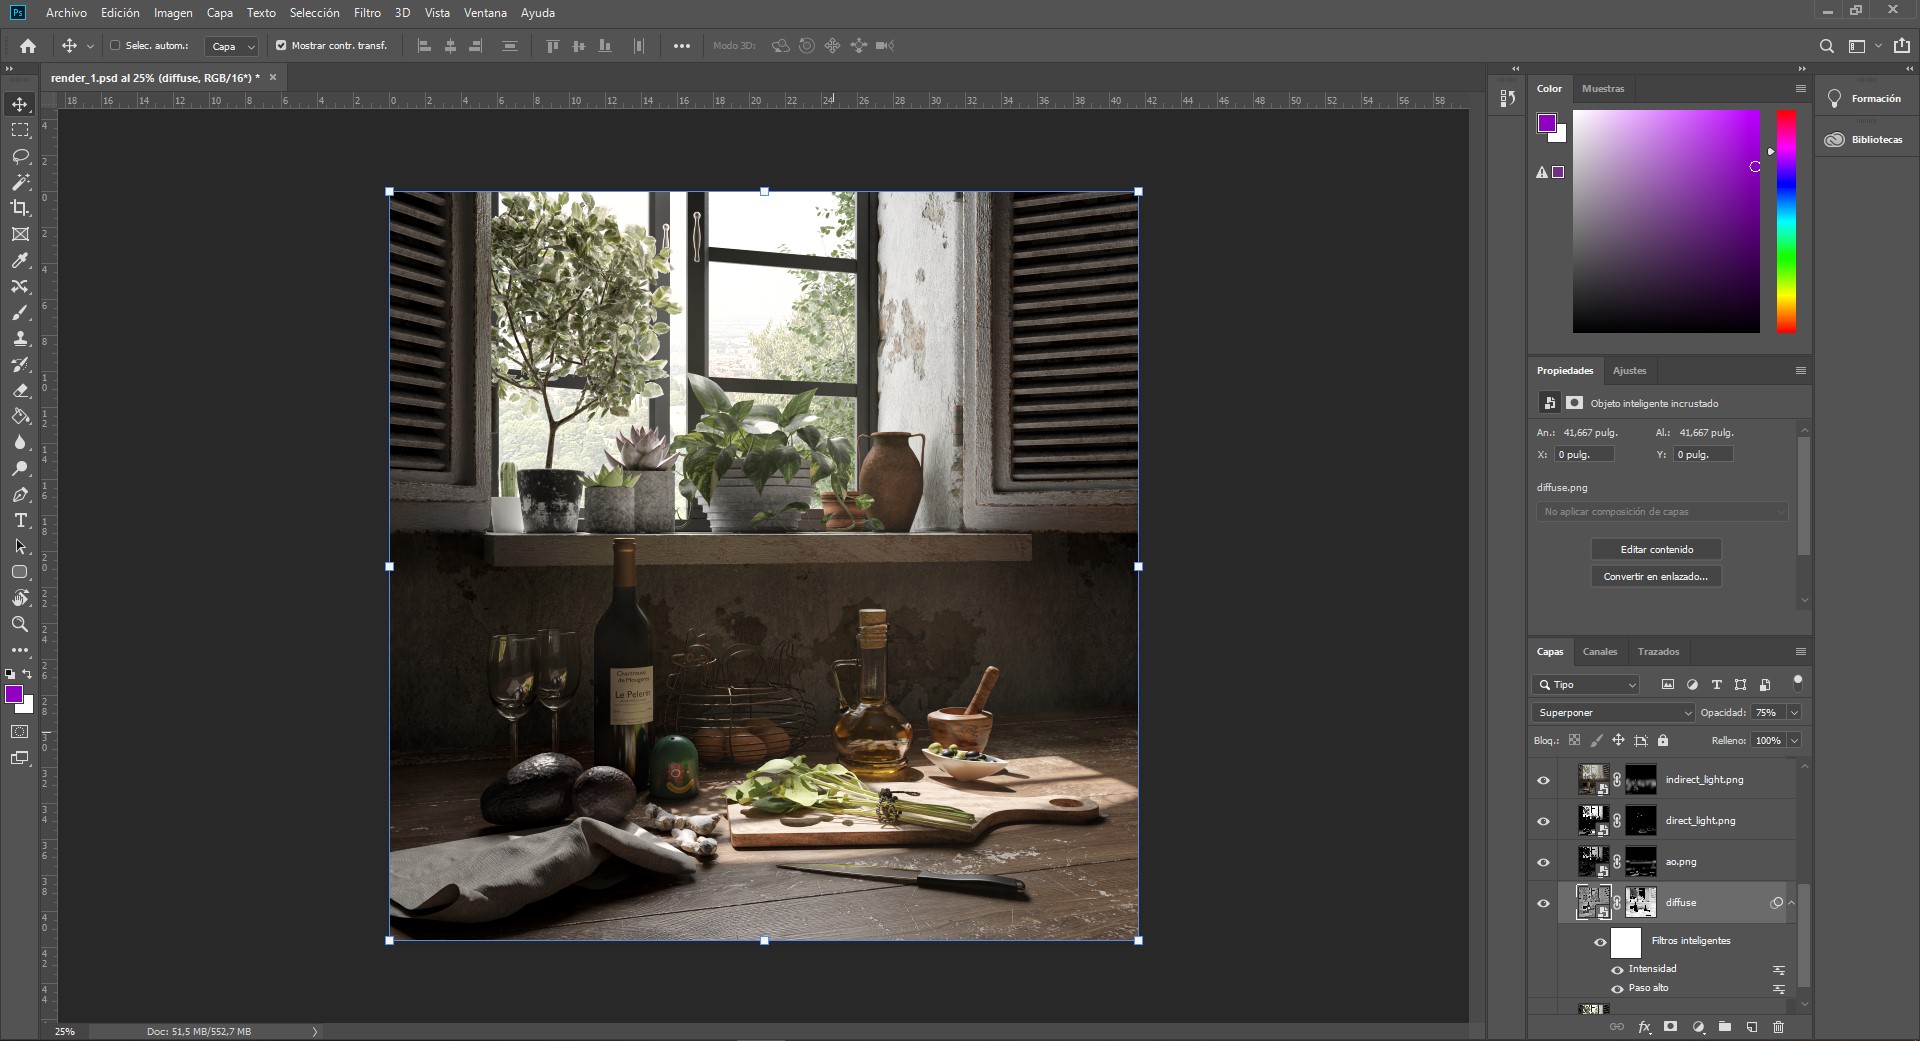
I always start with the diffuse pass, applying a high pass and a black mask.

To apply the effect in the specific areas that I am looking for, I painted with a diffuse brush in white, supported by my cryptomate passes.
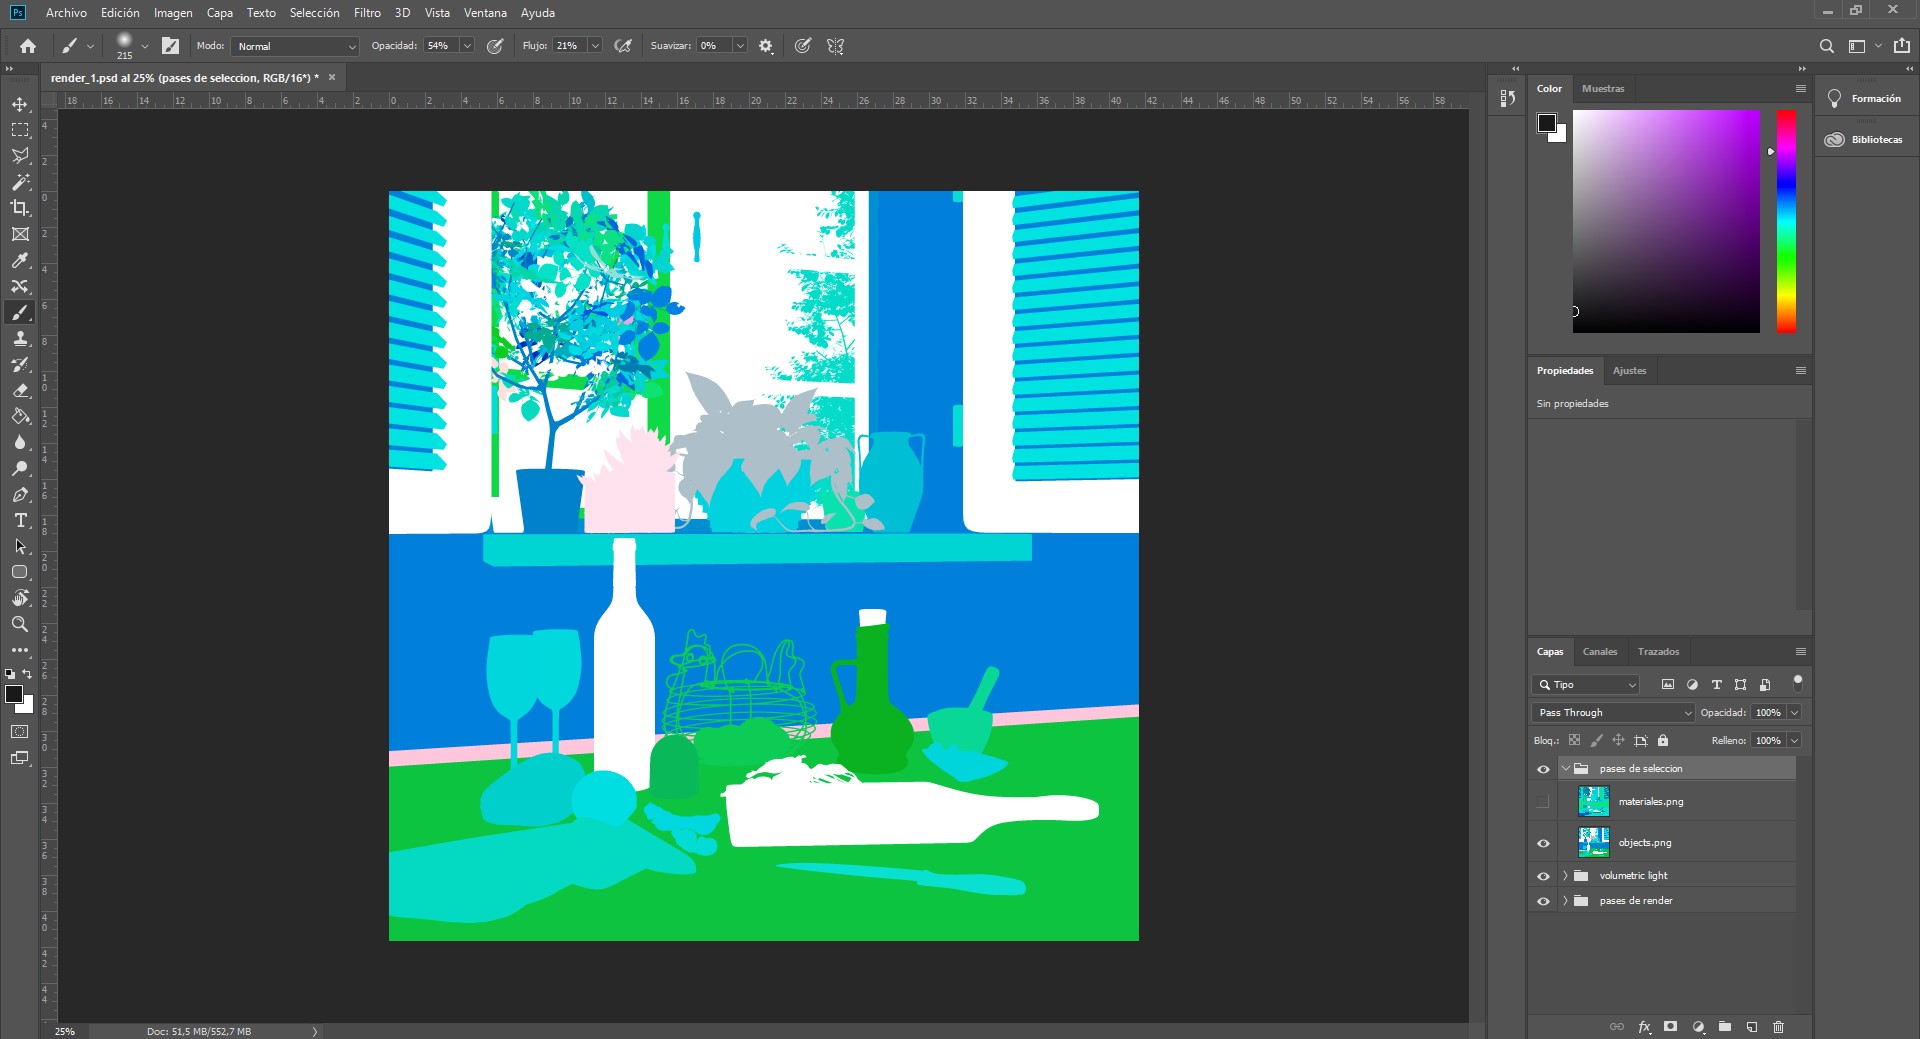
I continued applying the other render passes in the same way, variating the blending mode of the layer, painting the black mask with the diffuse brush in white color on the areas where I want to apply my effects.

To finalize my composition process, I painted the volumetric light in a new layer with the same diffuse pencil and applied the filter of the raw camera in the combined pass.
RUSTIC INTERIOR WINDOW
I hope you liked my work process, enjoyed it, learned something about my technique and the artistic process behind my renders. Finally, I would like to invite you to feed your talent, for talent is something that you feed every day and all time. Watch independent movies and series, search for new pictures every day, look for new good music, keep traveling and look for new places to visit, and never stop learning about 3D, this road is infinite.
Thanks and hope you achieve some good renders!
About the Artist
 Juan Sebastian Duque Quevedo, a 3D Artist from Bogota, Colombia. Currently working as a 3D compositor at Graphic Market Company.


Looks great Juan! I like the workflow explanation.
Fine and detailed work and thanks for explaining the process