
Introduction
Hello, folks! I’m Steffen Hartmann, a 34-year-old 3D character artist and illustrator from Germany. To describe my art in 3 words: horror, grotesque and expressive.
My creative journey started back in early 2017 with the use of drawabox.com, an old PC, and a Wacom Intuos Pro Medium. Yes, I started out as a 2D artist, which is pretty common I suppose.
After 3 years of digital painting and drawing, I felt the urge to try this wondrous software called Blender. And, oh boy, I was instantly hooked and my 3D virginity was gone.
Needless to say, I started with Blender Guru’s donut tutorial series. That was the foundation to build upon and to start modeling and texturing all kinds of objects until I decided to try sculpting.
Now that was a mind-blowing experience, to be honest. I drew and painted lots of characters in the past and I know the struggle with perspective, lighting, color, values, and so on. Sculpting lifted that burden and enabled so many new possibilities. Creativity unleashed!
The knowledge about anatomy and the rules of design and composition translated very well into the 3D realm.
For several years, I have occasionally worked as a freelance artist for clients of all kinds. It's fun and always challenging, which is a great way to venture into new waters.
Lately, I've mainly been working on expanding my portfolio.
Inspiration and Reference
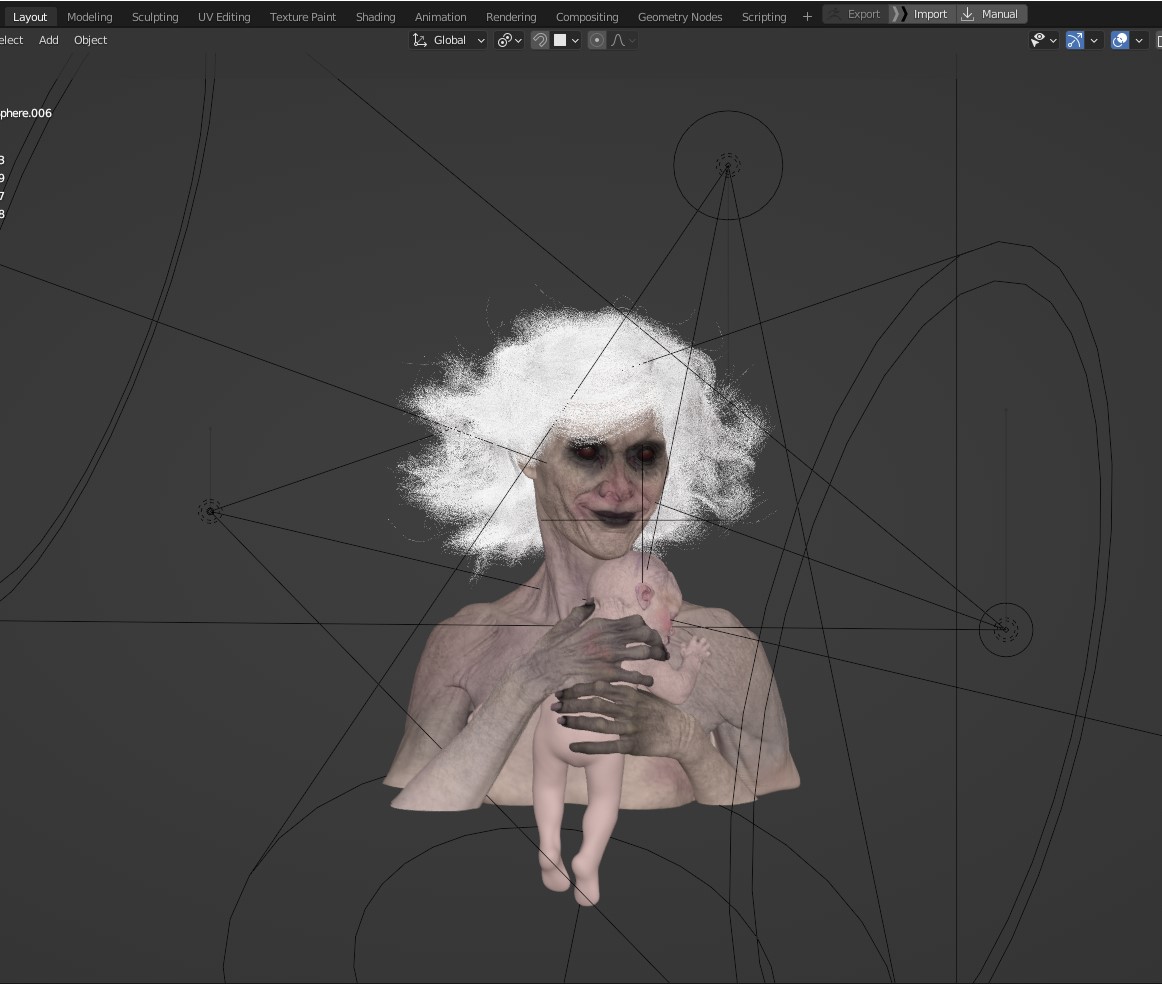
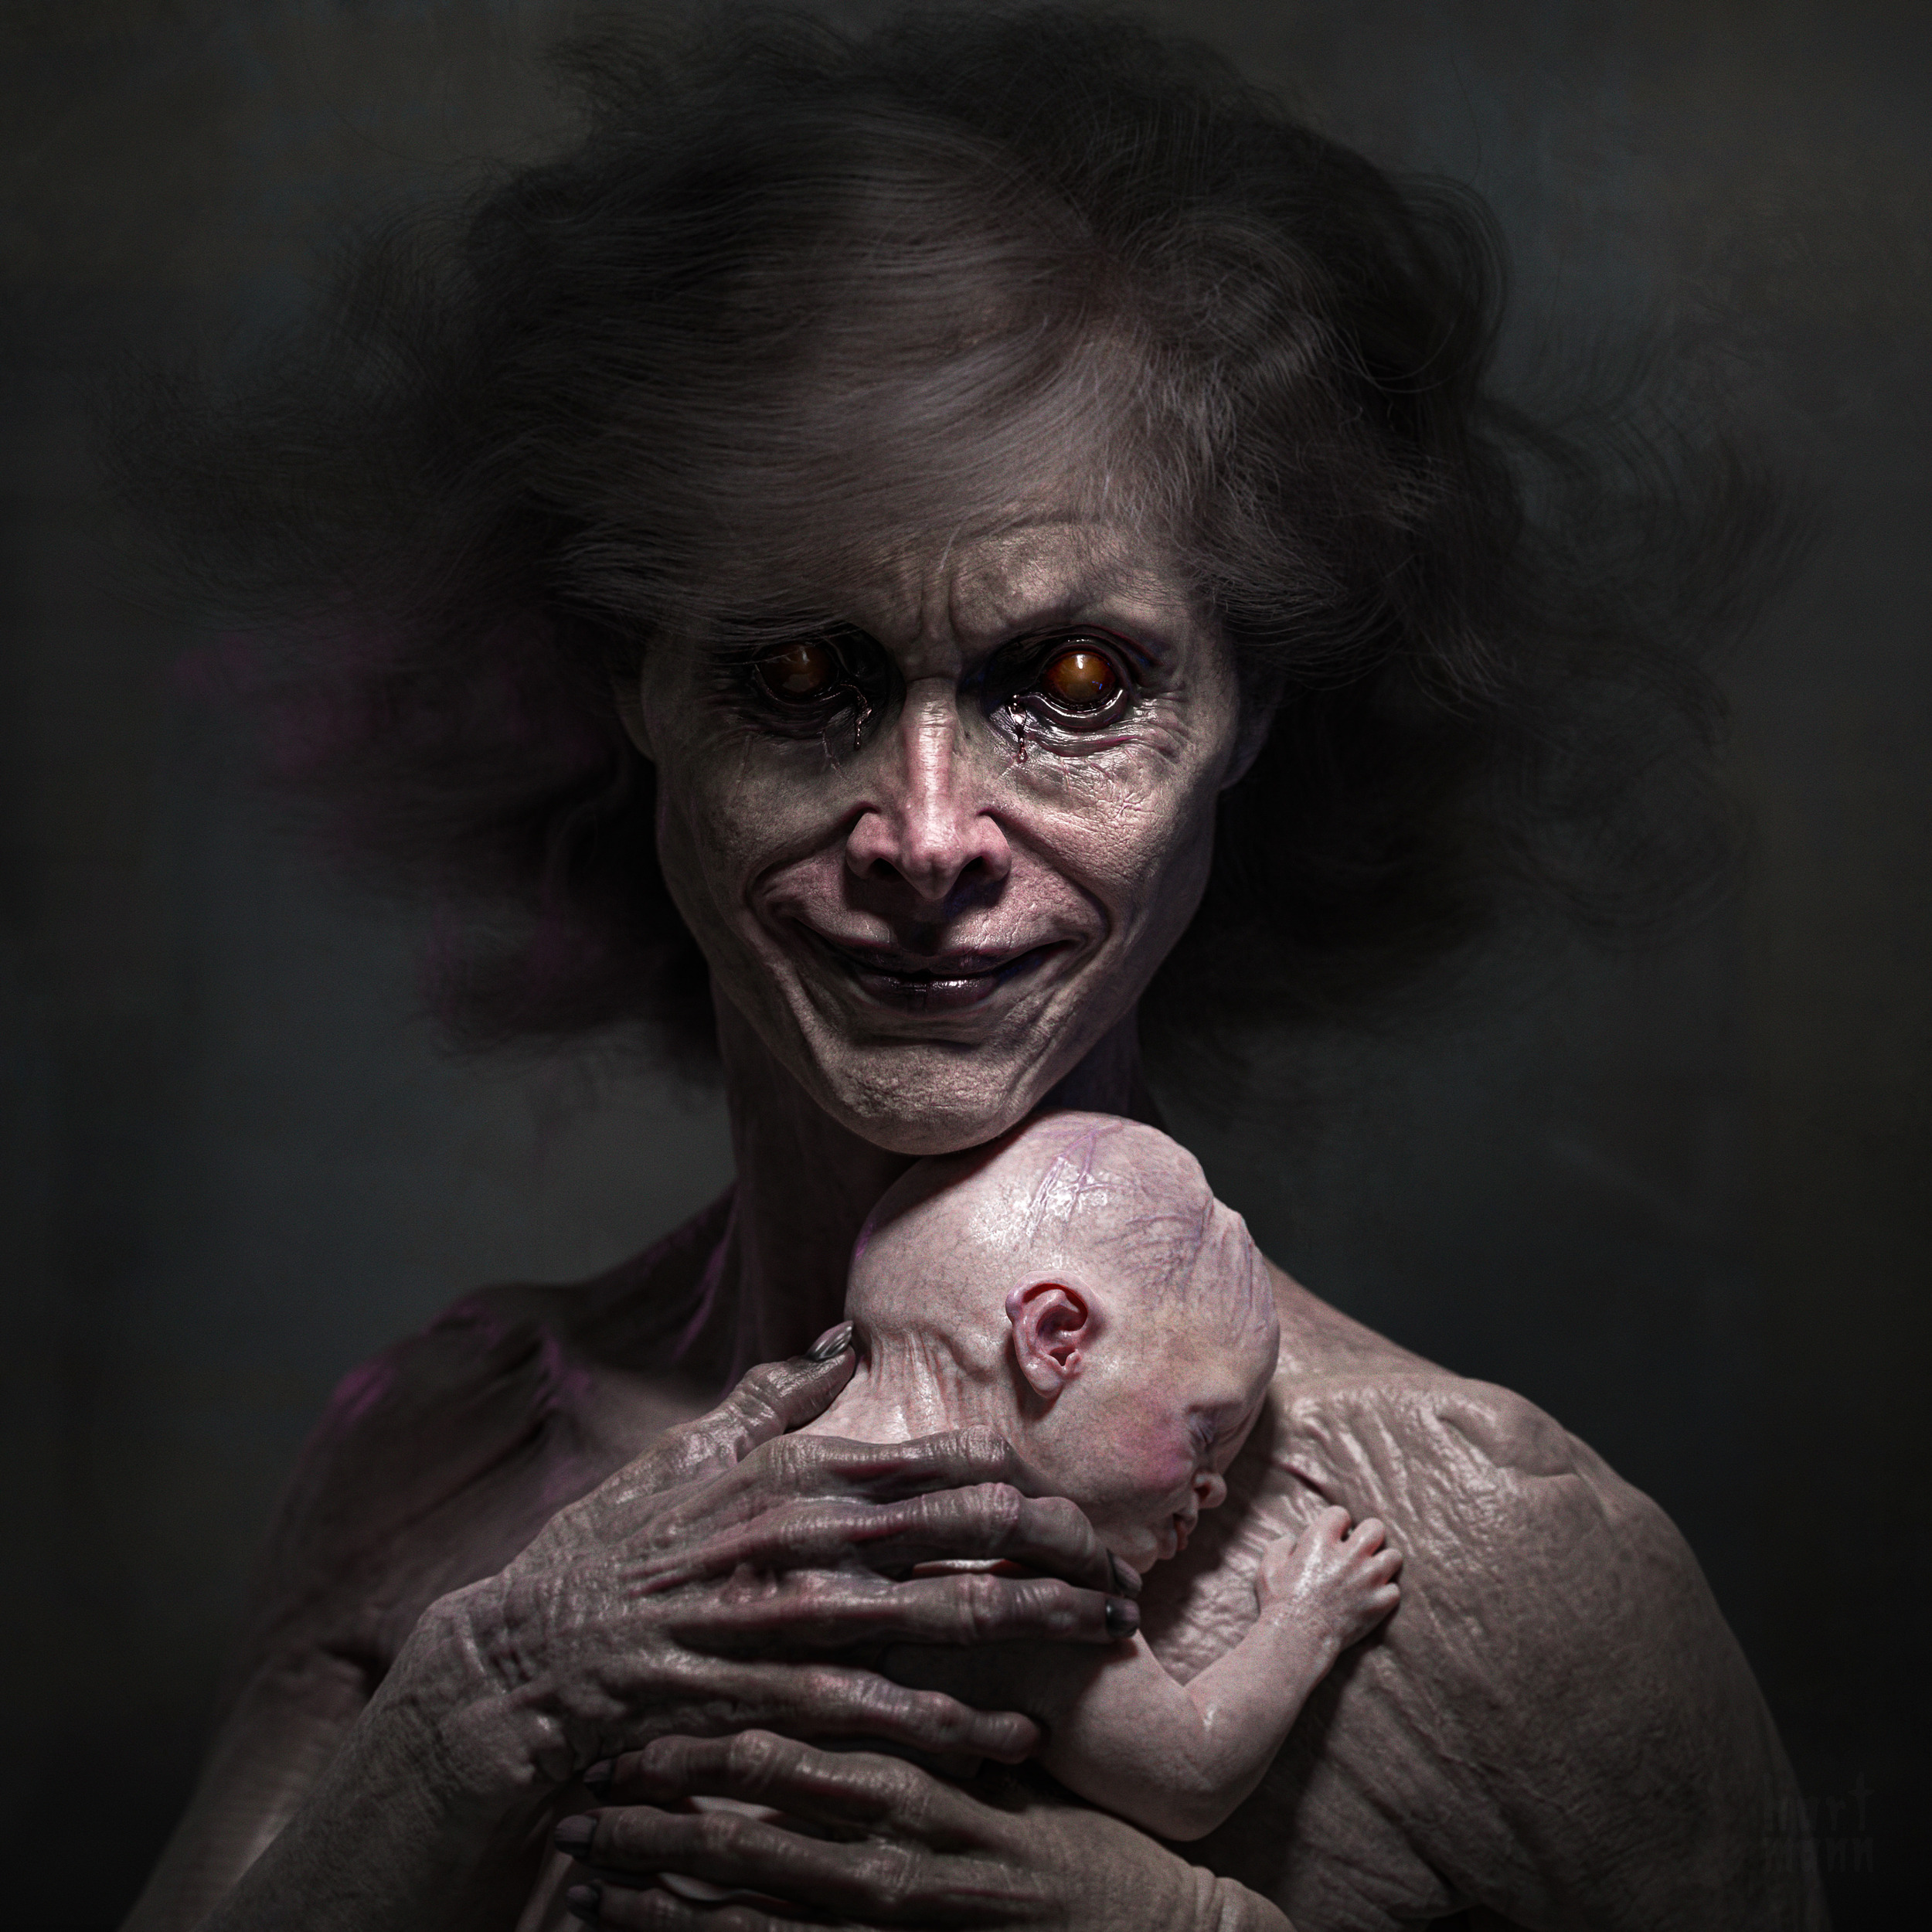
Let’s talk about “Mother Ann.”
The project started with a simple female character but morphed rather quickly.
I always wanted to show some kind of relationship between two characters in a dark, grotesque yet calm way. So I chose one of the strongest bonds––of a mother and child.
Not uncommon for my projects to gain drastically more complexity after some simple initial blockouts. The more I think about my projects, the more I want to add.
Collecting reference material is one of the most important ways to not only get inspiration but also to deliver a realistic and detailed final product. PureRef is my choice of software in that regard.
The Early Phase
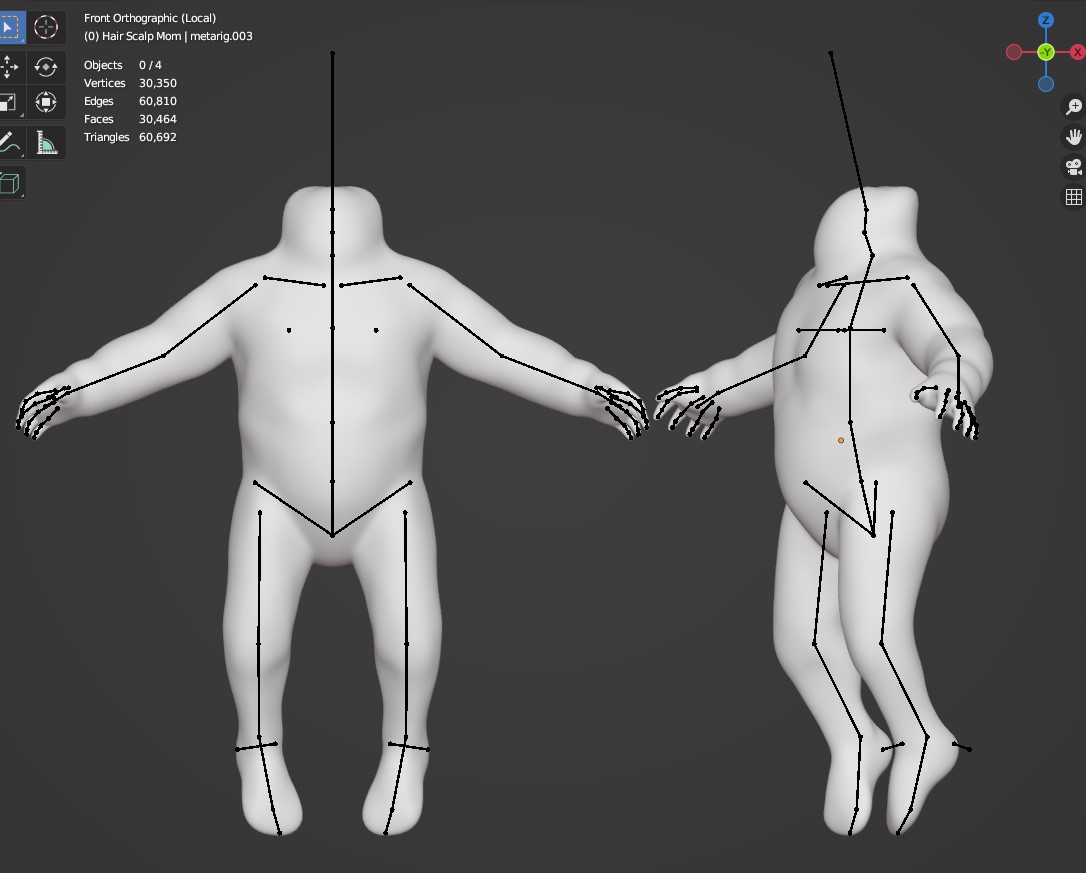
So I used Blender for all the 3D needs and it started with a simple, self-made humanoid base mesh, created using the skin modifier approach.


Pretty easy to pose this character in edit mode by moving vertices around. Such a very simplified base does not distract me when I explore and play with anatomy. That’s why I don't use a normal human base.
After a few hours of tinkering, the pose and expression were in place. The head, eyes, ears, and torso are separate objects to have the ability to quickly move them around.
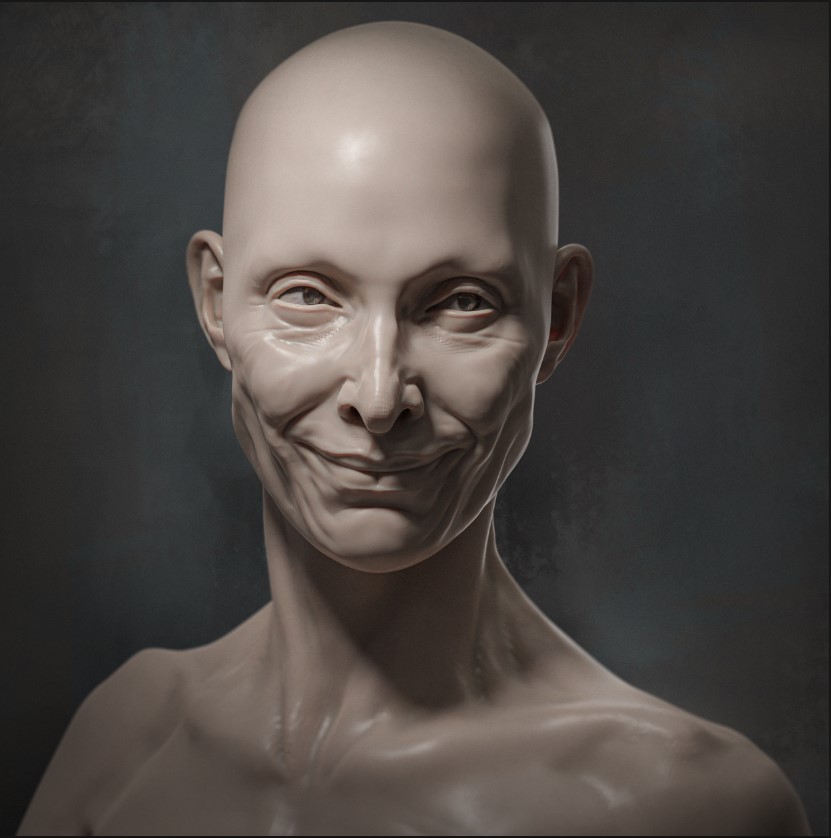
Experimenting with a few lights helps to get into the mood early on. It's also useful to have a better idea of how the forms are read. Working only with MatCaps can be very deceptive.
Adding the baby was the next big step.
I recycled the base mesh from another project so I only had to change the pose and sculpt over the new details.
The mother's fingers are made with the same skin modifier method as I mentioned above. That way, I can pose them easily and don’t need to create a rig. Everyone knows how difficult posing hands can be, right?
Notice how her left arm is missing here––I decided to add it later on.
This is the self-made, rigged baby base mesh.
I created this body for a short animation project last year. Reusing assets helps to cut time.
Adding Details
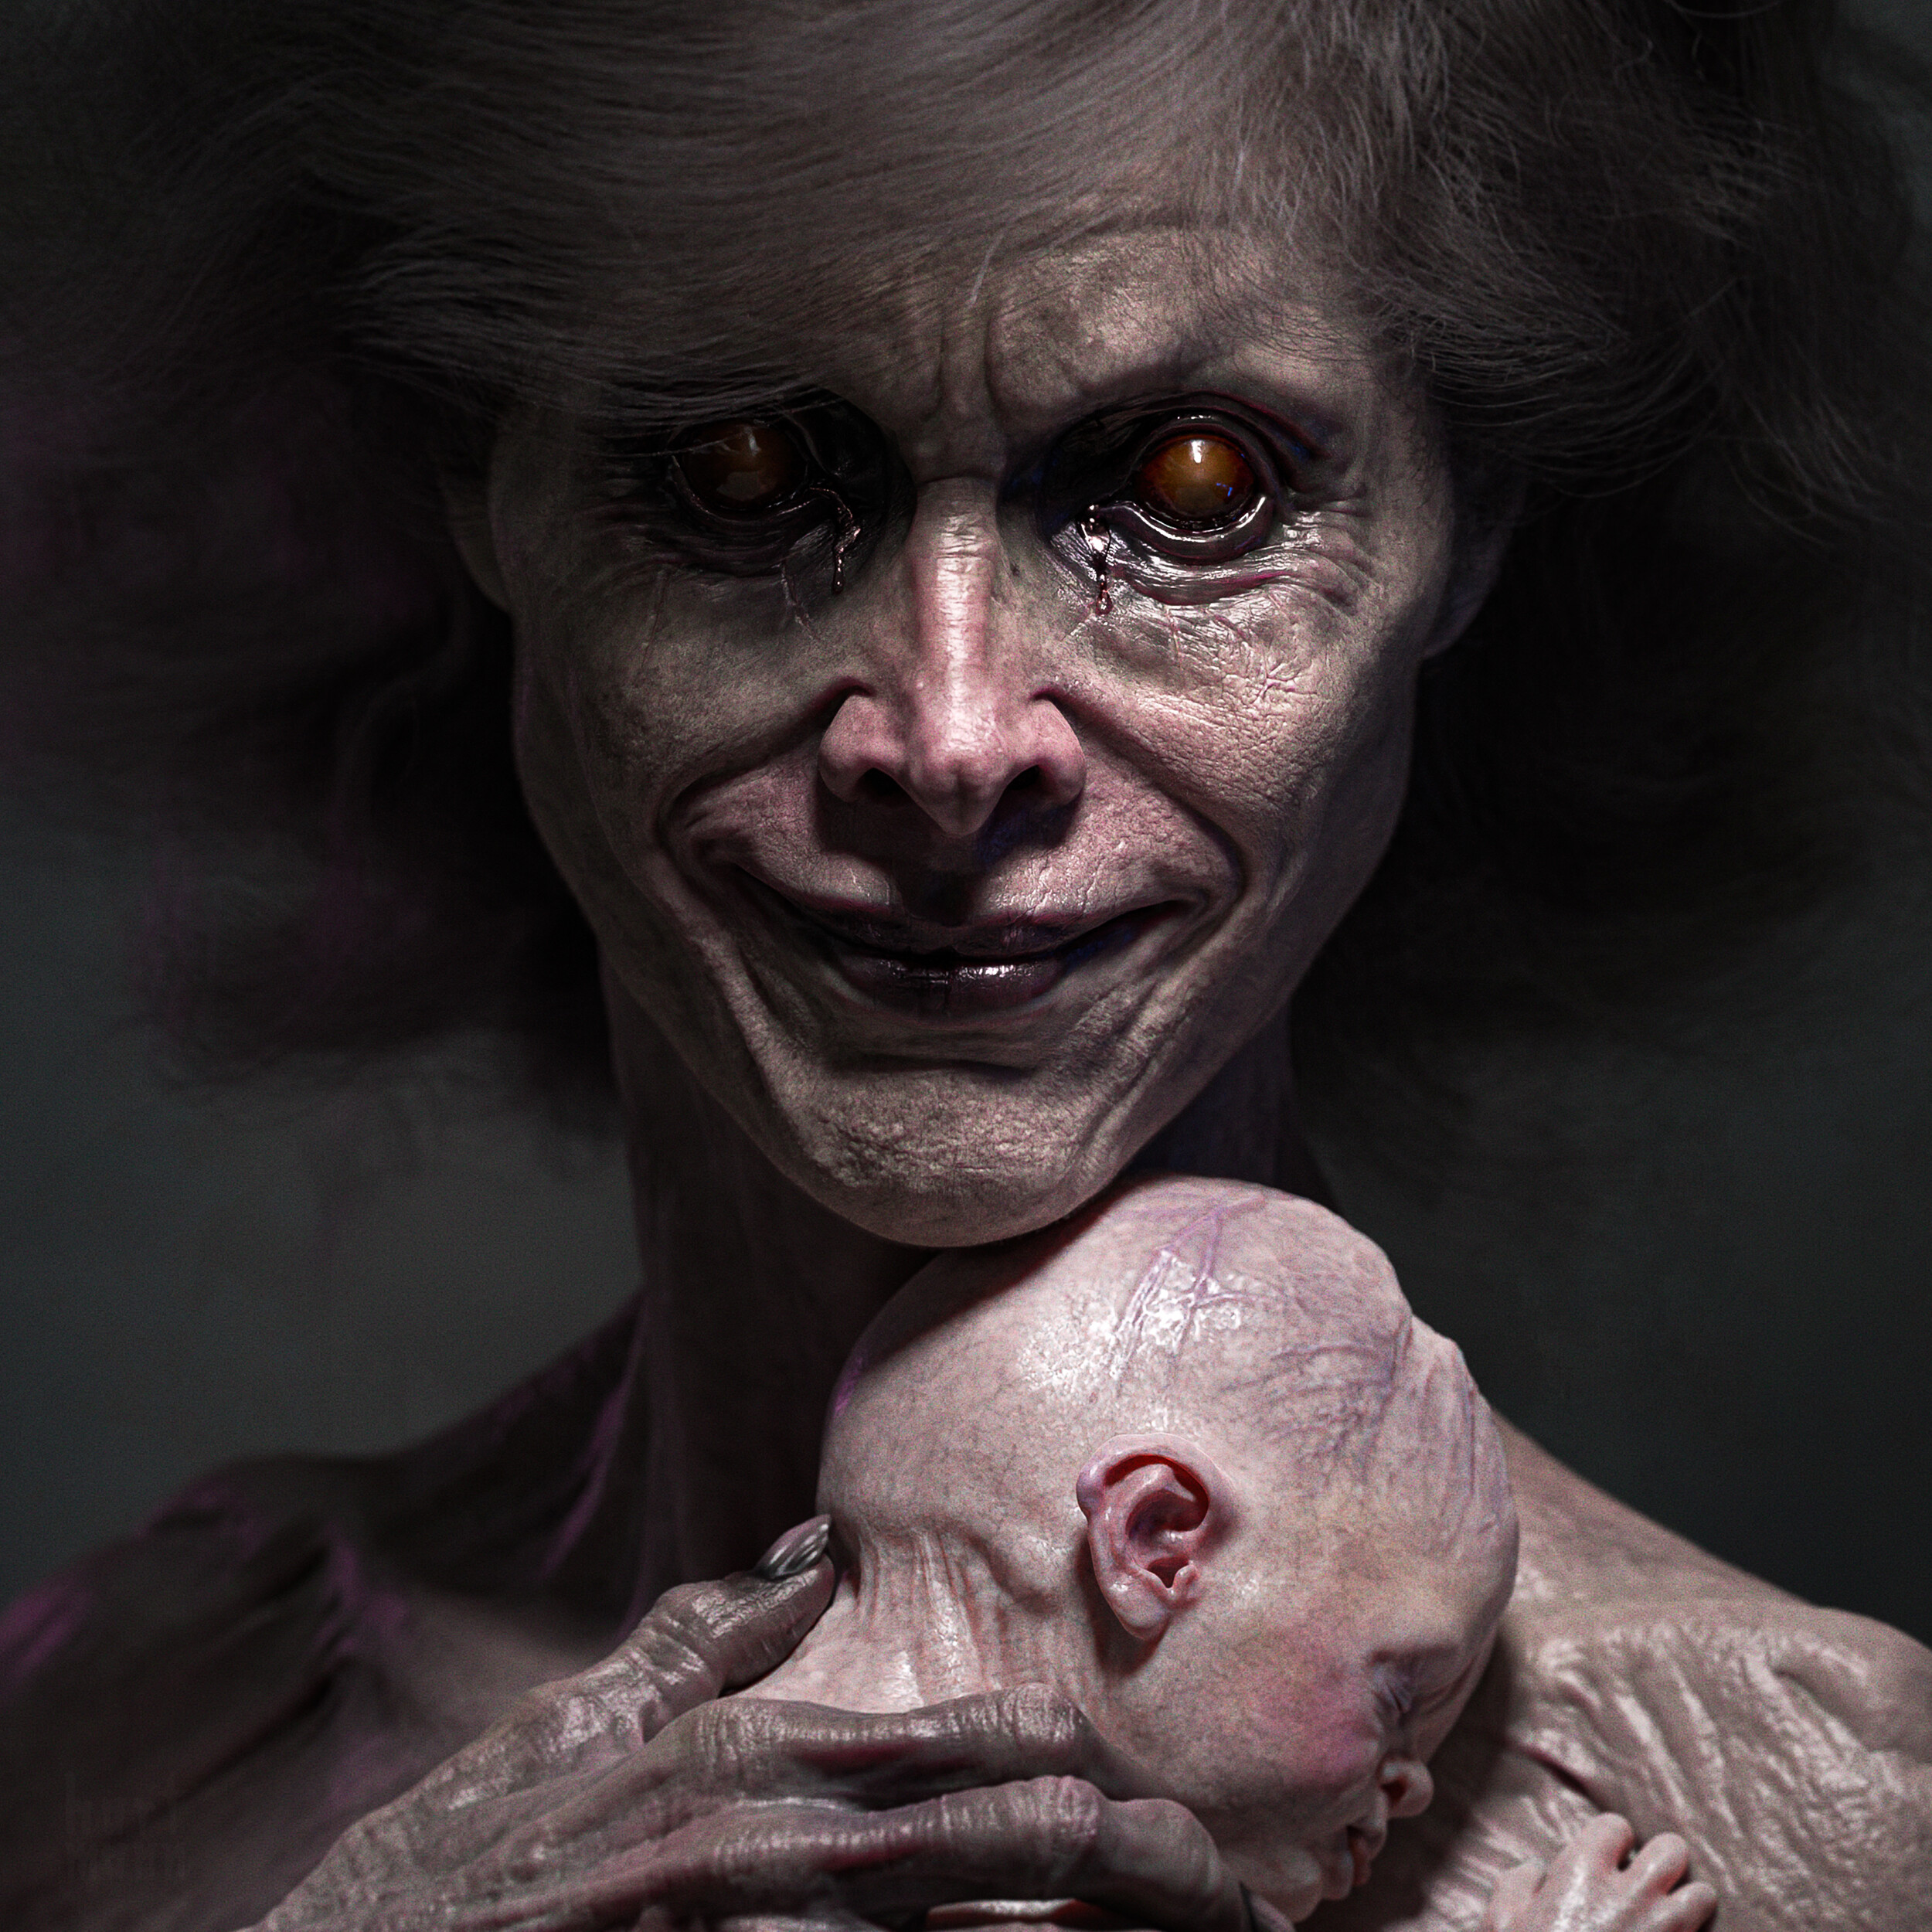
At this stage, I added a lot of the horror elements, details, and colors using Blender’s attribute painting system and hair. The messiness really contributes to the ominous vibe.
Time to focus on the tertiary skin details by using textured alphas on the standard sculpt brush. Sculpt Vertex color doesn’t work with Multires (yet) so I just carefully voxel re-meshed my way up. It has over 16 million faces in total!


Skin based color variations and details like veins are super important and add so much visual interest. Since I'm using vertex/attribute painting, I don't have to retopologize and UV unwrap to play with color.


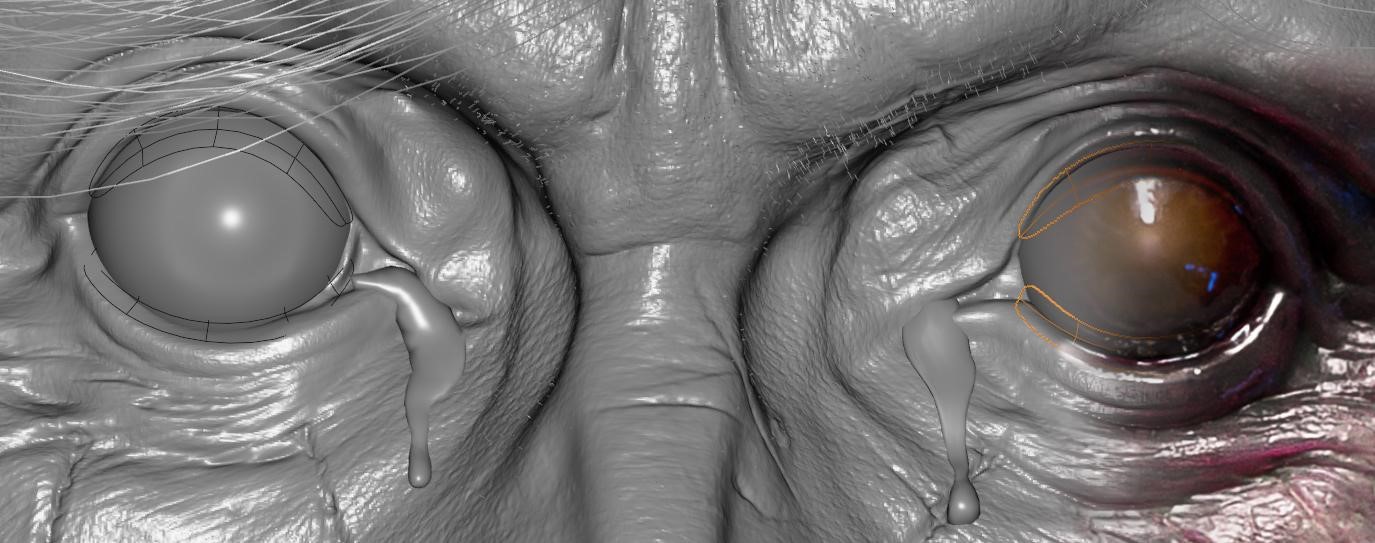
Notice the polygon stripes around the eyes––those are meant to get some nice extra reflections. It’s called the ‘tear line’ and helps to boost realism subtly.
The hair was made up of 3 different particle systems (big, medium, and small) and some basic grooming.
Shhhh! Don't tell anyone but there are bones inside of Mommy! 😱
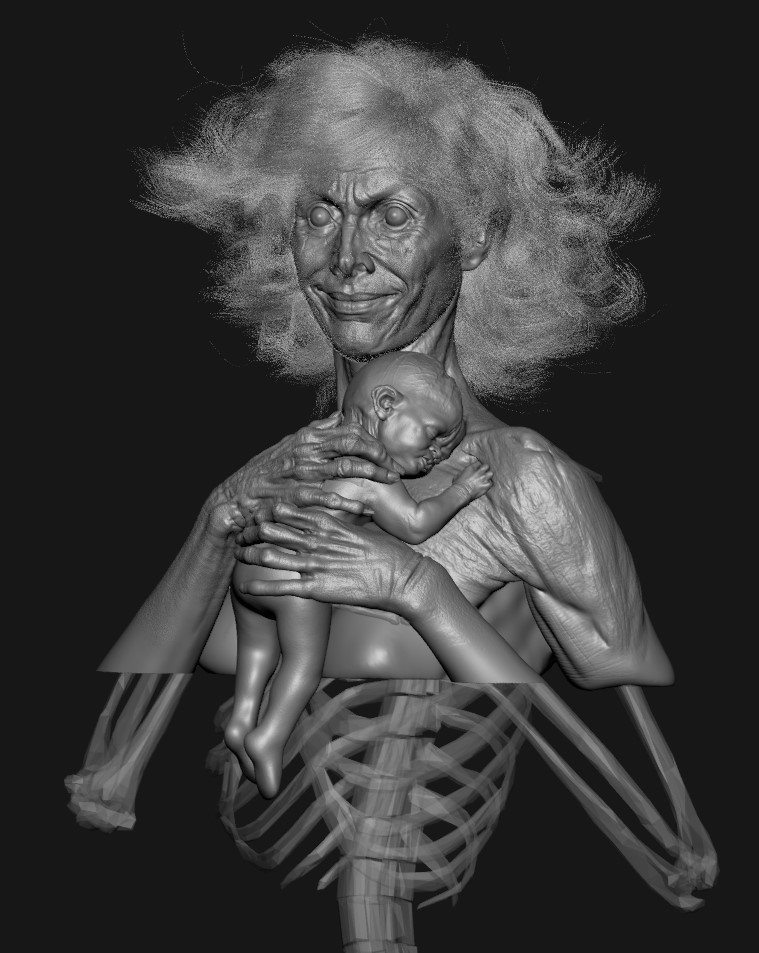
I have created a poseable skeleton to check the proportions and bony landmarks. That can be very helpful in some cases, especially for characters with close to normal human proportions and anatomy.
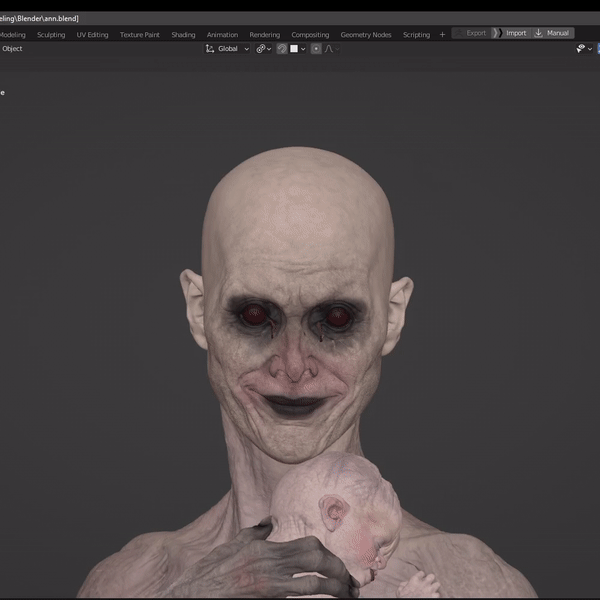
Final Blender Viewport Render
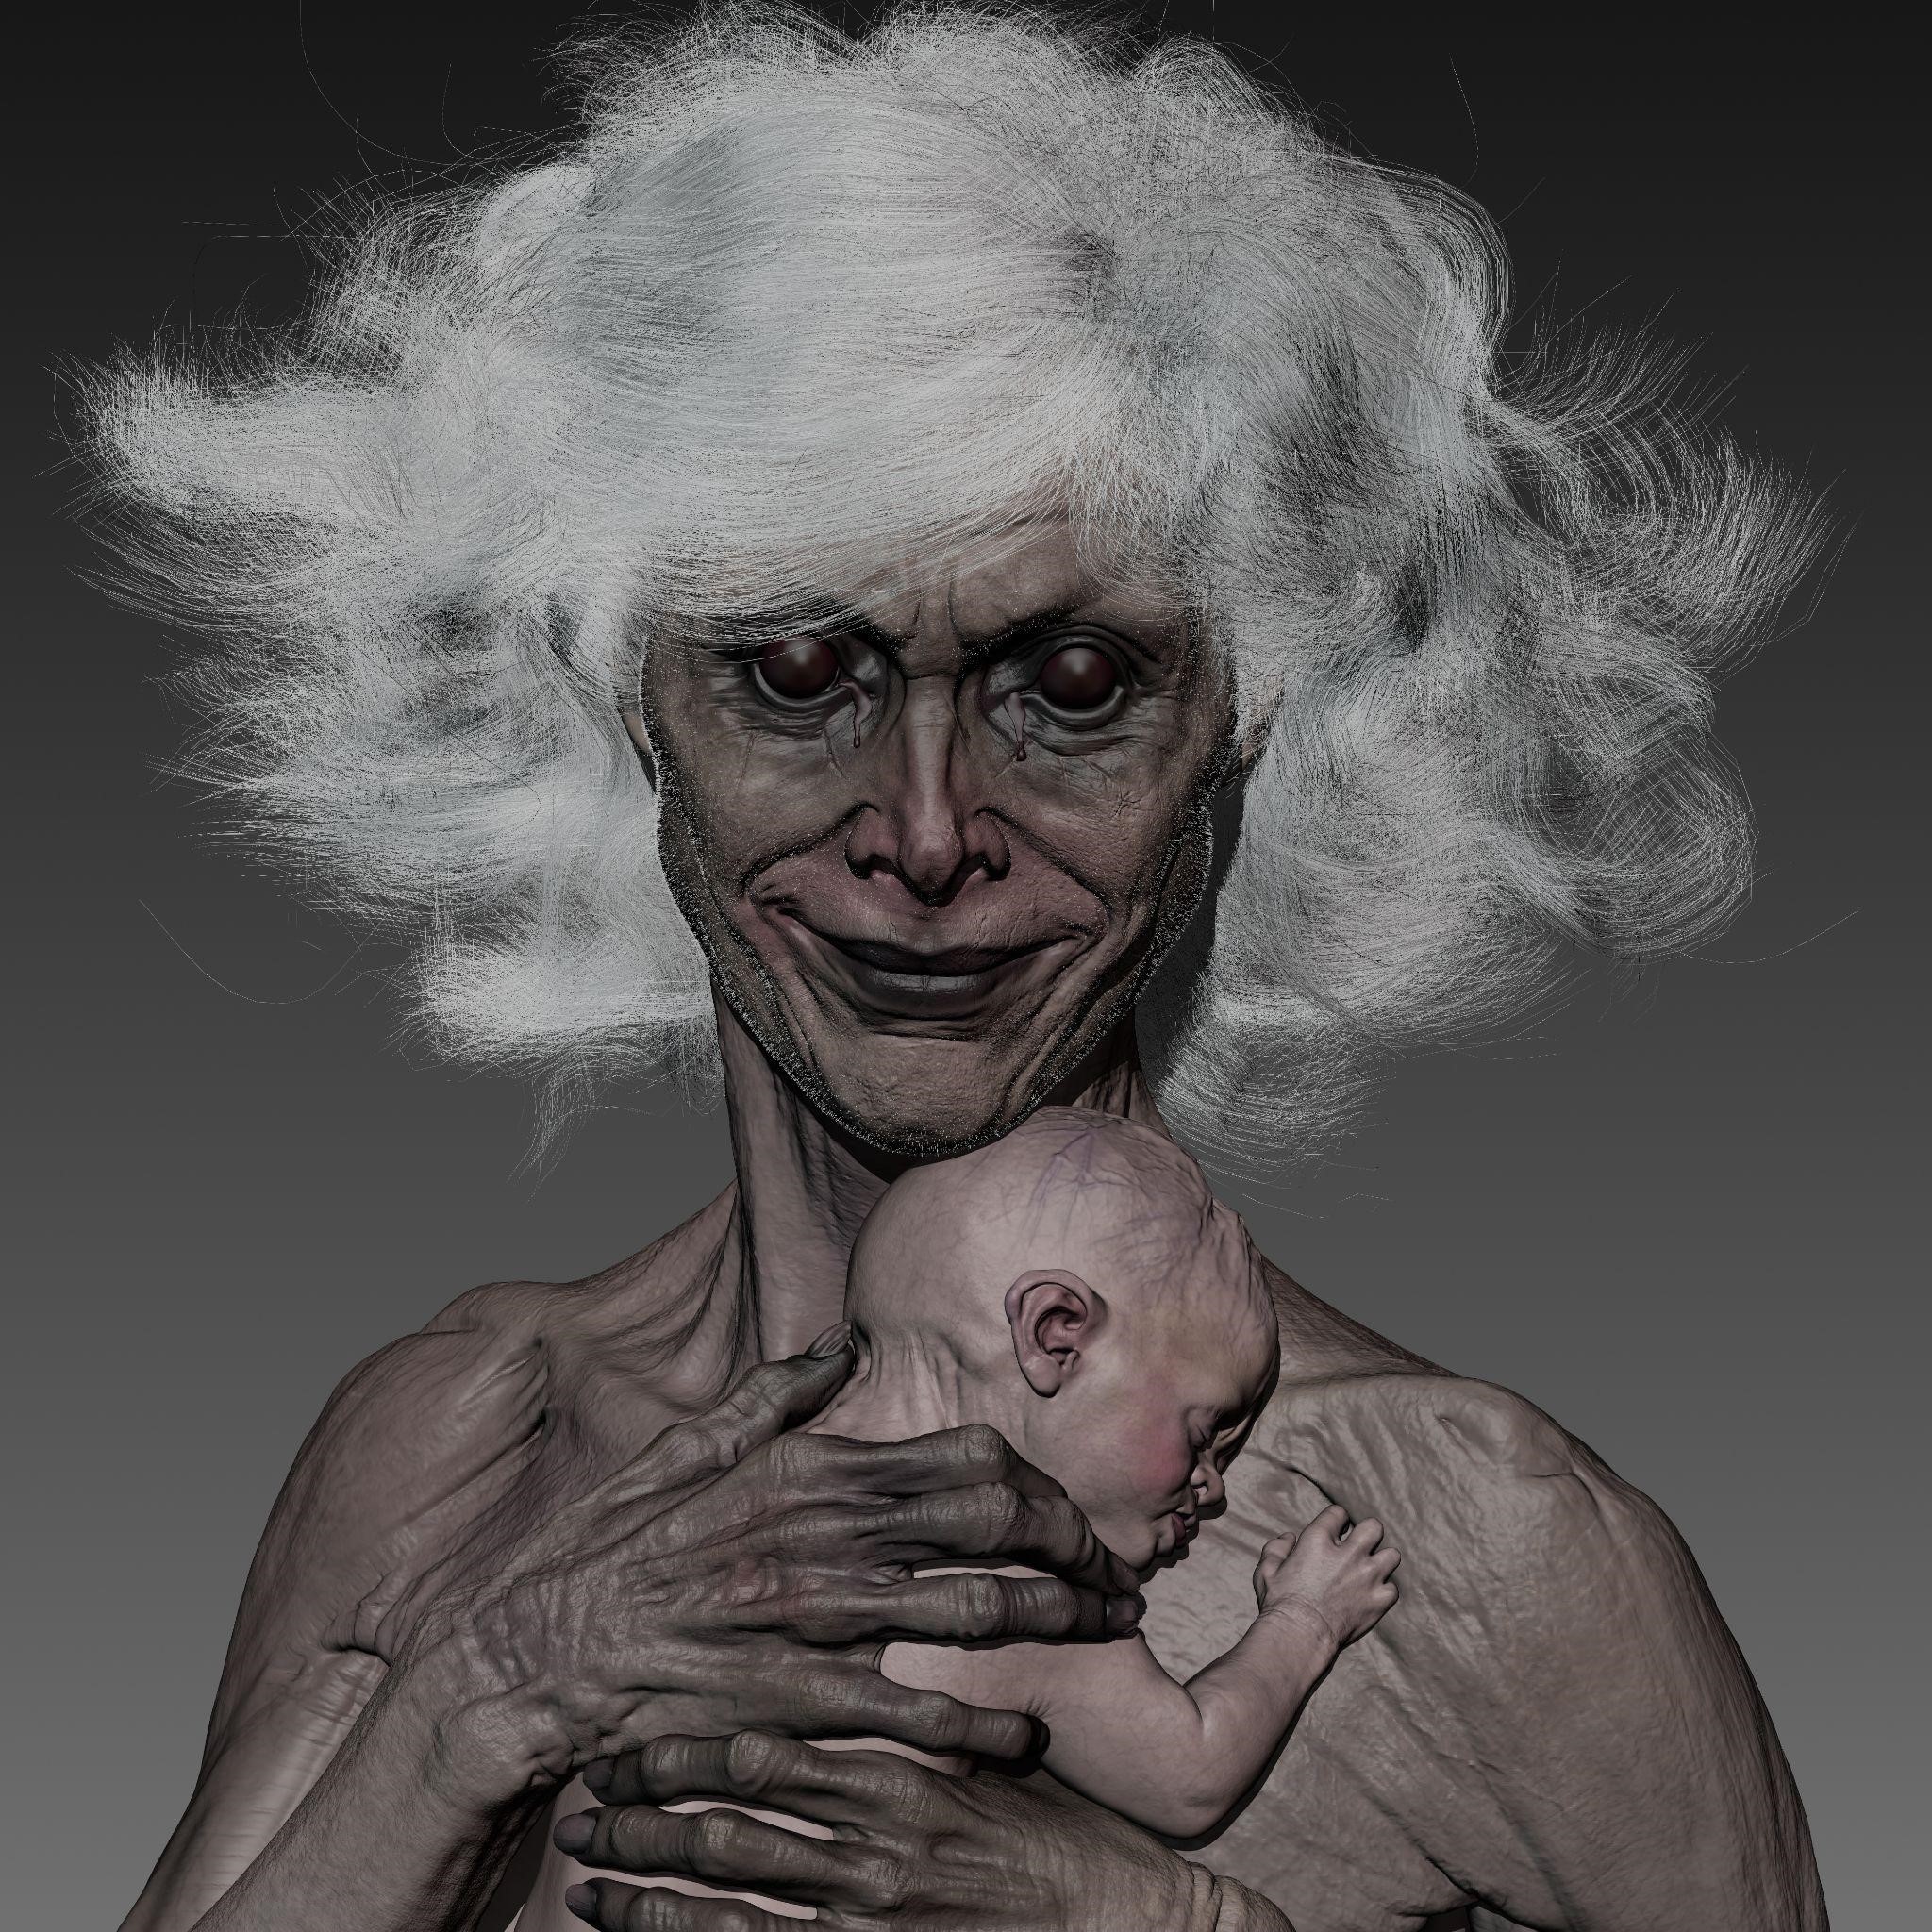
Adding peach-fuzz facial hair was a last-minute decision.
Materials, Lighting, and Rendering
This is the material for mommy's skin.
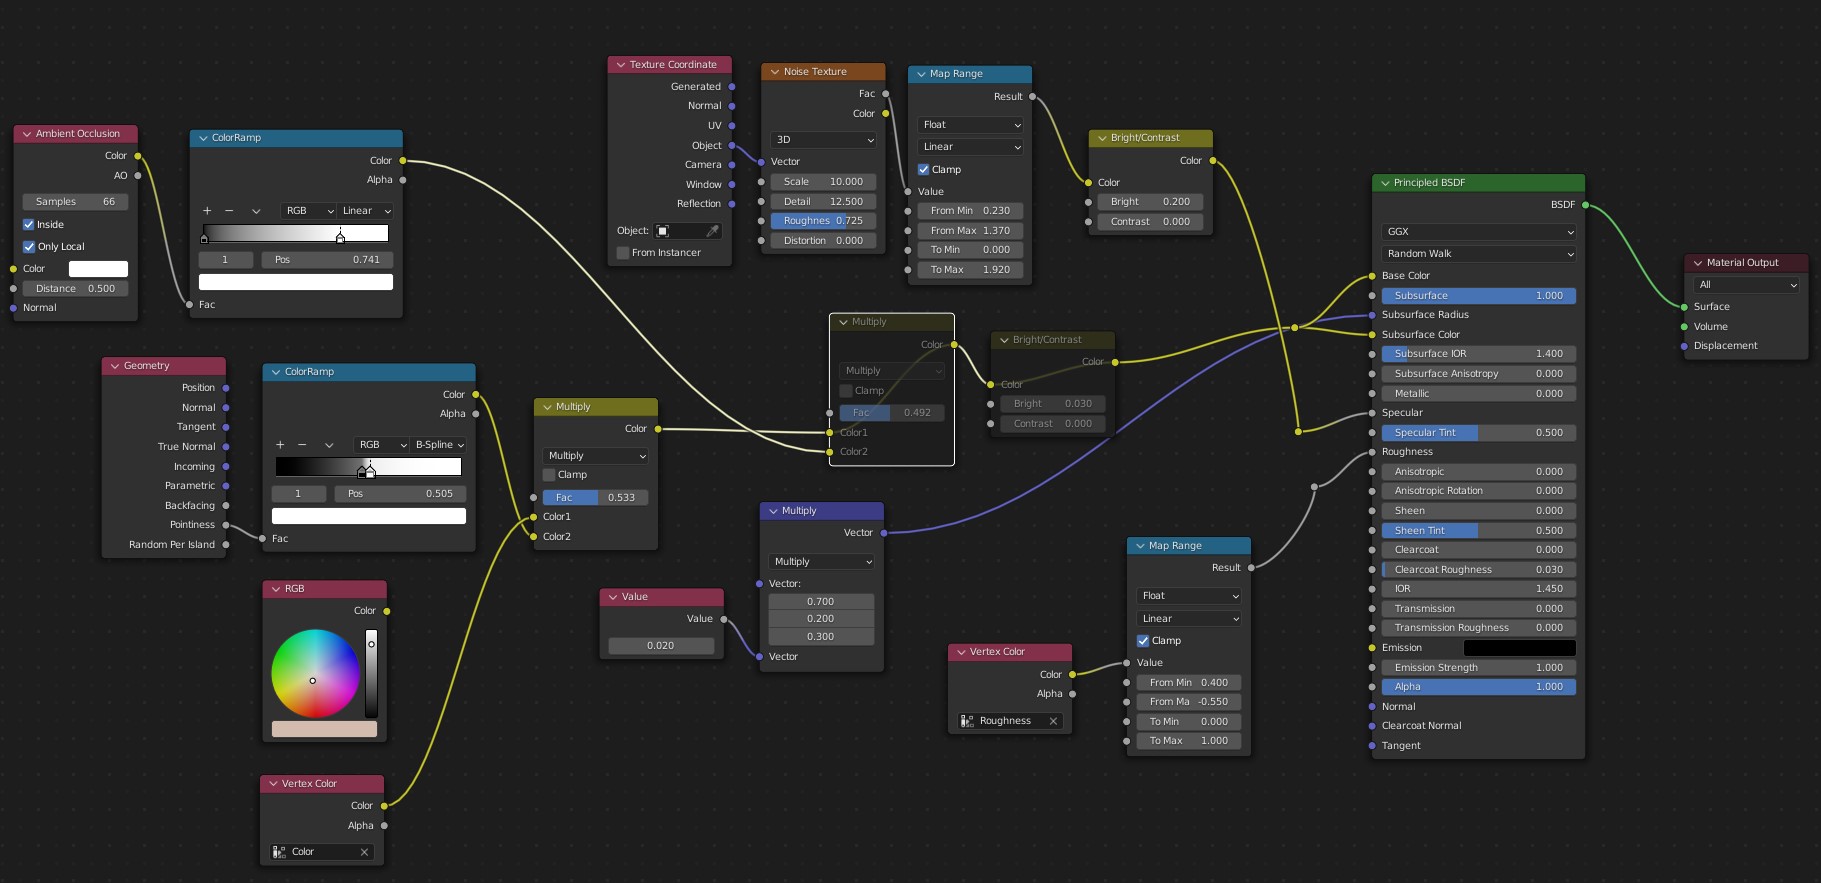
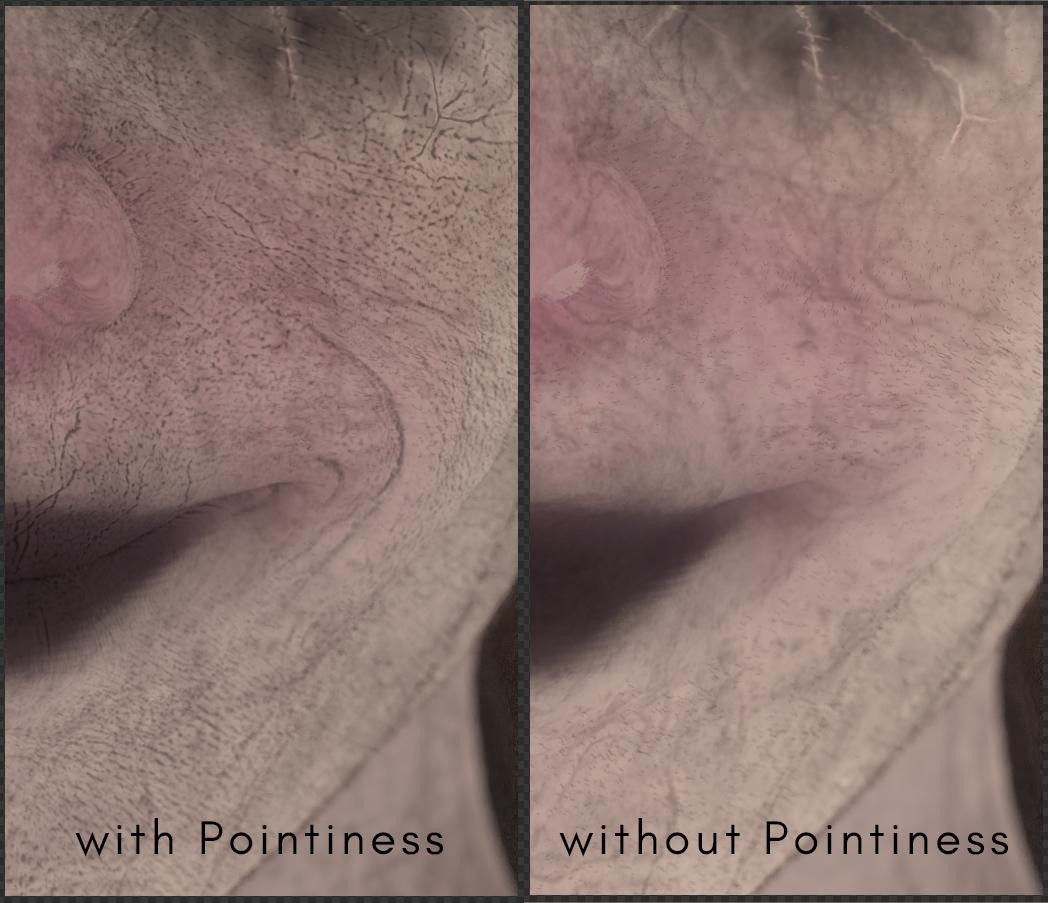
Base color and roughness maps are painted with the new attribute/vertex paint feature. The Pointiness option of the Geometry node is used to boost the contrast of details.
My subsurface scattering setup is pretty uncommon and I wouldn't recommend it in general, but it adds something special to my creations. The material of the baby is very similar.
Material of the tear line.
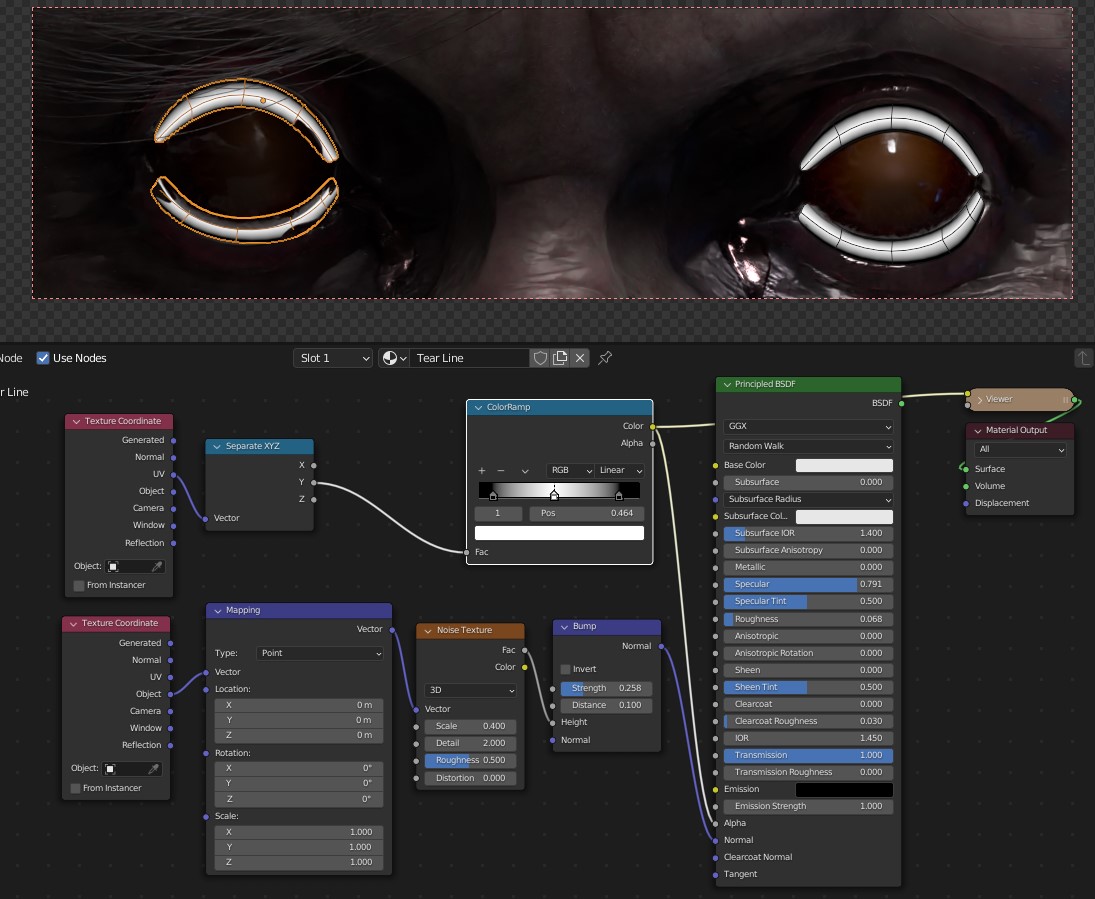
Black means transparent, and white means reflective.
And finally a look at the sclera material of the eyes.
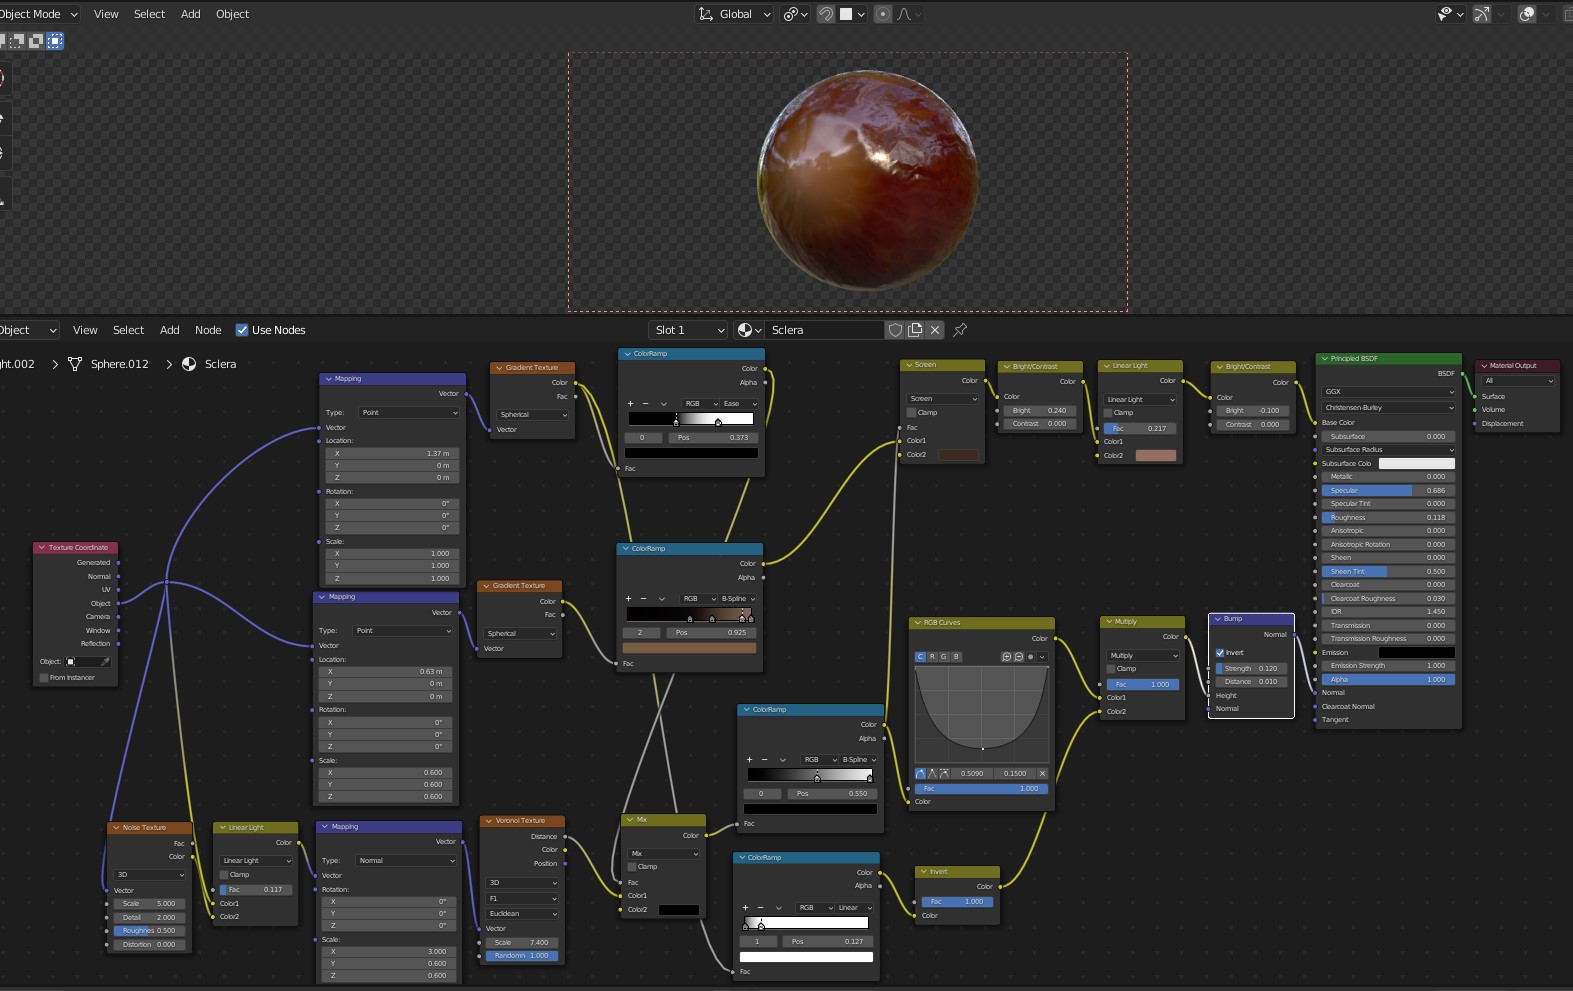
I reused this self-made material from another project and it turned out to be quite messy. It could have been done more delicately.
Hair is just a very basic Principled Hair BSDF setup.
Lighting is rather simple. One key light in the front, a dim light in the back, small blue light in the bottom right, and a low strength HDRI (High Dynamic Range Image). I also placed a bright plane in the background and bottom to add reflected light. Those planes are set to be non-visible to the camera.
Also notice how I cut away the geometry from Mommy to save memory, render time, and boost viewport performance.
Render time, using my RTX 3060 12GB graphics card at 4000 by 4000 pixels, was about 5 minutes. I then used the compositor to blend the noisy with the denoised image to add some grain right back into the raw file. That's it.
Post Processing
Once I rendered the final image with Cycles, it was time for some finishing touch-ups in Photoshop.
The background is painted with some grungy textured brushes. Color grading, contrast-enhancing, sharpening, and noise were added using the Camera Raw filter.

Very basic and quick process––nothing fancy.
One thing I really like would be to place my work-in-progress renderings as a Smart Object in Photoshop and play around with filters to get an early glimpse of how the shapes and details will be read with post-processing enhancements. That helps my decision-making in Blender.
Smart Objects are great because you can quickly swap out the content and have the ability to non-destructively add filters.
Mother Ann
And that's it, folks! I wanna thank you for your time and interest!
Feel free to share your thoughts and questions in the comment section down below.
About the Artist
Steffen Hartmann, is a 2D/3D character artist and illustrator with a great passion for the horror genre, based in Germany.
4 Comments
Man, ... that is awesome. I'm blown away about how real and scary that looks.. Far Out Dude. again, W O W.
Fantastic job.
Beautiful
Amazing!