Behind the Scenes: Santorini by Night
Introduction
My name is Mia, and I’m a 24-year old artist from Denmark. I started working with 3D about 7 years ago, and recently finished my Master’s in Game Design at The Royal Danish Academy of Fine Arts in Copenhagen. I’m currently working as a Lighting Artist at Little Chicken Game Company in Amsterdam, where I mostly do lighting, set-dressing, and modeling.
I initially wanted to specialize in modeling, but after having worked for a while as a 3D artist, I found I was more interested in the overall environment, rather than modeling or sculpting props. During my studies, I became more passionate about lighting in particular. I did my thesis on Lighting in Games, where the intent was to investigate lighting as part of the larger concept of environmental storytelling, and how it can be used to tailor the emotional impact of a scene.
My decision to specialize in lighting came from two places: Isac Crafoord, who introduced me to lighting in Unity, and everyone at Little Chicken who were trusting enough to let an intern light their game.
Gathering references
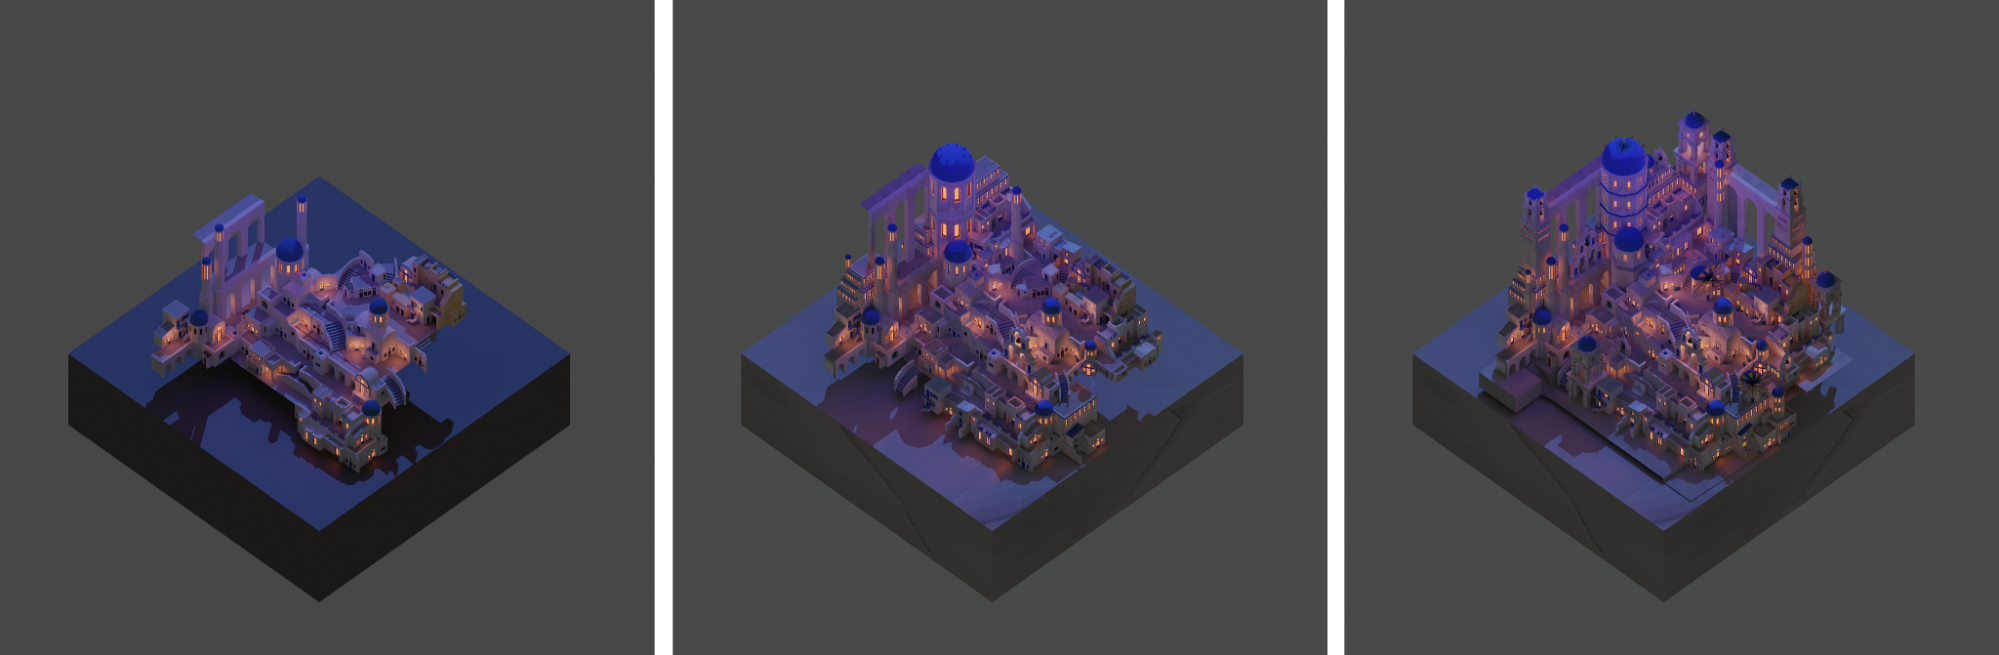
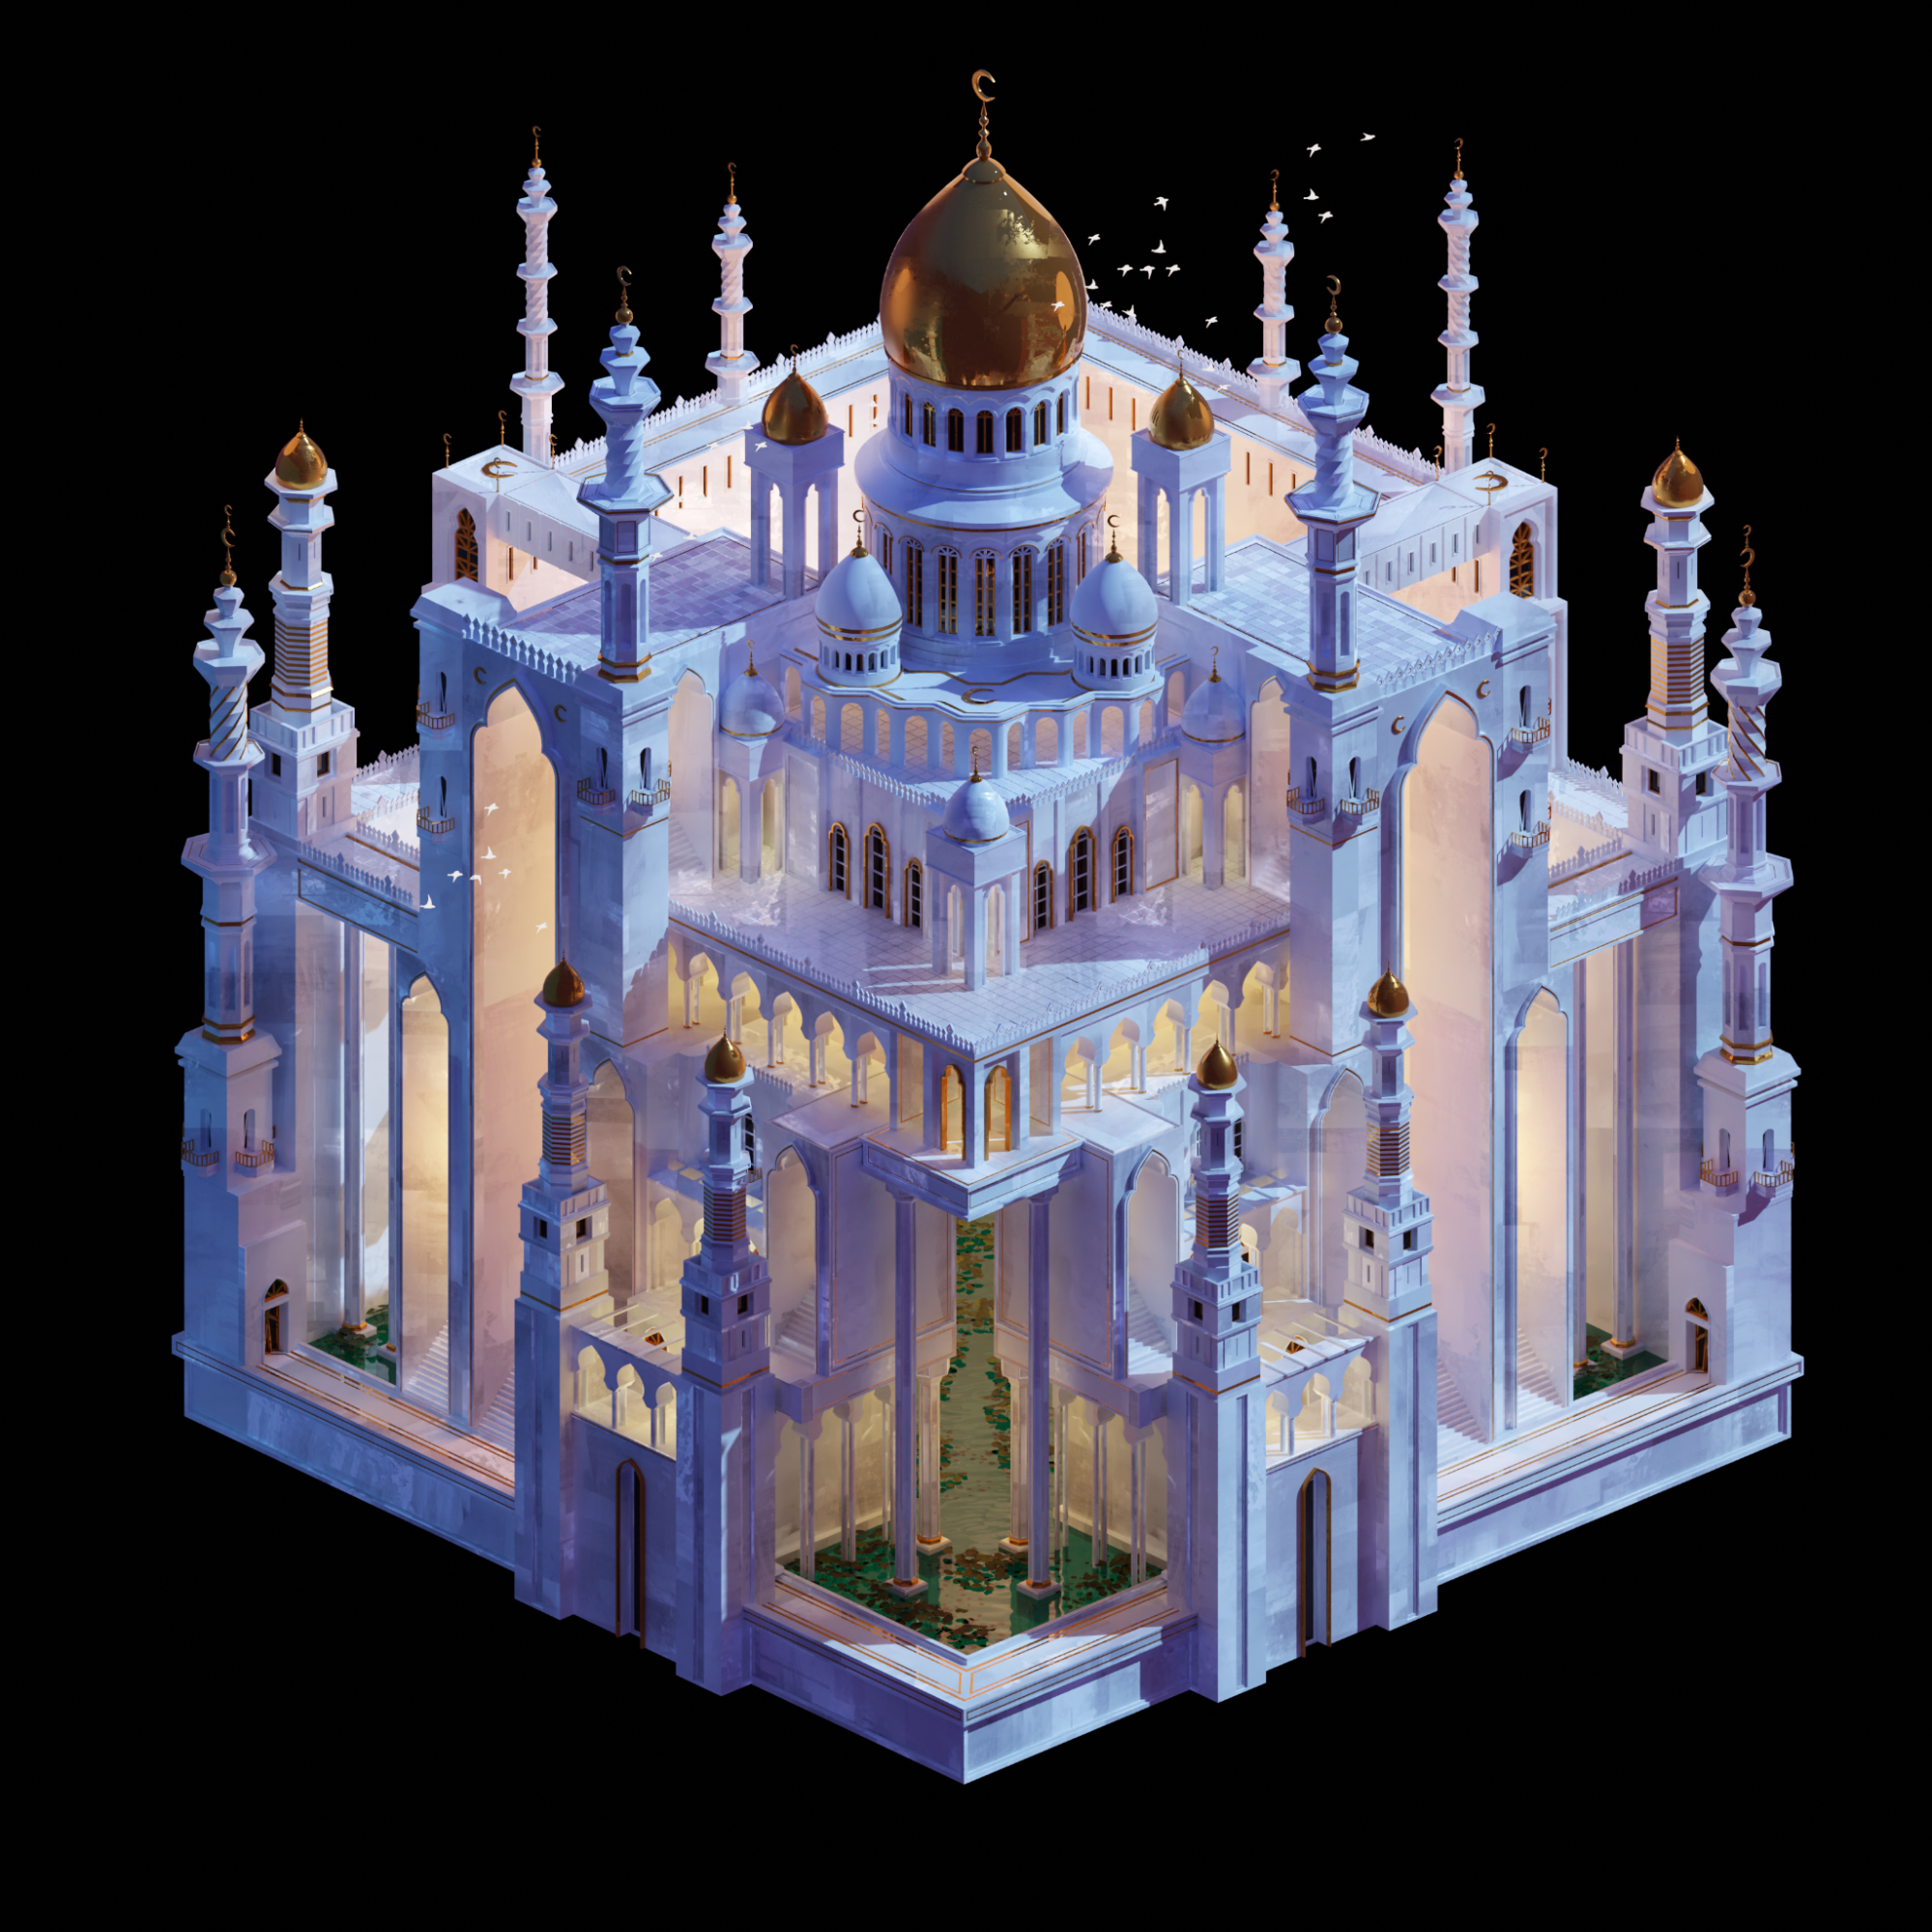
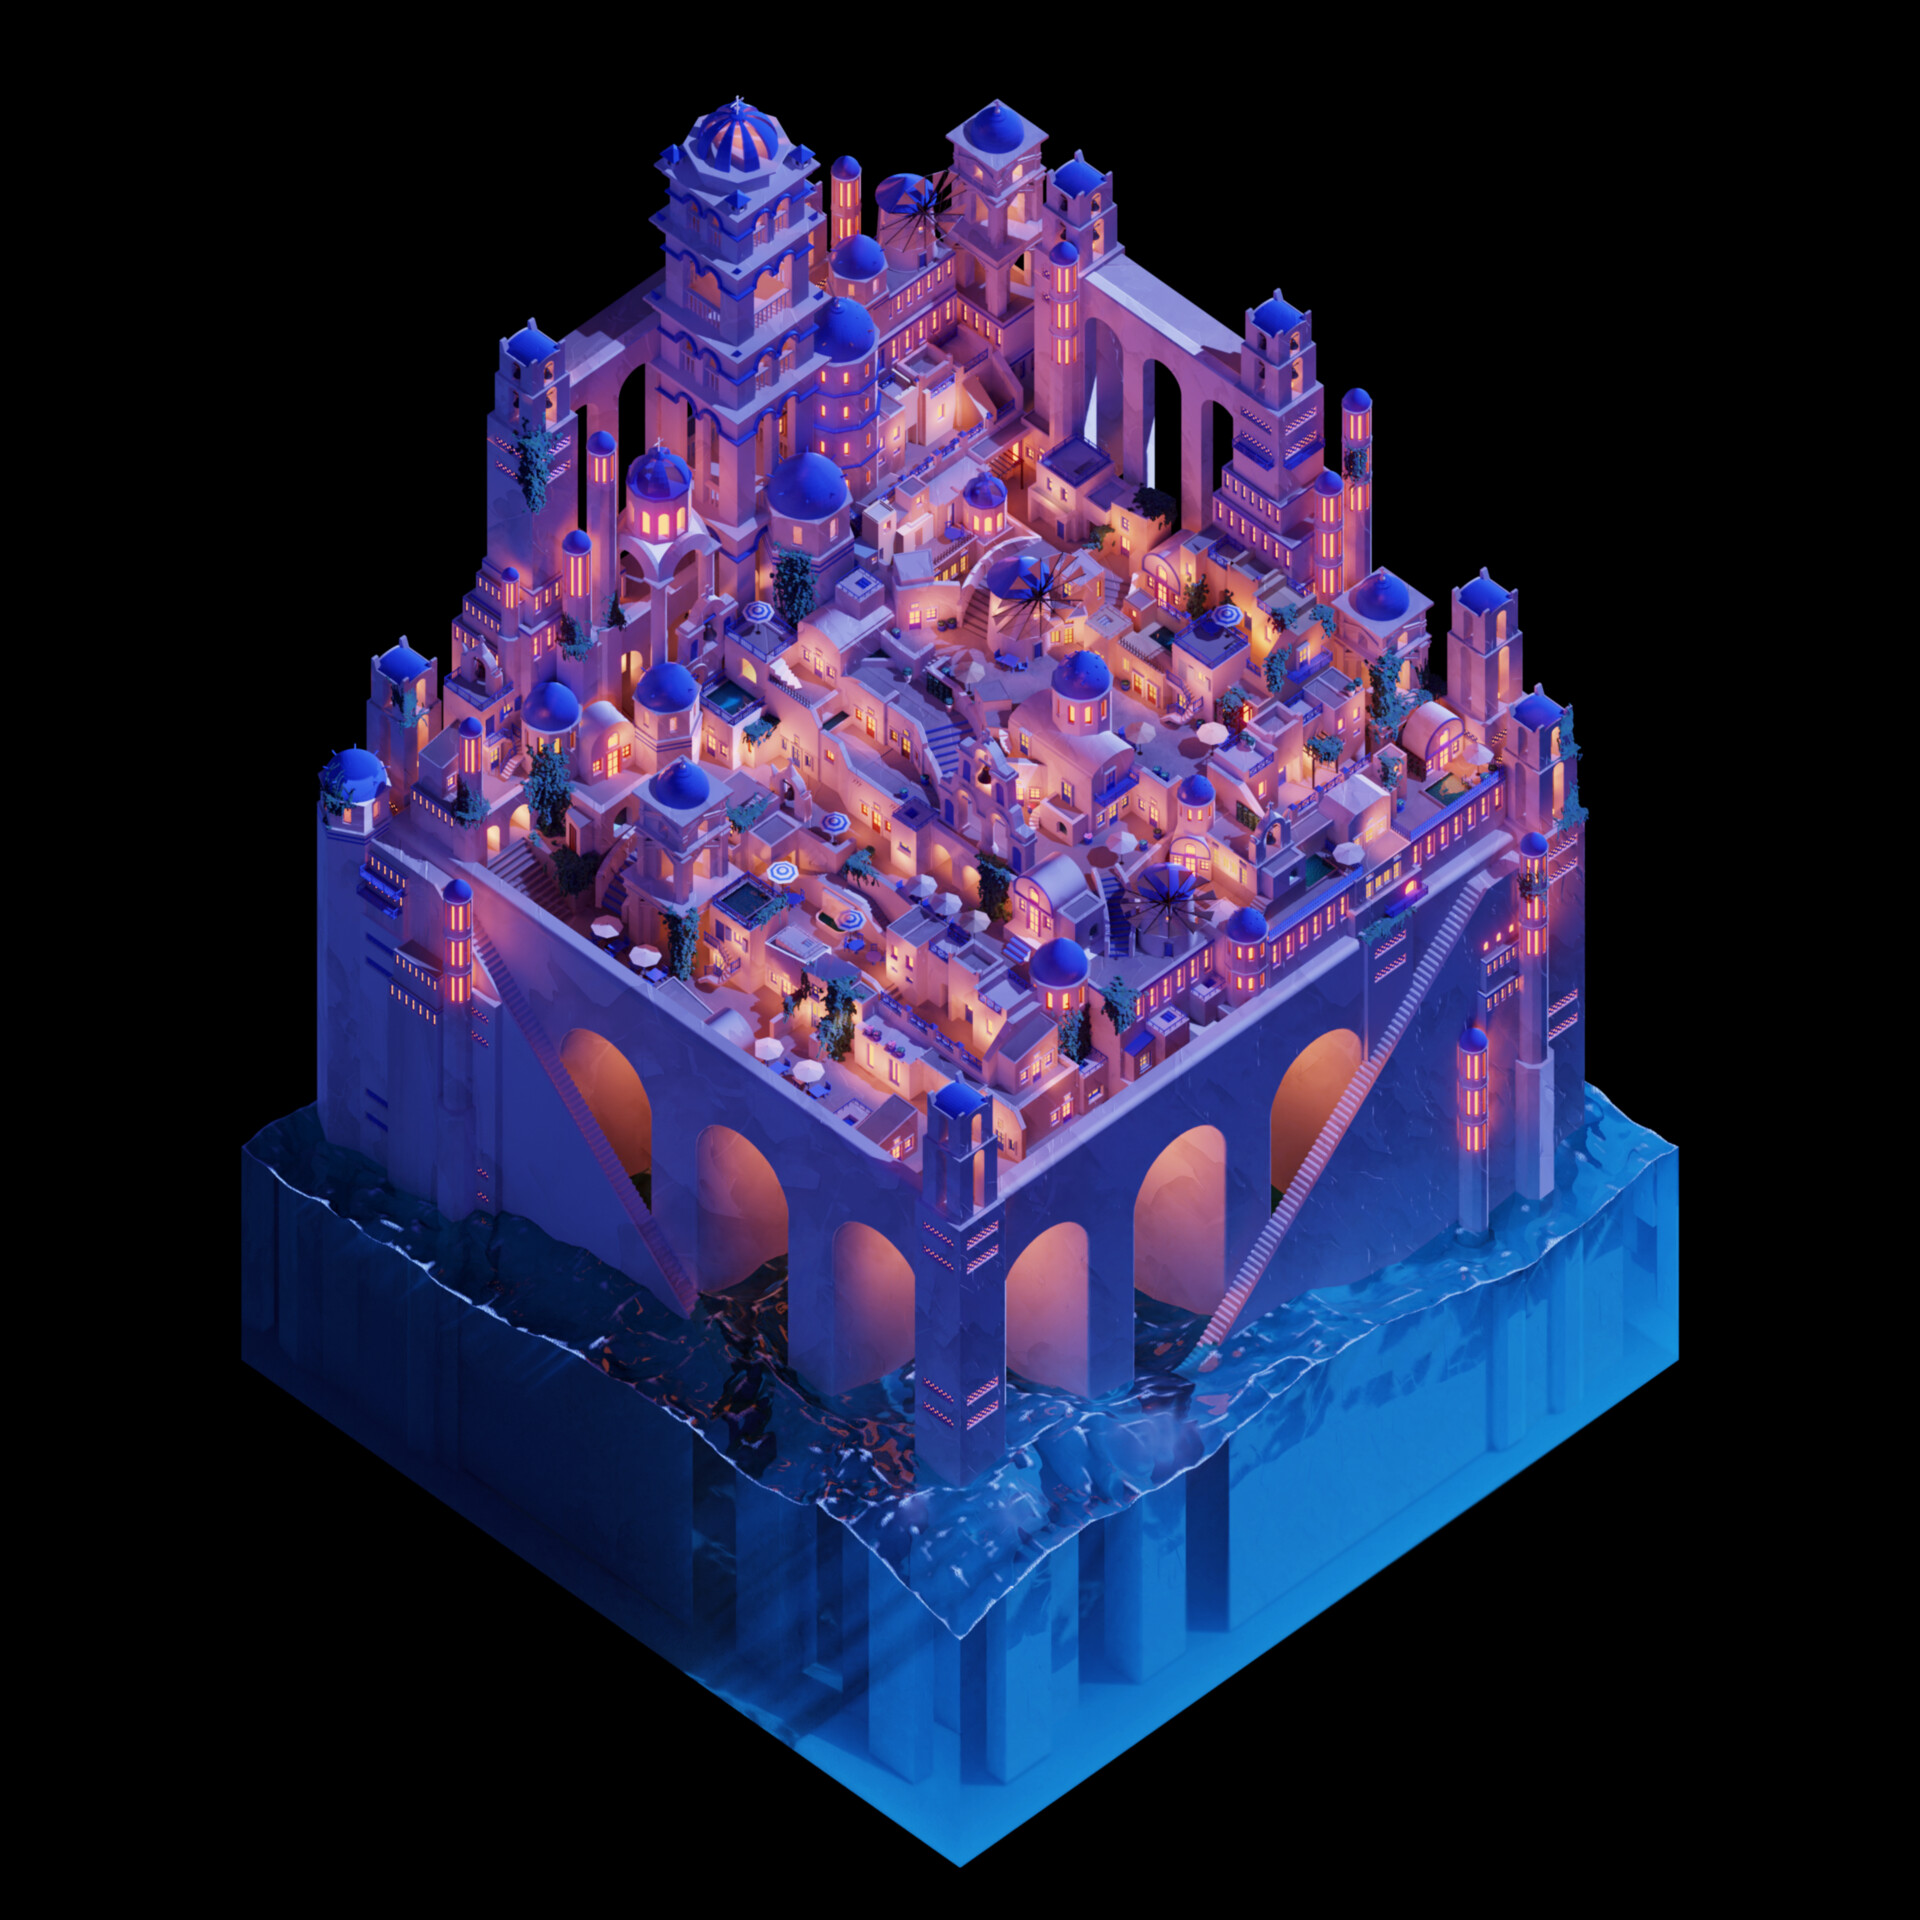
My goal for this project was to create an isometric scene that would allow me to work with different lighting setups in Blender. I start off all projects by gathering reference images from either Pinterest, ArtStation, or Instagram. The setting and style for this particular piece were mostly inspired by the Santorini map from Overwatch, as well as some of the artworks by @madmaraca on Instagram.
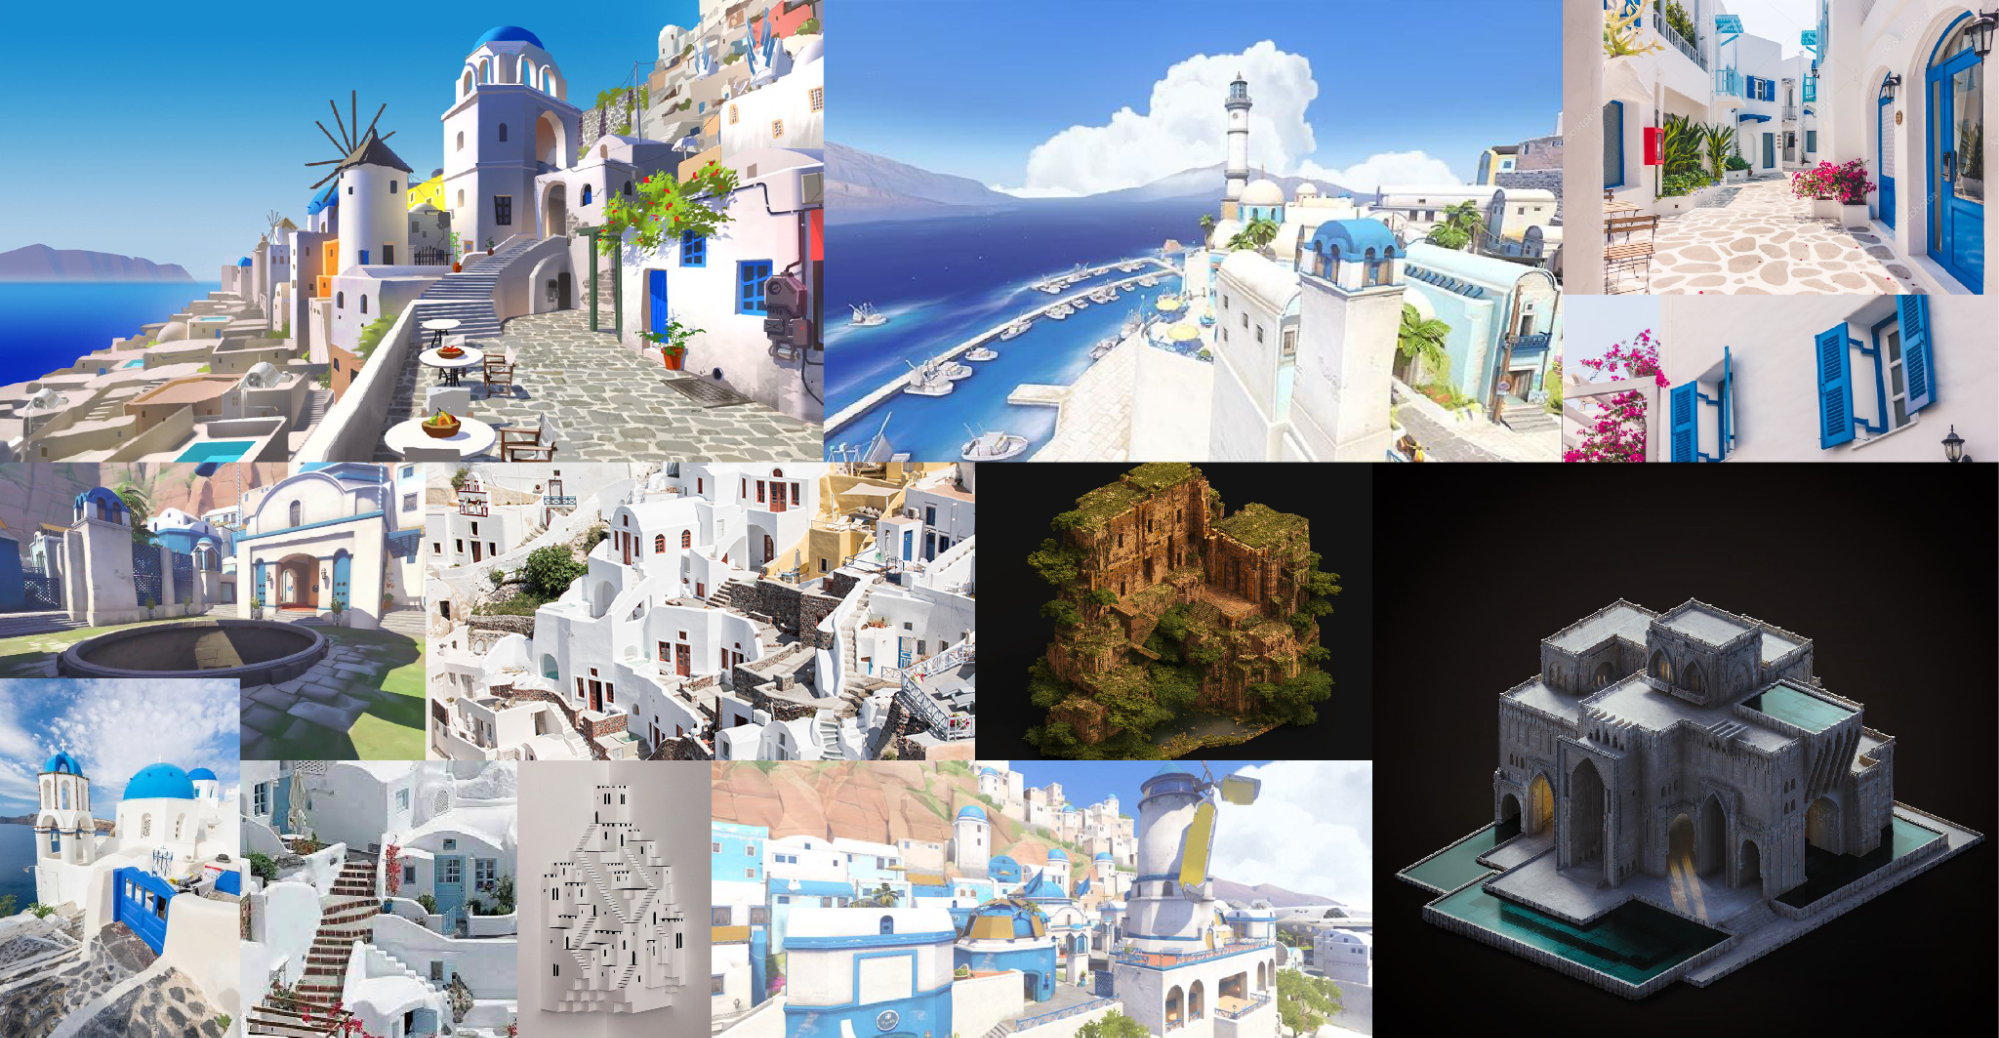
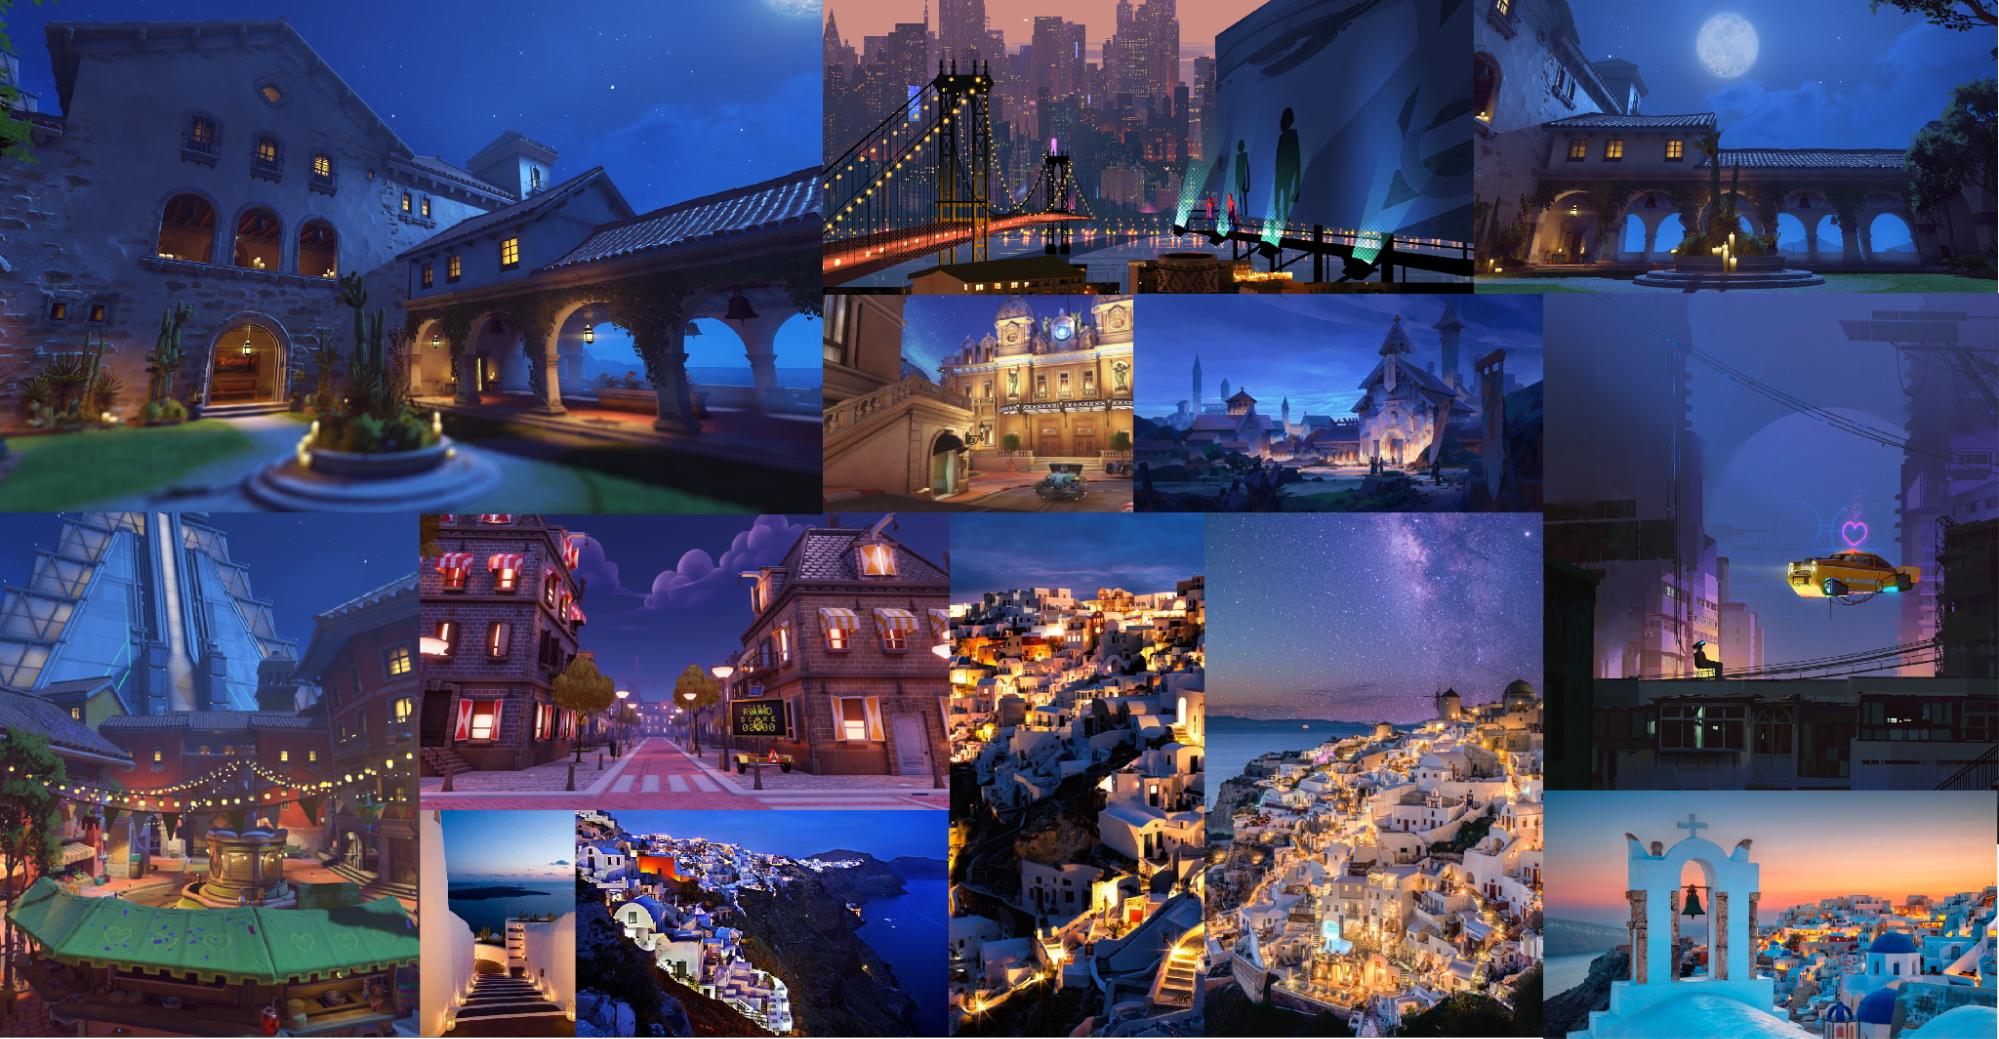
The lighting was also inspired by Overwatch—specifically the dark blue and yellow colour palette from the Dorado map—as well as other references with a similar night setting.
Composition and modeling
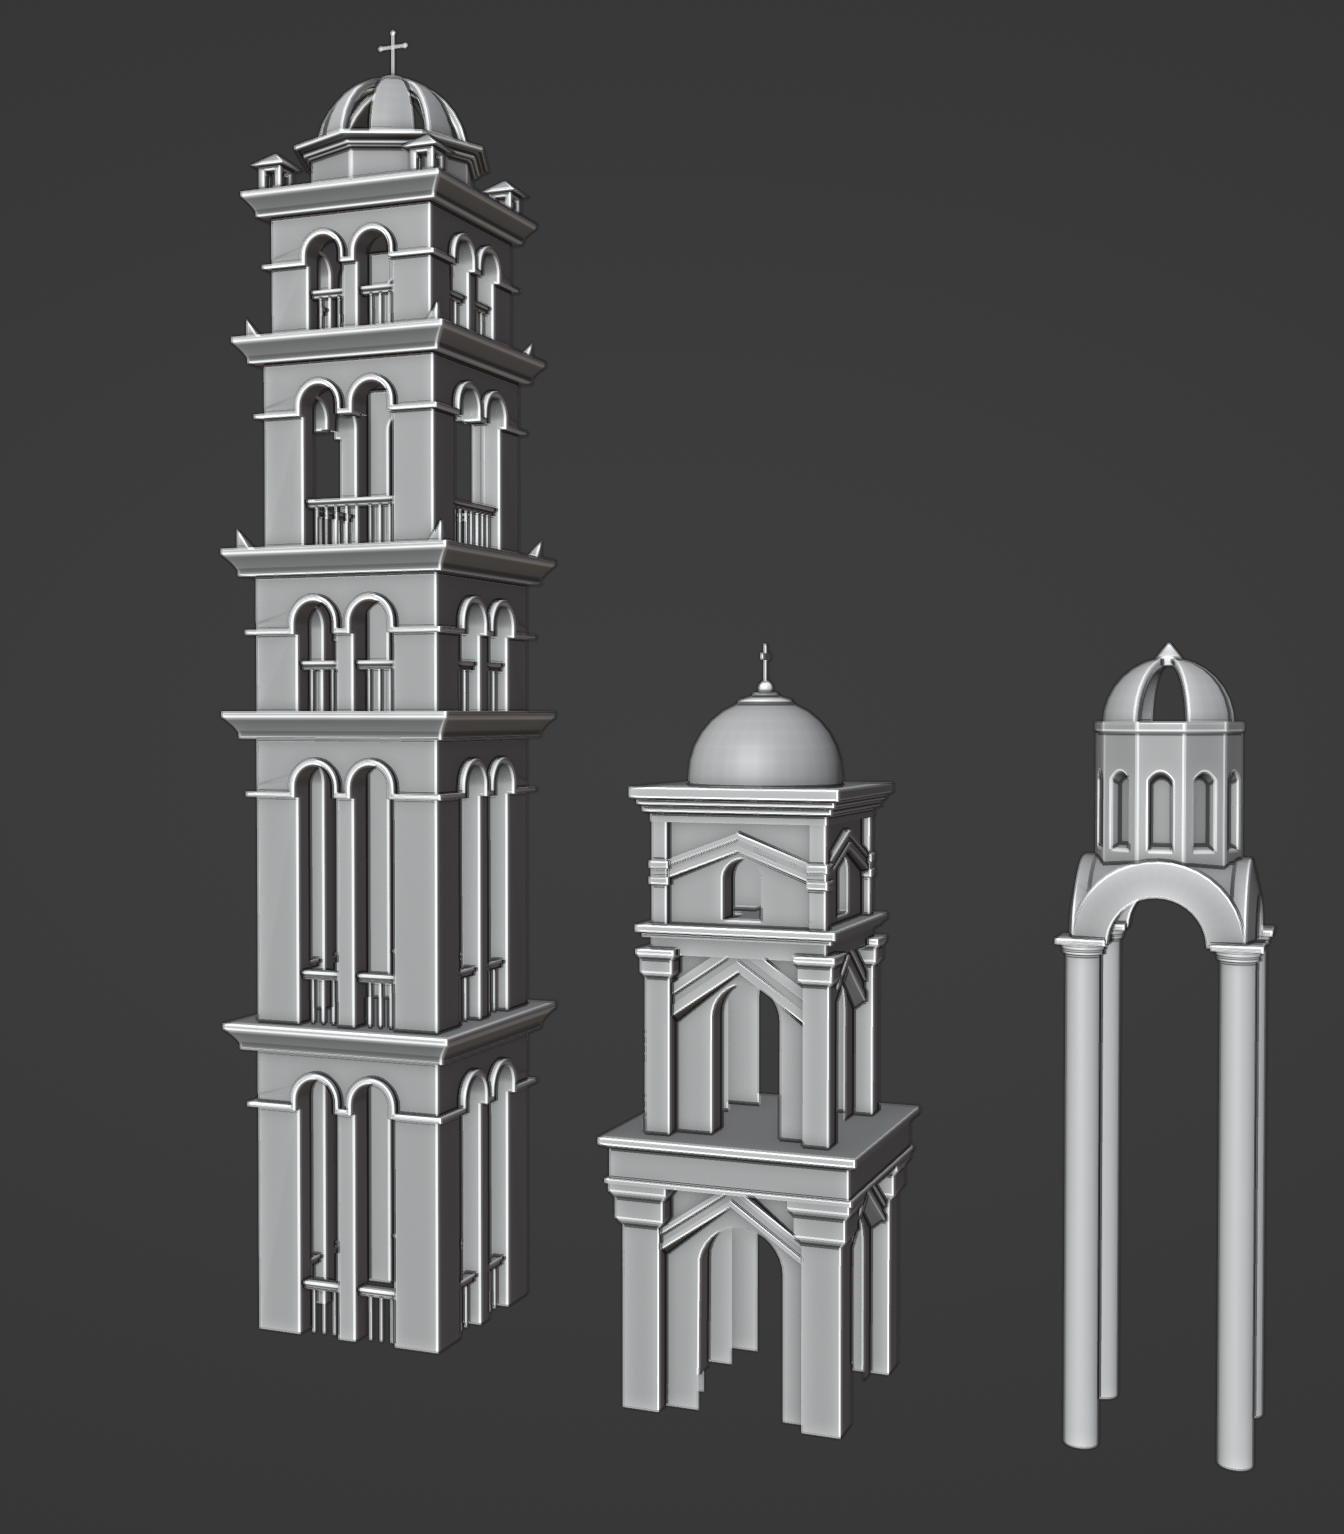
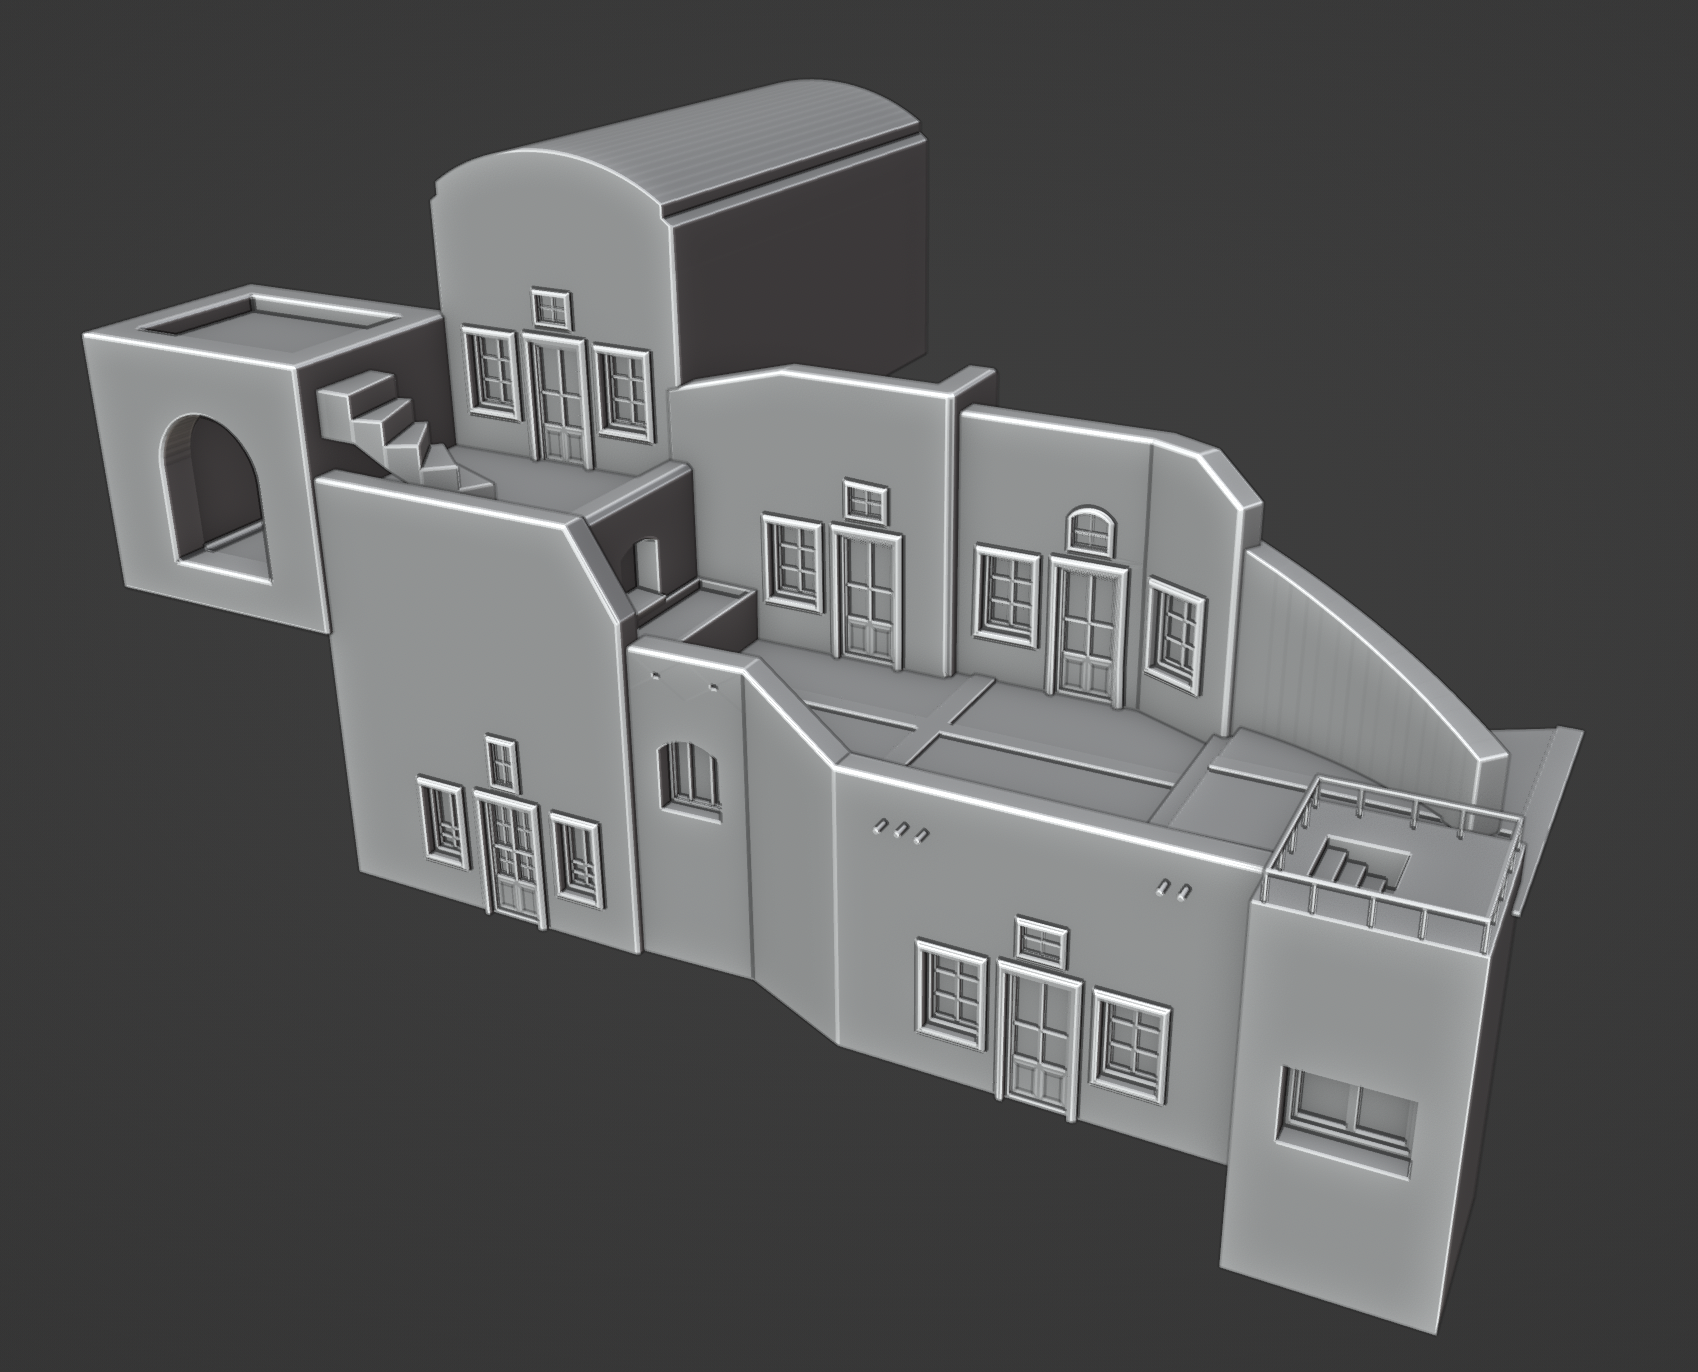
I started by modeling a simple building kit, with a few different house variations. The buildings were mostly based on simple primitives, making it easy to block out the overall composition for the scene. During the block out phase, my focus was mostly to create interesting shapes and silhouettes.
Once the blockout was done, I modeled several unique buildings to add some more interesting focal points to the scene. To hide repetition, I changed up different areas of the scene, and added smaller unique props, such as vegetation, tables, chairs, pools, etc.

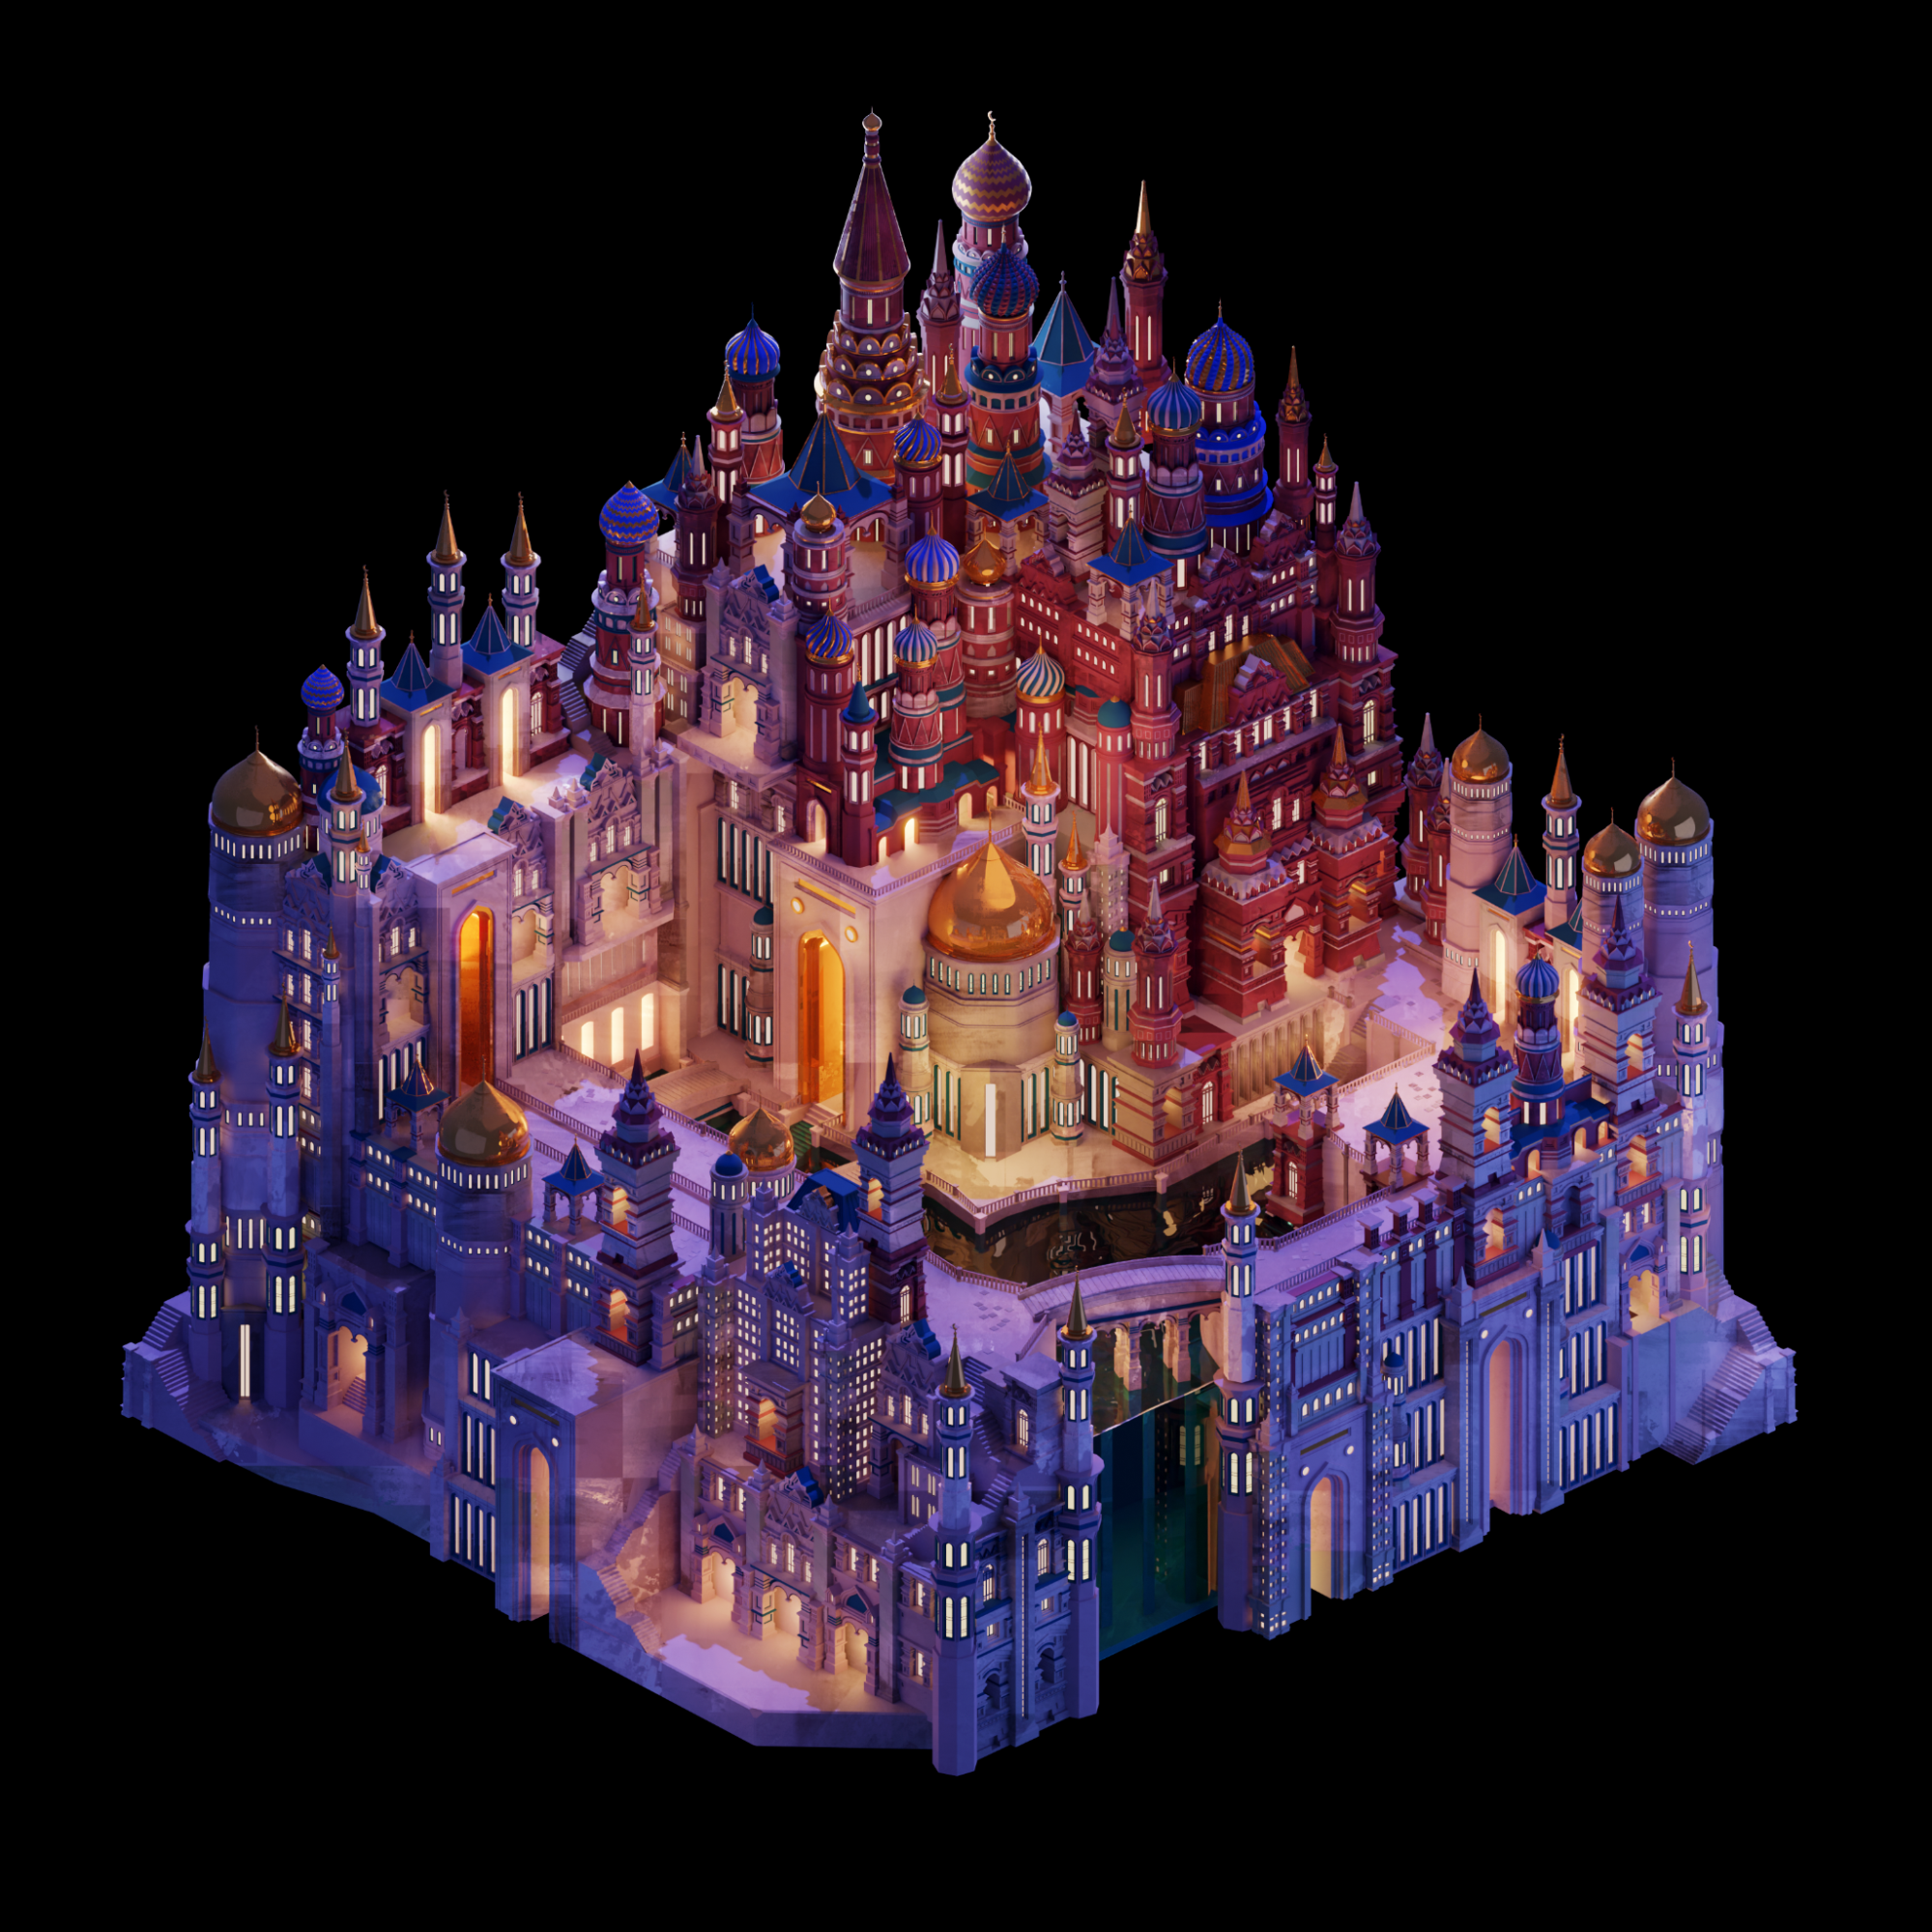
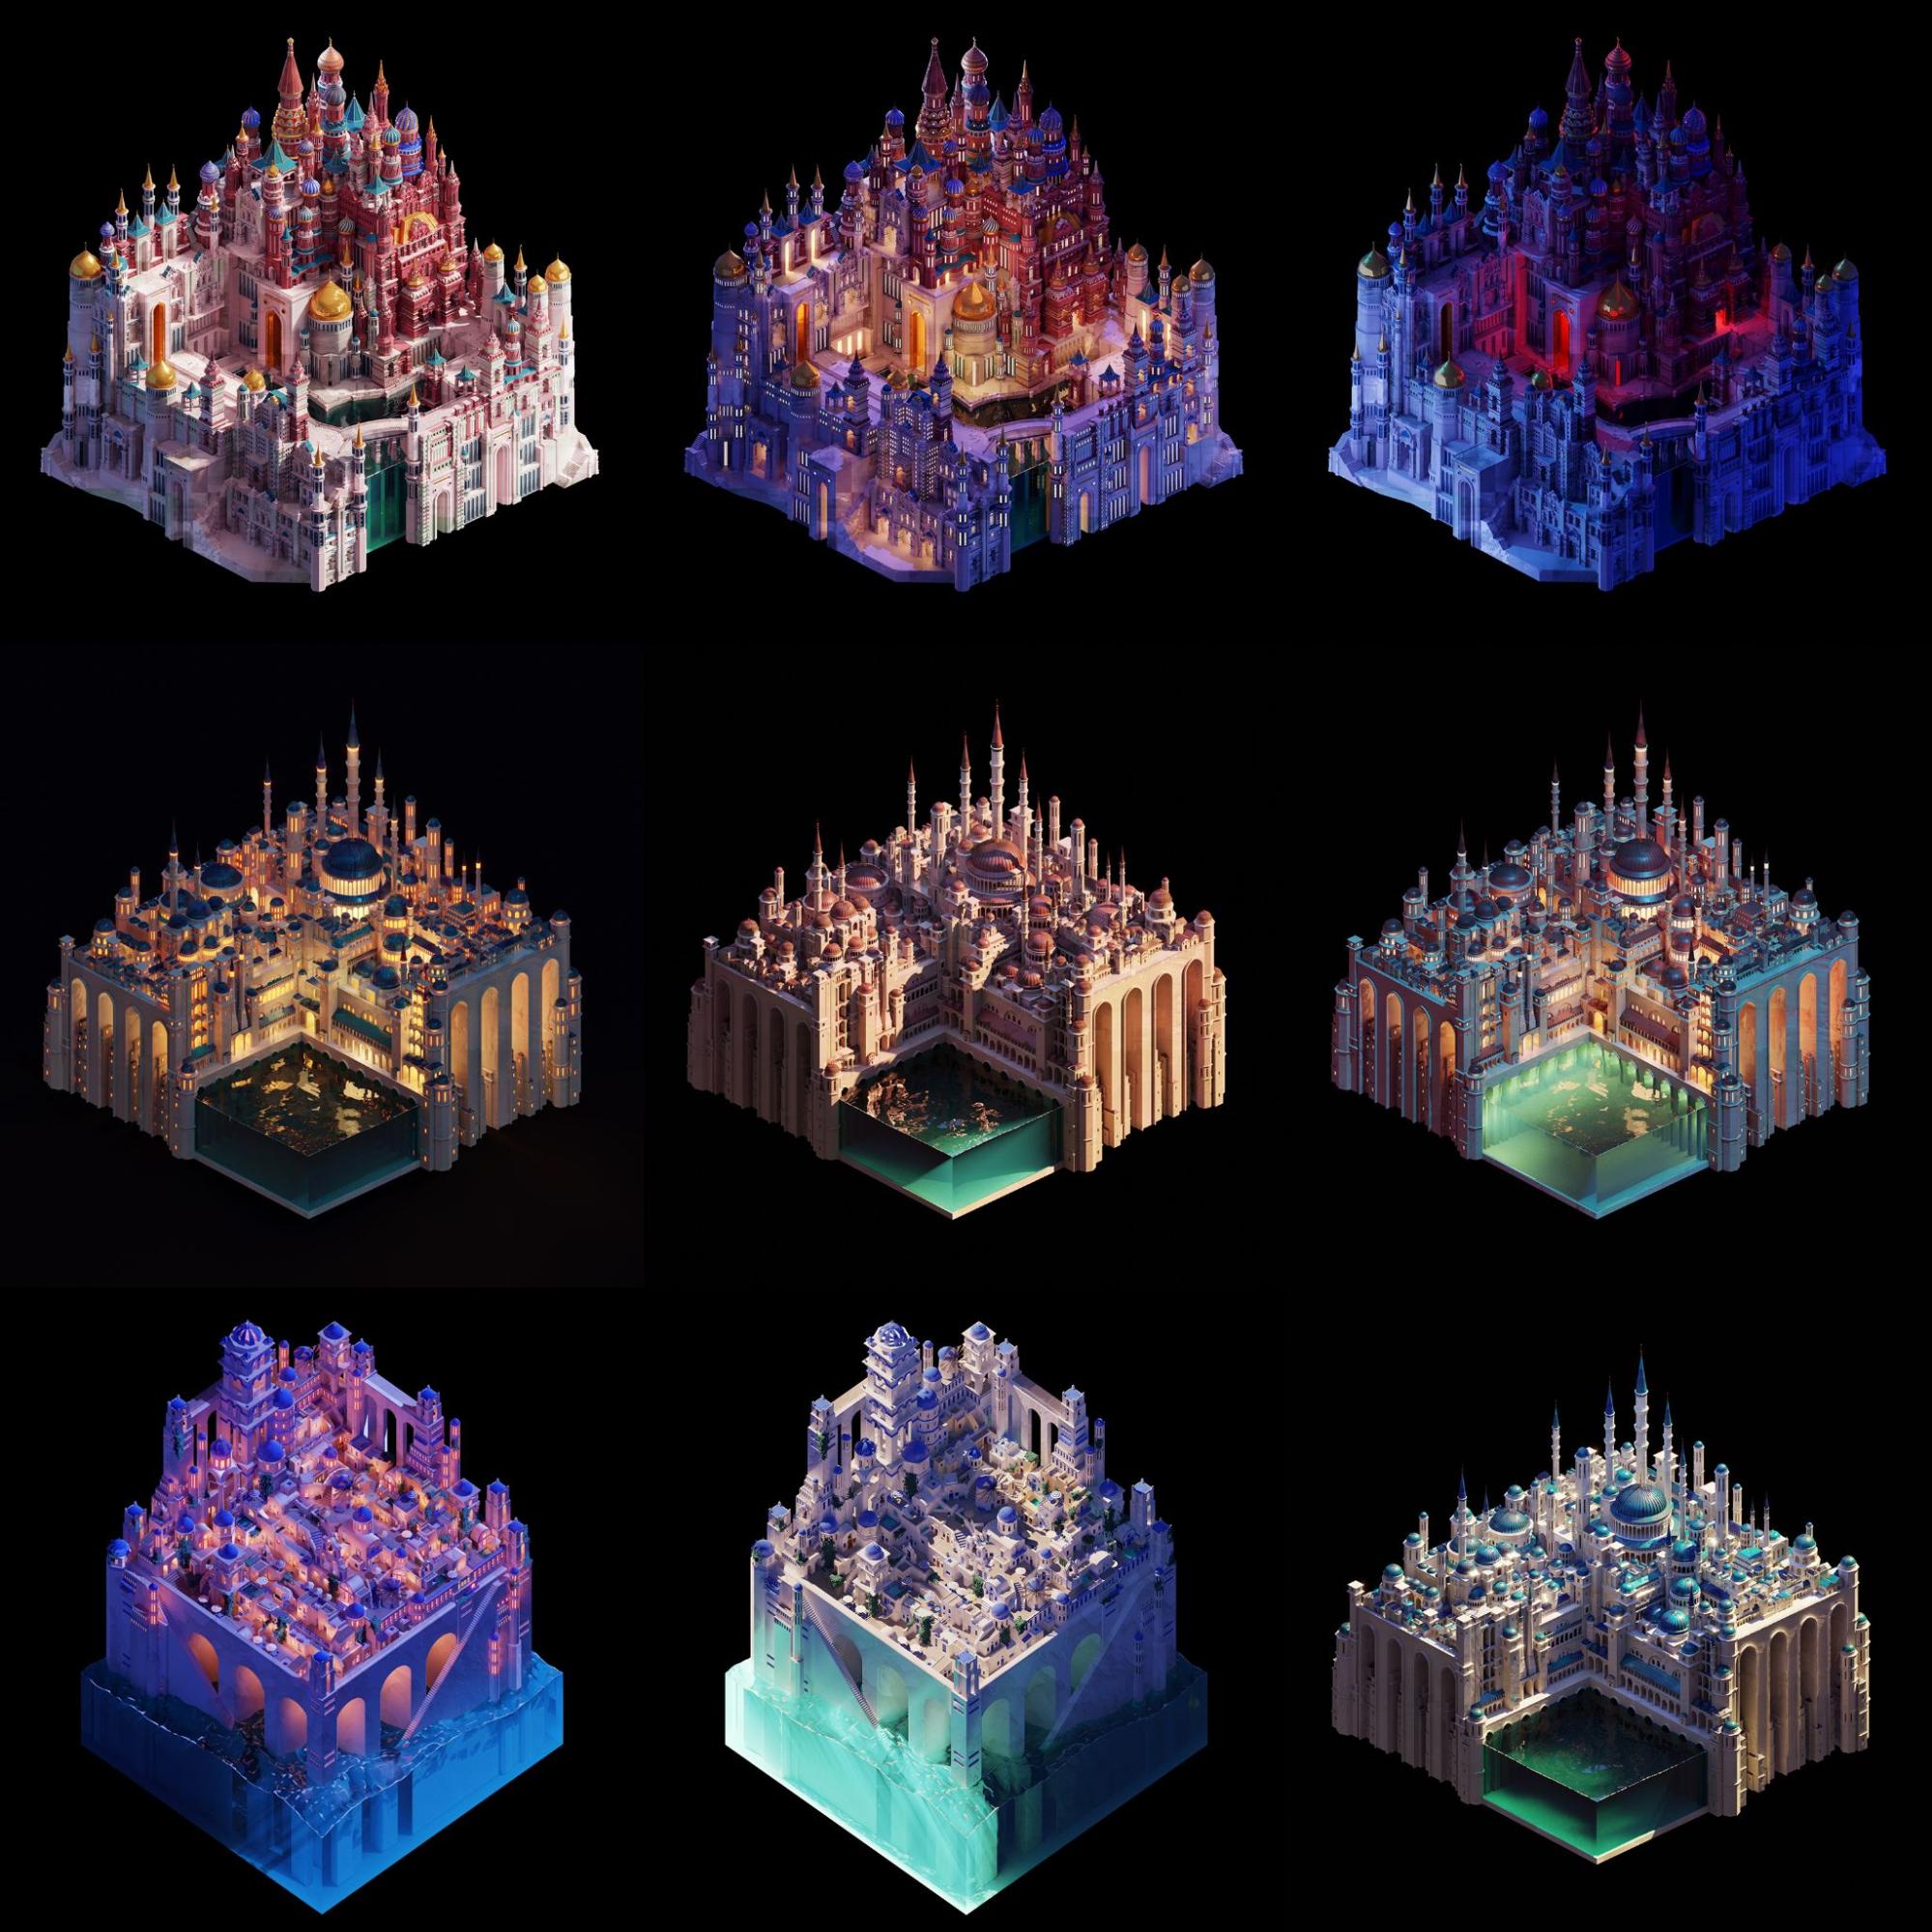
I have used the same approach for my other dioramas:
Almost done with the night version of Moscow! ?#WIP #b3d #blendercommunity #nftart #NFTartist #NFTCommunity pic.twitter.com/6YlzSxpZUq
— Mia Boas (@miaboaz) January 16, 2022
Gm! #wip for the Moon Palace! ?#b3d #Blender3d #blendercommunity pic.twitter.com/AS0v5SiwQO
— Mia Boas (@miaboaz) February 6, 2022
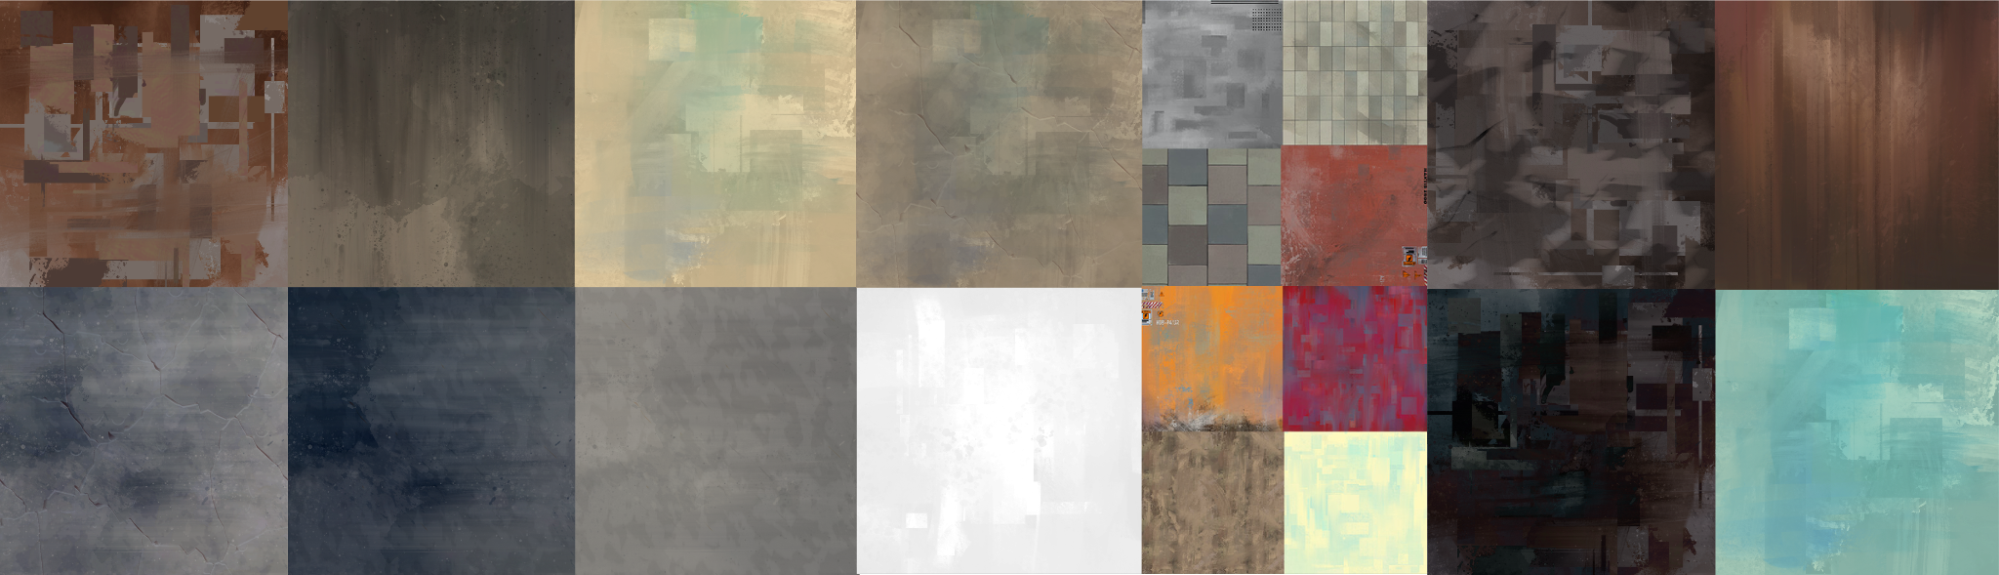
Materials
I wanted to keep the textures simple, so that I could focus on lighting. All the models share the same material, with the same grunge texture mixed with different colors. Over the past year or so, I have built a library of grunge textures that I now use for almost all of my scenes. Most are created by or in collaboration with Johan August Christiansen.
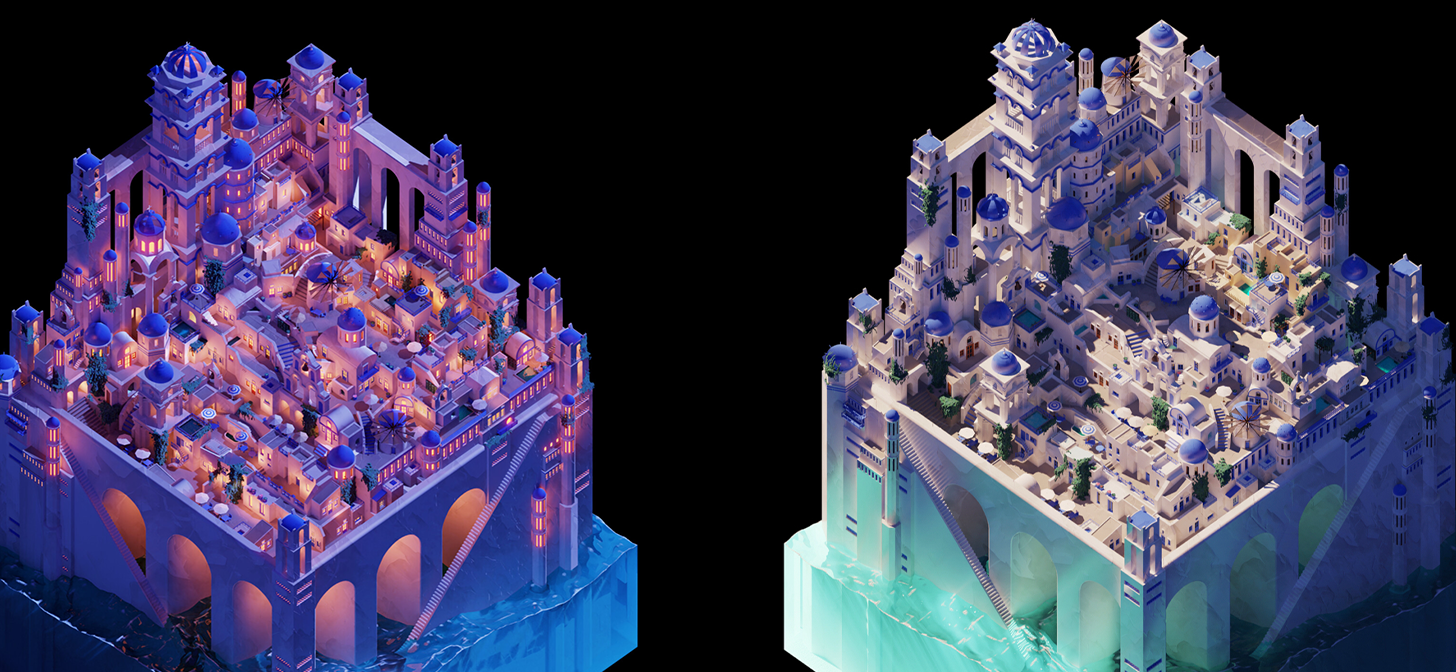
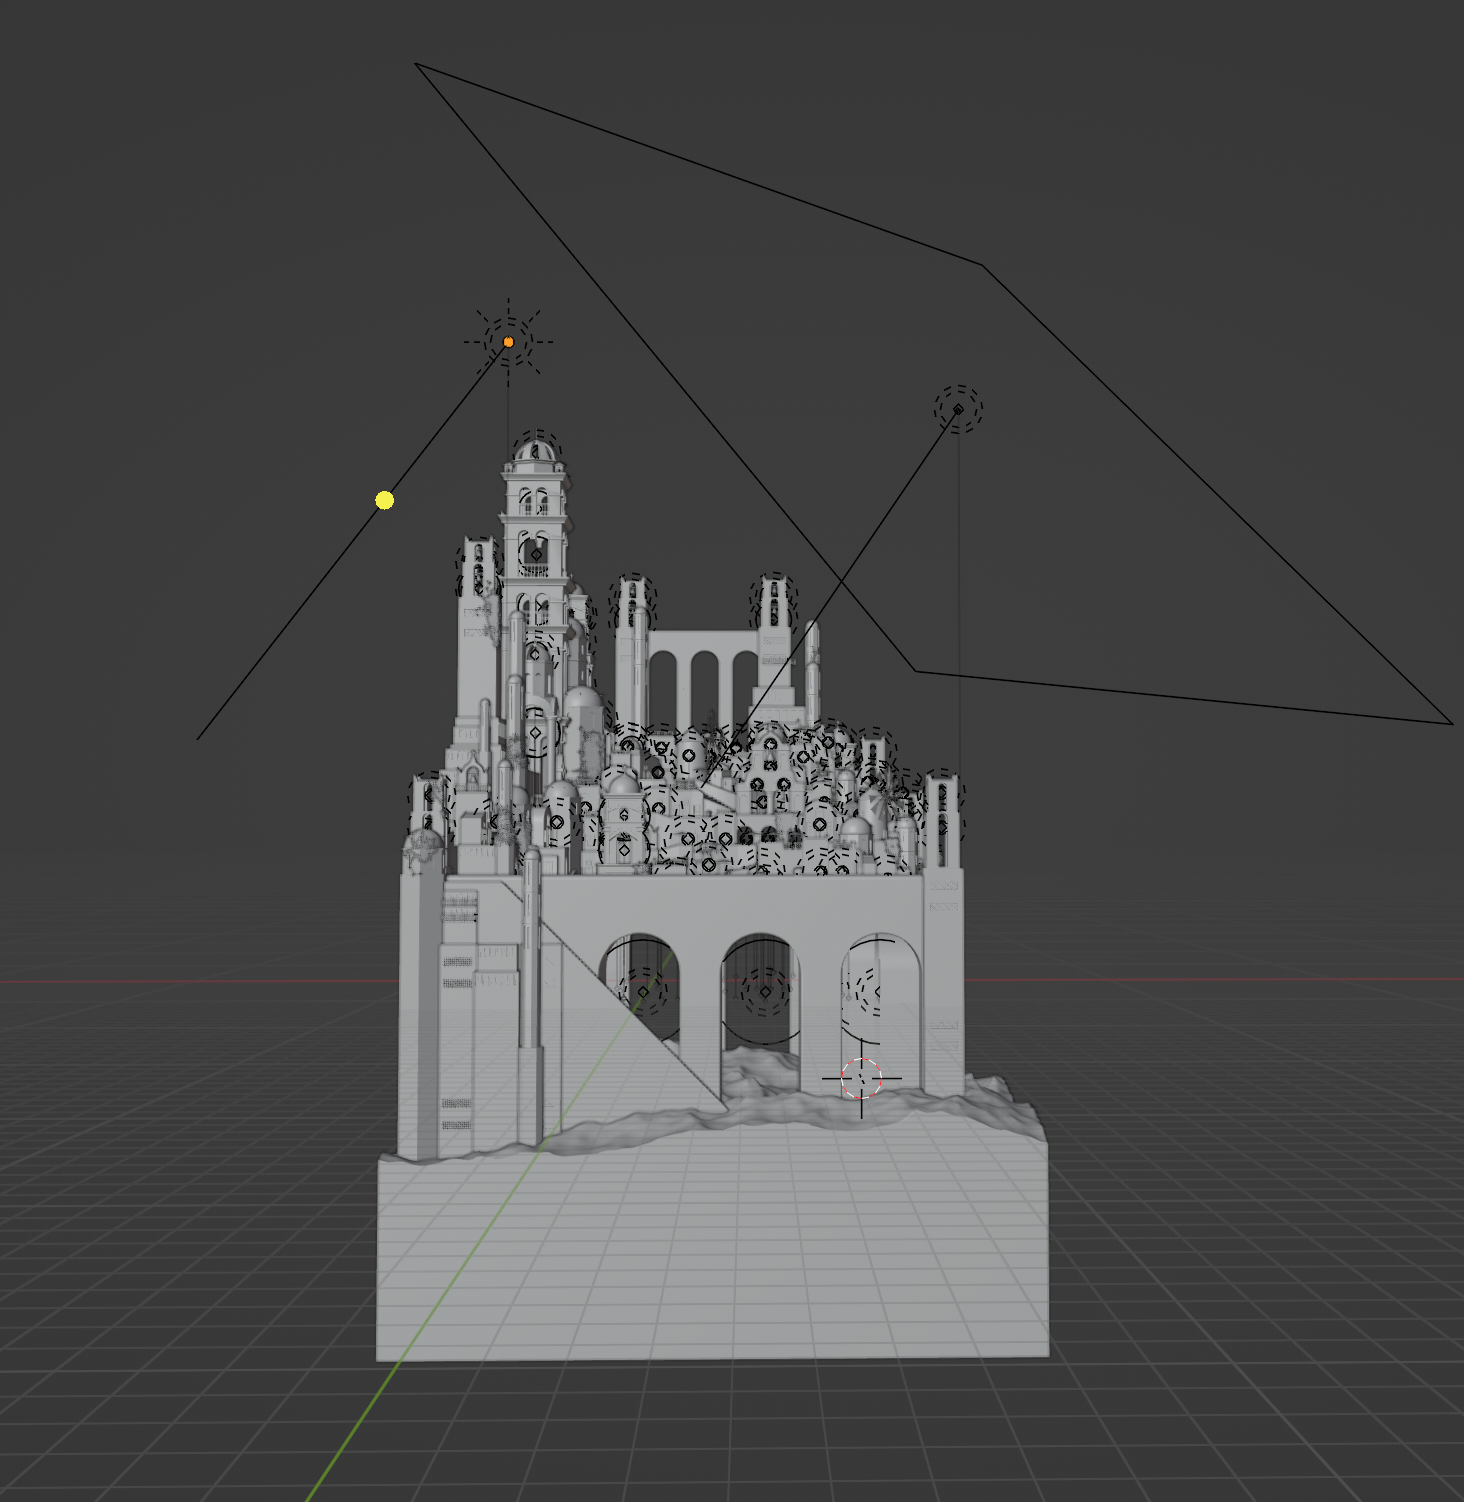
Lighting
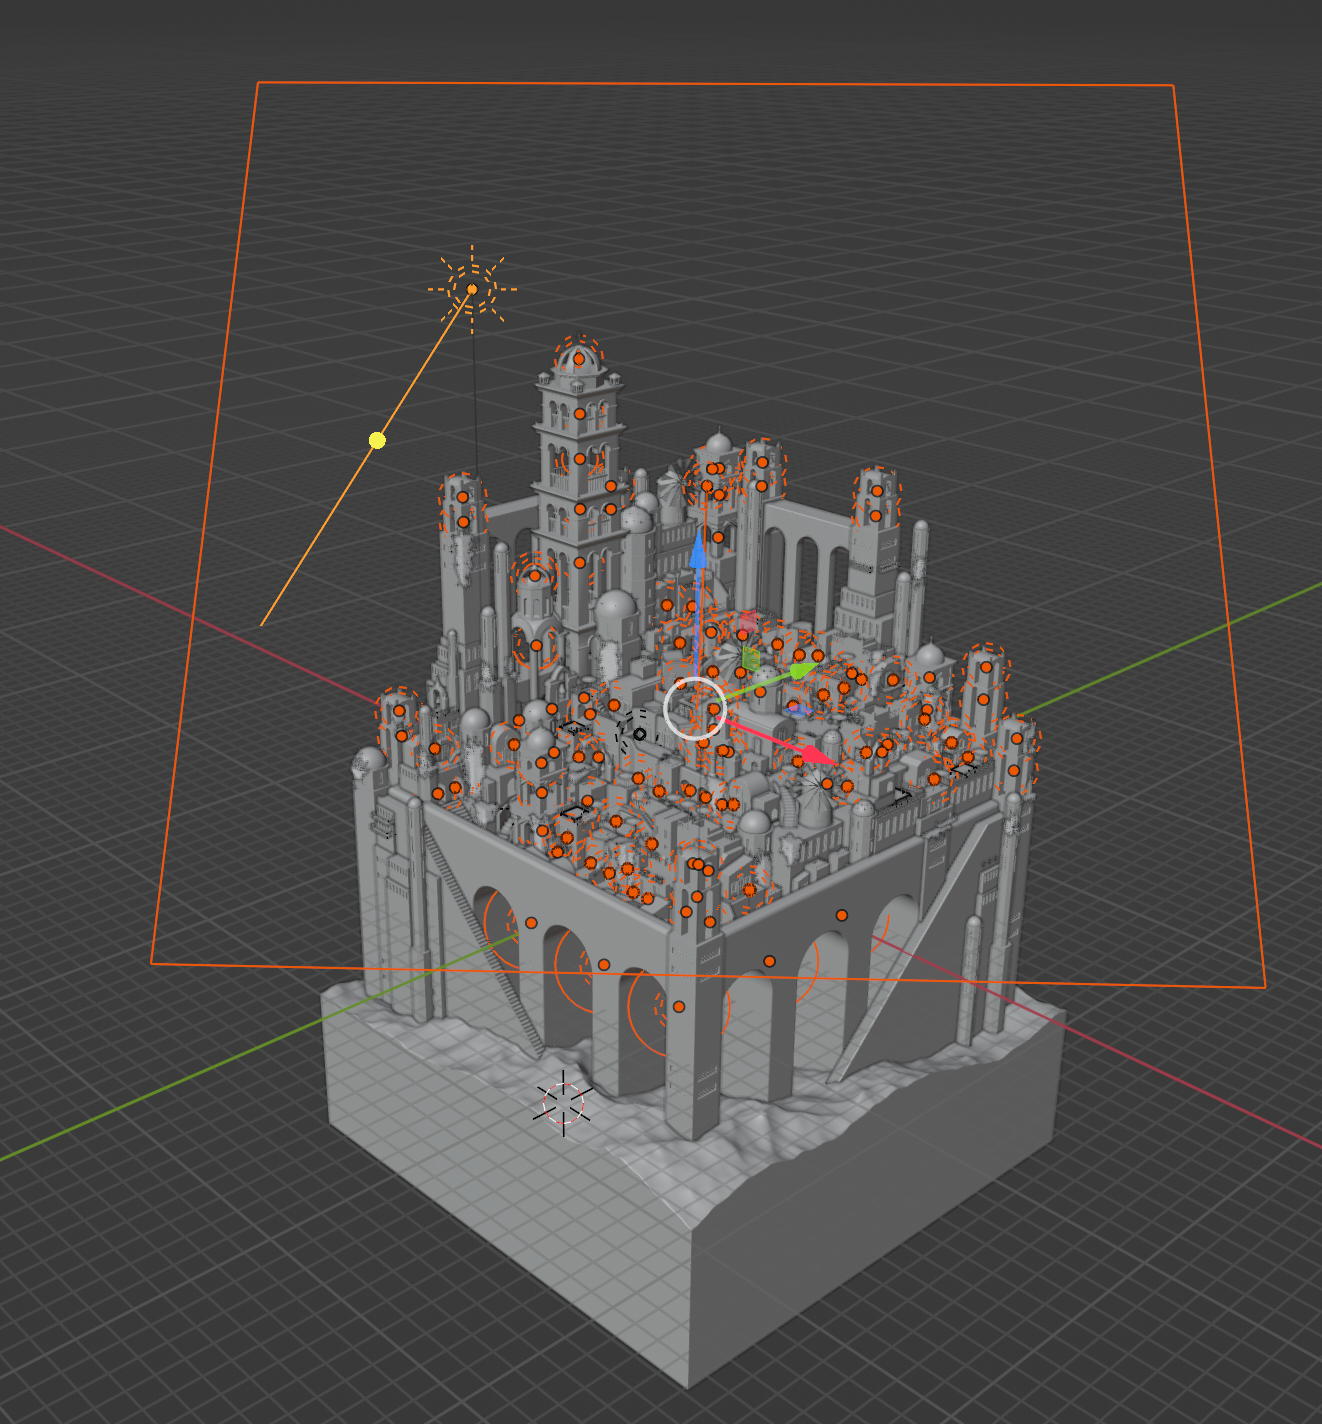
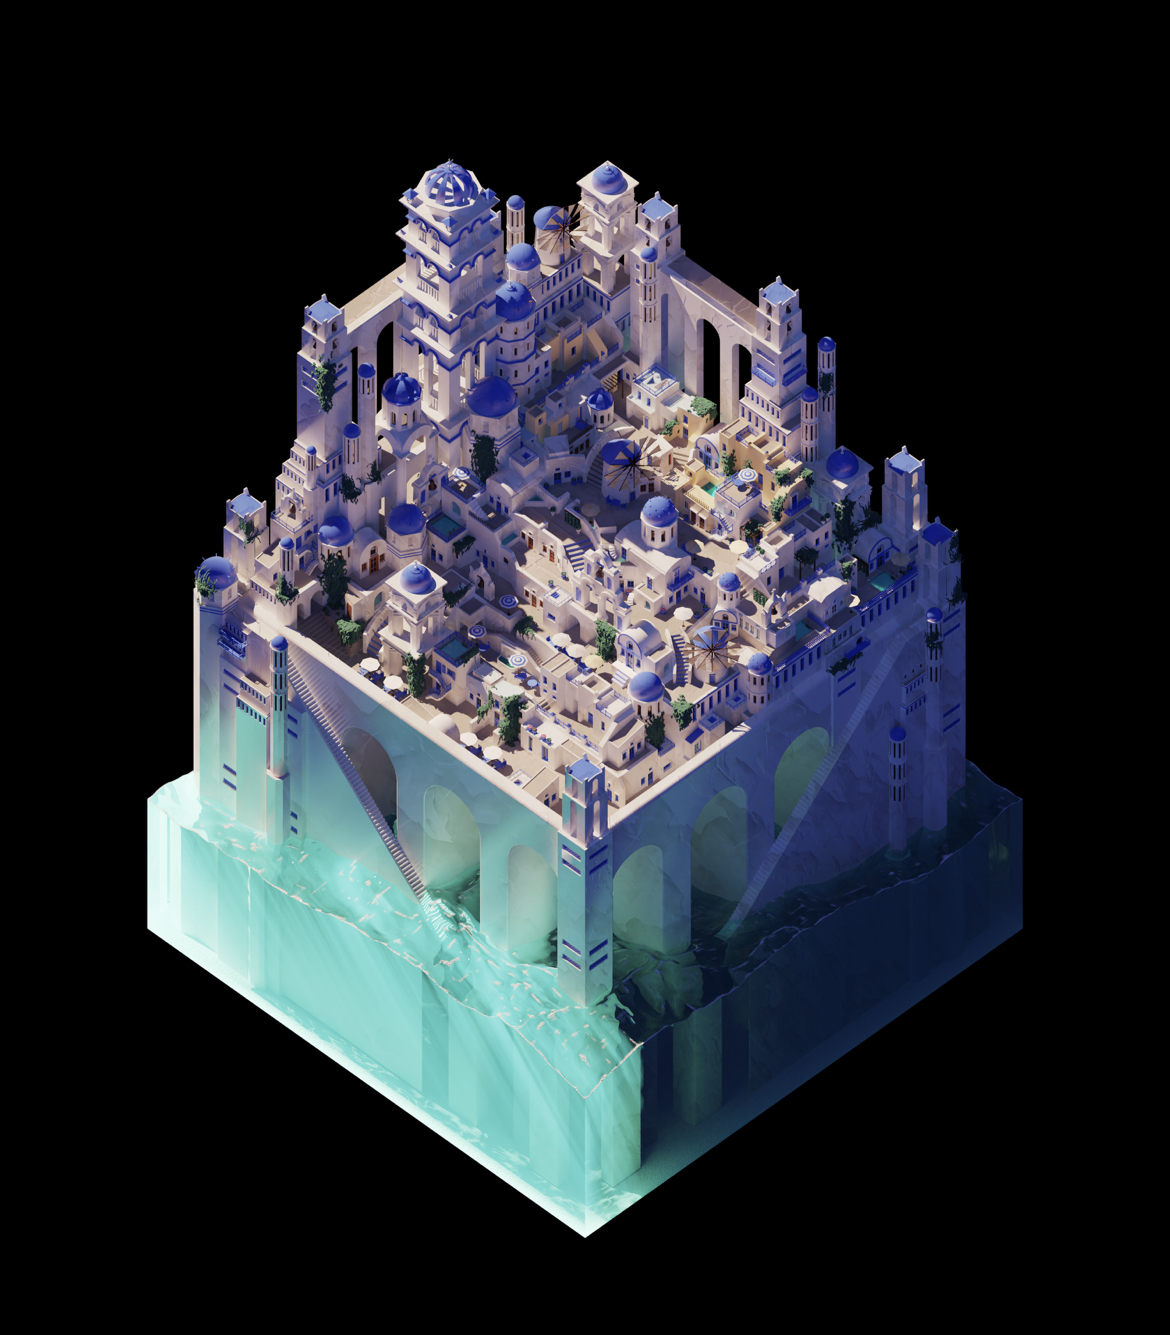
I have worked with lighting for about 5 years now, and started off by rendering simple scenes and props in Blender. On a daily basis I work mostly in Unity, but I still do most of my personal art in Blender. For this scene, I was especially interested in working with different lighting scenarios and color palettes and still have a few that I want to try out. The first lighting setup I did for this scene was the night setting.
I try not to follow a strict set of rules when lighting, and I am not too concerned with trying to recreate the real world. My primary concern when lighting is to create focus, and to set the appropriate mood for the scene. Generally speaking, I use four types of lights when setting up a scene in Blender:
- The key light, which is the main light source in the scene. As this is an outdoor scene, I used a directional light to mimic the moon, and placed it in a way that ensures good shaping.
- The fill light, which is there to complement the key and adjust contrast in the environment. In this scene, I used area lights as softer light sources, coming from several directions. The area lights lift the shadows in the scene from pure black, while adding a blue tint to the scene.
- Detail lights, which refers to all the yellow point lights placed near the windows. These are added to help separate the buildings from each other, or to make sure a certain element stands out.
- The windows, which all share the same emissive material. At first, I only lit a few windows, as I thought it would add more variety to the scene. I ended up lighting all the windows, as it made the buildings more readable, and the scene more interesting overall.
Future Work
“Santorini by Night” was the first city diorama I made in Blender, and it inspired me to create “Dioramas” – an ongoing series of miniature dioramas, portraying real-world cities as well as otherworldly places. The pieces are inspired by different architectural styles from around the world and explored through contrasting light setups.
The collection can be followed on my Twitter and Instagram!
About the author
 Mia Boas, 3D Lighting Artist at @littlechickengc. M.A. | The Royal Danish Academy of Fine Arts


