
Check out the free plugins developed by Reallusion below to take your characters to the next level! With these plugins you can import both the texture and the mesh back to Character Creator with just one click!
INTRODUCTION
Russell Midfield is a freelance artist who enjoys making tutorials on YouTube around the 3D character development process, with a particular focus on Blender. With Reallusion’s commitment to developing their Blender Character Pipeline with the introduction of the Blender Auto Setup addon and CC3 Python plugin, Russell decided to see how one may create their own custom character quickly using these very tools. Do the plugins work as advertised? Is it really that quick & easy? Well there was only one way to find out.
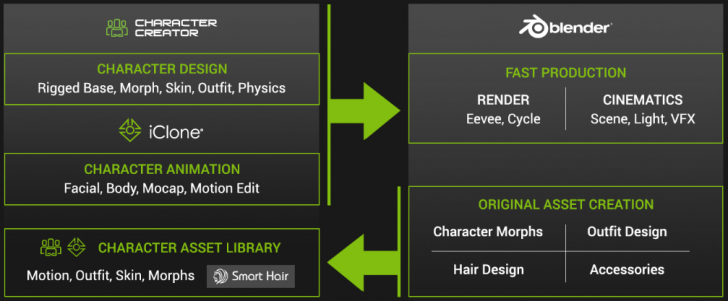
Complementary Workflow between Blender, iClone and Character Creator
For this character Russell would be making use of a Character Creator/Blender “roundtrip” workflow, through the use of the Blender Auto Setup addon and CC3 Python plugin as touched upon above. The workflow would be as follows:
- Start with a model generated in Character Creator 3 (CC3);
- Import the CC3 model into Blender through the use of the Blender Auto Setup addon, to make some customization; and
- Import back into CC3 through the use of the CC3 Python plugin, for rigging and weighting.
If one wished to add animation, a simple transfer to Character Creator’s companion software, iClone, is just one click away.
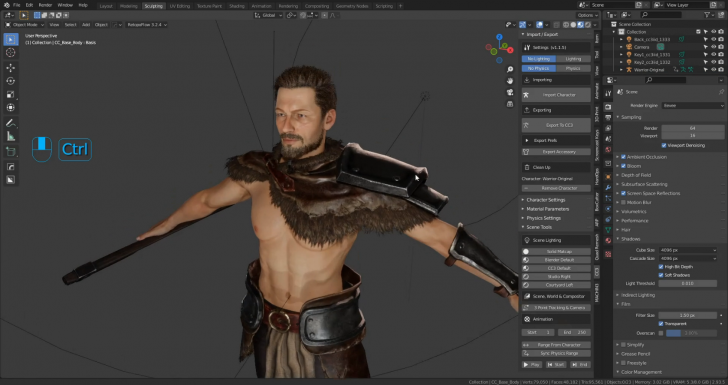
STEP #1: GENERATE MODEL IN CHARACTER CREATOR 3
The first step of the process would be to generate a character model in Character Creator 3. There are a number of different options available in CC3 that make this task rather simple:
- Morph sliders allow one to modify the size, shape, and rotation of every part on the body;
- Content galleries allow one to quickly add basic clothing, hair, armor, and accessories; and
- The SkinGen plugin allows one to easily add micro-details such as wrinkles, veins, moles, and pores.
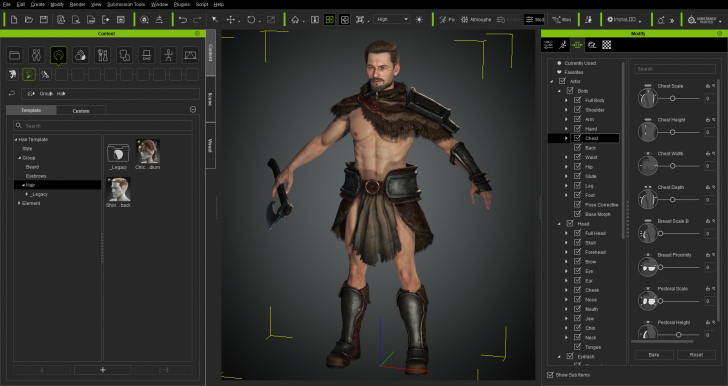
CC3 comes equipped with several tools to make character creation quick and easy
Once the character model was complete, it was then time to export to FBX for further customization in Blender. CC3 has advanced FBX export options such as software presets, mesh and motion, texture embedding, and texture baking that make this transition easier.
Important note! Ensure that you select the Mesh only option at this stage of the process, and not the Mesh+Motion option. This ensures that the correct FBX key information is brought into Blender and is paramount to this roundtrip workflow working as intended!
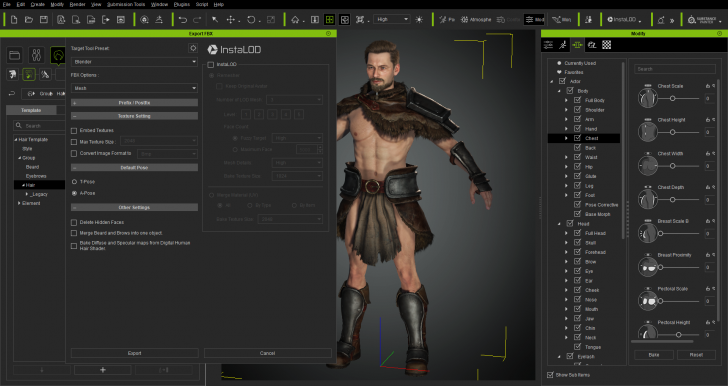
Advanced FBX Export options available in CC3
STEP #2: CUSTOMIZE MODEL IN BLENDER
Blender comes fitted with a number of tools that allow the user to sculpt, model, and texture paint. It’s these tools that one can employ to further customize a model and add their own unique art style to a piece.
With the newly created FBX, the first plug-in of the round-trip workflow could be put to the test, the Blender Auto Setup addon. To use the addon it is quite easy, after you have installed the plugin, just press “N” on your keyboard for the Side Toolbar in the 3D viewport, and you will see a tab called “CC3”. Open it up and there will be a button labeled “Import Character”. Select your FBX file and the rest is taken care of.
If you would like more information on the installation method you can check out the Reallusion Forum Thread (by Victor.Soupday) or my video at the 4:56 timestamp.
Blender Auto Setup Addon in Blender 3D Viewport
Below you can see the difference between making use of the Blender Auto Setup addon and the default FBX import option in Blender’s File menu. The materials compile perfectly with the addon whereas some adjustments would be required under the default method. Both models are under the same lighting conditions.

Comparison of Auto Setup addon and regular FBX import
With the model successfully imported into Blender, now it was time to add some customization. Russell
sculpted in some more stylized shapes around the face, hands, and feet to make the character align more with his own art style.

Blender’s sculpting tools allow you to add your own unique art style
Once the sculpting was done, some adjustments to the clothing and armor were required. This was done through a mixture of the modeling and sculpting tools in Blender.

Adjusting clothing through the use of Blender’s modeling and sculpting tools
Russell also made use of the existing topology of the clothing and armor to make his own, custom armor by duplicating select portions and moving them around. This is a quick and easy approach to making your own custom characters with Blender and CC3 together. Using an approach like this could allow you to make several different iterations of a soldier very quickly for a large army scene for example.

Duplicating existing topology allows you to quickly build custom clothing and armor configurations
CC3 uses a hair card system, which means that in Blender, Russell was able to shape his own beard and hair styles by duplicating and transforming the hair cards.

Create your own custom hair styles in Blender using CC3’s hair card system
Utilizing Blender’s texture painting tools, Russell was able to add in some custom skin textures and designs.

Create your own custom hair styles in Blender using CC3’s hair card system
With all of the customizations complete, it was then time to export back out to FBX again. With the Blender Auto Setup addon it is incredibly easy, just select all the components of your model and go over to your Blender Auto Setup tab on the right, and click Export to CC3.
Easy one-click export to FBX with the Blender Auto Setup addon
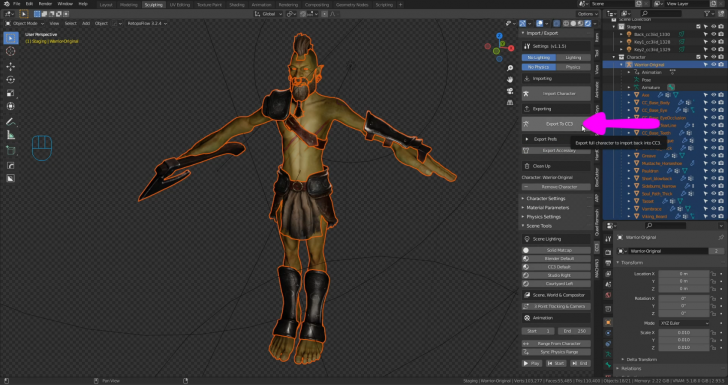
STEP #3: RIG & WEIGHT PAINT IN CHARACTER CREATOR 3
And so to complete the roundtrip, we are back in CC3. It was now time to call into action the second plugin, the CC3 Python Plugin. Similar to the Blender Auto Setup addon, this one is incredibly easy to use, once installed just go up to your Plugins menu in CC3 and select Blender Auto Setup, Import from Blender, and select your FBX. The rest is taken care of automatically. All of the materials are automatically configured for you with no extra work required.

Easy one-click FBX import into CC3 from Blender with the CC3 Python Plugin
Below is a comparison between the CC3 Python Plugin and the default FBX import option through CC3’s File menu. The materials compile perfectly with the addon whereas none of the materials compile properly under the default method, manual adjustment is required. Again, both models are under the same lighting conditions.

Comparison between default FBX import and CC3 Python Plugin
Just a note, if you have changed the body of your character significantly, you can adjust the bones to match the body better by going up to the Modify menu here, Adjust Bones, and Auto-Position. This makes apply skin weights to your customized model more accurate, which in turn makes animation and posing much easier.

Adjust the bones of the CC3 armature quickly and easily with the Auto-Position feature
Now if one wished, you could adjust skin weights for posing here in CC3. Or, you could also transfer to CC3’s companion software, iClone, for animation and rendering.

Pose your character in CC3 quickly using the poses included in the Content Gallery

Animate your character in CC3’s companion software, iClone
The verdict is in: the Blender Auto Setup addon and CC3 Python plugin work perfectly and make the integration of Blender and Character Creator quick and seamless!
Stay tuned because Reallusion will be releasing more Work-In-Progress videos for their new software, Character Creator 4 & iClone 8 from January to March! Check out their website, YouTube channel, and other social media for all the latest news! Expect much more to come this year in 2022 as well as Reallusion is really making strides to connect with the Blender community, joining the Blender Development Fund and becoming a Corporate Silver Partner in January! Some links below for more information!

1 Comment
I liked it a lot… it opens up a lot of possibilities.
Thanks