
Behind the Scenes: Dumptruk
About
My name’s Joel Azzopardi, I’m a senior environment artist II at Cloud Imperium Games. I’m from Melbourne, Australia🦘 but currently overseas in the UK. I graduated from the Academy of Interactive Entertainment in Melbourne then went on to work at a VR games studio before moving to the UK to work on Star Citizen.
Prior to starting university, my brother and I were always into making video games and he was the first of us to take the leap into 3D back in the day and taught me all the basics.
Earlier on, titles like Star Wars, Morrowind, and The Dark Crystal really shaped me into wanting to design worlds, and so here I am.
“Dumptruk”
I’ve been concepting a few ships lately; I think they give me the nice bridge of being able to concept something detailed, then something a bit more abstract in the form of the background and setting. My ultimate goal is to do environment design and I feel it helps to design an environment around a subject matter.
But I’ve had in my mind for a while to design a sci-fi garbage truck in the Star Warsy-utilitarian style I’m often doing. I also wanted to try some wilder color pallets than I’m usually comfortable with; making a garbage truck ship on a trash planet was a great canvas for that.
Inspiration
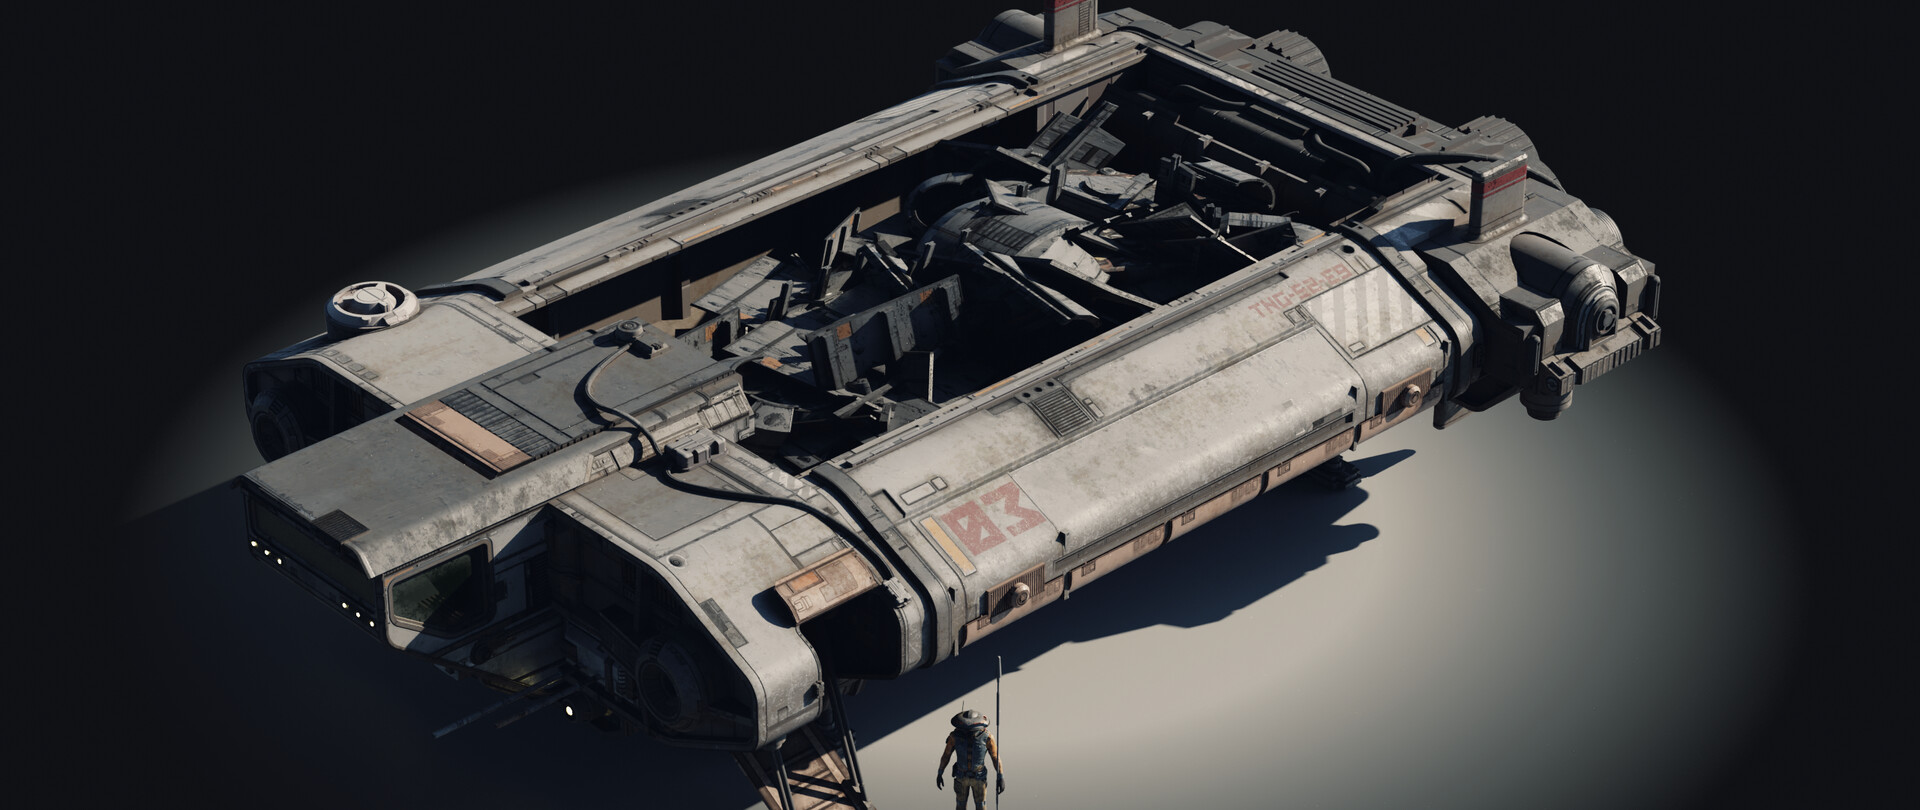
First and foremost, I took some shape language from real-world garbage trucks as I didn’t want the ship to feel like a real-world garbage truck with ship boosters on it.
There’s some Star Wars in there too, of course. I try to follow the 3-shape rule that Star Wars utilizes for their ship designs; it requires being able to describe or draw a ship using only 3 primary forms. I also looked at some of the planets in our solar system for color palettes. I love the shots of the surface of Venus—muted greens with a little bit of red.
Tools
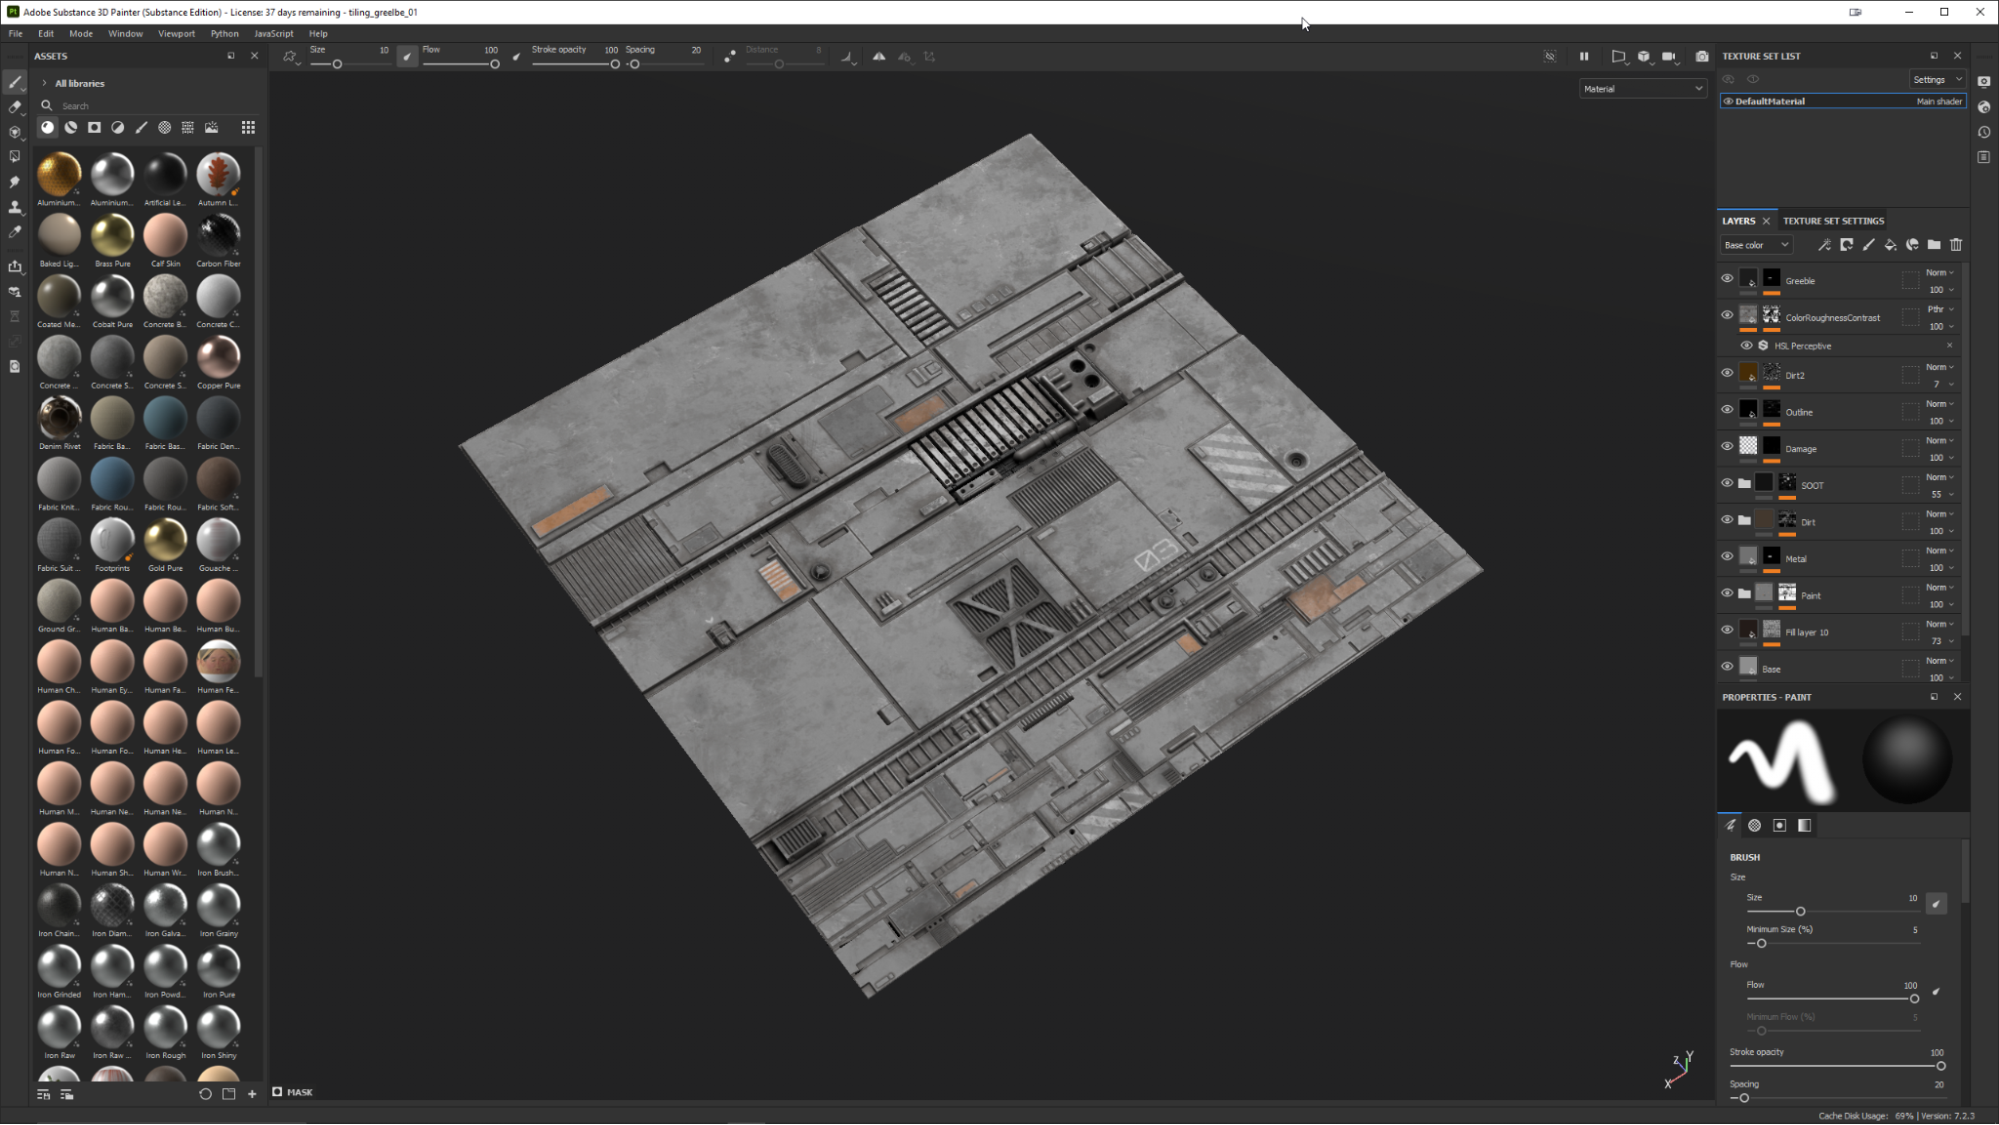
I used Substance Painter for some of the ship textures and the little character, and Photoshop for post-processing (color grading and some paint-overs).
But the main tool for the majority of the piece was Blender, and some noteworthy add-ons I use almost daily for this piece and many others are Hard Ops and Boxcutter. I feel those add-ons really aid the concept ideation process and creation of the final meshes because they make everything so fast. Separating your designs from the topology of your meshes is critical, in my opinion, to concepting with 3D. Seeing a design in the topology of your mesh and using the topology to execute it can be very limiting as you’re only seeing a subset of possibilities; seeing a form in your mind and being able to execute it without much constraint is preferable.
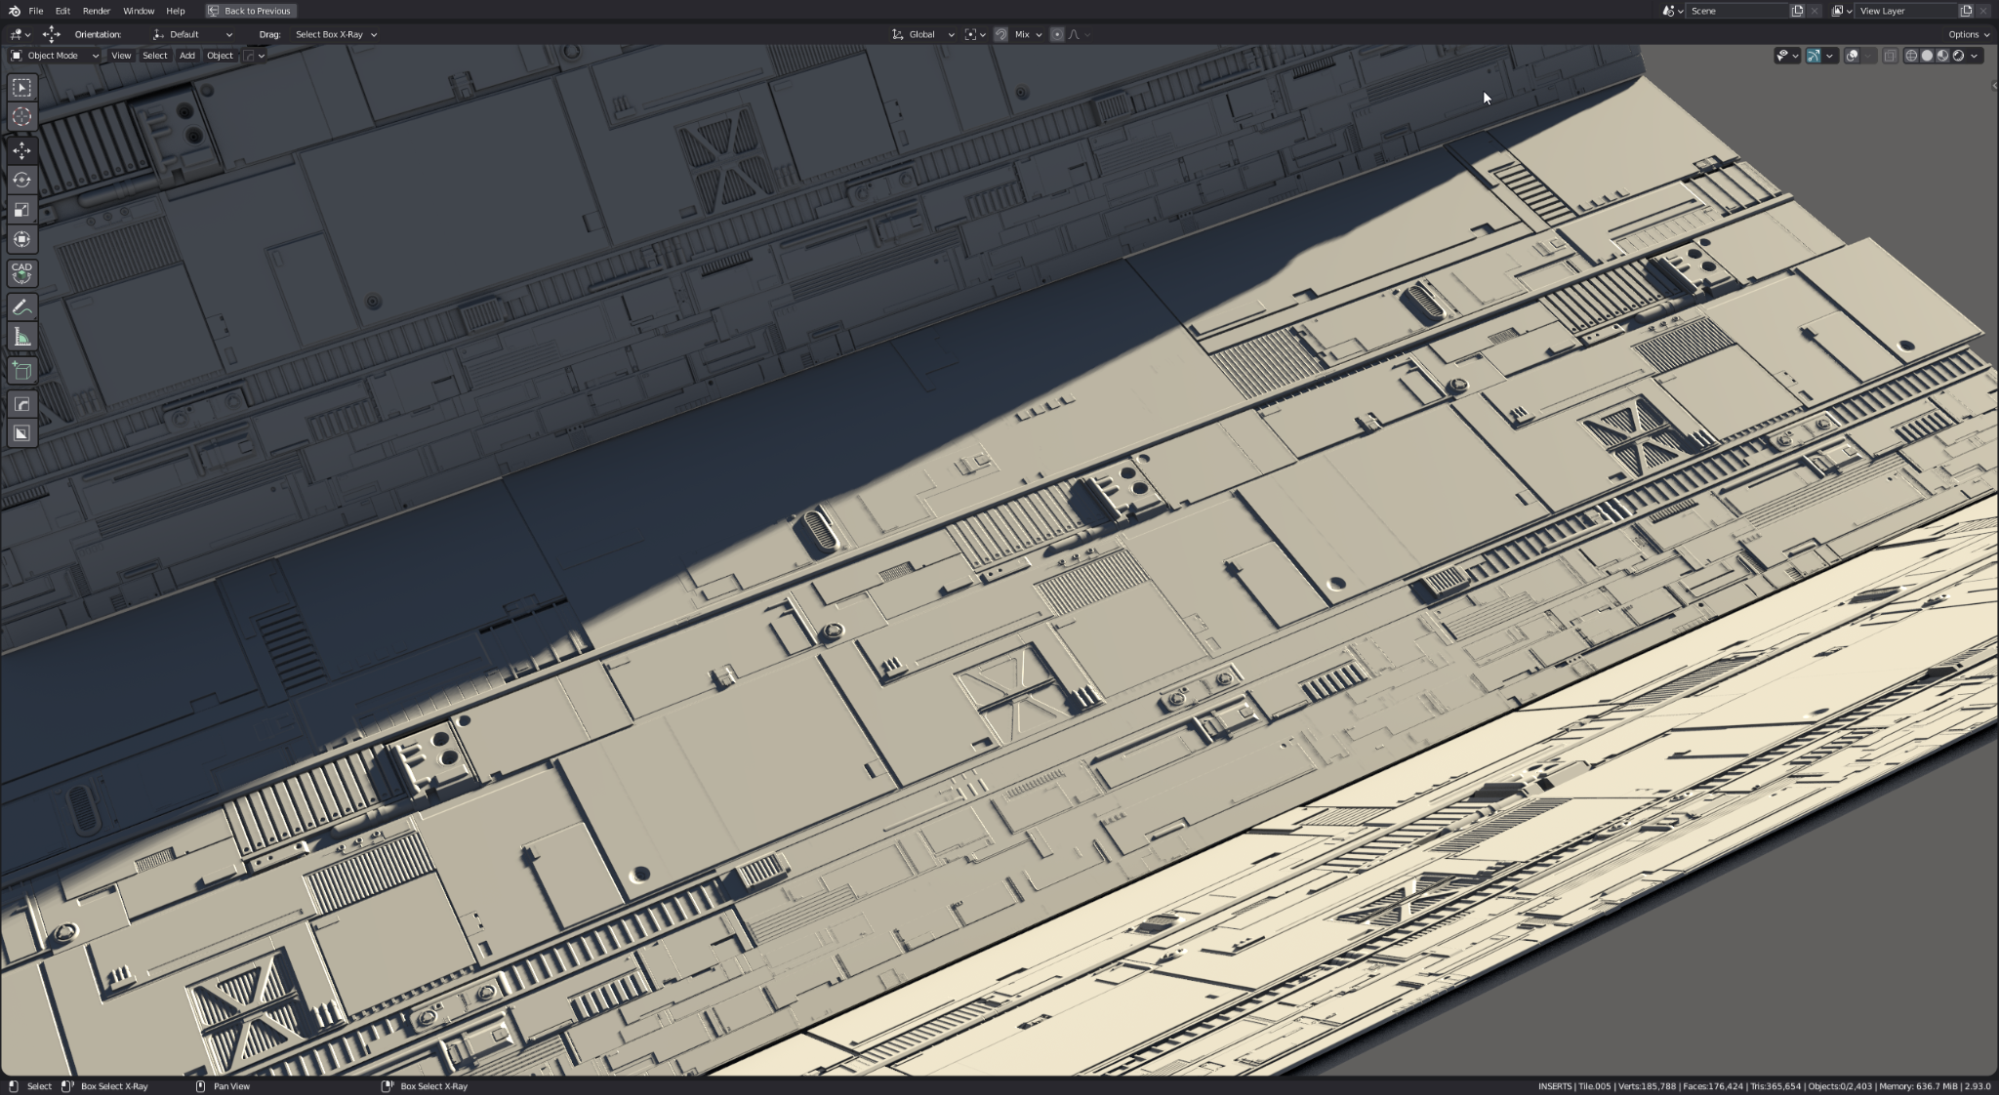
Modeling
The modeling isn’t anything to write home about—as I mentioned before, to me design comes before topology. Keeping it simple and utilizing modifiers lets me try things out quickly.
One thing I did differently on this piece was making a custom tileable/trim texture for the ship as opposed to just using some generic tileable panel heightmaps as I’d done previously. This approach helped me spend less time on a complicated shader to get the ship to feel grounded, as I got most of that from the texture. It also helped with some more abstract areas. You can get some details for free just messing around with the UV placement. Sometimes you know you want some detail somewhere but don’t exactly know what—having a custom texture and just playing around with the mapping can give some great unexpected results.
I liked this approach so much I’ve incorporated it into some of my current and future concepts, as well. And I’ve started authoring a library of some generic sci-fi textures so I’ll have more variety in the future. Decal Machine comes in handy here for quickly mapping a portion of the texture sheet.
I usually animate the mechanics of the ships; landing gears, ramps, doors, etc. because I like to make sure they can actually function and I find it helps inform some of the design. Adding in some constraints to the design to support the ship’s mechanical functions is a great way to alleviate some of the open-endedness of the design. Form follows function, after all. This ship is no exception to some of my other ships—I just decided to not show off any shots of it animating.
The character
My “scale ref” humans are usually just painted in Photoshop to help imply scale, but I generally keep them fairly shadowed and just use their silhouette ‘cause I’m not that good at painting. So I decided that I’d try my hand at Blender’s sculpting tools to try mocking up a character in 3D and then do a quick texture in Substance Painter. I really enjoyed the process and I think it worked out well. I picked up some costume design books that I’ve been reading through so I think I’ll be doing this a lot more. I mean as far as character art standards go, it’s nothing to write home about, but for a concept, I like how it turned out.


Composition
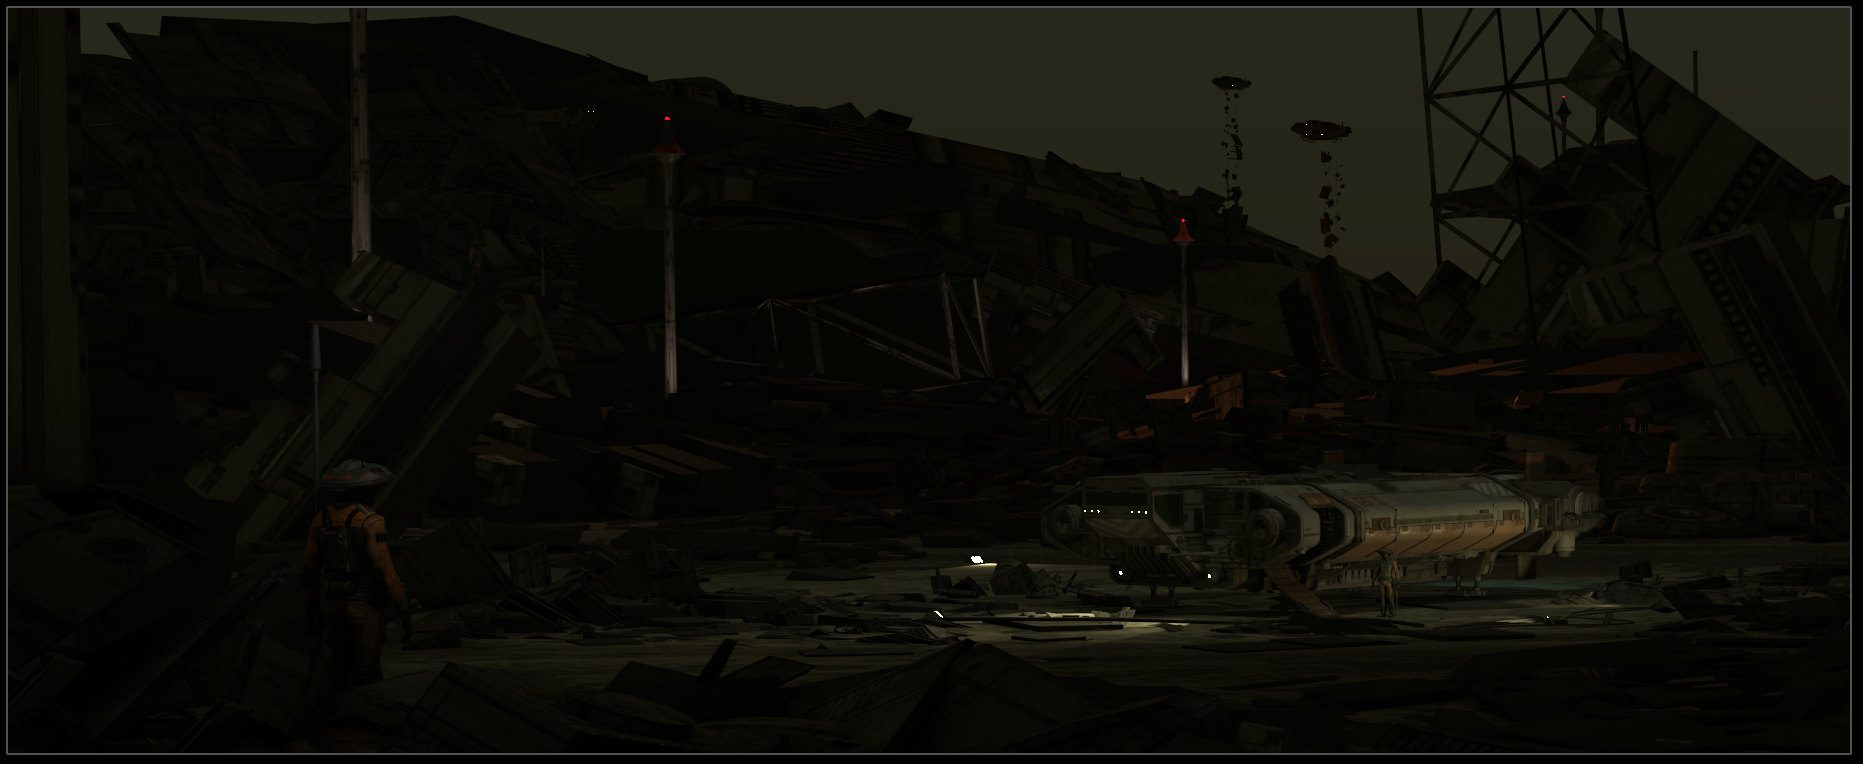
I knew early on the rough composition and the setting I wanted. I wanted to play around with scale a bit more this time, not fill the frame with the ship, but have the scene be a piece of storytelling. I usually start a new Blender scene and bring in all my components as instanced collections to keep everything separated a bit.
After setting up the new scene and bringing in all pieces, I usually drop a camera down and place my focal points. Then I start working on my foreground and background elements.
Having the ability to just run 2 (or more) viewports let me set one view to check my composition and the other view to freely navigate around so I can always see my changes relative to the composition. Kind of like the navigator in Photoshop but with more bells and whistles.
It’s also great for just playing around with different elements of the composition, seeing what works, and finding happy accidents, such as with the background in the scene. I originally had the sky visible across the entire horizon but, as I mentioned before, I wanted to play around with scale a lot more in this piece.
So I decided to take one of my trash piles and scale it up huge, knowing I could hide most of the crimes with fog.

Rendering and post-processing
I rendered the final image out on a GTX 3090 and it took about 5 minutes at about 1000 samples.
I can usually get away with a lot fewer samples, but I had some fireflies that I wanted to resolve. With that being said, 5 minutes was pretty quick in my book, and the denoising helps a lot.
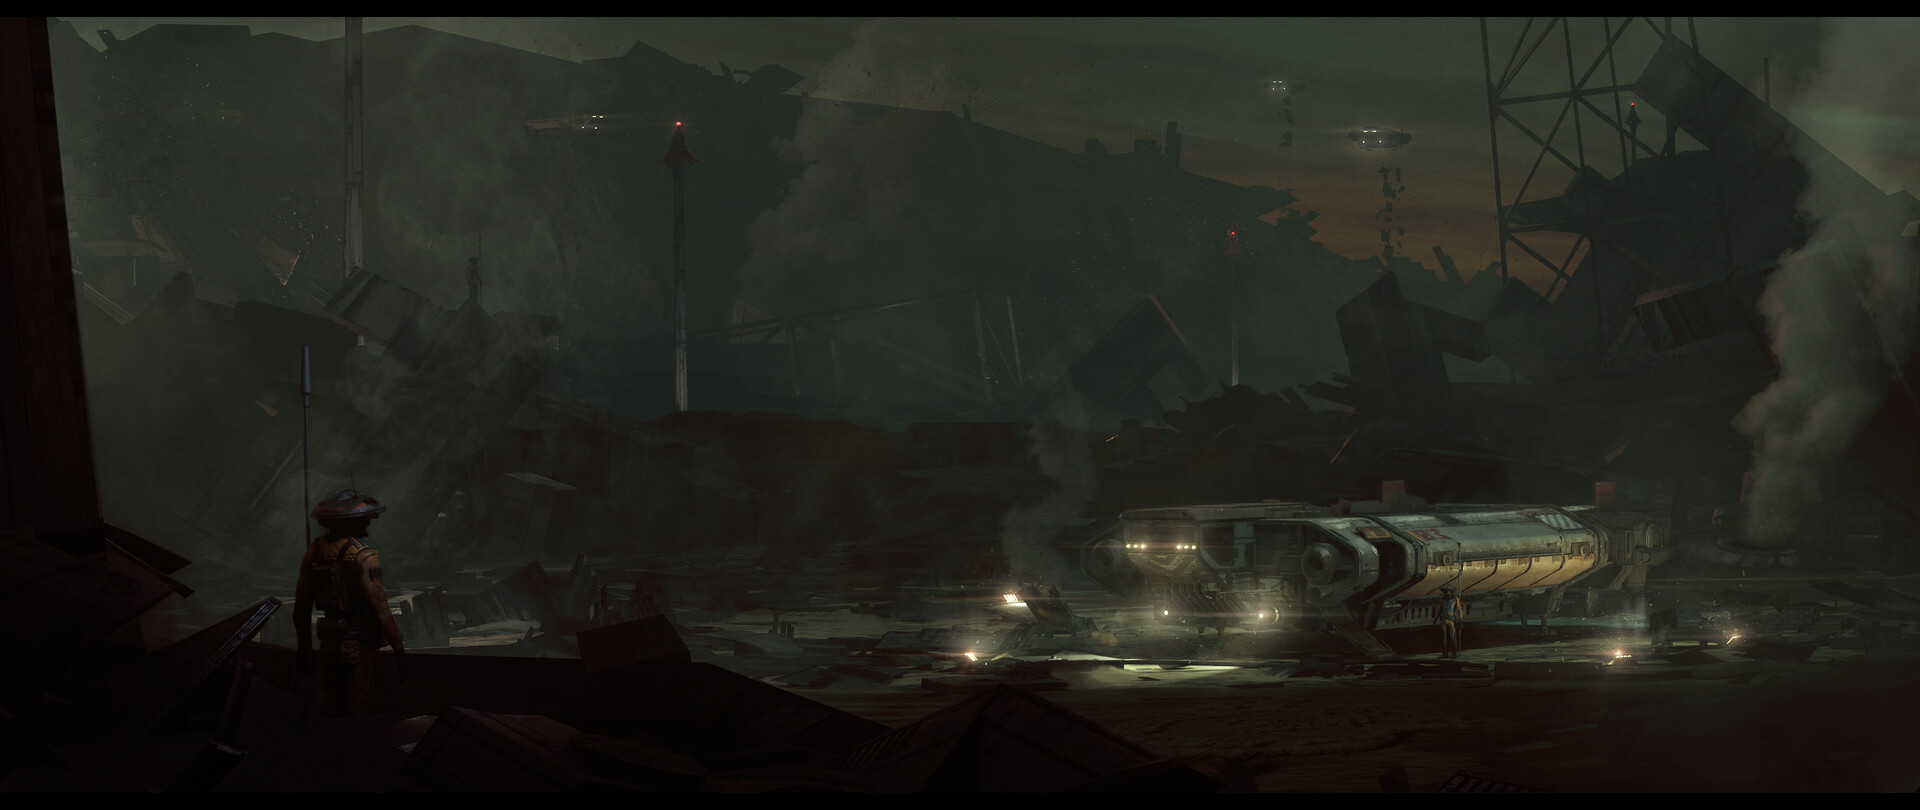
I still rely on Photoshop for a lot of post-processing and clean-up, and for adding the final touches—especially lighting, as optimization isn’t really a forethought when concepting. Sometimes the renders can be quite fast for checking modeling and composition iterations, but the fine details that you want to work into the lighting can take a while to resolve and see in the final frame. With CyclesX coming just around the corner, I’m sure I’ll be relying less and less on Photoshop for post-processing.
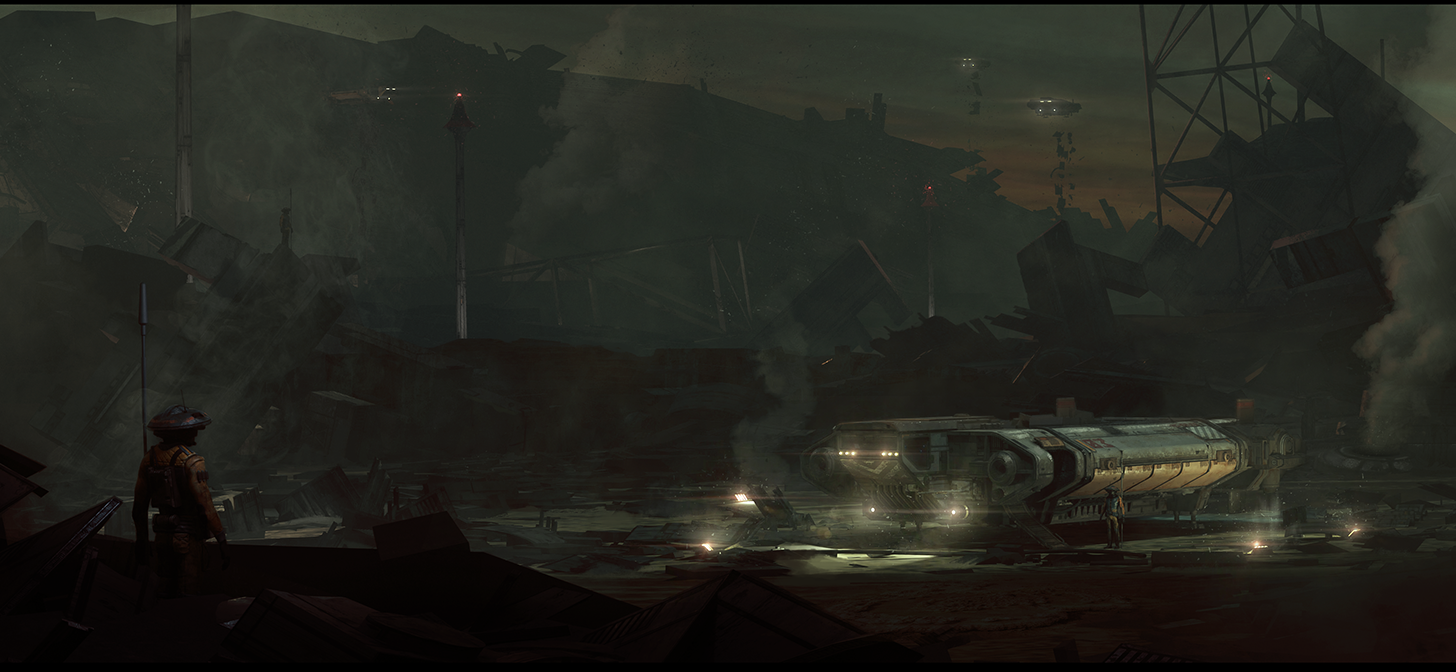
I knew I wanted to introduce some red into the sky pretty early on—I really liked some of the reference photos of Venus that I had, so I started filling in the sky.
Then I used the camera raw filter to tweak the hues and saturations of different elements such as highlights and shadows.
Then I painted in effects such as steam, lens flares, dust, etc.
Again my post-processing is basically 80% lighting and some small touch-ups when things look too 3D generated.
About the author
 Joel Azzopardi, Senior Environment Artist II @ Cloud Imperium Games.


