Behind the Scenes: Express Shipping
Quick bit about myself
Hey there! My name is Menno Snoek and I’m a 22-year-old Dutch guy. I’m a self-taught 3D artist who has been using Blender for about 2 years now. I went to school for graphic design and am now a graphic design graduate. So most of the Adobe stuff and creative workflows were taught to me. I only recently started doing some more sci-fi/realistic renders and trying to get some freelance work. But I guess people really like them so here I am writing a Behind the Scenes!
Idea
Probably the most-asked question I get: “How did you come up with this?”. The only thing I really do is look around. This particular piece came to mind when I was on a boat vacation for a week. I also remembered the awesome flying ships made by Ian McQue. I slapped those two together in my head and pictured how I would do it. And that’s really about it. The rest of the artistic choices, which I hope to be able to shed some light on in this article, come while making the artwork itself!
The process
First of all: I only used Blender and Photoshop for this. But I do use some really useful (paid) plugins inside of Blender that help me texture or import assets. I also use assets from CGTrader, Quixel, and all sorts of random stuff bought from ArtStation.
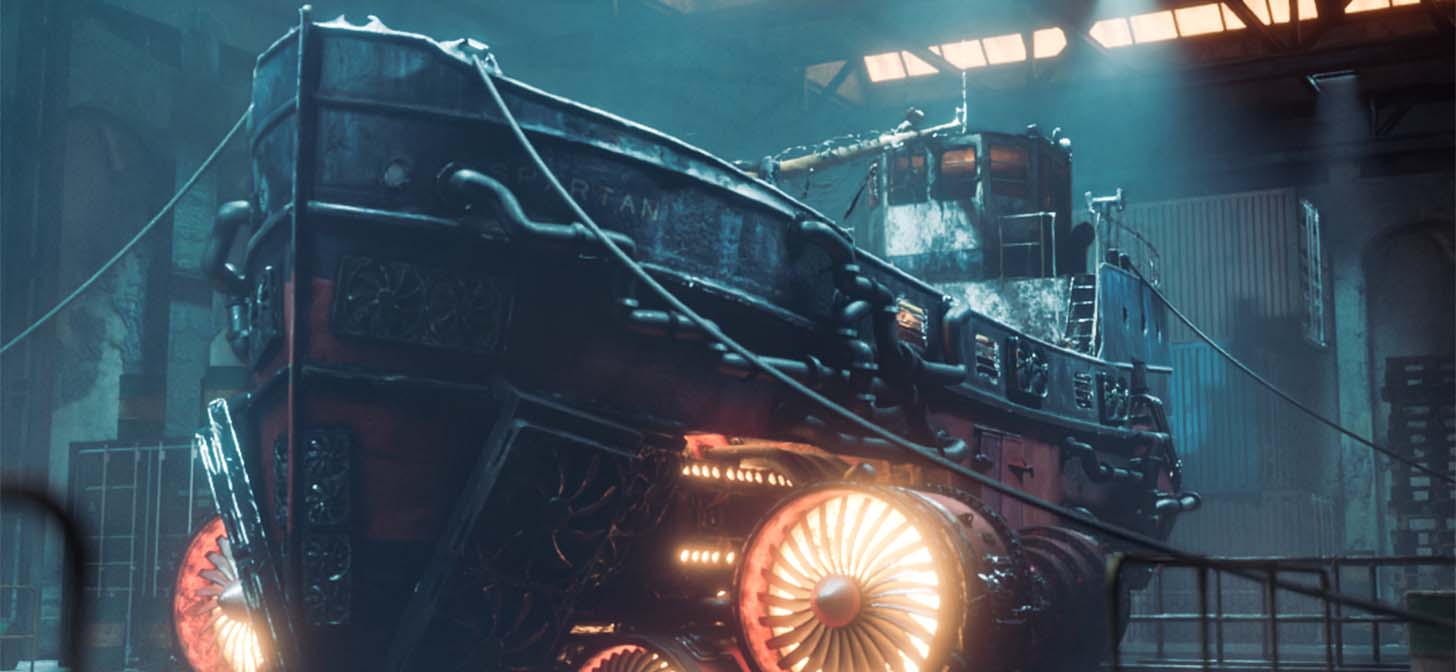
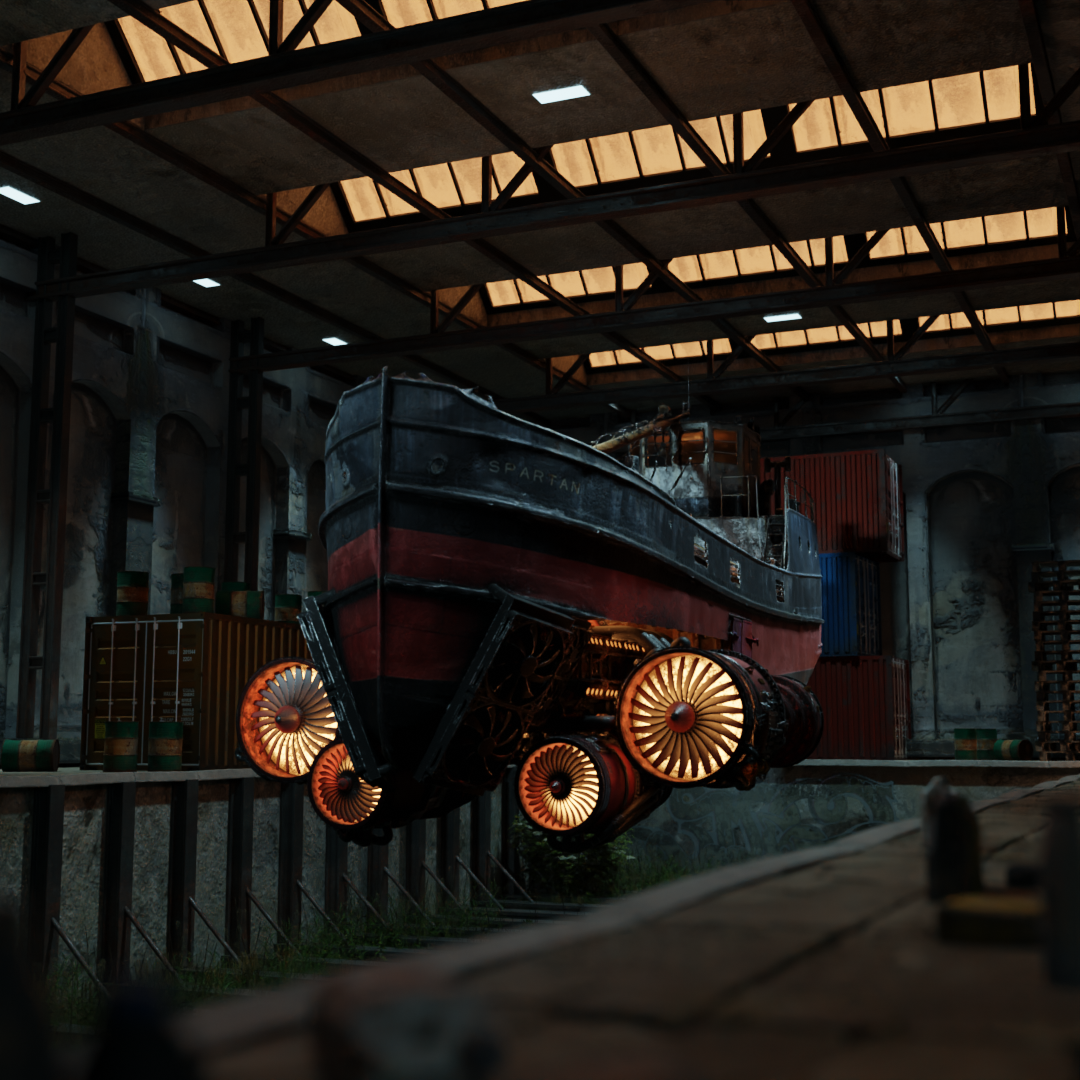
I started by finding a good-looking boat asset. There are a lot of museums posting 3D scanned public domain models so I always start there. And I got lucky and found this awesome model by the Scottish Maritime Museum.
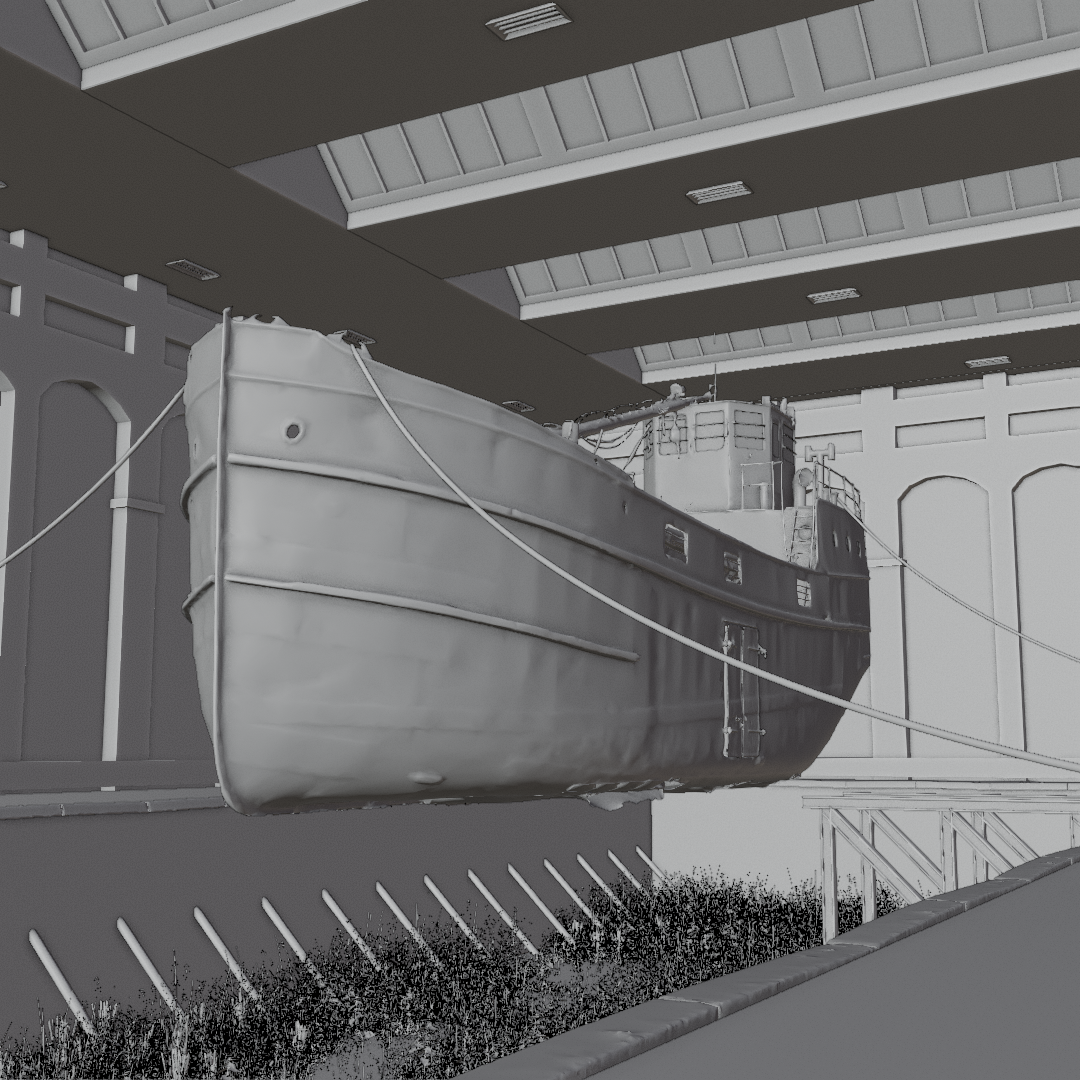
Step 1: Blocking out the scene and composition
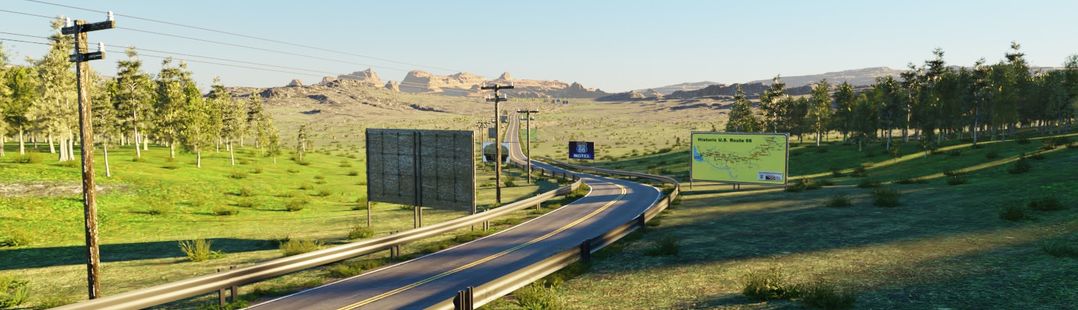
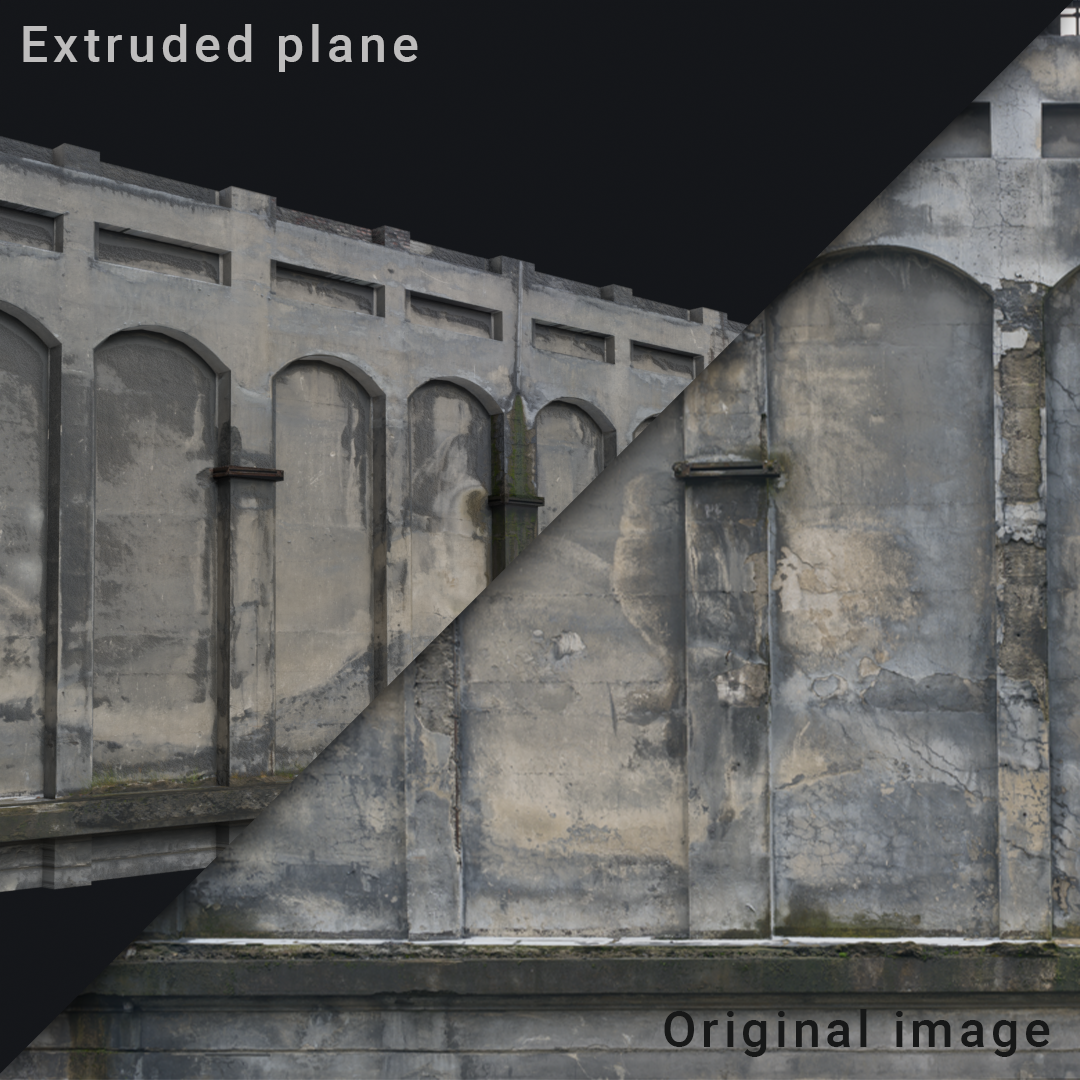
The basic idea for the layout was already in my head so I did the Ian Hubert classic and grabbed a few photos from textures.com for a wall and roof. I then extruded all the needed parts to create a quick dirty-looking wall and ceiling. I also added some grass using the Botaniq add-on, which is expensive but well worth it, in my opinion!
Step 2: Adding everything
So this is where I just start doing stuff that feels right—grabbing assets from all sorts of places and adding and removing them. This process often gives me a feeling of what should be in the scene and what shouldn’t. So, after removing and adding a lot of stuff, I am often left with a few placed assets and the knowledge of what I need to model myself. The image below shows the first draft with assets and the second draft with all the modeled and detailed assets. I also used a free add-on called Piperator to generate the pipes on the side of the ship. And I used Kit Ops to add graffiti.
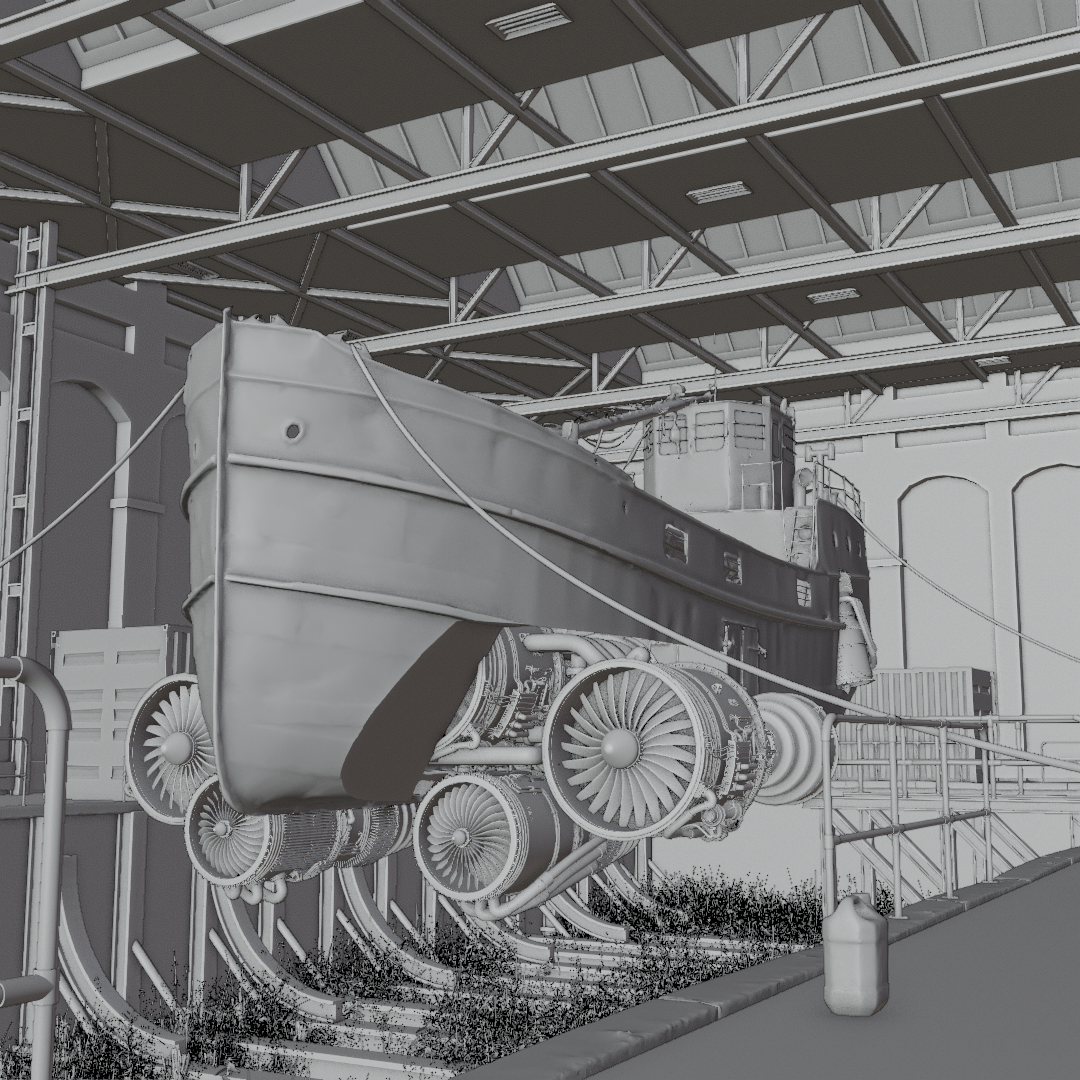
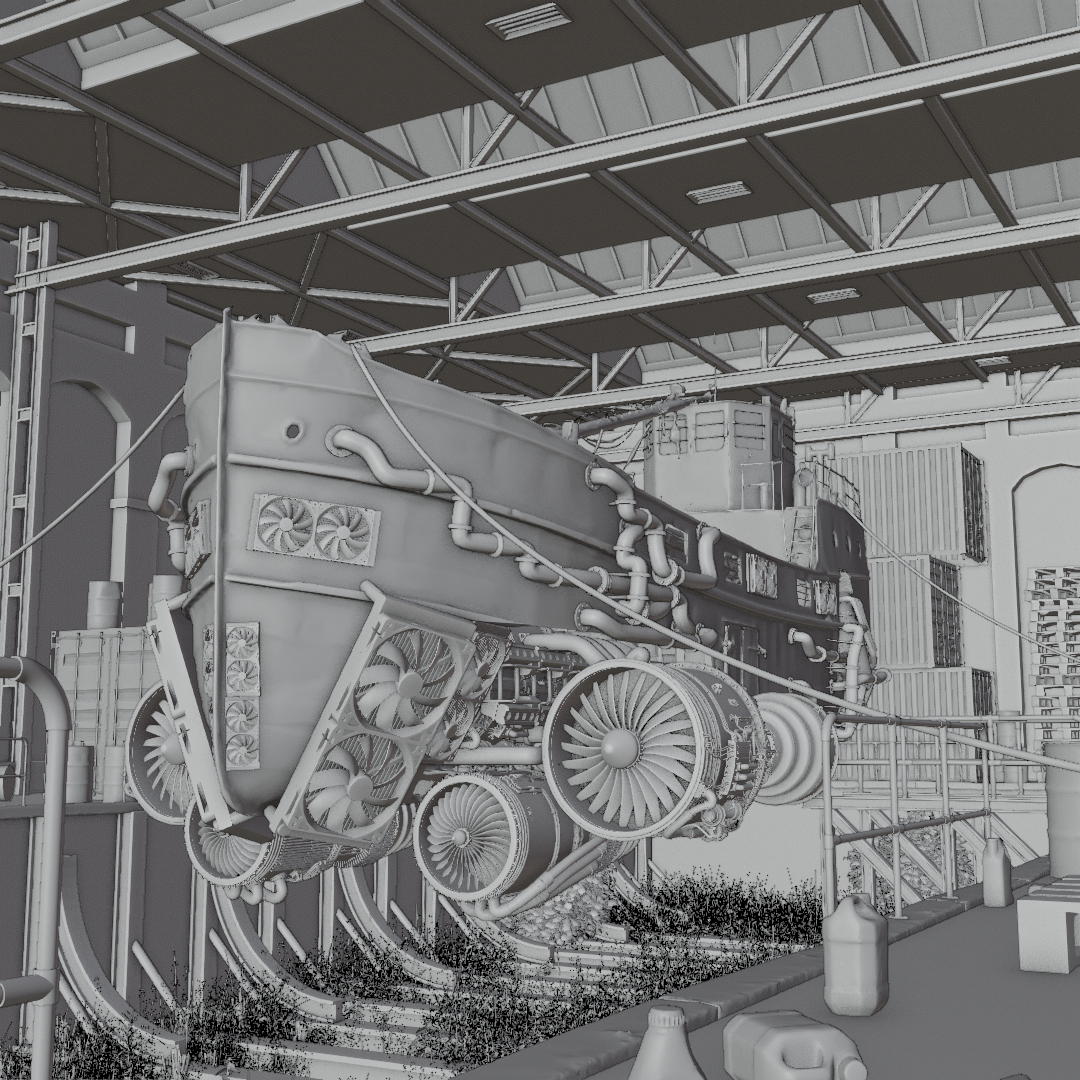
These two images make it look like this is a quick process. But believe me, I spent a long time moving stuff around and modeling everything that was needed. :p
Step 3: Materials
So most of the assets, of course, come with their corresponding materials. But for new objects or adding detail I use an amazing add-on called Materializer. There are probably a lot of good other options for materials, but this is the first one I bought and I love it so far.
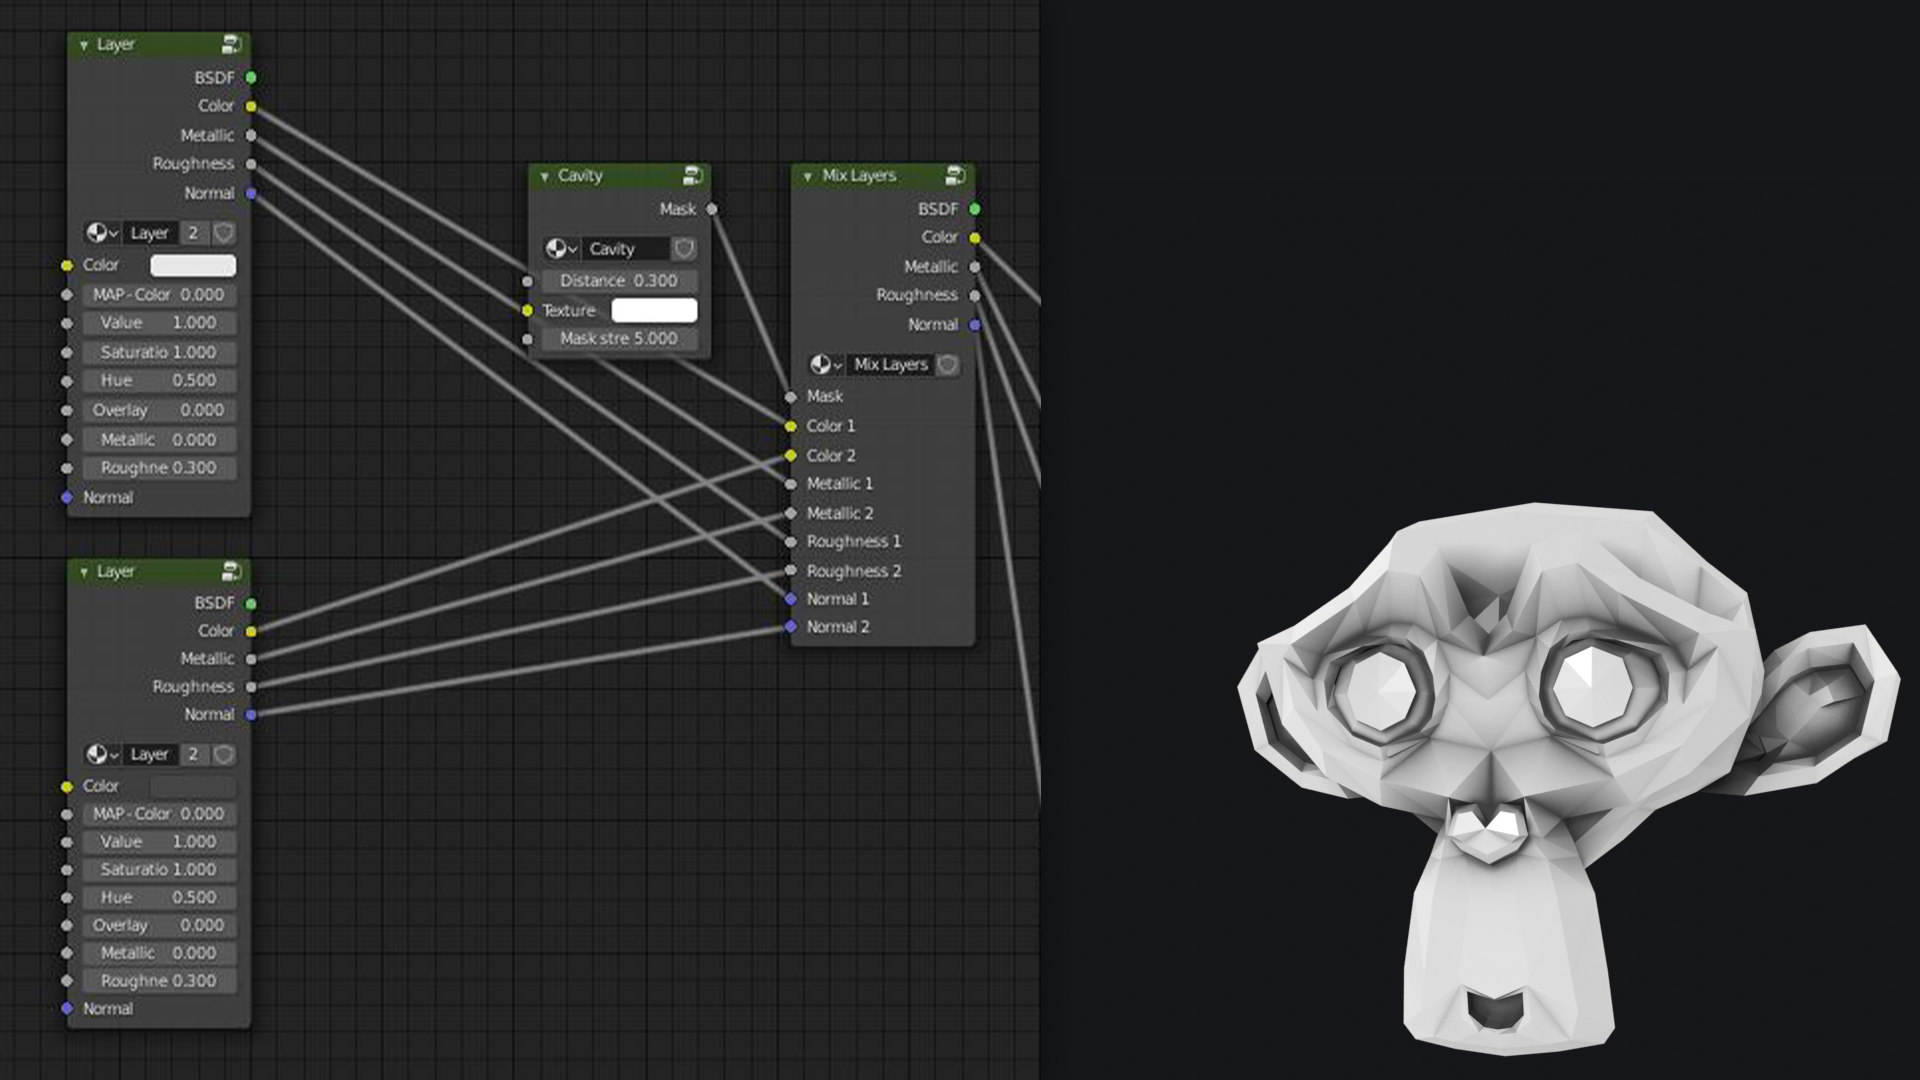
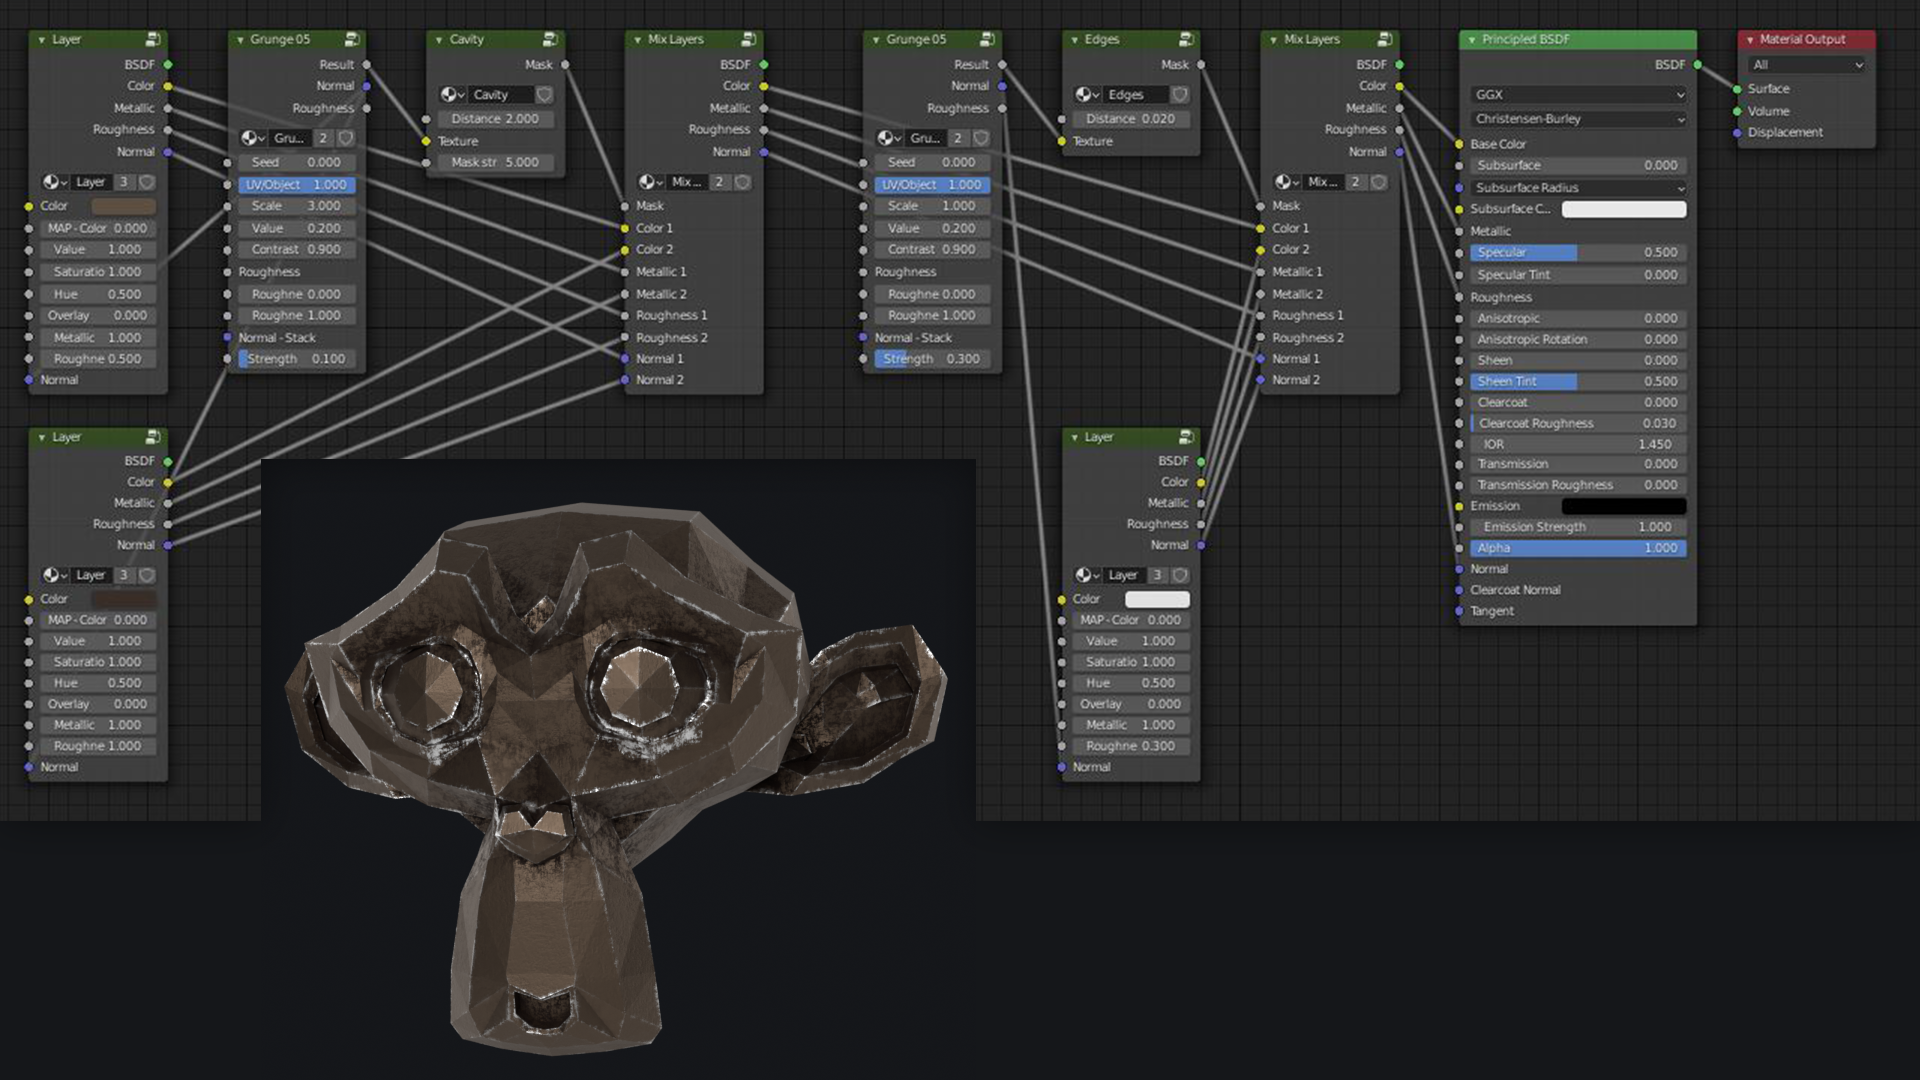
An attempt at a quick explanation: it is a layer-based, procedural texture add-on.
It allows me to add a layer to a texture like this. And as you can see, there is a radial menu that lets me choose options like adding more layers and/or cavities, edges, etc.

So if I add two layers, one white and one grey, and a cavity filter, I get the following result:
The add-on also comes with a whole bunch of grunges, imperfections, patterns, and material nodes included. And if I add a grunge node into the texture input of the cavity filter, I get a very detailed cavity. Of course, you can change the look of this detail with all the settings.
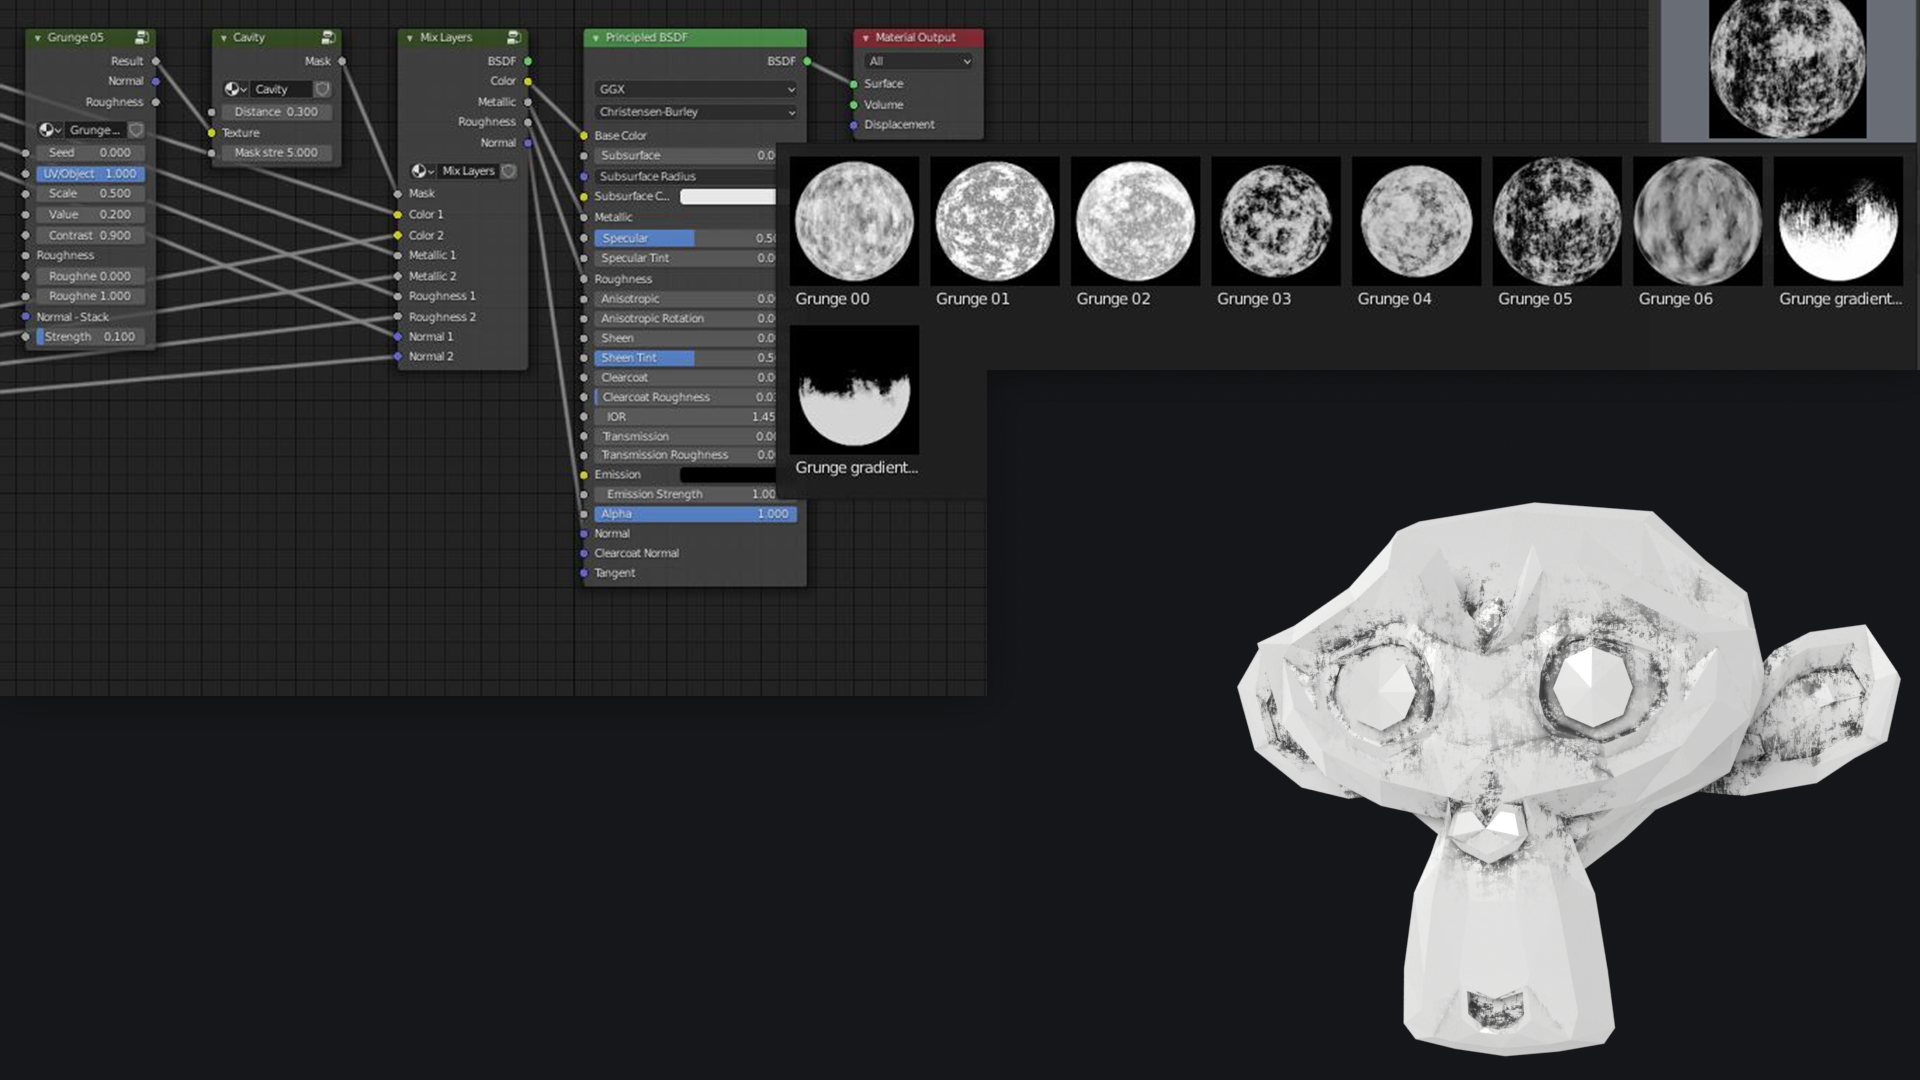
By combining all this with another edge layer and some metallic properties, I ended up with a detailed-looking metallic shader that I can use on jet engines!
A little bonus: you can add the cavity node on any material. You can also, for example, import two image texture materials, like moss and concrete, and use a mix shader node and cavity node to add procedural moss onto the object! Of course, you could make this node yourself but the fact that I only have to click twice for effects like these saves me a lot of time in the long run.
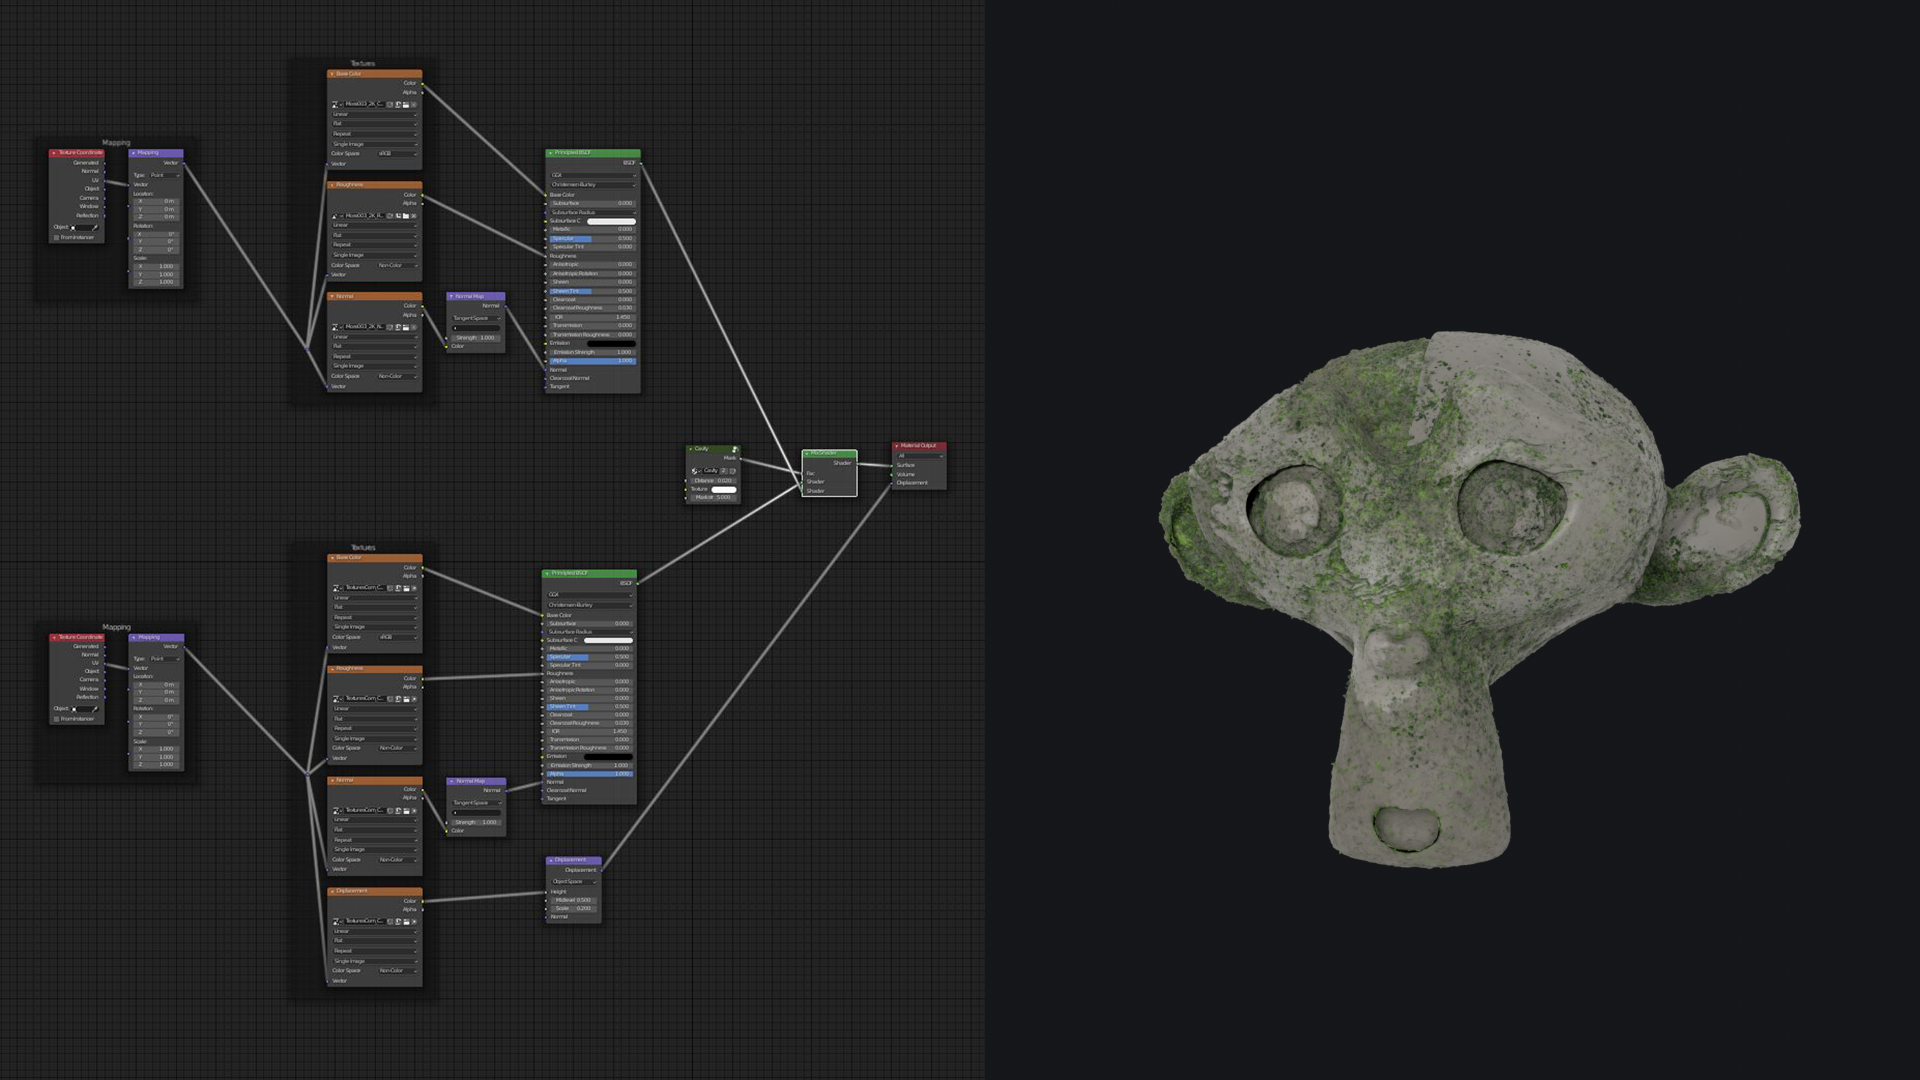
So that is basically it. I created all the new materials needed using this add-on. For example, here is a comparison between the jet engine with all the basic layers and the one with all the cavity and edge details.
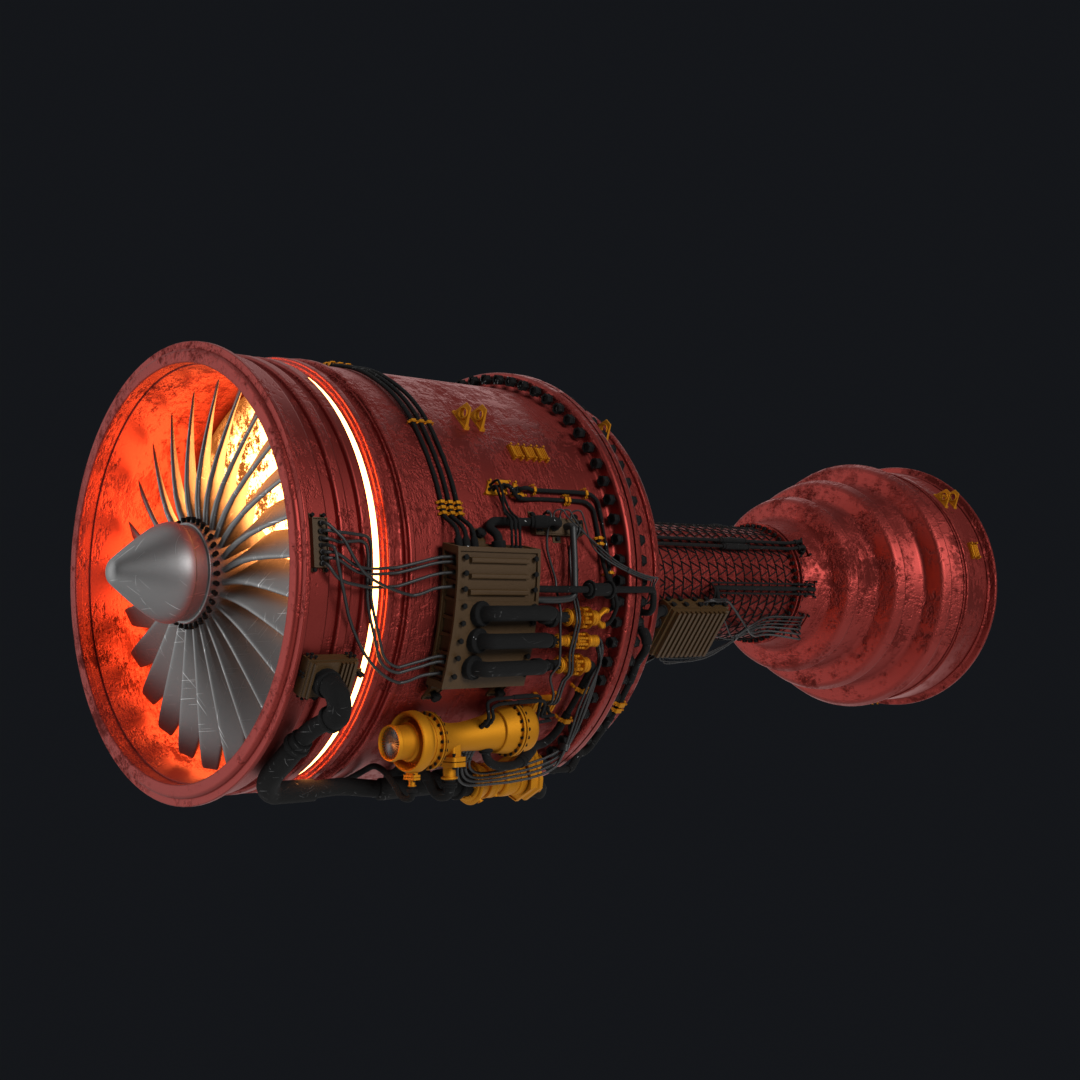

I also often add extra cavity or edge detail on the downloaded assets from ArtStation and Megascans.
After this, the only thing that is left is rendering and doing some work in Photoshop.
Step 4: Rendering
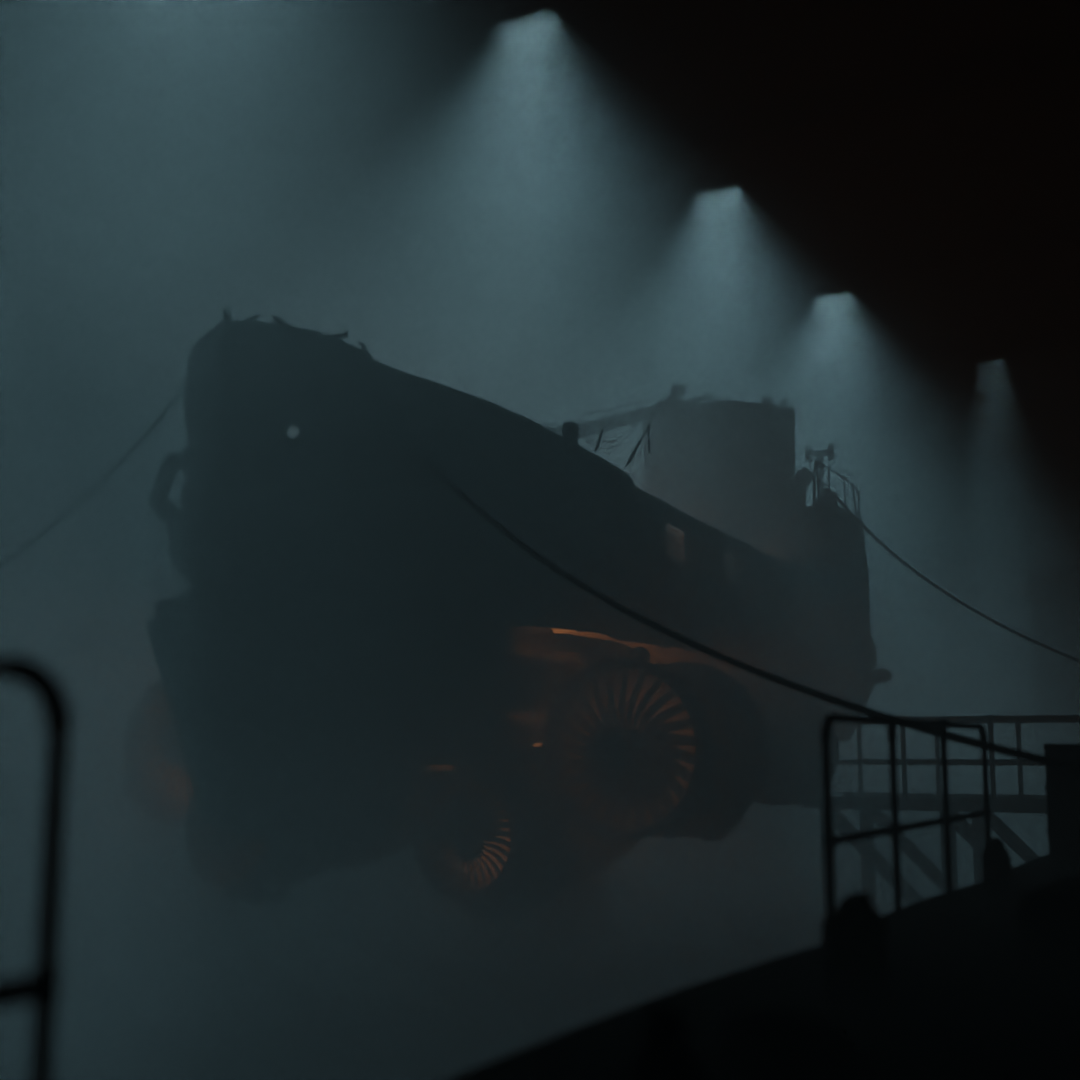
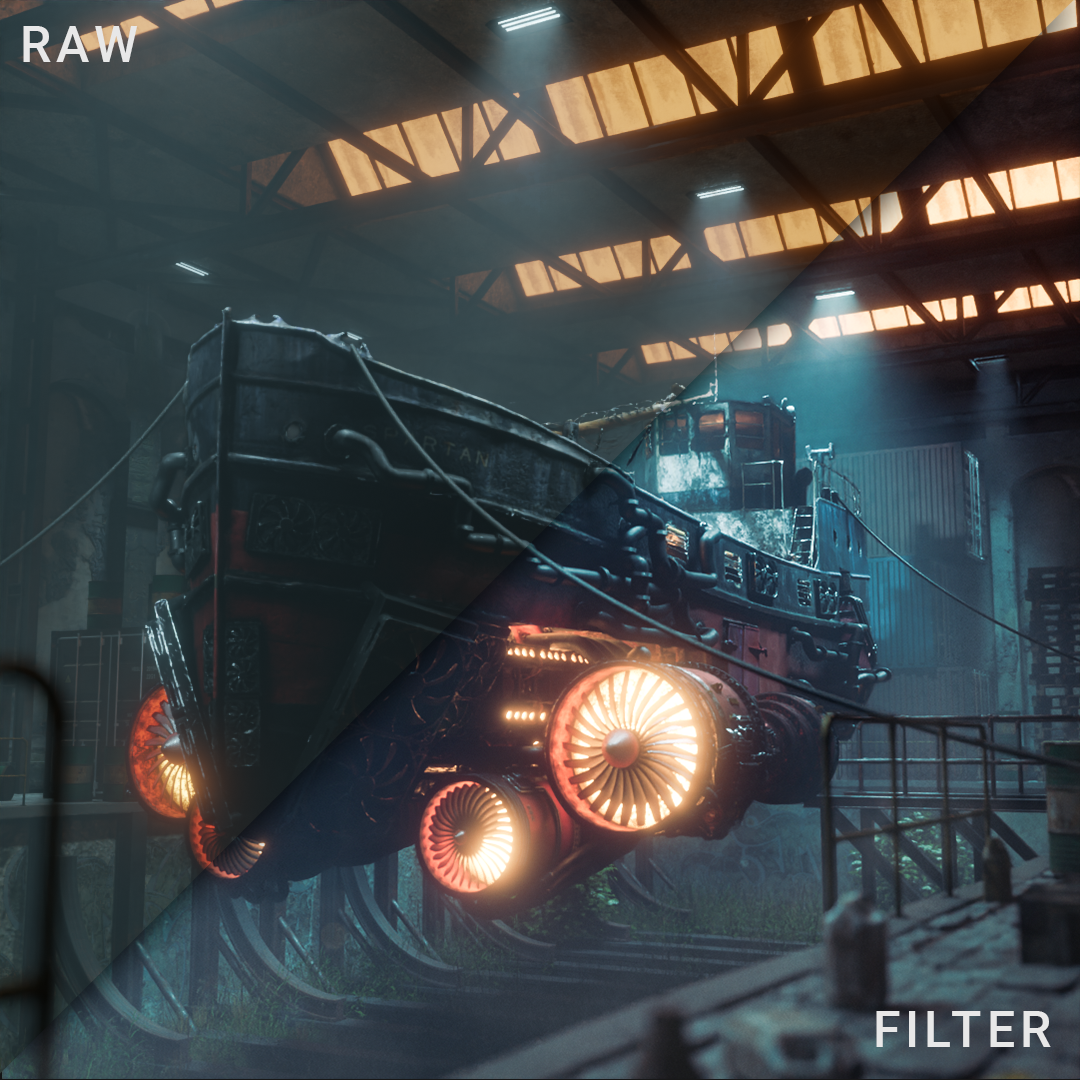
For the rendering, I only really do one kind of interesting trick. I always render the volumetrics on a separate layer. I do this since I can then change the number of samples for the scene and the volumetrics separately. But the denoising on both the layers will also be a lot cleaner. I set this up by adding a volumetrics collection that contains the volumetrics object, creating a linked layer, setting all the world collections to holdout, and only enabling the volumetrics collection. Then I disable the volumetrics in the scene layer.
I then have both the images separate and combine them again in compositing.
(This example is an older version scene with new version volume, but hey, you get the point. :p)
I don’t have a lot of experience grading in Photoshop. This was basically my first time doing it since I’m used to doing it in Premiere Pro because I like to animate everything.
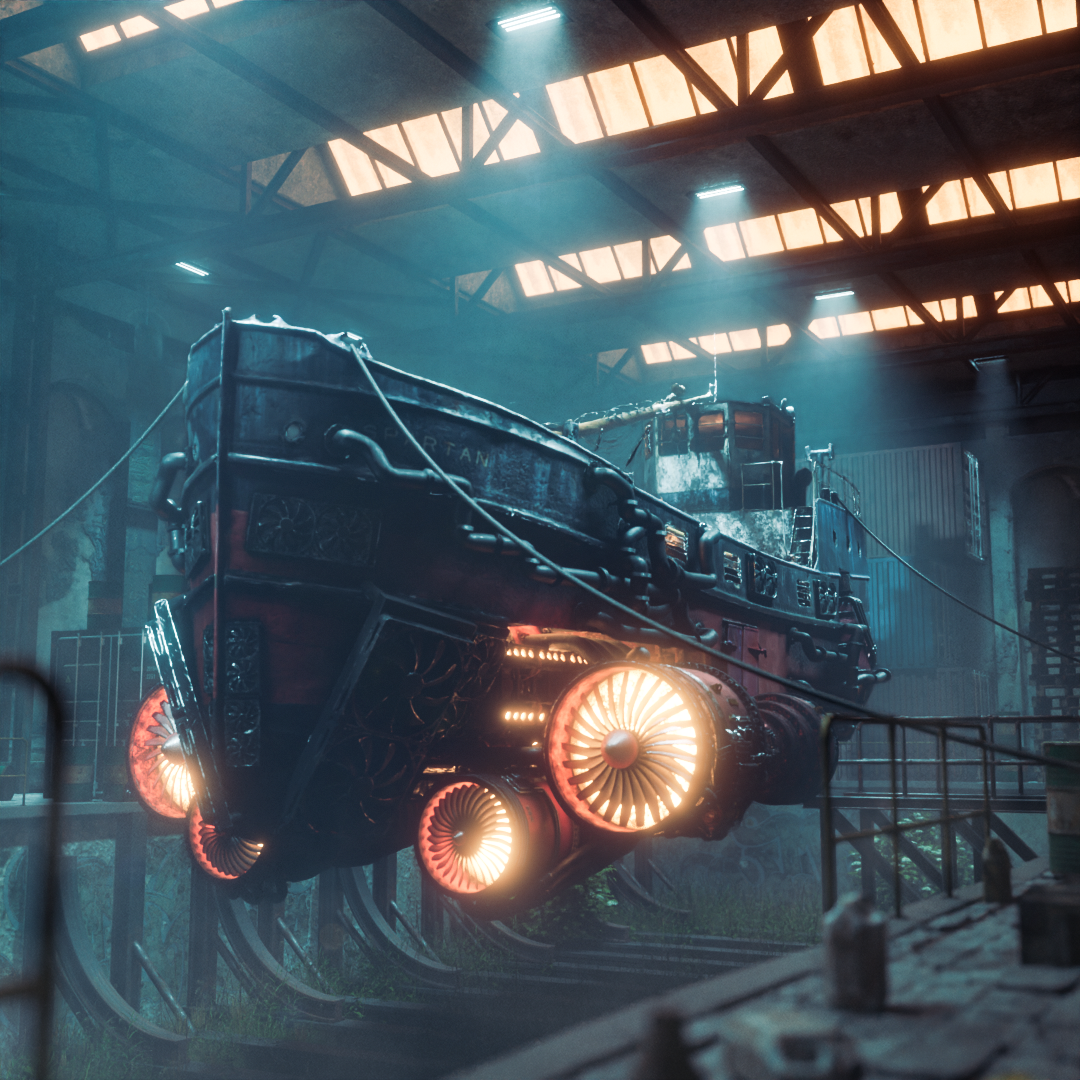
I started using 1 camera raw filter to correct the light levels. I then added another for doing some color grading, clarity, dehaze, and film grain. After that, I added a few mist and dust overlays and masked them into the scene. And boom, done!
About the author
 Menno Snoek, graphic design graduate and 2 year Blender user with love for motion design and storytelling.


no inspiration from ian huberts design of the flying cargo ship asset on patreon? hm