Behind the Scenes: Big Family Treehouse
Introduction
Hello everyone, my name is Michael Aldrius from Indonesia. I’m a self-taught 3D artist for almost 2 years now. I learn 3D mostly from YouTube and articles. Actually, I’m an Electrical Engineering student but I spent quite a lot of my time creating 3D artwork and doing some freelance work, hoping that someday I will be able to work professionally as a 3D artist because I really love it.
Idea
This render I made for the CGBoost monthly challenge, the theme of which was “Treehouse”. I really wanted to create a render that looked good but wouldn’t destroy my hardware, because I’m using old ThinkPad x230. Luckily Blender works really well with old hardware. So I thought a treehouse on top of an island in the water would do the trick because it would not require a lot of particle systems and other stuff that would slow down my laptop.
The process
The island
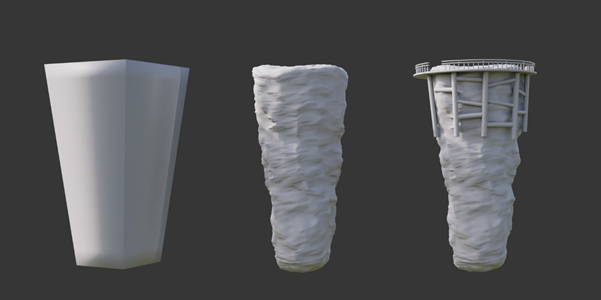
This is the process of how I made this render. The first thing was the island; I started with a cube that I scaled until it looked like what I wanted and then I added a multi-res modifier so I could sculpt the island to get a better shape and add more detail. After that, to save some memory I just instanced the island and made the second island and rocks. Then, I added more details, like the support beam and the fence, to the island.
The house
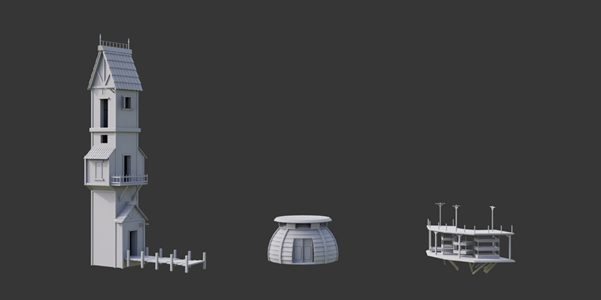
For the house, I made 3 different structures. The main structure was inspired by medieval house design, the second structure is just a small house that looks like a typical treehouse, and the third structure is designed as a vegetable garden.
The tree
The tree is composed of two different trees. I used the same technique both. First, I started with a single vertex and I extruded it to make the tree shape. After that, I added skin and subdivision surface modifiers. Finally, I sculpted the tree and added a displacement modifier using the displacement map from the bark texture so that I could get extra details.

The way I made the leaves was to first make a small tree branch with a few variations as the particle object and then added an icosphere and deformed that icosphere until it looked like the overall shape of the leaves that I wanted. After that, I just added a particle system and used volume to emit the particle.
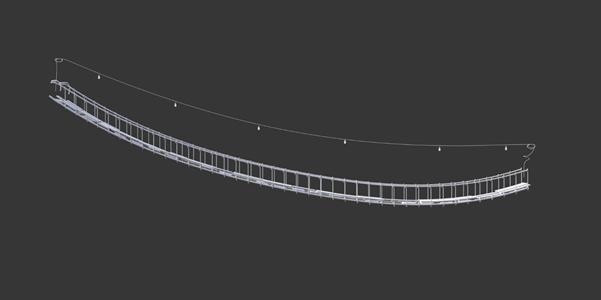
The bridge
To create the bridge, I used a plane that I scaled until it looked like a bridge. I struggled to make the bridge curve look natural, so I came up with an idea to use cloth simulation and play with the parameters to get the look right. Once that was done, I just worked on adding some details like the planks, the rope, and the lamp.
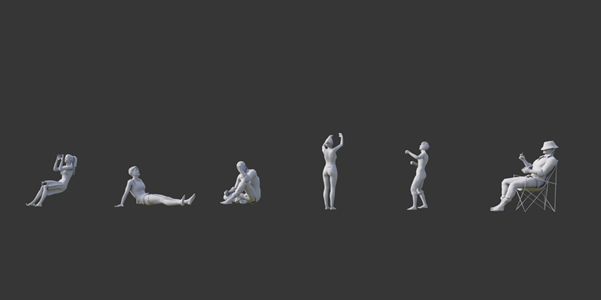
The characters
I used a software called Character Creator to make the character. I created six different characters and posed them to get the look that I wanted.
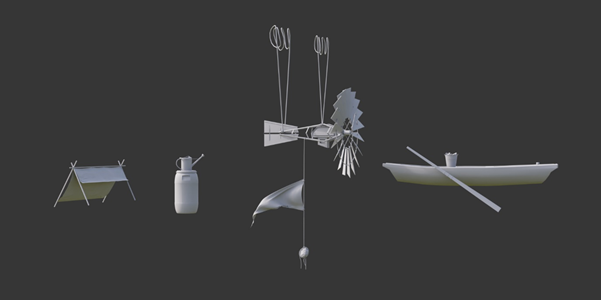
The props
The last thing I did was model and add more props, like the windmill, boat, and small watering can, to make the scene look more detailed. Those details gave me a more realistic render.
Unwrap and texturing
For the UV unwrap, I performed a manual unwrap on some assets like the tree and island. For simple objects like the house, I just used smart UV unwrap to save some time.
For the texturing, I found some free textures on Poly Haven and ambientCG. I used those textures and mixed them with noise and Musgrave texture to get some variations in color and texture. I also added Edge nodes so I could add more variation to the edges in the model; for example, I use this technique on the main house.
Rendering
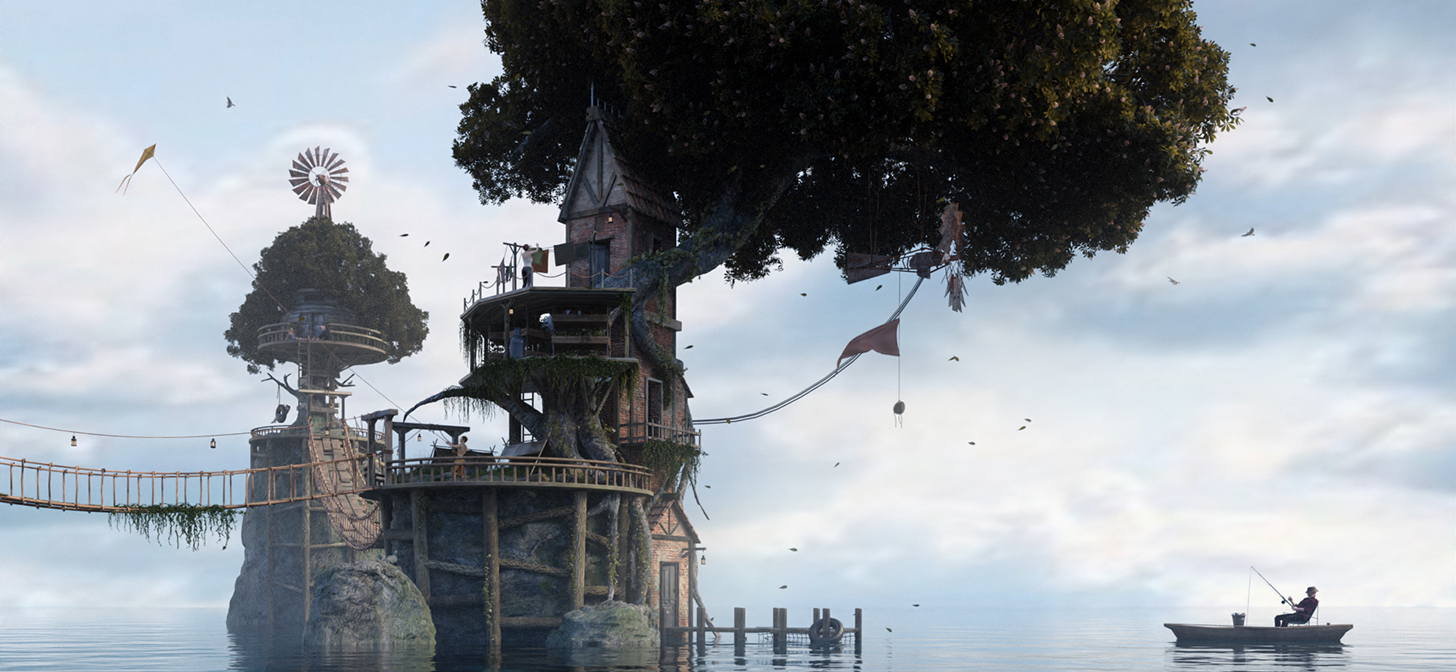
I rendered this scene using Cycles and when the render was done I did some post-processing in Photoshop, which helped me to get a much better render.
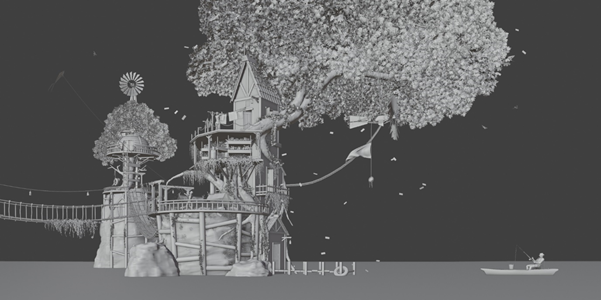
That was the main process that I followed when creating this render. I’m really happy to share my process and workflow with all of you and I’m so glad for this chance. If you have any questions to ask you can contact me. Here’s the final render. Thank you!

About the author
 Michael, 3D Artist from Indonesia who loves to make 3d illustrations and product models


