

A bit about myself
My name is Tanguy Weyland and I am a 3D artist based in Paris and currently working as a CG Supervisor at Cube Creative.
I started making things in 3D when I first downloaded Blender back in 2008, before the release of 2.5. A few years later, I decided to make it my job and I graduated from Supinfocom in 2016. I have been working at Cube Creative since then.
During the past two years, all my professional projects were done using Blender 2.79 (we started before the release of Blender 2.8 and we tend not to switch versions in the midst of a production). My will to try newer versions of Blender and to use the latest features led me to start personal projects.
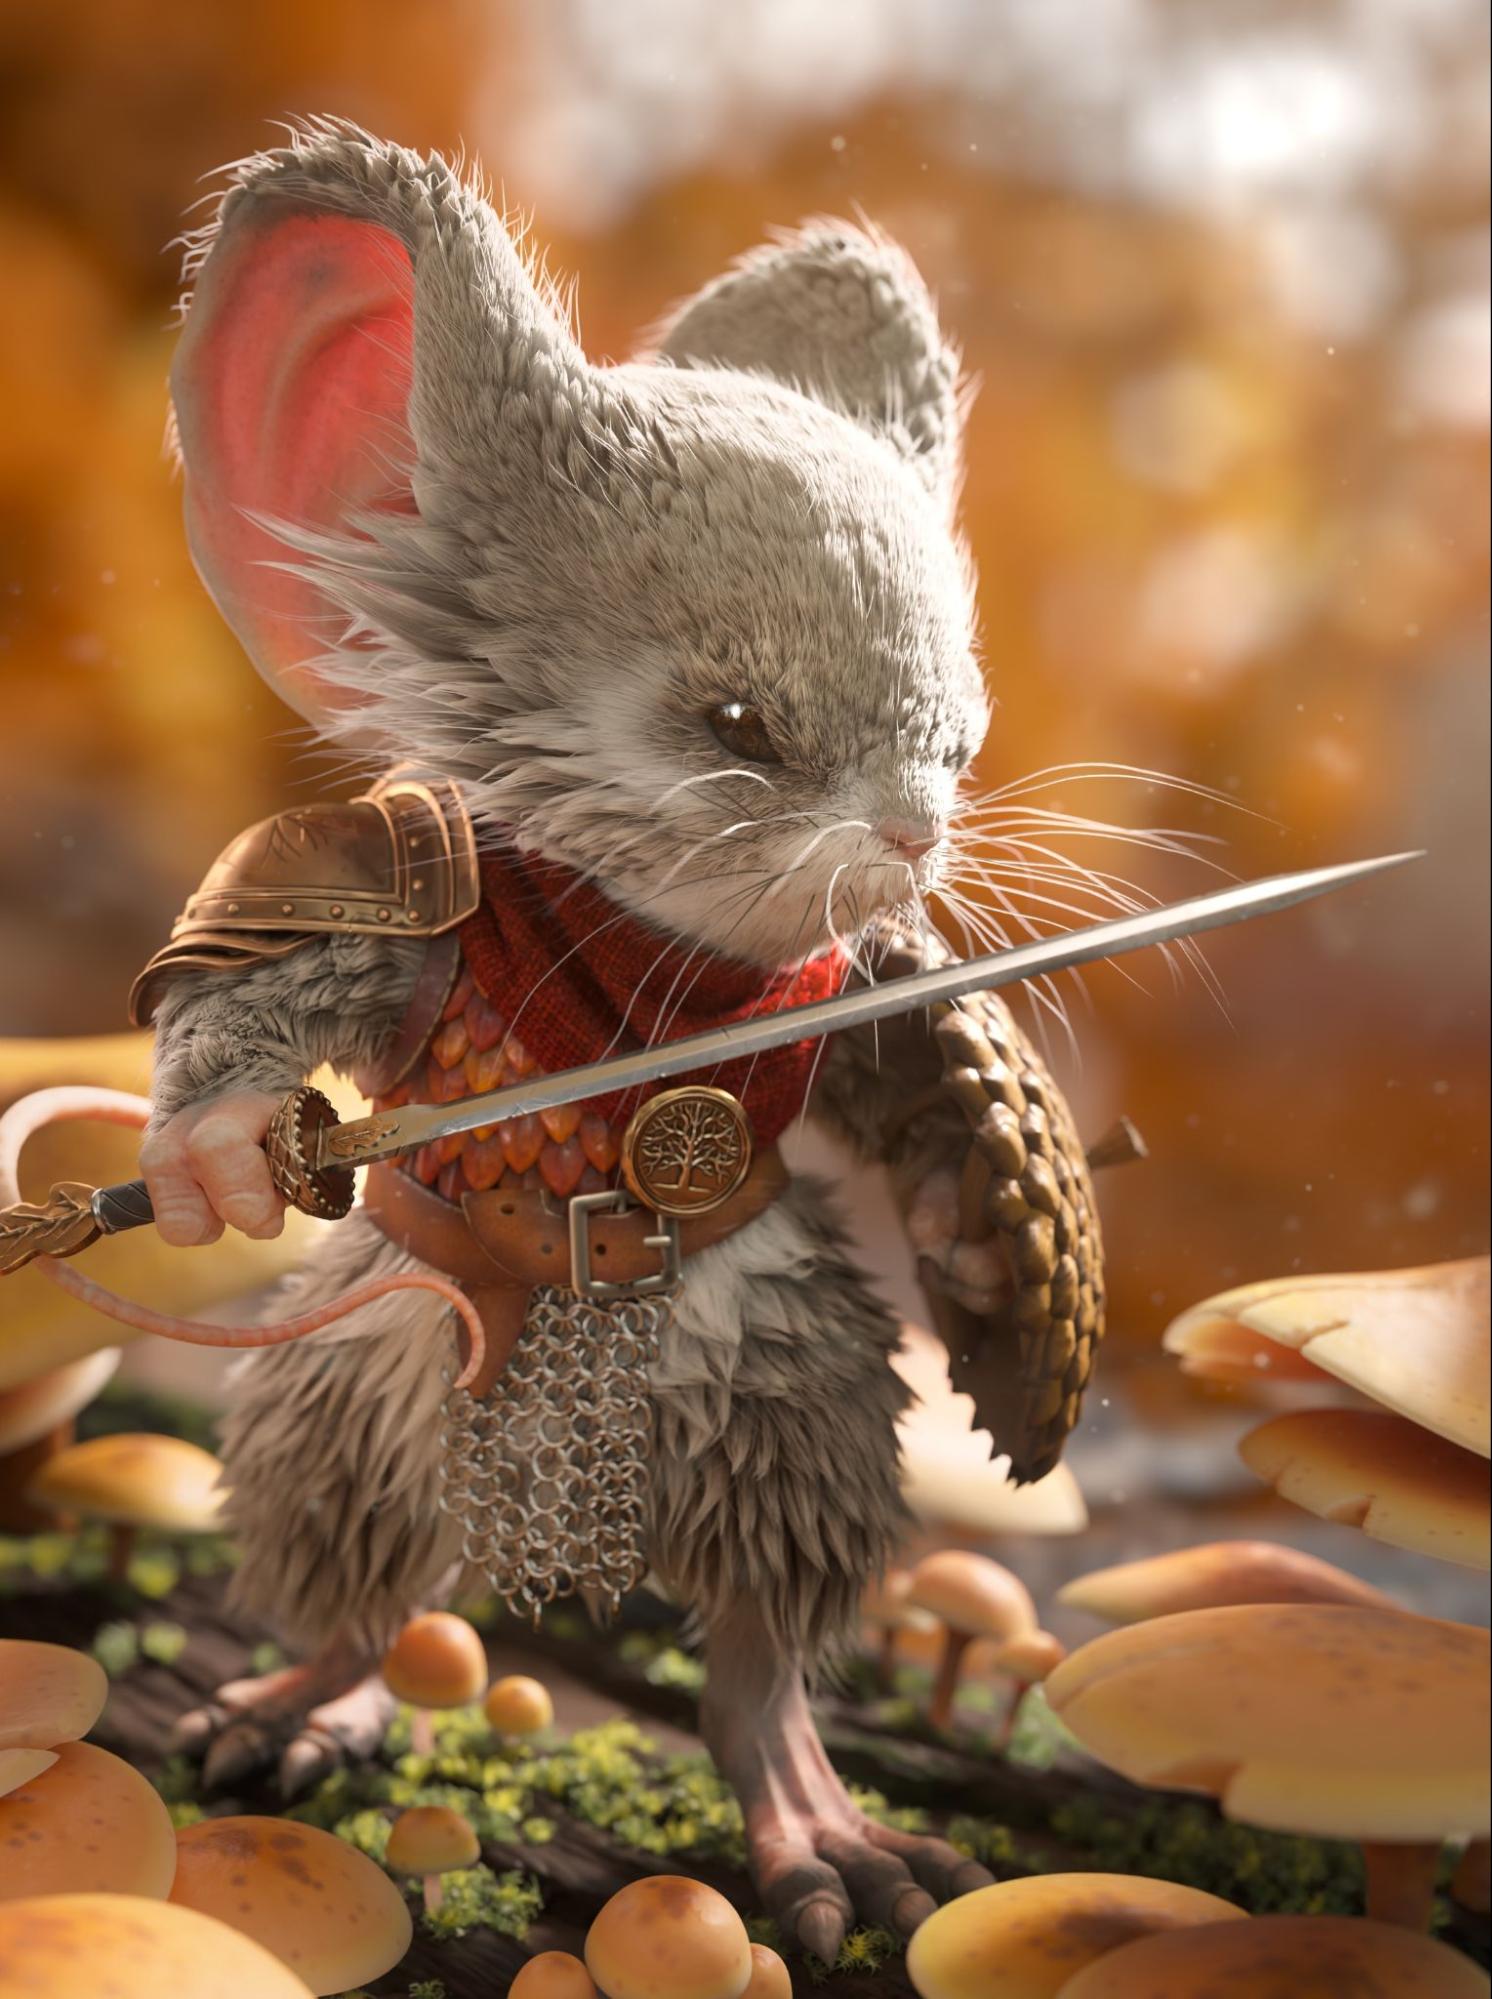
The Mouse Knight is the last and the most successful of them.
Inspirations
Among the features of Blender that I had never used before were the hair system and grooming alongside all the sculpting tools brought by Pablo Dobarro. Naturally, when I chose to work on a furry creature, I knew it was going to be a nice challenge.
My initial idea was to create a 3D version of Colin, a character from the board game “Mice and Mystics”. However I discovered the drawings of David Petersen and his world of “Mouse Guard” and was in awe before these cute yet fierceful mice. I decided to make them my main source of inspiration:

While working on this piece, I tried to improve every aspect of it in parallel. It has been a way of avoiding bad surprises when discovering how the shaders would react to the lighting or how the pose would impact the modelling of the mouse's equipment. As you can see in this short breakdown, I went back and forth on the different aspects of the image:
Modelling
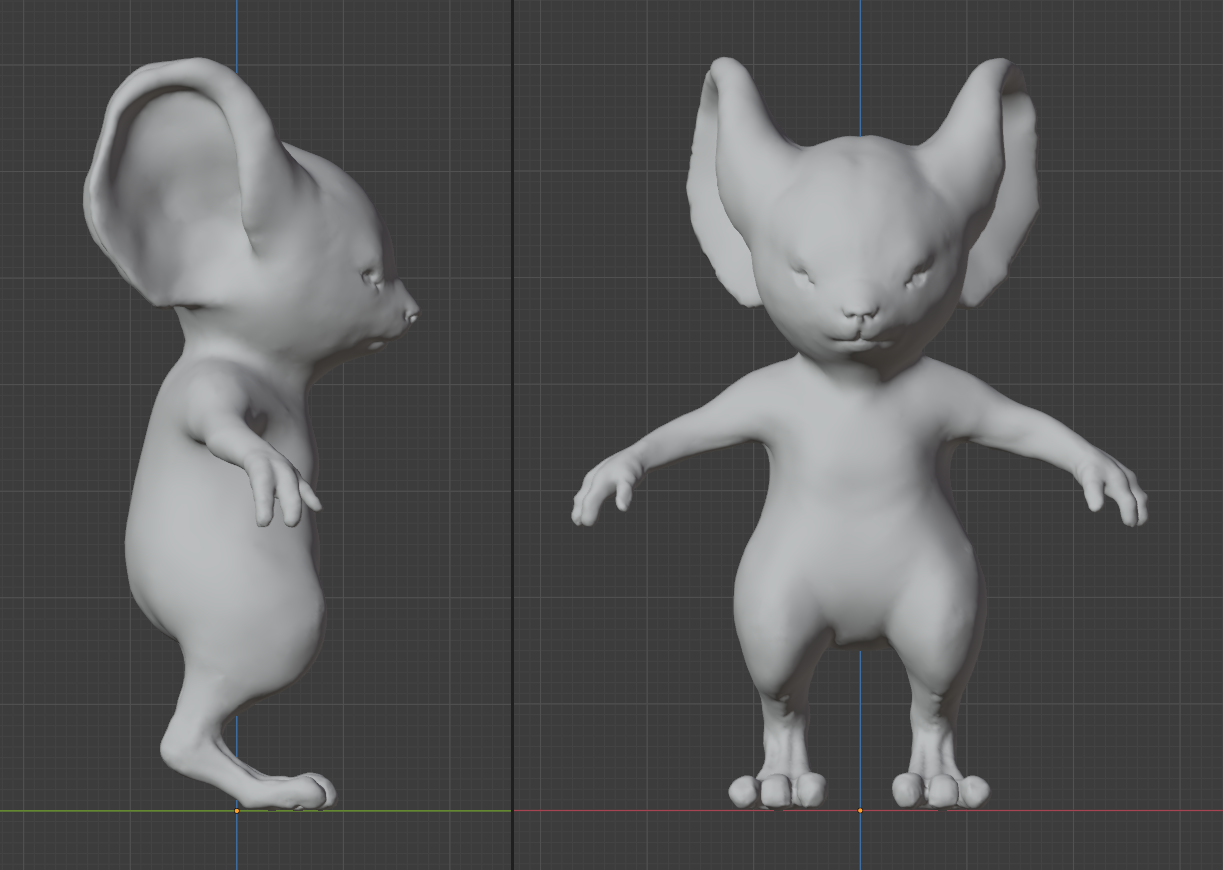
As you would expect, I started by sculpting the character in a neutral T-pose. My main struggle here was getting the shape of the head right; it is seldom easy to transpose a 2D drawing into a convincing volume.
Then I got down to the manual retopology, UV unwrap of the body, and a very basic rig. However, I can now say that the UV unwrap turned out to be completely useless.
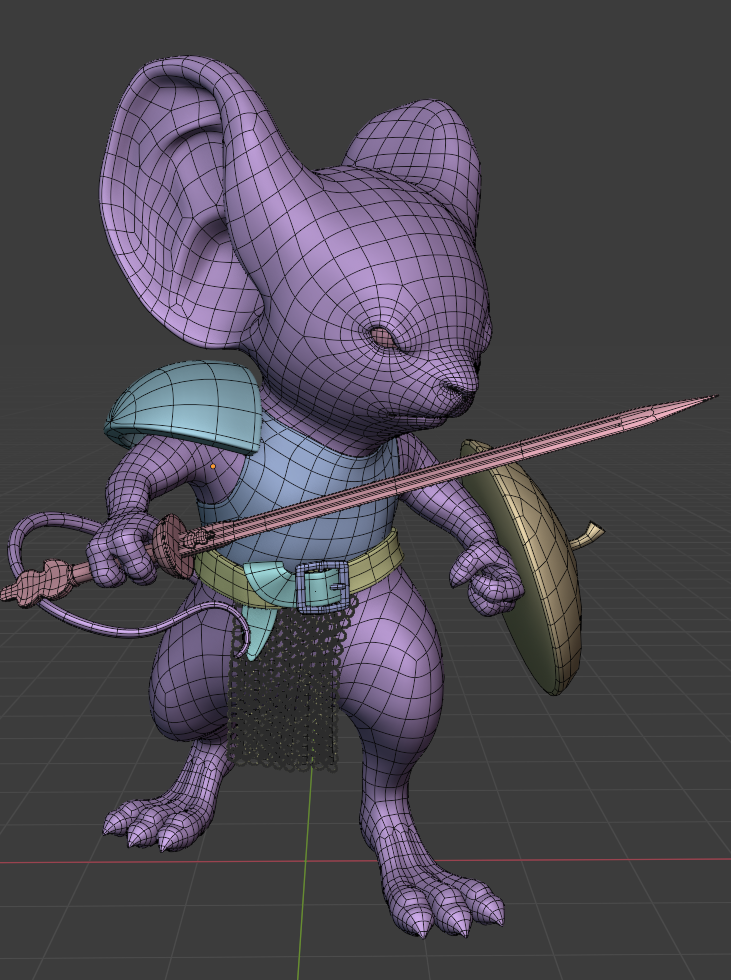
The basic rig allowed me to get the mouse into pose and to lock the layout very early on. I was glad to get the framing settled this early as it showed me which part of the model would need more attention to details. The decision not to move the camera afterwards was a huge time saver when working on props modeling, shading and lighting: I knew that I only cared about how things looked from one unique point of view.
After having sculpted the body’s base mesh, I felt comfortable with sculpting tools. However, I had never tried cloth simulation in Blender, which is why my first idea for the scarf was to manually sculpt the folds. It wasn’t long before I understood my mistake and started looking for the best way to set up the simulation.
The method I chose was to set a cylinder as the cloth and to place it around a very stretched version of the mouse’s neck (a simple shape key did the trick). I then animated the neck so that the head would push the cloth down in a proper fashion. I also skinned a vertex of the cylinder to an animated bone to simulate the weight of the medal.

The Shield

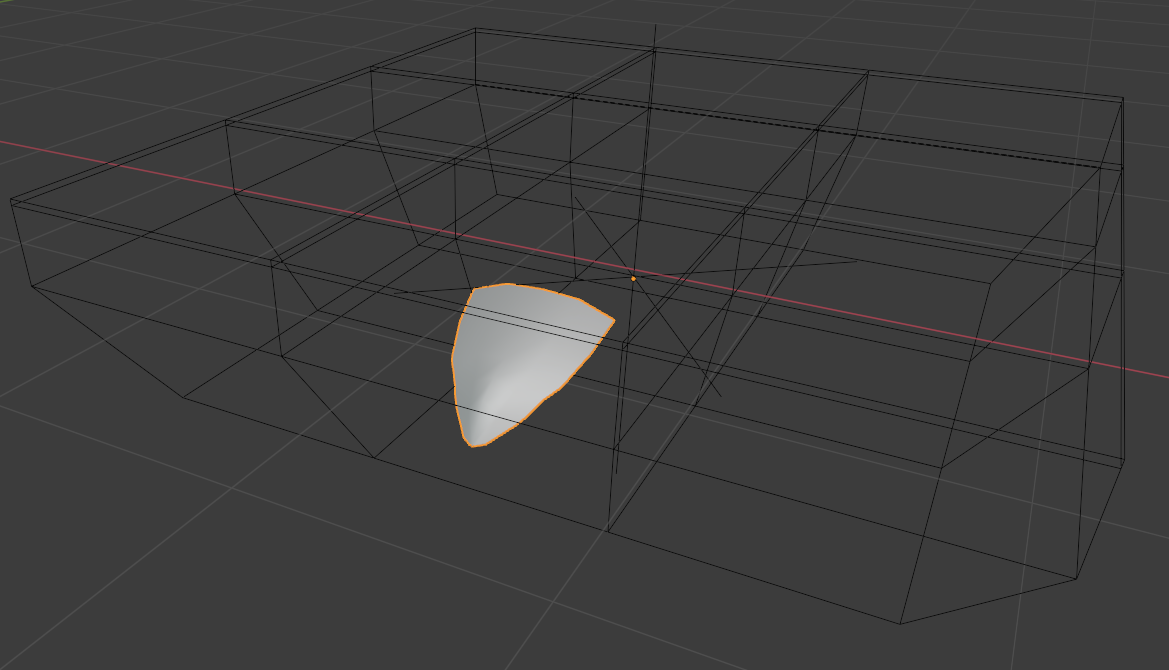
I have been asked if I used Geometry Nodes to model the scales of the shield. Maybe I would if I had to do it again, but for this time, an array modifier and a lattice deformer were enough.
Here is the single scale I modelled, without any thickness:
Here is what I got by playing around with the array modifier:
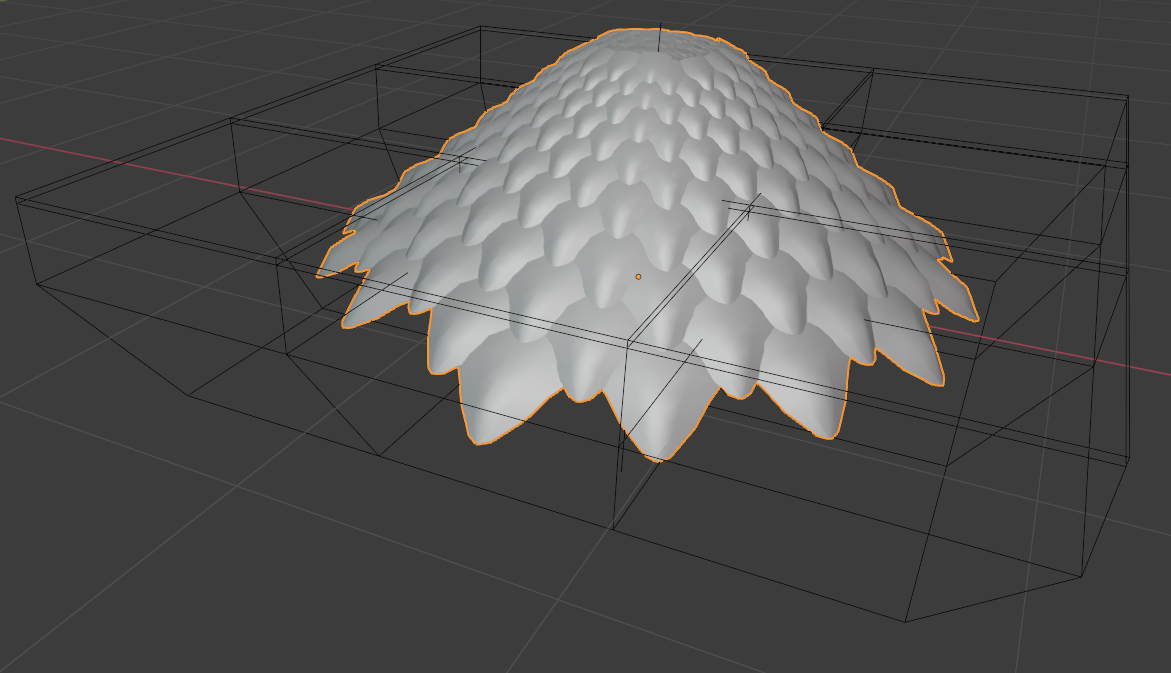
Here it is deformed by the lattice to match the shape of the shield:
And finally, here are the scales in their final form, I used a displace modifier linked to a cloud texture (RGB to XYZ) to make them more organic and less repetitive:
This is what the modifier stack looks like:

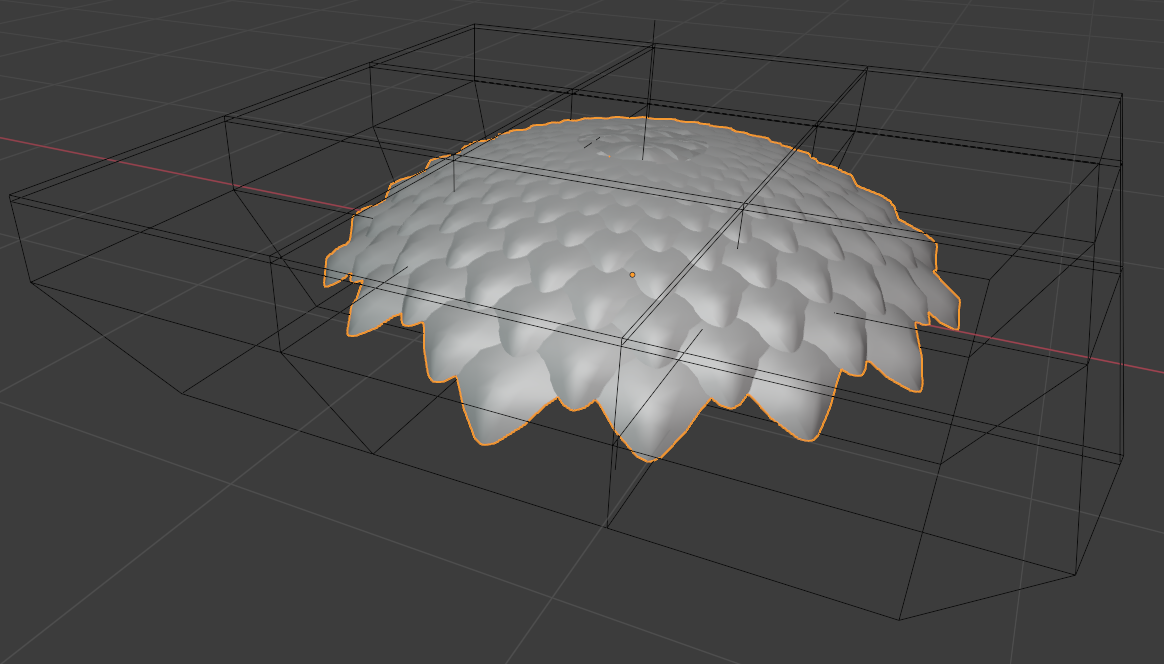
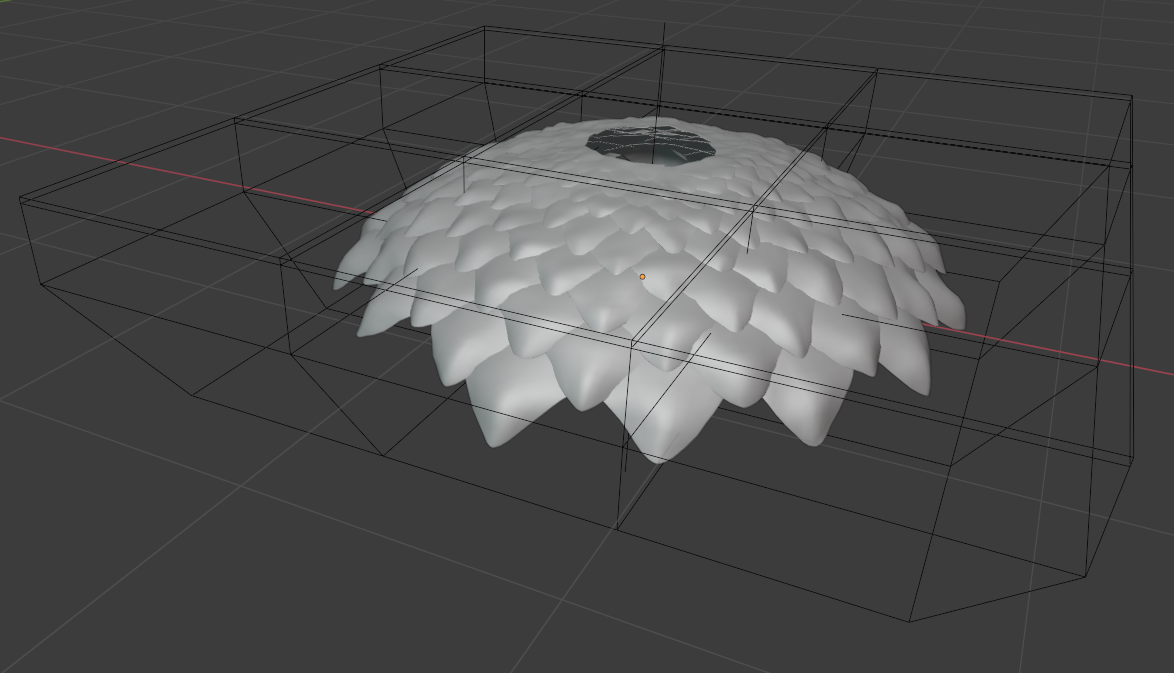
The mushrooms
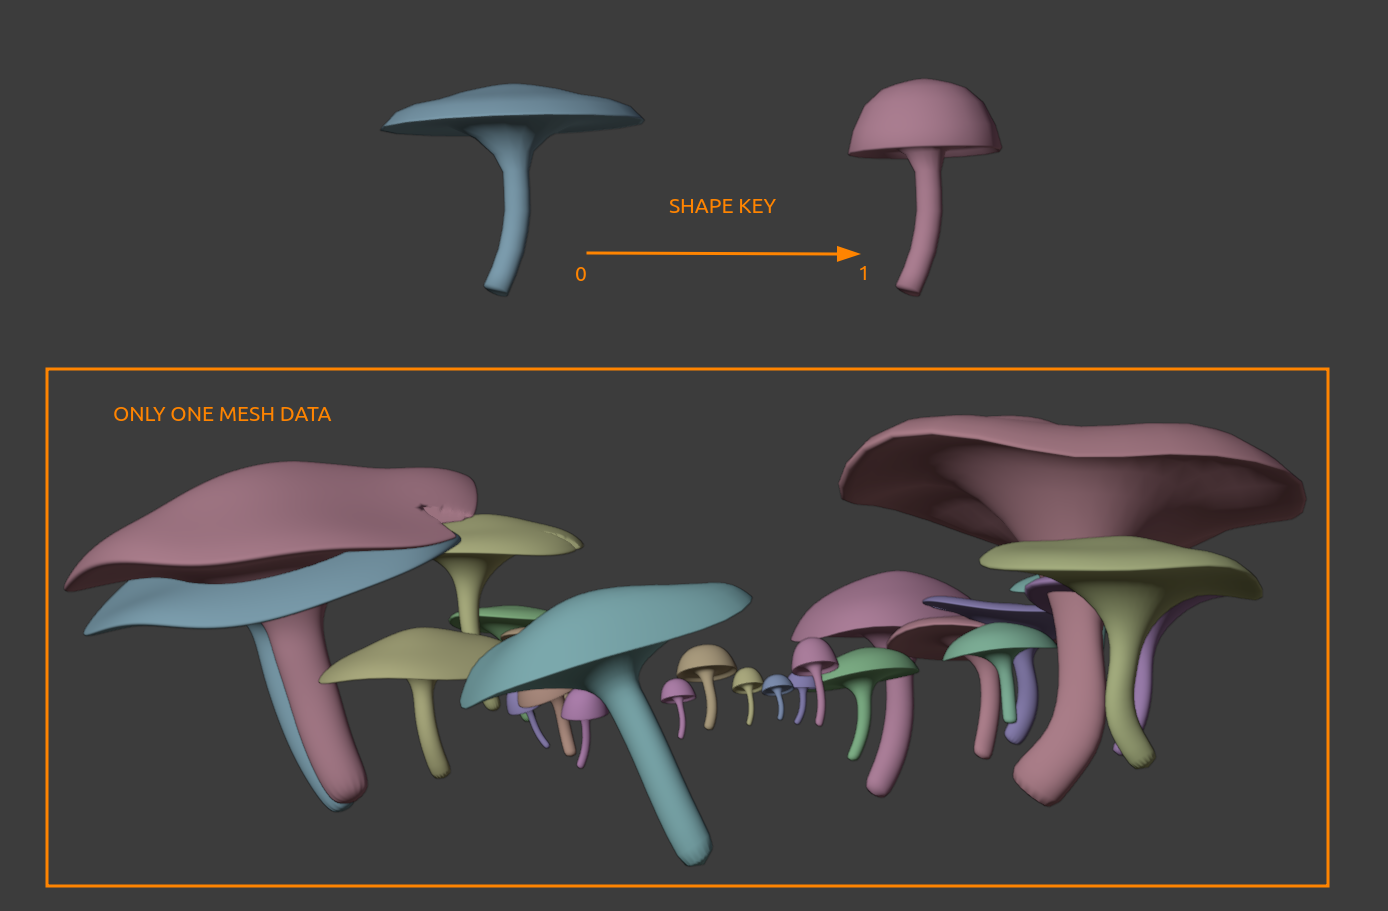
I decided to add the mushrooms at the very end of the project and didn’t want to spend too much time modelling them. This is why I used a keyframe to generate quick variations.
In order to further break up the repetition in the mushroom shapes, I used a displace modifier with large 3D noise mapped onto an object. This is the same method as for the shield scales.
The last step was to use very basic triangle shapes and cut them out of a few mushrooms with a Boolean modifier to give them a more organic feel.
Grooming

This mouse knight was my first project involving grooming and it took me some time to get used to Blender’s hair system and to find a workflow that suited me well. It was definitely the greatest challenge I faced when working on this piece.
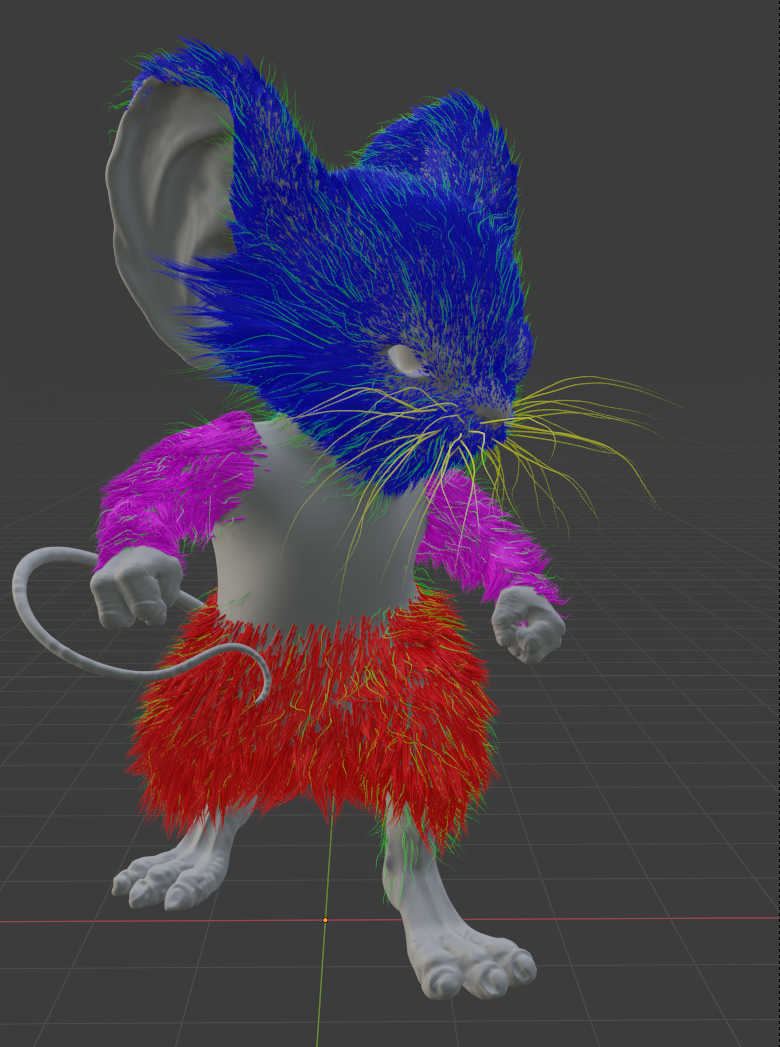
I used 5 different hair systems: the head, the arms, the legs, the white long hair all over the body, and the whiskers. Here they are in five different colors for readability’s sake:
At first I used vertex groups to drive the density, length and clumps of each system. If I had to do this again, I would make sure to have a higher vertex density on my emitter mesh to get finer control on those vertex groups.
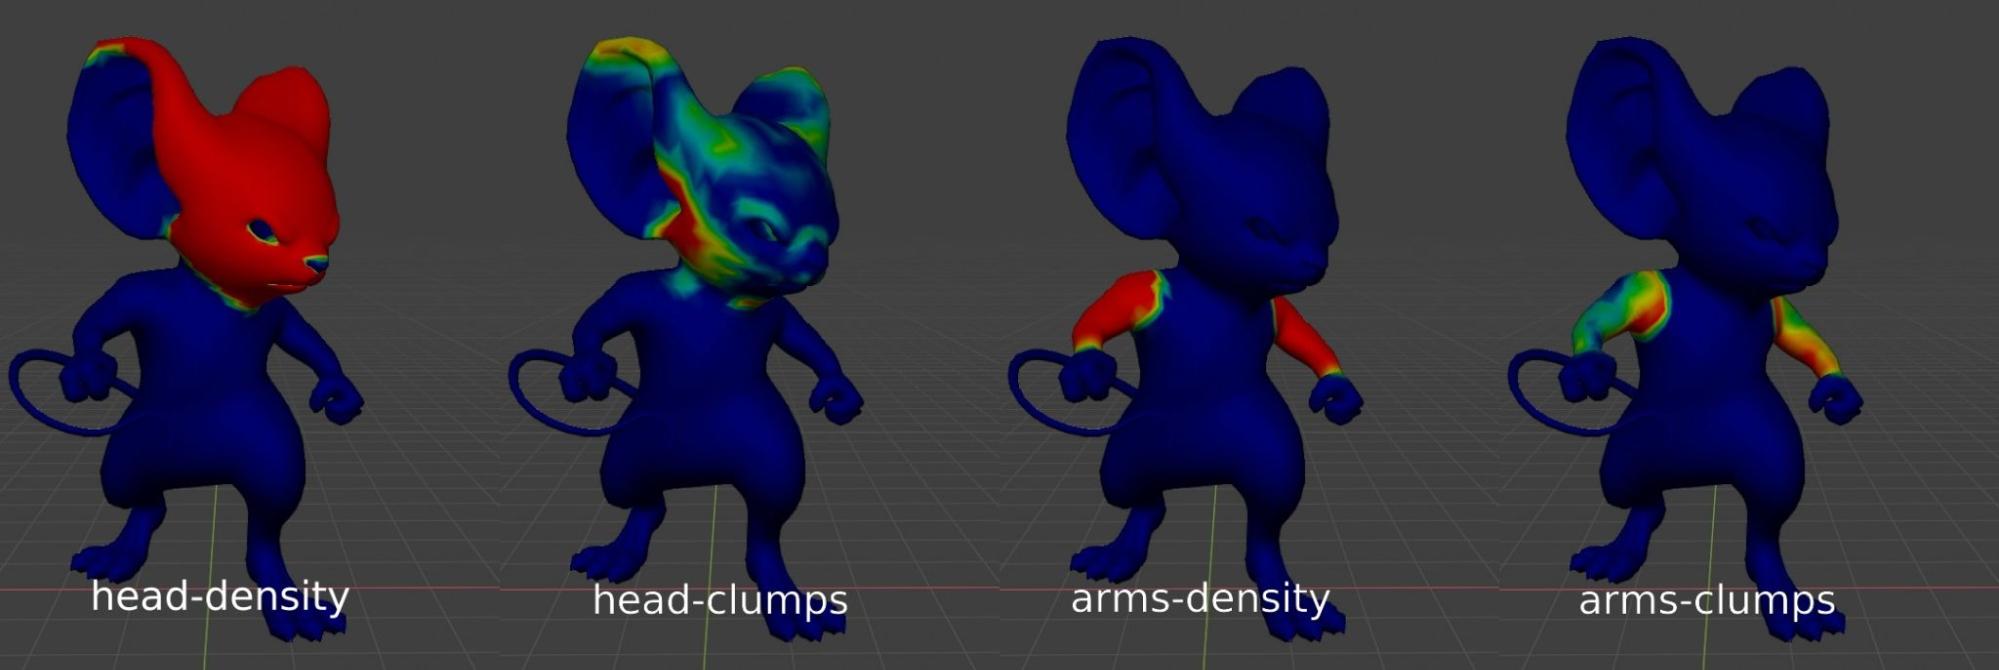
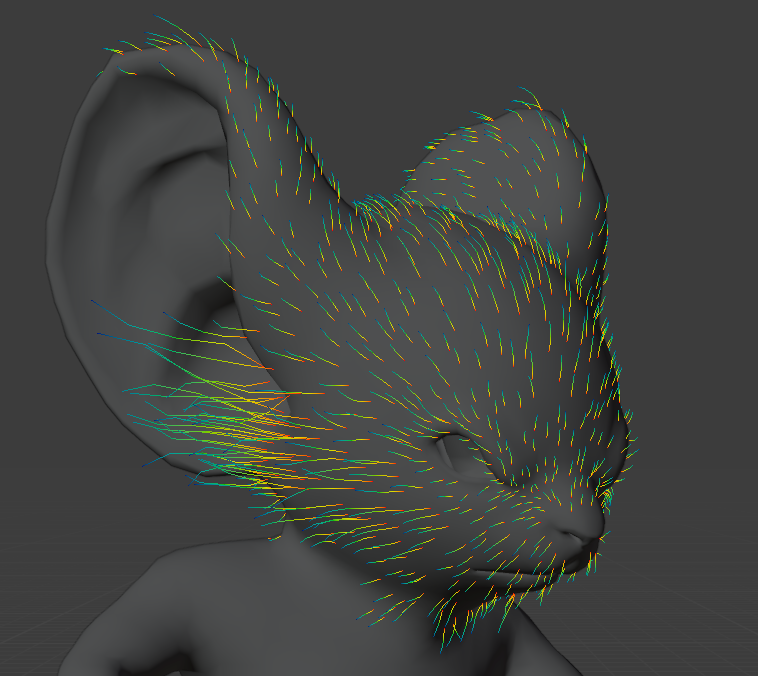
Then I spent a great deal of time grooming the hair, adjusting the curve and length of single particles, and adding some where needed. The most challenging part was the head, for sure. I struggled to find the right variations of length, color, and clumpiness to keep things appealing.
One of the most frustrating things with Blender’s hair system is that it only allows exactly one clump of hair per guide hair. This is why I was forced to add many guide hairs in some areas where I would have loved to groom only a few.
In the end, I had vertex color driving the colors of the hairs and vertex groups driving the clumps (with children set to “interpolated”) and hair density.
I learnt that you have to accept that things will be ugly at first, and that it gets better if you’re willing to spend time refining it through multiple iterations.
Shading
Shading-wise I tried to keep everything procedural. I find this method the most pleasing and efficient since:
- There are no resolution limits;
- It is a good way to avoid UV unwrapping;
- Everything can be kept within Blender;
- It is easy to adjust every aspect of the shader in later stages;
- It is always pleasing to do a bit of math.
A few tips
I won’t go into details of how I built all the different shaders, but here are a few tips I like to rely on when doing procedural shading.
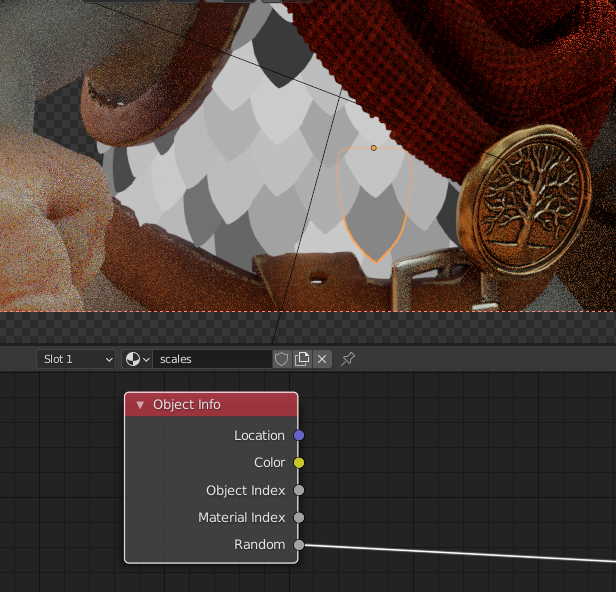
The “Object info” node lets you have a random value between 0 and 1 for every object of your scene. This is a great base to avoid repetition in your shading. If you would rather have random values per element in a single object, the “Geometry” node is the one you are looking for (“Random per island” output).
I also make heavy use of the “Pointiness” output of the “Geometry” node, which, when coupled with a “Map Range”, allows you to fine tune the contrast between the concave and convex parts of your mesh. This is perfect to bring the best out of your detailed sculpt. I heavily relied on it while shading the skin, the shield, and all the metal parts.

If I can avoid painting textures, I will always do so. This is why I painted all the masks I needed for the skin shader with vertex color. As long as fine details or sharp edges are not needed, it always does the trick.

The Scarf
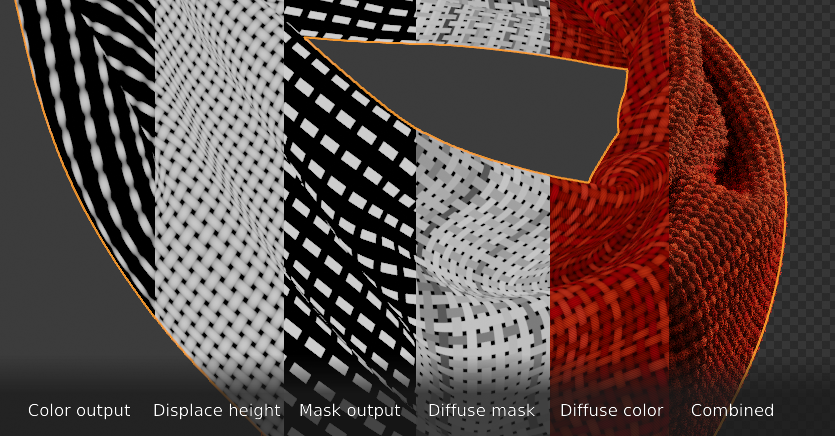
The shader I had the most fun with might be the scarf one. It ended up in complete defocus, but I do not regret the time I spent on it. My goal was to get a convincing procedural weaving shader. As I had unwrapped the UVs of the cloth cylinder before the simulation, I knew I could rely on it to get the threads properly placed on the mesh.
Here is a node group which is at the foundation of the shader:

This group has one input (the UV coordinates) and two outputs (“Color output” and “Mask output” in the image below). By offsetting and Rotating the UV maps and using this node group four times, you can get two sets of threads in each of the two perpendicular directions.
The displacement height is created by combining the four “Color” outputs with a “Maximum” math node. The diffuse mask is created in roughly the same way, but using the “mask” outputs.
If a few people are interested, I will be happy to share the complete shader.
To complete the look of the scarf, I finally added a short hair system on it.
Lighting
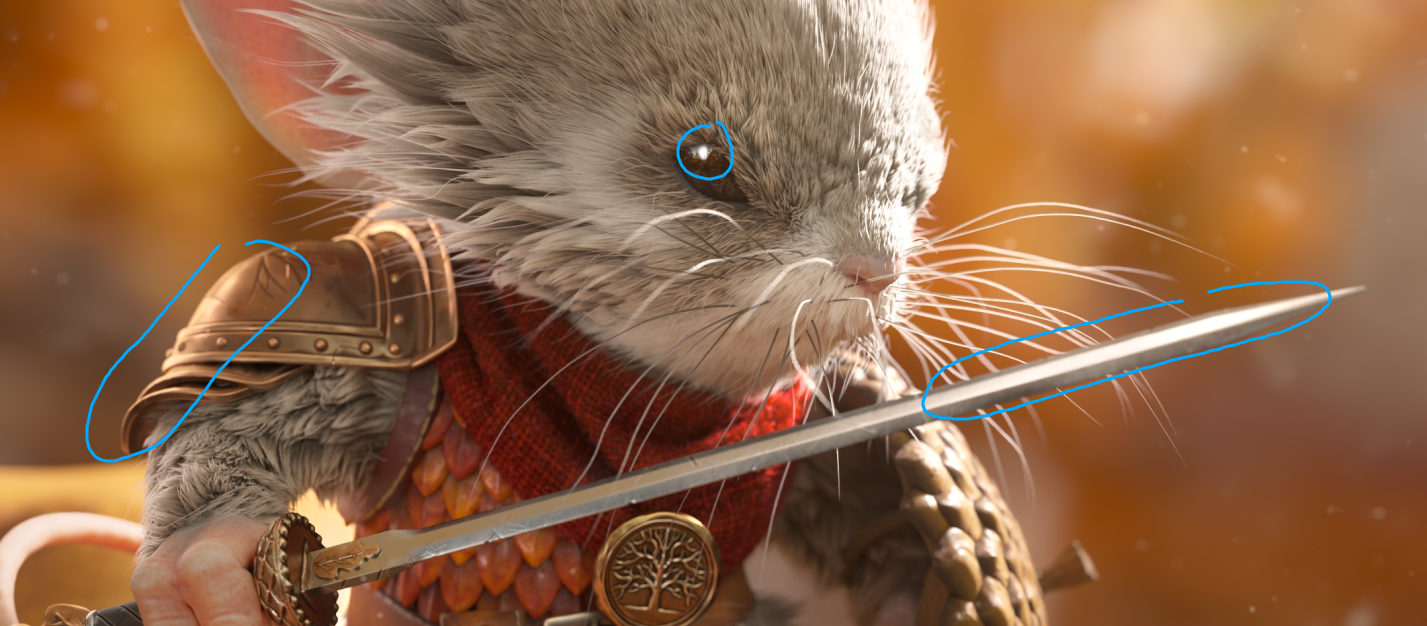
Rendering-wise, I wanted this piece to be realistic but physical accuracy was not my priority. Above all I wanted the image and the character to be appealing.
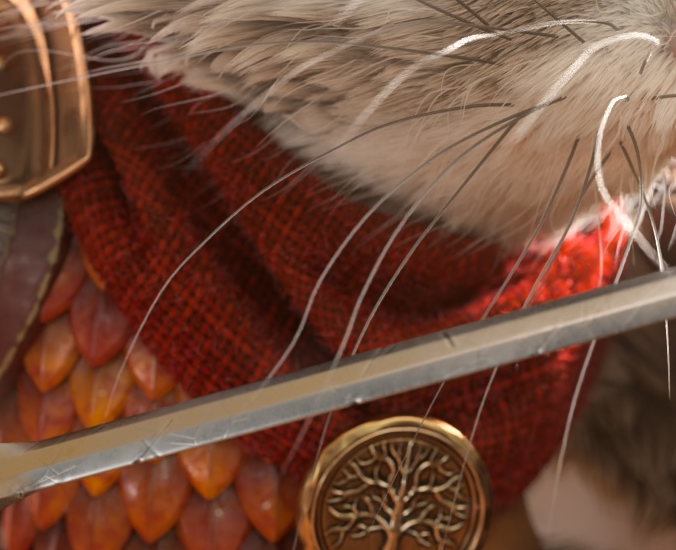
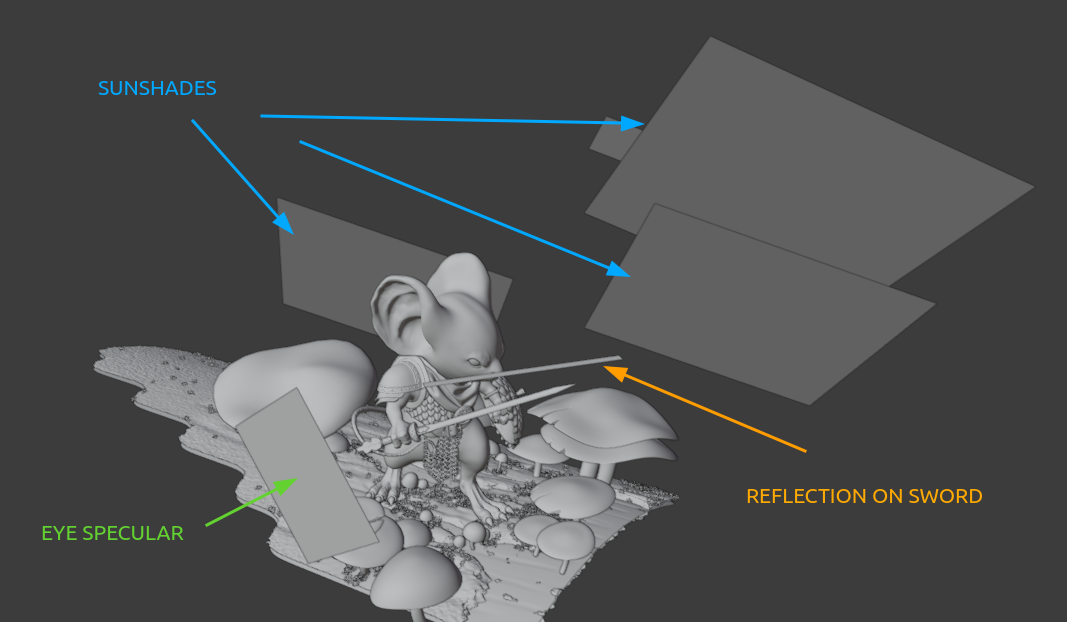
This is why a few highlights and reflections appear where they should not, as the mouse is mainly backlit. Some examples are the tip of the sword, to which I wanted the viewer's eye to be drawn, or the reflection on the shoulder pad that helps the silhouette’s readability. I also made sure to have a nice detailed reflection in the eye to bring life to the character.
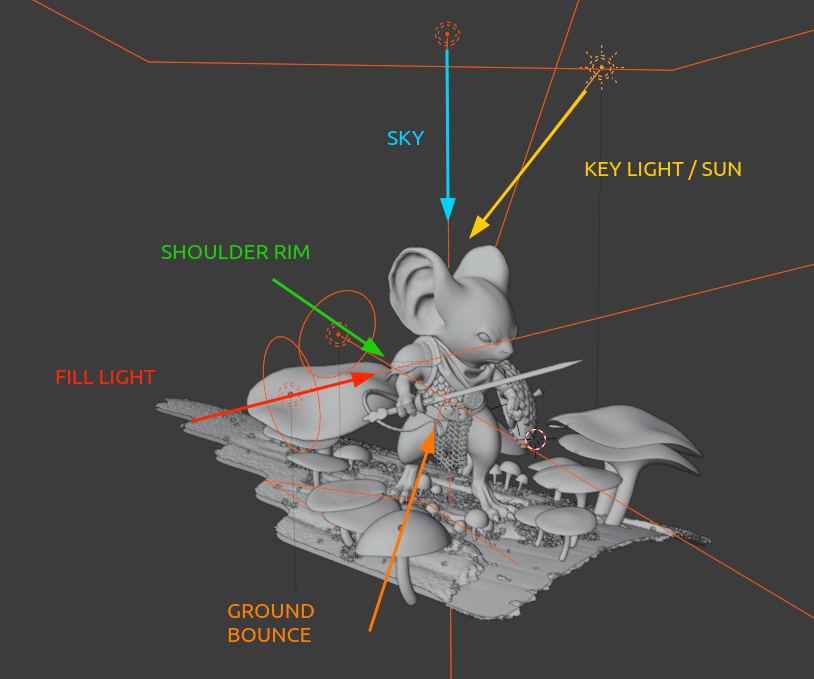
In total, the scene has light sources in addition to the environment HDRI, which is the forest environment texture shipped within Blender. I tweaked its hue and values a bit in Darktable and I got the autumnal tones I was looking for.
To help focus the attention on the main subject of the image, I added planes to prevent the mushrooms and the ground from shining too much in the sunlight.
Compositing
At this stage, the image was nearly in its final state. The only things that needed to be added were :
- The background;
- A few dust particles in the air;
- The proper forest reflection in the eye;
- A few color adjustments.
I chose to do the compositing in Nuke as I feel I am much more efficient than when using the Blender compositor.
Here is the final result:
Overall, I had a lot of fun working on this piece, especially with procedural shading. It was really exhilarating to see the image evolve, step-by-step, toward its final state.
I hope you enjoyed reading this “Behind the Scenes” and that you got some knowledge, motivation or inspiration out of it. If you would like to know more about any step of the process, please let me know, I will be happy to answer questions.
About the author
 Tanguy Weyland, 3D artist and a CG supervisor at Cube Creative
8 Comments
Very nice!
It so So beautiful! And it was very interesting to read the breakdown. You are Gooood. Thank you! Please do more amazing renders.
Amazing Work.
Wowwwwwwww,,,,, beautiful work man
Awesome image and great in-depth explanation.
I'm not at all proficient in procedural shading, but I think I might just puck up a few tutorials on that.
Thank you for sharing.
Wery cool!
Have you added particles to the scarf, or it's just displacement?
Thanks !
Yes on the final image I added hair particles on the scarf on top of the displacement.
The best mouse!
I love mouse guard setting and I would like to play a CRPG like pillars of eternity with mice!