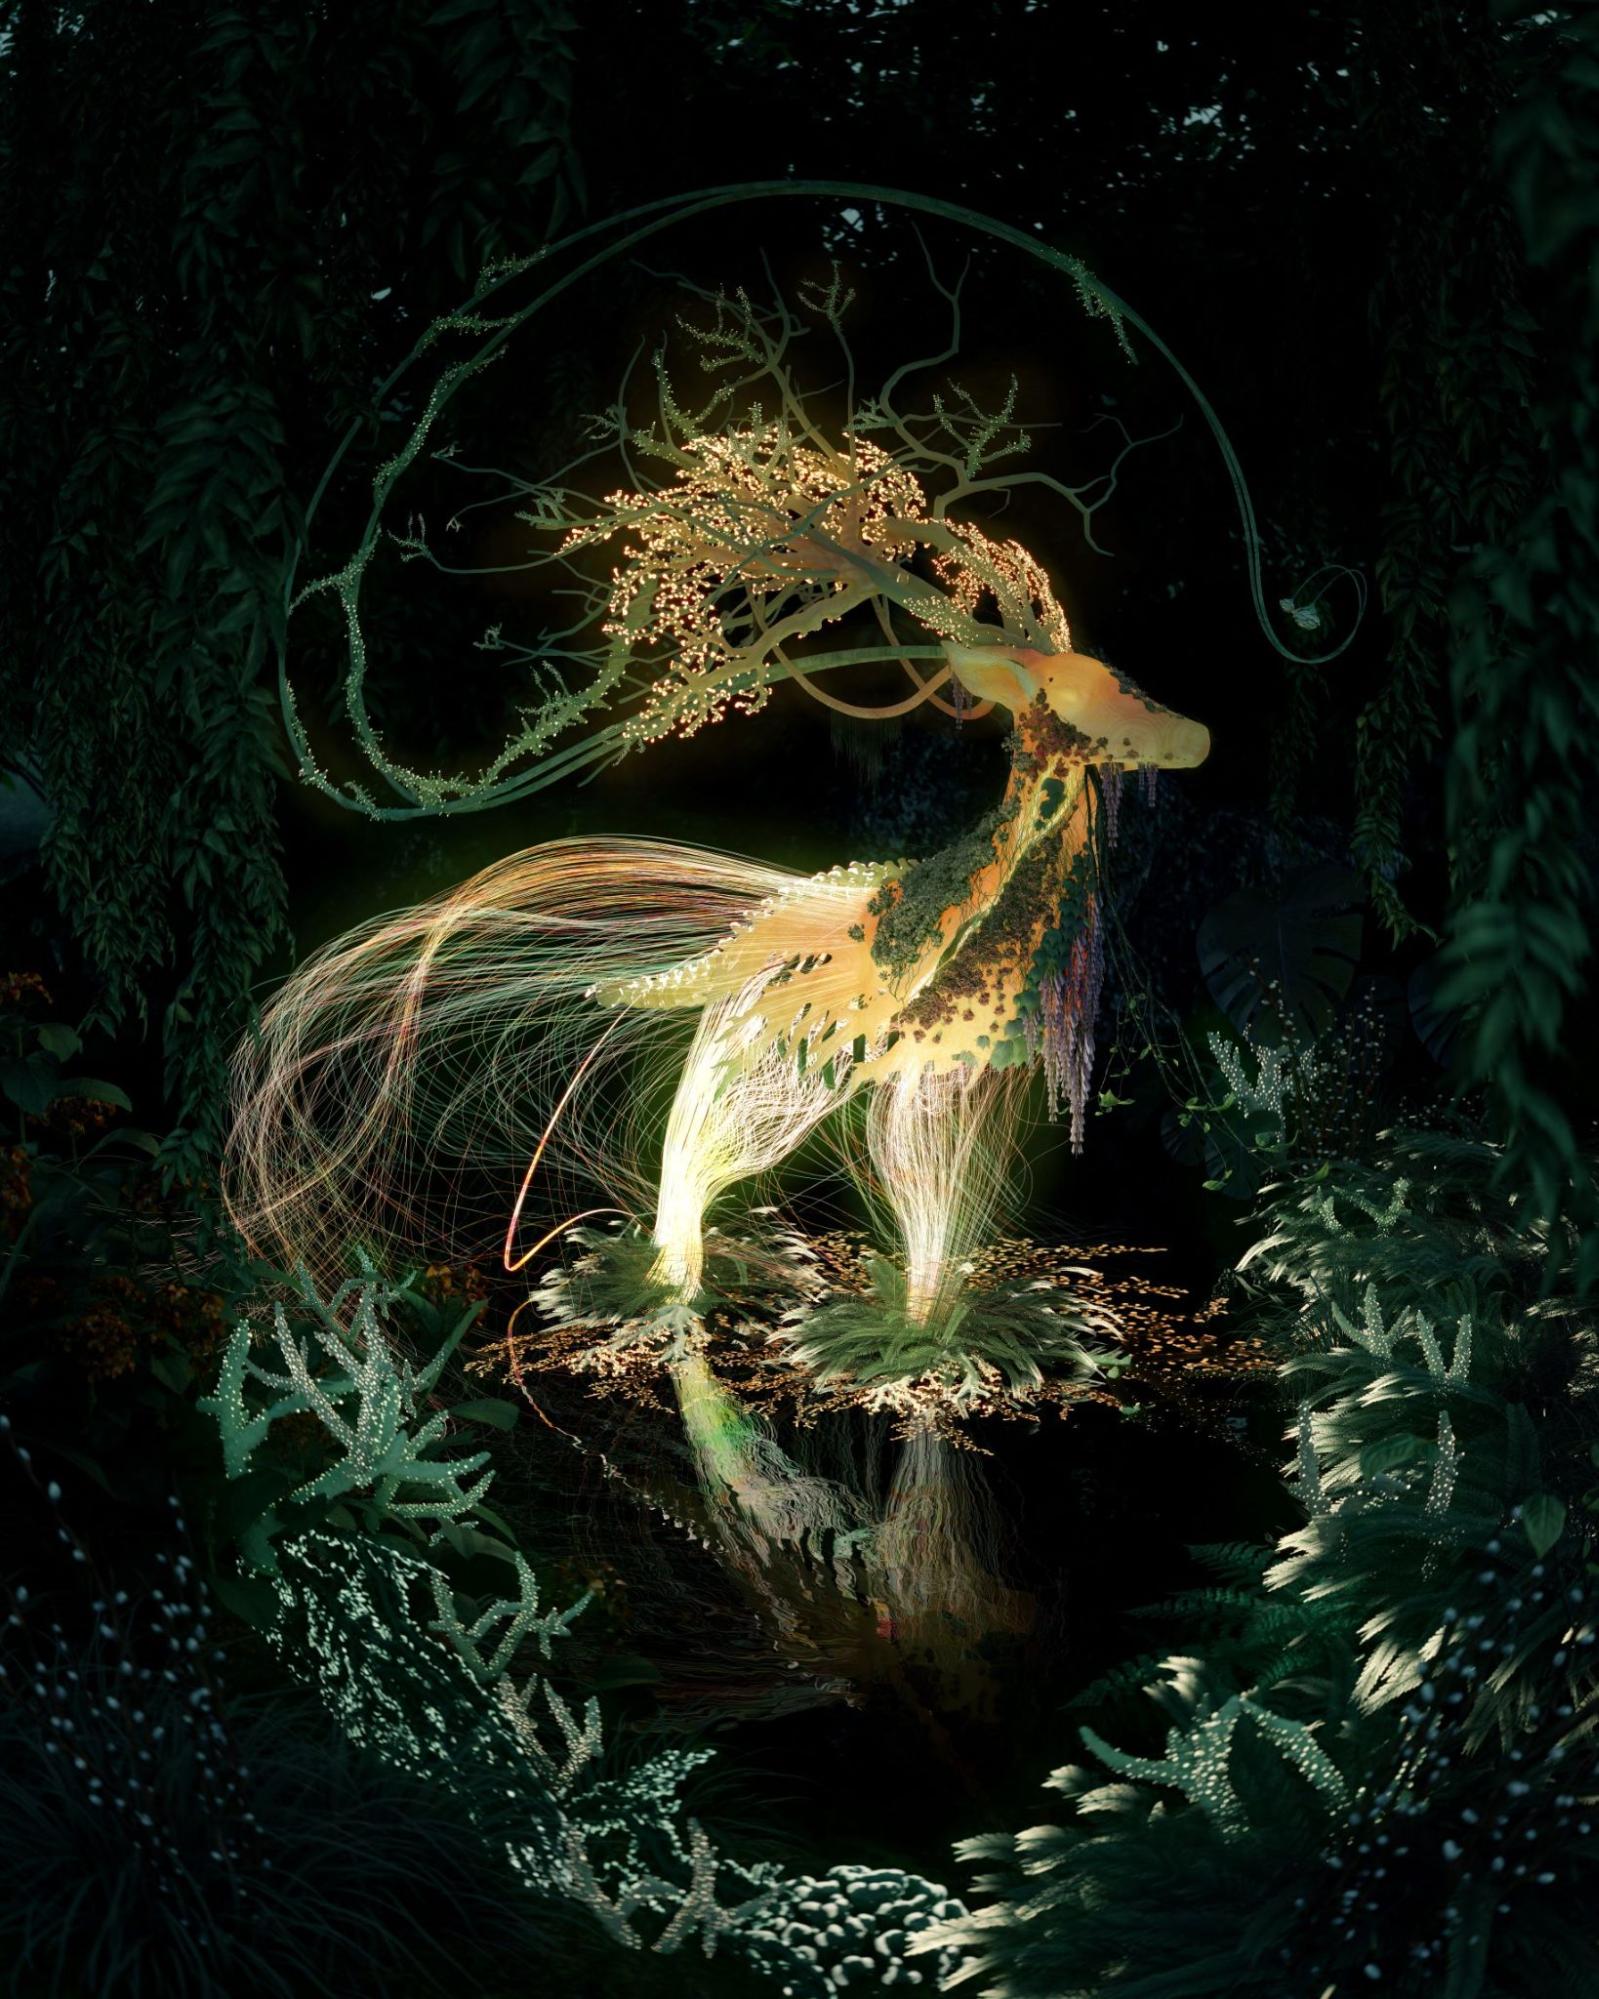
Behind the Scenes: Secret Deer
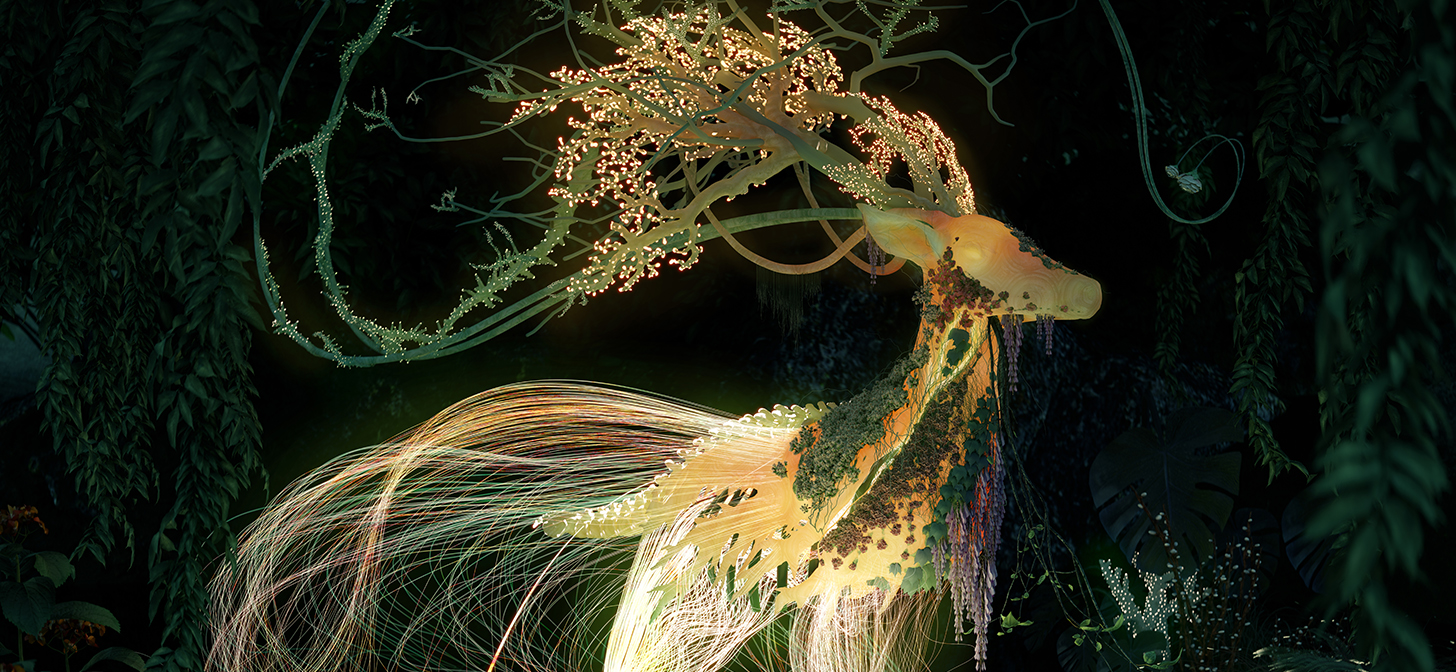
About Secret Deer
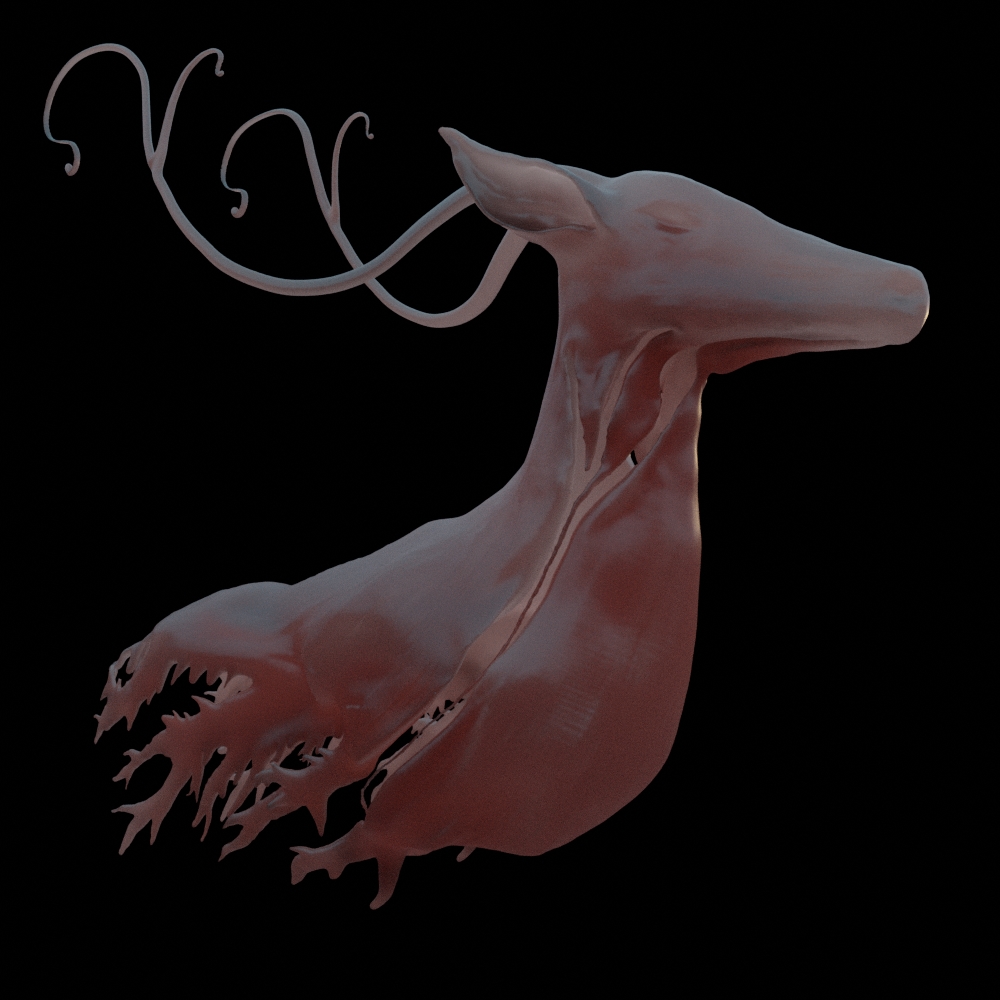
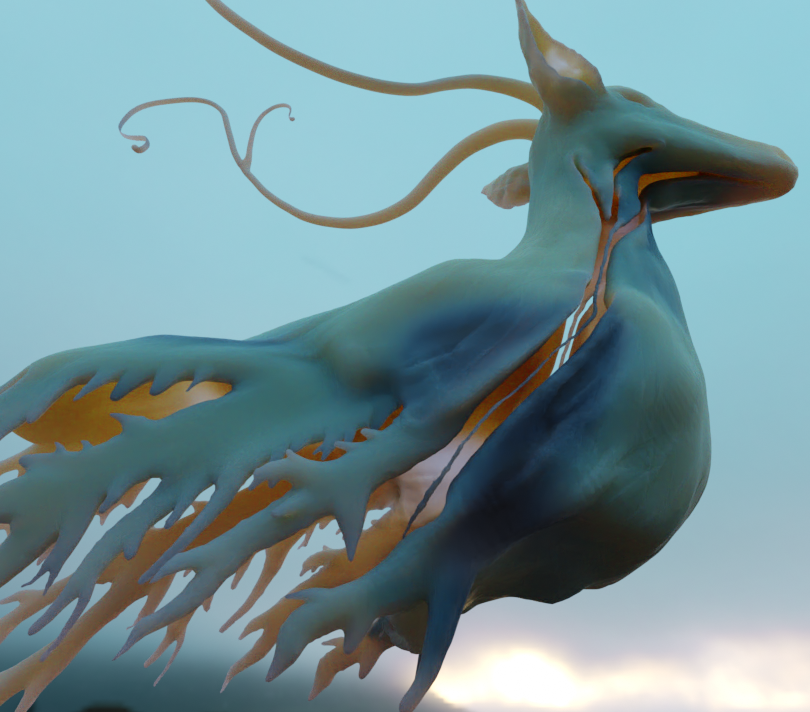
I wanted to make a creature that was physically and metaphorically merging with the environment, while also allowing the environment itself to inhabit its body, with flowers and corals growing on its skin and glowing energy flowing through.
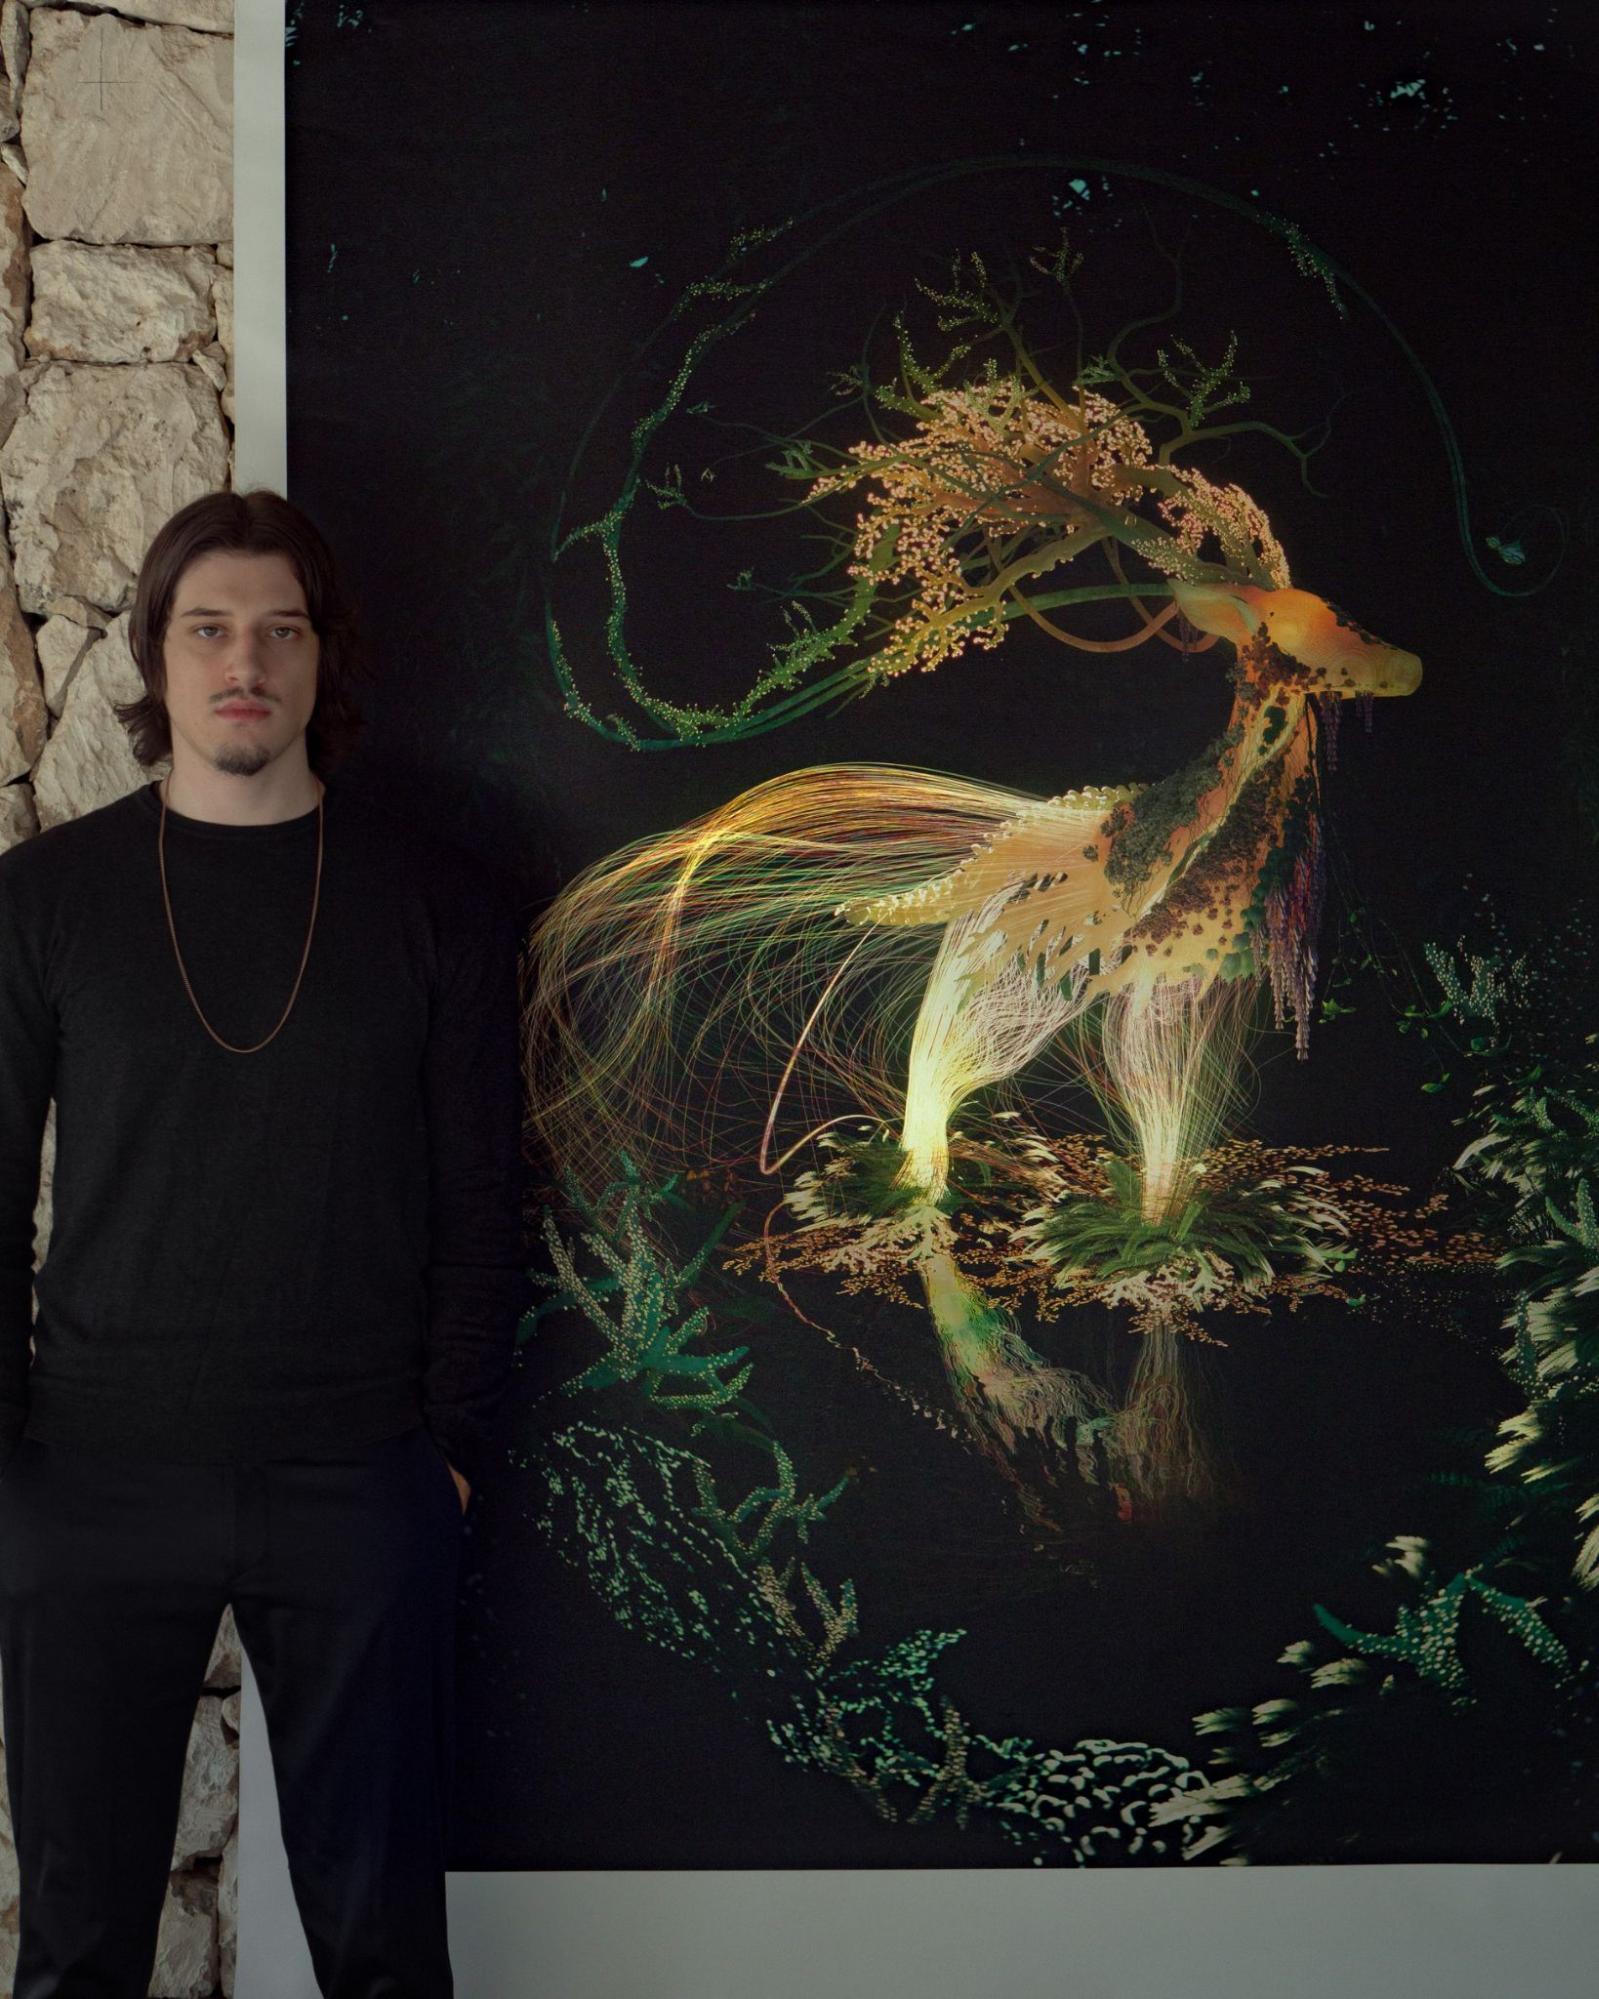
My first collector will also receive this 2m tall, 325 DPI high-quality canvas and the original 19.200 by 24.000 JPG render.
Intro
My name is Lorenzo and I’m a filmmaker and 3D artist based in Italy.
In my recent work, I like to portray bioluminescence through scenes that showcase secret gardens and glowing creatures.
I discovered photography when I was very young. Growing up, I started making videos, which also pushed me to compose my own music scores. From there I decided to learn 3D and bring all my passions together into making my own CGI short films.
Sculpting the body
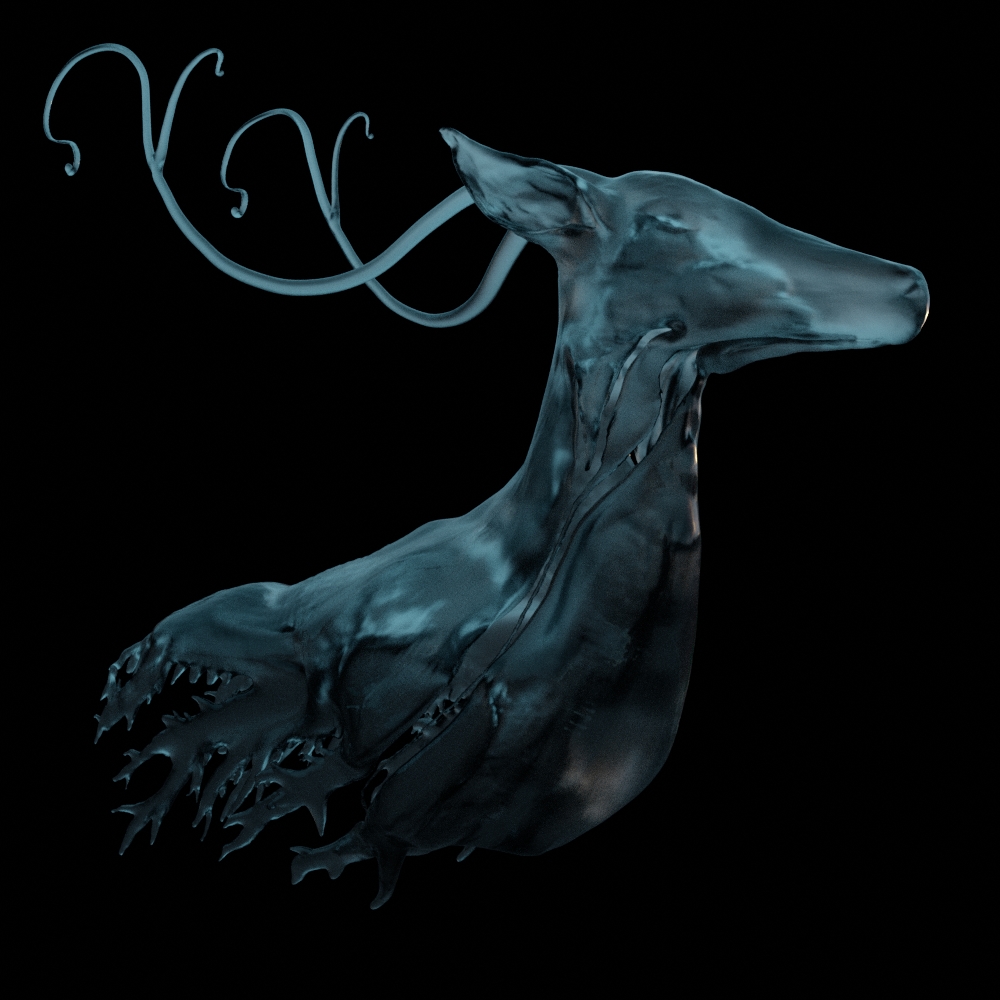
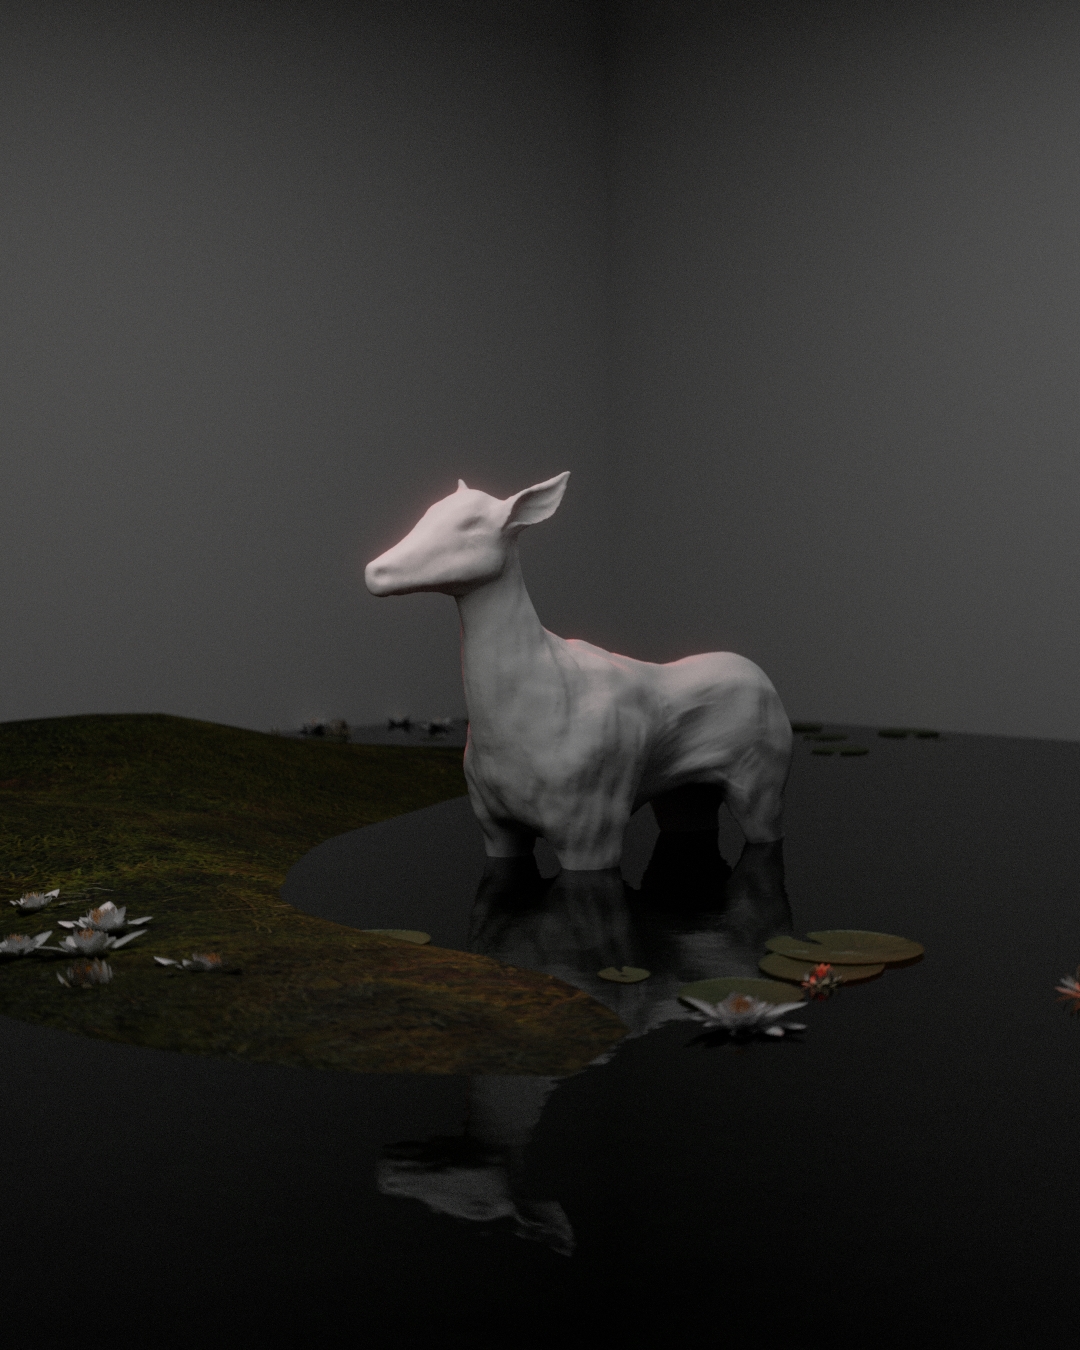
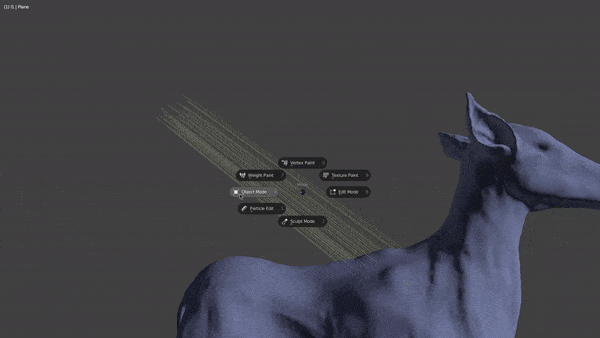
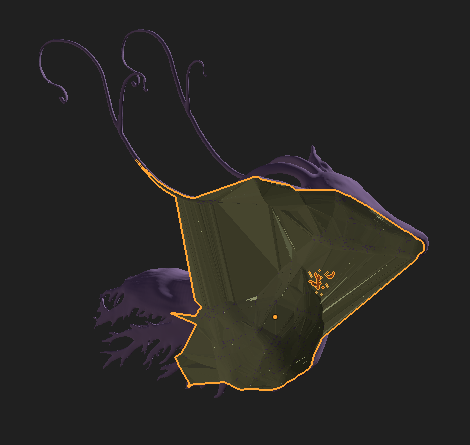
I started this project by sculpting a regular deer from a sphere. I used the high-poly sculpt for the whole project because I knew I wouldn’t need to animate the deer, and I wanted to maintain the liberty to sculpt new details even at the end of the project.
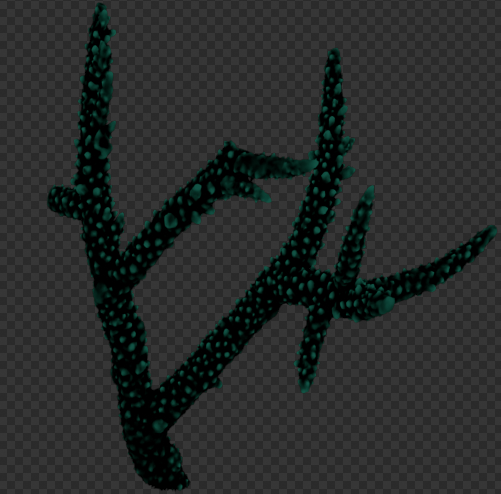
Some of the antlers were made by sculpting with the snake hook brush. The bigger ones are simple bezier curves, and all the little ones are just tree branches with the same SSS shader I used for the whole body.

I experimented with many procedural shaders to get the deer to light up correctly; here are some of my attempts.
I ended up choosing the subsurface scattering shader because it gave the best results with the color palette I was after—even though it’s by far the slowest to render.
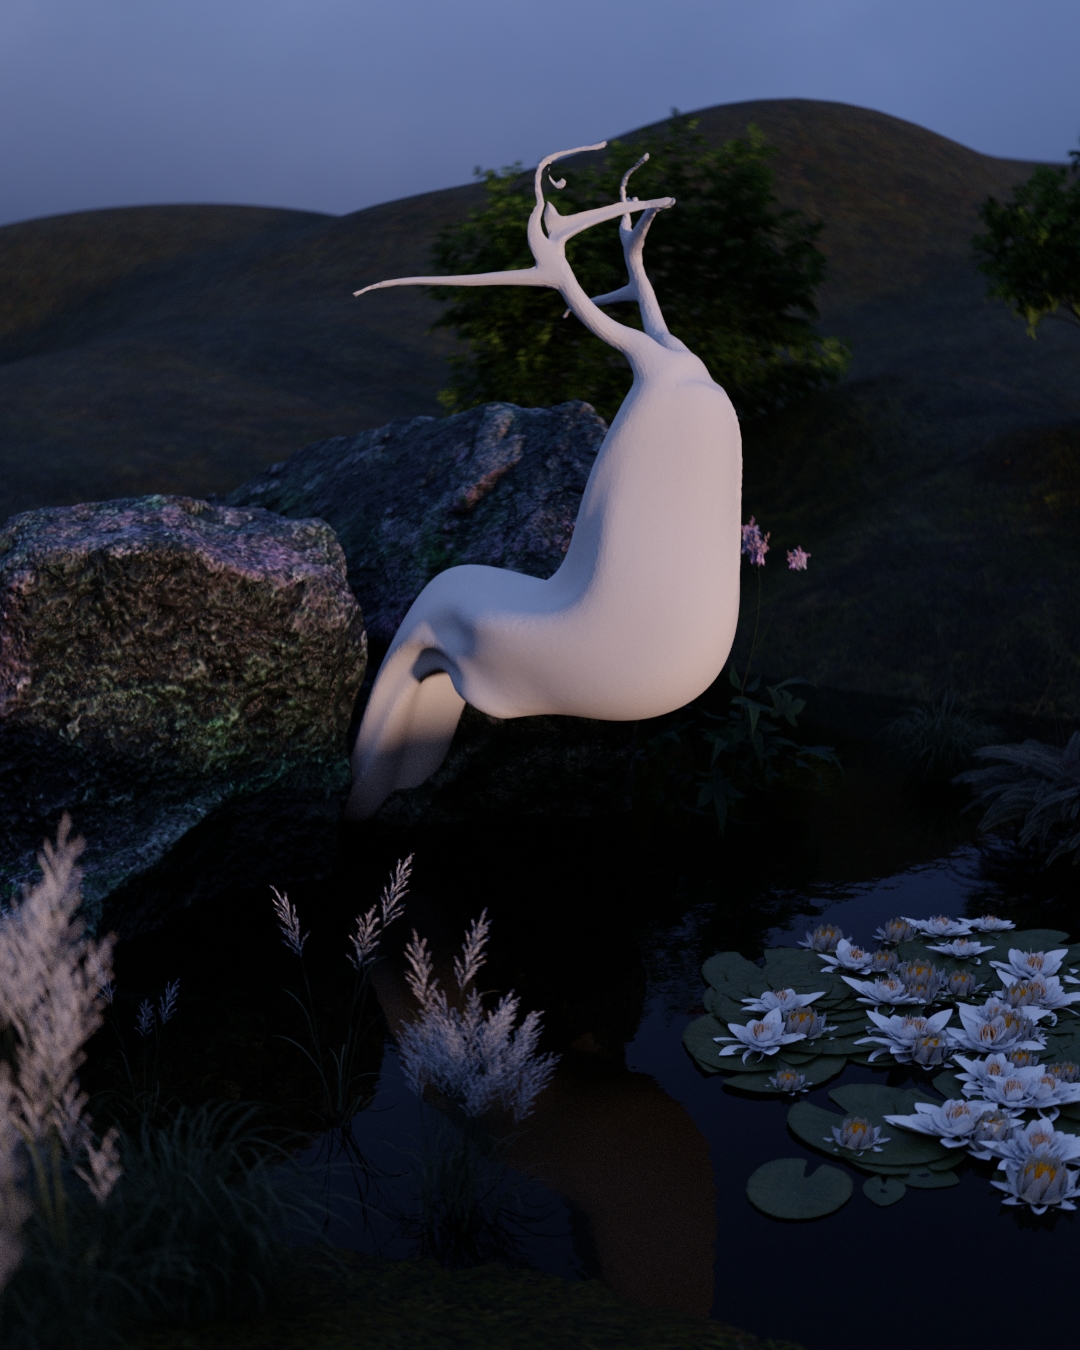
But to make it react properly to the environment, I had to sculpt its internal cavity and leave the deer hollow.
I did this not only for the light interaction but also because I was planning on extending some of the glowing hair particles from inside the deer, like on the neck.
Lighting and composition
I knew I wanted a very dark scene, so I opted for a very toned-down blue HDRi. Then I proceeded to light the scene with the emissive surfaces of the main subject and the surrounding bioluminescence.
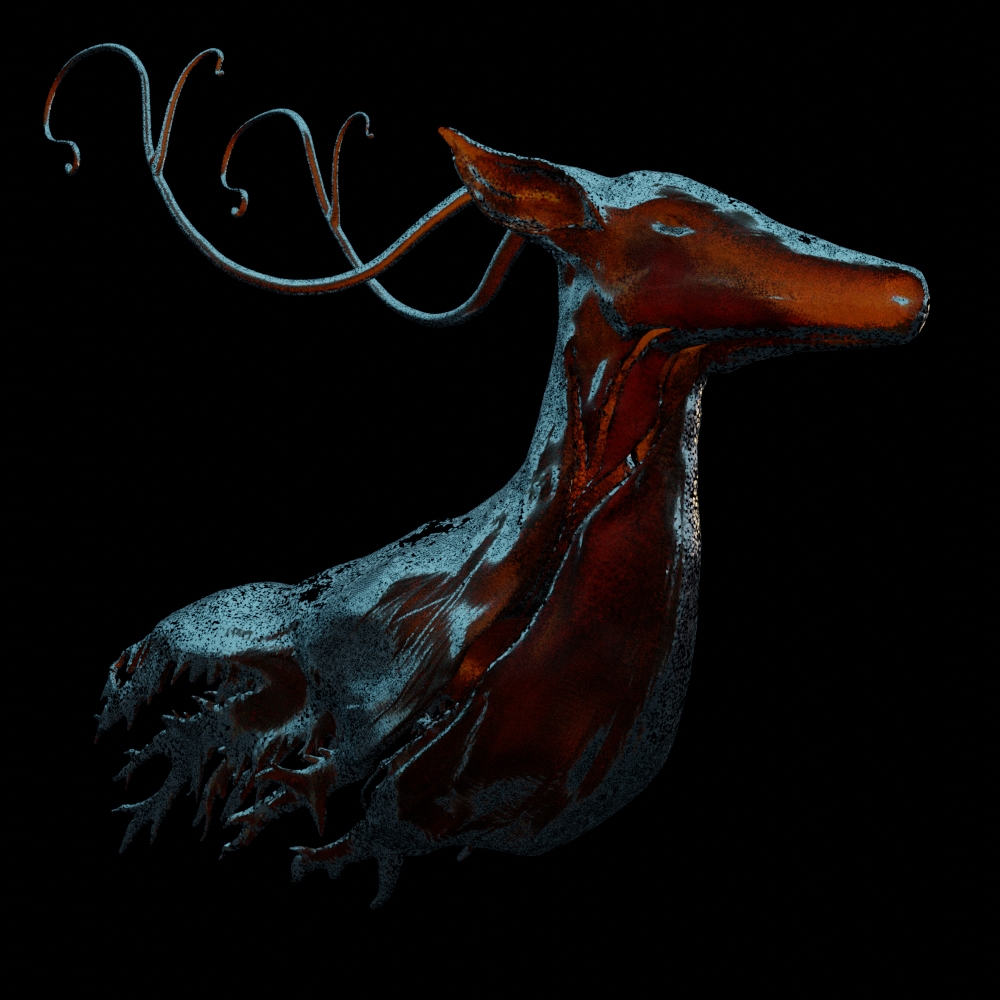
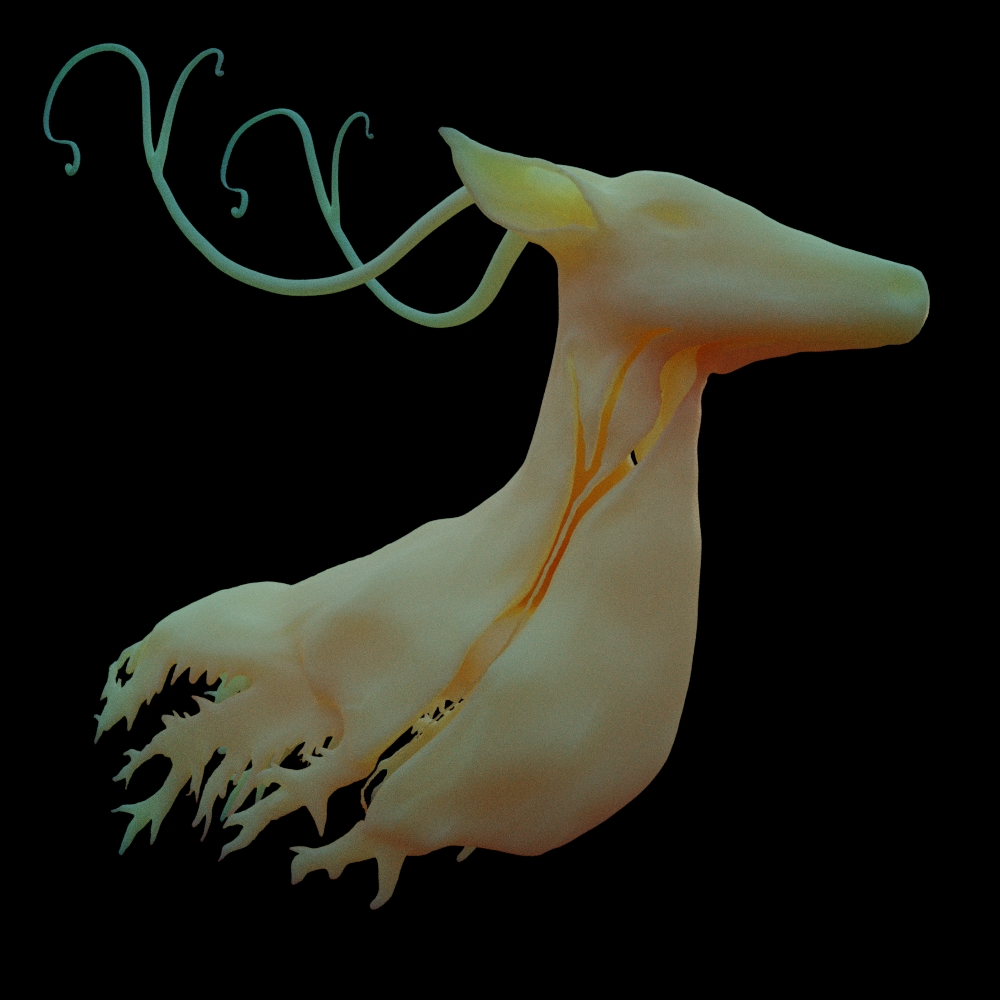
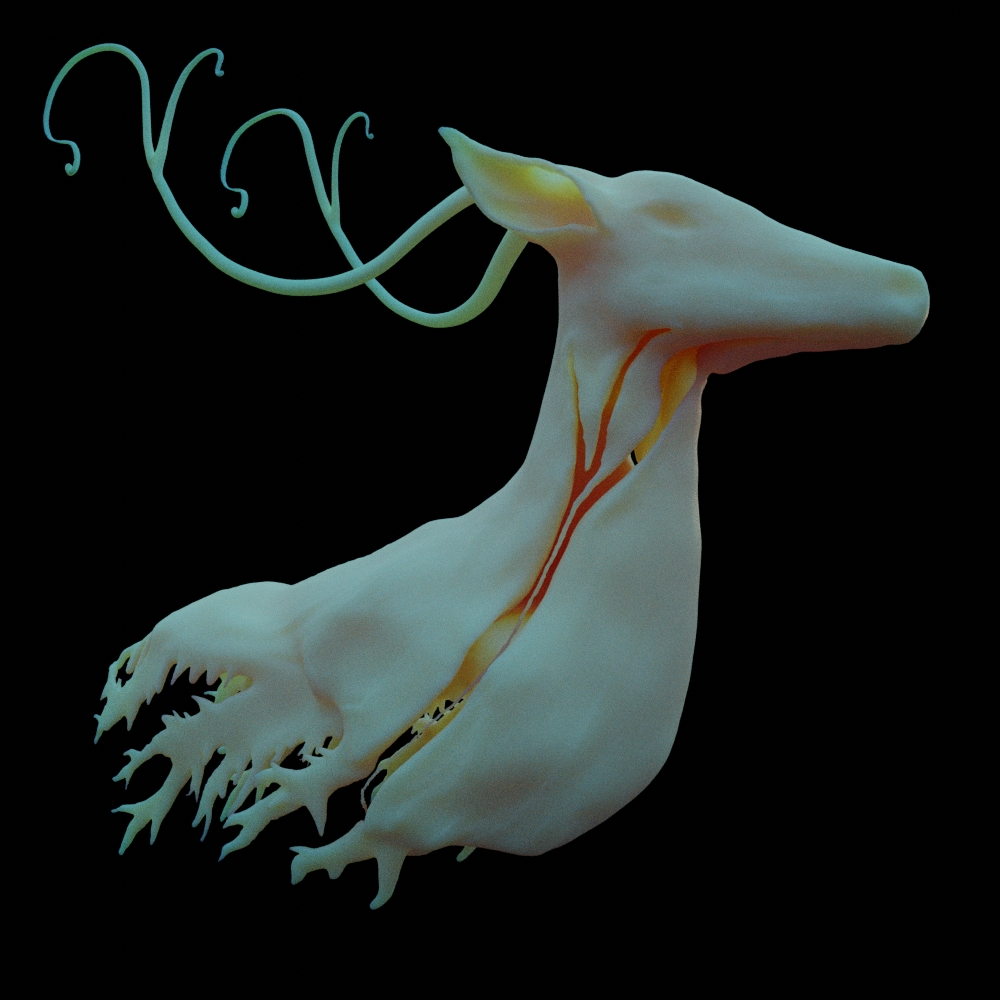
Here are some early drafts meant to experiment with the overall mood and the lighting.
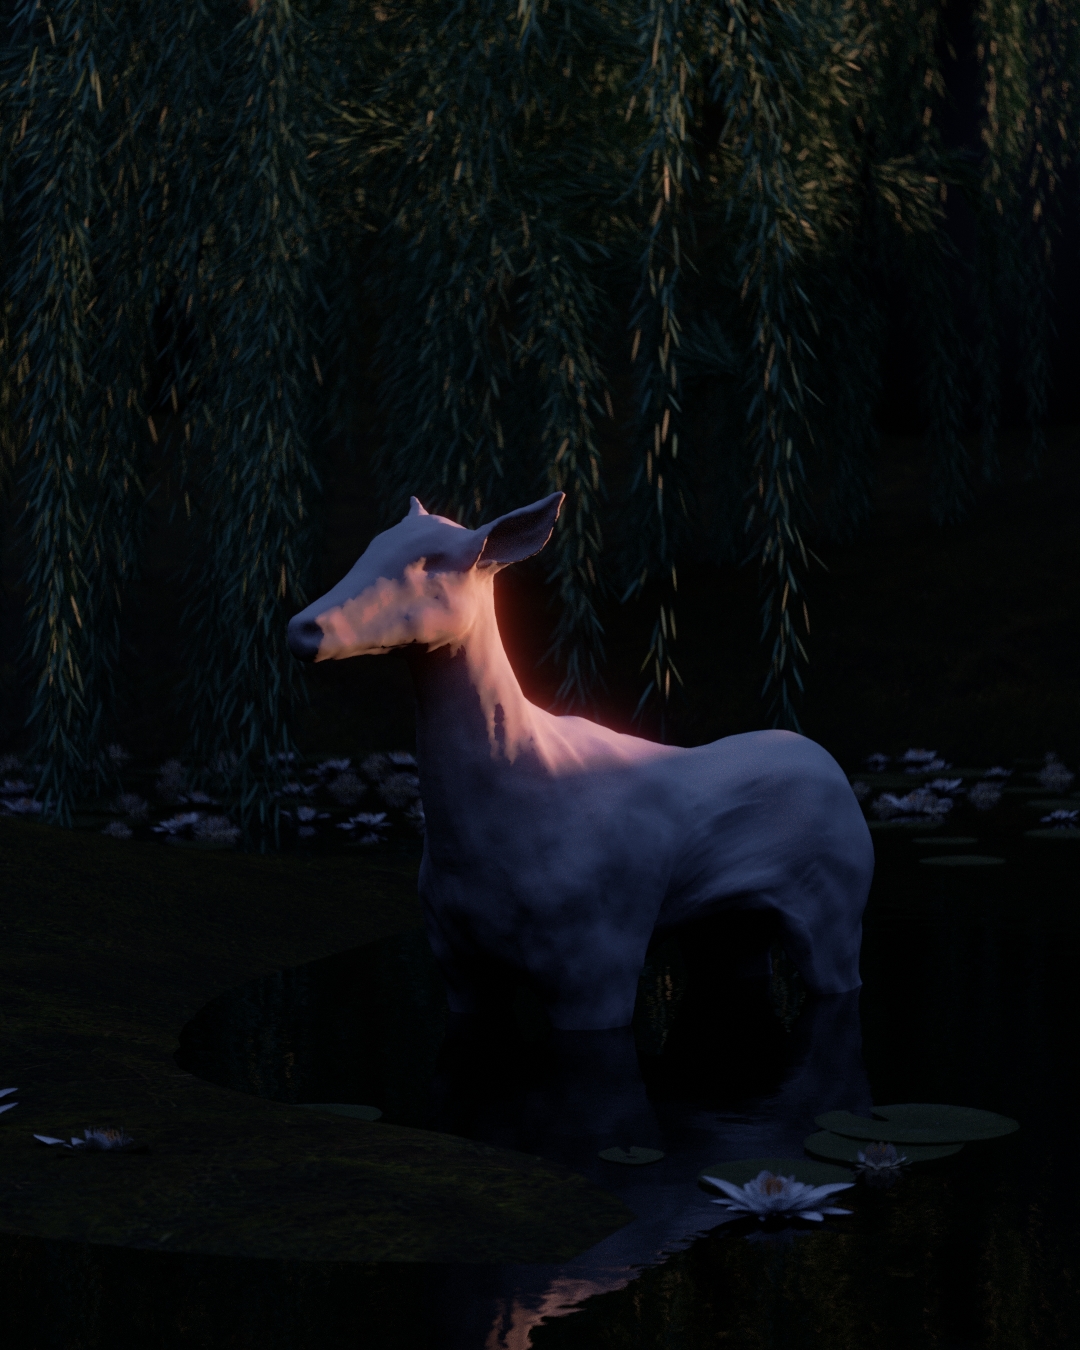
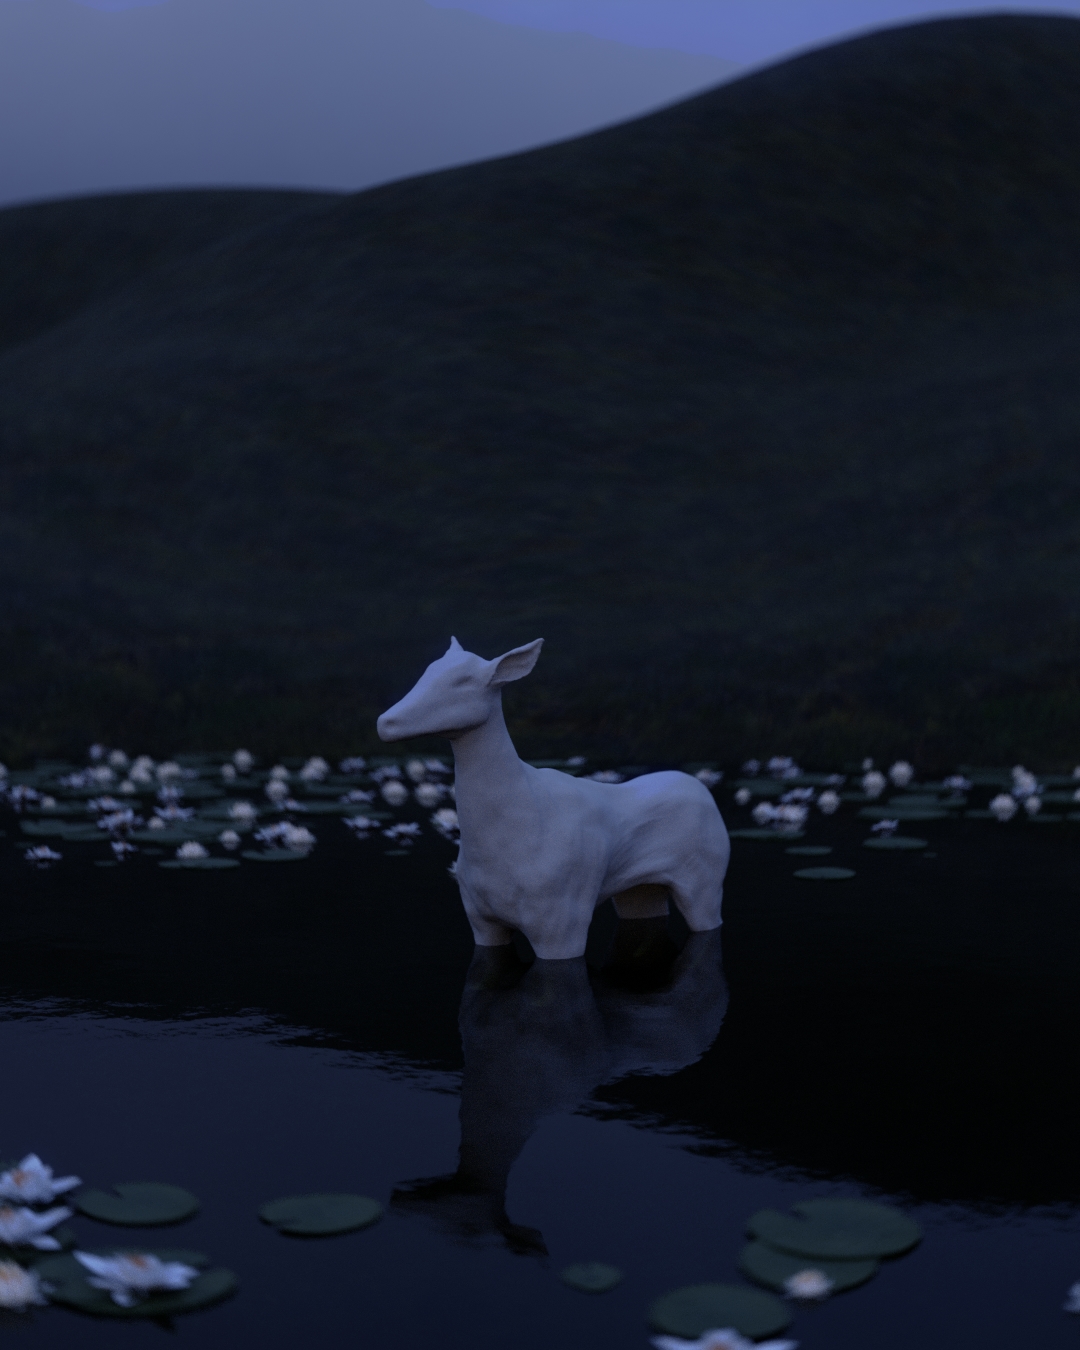

Once I figured out all the major elements, all I needed to do was reinforce the composition with more detailed assets.

At this stage, I decided to carefully place each bioluminescent plant to form the shape of an “8” while also forming some additional subliminal shapes.
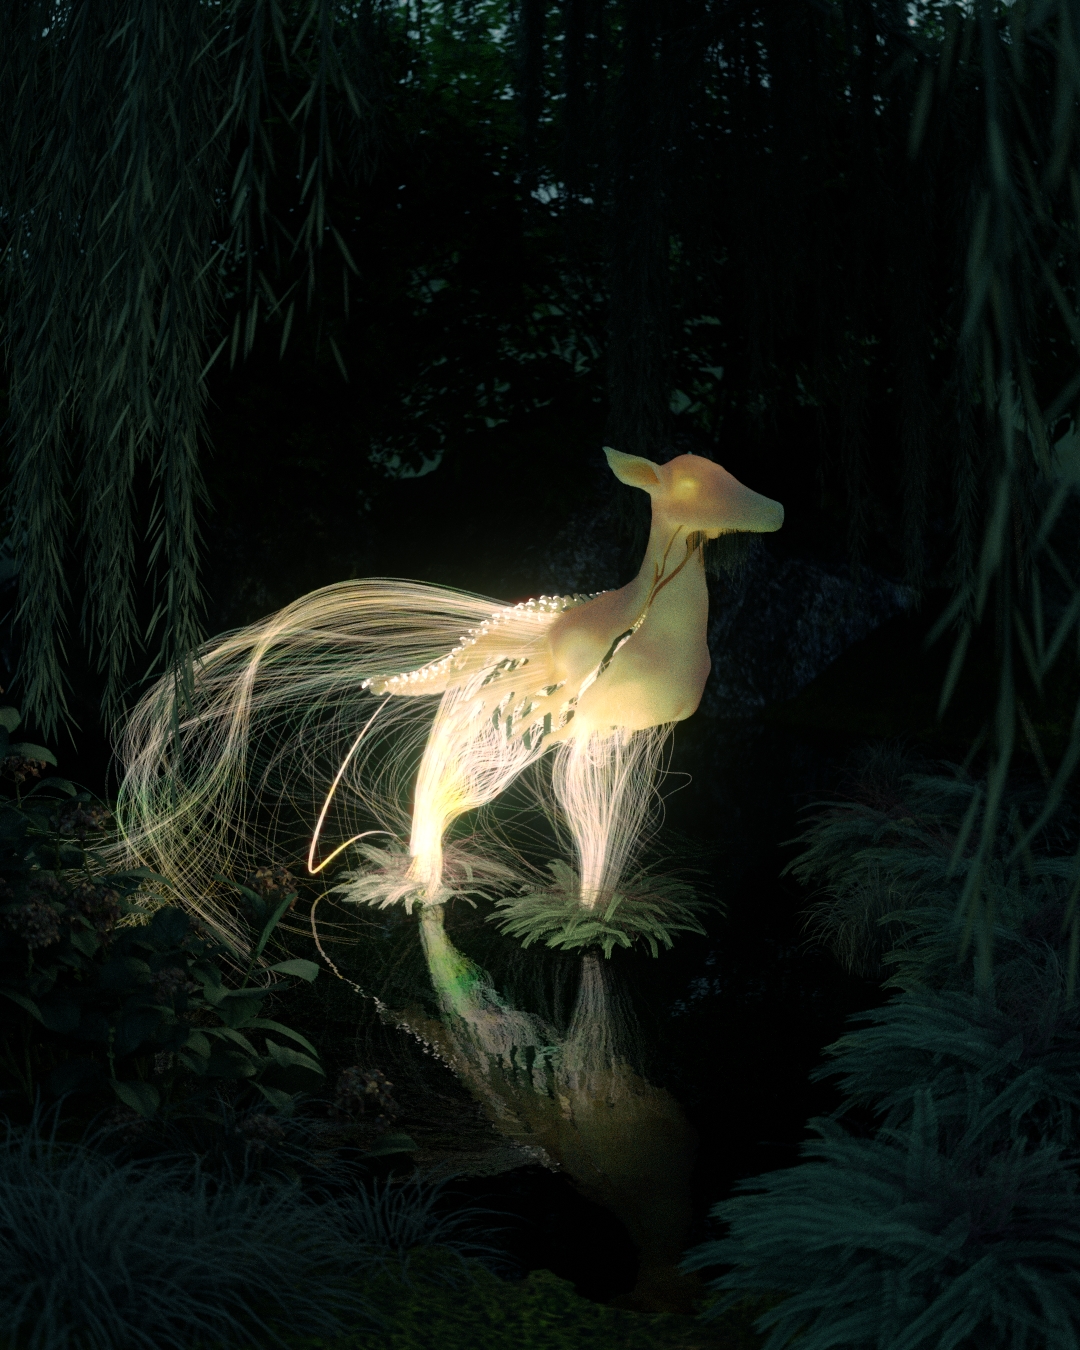
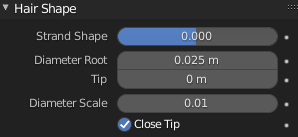
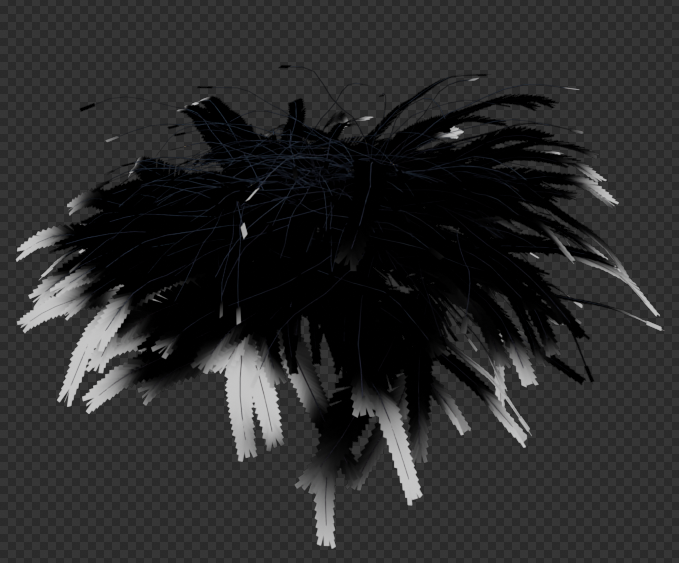
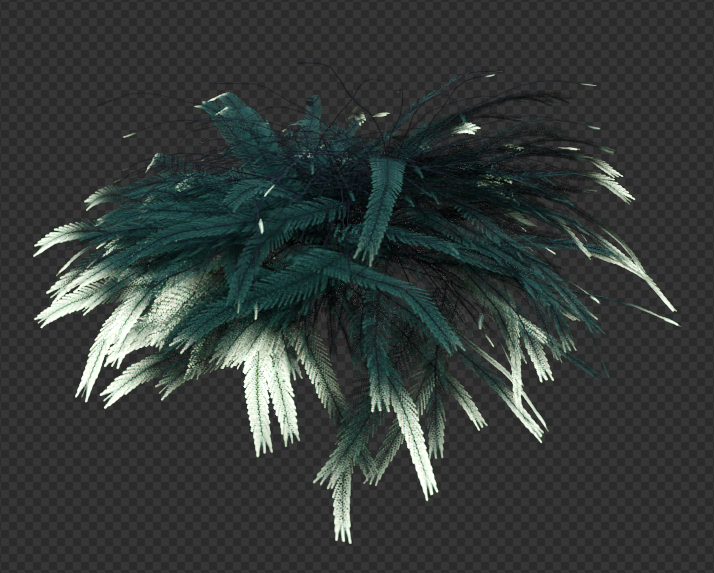
Hair particles
I made a hair particle system with a few hundred fine strands. Then, I simply assigned an emissive shader to them.
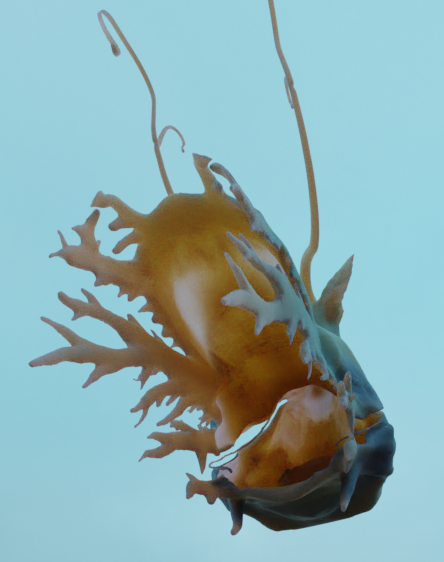
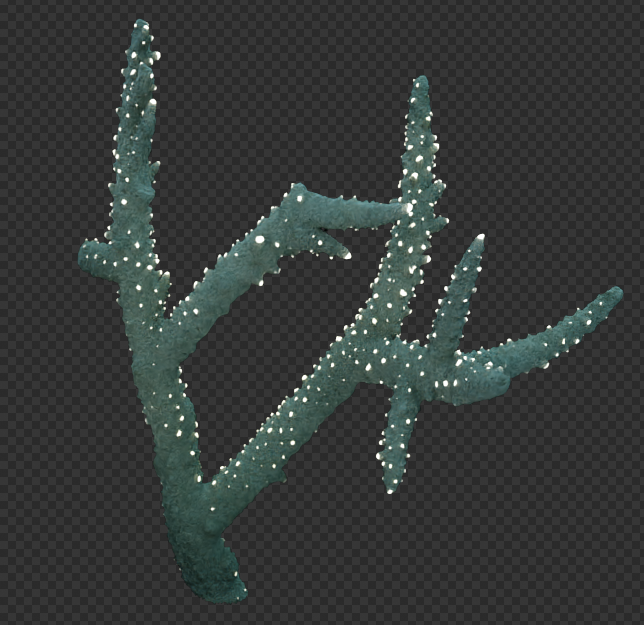
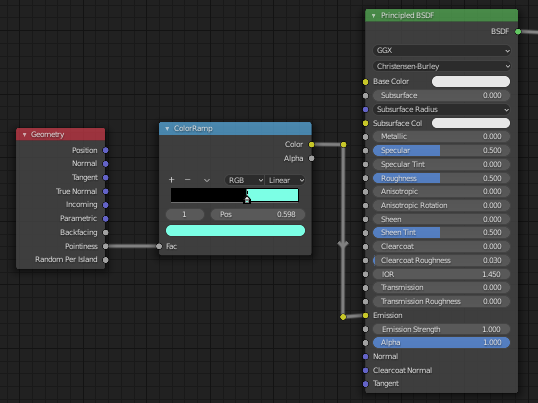
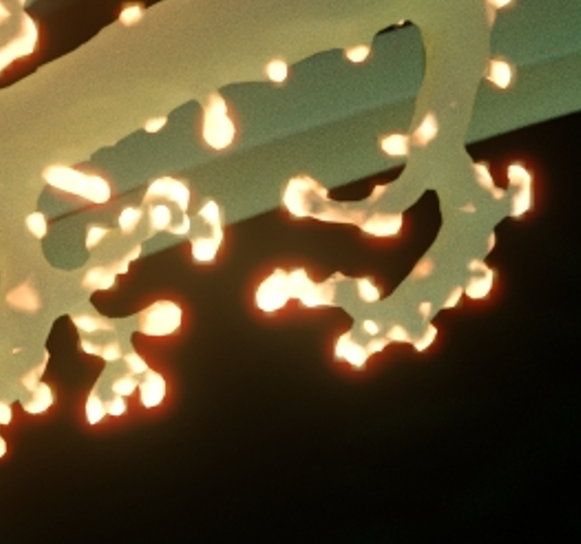
Glowing corals
One of the ways I create bioluminescence is by using the pointiness node in the shader editor. With a simple color ramp, it is possible to tweak the black and white mask, tint it with a specific color and then feed it into the emission socket.
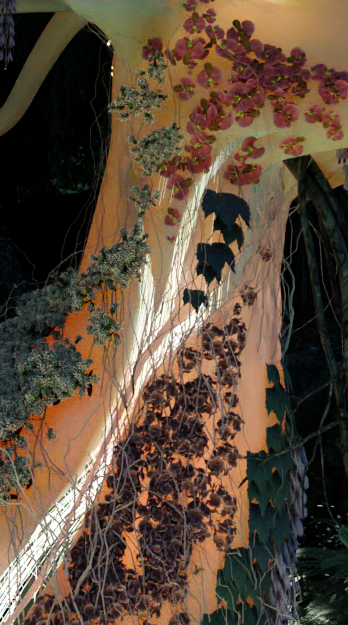
Glowing plants
A great free resource to make plants is ngplant. The quality of the textures is very low but it allows quick iterations of various natural shapes. Everything is already UV unwrapped so it’s easy to apply custom higher-quality materials afterward.
To create the bioluminescence, I either texture paint a black and white mask where I want the shader to be emissive, or I just quickly vertex paint if the model has enough geometry.
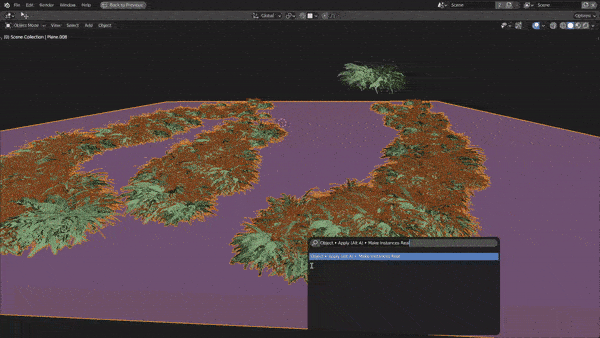
Plants distribution
To distribute the plants I used a simple particle system. But instead of using weight paint, which relies on how many faces there are, I manually painted the hair in “Particle Edit” mode. It’s the closest thing to painting with an actual brush.

What I generally like to do next is convert the particles into instanced individual objects. Now each plant can be adjusted separately to avoid obvious intersections and refine the overall composition.
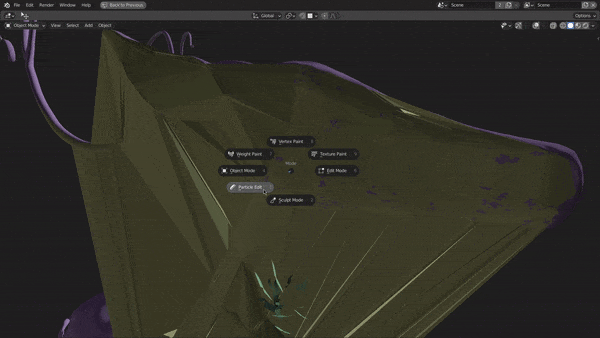
Flowers on the deer
Because I wanted full procedural control on the distribution of the flowers, I opted again for manually painting the hair particles on the deer. The only problem was that, being a very high poly sculpt, the hair brush was glitching and struggling a lot.
As a solution, I simply shrinkwrapped a subdivided plane over the deer, and then on top of that I painted the particle hairs for the flowers.

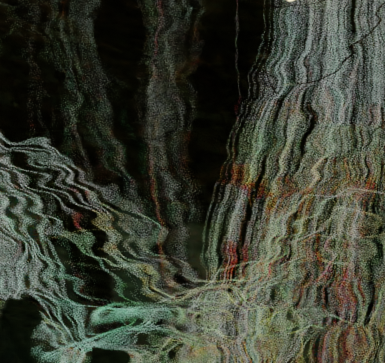
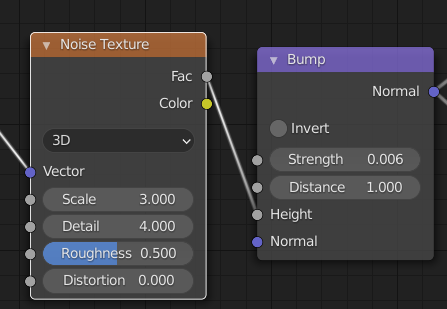
Water
I used a simple noise texture with a bump node to create the water.
Render settings
For rendering hair, the settings below have the best performance. The other options are much slower and in most situations, you won’t see the difference in quality.

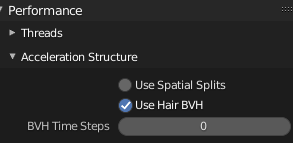
It’s probably a bug, but rendering with 6 steps, other than being higher quality, is actually faster than 1,2,3,4, and 5 steps, so you have nothing to lose.

For the light bounces, I used these settings. In open areas like my scene, 3 global bounces are more than enough for accurate results. I used 16 bounces for transparency because I had a lot of alpha textures, but they weren’t overlapping too much so I kept the value rather low.
Clamping the indirect light to 1 was essential because, with all these emissive textures, the scene was full of fireflies. Also, clamping works backwards: you have to use low numbers tending to 0. Setting the value to 0.4 will clamp twice as much as a value of 0.8.
I disabled caustics since they increased render times but they didn’t make any difference in this scene, even though there’s water.

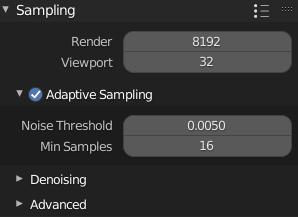
Below you can see my regular render settings. A noise threshold below 0.005 means clean renders almost without any noise; lower numbers, like 0.002, mean even less noise. But it’s crucial to set the render samples to an exaggerated value for the adaptive sampling to do its job—8192 or higher, which is just a maximum ceiling of samples, and not how many you’re actually going to use.
In order to bring this scene to a 2m tall canvas, I had to set the output settings to the following resolution. It took 28 hours to render but ensured a 325 DPI print.

Compositing
I used a simple vignette and a couple of glare nodes. The top node works regularly while the bottom one is set to replicate an effect called halation, which is found in film photography.

When shooting an over-exposed surface (light bulbs, etc.) the film creates this red glow around the object, caused by how the light bounces inaccurately inside old cameras.
I usually don’t apply too much post-production on my renders. I like to do as much as possible in the actual 3D scene with a simple grade afterward.
PC specs
10 core i9, 64GB RAM, RTX3090
A special thank you to my little sister Margherita, who patiently gave me constructive feedback throughout the process, using her good taste and keen eye for detail.
About the author
 Lorenzo Aiello, Filmmaker and 3D artist