Sew your own Suzanne!
thomaskole writes:
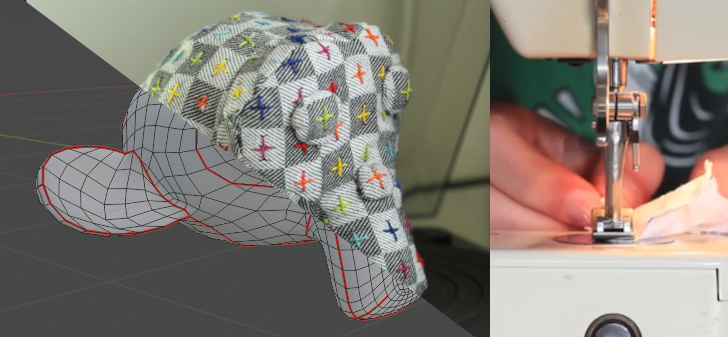
I recently finished a plushie Suzanne, made to look like it has the UV grid on it.
I bet some of you would like to try this for yourself, so here’s a quick walkthrough!
Of course, you’re not limited to Suzanne – you can turn any 3D model into a plushie, as long as the shape allows it.
If you don’t have any experience with sewing, don’t worry! There’s probably someone around you that does, and is willing to help you with your project. You’ll be surprised how easy it is to pick up, and how much fun it is. Even with no prior experience, you should be done in a weekend.
Let’s get started.
0. Prerequisites
A sewing machine is not strictly necessary, however, sewing by hand is a lot slower, and potentially messier. I’ll assume basic Blender knowledge too.
What you’ll need:
- Blender (duh)
- Seams to Sewing pattern add-on (optional)
- A piece of fabric
- Paper
- Pen
- Scissors
- Sewing machine
- Thread
- Pins
- Stuffing
1. The Blender part.
Our adventure starts in Blender.
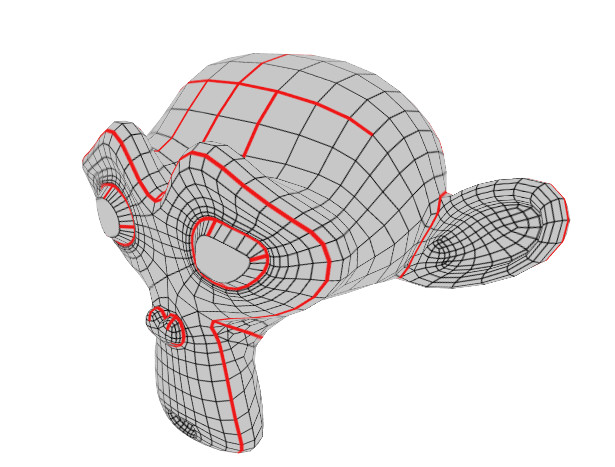
We’ll start with preparing Suzanne. The eyes are not part of the rest of the mesh, we’ll replace them. In my design, the eyes are separate parts, but you can use buttons for eyes too.
Next, we’ll place UV seams. The basic idea is that the UV layout will act as our sewing pattern.
While fabric can stretch and bend, it can’t do so as much as UV’s. We’ll have to place more seams than usual to account for it.
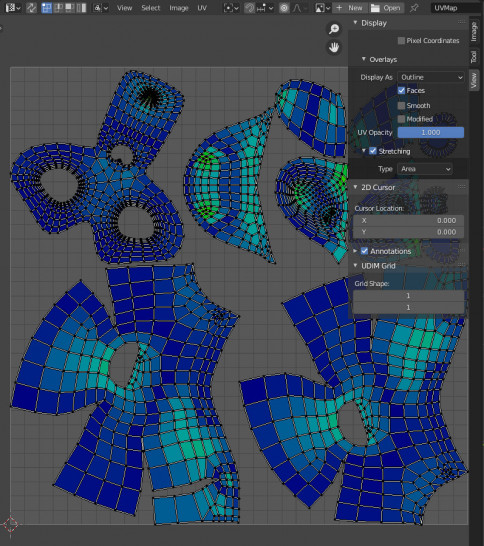
We’re looking for as little stretching as possible. Placing too many seams can make it harder to sew, so it’s important to find a balance.
If you want to simulate your pattern beforehand, you can use my add-on, Seams to Sewing pattern. It uses Blender’s cloth simulation to show you what your pattern would look like when sewn together.
This step is optional, but if you’re unhappy with the simulated result, it’s easy to add / remove seams and try again. I do recommend it.

2. Tracing and cutting
The Seams to Sewing pattern add-on also exports a sewing pattern .svg for you.
You can also export the regular UV layout using UV > Export UV layout.
A printer can be used to put the layout onto paper. If you don’t have one, you can put a piece of paper against your monitor and carefully trace it with a pencil.
![]()
It’s a good idea to label the pieces, like “left ear front”, so that you know what goes where.
Carefully cut out all the pieces from your paper.
Now it’s time to pick a fabric. A non-stretchy fabric is easiest to handle.
If it’s your first time, a plain colored cotton is easiest. It’s also a good idea to iron it beforehand.Put all your pieces onto the fabric, and trace them again. Be careful not to use a pen that bleeds through the fabric. Also label the pieces if necessary.
Use scissors to cut the pieces out of the fabric, making sure to leave a bit of space around the traced line. This is where your stitching will go.
With all your pieces prepared, it’s time to put them together.
The goal is to assemble the whole piece, leaving a gap in the back. We’ll use this gap to turn the piece inside-out, and then we sew that closed manually.
As you’re sewing parts together, the part will look very rough:
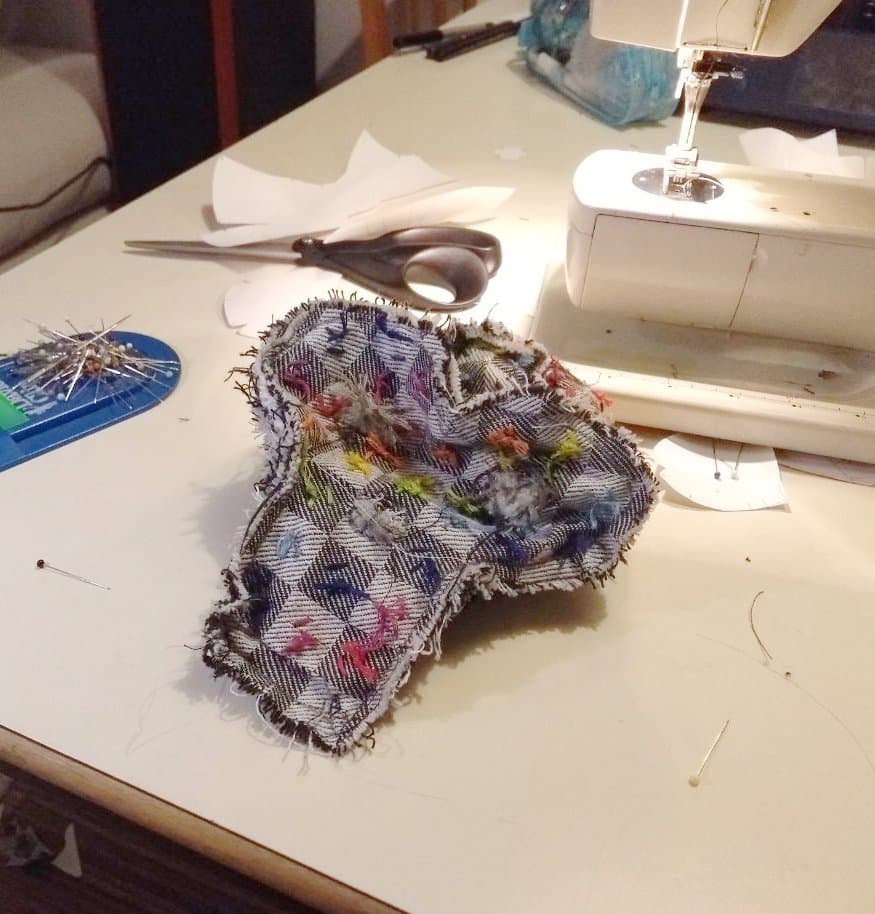
Don’t worry about it – just keep going.
All done? Turn the piece inside out. It looks much cleaner!
Stuff it with your stuffing of choice, keep adding until the shape is firm. It’s a good idea to first stuff the parts that stick out, like the ears, eyes, and chin, and then stuff the rest.
After you’ve stuffed it, close it up and knead it further into shape.
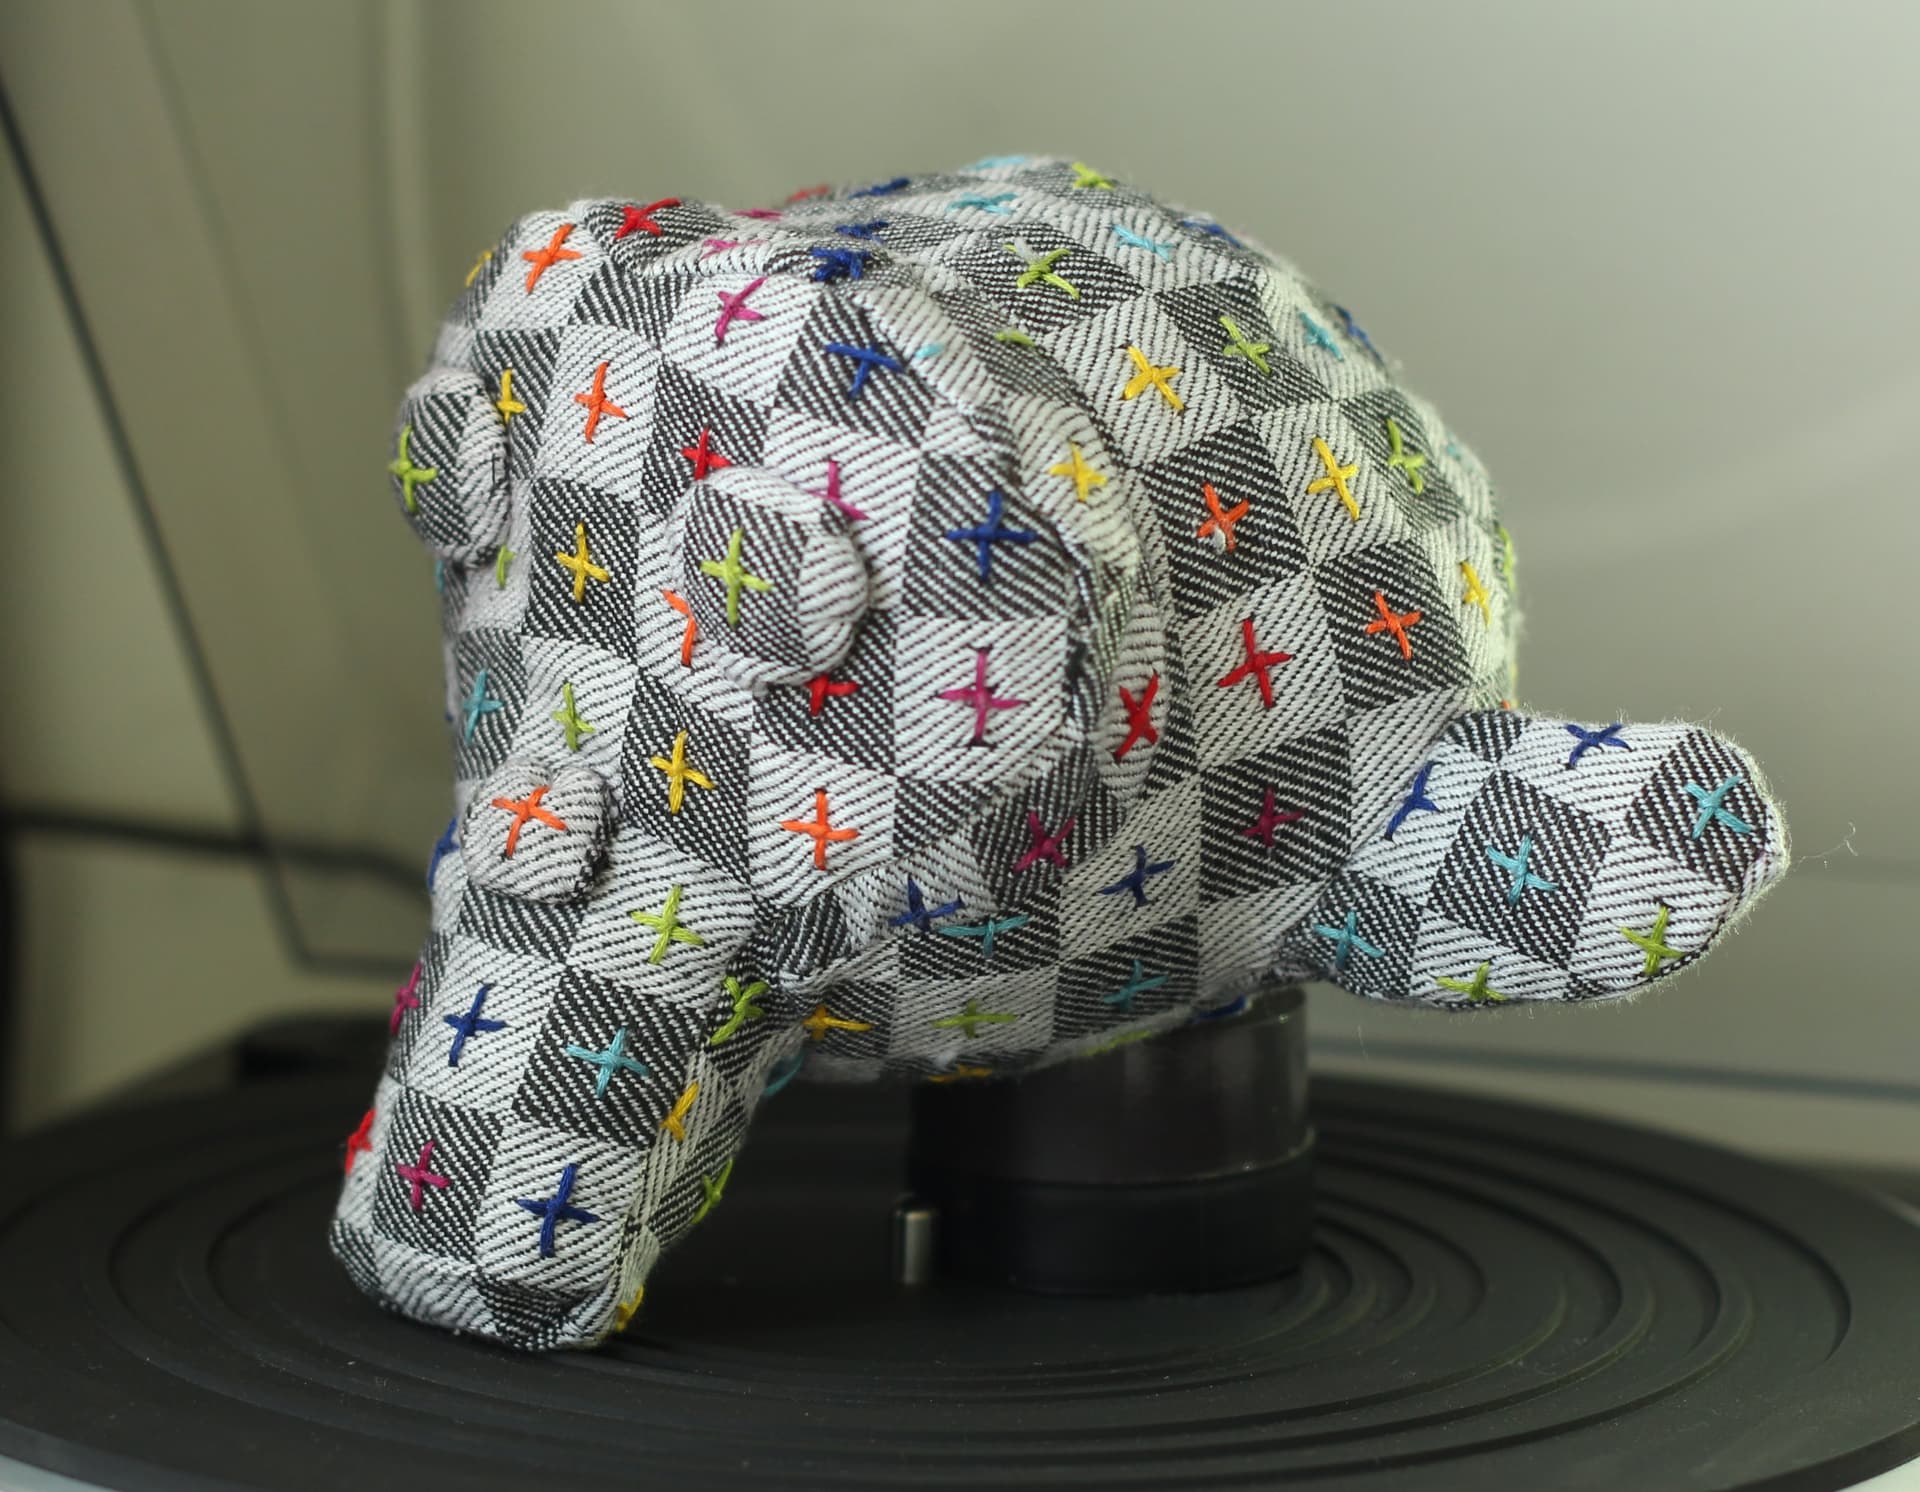
All done! Enjoy your Sewzanne!
4. Final remarks.
- The seams to sewing pattern add-on can be found here. On that website you’ll find a few more details on how to used the add-on.
- There’s a one minute how-to on Blender Secrets’ channel.
- And a BlenderArtists thread here.
- More info on the UV grid plushie can be found here.
- Please show your results on the BA forums! I’d love to see what you come up with!


That is brilliant !
My kid thanks you :D
Btw how did you add the 3d scan to your webpage ?
Cheers, Kurt
Oh wow! This really is brilliant!
…. starts looking for a perfect 3d model of hobbes…. ;)