
Behind the Scenes: Captain America Stylized Sculpt

About me
Hi! My name is Thomas, I’m a freelance 3D artist from Paris, France, also known as ‘Geosyrup’ on social media. I started learning Blender in January 2021, and rapidly fell in love with it, so I decided to make at least one project per week and to learn something new every day, which allowed me to quickly improve my skills during my free time.
Inspiration
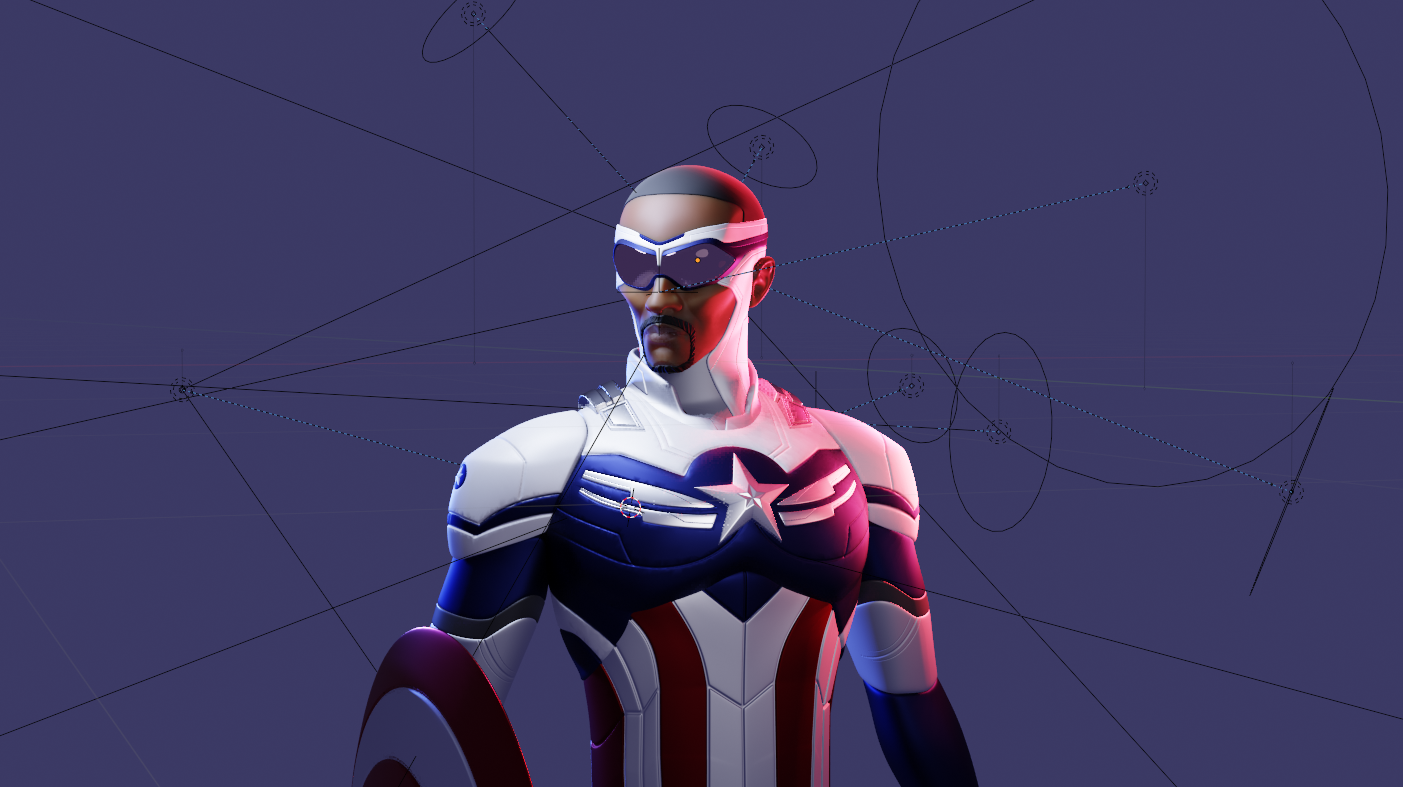
I started learning how to sculpt and make stylized characters in April, heavily influenced by the work of other artists such as Gabriel Soares or Xi Ding, who are both extremely skilled at capturing likenesses and exaggerating facial features. It was also during that time that Falcon and the Winter Soldier, the new show from Marvel studios, started airing. Now, if I’m being honest, the show wasn’t great, but it did take a big step in the right direction when it comes to the representation of minorities in superhero movies, through the character of Sam Wilson becoming the new Captain America. I got very inspired to make my own stylized version of the character and was especially motivated to try my hand at making Sam Wilson’s brand new Wakandan suit.
View this post on Instagram
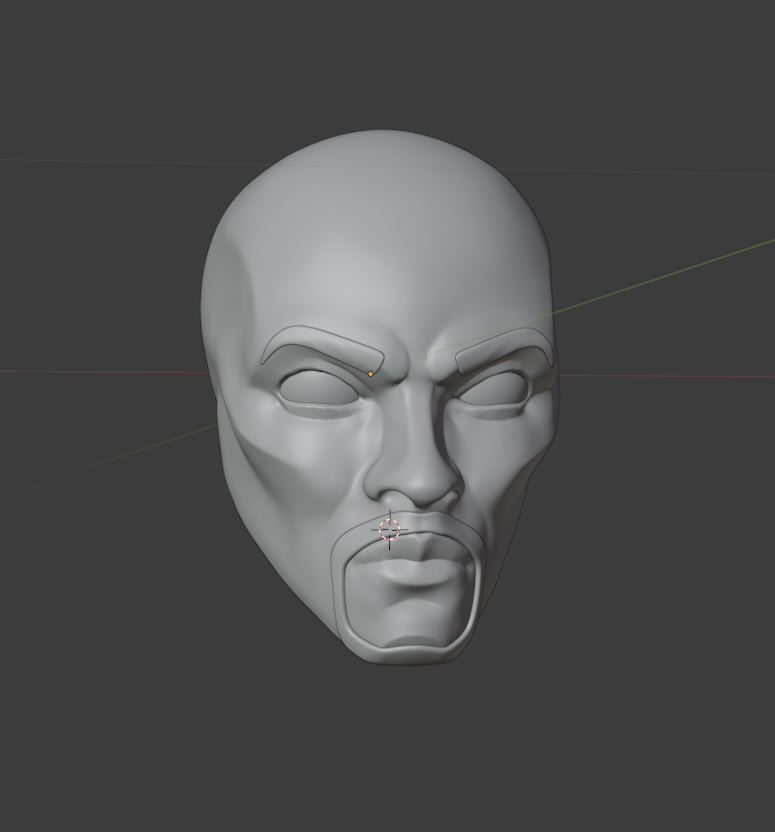
Sculpting and capturing the likeness
This, to me, is the most interesting part of my projects. After all, the face is the first thing we look at when we see someone.
The first thing I do when it comes to sculpting a real person is writing down what their most noticeable features are (Little tip: try to put down a few without looking at reference pictures first, to let your mind automatically exaggerate the features for you). Some of the most prominent features of Anthony Mackie are the shape of his face (wide at the top, pointy chin), the thickness of his neck, his strong cheekbones, wide-spaced eyes, high jawline, and narrow mouth. I then open a PureRef board and select a few reference photos and artworks from other artists of the same character to further help me during the sculpting process.
With all the important features laid down, I jump directly into Blender and start sculpting the face while looking at my notes and at the reference photos I previously selected.
View this post on Instagram
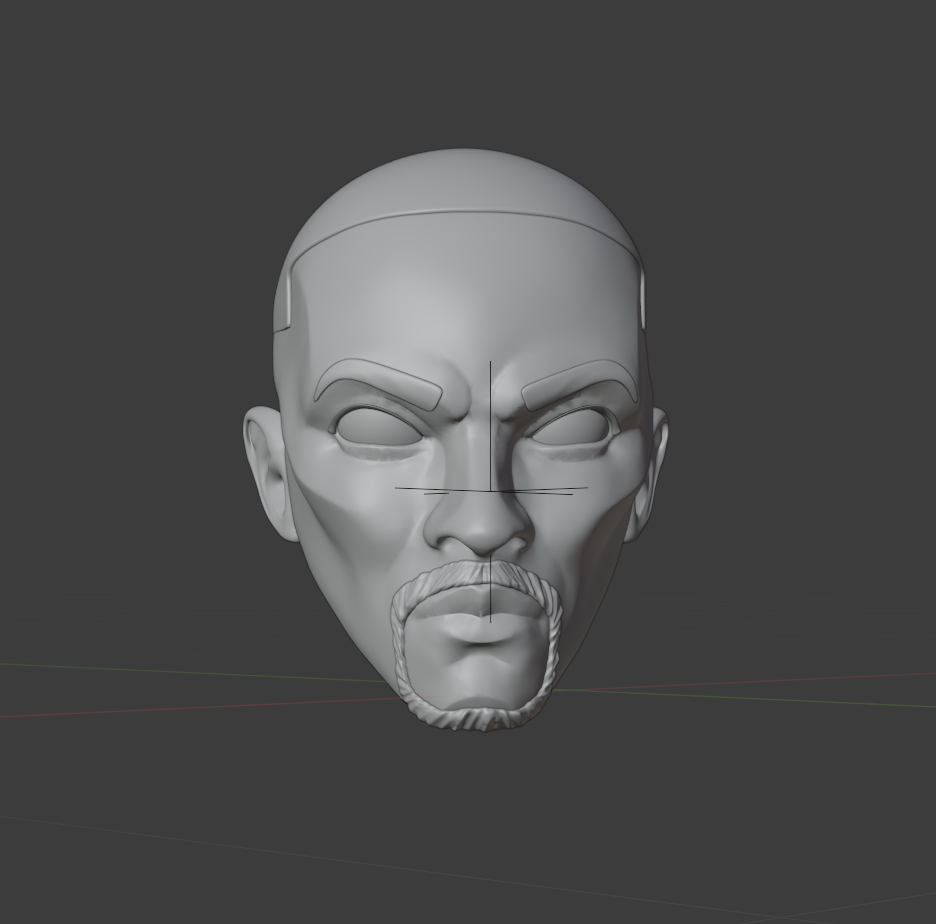
One of the key aspects of the style I’m trying to develop is the very angular yet smooth look that I give to my sculpts (the one comment I get the most is that they look like Fortnite skins or Disney Infinity figurines, and I take that as a compliment). This helps me better visualize the face planes and the underlying anatomy of the face. To get these “sharp” edges, the tools I use the most are the draw sharp, scrape, and pinch brushes. For the hair and beard, I simply used a plane with a shrinkwrap and a solidify modifier, and then sculpted the beard a little bit with the crease brush to give it some flow. By the way, I always use a tablet for sculpting; the pressure sensitivity is a must-have for me to get more control over the sculpt than I would have with a mouse.
Once I get a face that I am happy with, I can confidently move on to the body. A nice face sculpt kind of confirms that the project is going in the right direction and gives me the motivation to keep working on it.
The suit
For the suit, I first create a rough body shape (or a torso, rather) to define the overall body structure of my character. Just basic anatomy, nothing too complex or detailed since it’ll be covered by the suit anyway. The goal here is simply to have some mesh to work with for the shrinkwrap modifier that I will be using in the next step.
With the body shape roughly defined, I start creating the actual suit mesh by placing a plane in my scene and giving it a mirror modifier, a subdiv modifier, a shrinkwrap modifier (projected onto the body mesh), a solidify modifier to give it some thickness, and another subdiv to smooth the edges out a bit. The first subdiv modifier’s purpose is to densify the suit’s topology so that the shrinkwrap modifier will make the suit fit the shape of the body much more nicely.
I then make my way all around the body mesh with this technique by extruding the original plane until I have a full-body suit ready to be sculpted and textured. Once I get to that point, I add a multires modifier to the suit which will allow me to sculpt the details of the suit, such as the creases. After that, I start modelling the metal parts like the stars, the blade-looking objects on his chest, and the wing straps on his shoulders. I then use basic modelling techniques to make his shoulder pads, nothing fancy.
The same process was used for his headgear: a plane shrinkwrapped to the face mesh, a solidify modifier, and some basic modelling for the goggles.

Texturing
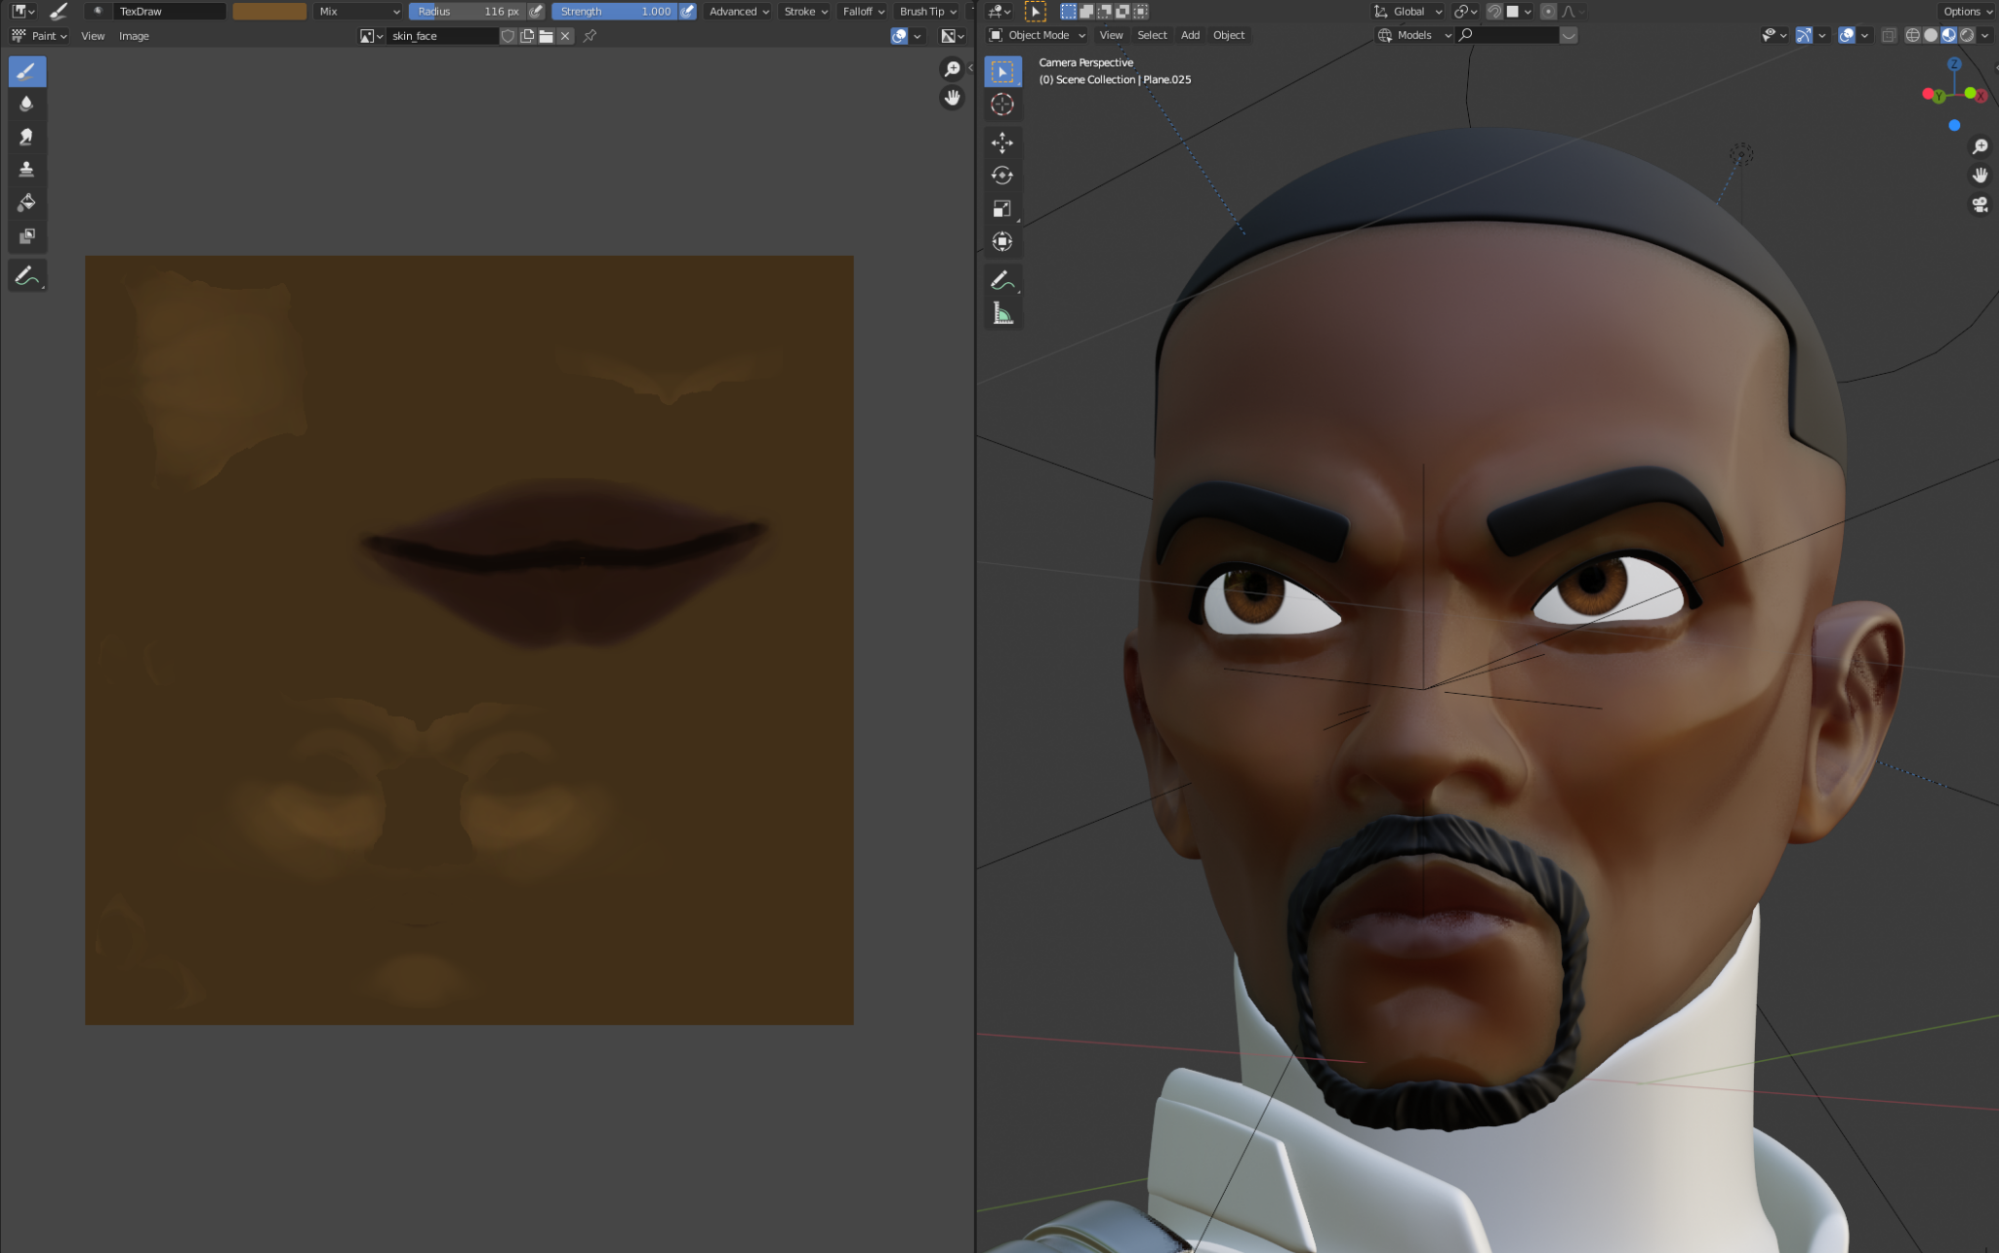
The style I’m going for involves a very low amount of texturing work as I try to get that smooth, almost plastic-y look to my projects, which doesn’t require any detailed or realistic materials. This is why every texture you can see here only uses the principled BSDF shader. I use a decimate modifier on any high-poly mesh (like the face for example) in order to create seams and UV-unwrap it without affecting its structure too much. I could retopologize it, but since I’m not planning on rigging it, I find it rather unnecessary here. After that, I simply create an image texture, throw some texture paint on my model, and… that’s it! For this particular project, I also created a black and white image texture to control the specular, which allowed me to add some reflection on the lip area. For the eyes, I used Danny Mac’s Eye Designer addon, because they’re hidden behind the goggles anyway (and because I’m lazy).
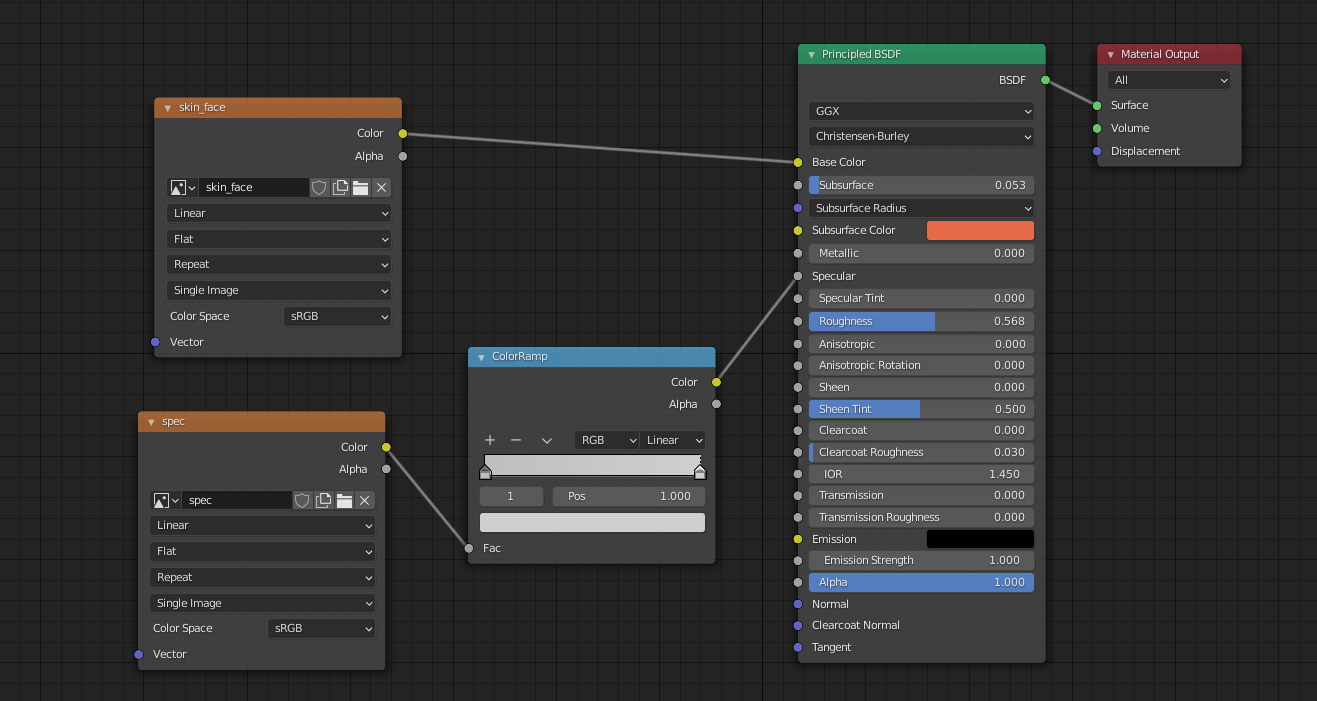
For the suit, I decided to go with a high-roughness-metallic material to stray away from the original material shown in the TV show (which kinda looked like a cheap Walmart children’s costume), and give more of an armor feel to it.
Lighting and rendering
The lighting is the most important part of any 3D project, in my opinion. Even the worst model can look stunning with the right lighting setup.
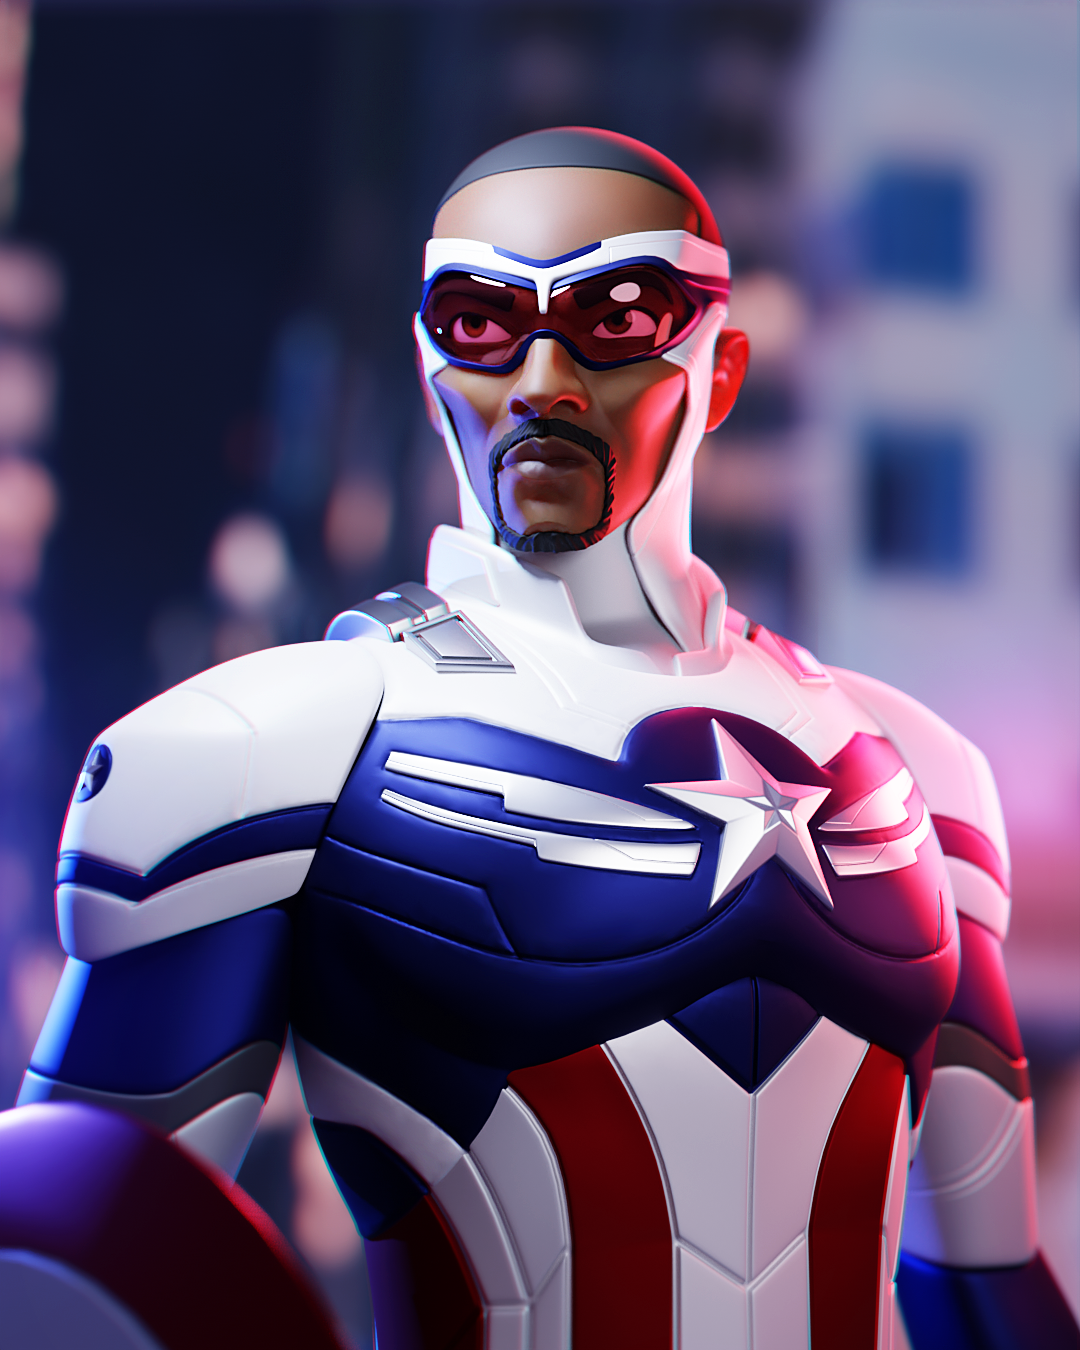
I decided to actually re-create a scene from the last episode in which, after saving the day, our new Cap finds himself on live television, surrounded by TV crews and police cars/ambulance flashing lights, in the middle of a city street at nighttime. I usually choose to light my scenes with a “studio” approach, with heavy rim lighting and colored lights everywhere (something that looks very unnatural) and I avoid making “realistic lighting” because it restricts the rendering possibilities (real-life lighting sucks most of the time). But for this one, I decided to actually go for the recreation of the scene, because the number of artificial lights it contained (police cars, camera crews, city lights…) actually allowed me to go crazy with it, as the original lighting already looked unnatural. Win-win for me!
I used a big blue-ish white main light source aimed from above, two smaller secondary lights (one red, one blue) on each side, and enhanced these secondary lights with colored rim lights to better define his shape against the background. Speaking of the background, I simply used a screenshot of the show and used it as a texture on a plane, which I put behind my model. With some depth of field to blur it and a tiny bit of emission to make it pop a little bit more, I had my show-accurate background!
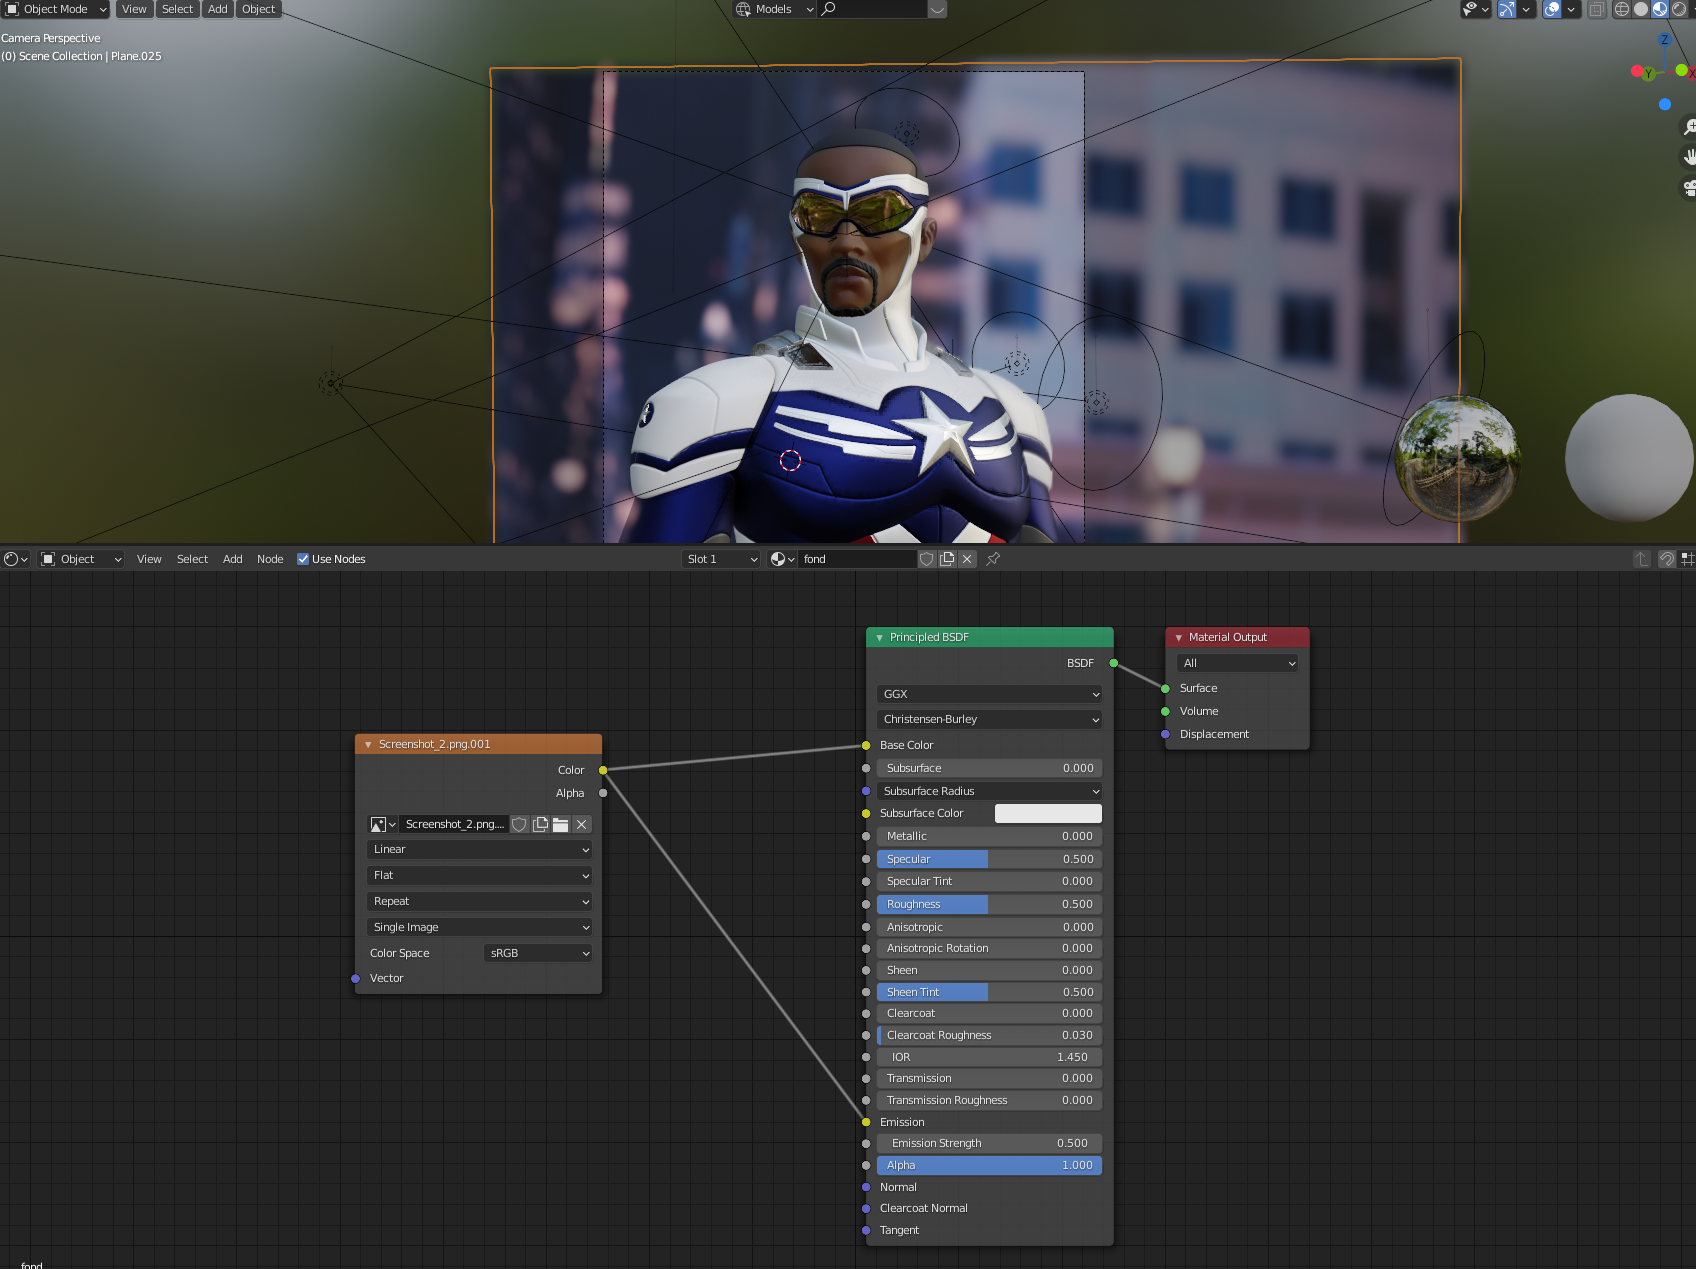
With that done, I rendered it with Cycles at 2000 samples with denoising activated, tweaked the colors a little bit in Photoshop, added a bit of chromatic aberration and voilà! Here is the final result, I hope you enjoyed this little walkthrough, don’t hesitate to DM me on Instagram (@geosyrup) if you have any questions!
About the author
 Thomas aka ‘Geosyrup’, Freelance 3D artist from France


This is amazing love it