Behind the Scenes: Test Run
About
Hello, my name is Sung-yong Park, and I’m living in Seoul, South Korea. Several years ago, I came up with an idea for a short film. Since then, I’ve been teaching myself the skills to realize the idea in my spare time.
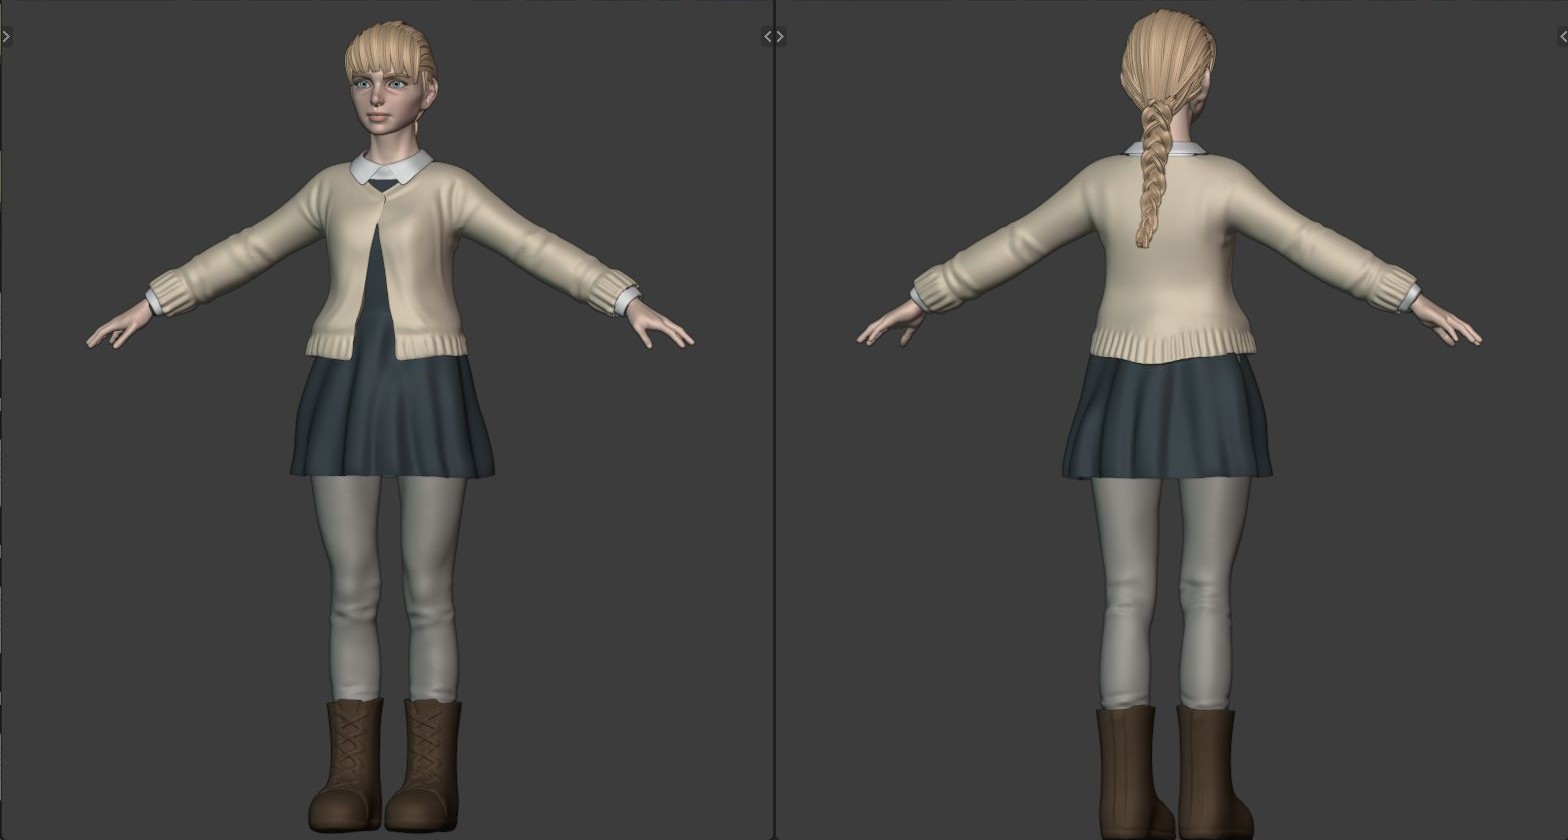
Without any background in art or computer graphics, it took me some time to learn the skills. But finally, I thought I was ready to start an actual production of the film, and this was the “test run” for the project – making a scene from the short.
I will try to explain my process of making a character animation scene briefly.
Tools
Everything was done in vanilla Blender 2.8/2.9. All the assets were created from scratch, and all textures were made procedurally or hand-painted. These are totally unnecessary restrictions, but I wanted to do it this way from the start.
Modeling references
Angela Guenette’s Blenderella was a great reference for modeling a human character. And Julien Kaspar’s Stylized Character Workflow helped me to “modernize” my modeling workflow.
Sculpting
The base mesh was made with a skin modifier.
There are several options for making a base mesh, but the old way of organic modeling was good enough for me. It’s easier to adjust the pose, proportion, and volume of the character with a simple edge mesh.
Rough massing was done mostly with the clay strip brush and grab brush. Then, I smoothed out the brush marks and added some surface details.
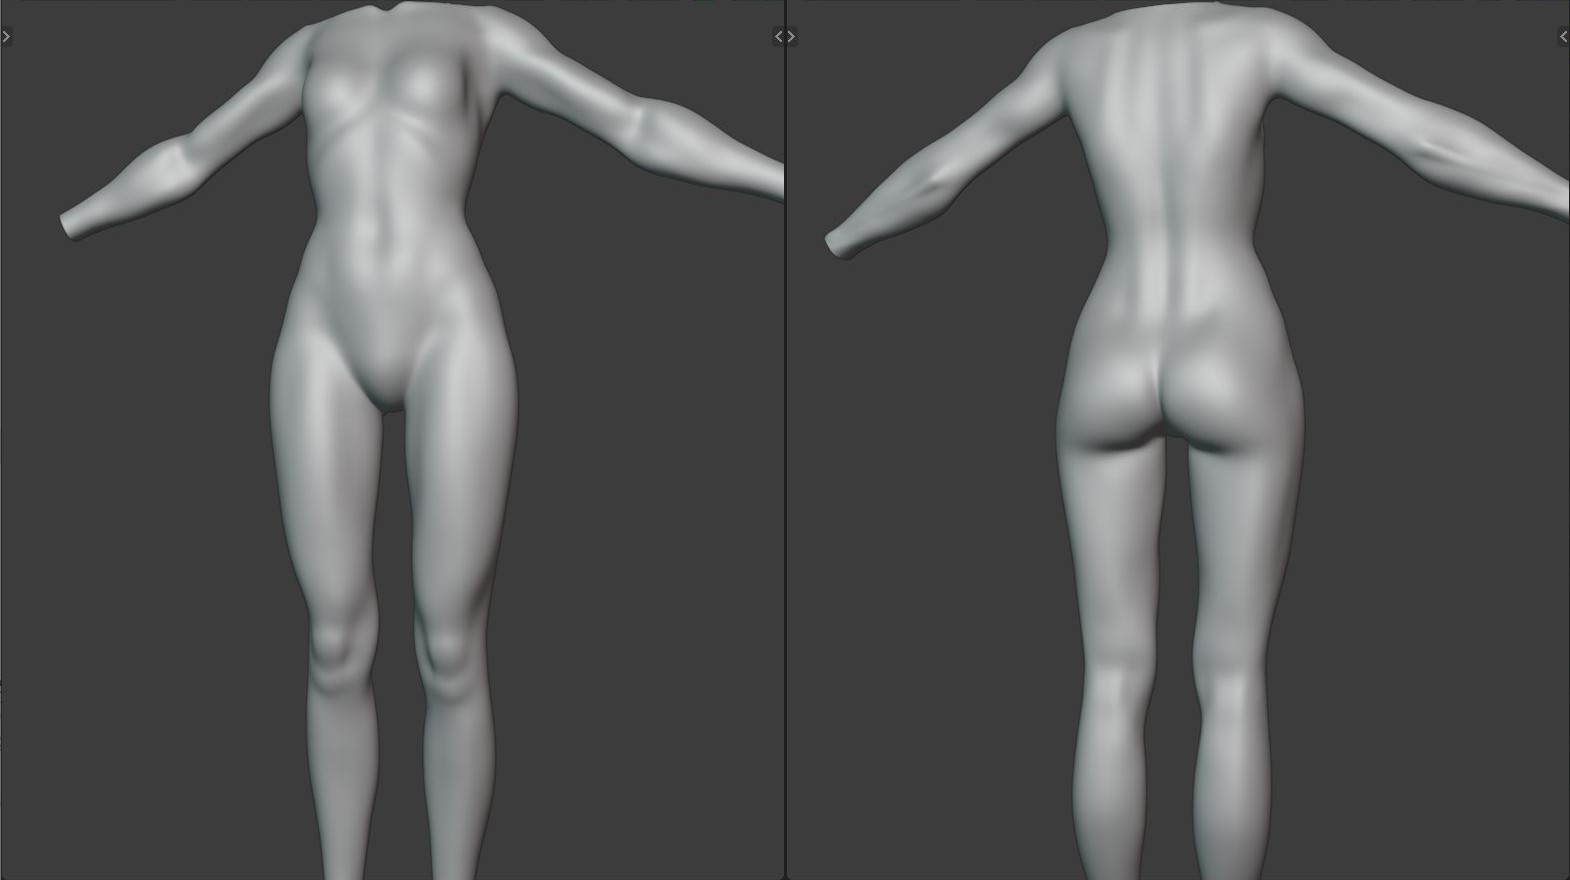
Although most of the body would not be seen in the final model, I sculpted a little more than I actually needed, because one of the goals of the project was to test the whole production process in the new Blender 2.8/2.9.
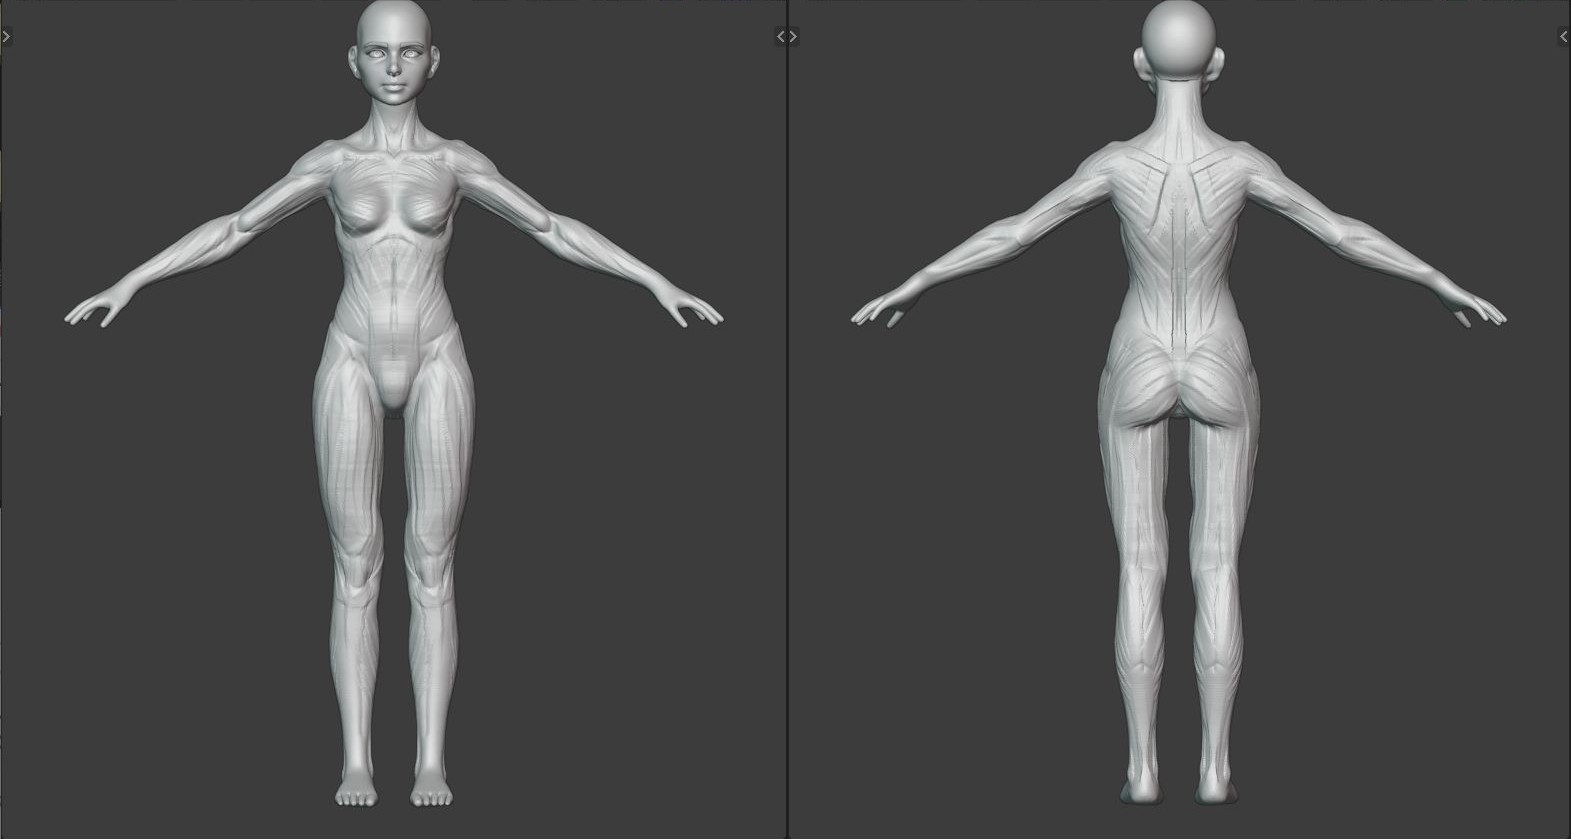
The clothes were roughly sculpted for reference purposes, and the mesh hair, eyebrows, and eyelashes were added for the same reason.
Vertex painting was helpful to visualize the 3D look of the model in this early stage.
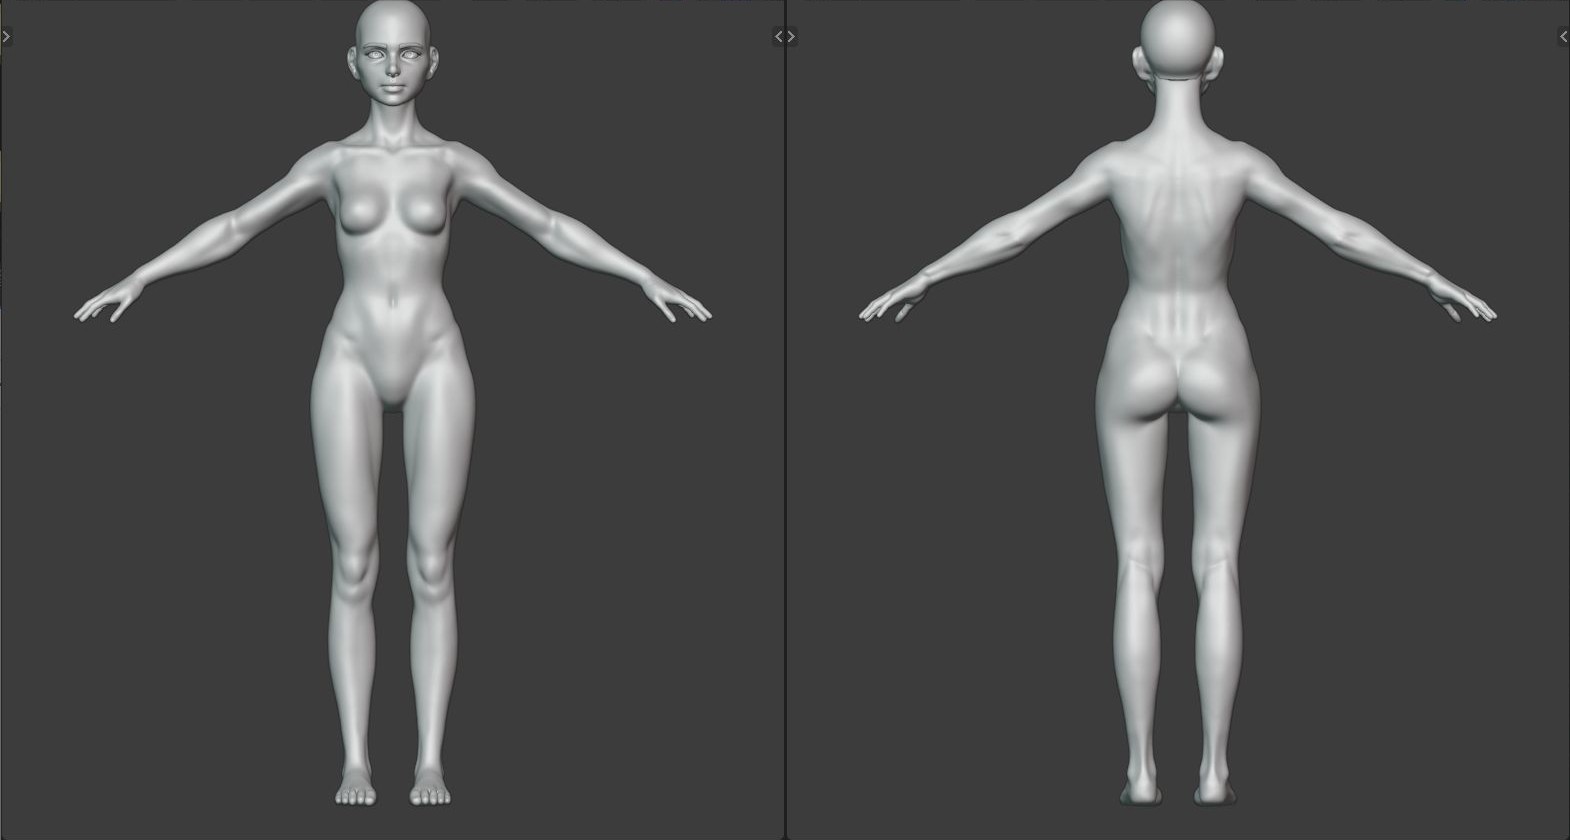
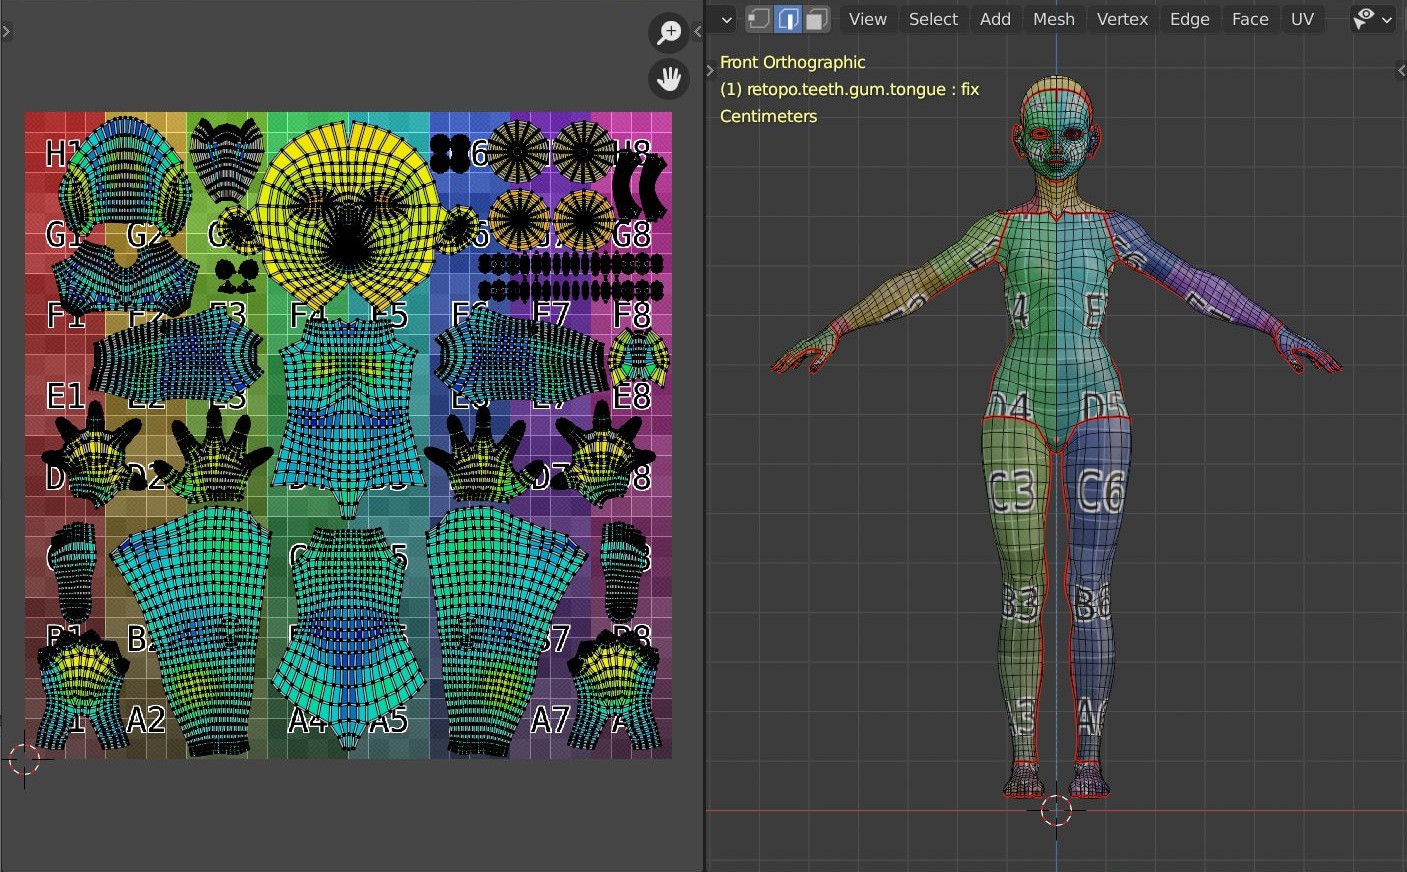
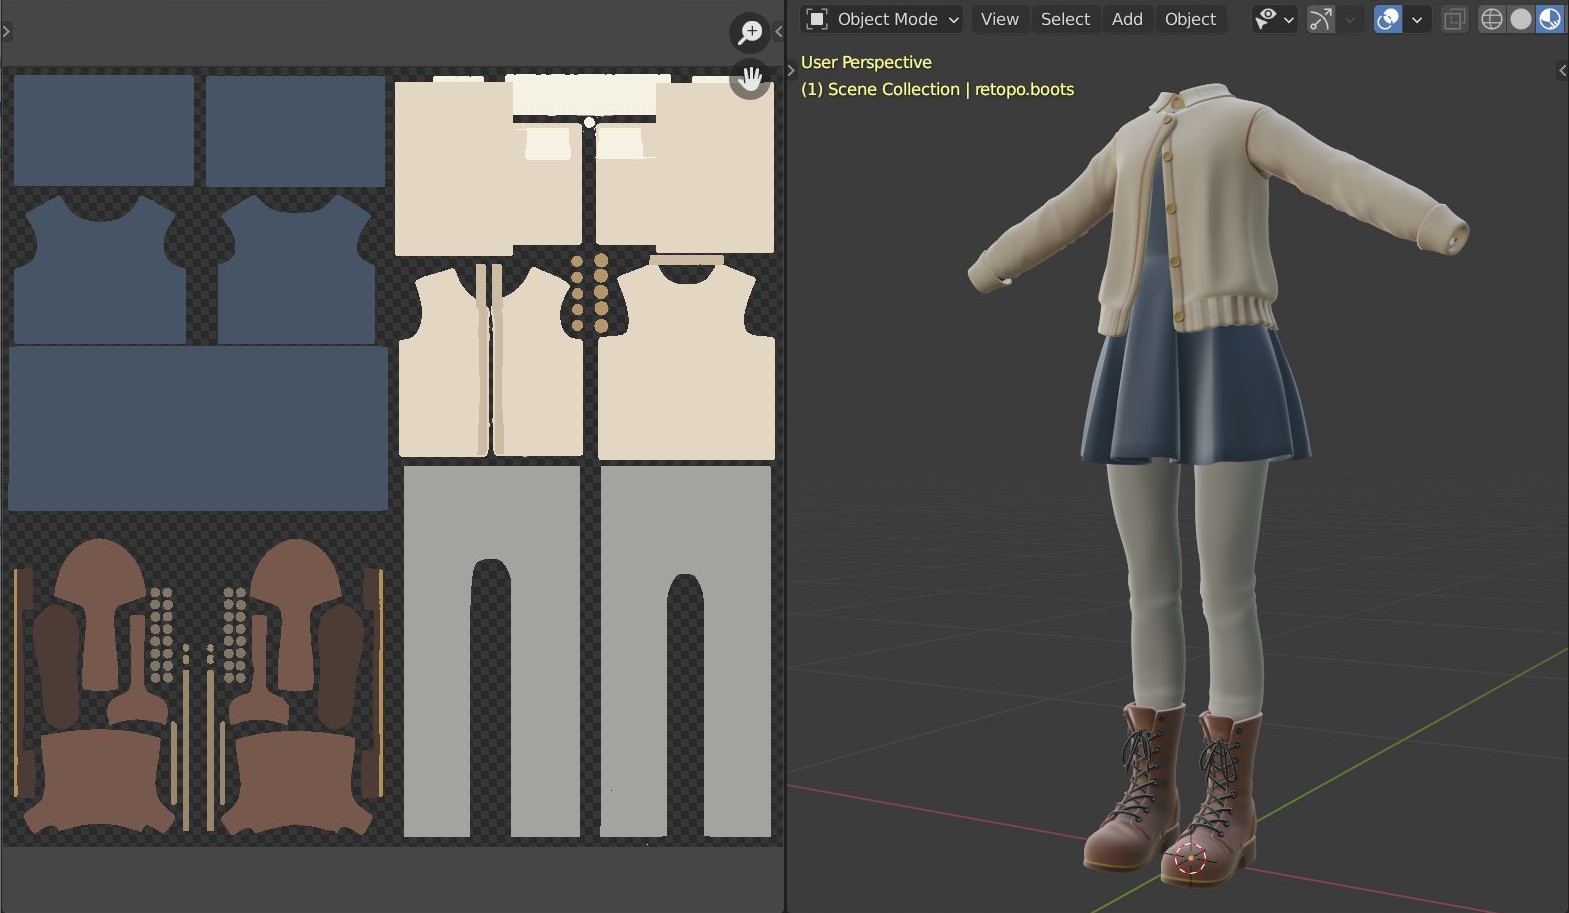
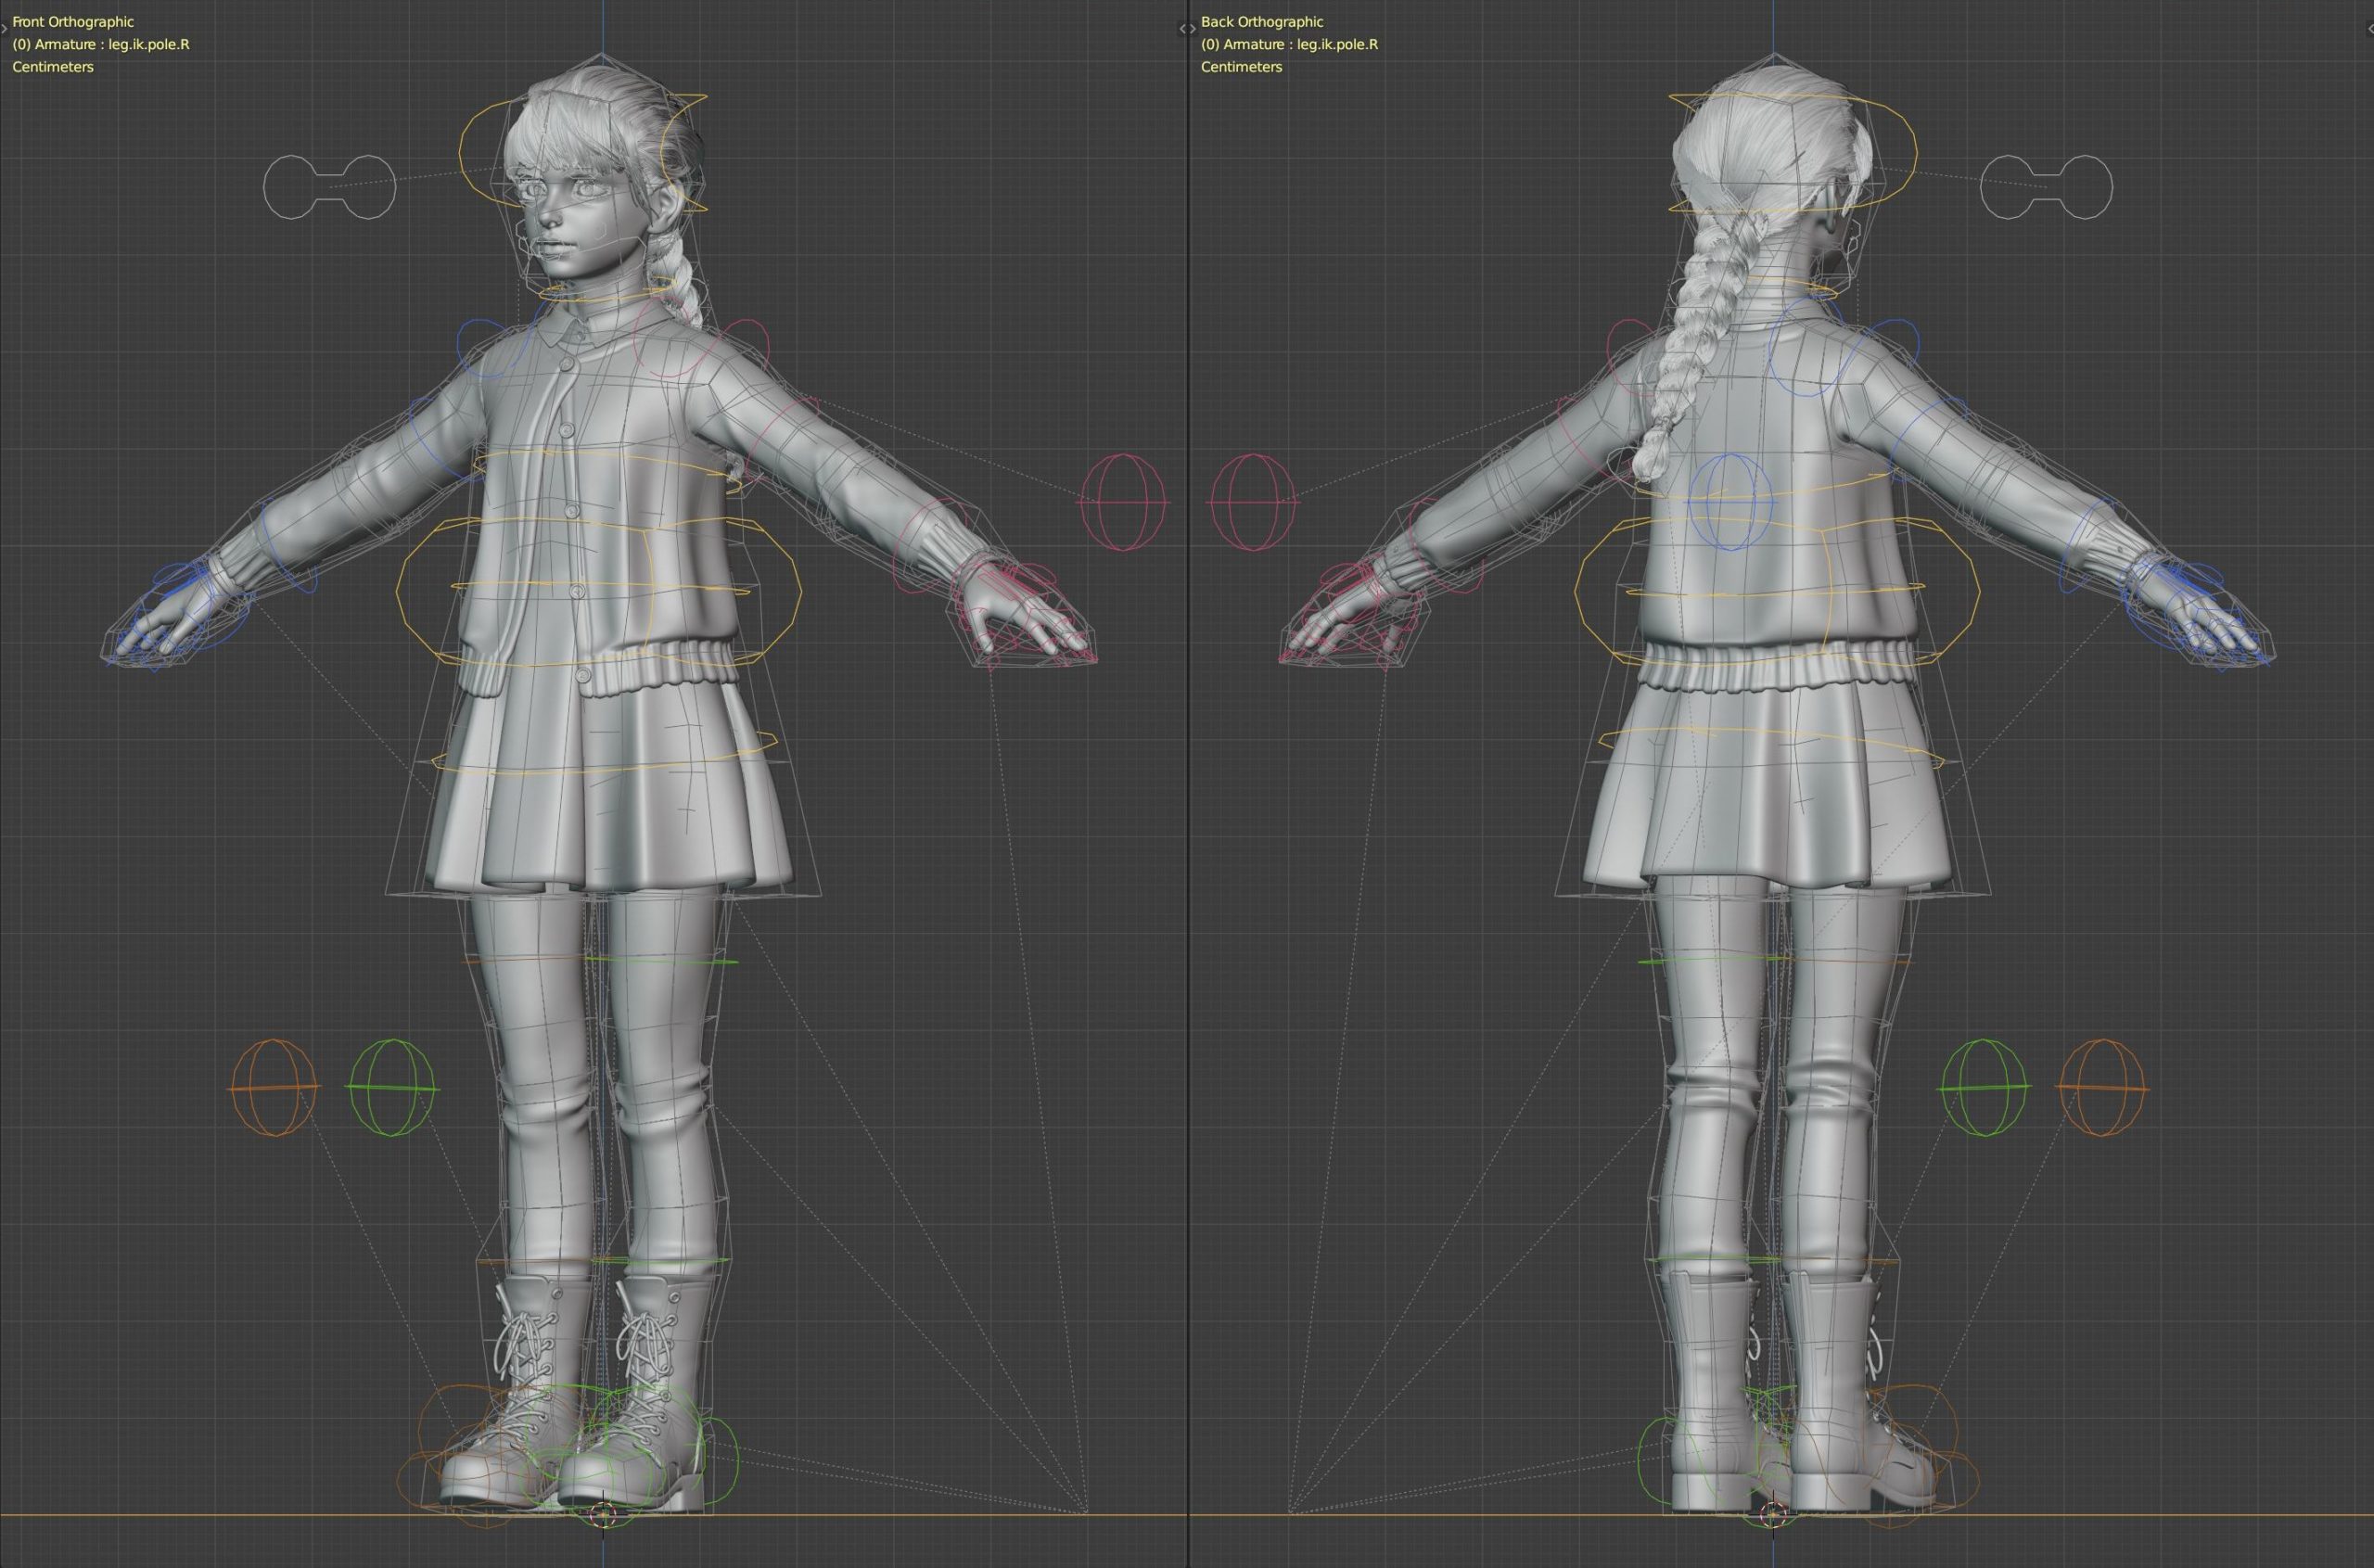
Retopology
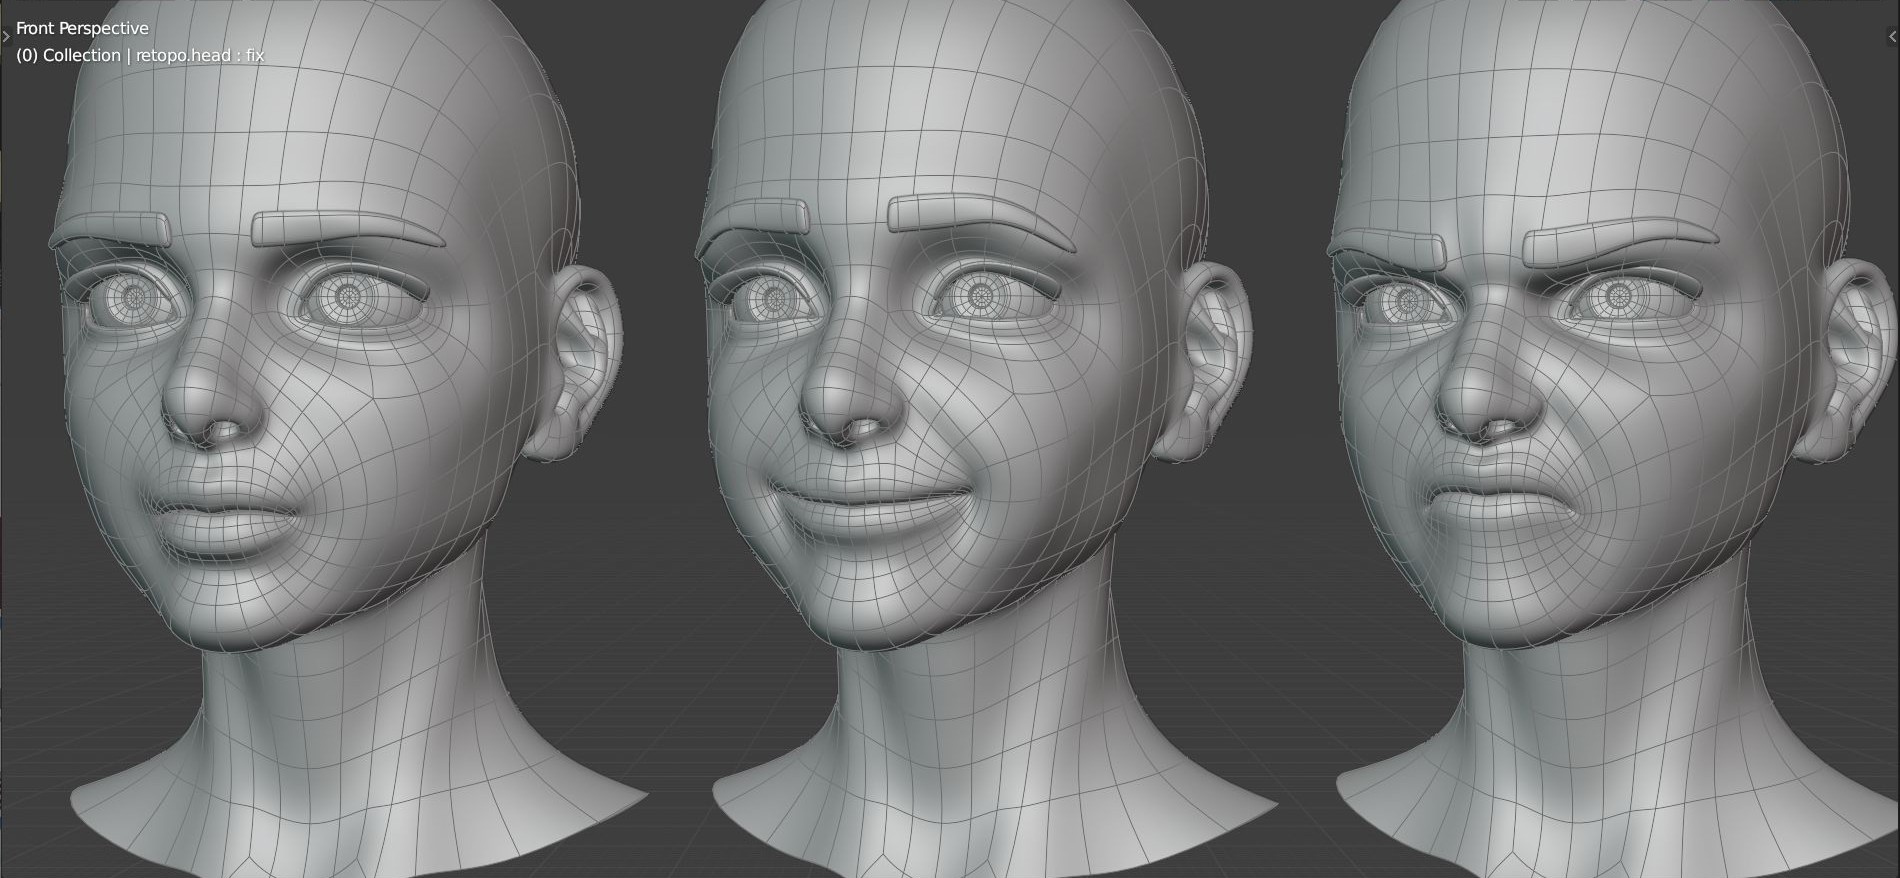
I retopologized the head mostly with the shrink-wrap modifier, and tested some facial expressions with it to make sure the mesh would deform as I wanted.

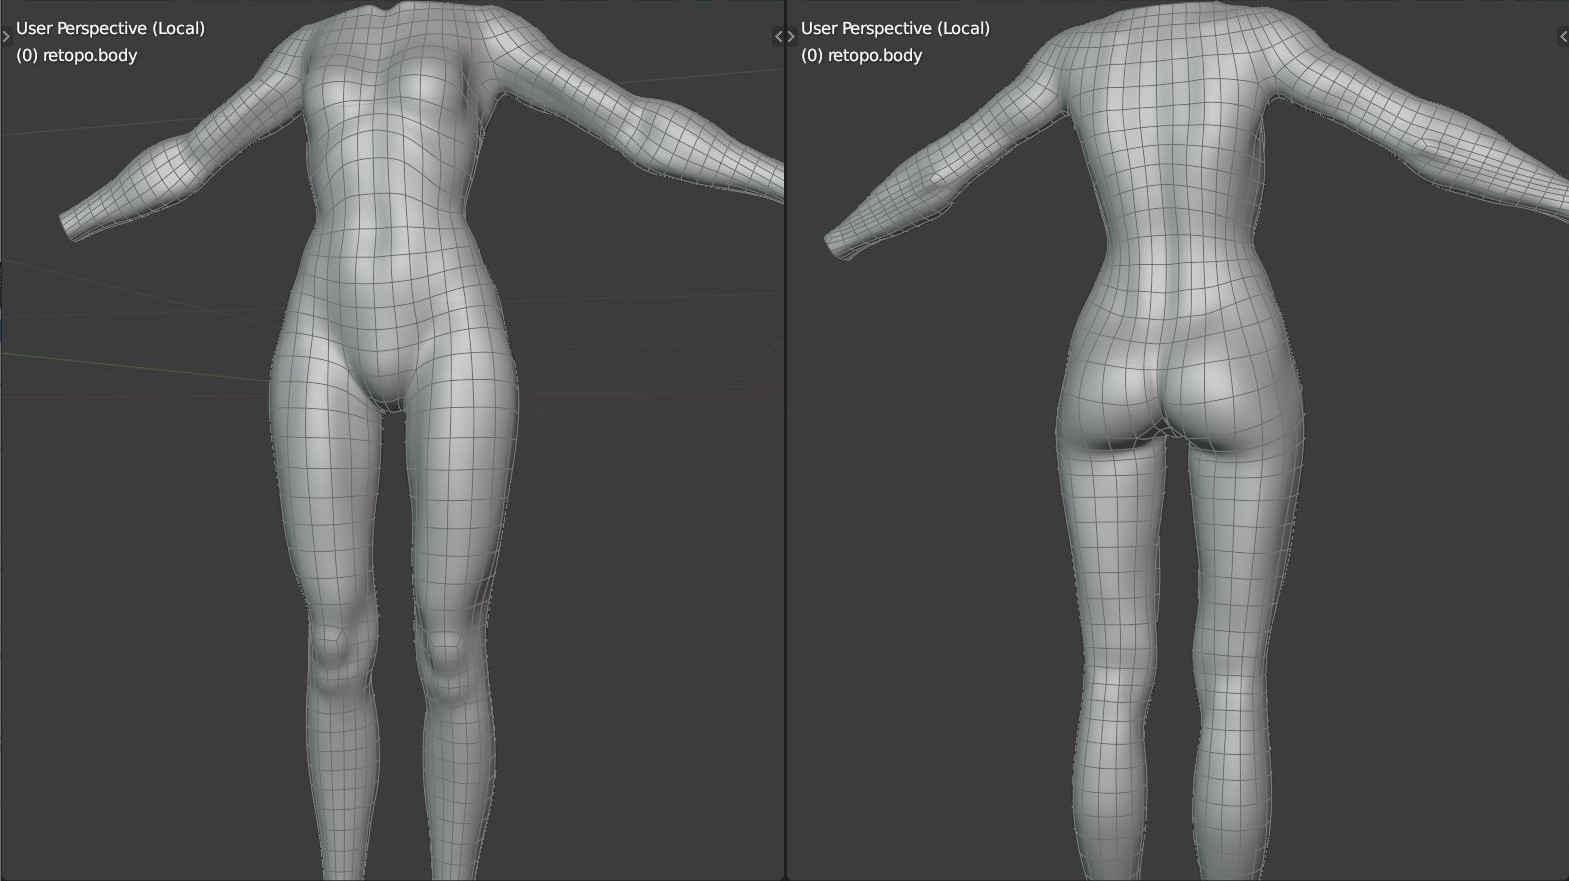
Since the body mesh itself wouldn’t be seen directly, there was no need to make it too detailed. The retopology was done in the simplest way—simple tube meshes with the shrink-wrap modifier.
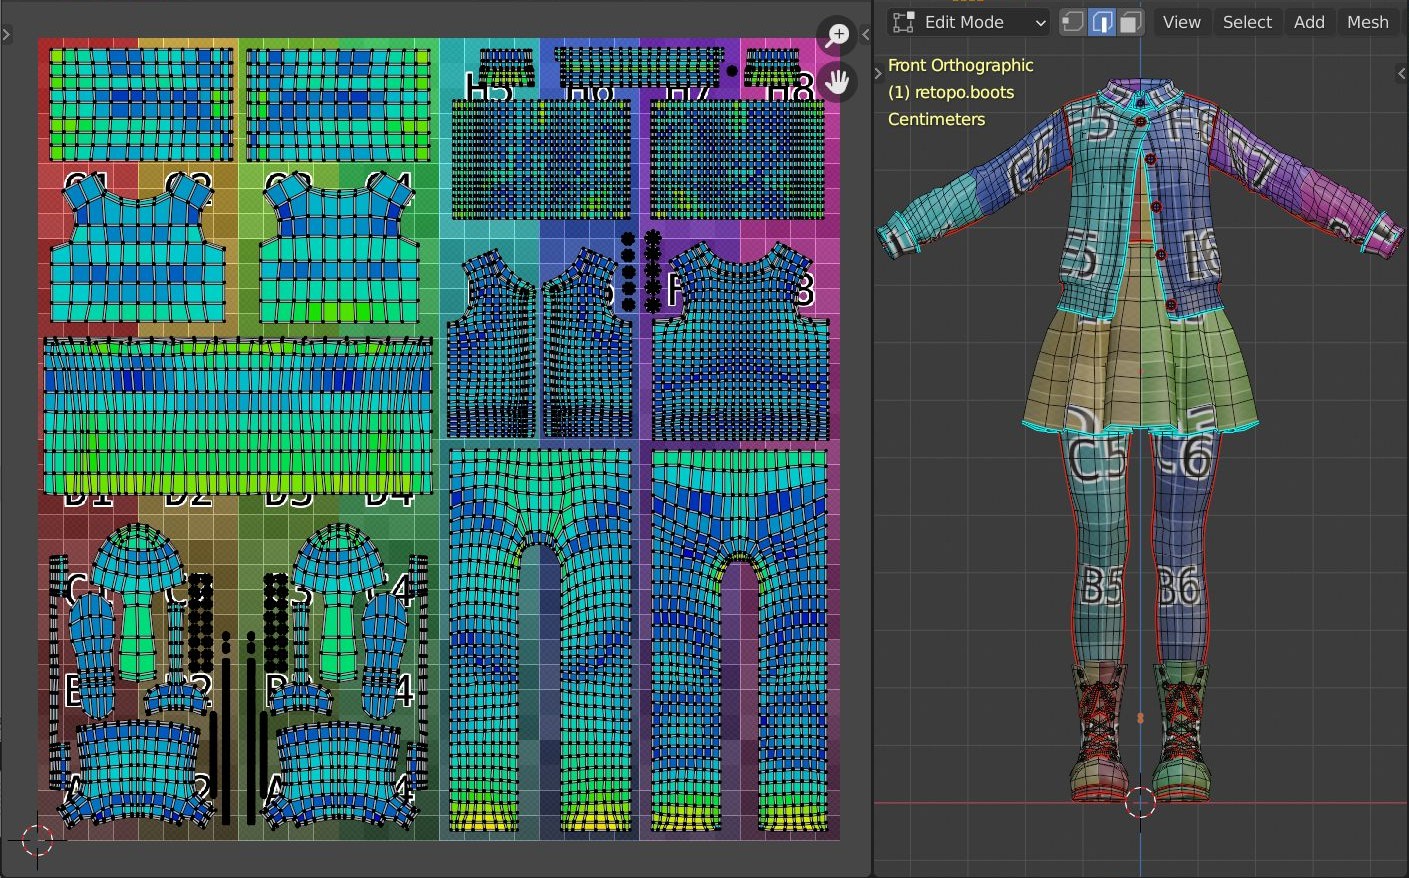
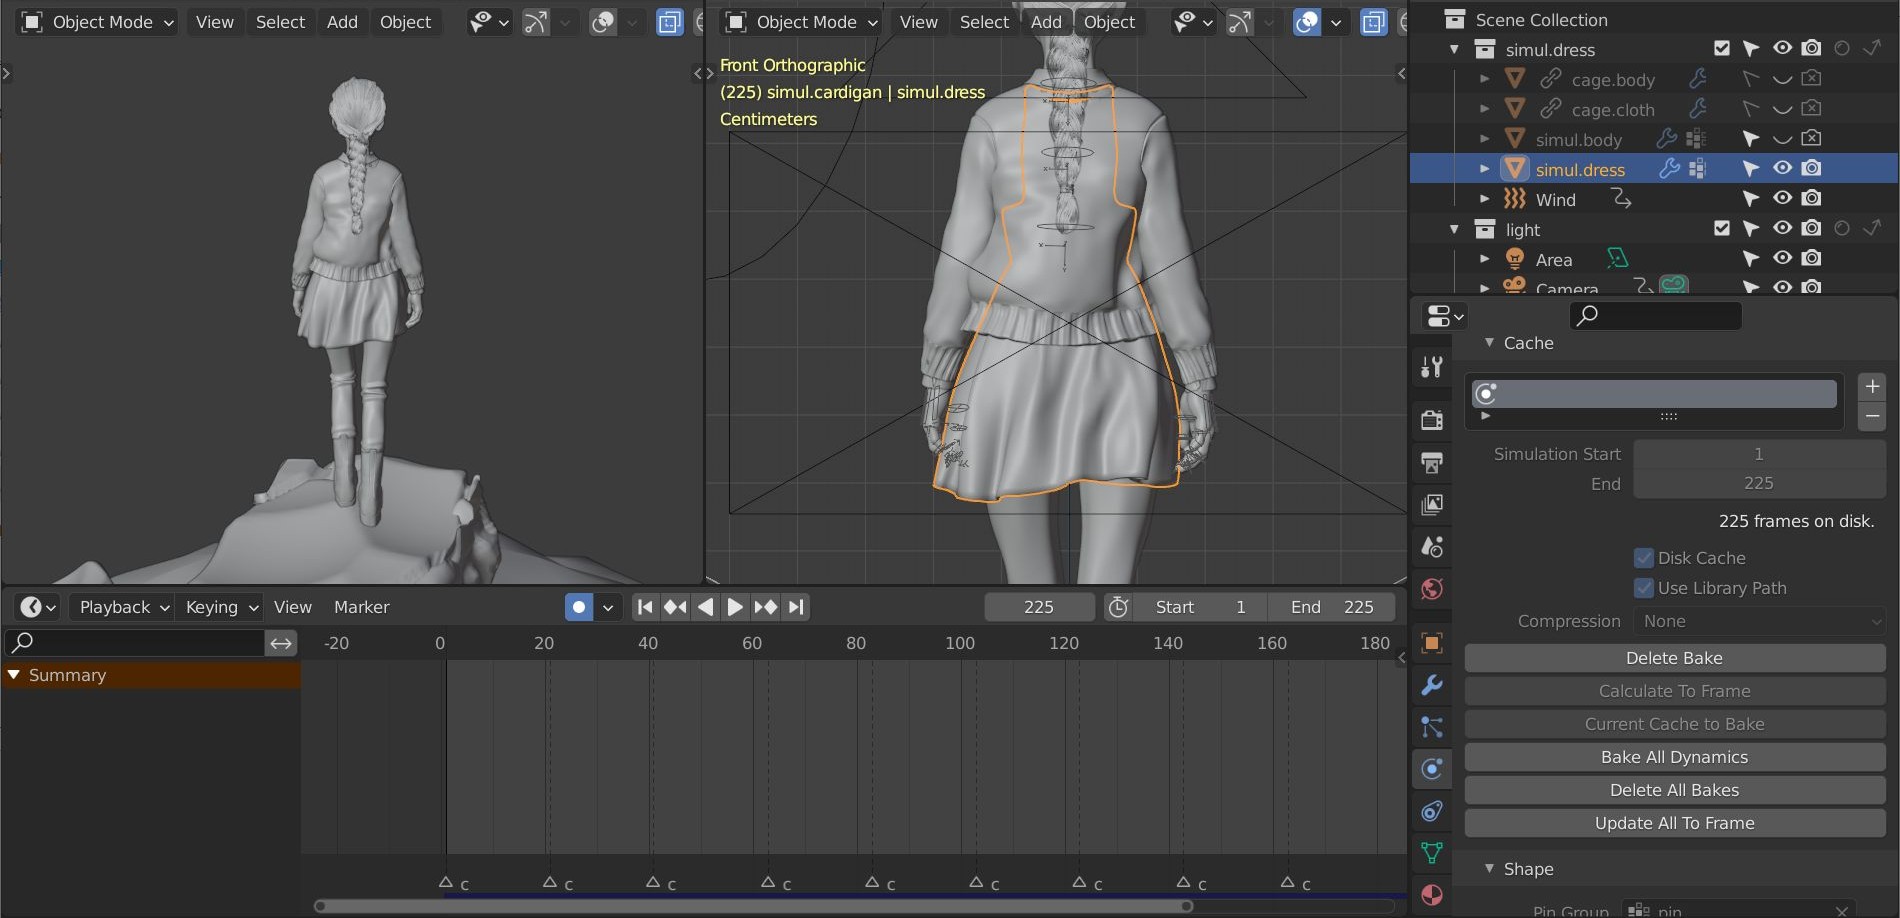
Later, the body mesh was used as a collision mesh for cloth simulations.
The cloth meshes were simple as well. Basically, they’re just planes with solidify modifiers.
After UV mapping, I added more details by sculpting on the multi-resolution meshes. Then I baked the sculpted details into a displacement map, which I then applied to the retopology meshes with displacement modifiers.
This way, the details could be sustained during cloth simulations later.

Surfacing
UV mapping
The body mesh was unwrapped for texturing. Of course, more room was assigned for the face and hand pieces to allow for more detail.
It was important to align the cloth pieces straight, so that I could apply fabric patterns to them later. But I made the mistake of straightening the skirt piece as well, which should have been circular. Because of this mistake, the texture on the lower part of the skirt ended up stretched.
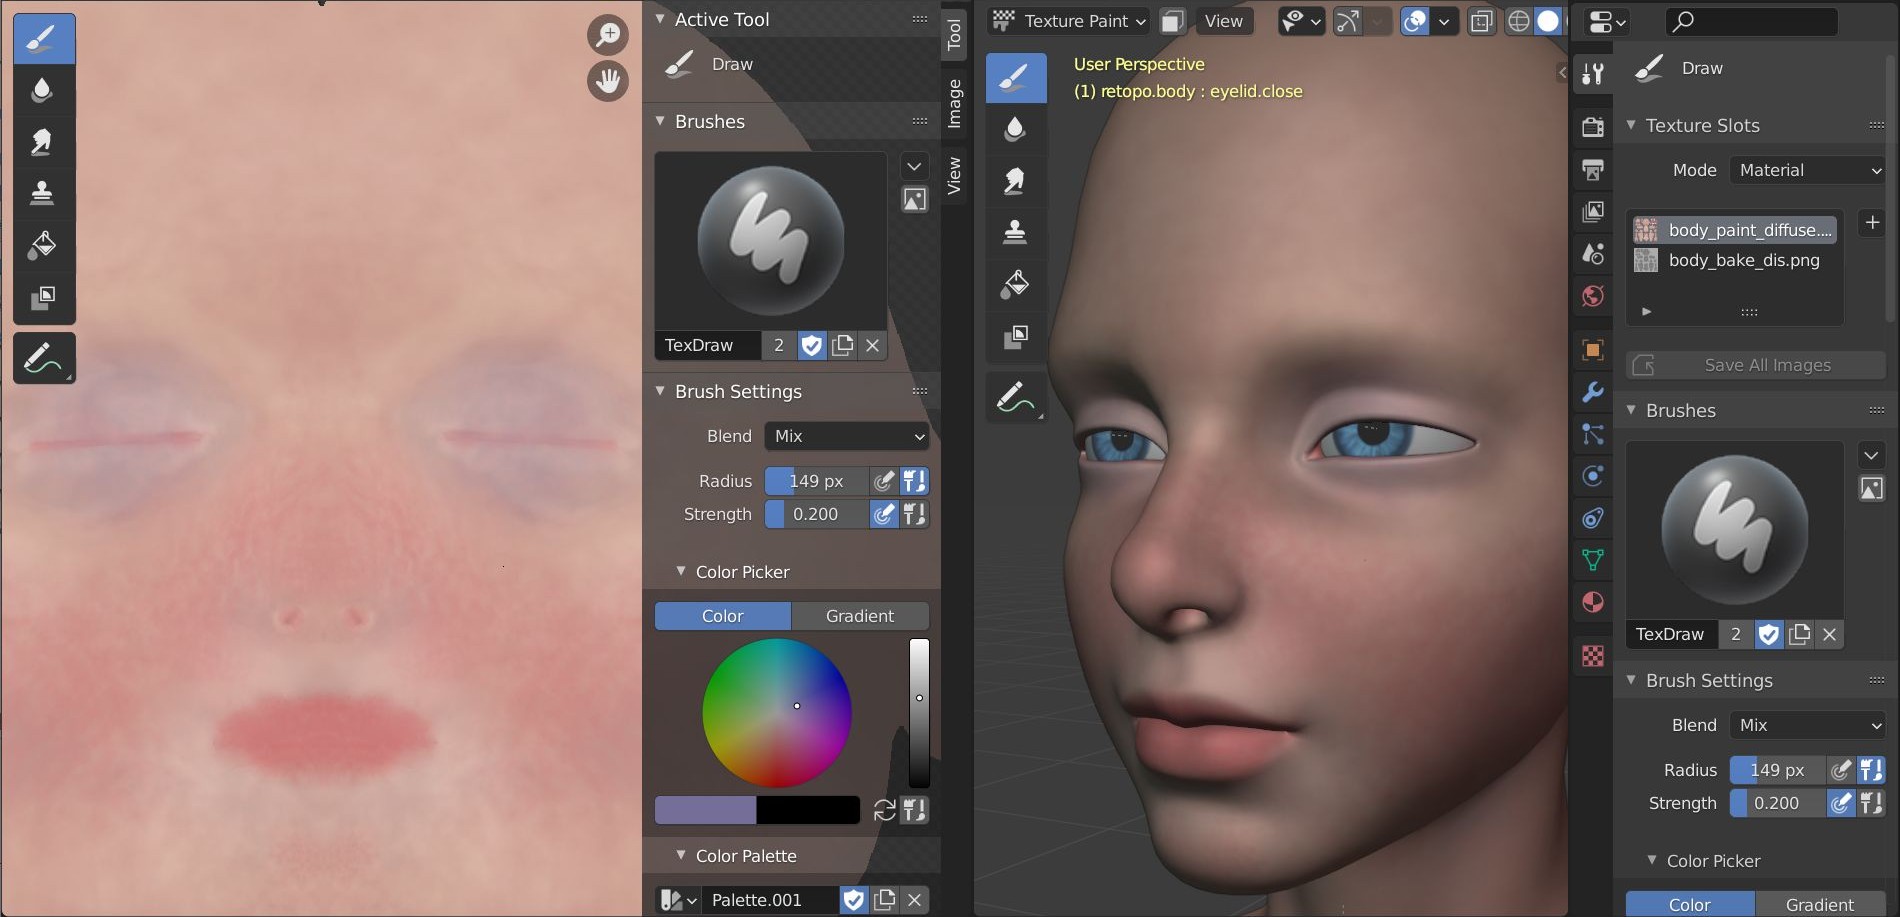
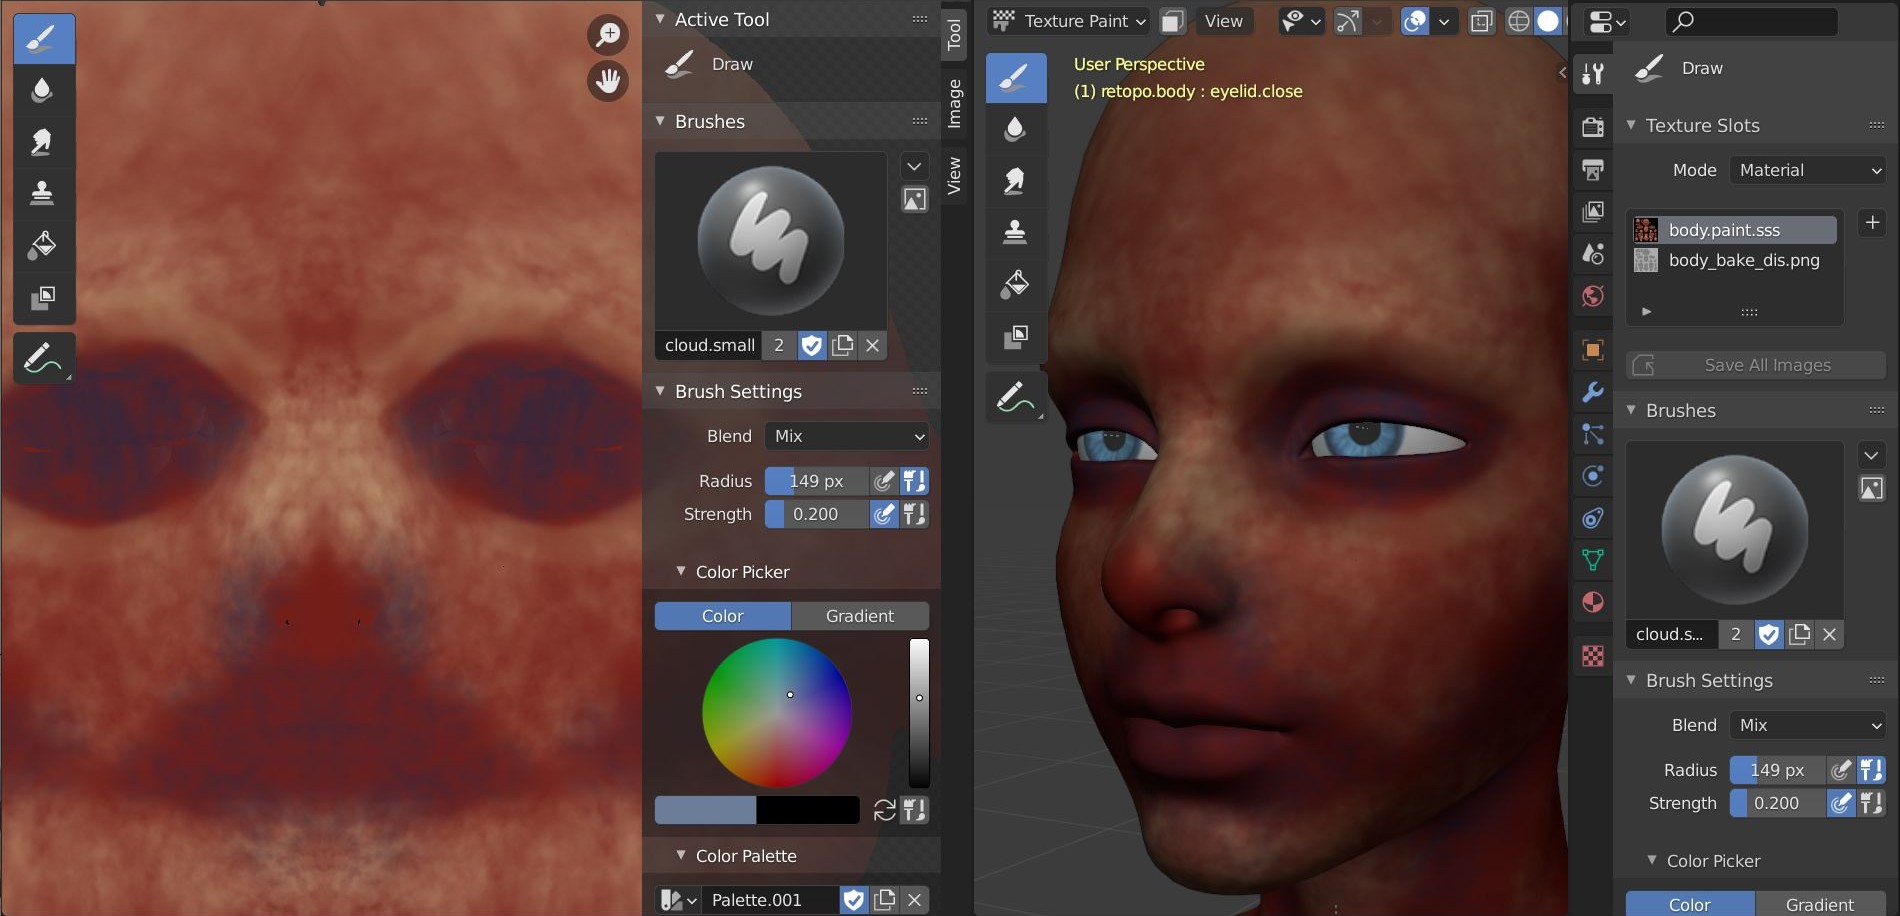
Texture painting
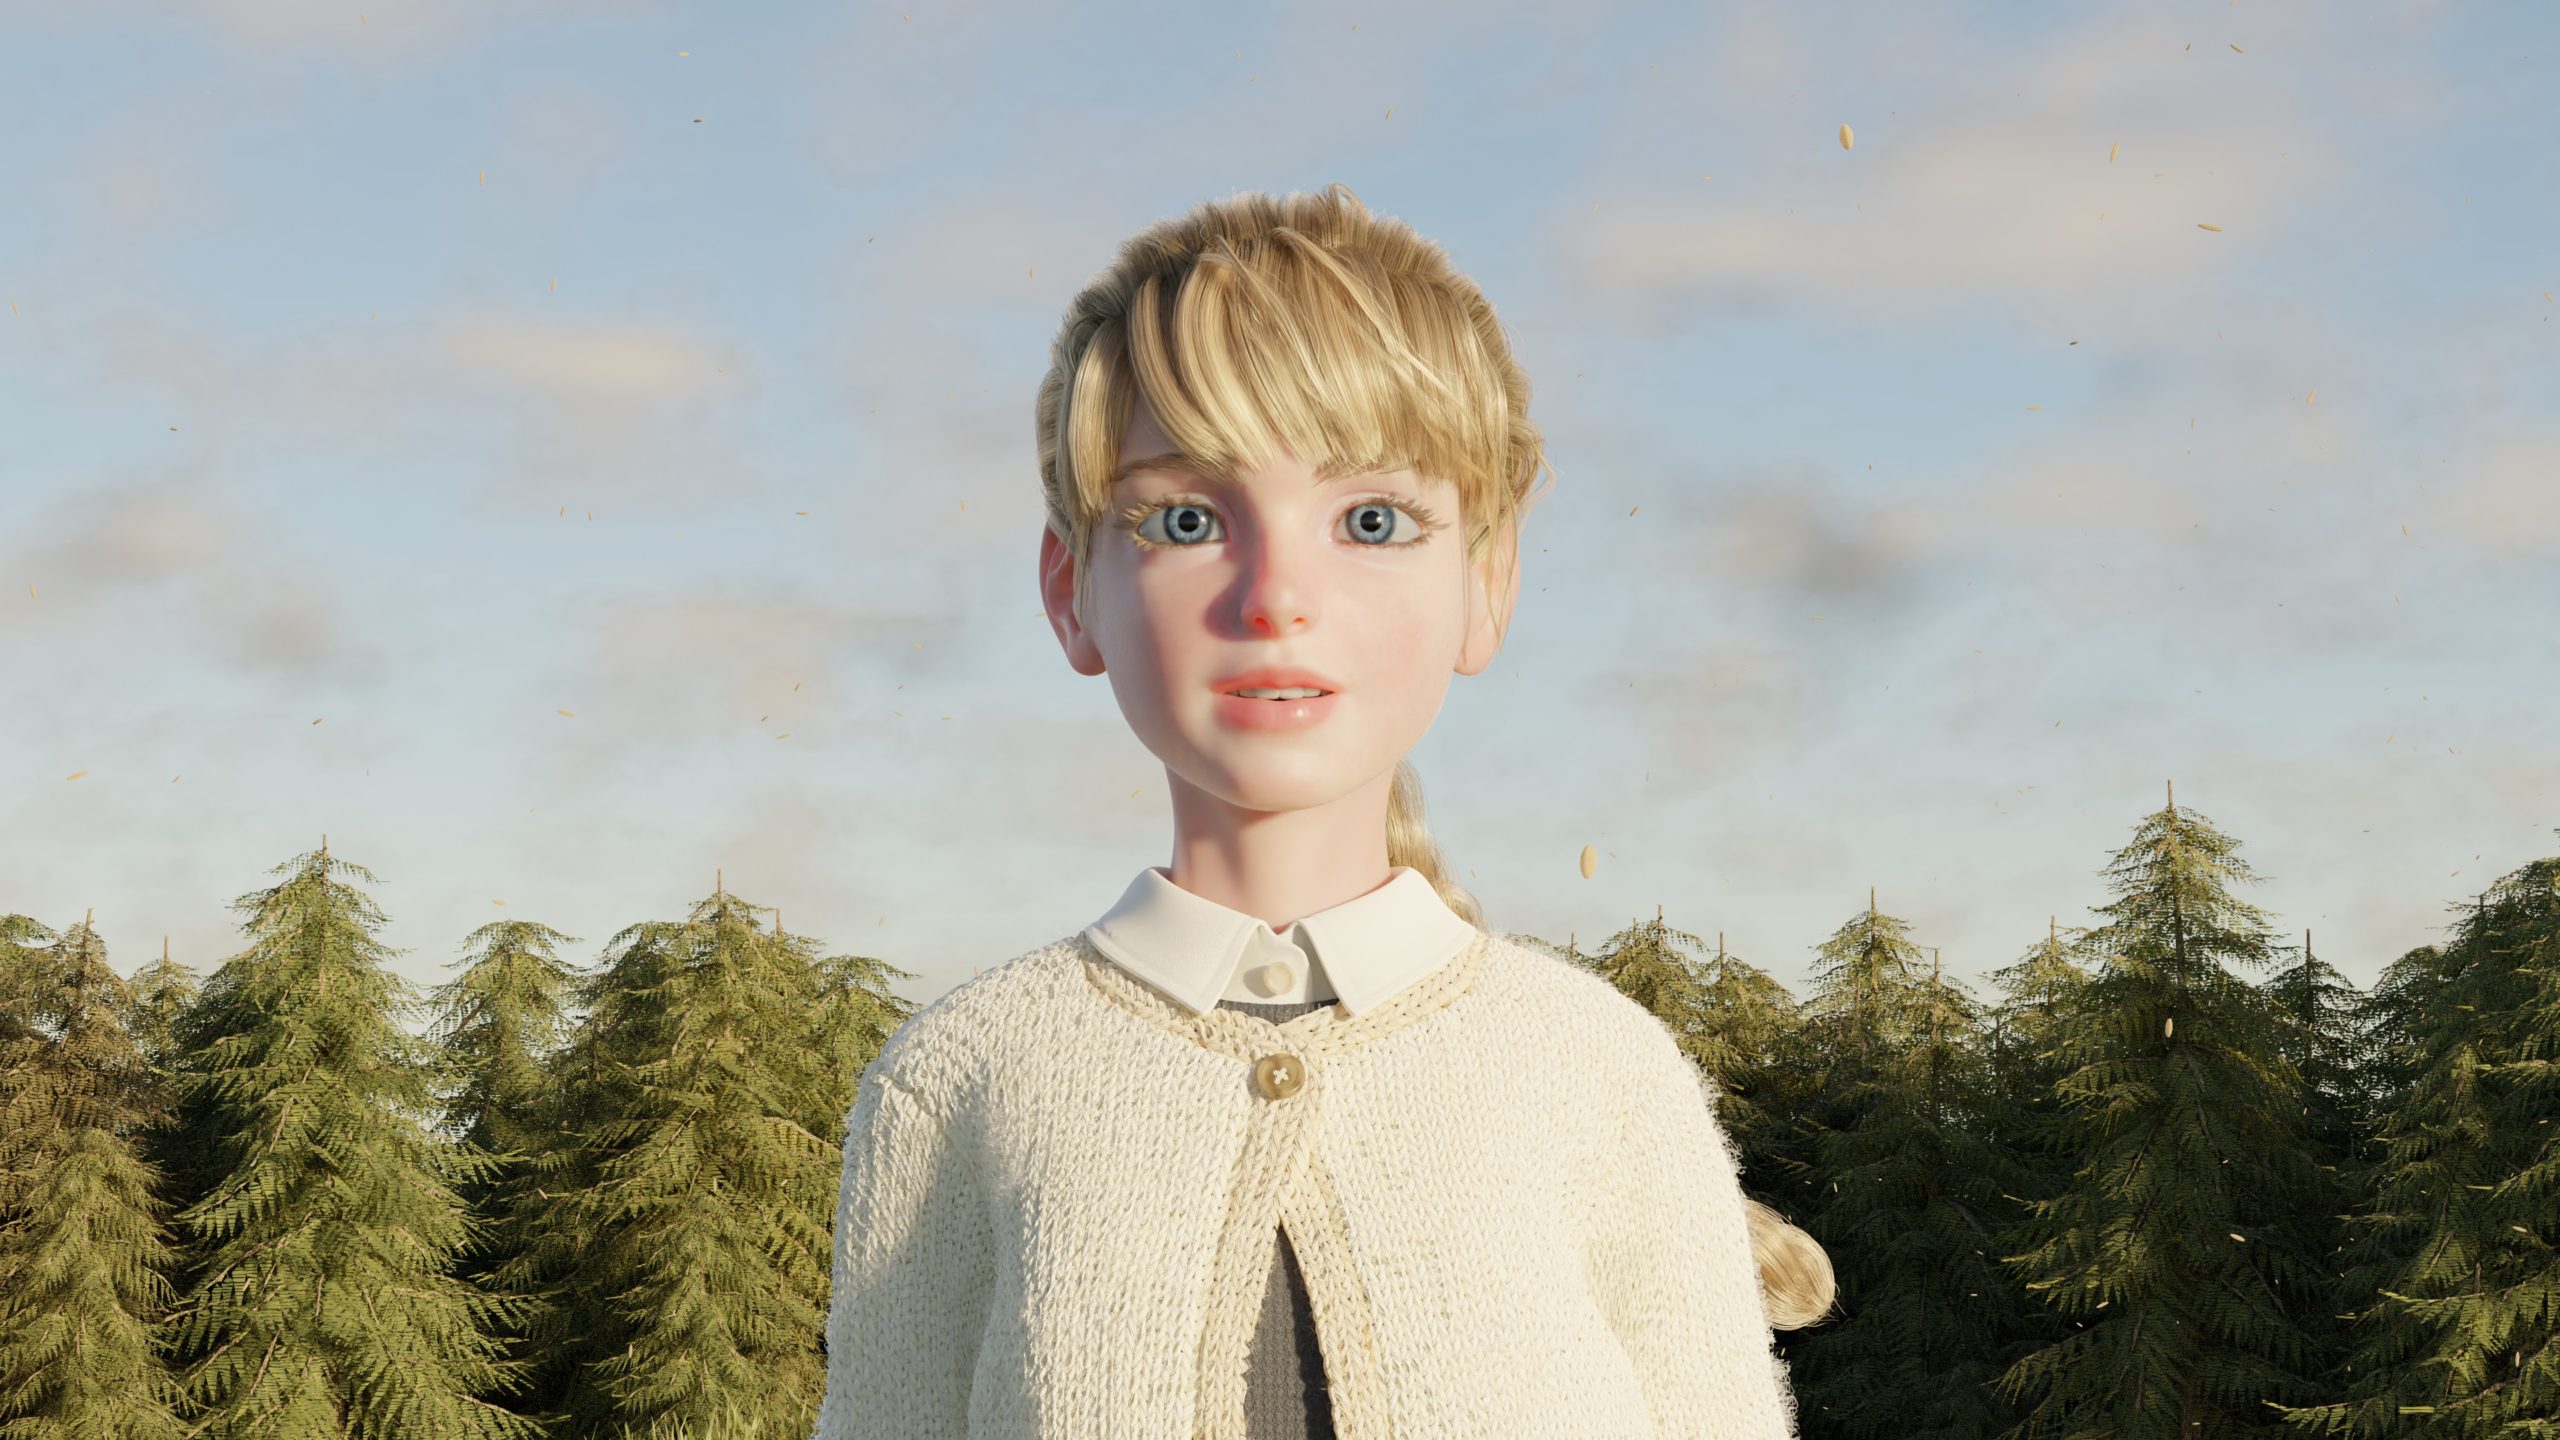
The body texture maps were hand-painted. Mostly I used brushes with cloud texture masks to reproduce the irregularity of skin. I painted a color map, SSS map, SSS mask map, and roughness map for the skin.
Texture maps for clothing were much simpler. It was mostly about selecting some mesh, and pouring and adjusting colors for each part.
Skin material
This is the skin shader, consisting of the four texture maps (color, SSS, SSS mask, and roughness).

Cloth materials
The textures for clothing were created using procedural textures and nodes. I used a simplified version of Erindale’s wonderful knit material for cardigans and tights.
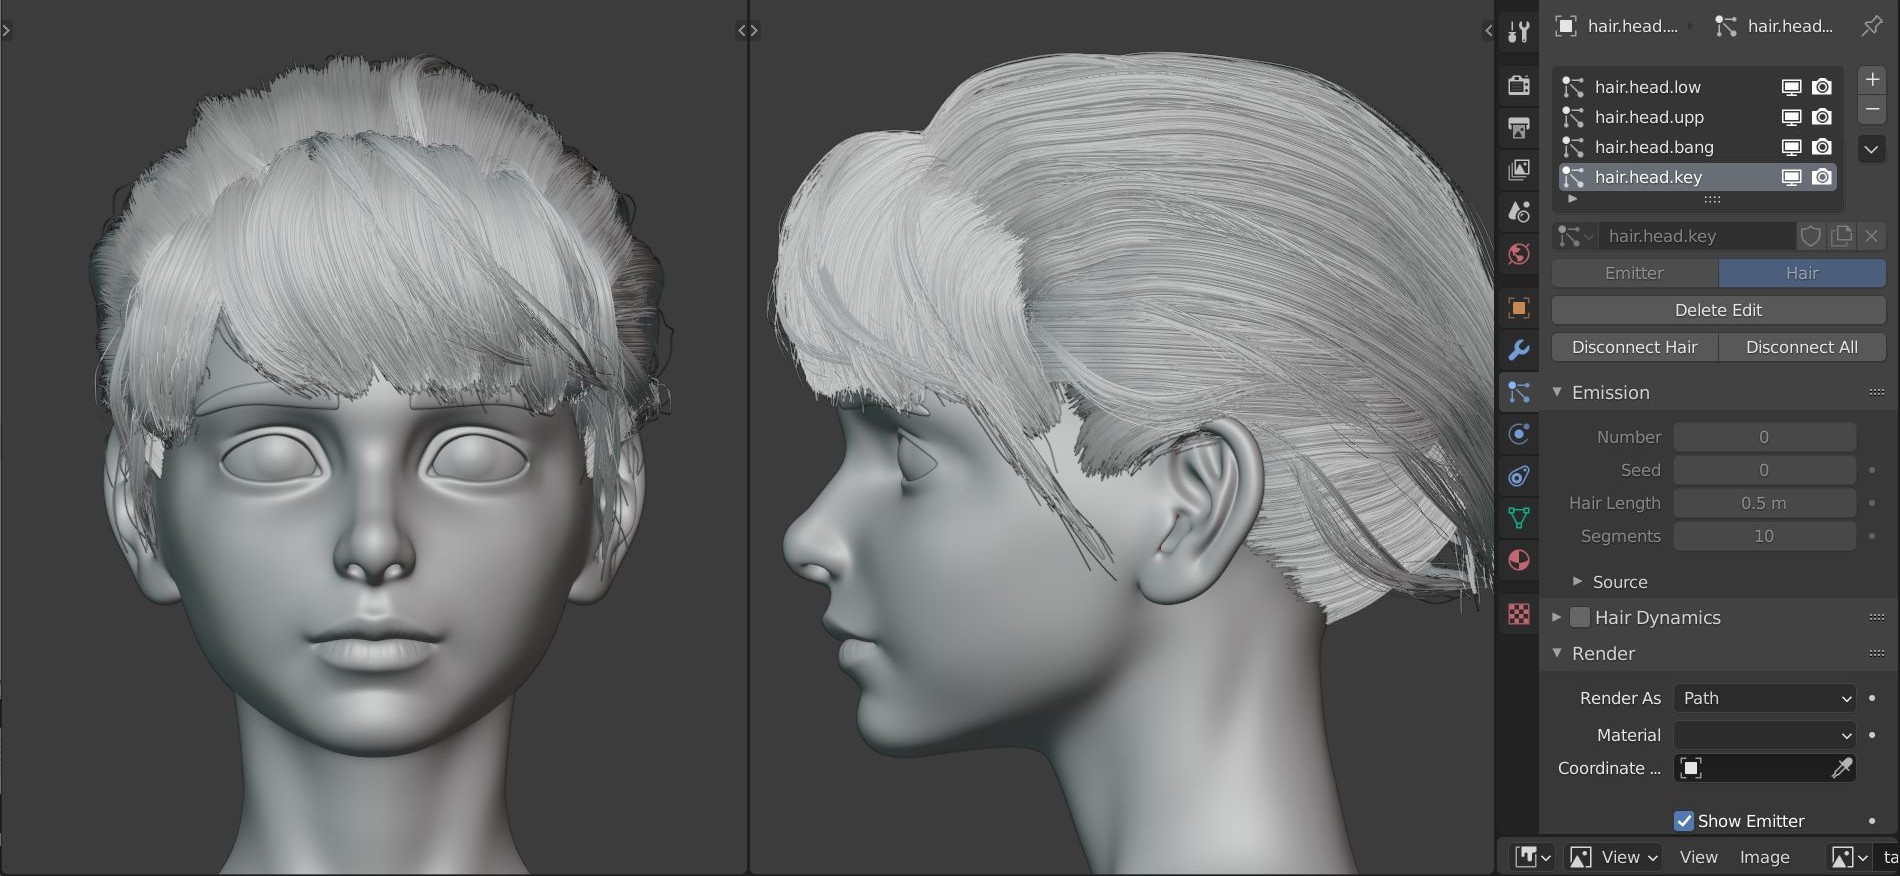
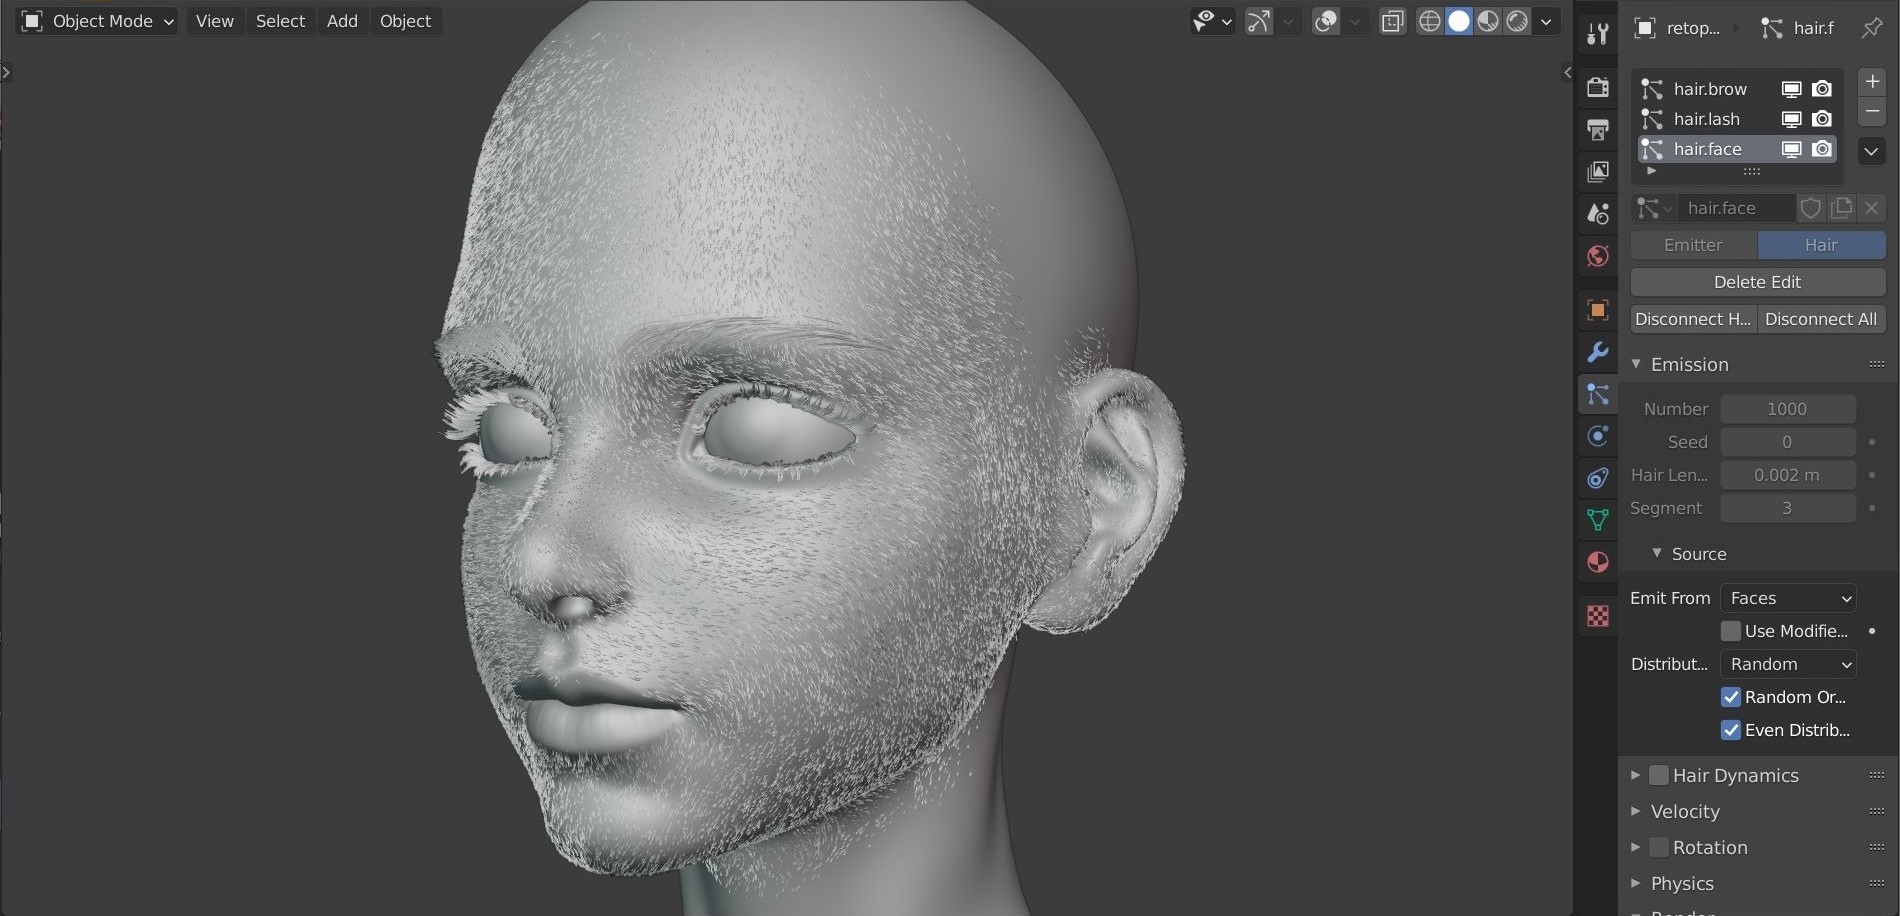
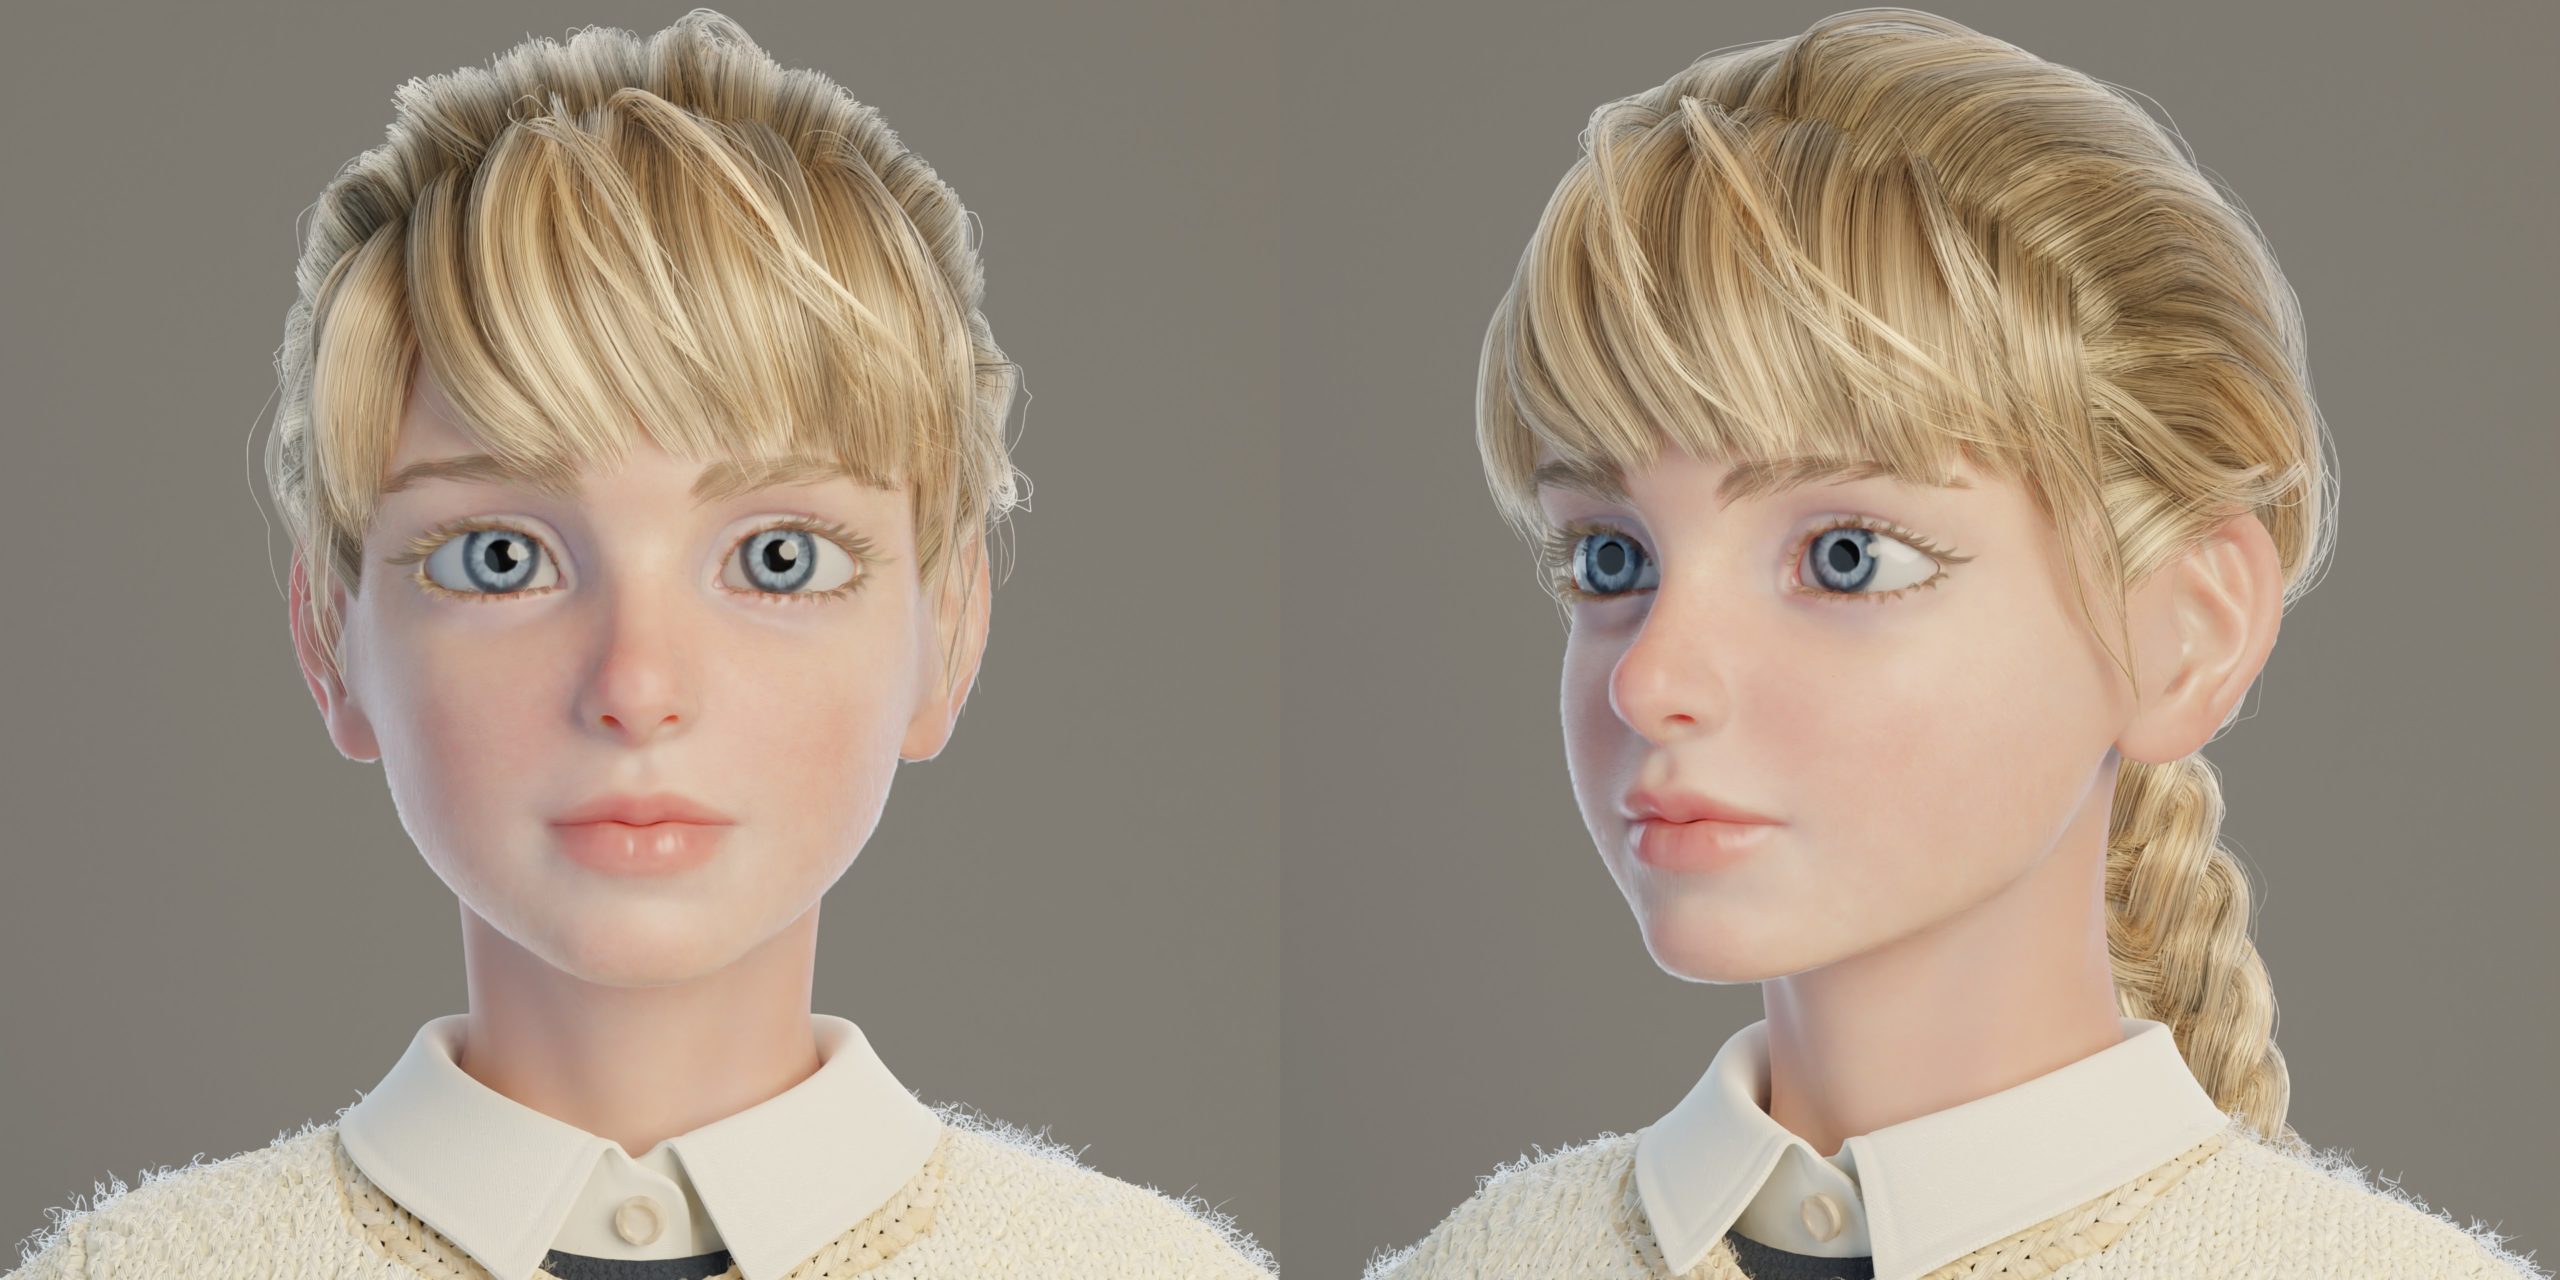
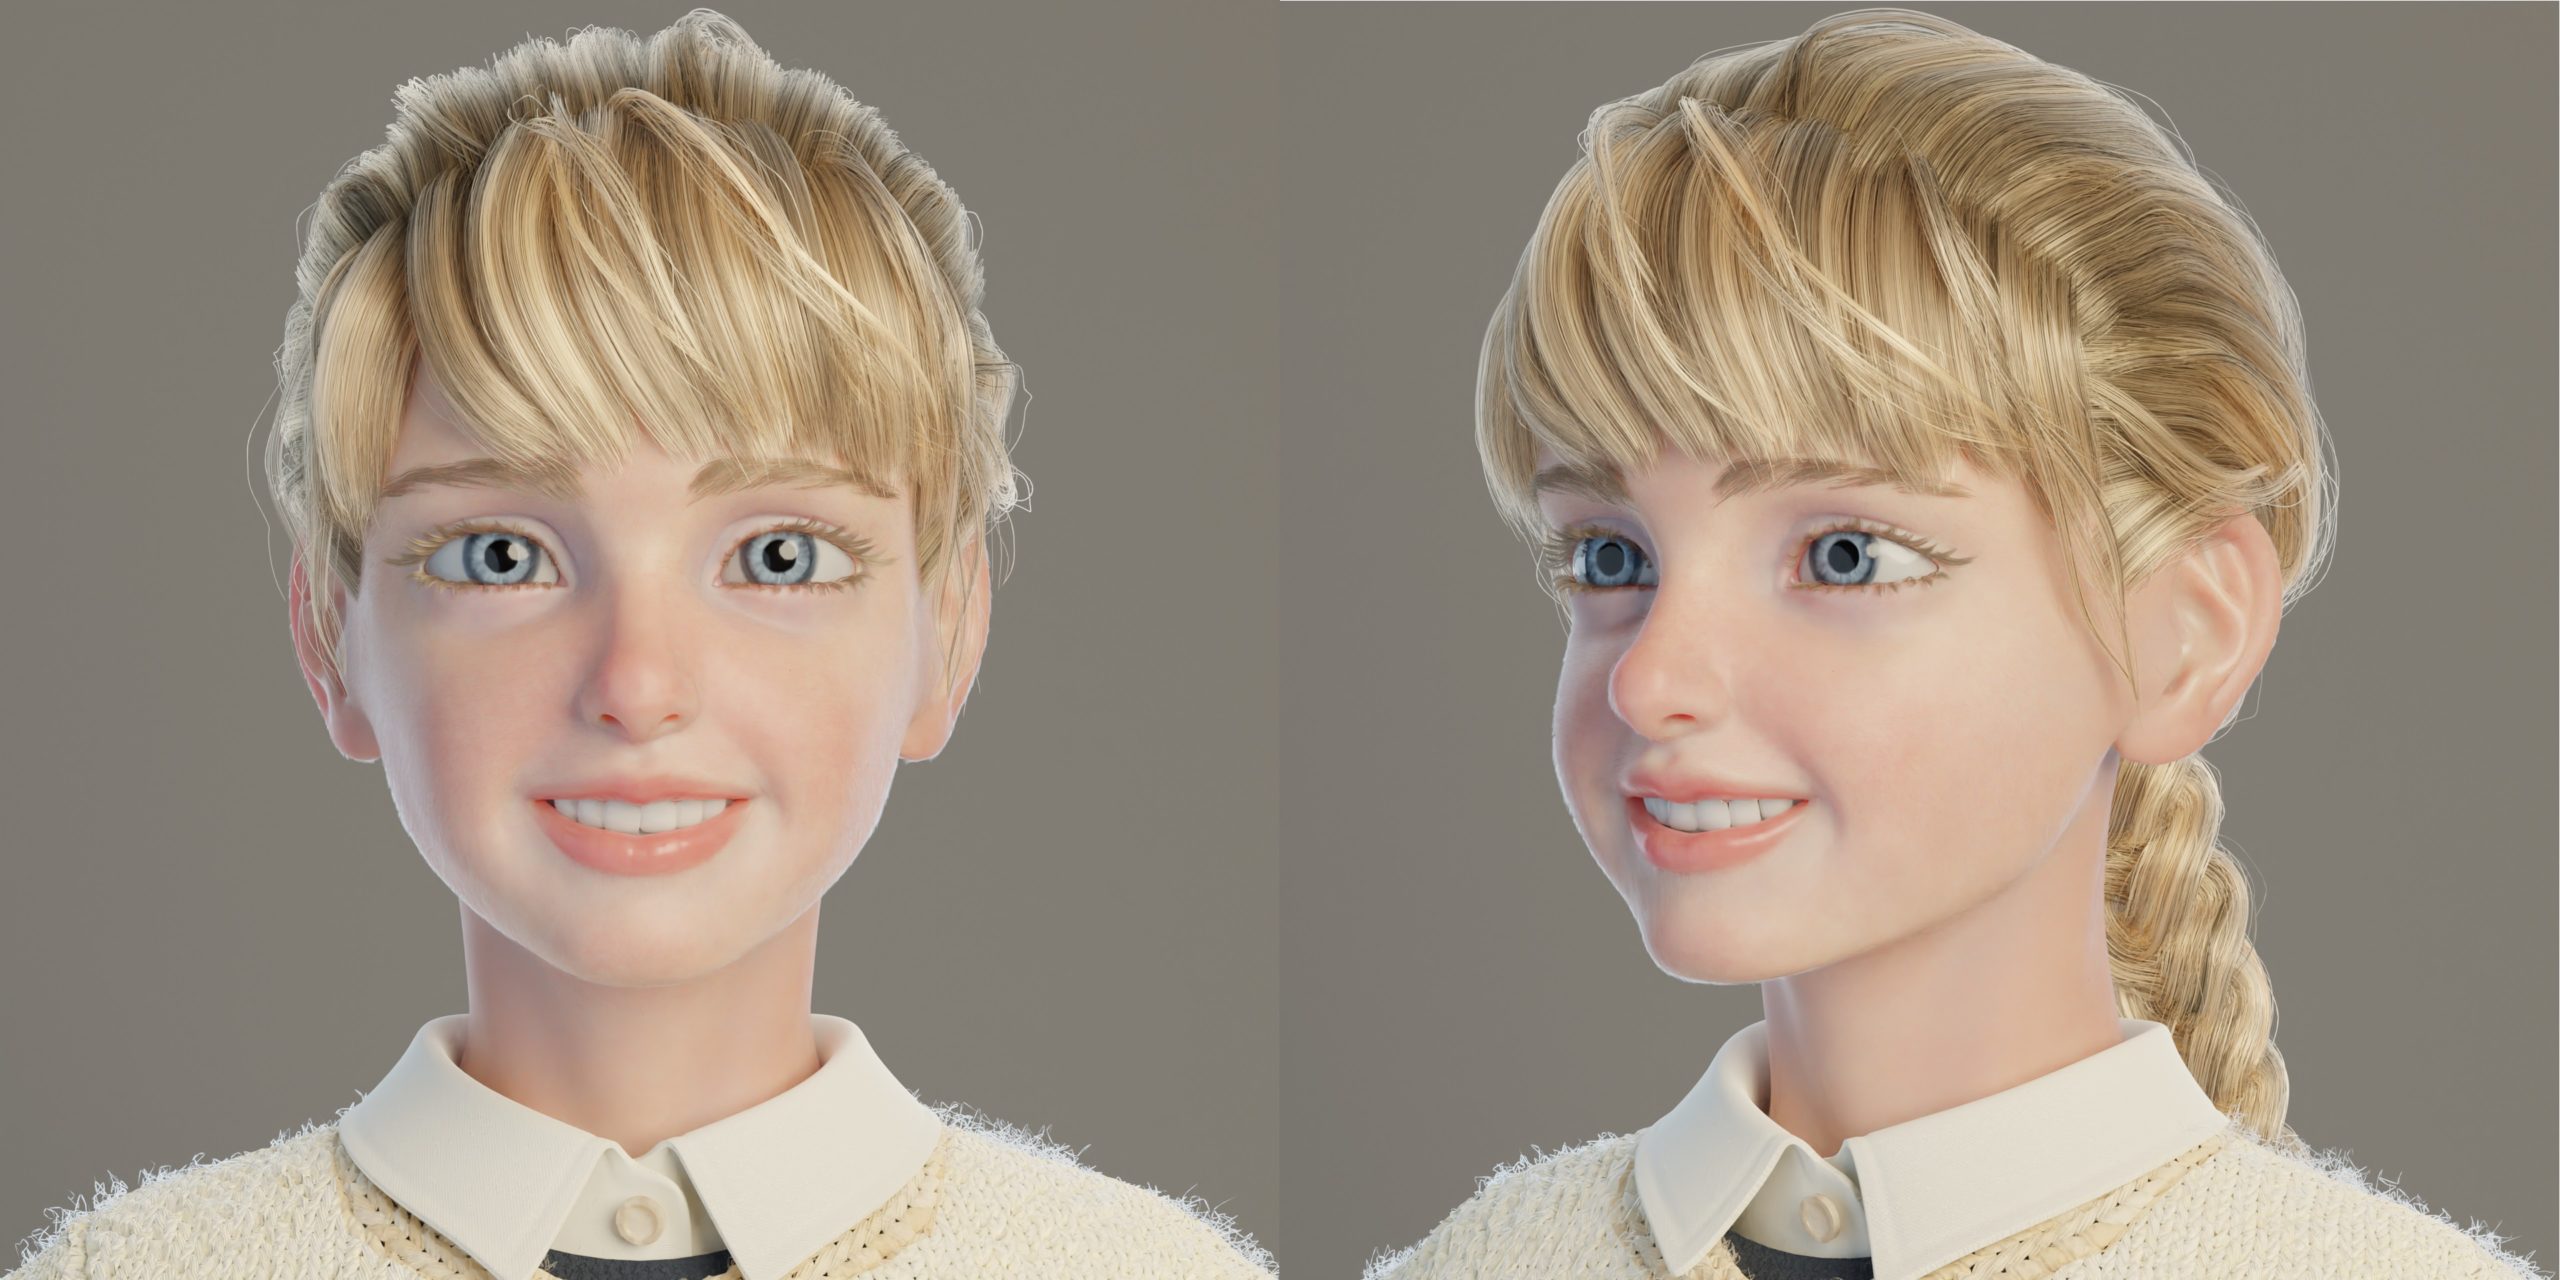
Hair
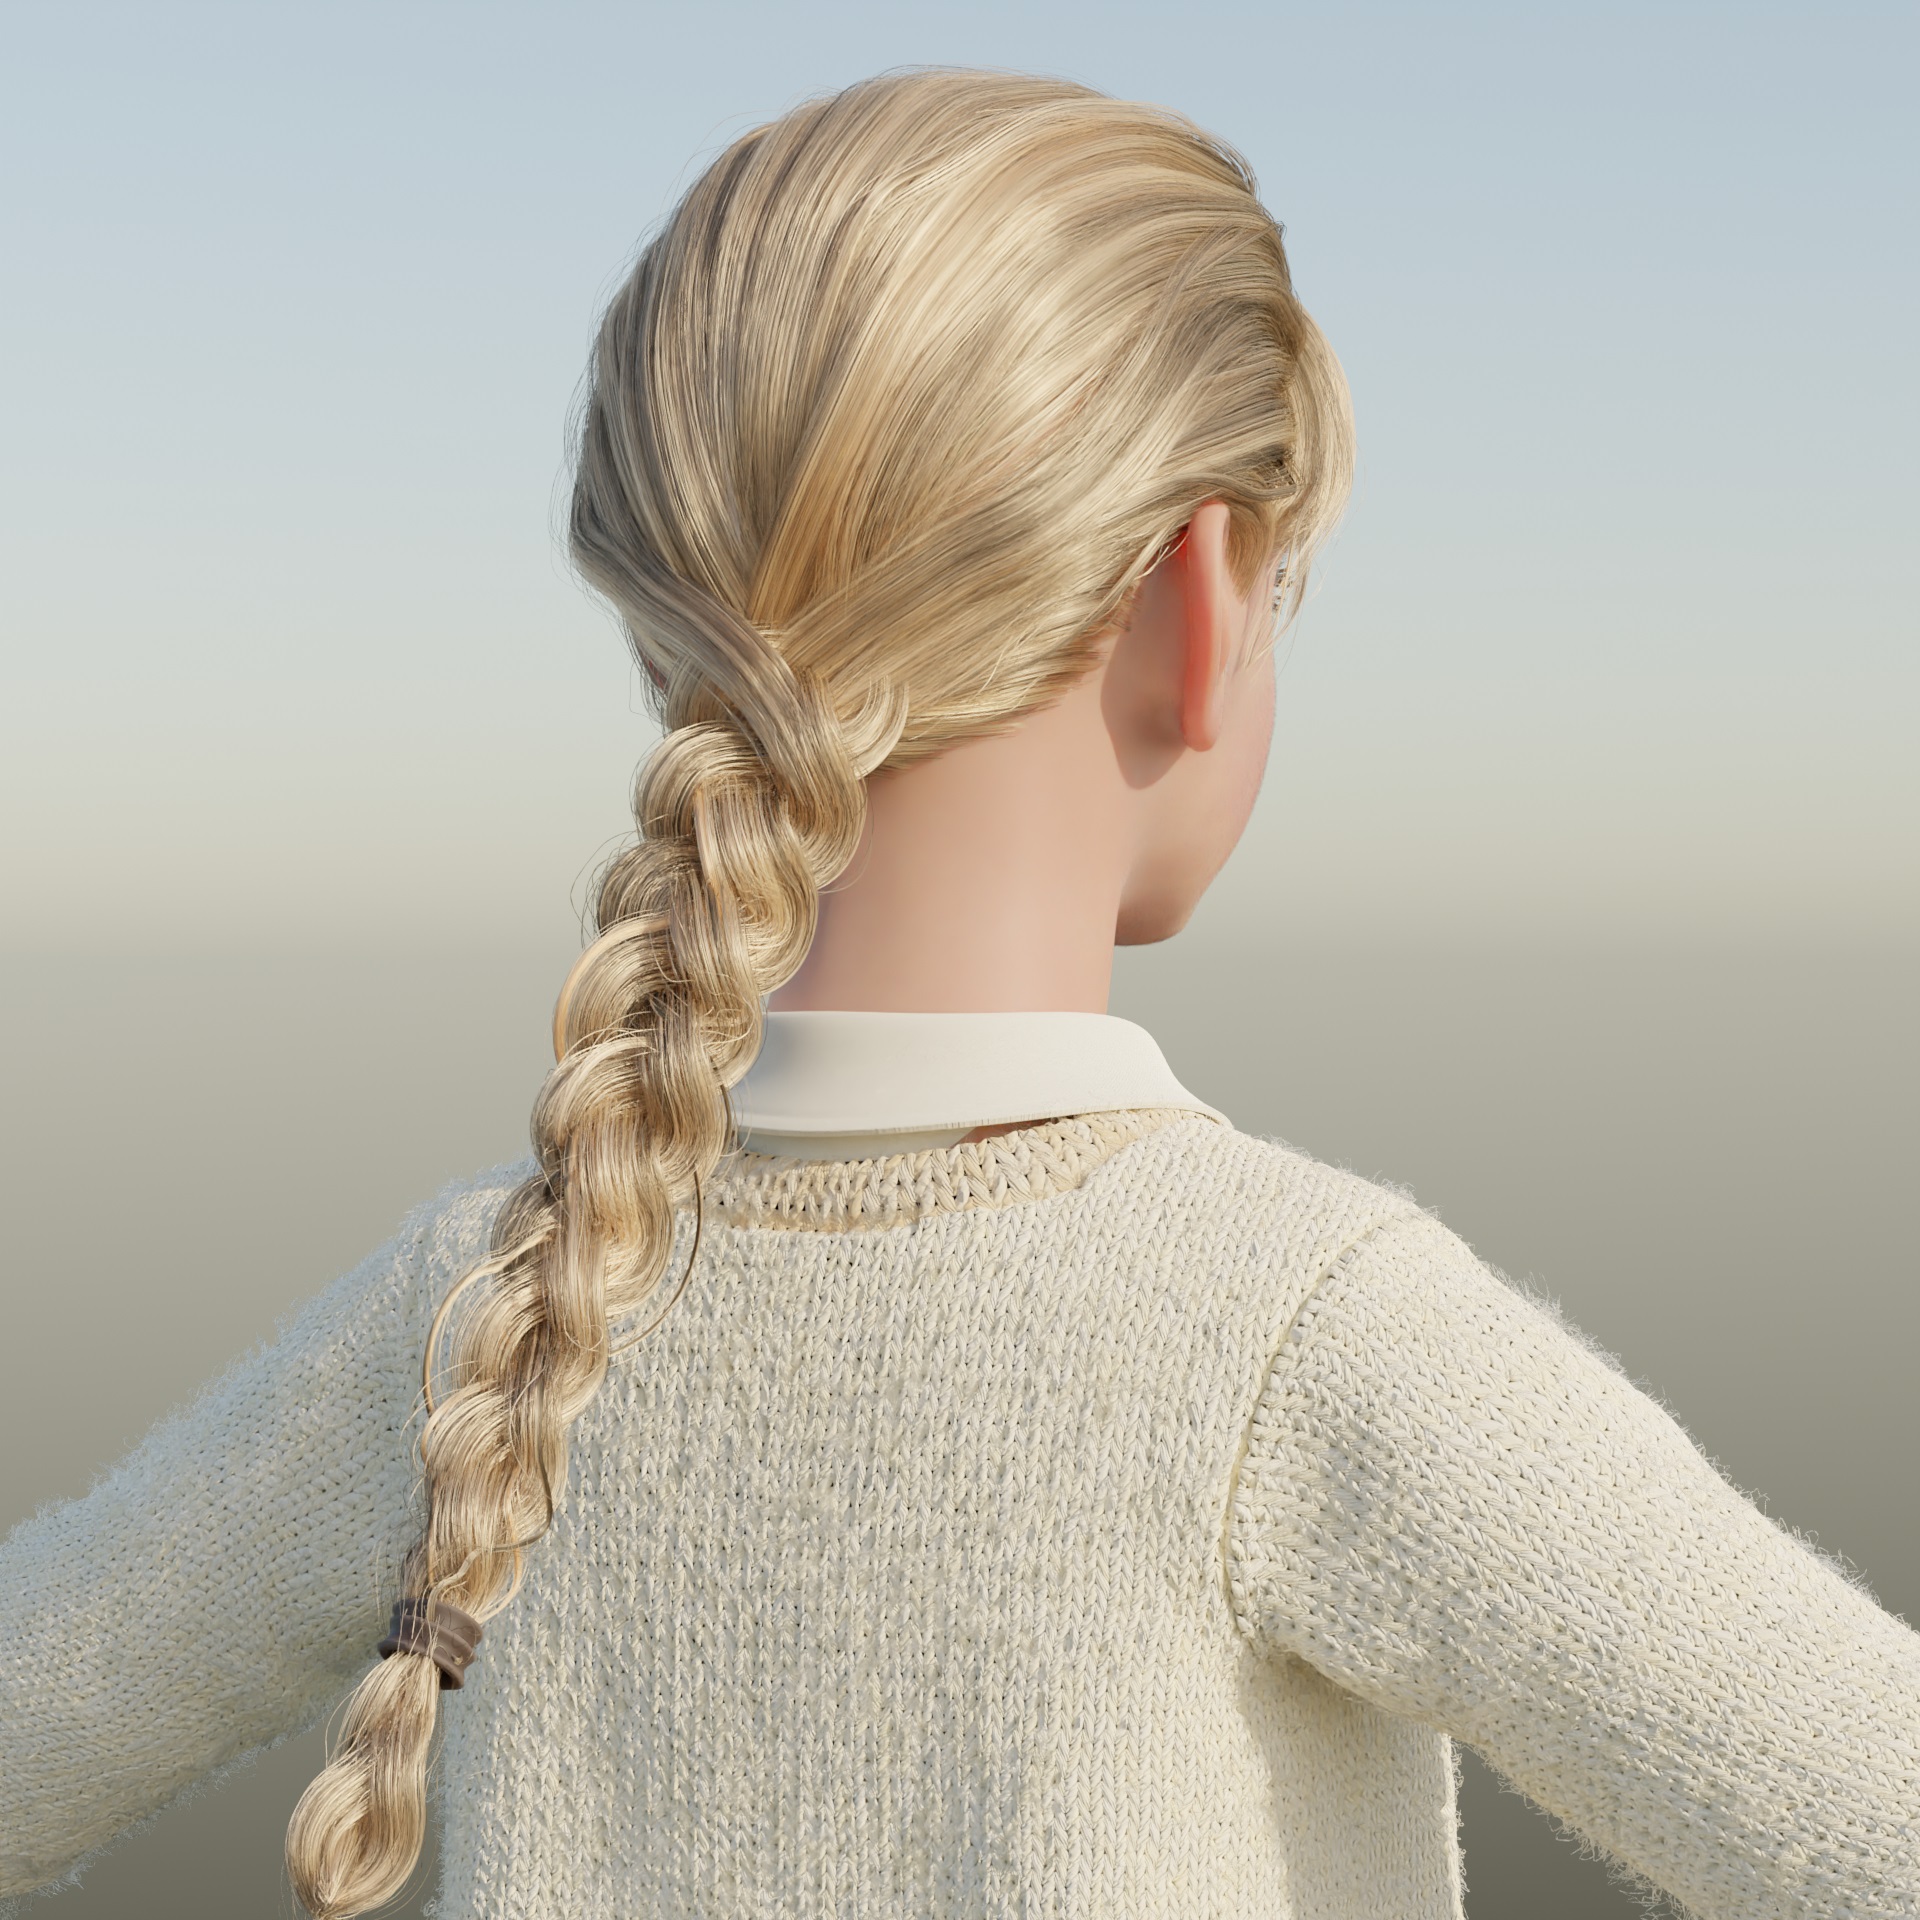
The particle hair was separated into several parts for convenience (upper, lower, bang, key locks, braid).
Nazar Noschenko’s braid tutorial on YouTube was a great help.
But I had to use a bit different method to rig and animate the braid.
The eyebrows and eyelashes were created with hair particle systems as well.
The facial hair added just a little difference to the rendering. I’m still not sure if it was meaningful.
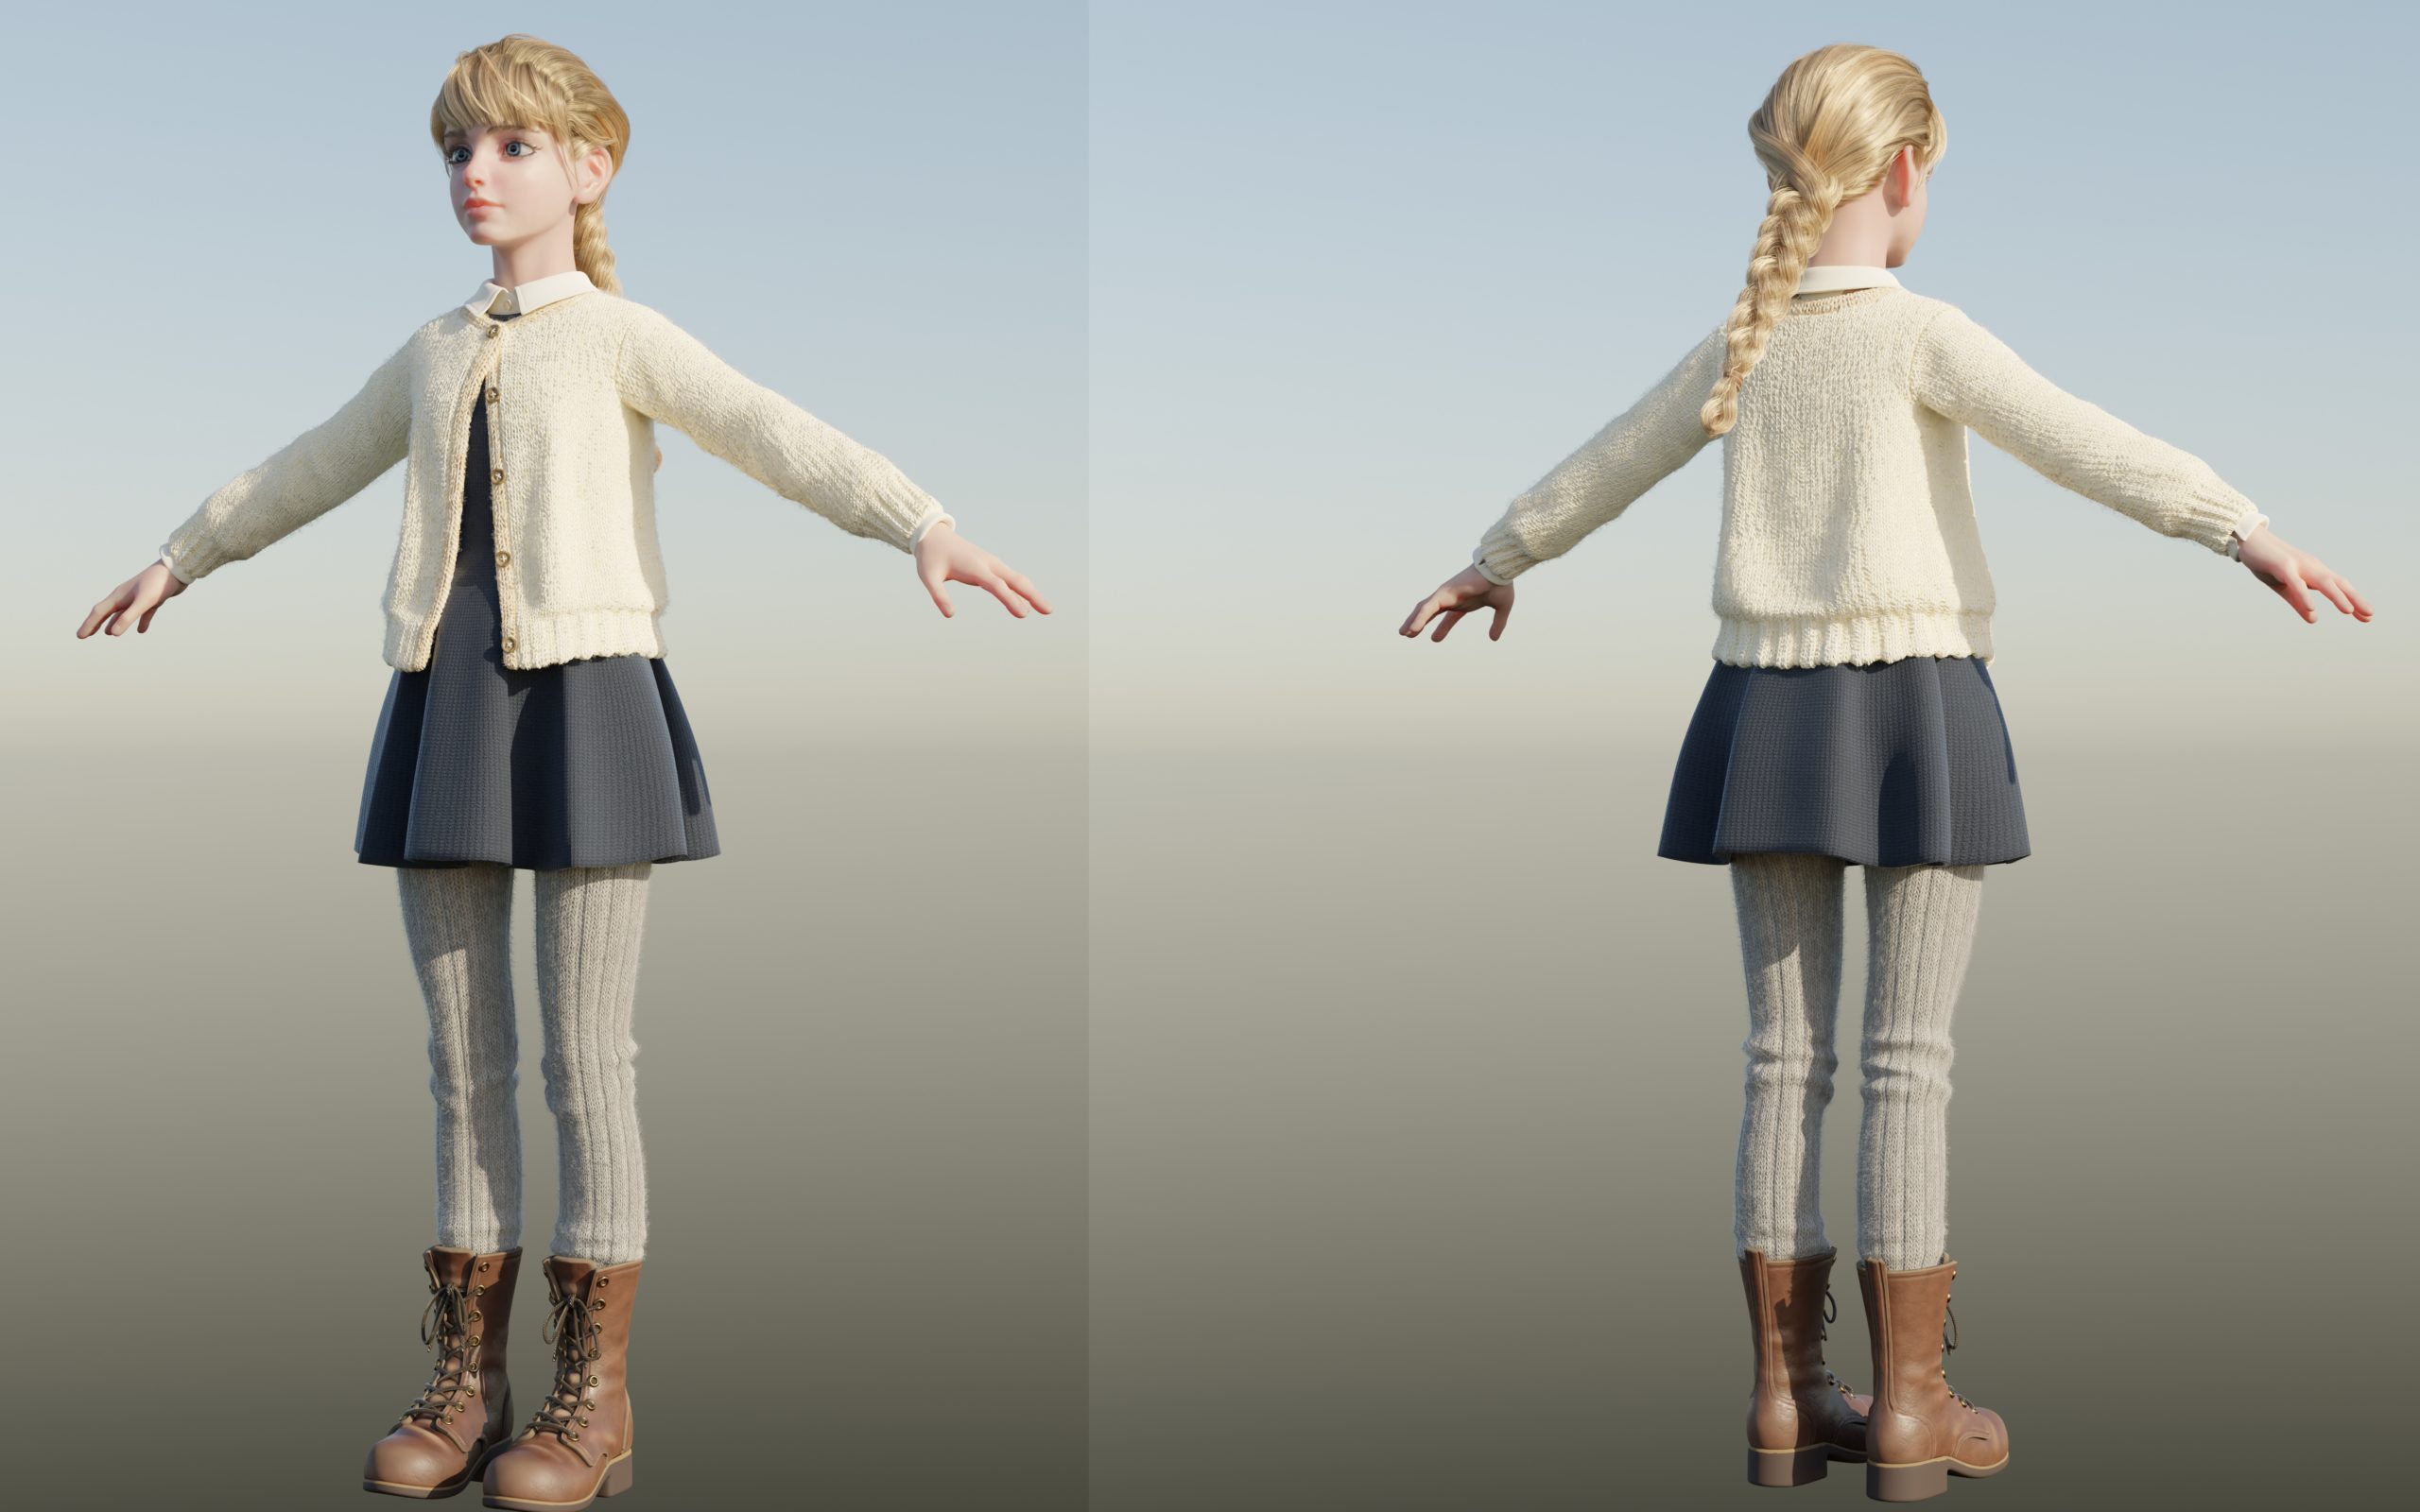
This is the result of the skin and hair.
Rigging
Nathan Vegdahl’s Humane Rigging was a great Reference for the body rig,
and Lee Salvemini’s tutorials were essential to the facial rig.
The whole rig was created from a single bone.
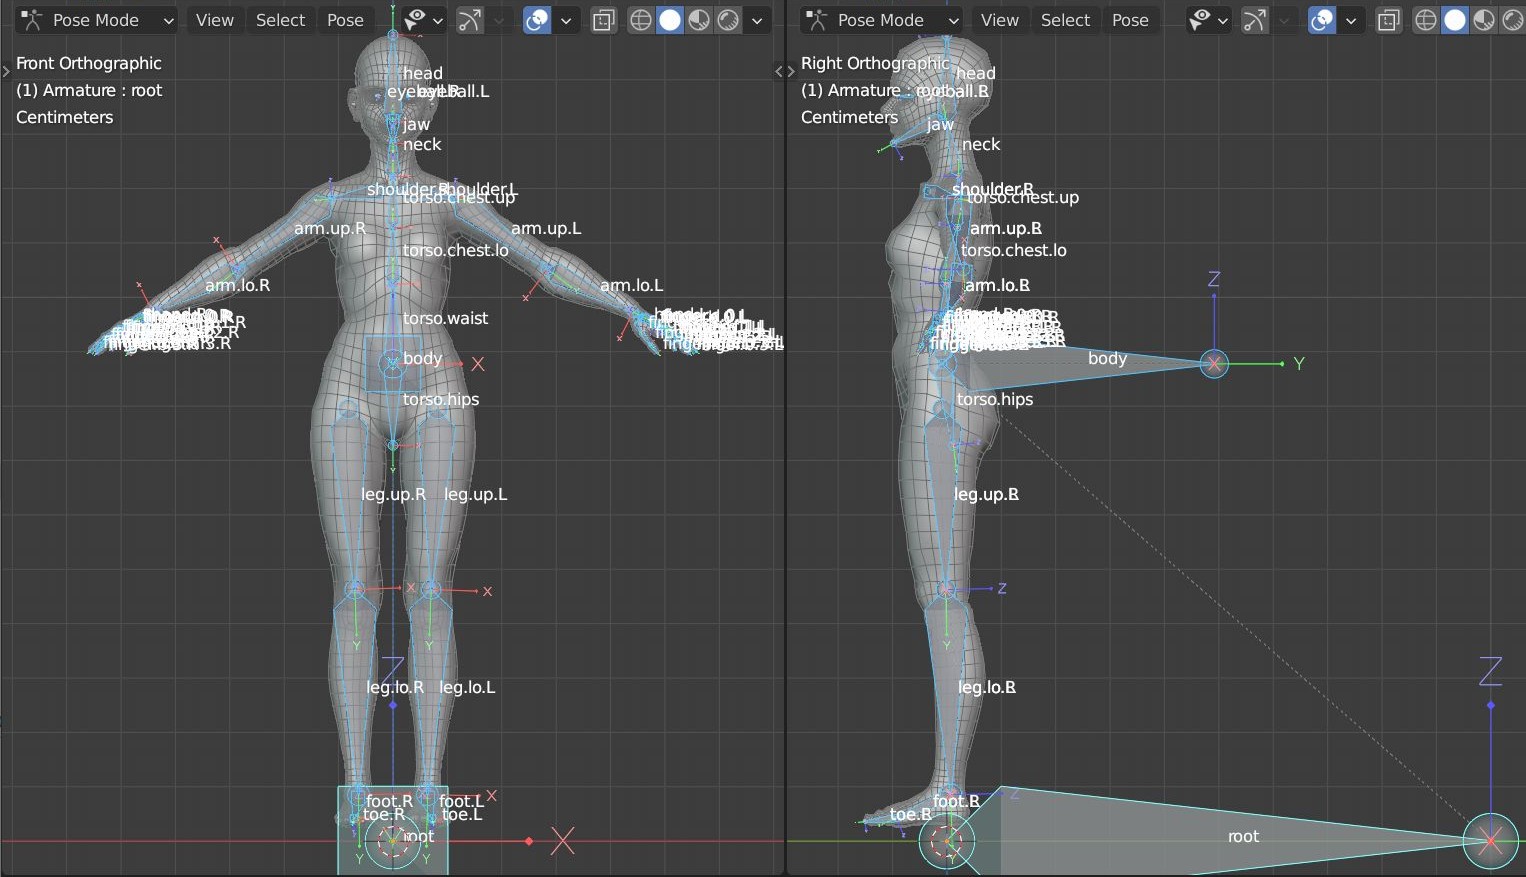
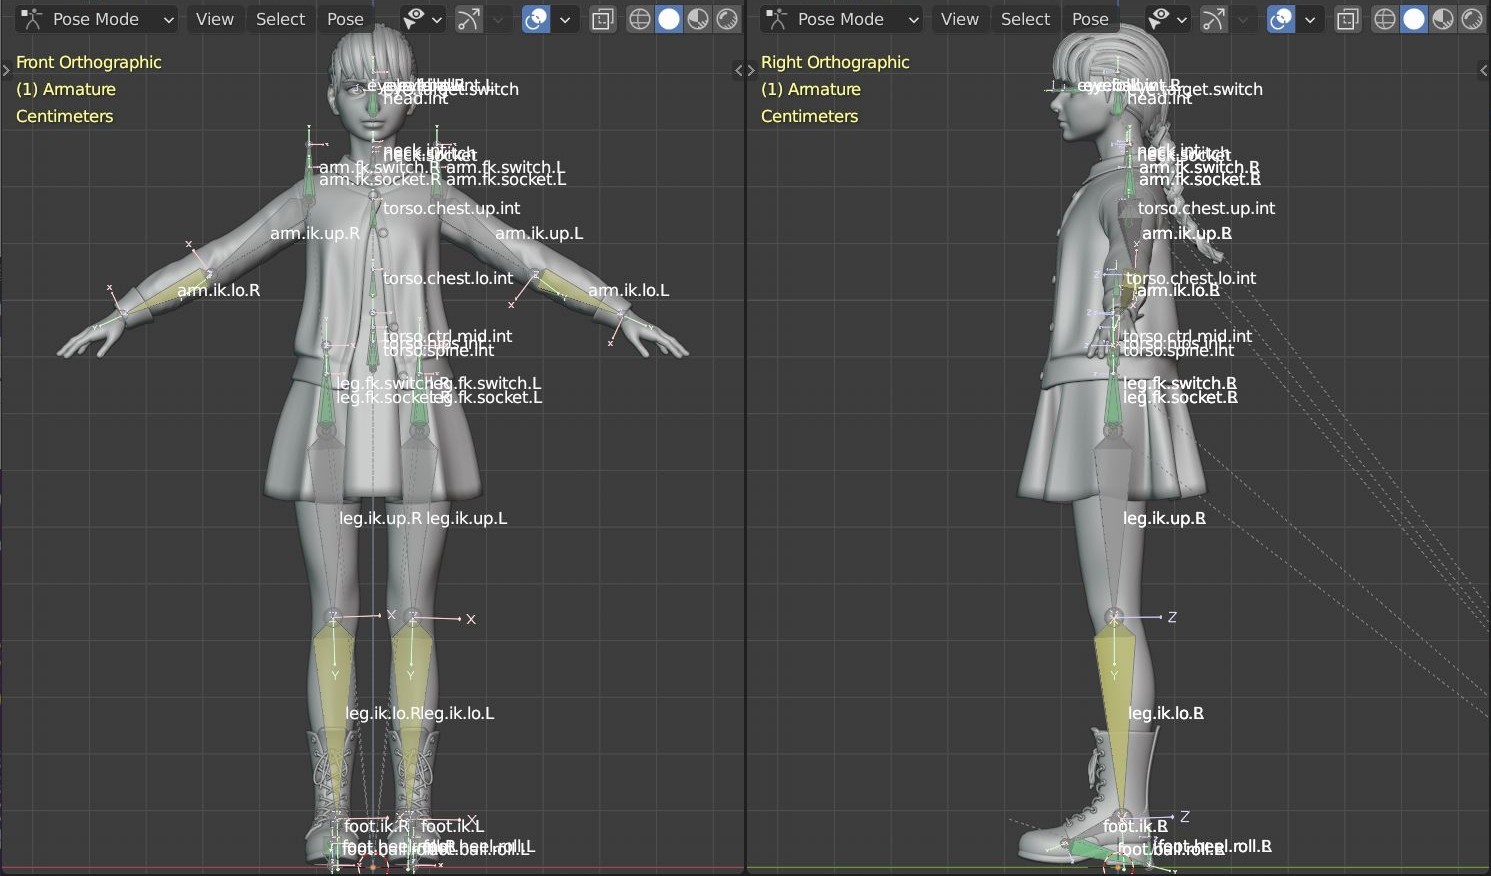
This is the final rig with custom bone shapes for control bones. For skinning, I mostly relied on the mesh deform method, using simple cage meshes.
And unsatisfying deformations were fixed with driven shape keys.
Nature Assets
References
AgenZas Brothers’ Movie Scene Creation course was a great reference for the production of a complete scene. And also, Steve Lund’s CG Geek YouTube channel was a big help for this nature scene.
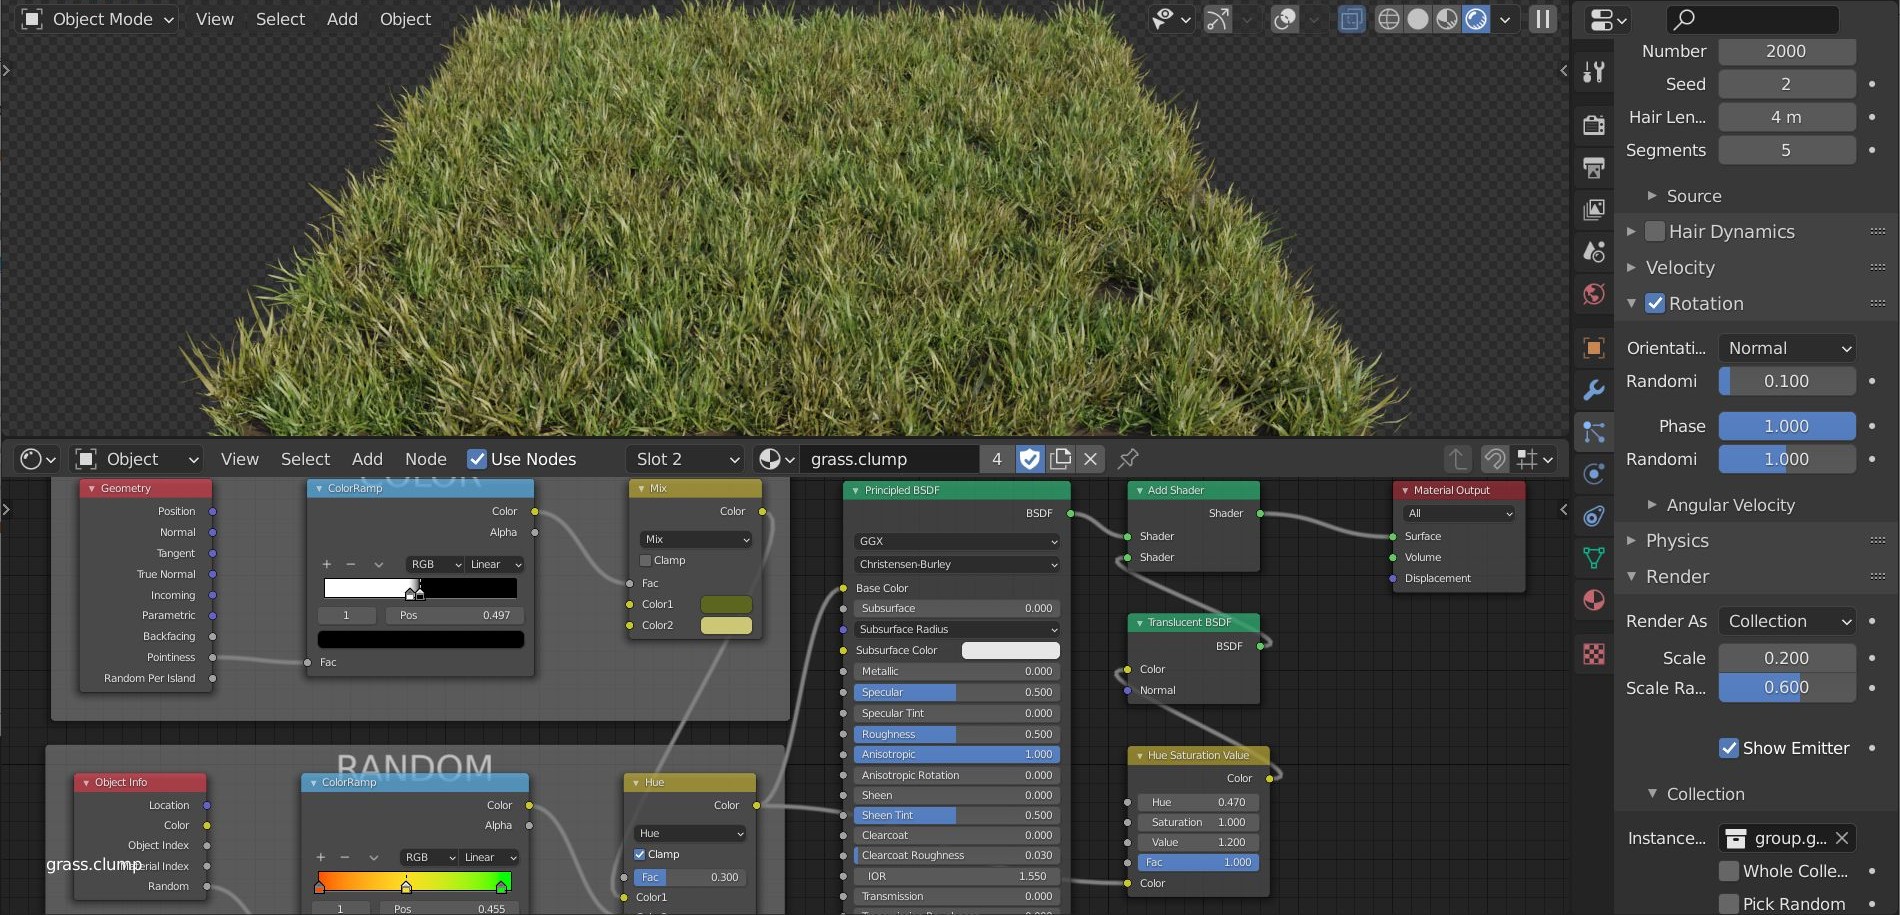
Grass
A grass clump is made with a simple plane, particle system, and displacement modifier to achieve random shapes. Then some color variation was added to the tips by using the pointiness setting of the geometry node. I duplicated the clump and made some variations for later.

The grass clumps were added to the field by using a particle system.
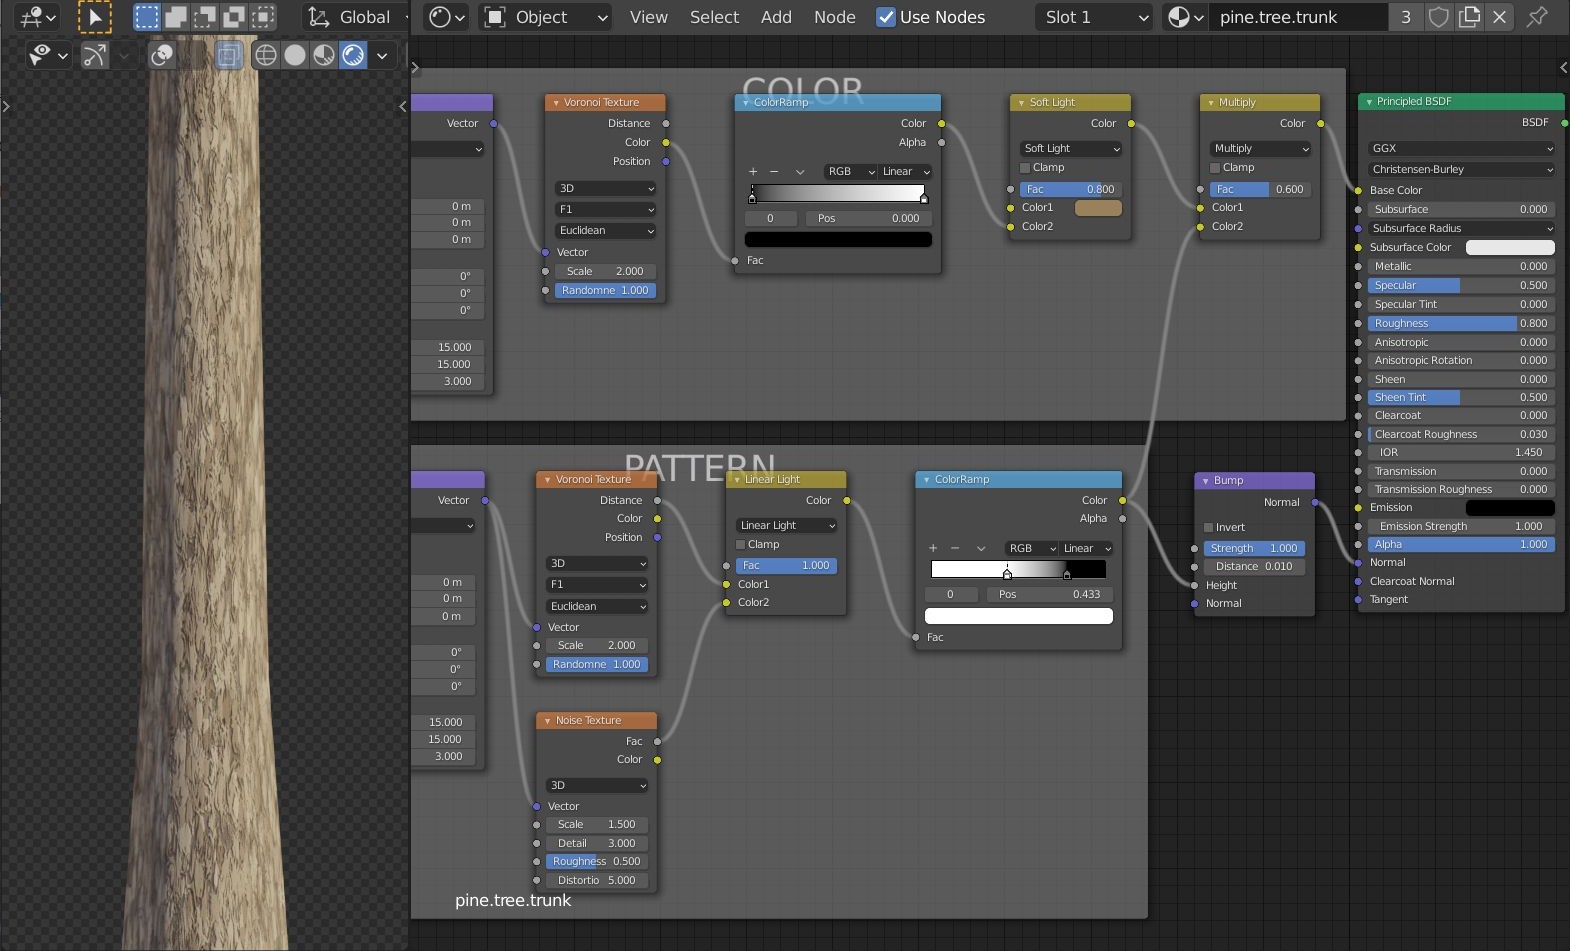
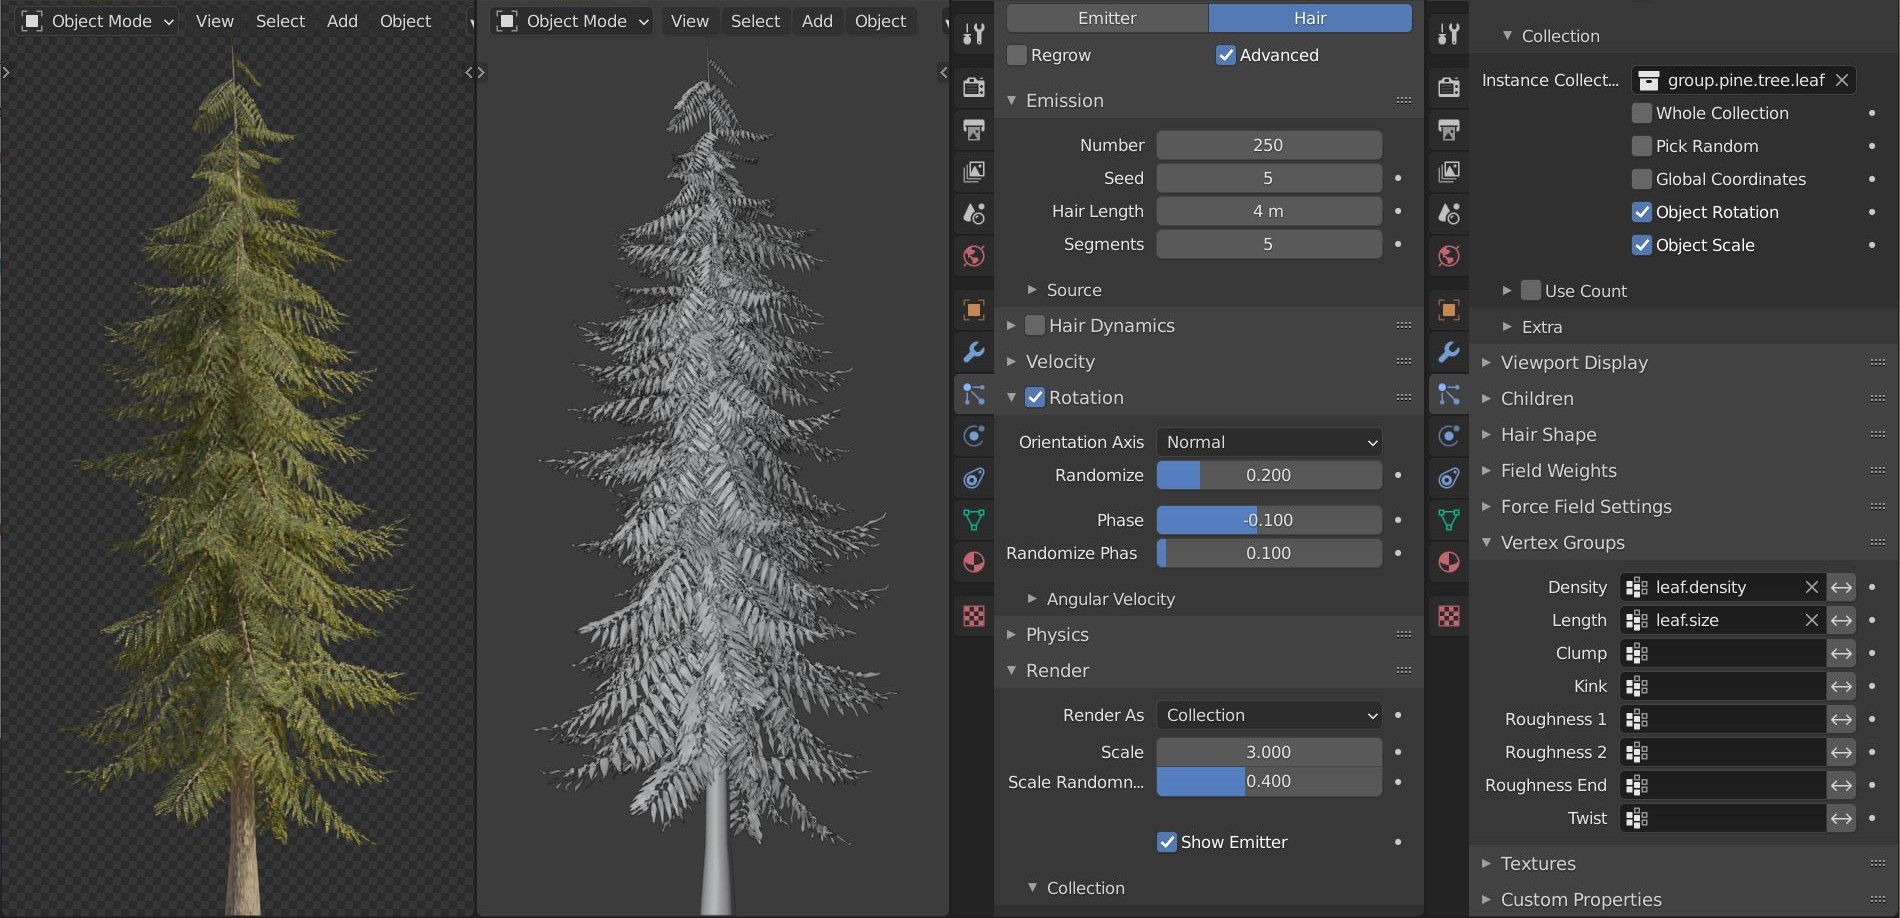
Trees
The trunk material was made with procedural textures as well.
Since the tree’s leaves would not be seen at a close distance, I only added some color variation and an irregular pattern of transparency. Later, this leaf was duplicated almost a million times in the scene by several particle systems.
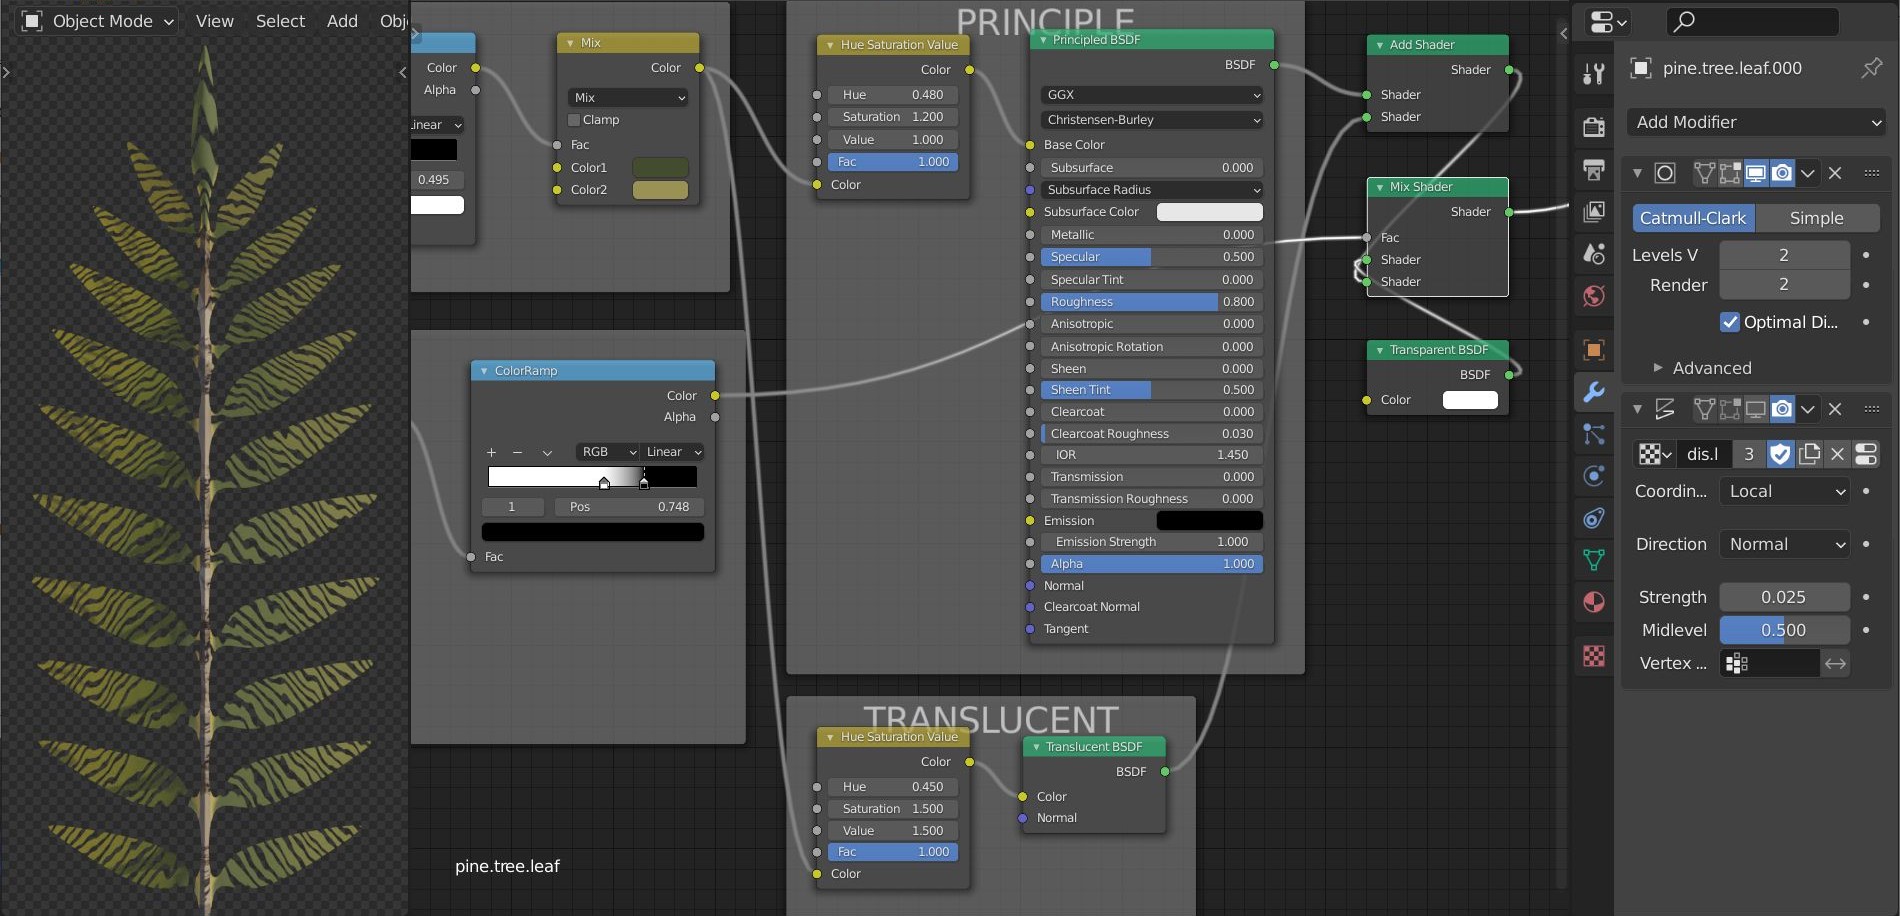
Then the leaves were added to the trunk by a particle system. The size of the particle leaves was controlled by vertex weight, and the density weight was the opposite of the size weight to compensate for the gaps between the smaller leaves.
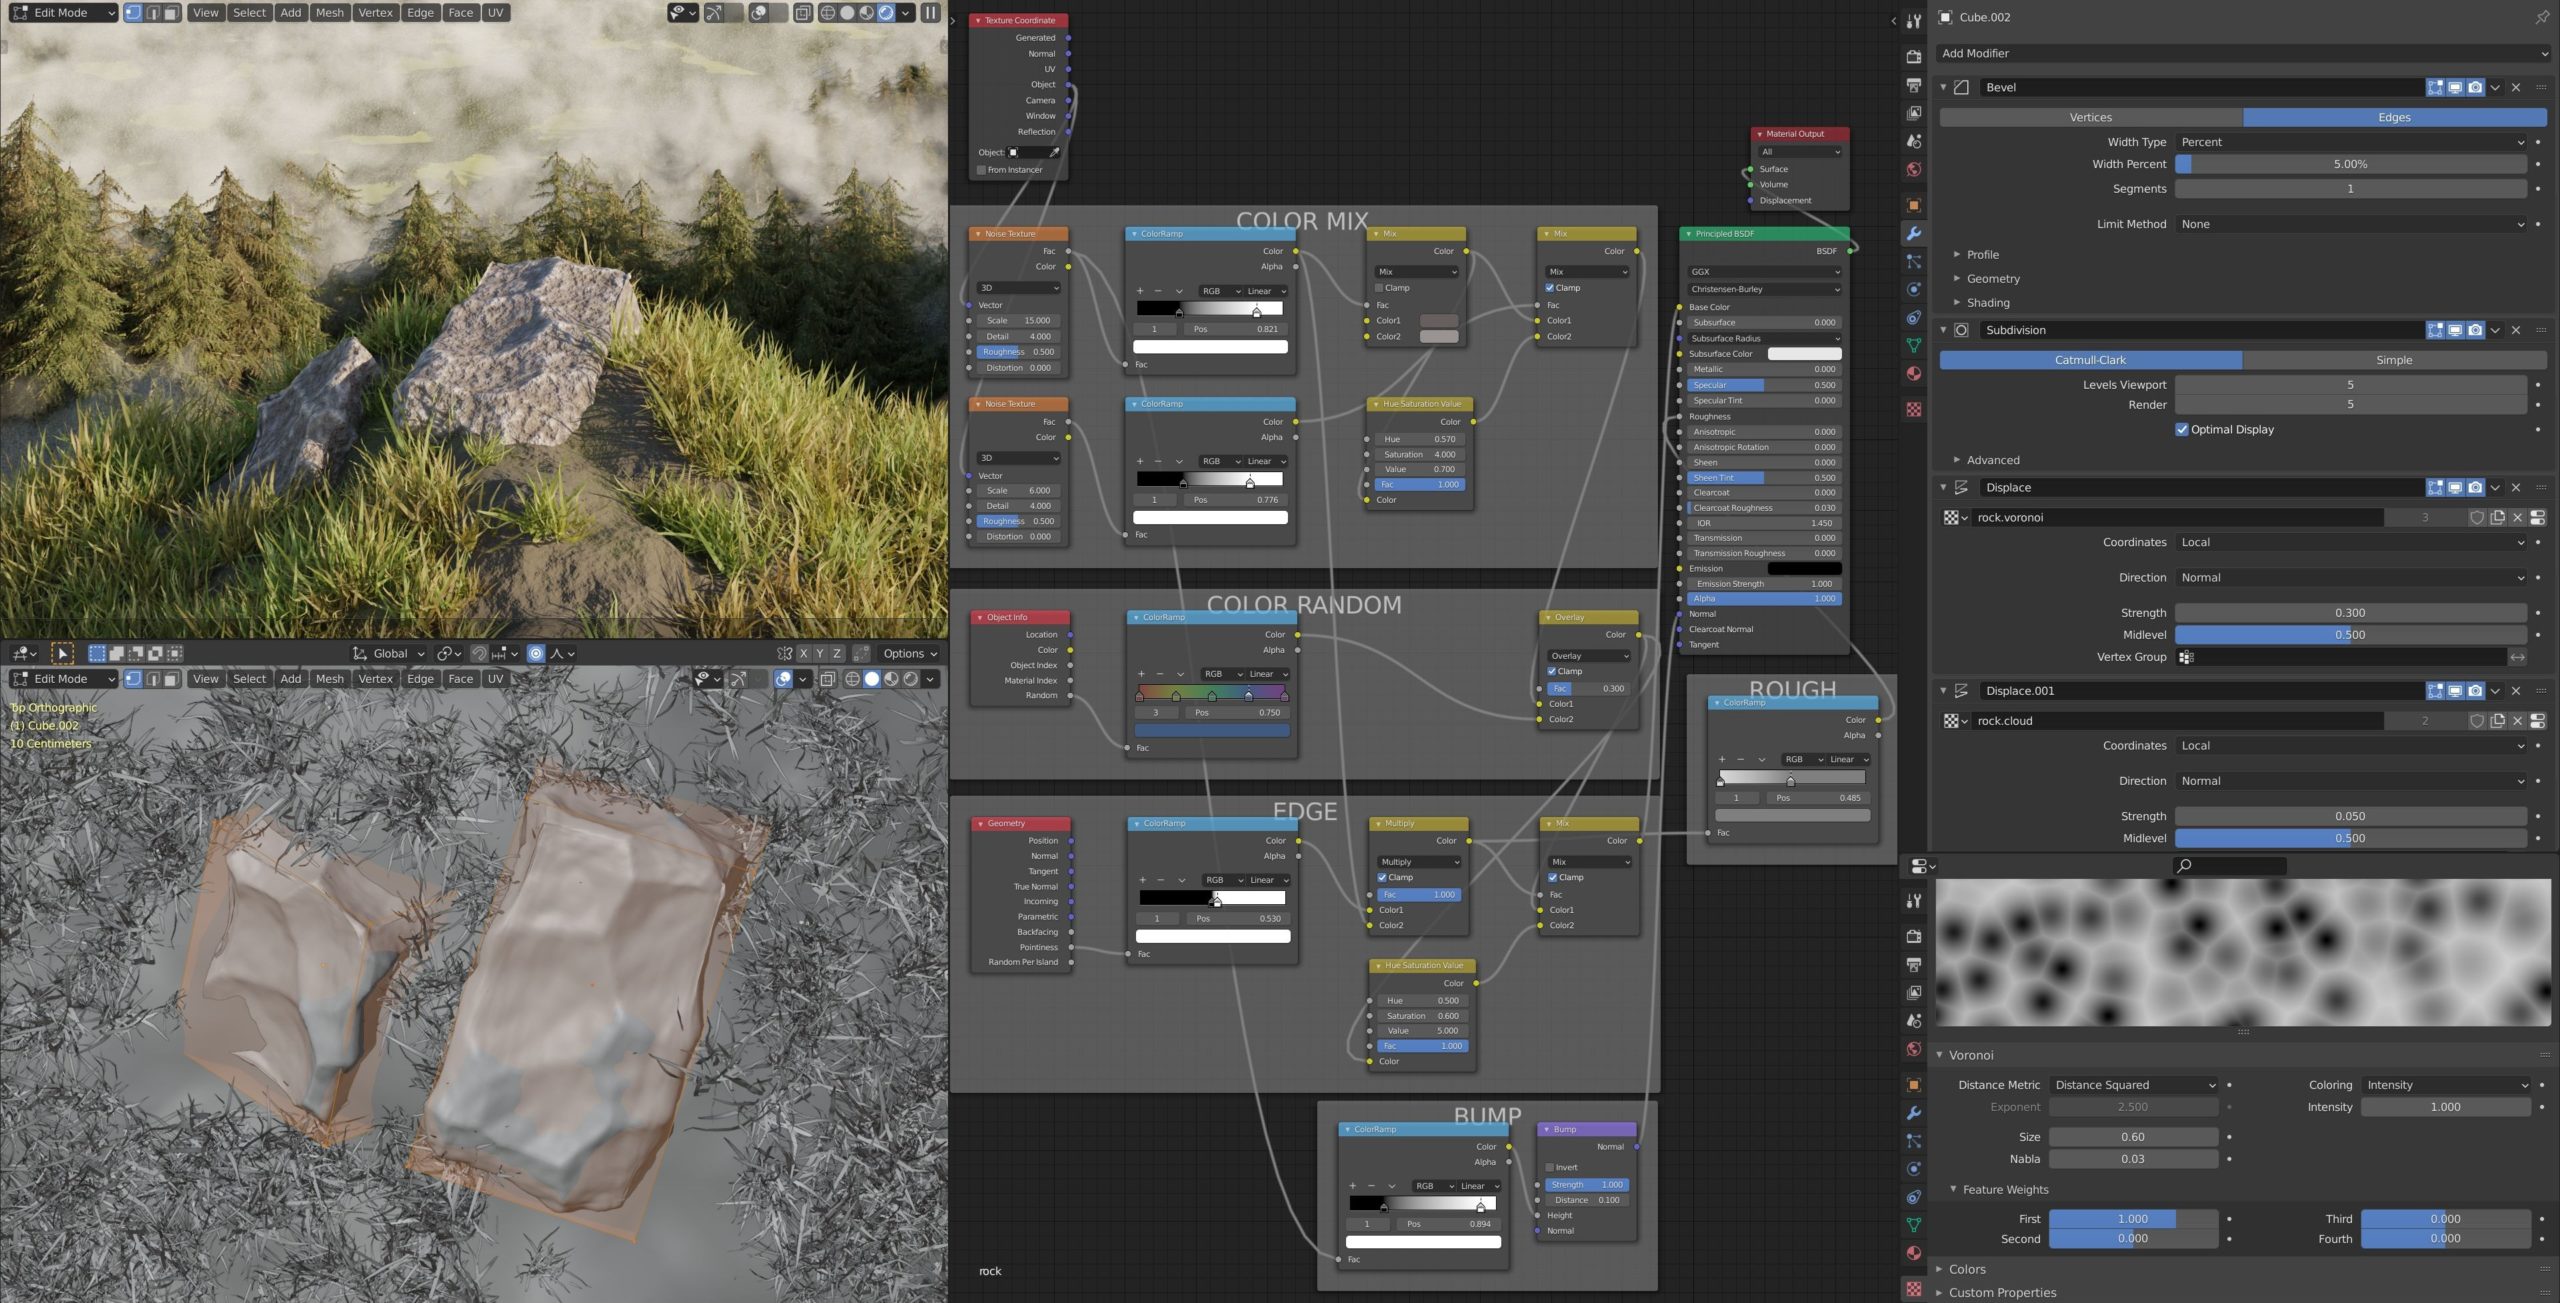
Rocks
The rocks in the foreground were just simple cubes with a subdivision modifier, displacement modifier, and procedural textures. The material was made with procedural textures, too.
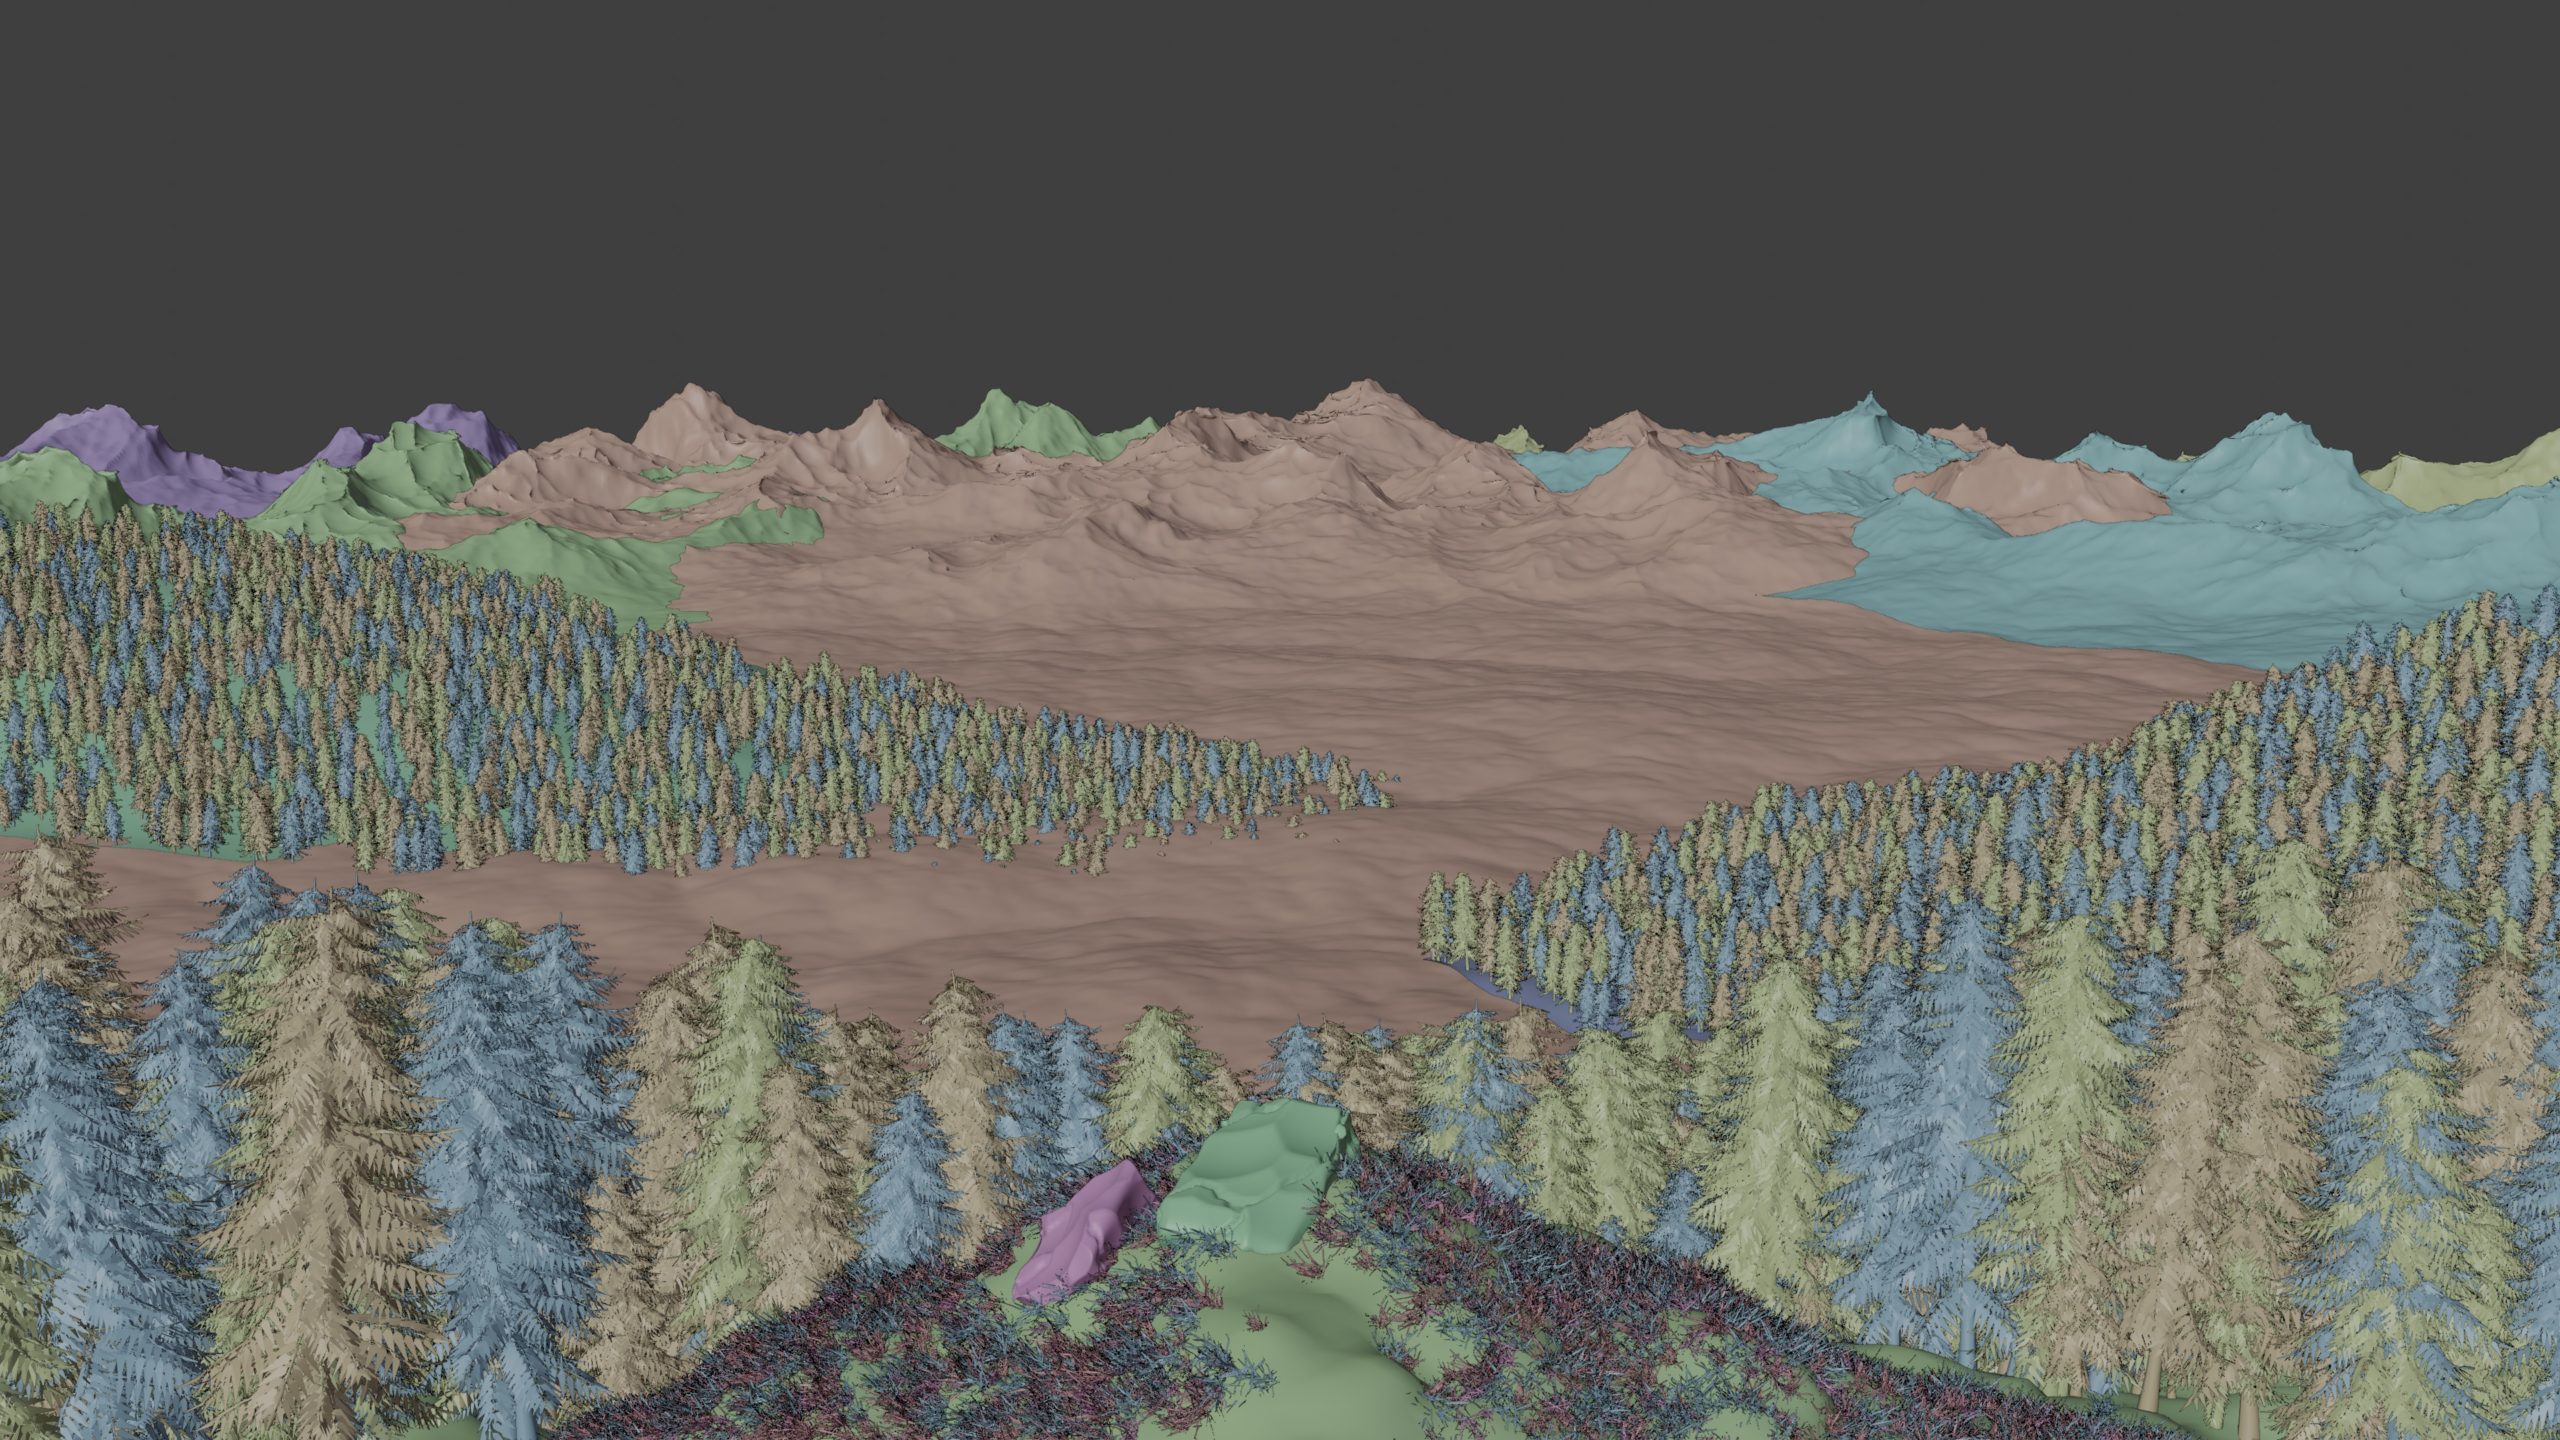
Landscape
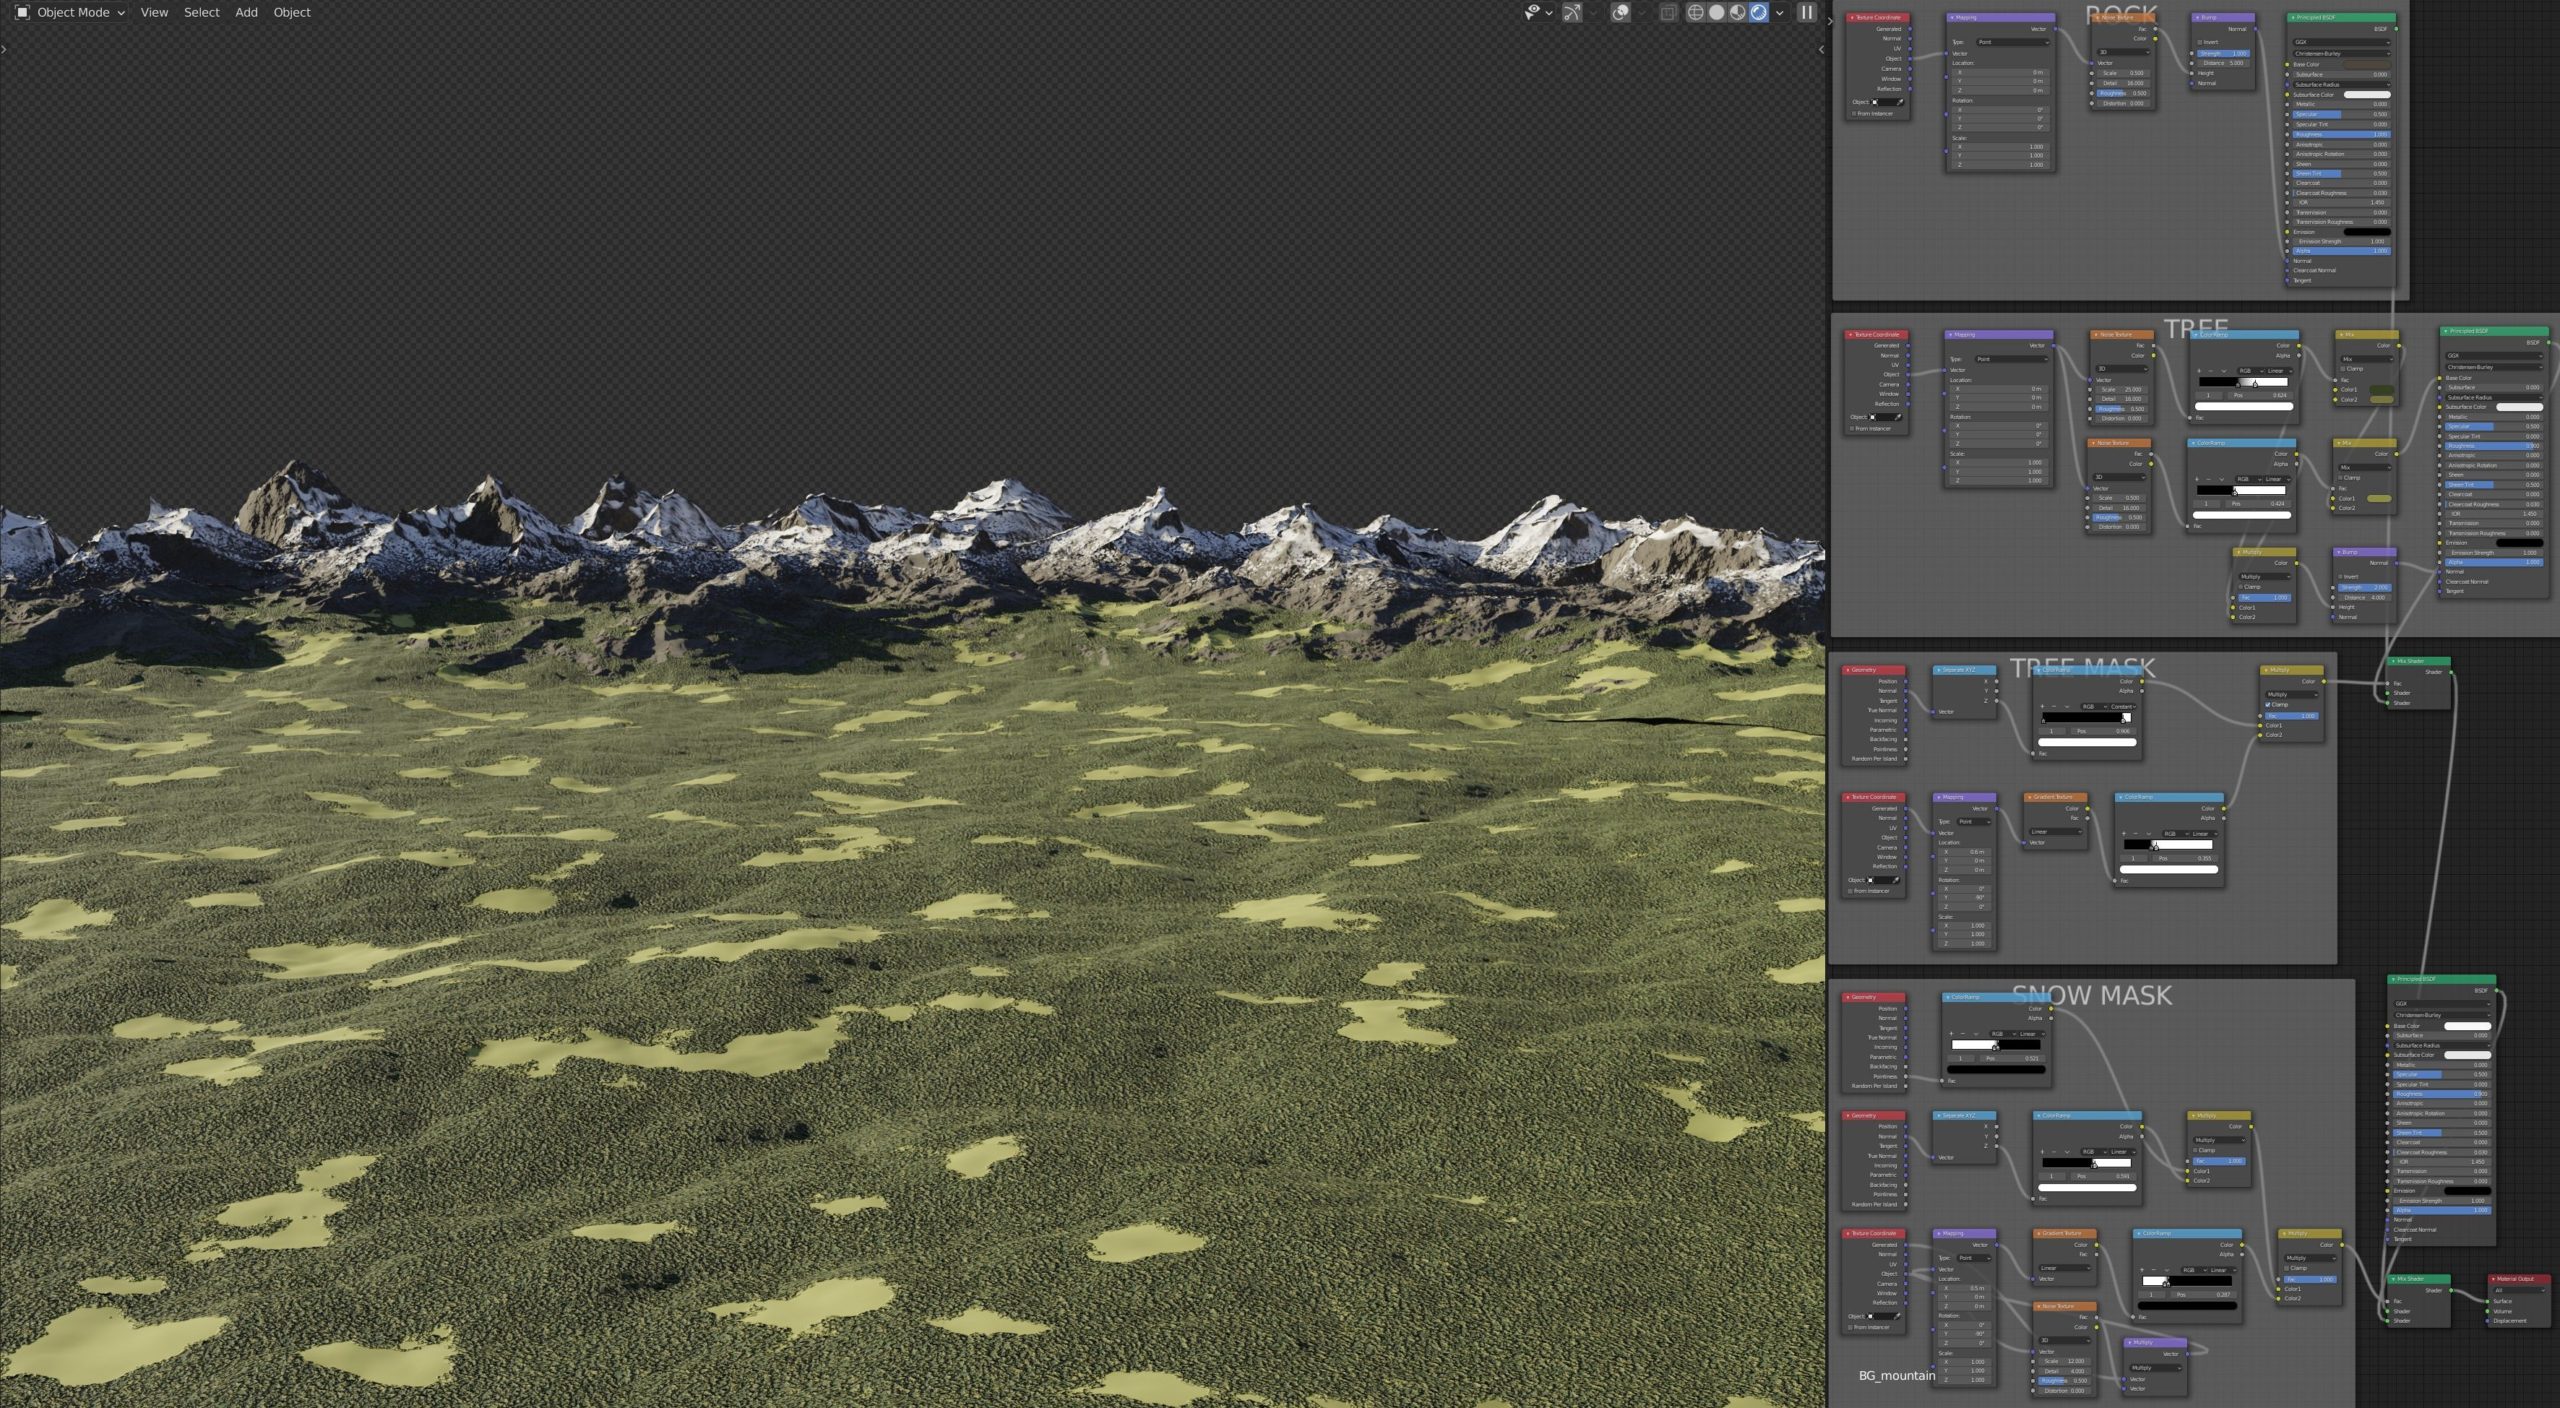
Background mountains
The mountains in the background were created with the A.N.T landscape add-on that comes with Blender. A single material for the background mountains contains all the rocky, snowy, grassy, and tree areas, which were created using nodes.
Middle ground & foreground
The middle ground and foreground were created with simple planes and displacement modifiers.
Then the plants and mist planes were added to it using particle systems. I learned this mist plane method from CG Geek, and it was a good alternative to using a volumetric method.
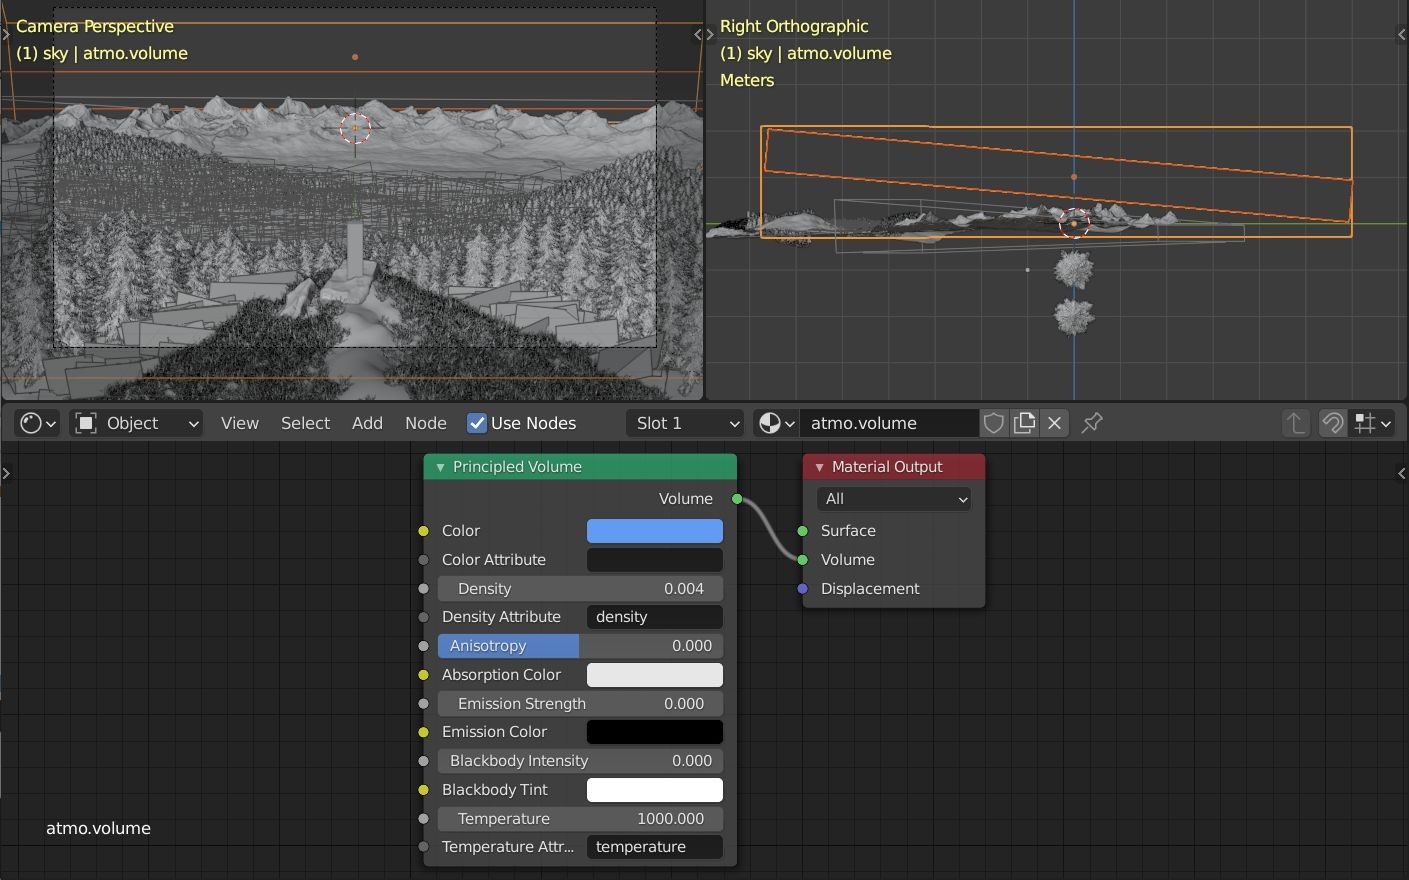
Atmospheric effects
I added a huge cube with a volume shader for aerial perspective effect. The clouds were also created in this way.
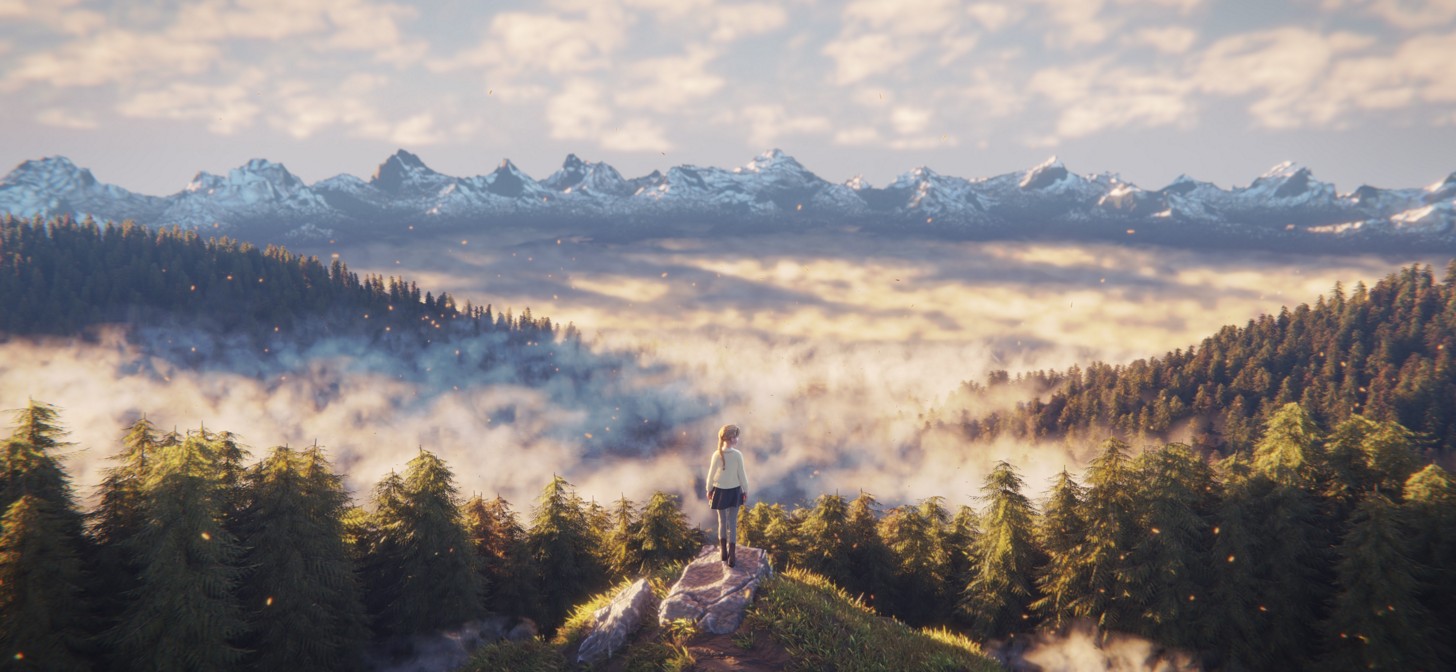
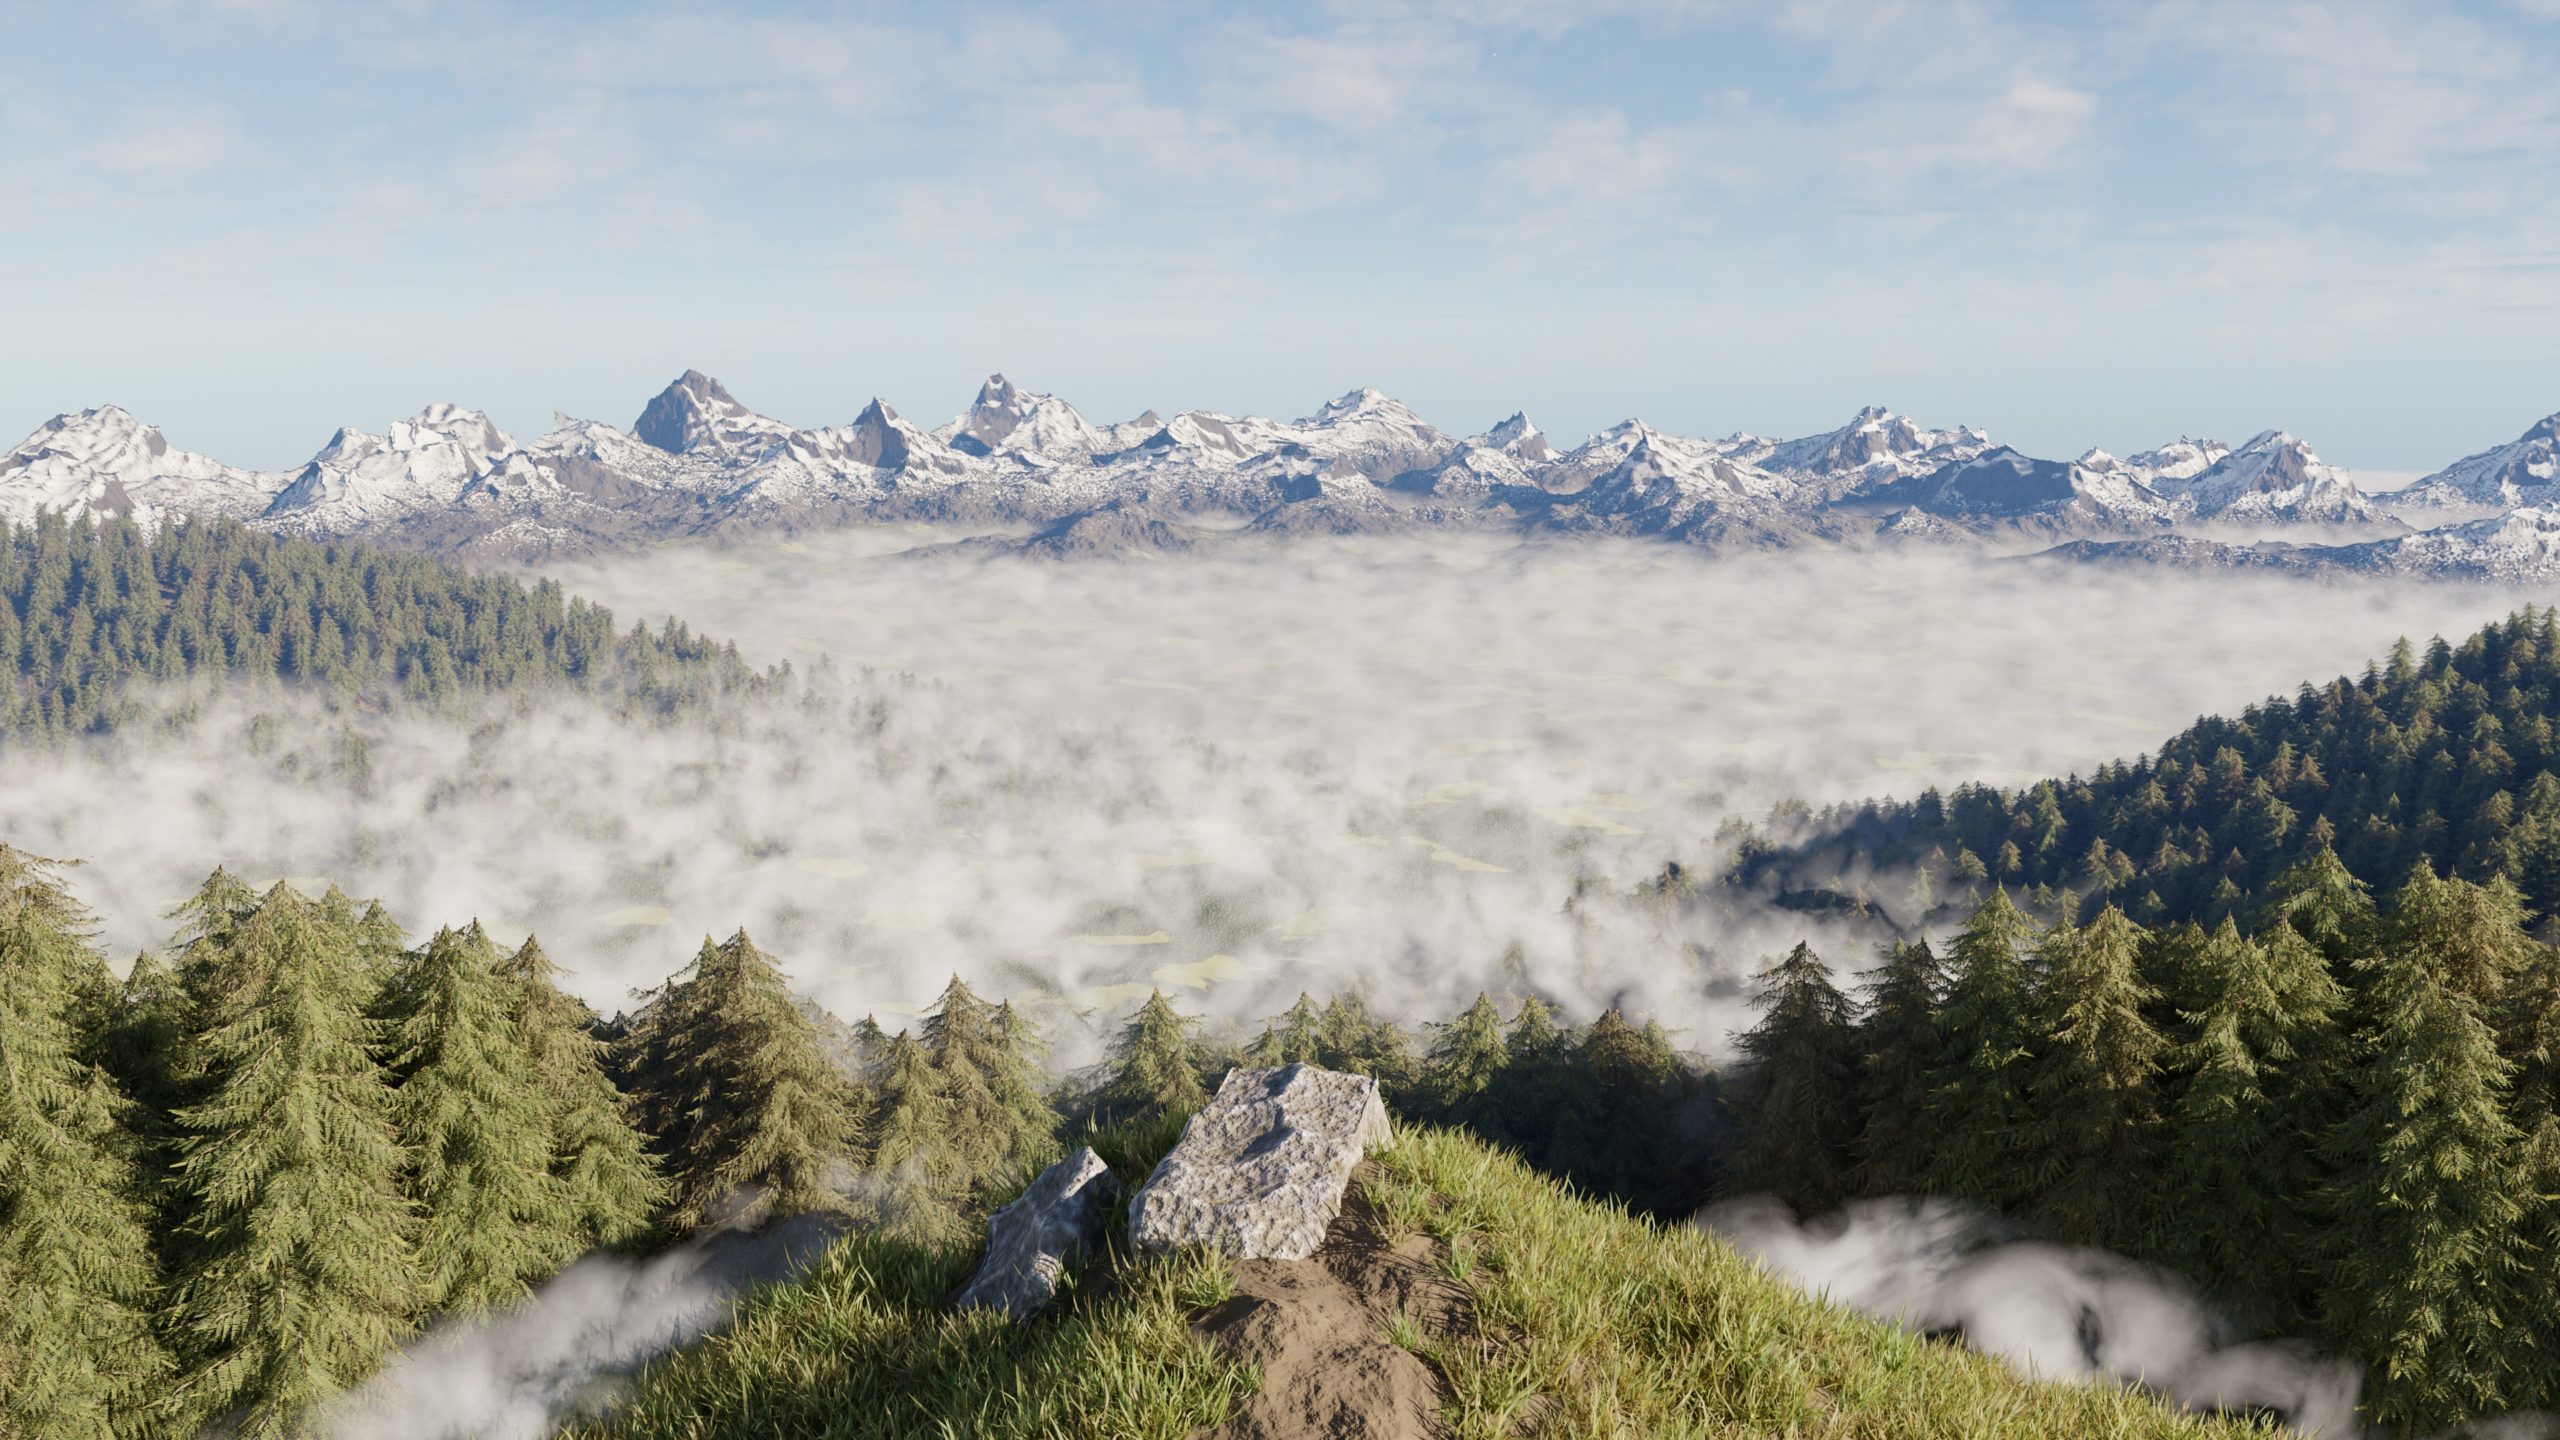
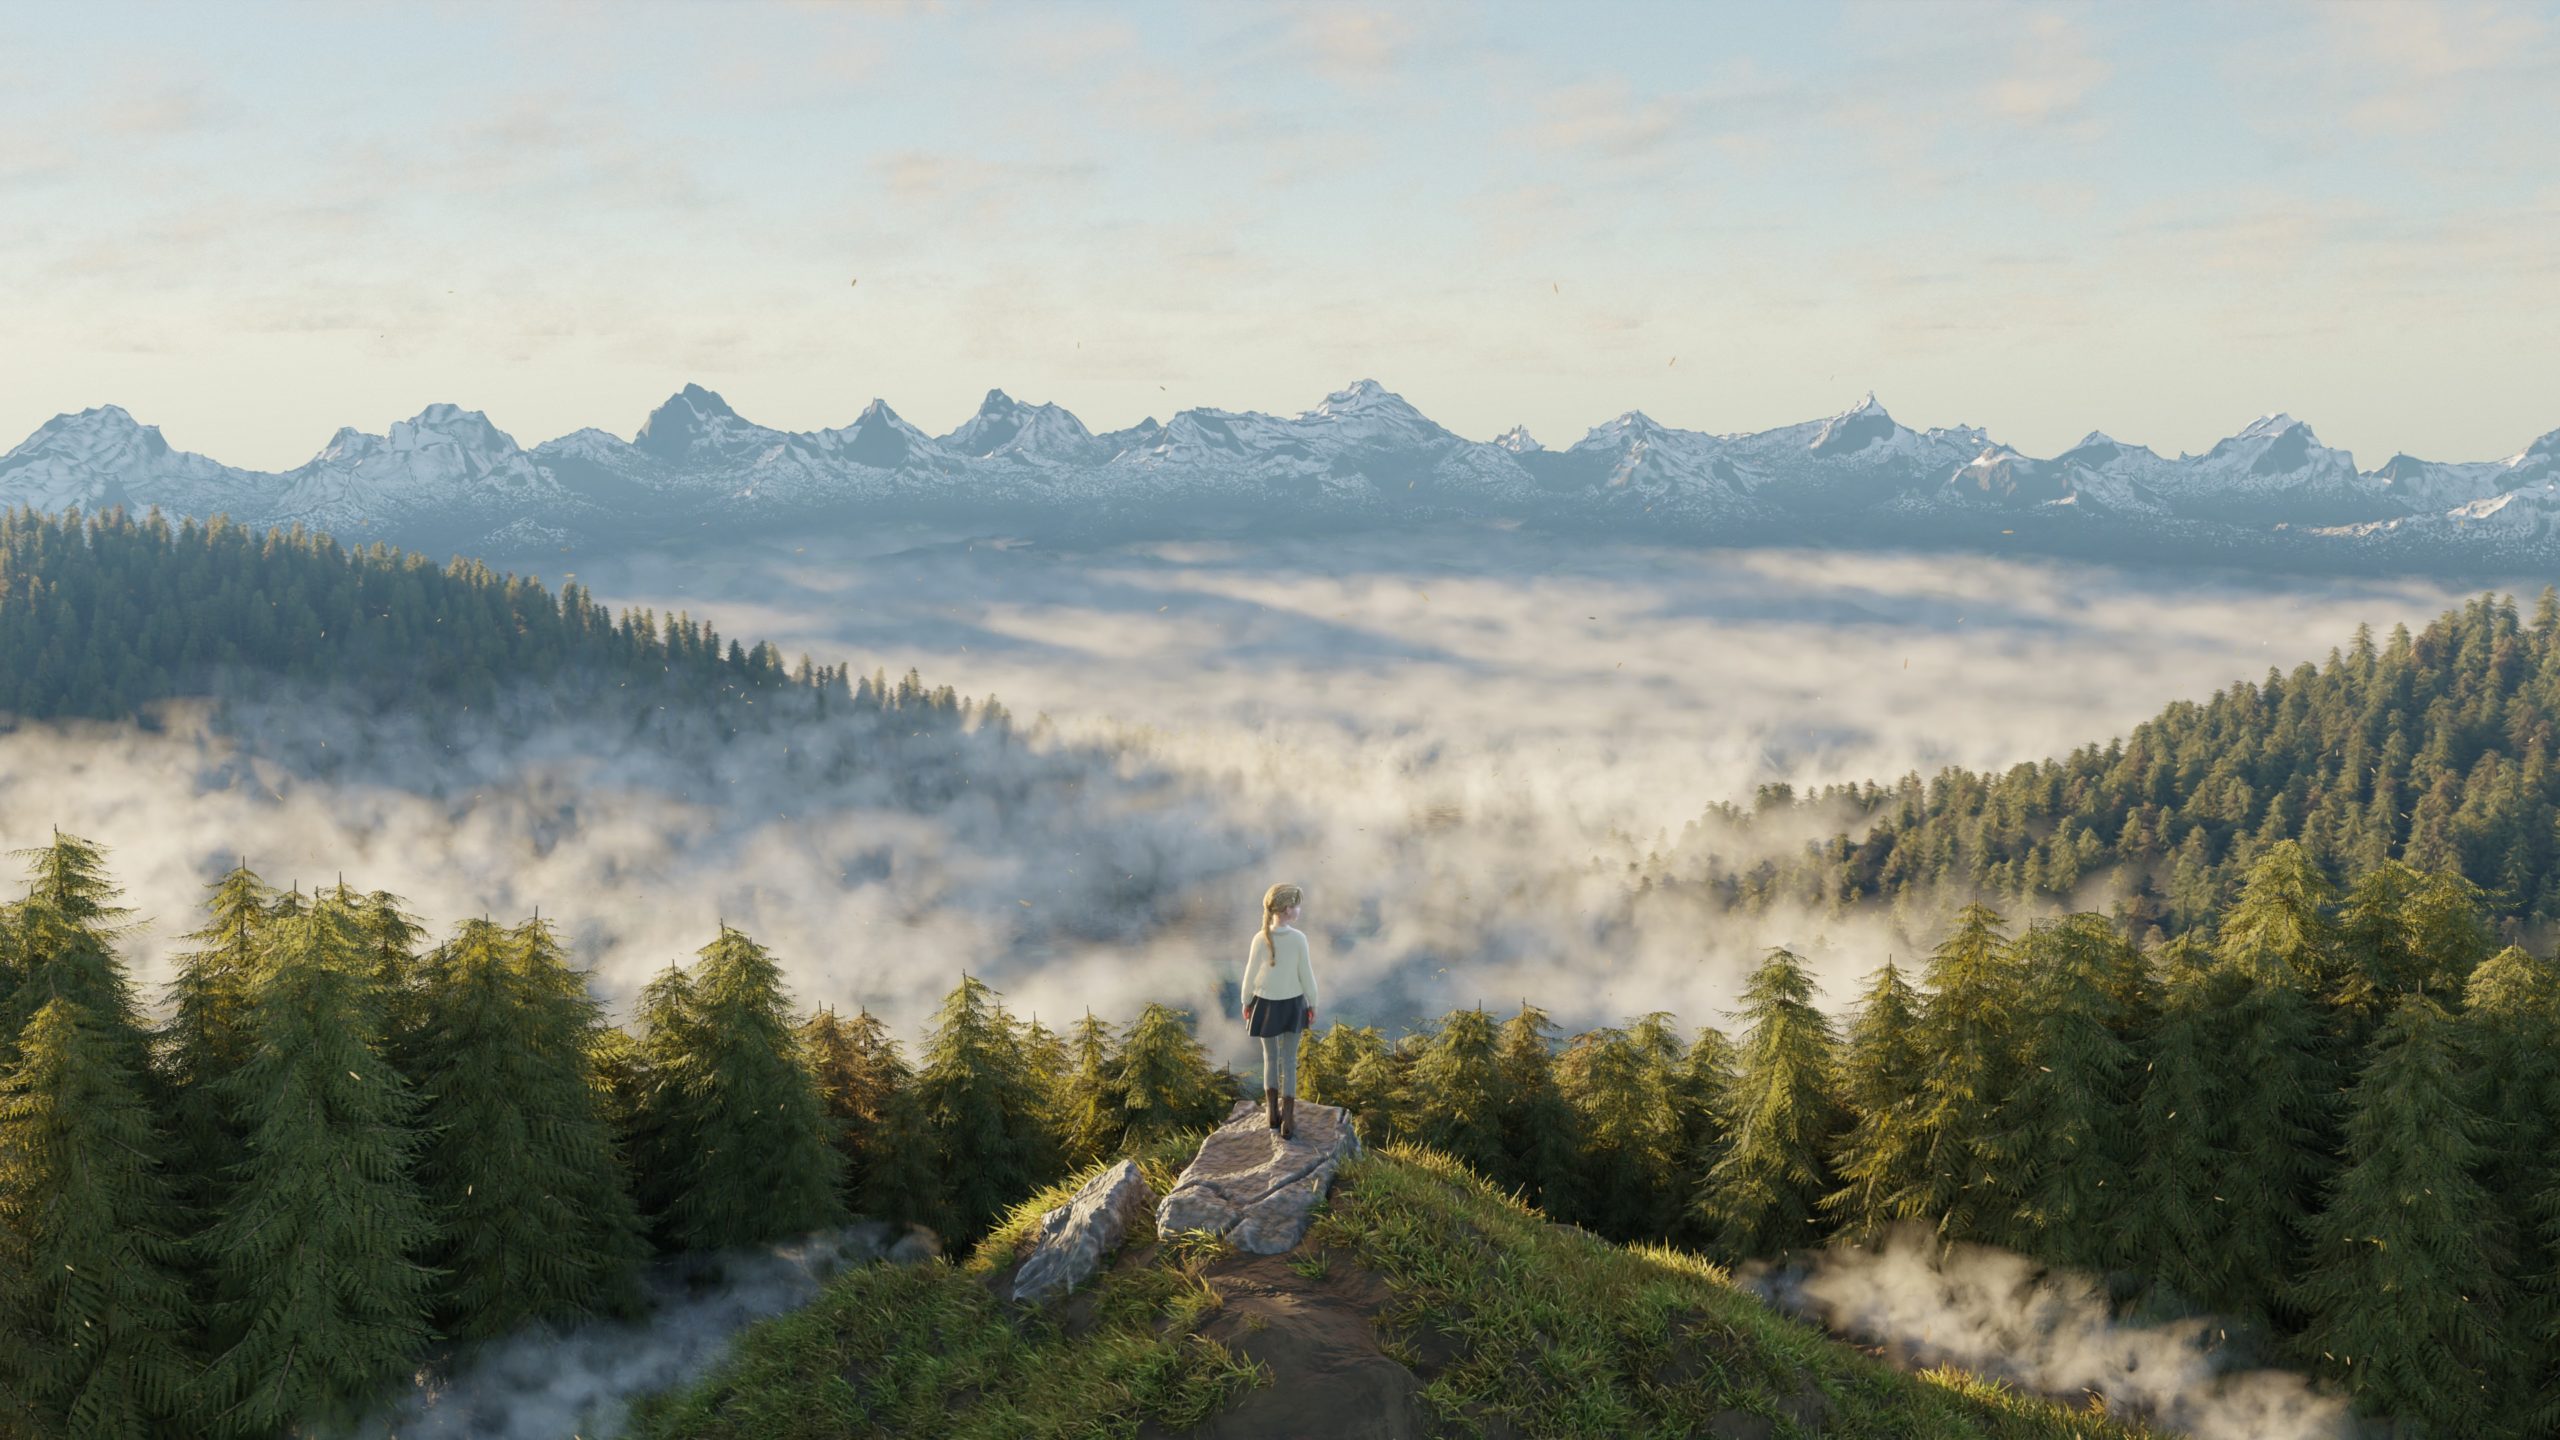
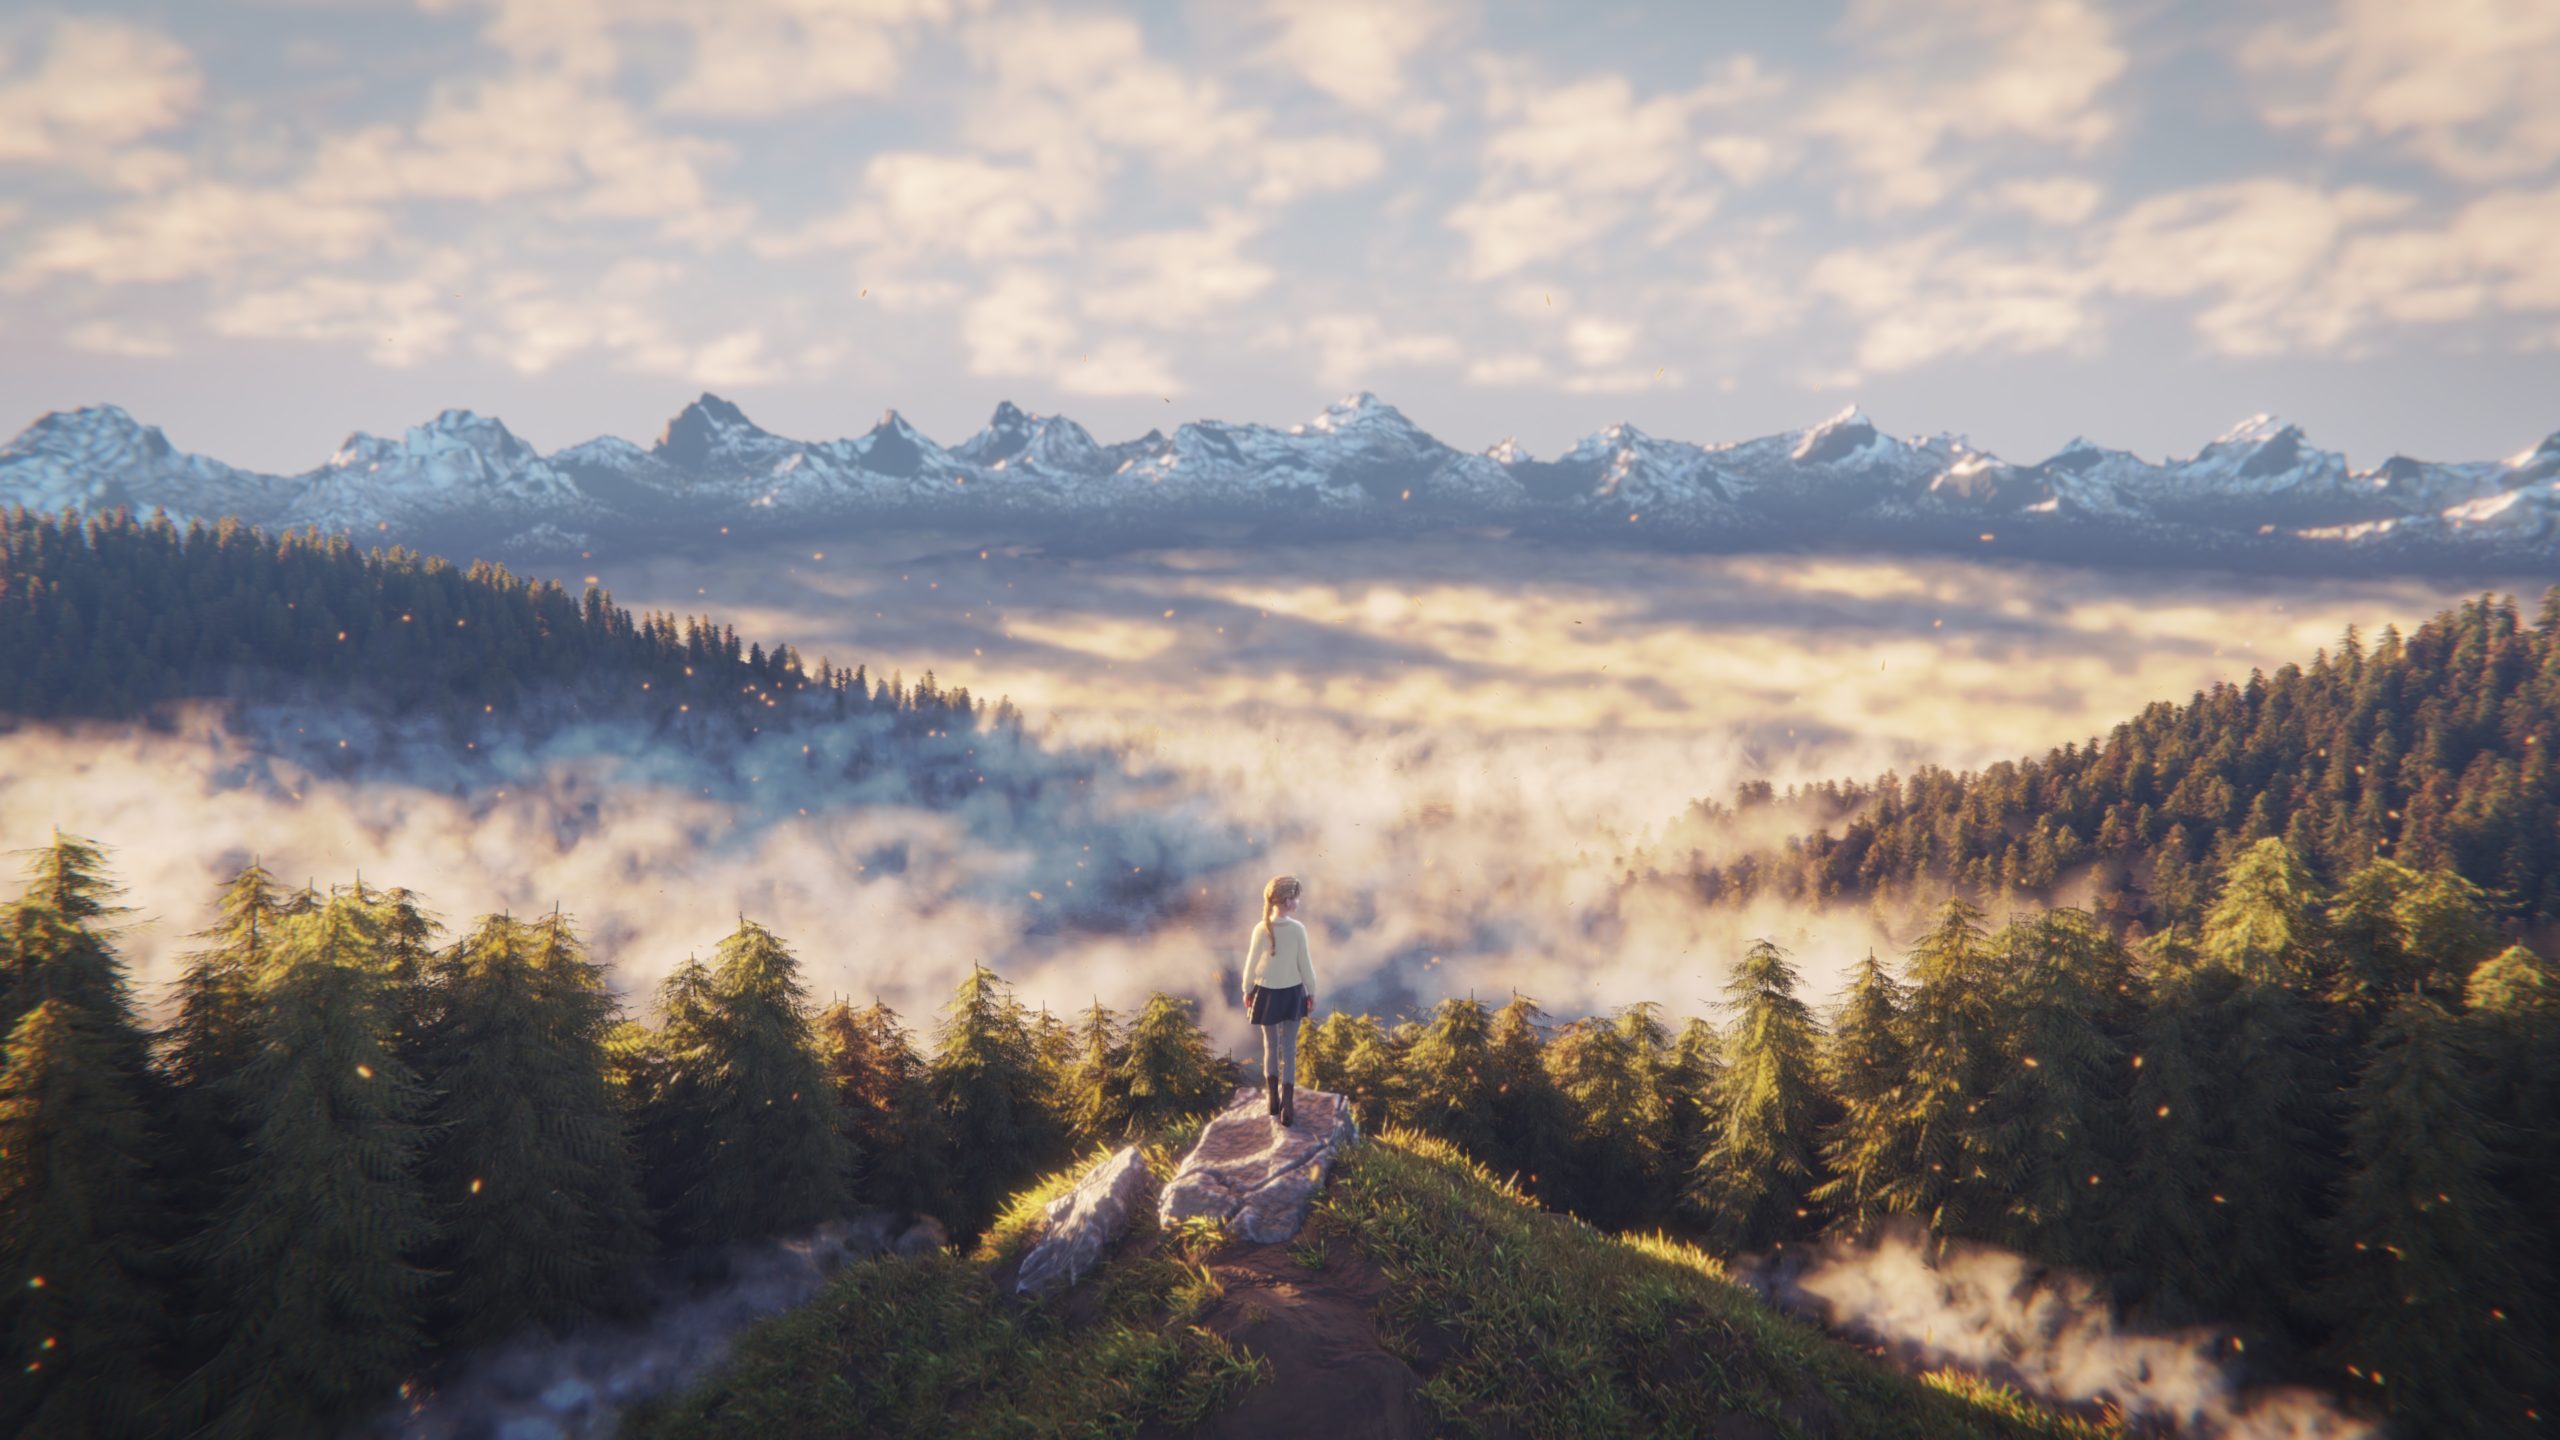
This is the result of the set. The lighting was done using the Nishita sky texture alone.
Shots
Layout
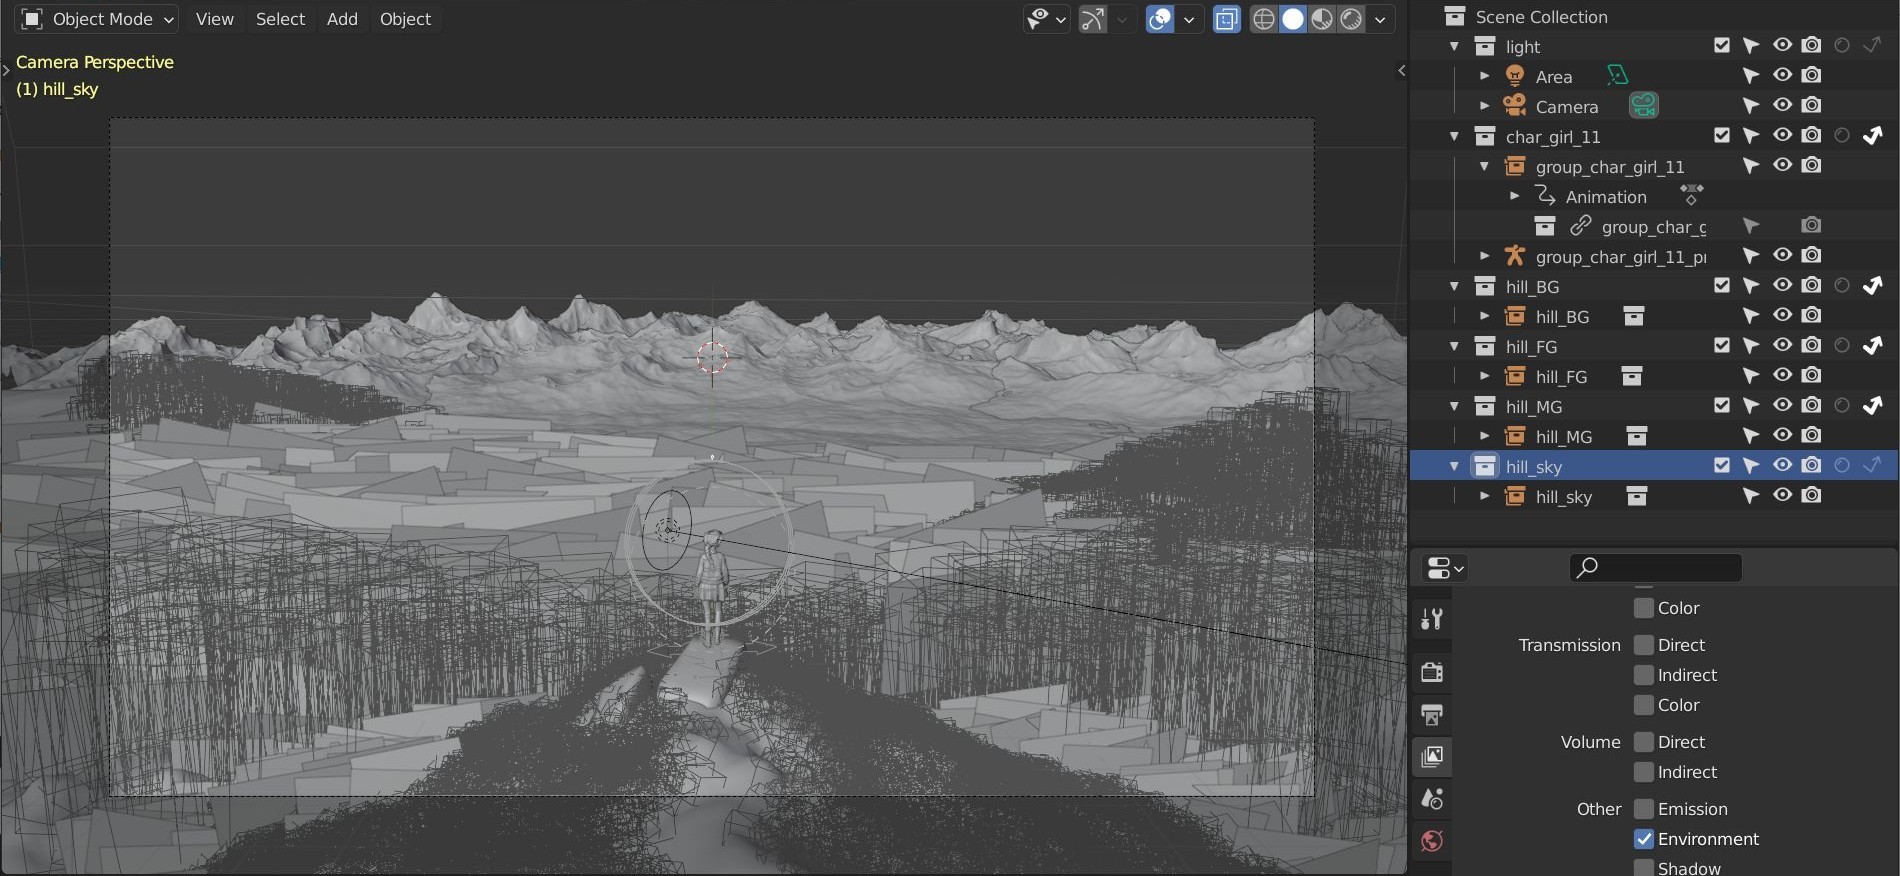
The parts of the set were linked to the scene file as separate collections (for compositing). The elements of the character were linked as a collection, then a proxy rig was created for animation.
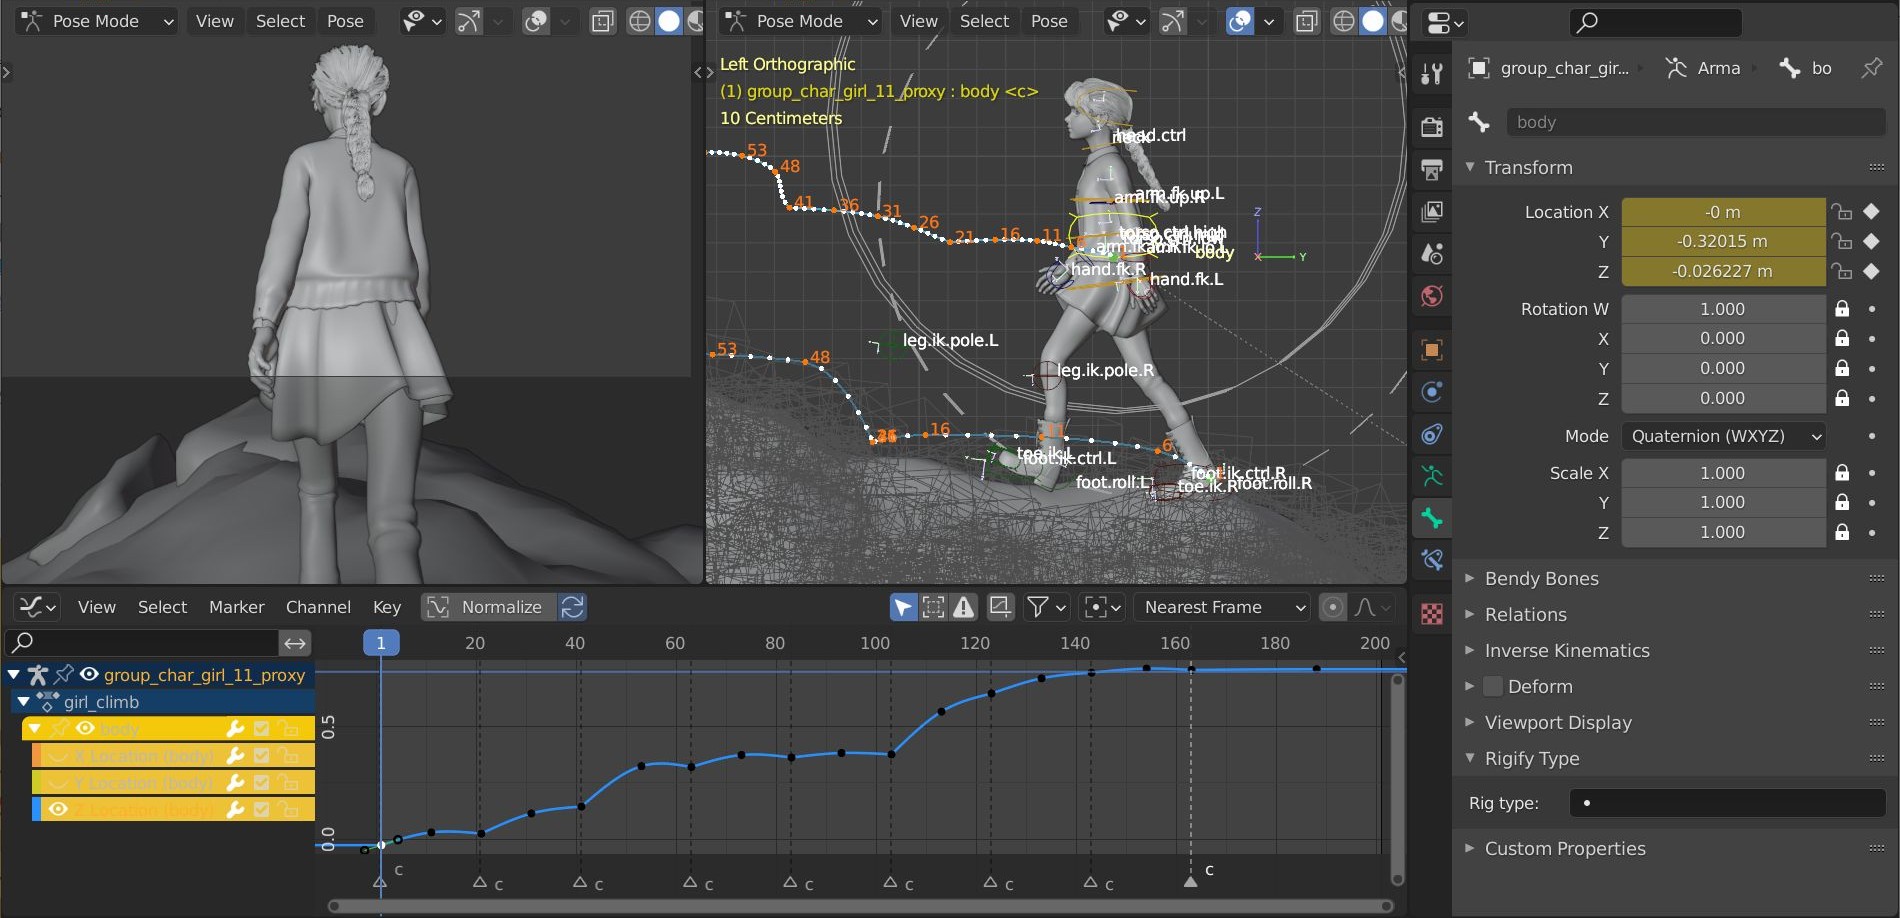
Animation
The animation was just a simple walk cycle. Firstly, I did key posing and timing for the main body, then I splined and polished the movement.
Once the main body movement was established, secondary movements were added (face, hands, braid).
Simulations
Once the movement of the whole body is established, I added subordinate movements using physics simulations. A collision mesh and cloth objects were appended to the scene, and simulated and baked into the scene.
The same things were done for the hair particles, too.
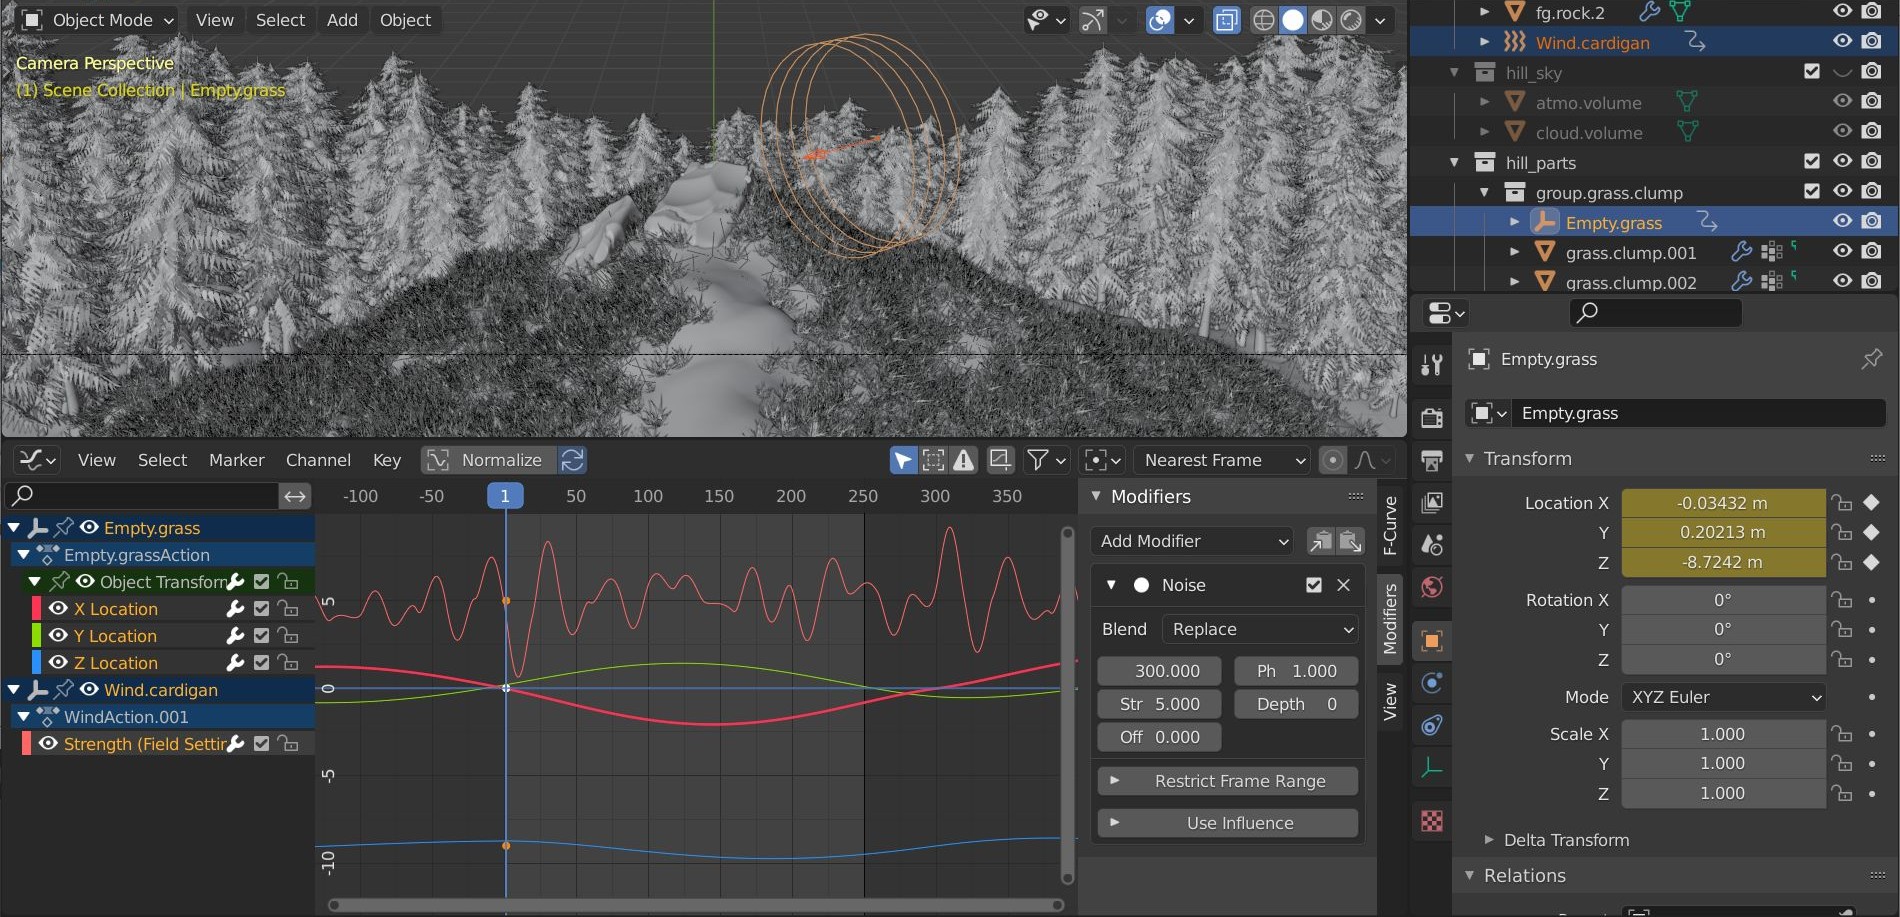
Wind was used for cloth, hair, and plant particle dynamics. I added a noise modifier to the strength of the wind to add some variation to the effects.
For subtle waving of the leaves, I used displacement modifiers with a moving empty.
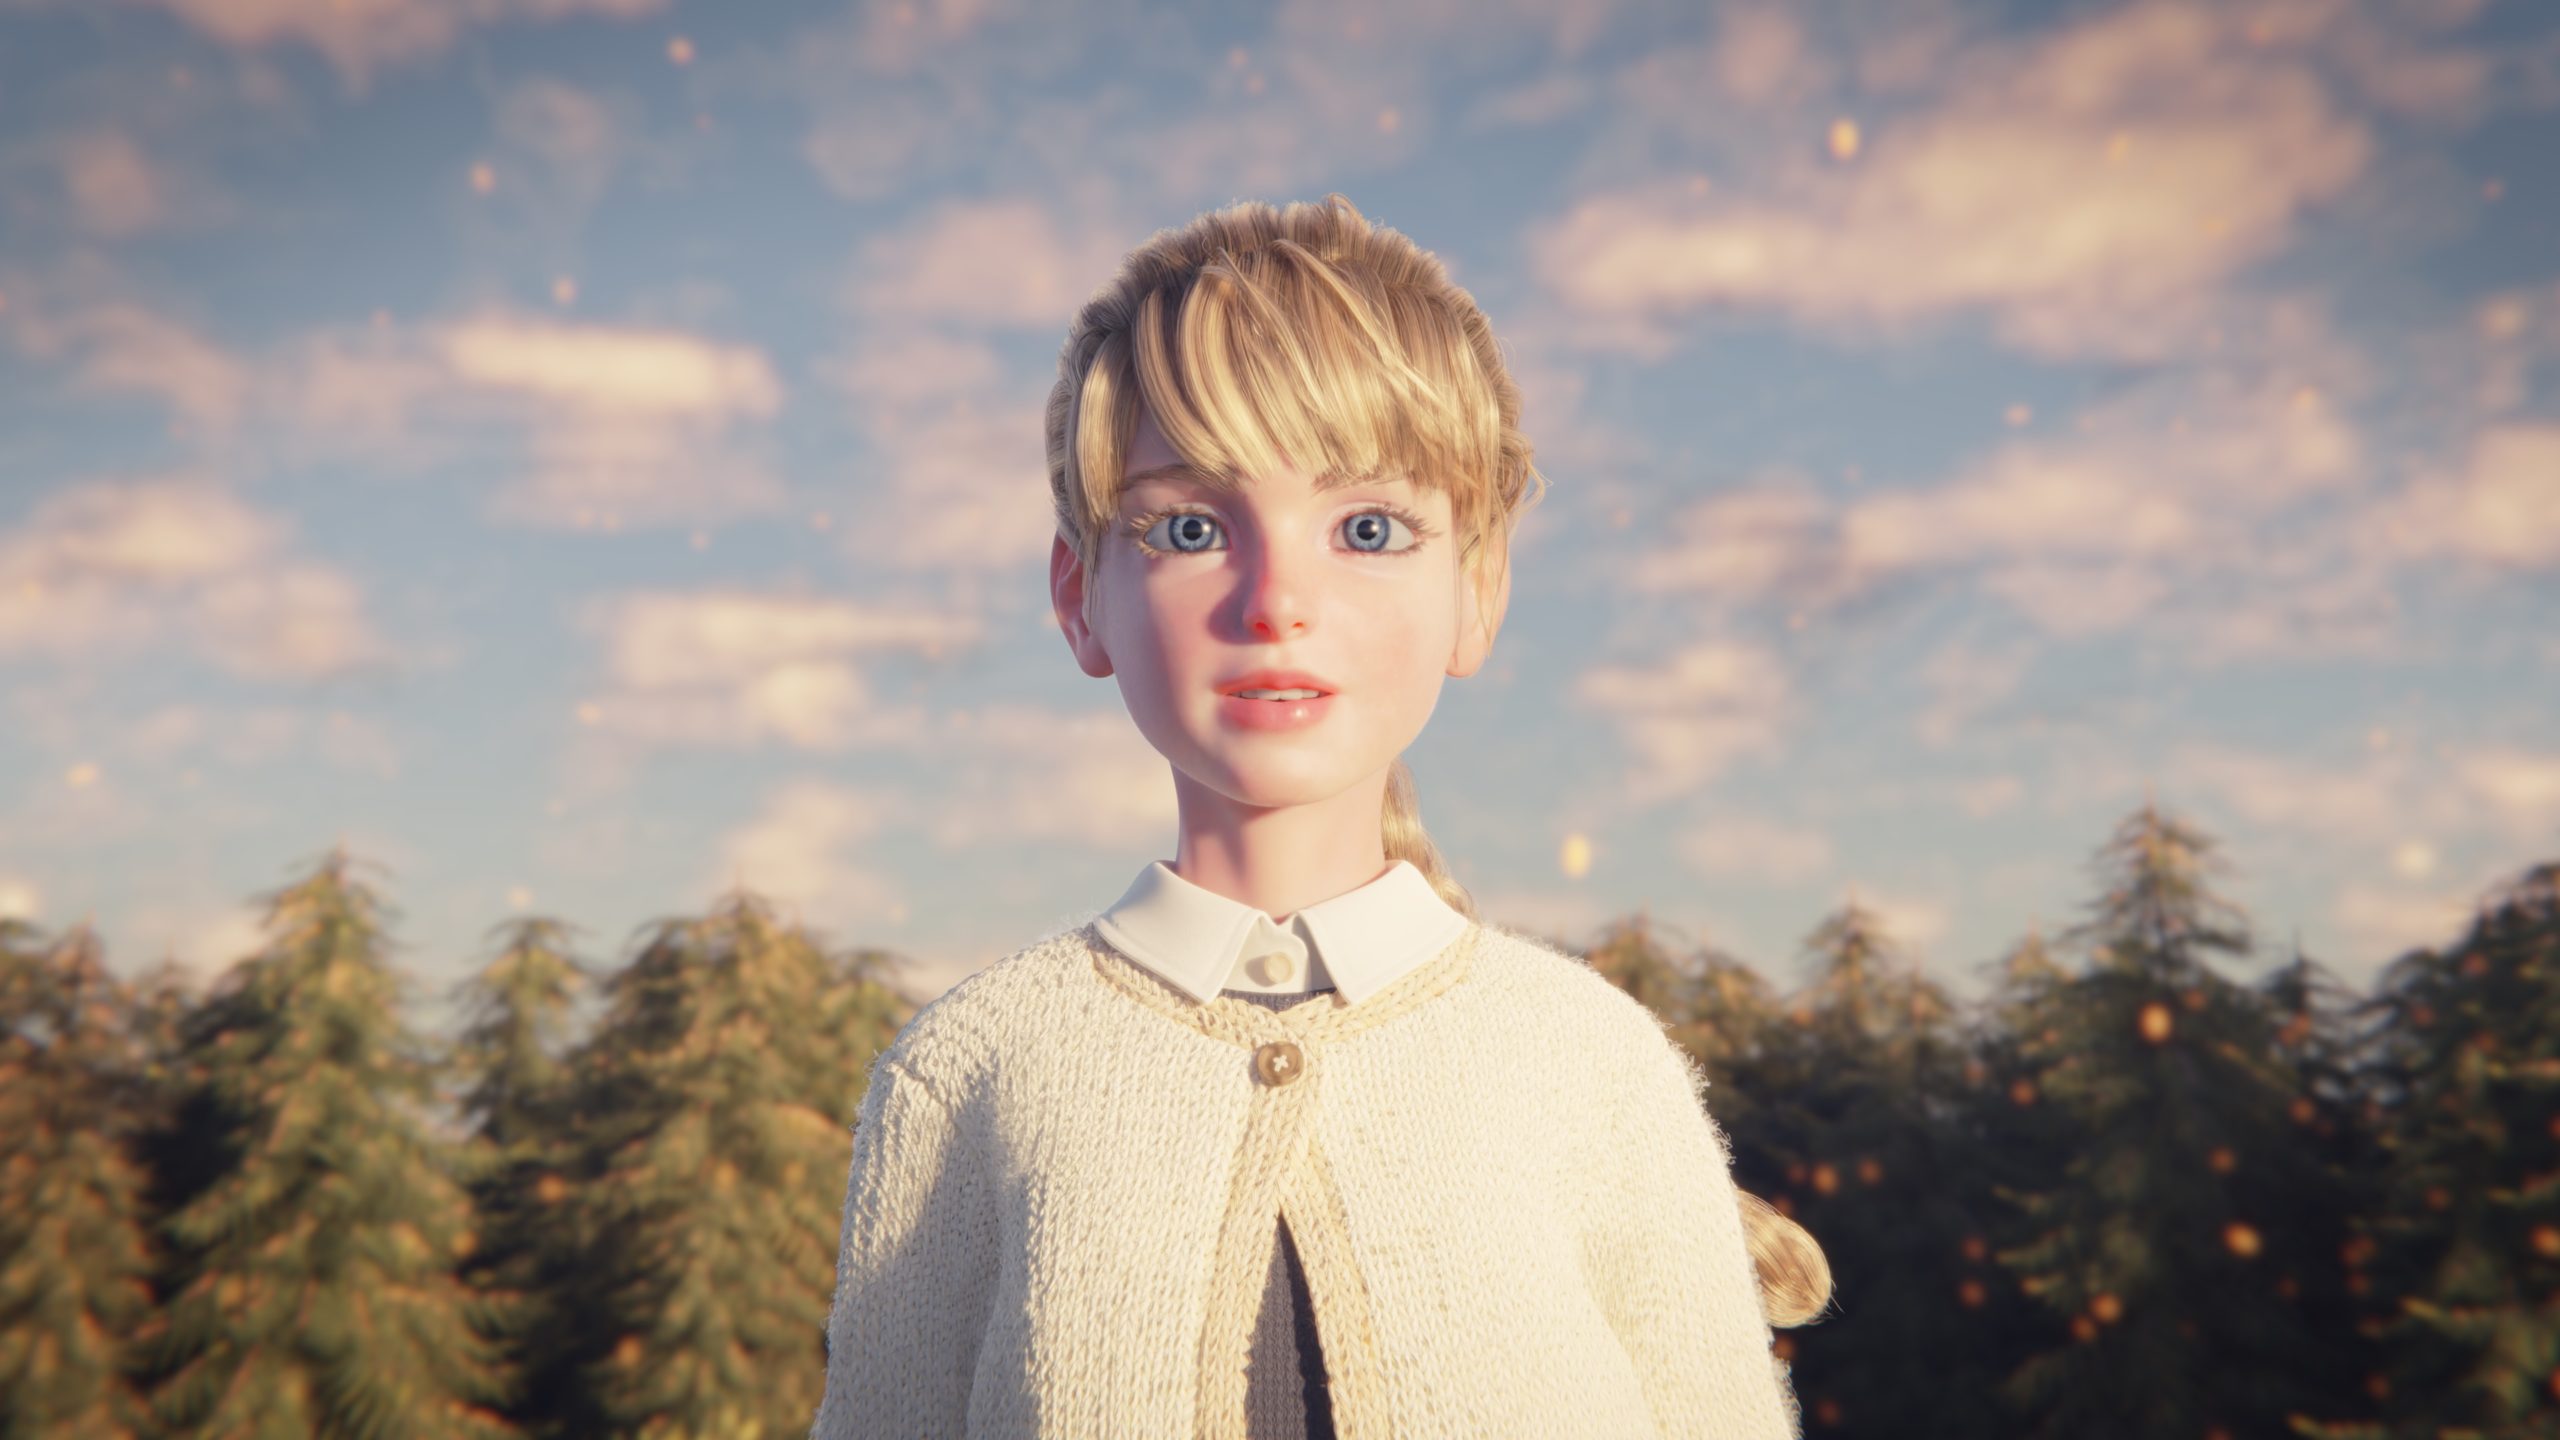
Lighting
Most of the lighting was done using the Nishita sky texture. Then, some area lights were added for the outline of the character.
Rendering
Elements that I wanted to adjust individually were separated by collections, render layers, and passes. Then the raw render was done, surprisingly faster than my old projects, thanks to the RTX GPU rendering and AI denoisers of Blender 2.8/2.9.
All the rendered frames were saved as image files (openEXR multilayer) for compositing.
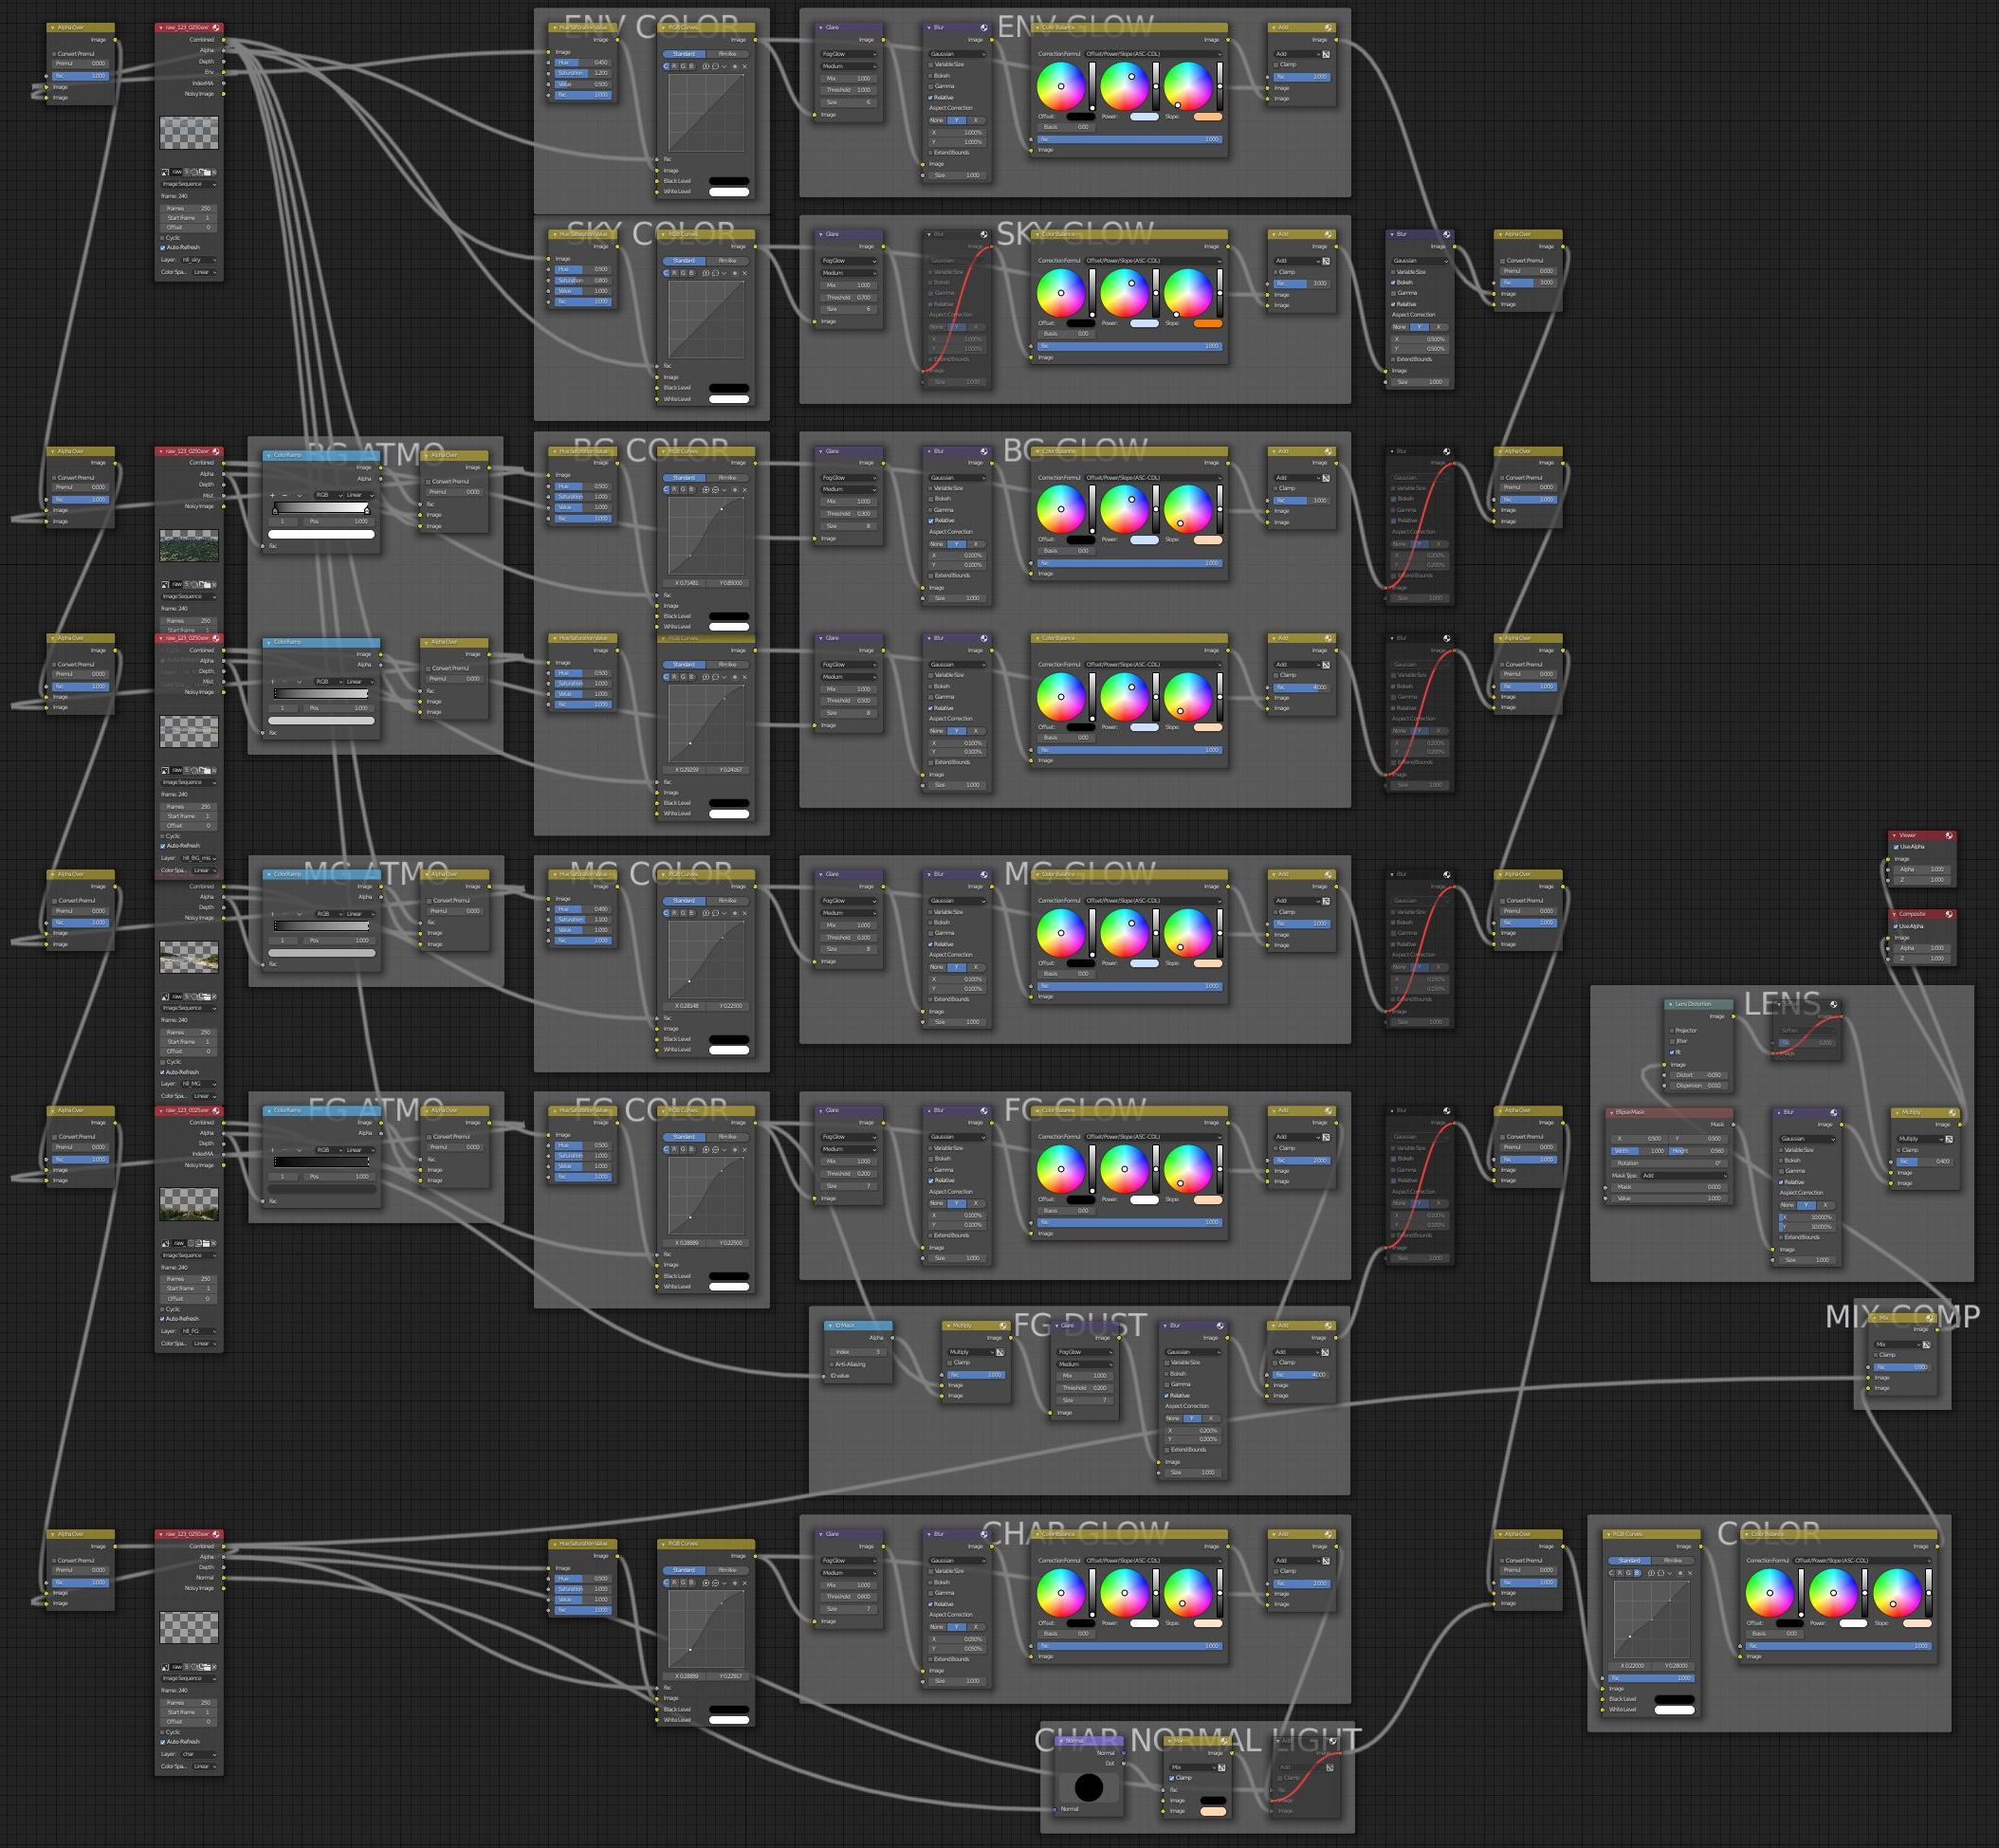
Compositing
The node tree looks quite complicated, but it’s just a bunch of repetitive works—
adjusting color, adding some glow, and blurring based on the distance for each layer.
Then some lens-related effects were added, such as distortion, dispersion, and vignette.
About the author
 Sung-yong Park, 3D Artist


Brillant animation!
Amazing work and fantastic detailed descriptions thanks !!!
A very precise and meticulous work which I will certainly be inspired by during my next productions. Thank you