
Hi. My name is Seyyed Mohammad Madani and I am 19 years old, living in Iran.
First, I want to tell you how I got to know Blender. During high school and even before, I tried out all jobs related to graphics, like engines, coding, 2D animation, VFX, and so on, but I wasn't able to make any good connection with them. In the end, I went for 3D design and worked with software that is in this category, such as Maya, 3ds Max, Cinema 4D, etc., as a beginner. Again, I still wasn't able to make any good connection with them. Two years of my life were wasted with these softwares until I came across Blender—quite by accident—and I was able to make a really good connection with it. At that time, the version was pre-2.8 and there were only around 15 tutorials about modeling in my native language (Farsi/Persian). I learned the rest by myself and by following YouTubers like Blender Guru. I'm sure that everyone who reads this article is familiar with how to make donuts on his YouTube channel.
But since version 2.8, everything has changed … BOOM! Blender became even more well-known. Especially in my country, it earned a lot of users—even professional users from other softwares switched to this software—and tutorials in Persian abounded.
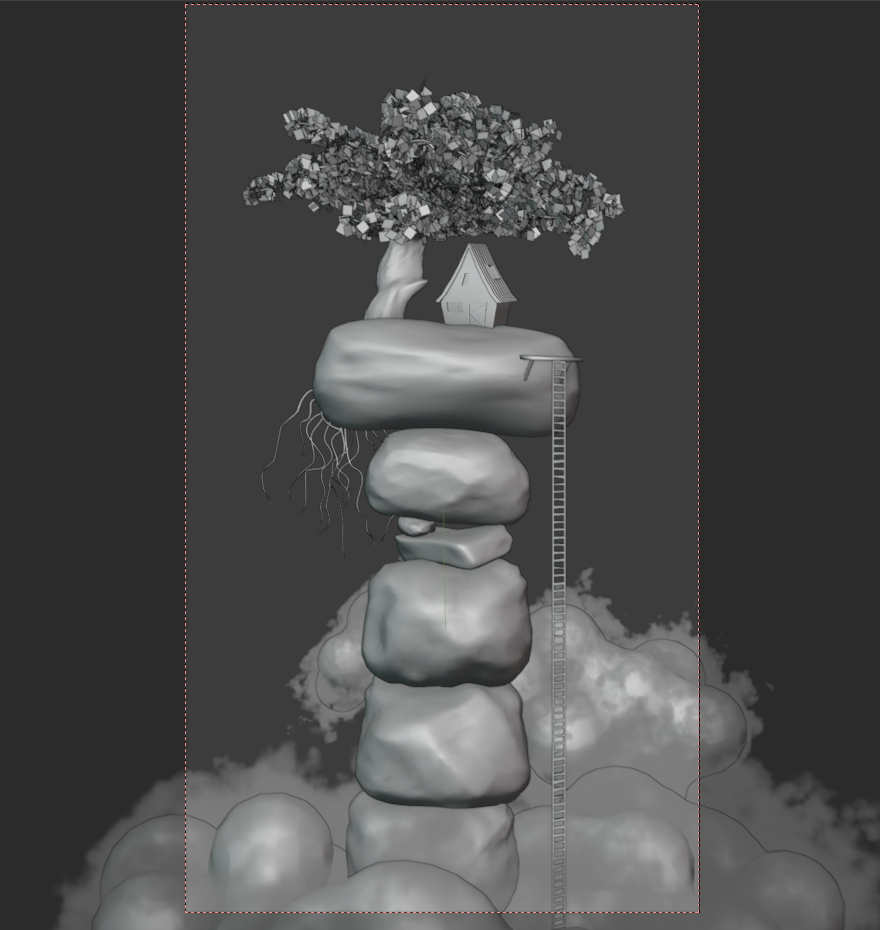
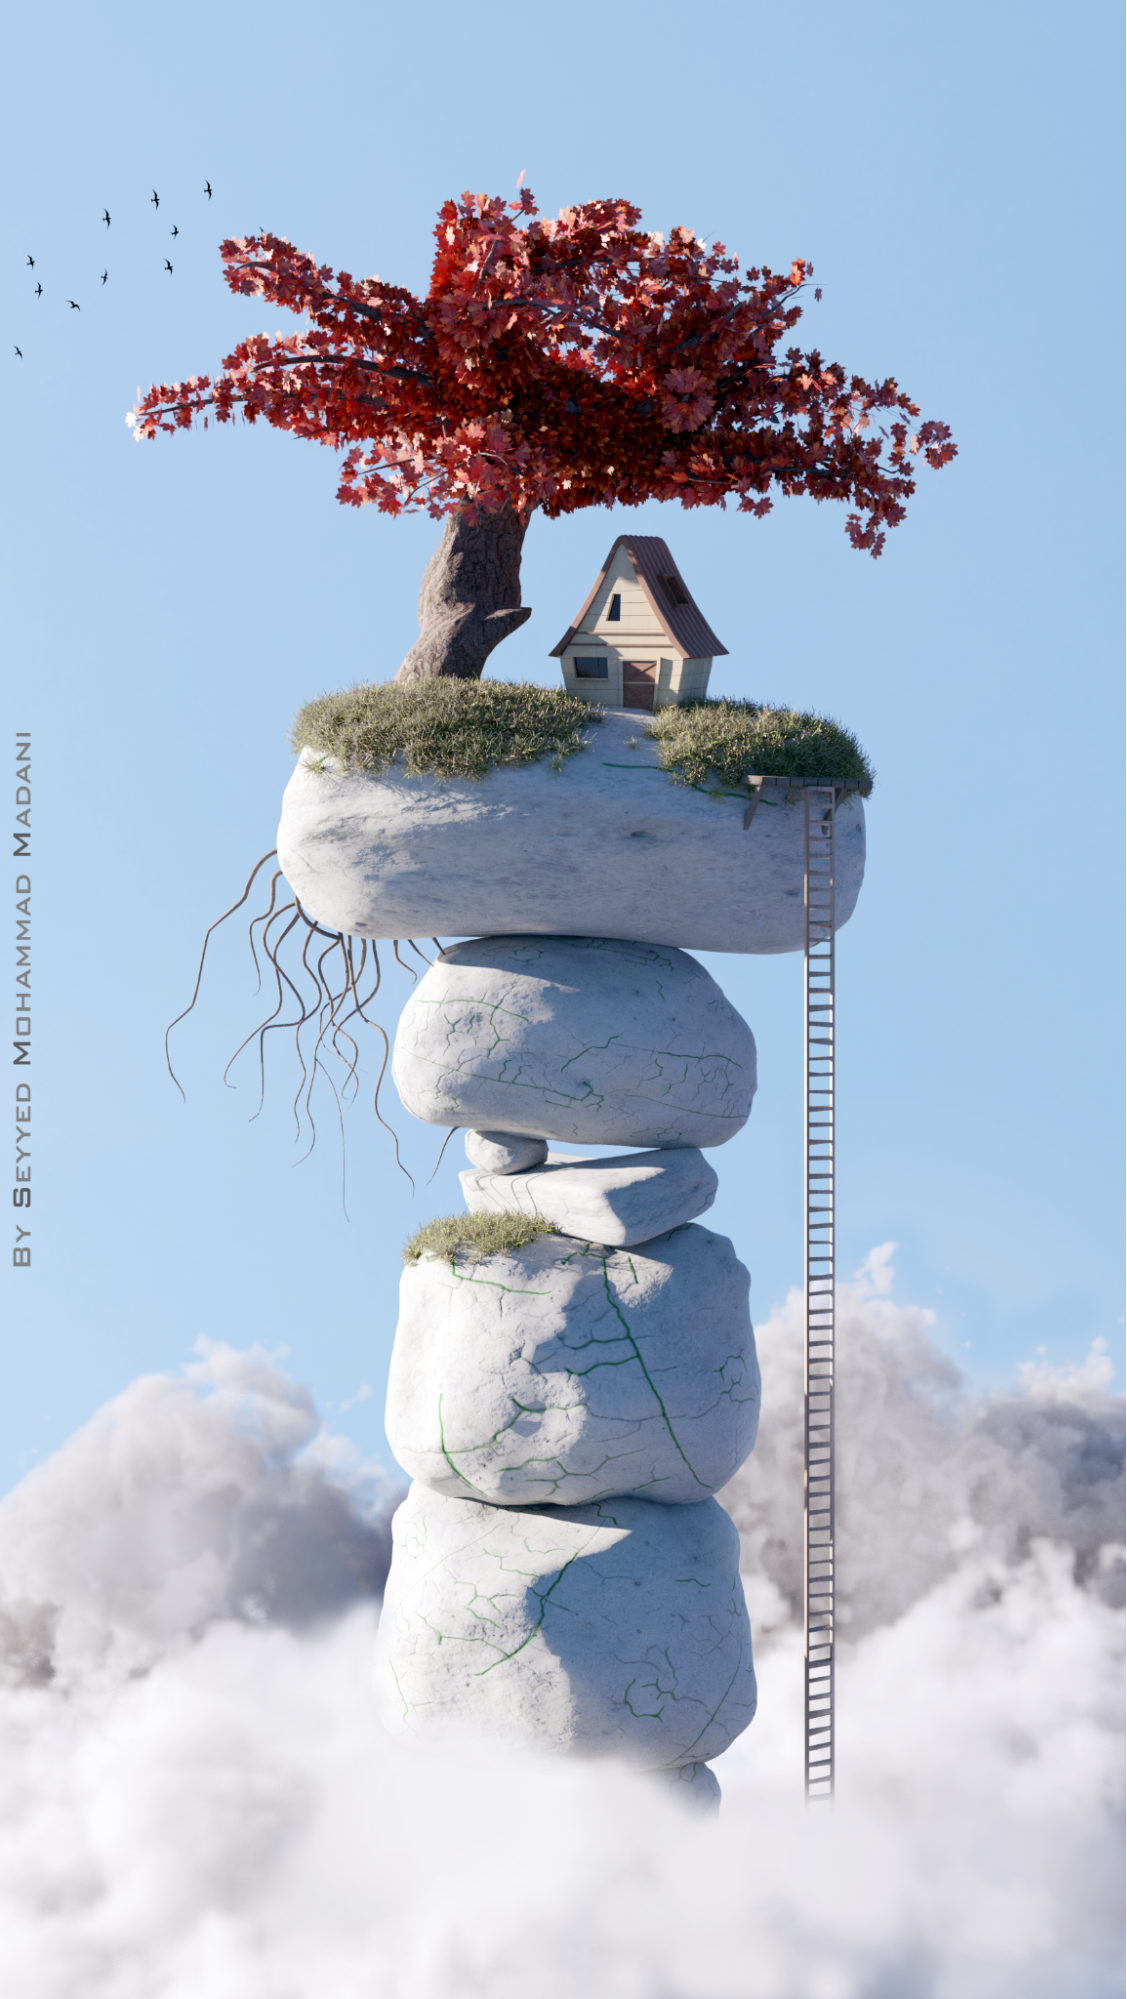
In this article, I will show you the steps I took to build the LITTLE PARADISE Artwork.
The initial idea
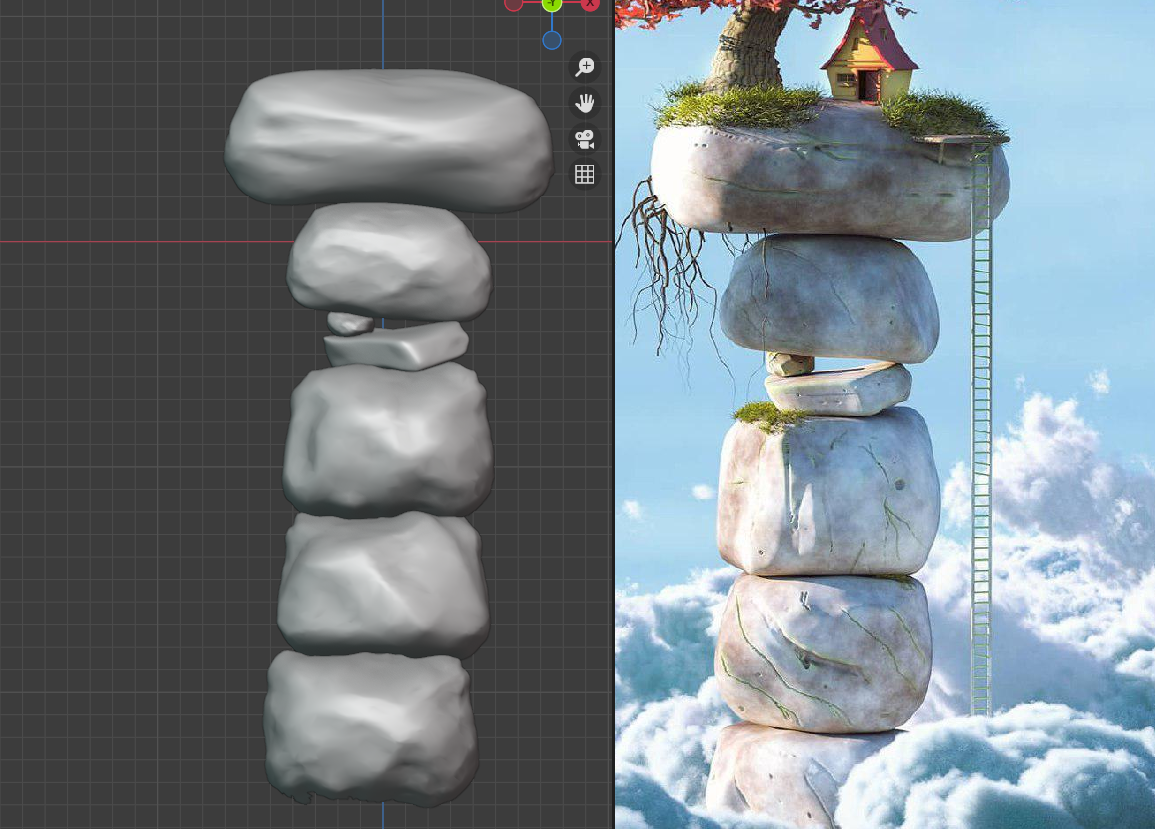
I was looking for a reference on the internet when I came across the image below, and I said to myself, let's make it. I didn’t know that the maker of this artwork was Persian until I completed the artwork!
View this post on Instagram
Modeling in Blender
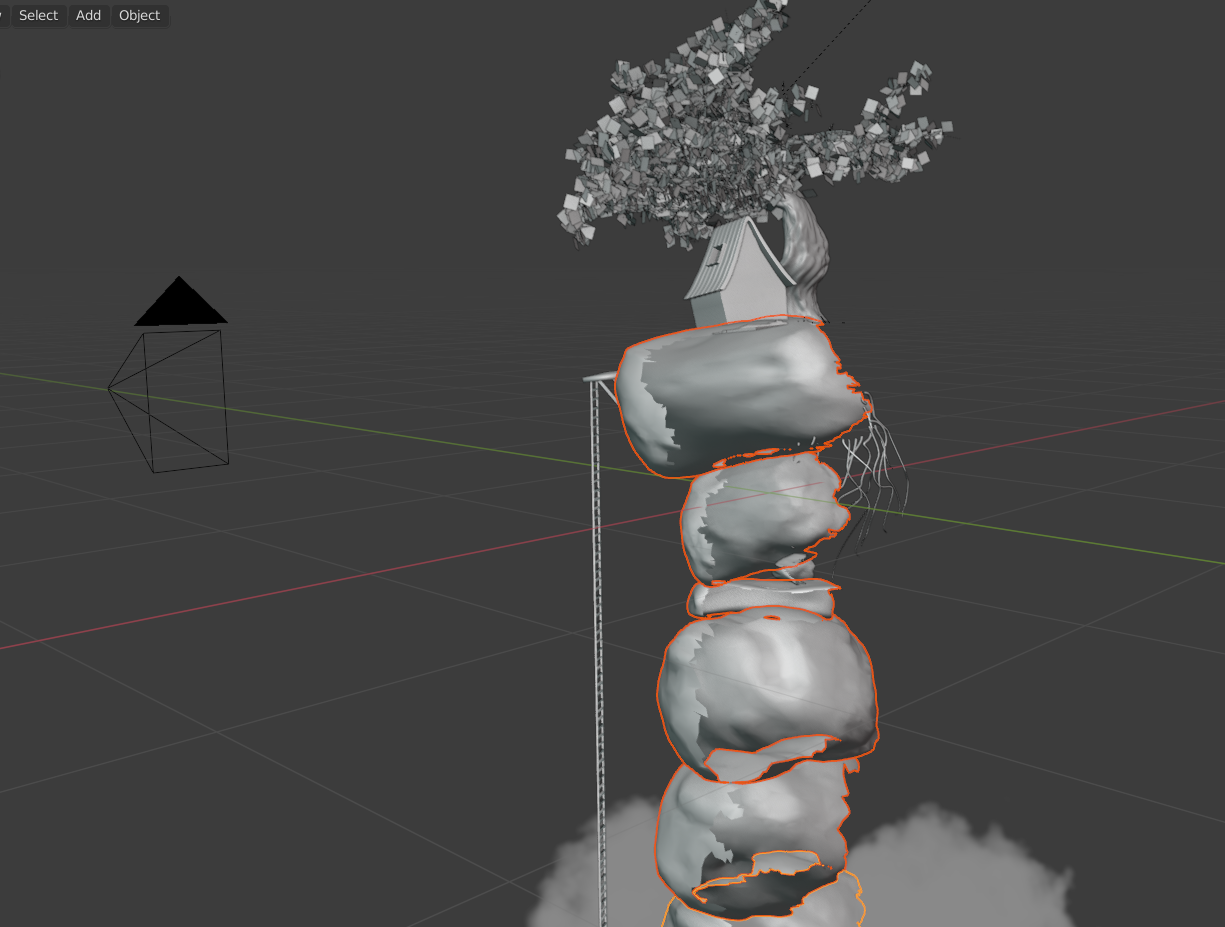
I imported the image into the software as a reference. With the help of a landscape add-on and a rock preset, I started modeling the stones.
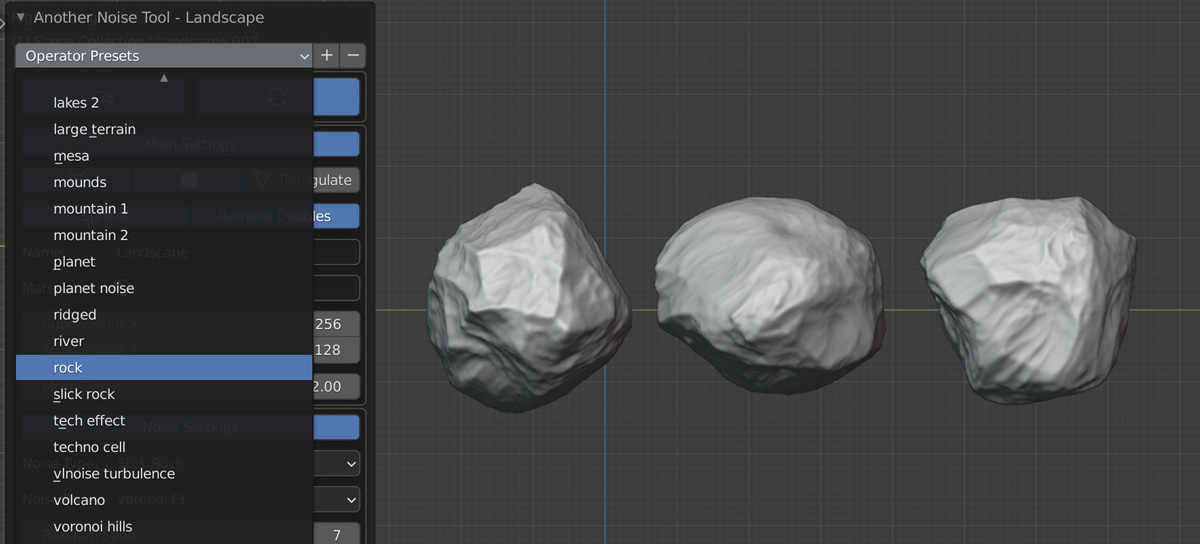
And by using proportional editing, I matched the stones with the reference image. In the end, I finalized it with sculpting and reduced the model’s polygon count using the decimate modifier.
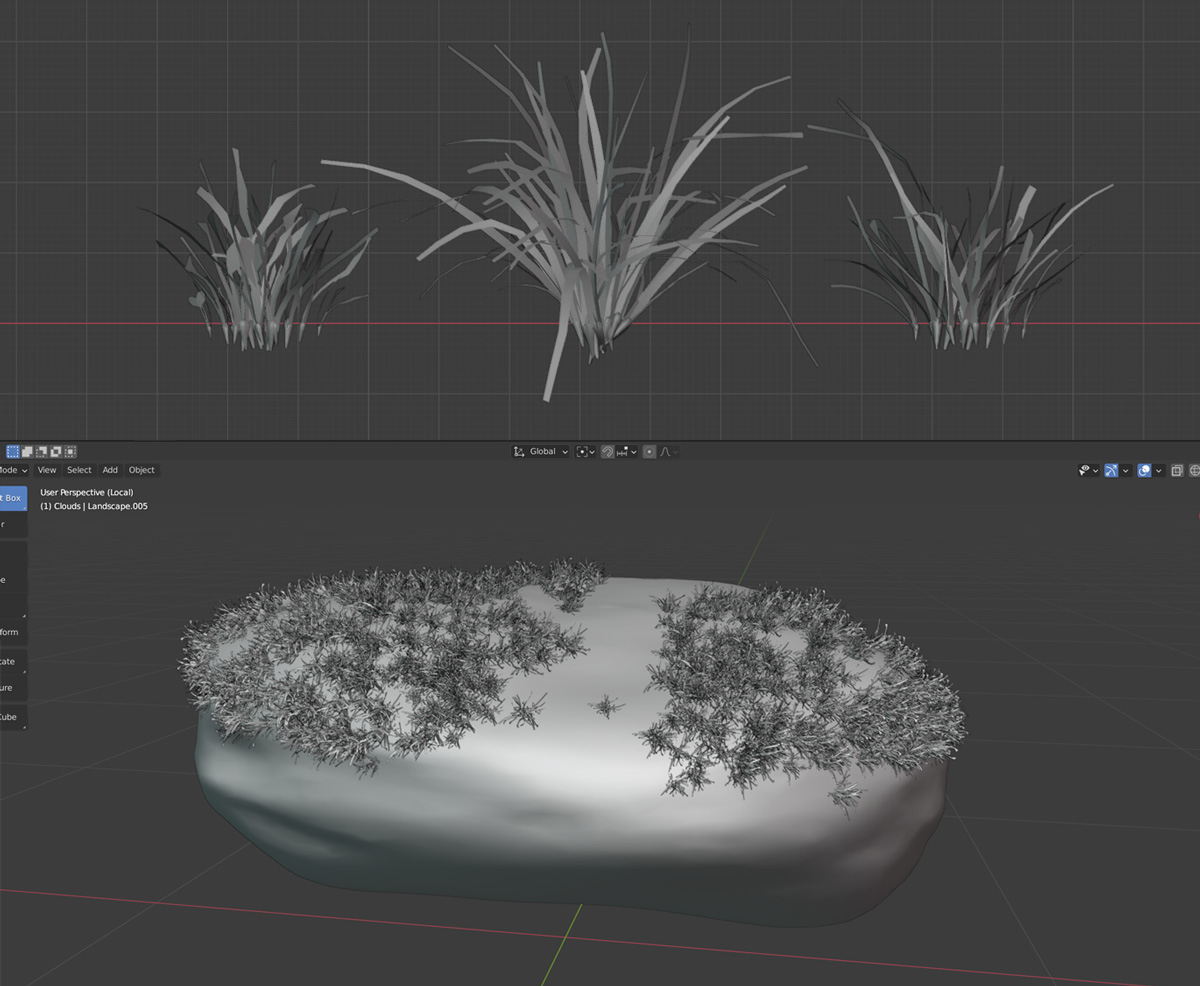
Then I modeled some grass and, using particles and weight paint, I attributed the grasses to the rocks.
It was easy to build a ladder, a bird, and a house. I downloaded the tree model from the internet for free; I made the leaves in transparency and, using different particles and weight paint, attributed the leaves to the tree.

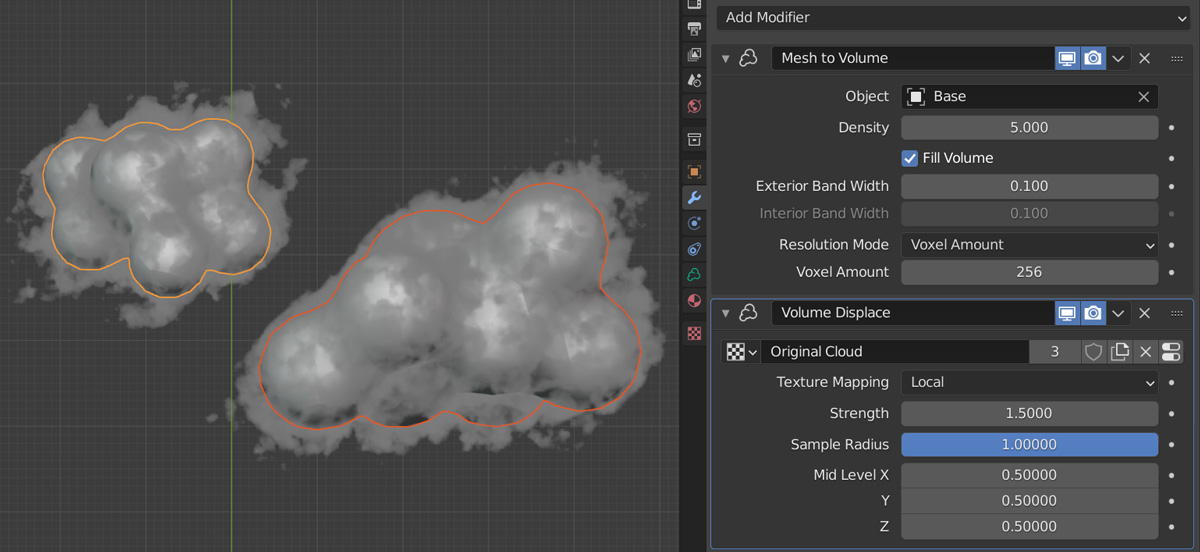
And for the last step, I used metaball and modifiers, such as mesh to volume and volume displace, to make the clouds.
And I set the camera similar to the reference.
Material and textures
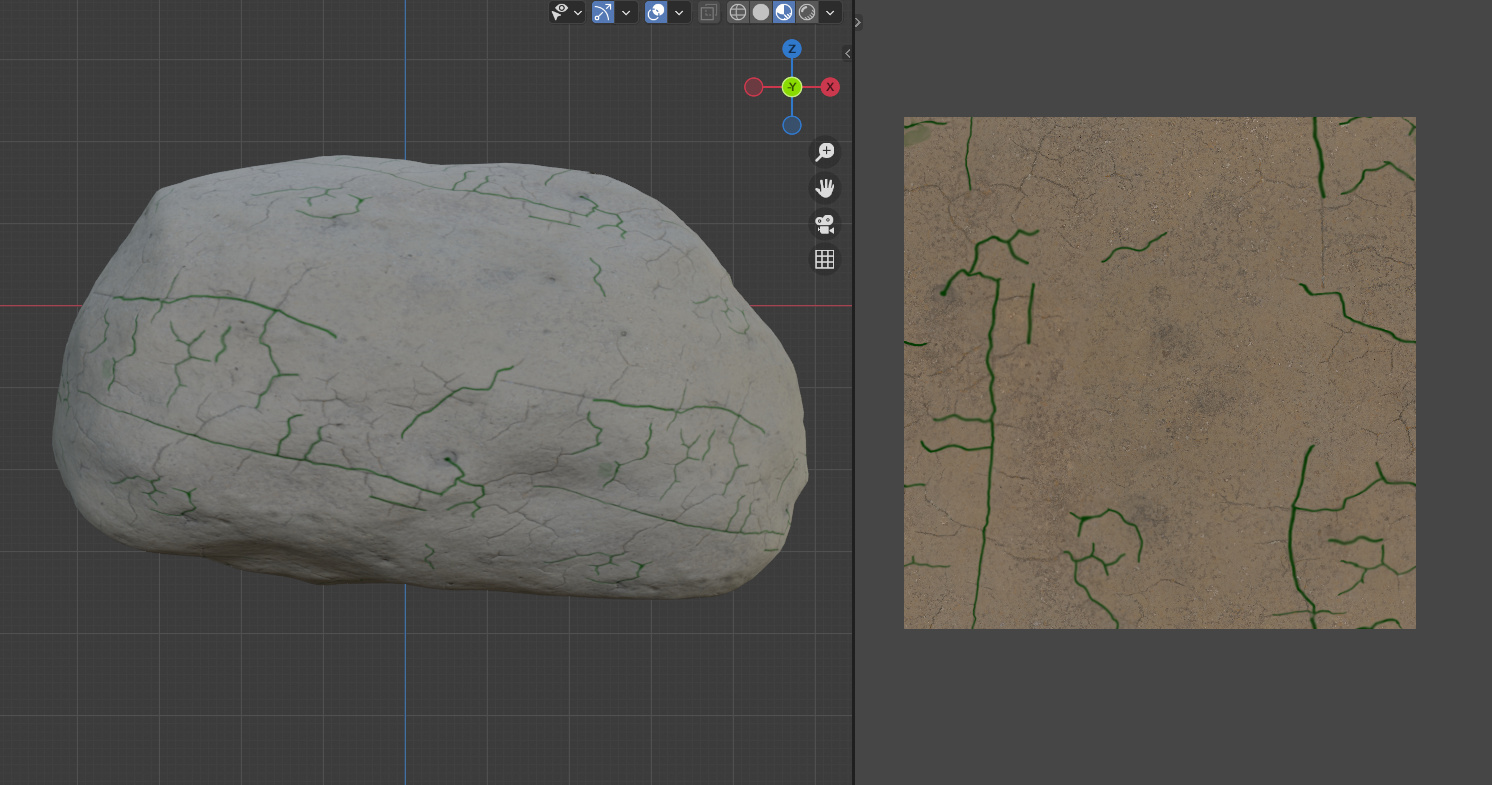
The rock and wood materials are PBR. I used Texture Paint to paint the green color on the parts of the stone texture that were hollow.
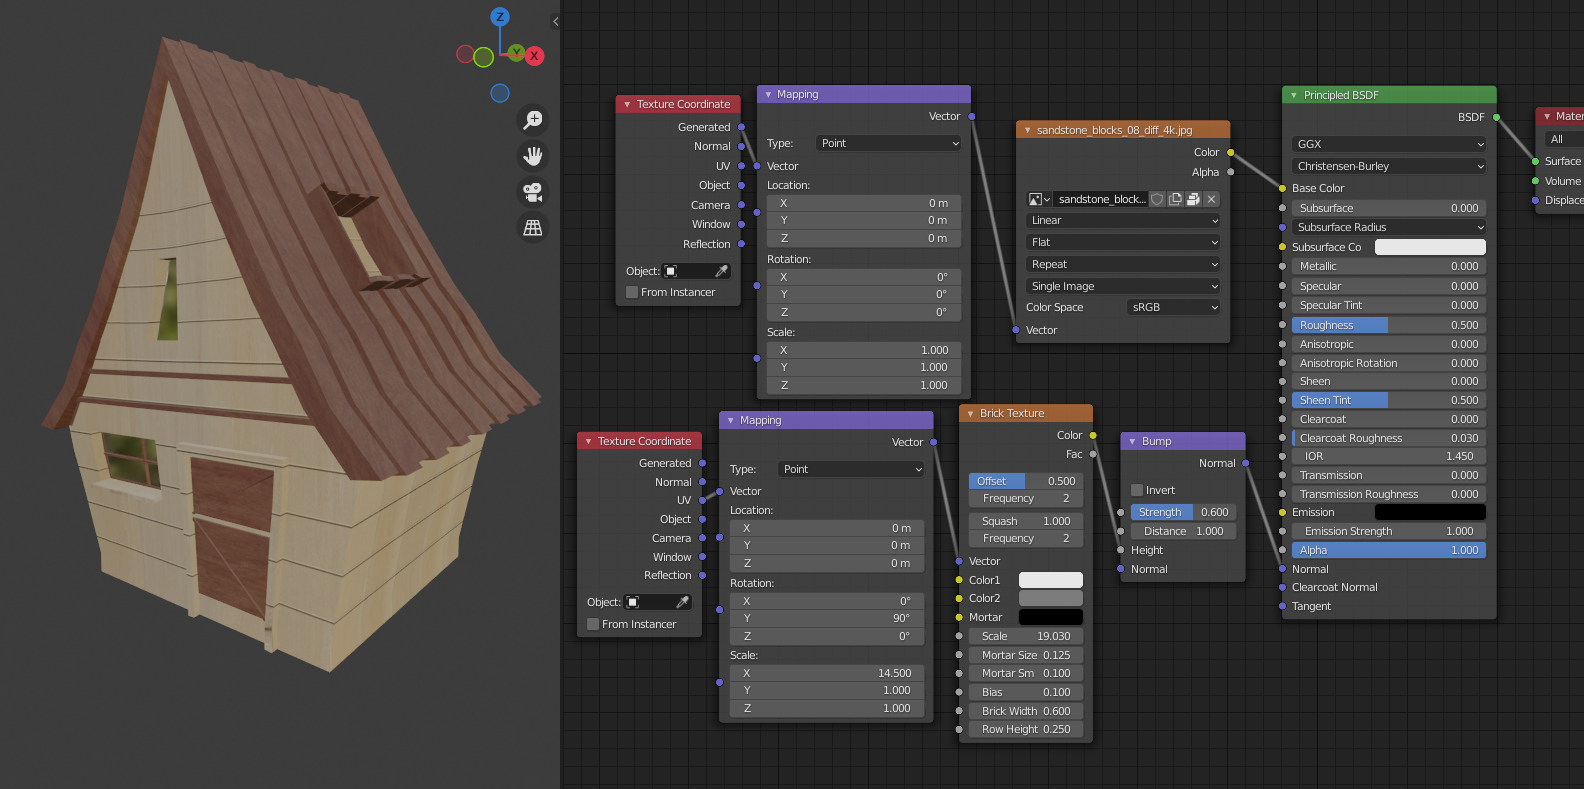
I used a wood texture for the wall material of the house and combined it with the procedural node brick texture. I also used a good wood texture for the roof of the house and the ladder.
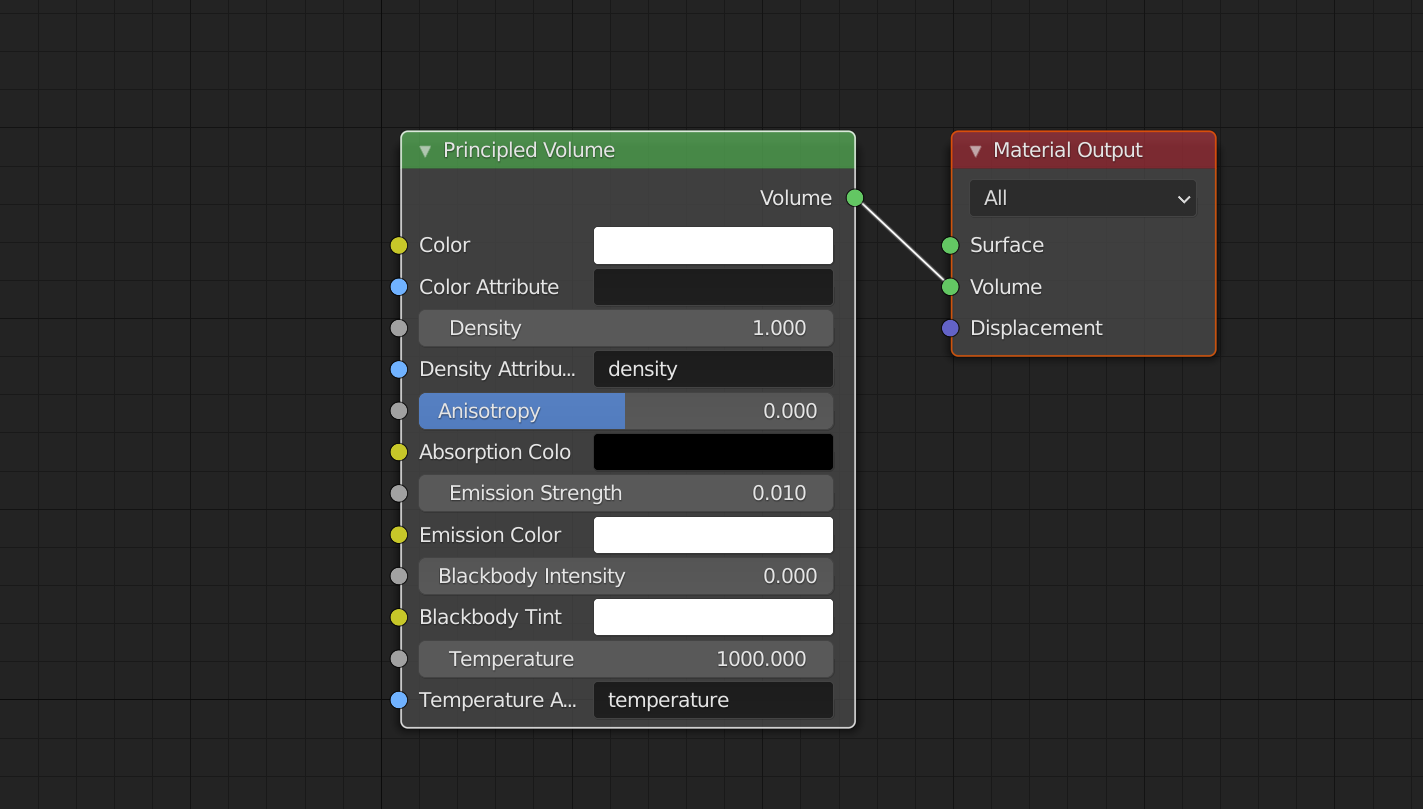
I gave the birds a black color and at the end, for the cloud material, I used principled volume, which you can see in the image below. In general, the materials are not so complicated!
Stage lighting
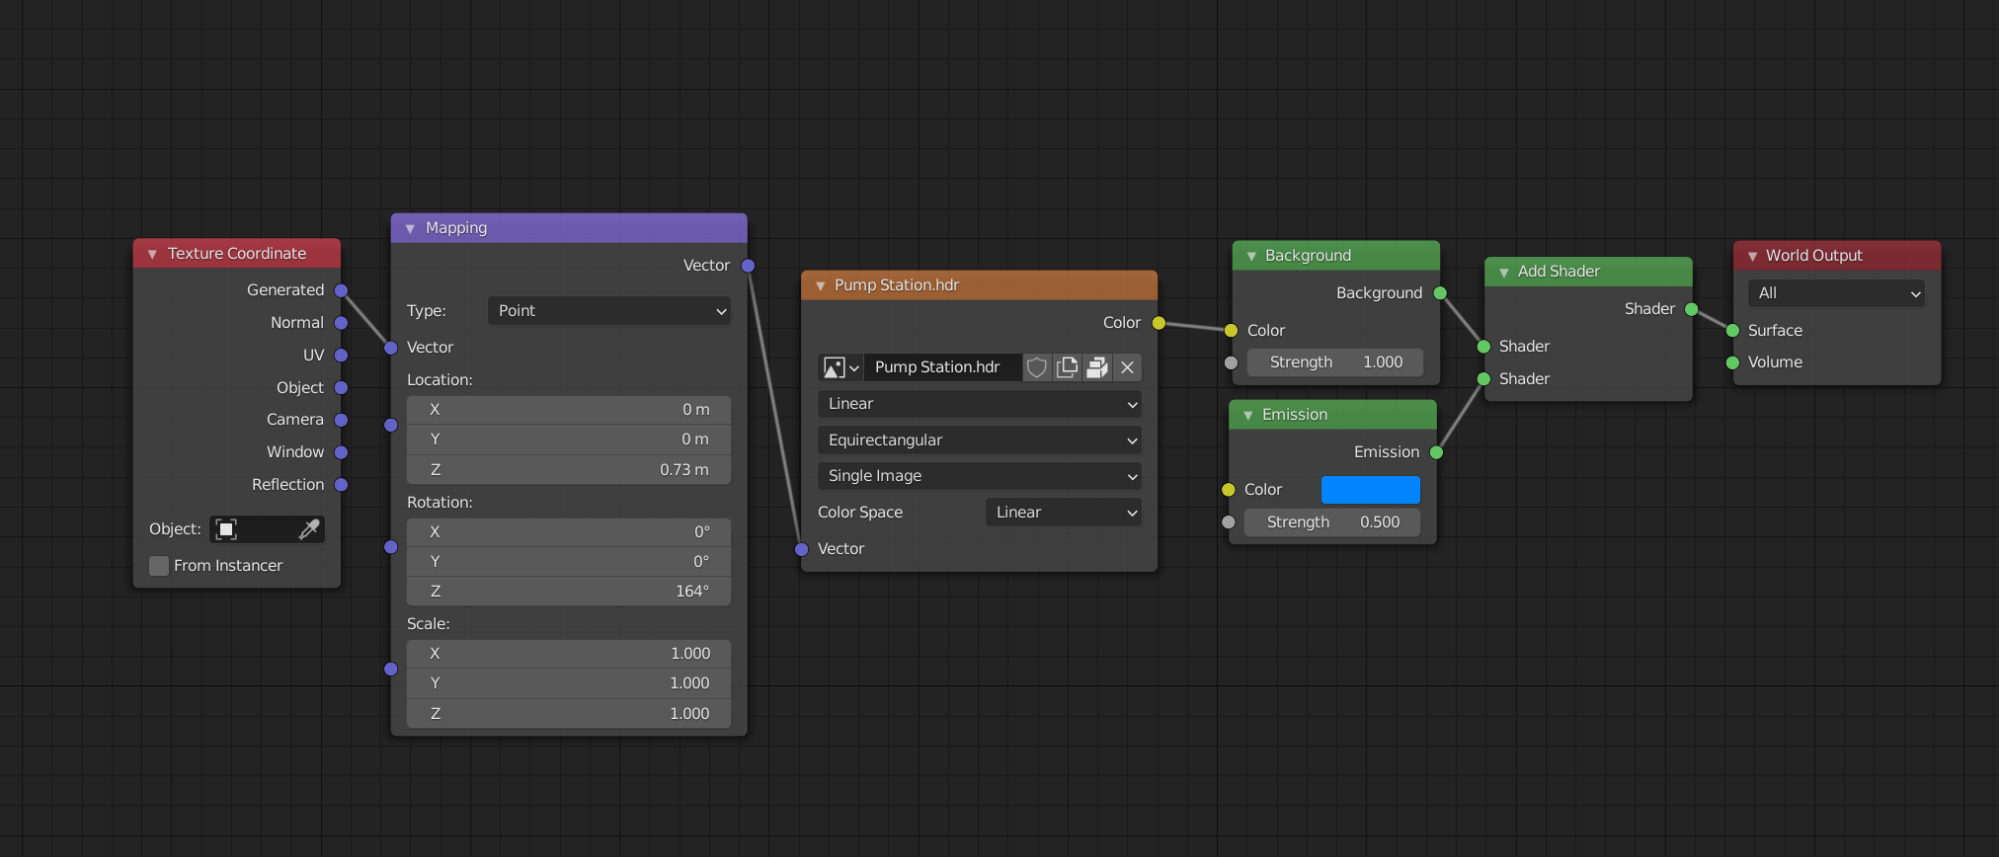
For the HDRI I used a high-quality HDRI that I had downloaded from HDRI Haven and, as you can see in the picture below, I combined it with one emission node and changed the color to blue.
And then I added a sun light to enhance the shadows of the scene and create an attractive shadow on the rocks.
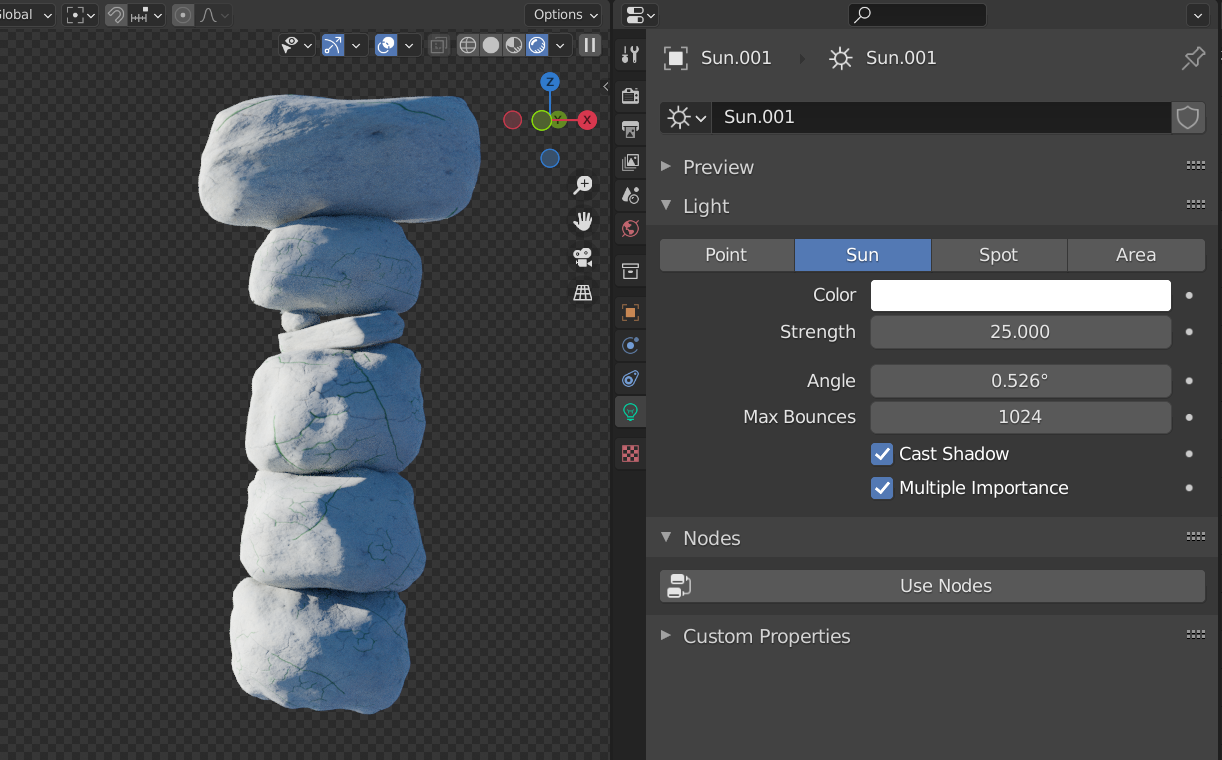
Finally, I added a point light to remove the darkness that the sun light had created on the clouds.
Rendering and post-production
I rendered the scene with Cycles and used Adaptive Sampling with 512 samples. I then added the Denoise filter in the composite workspace and I was able to render a quality output without noise. Finally, I did a very accurate color correction method.
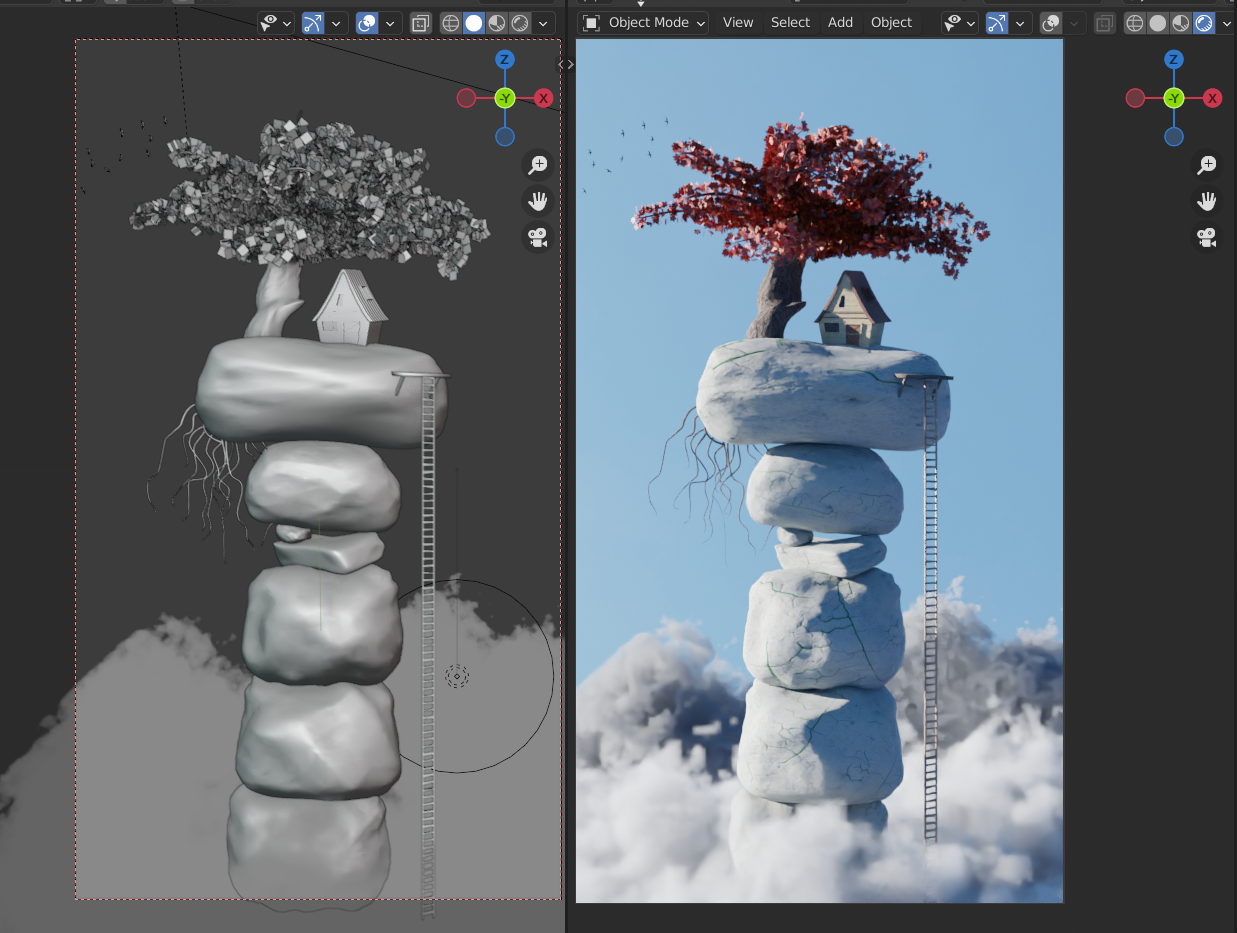
And here is a fun image of the backside of the objects that shows how I reduced the size of the project. :)
- Tools : Blender/Cycles
- PC Specs : AMD K16, 8GB Ram, AMD Radeon R4 Graphics
About the Author
 Seyyed Mohammad Madani, Freelance 3D artist
1 Comment
well done. thanks for the article.