Creating Stylized Character with Character Creator and Blender
Greetings, my name is Peter Alexander (aka Mythcons). I’m a digital freelancer specialized in illustration, graphic design, and 3D modeling.
I’d like to share how I create an exaggerated character using Character Creator and Blender. Character Creator supports base character with evenly-distributed quad surfaces, which allows me to touch up the mesh in Blender based on this to create a facial and body animation ready character.
I also use a free Blender add-on called ‘Blender Auto Setup‘, which is developed by Victor.Soupday, to simplify the process of file transfer between two programs.
In this video and text below, I’m going to walk you through some of my steps. You can follow me by using the free trial of Character Creator.
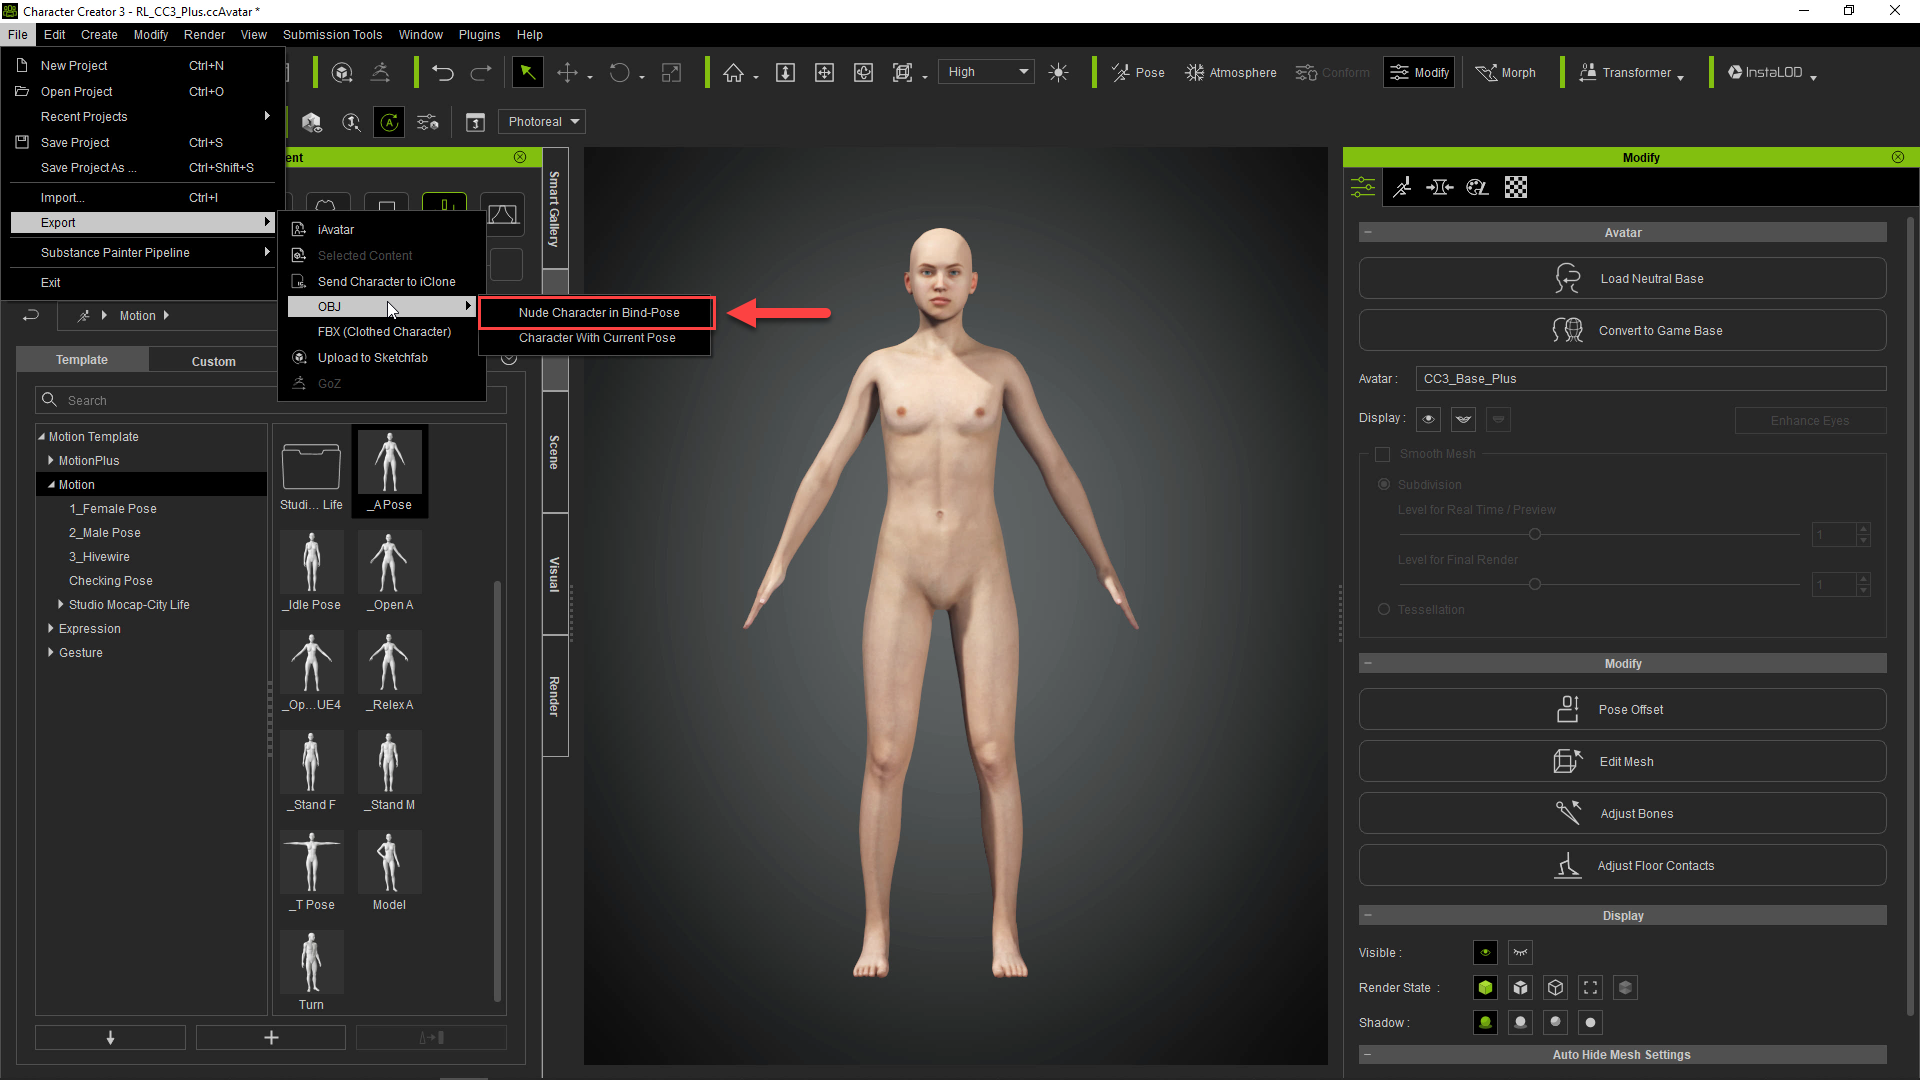
Export Base Character from Character Creator
I start by exporting the CC3+ base mesh as a Nude Character in Bind-Pose, which can be accessed by the OBJ export options.
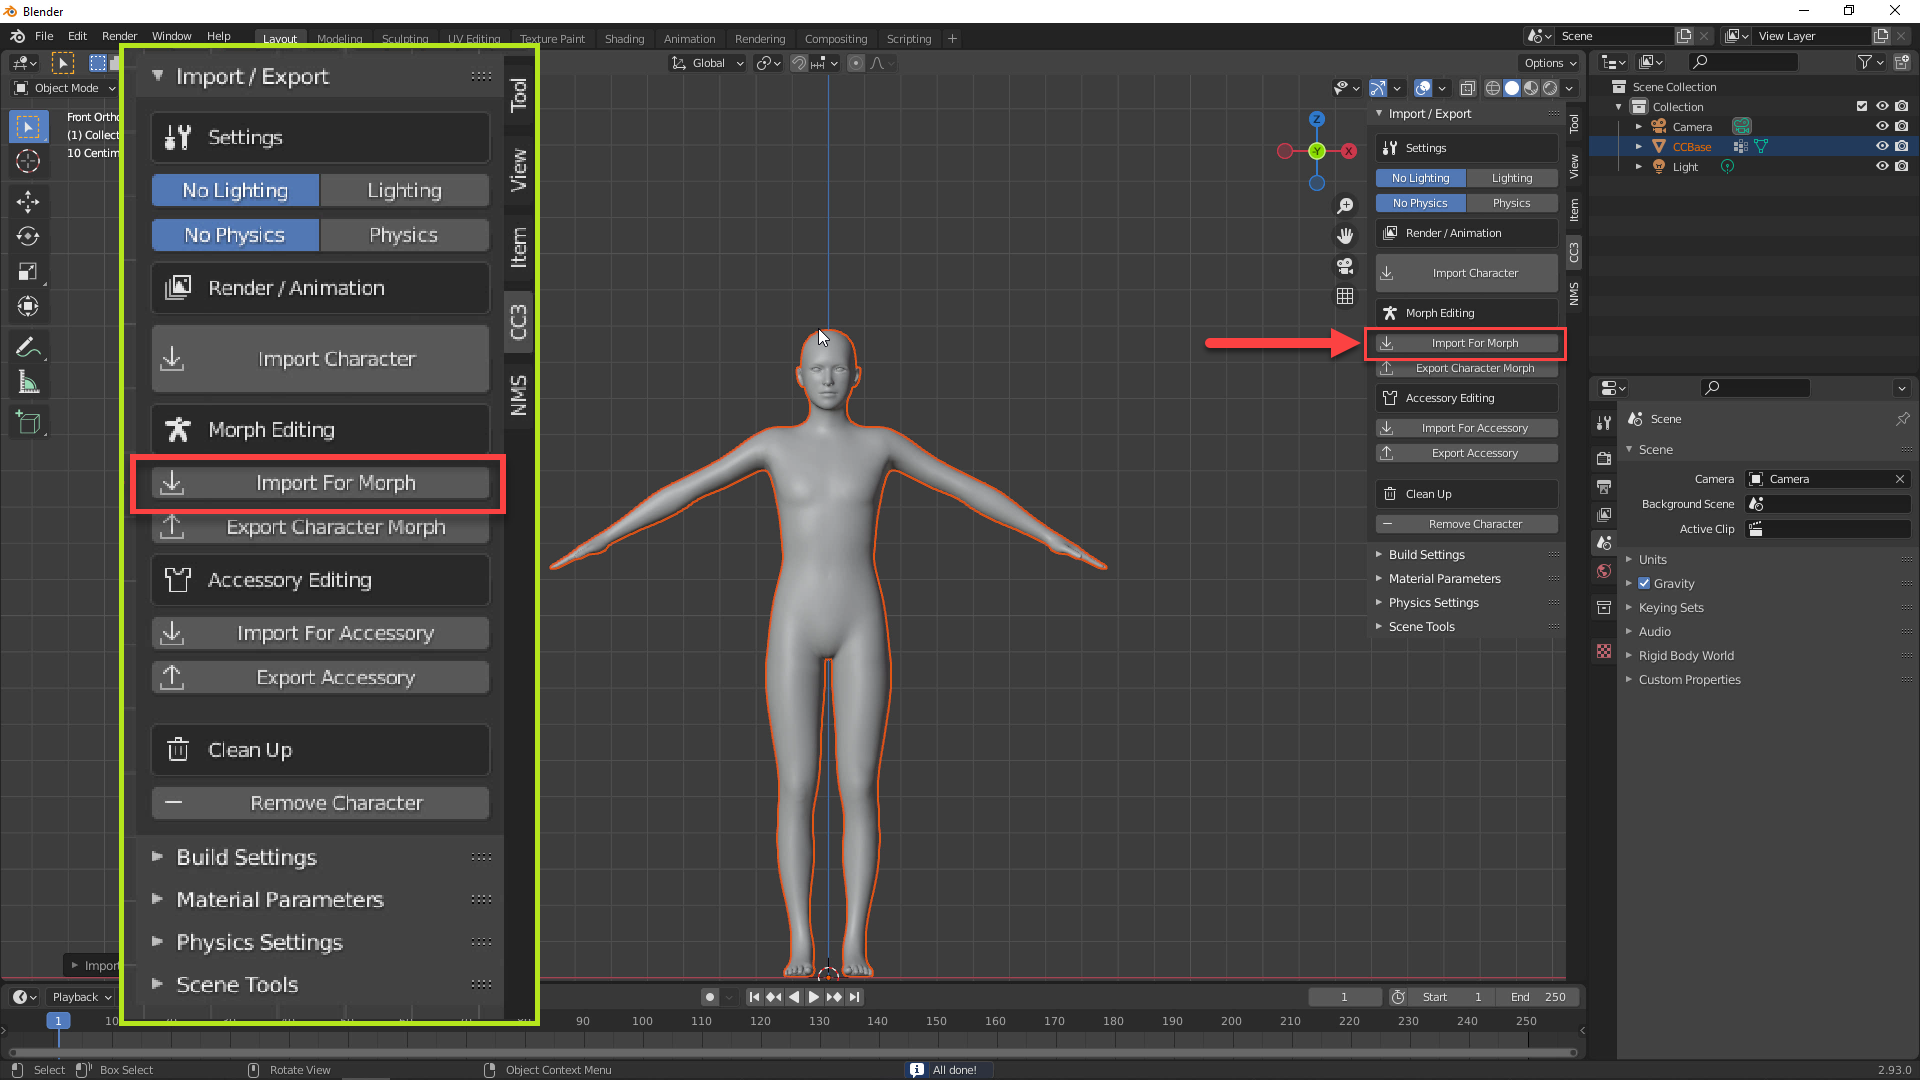
Import Character in Blender via Auto Setup
In Blender, with the Blender Auto Setup add-on installed, go to the CC3 tab and choose the ‘Import for Morph‘ option. This imports the mesh as a single object with the appropriate groups for import back into Character Creator. It also generates the necessary OBJ key file when you export the file.
Tips in Sculpting
I would call this step a problem solving exercise. I found the easiest way to set up my proportions was to go into Edit mode, select the vertices, with symmetry enabled on the X axis, and move large portions of the mesh to approximately where I need them to be. You may find a more manageable way to move the mesh around.
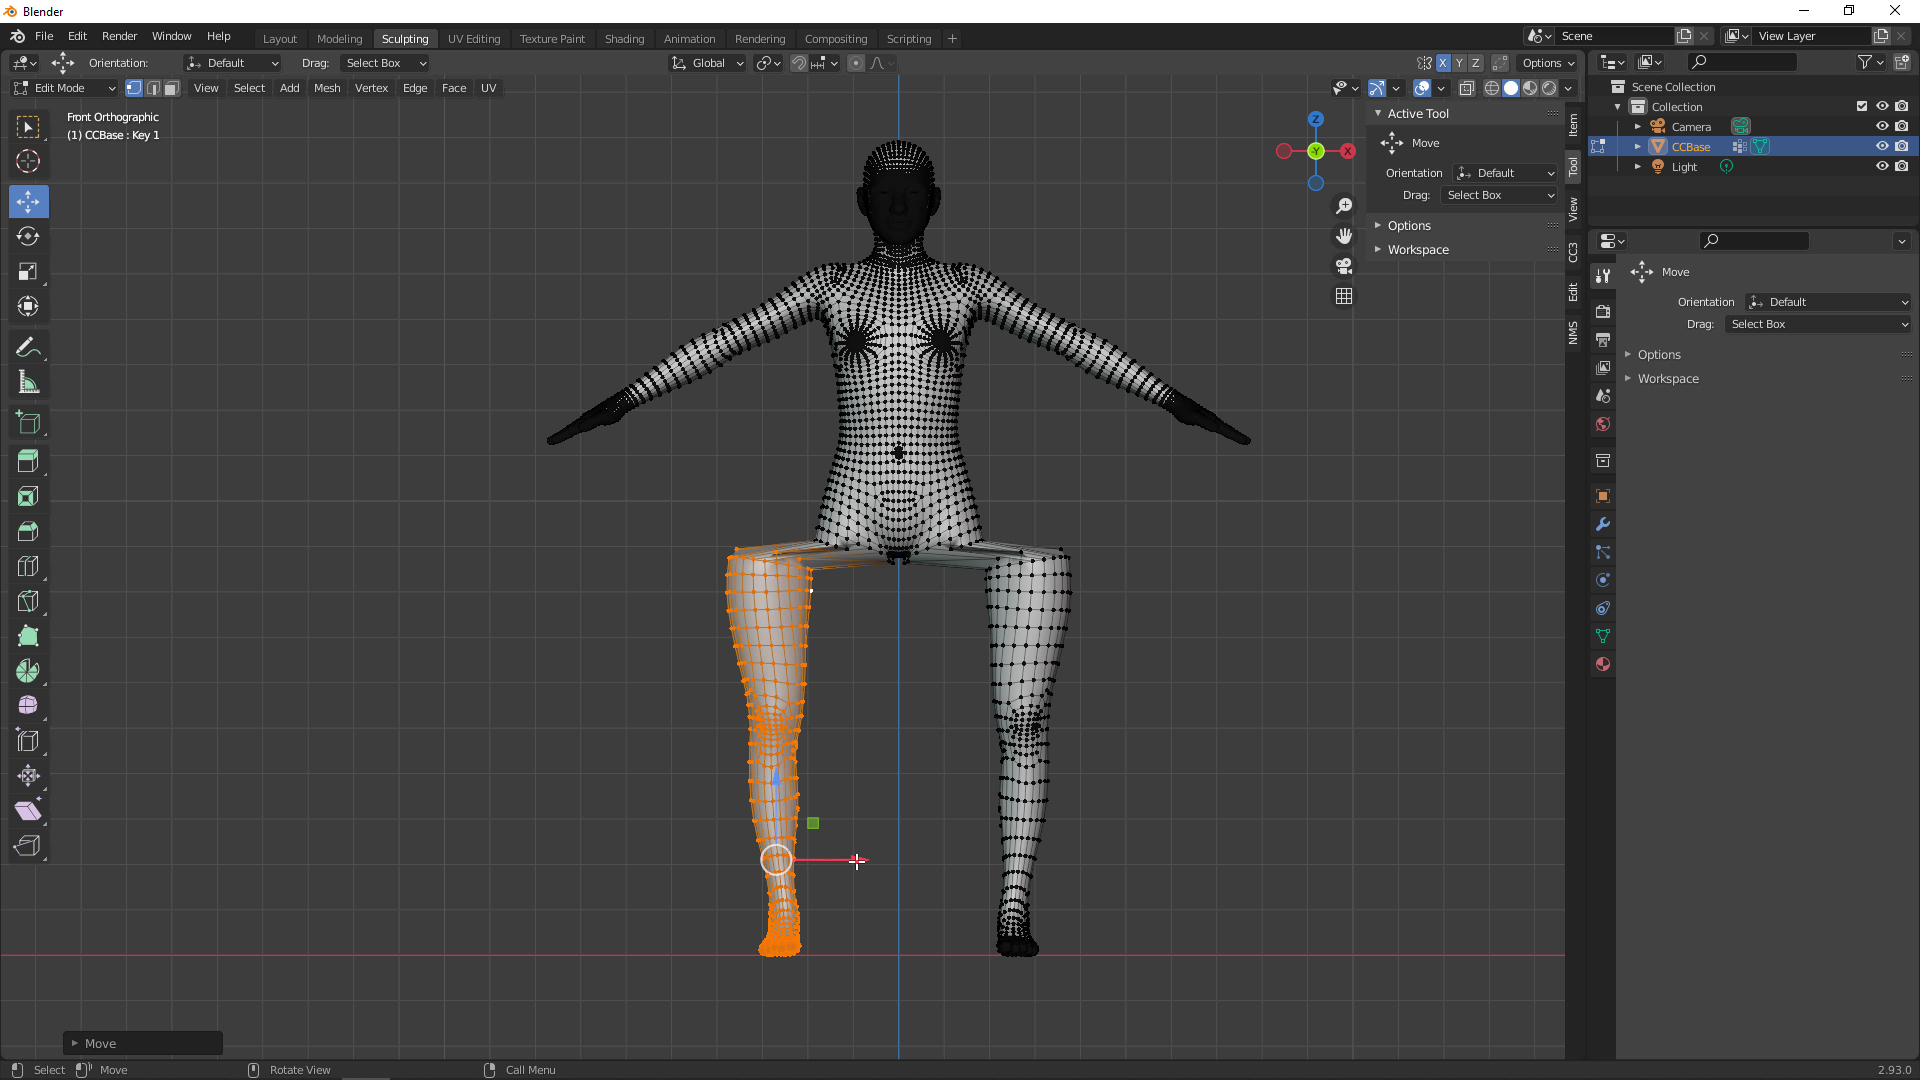
I mostly use the Grab, Inflate, and Smooth brushes with symmetry enabled to relax the stretched vertices and move everything into place. As Character Creator provides most of the normal maps through SkinGen, there’s less need to sculpt in high resolution as you would in a typical creation process.

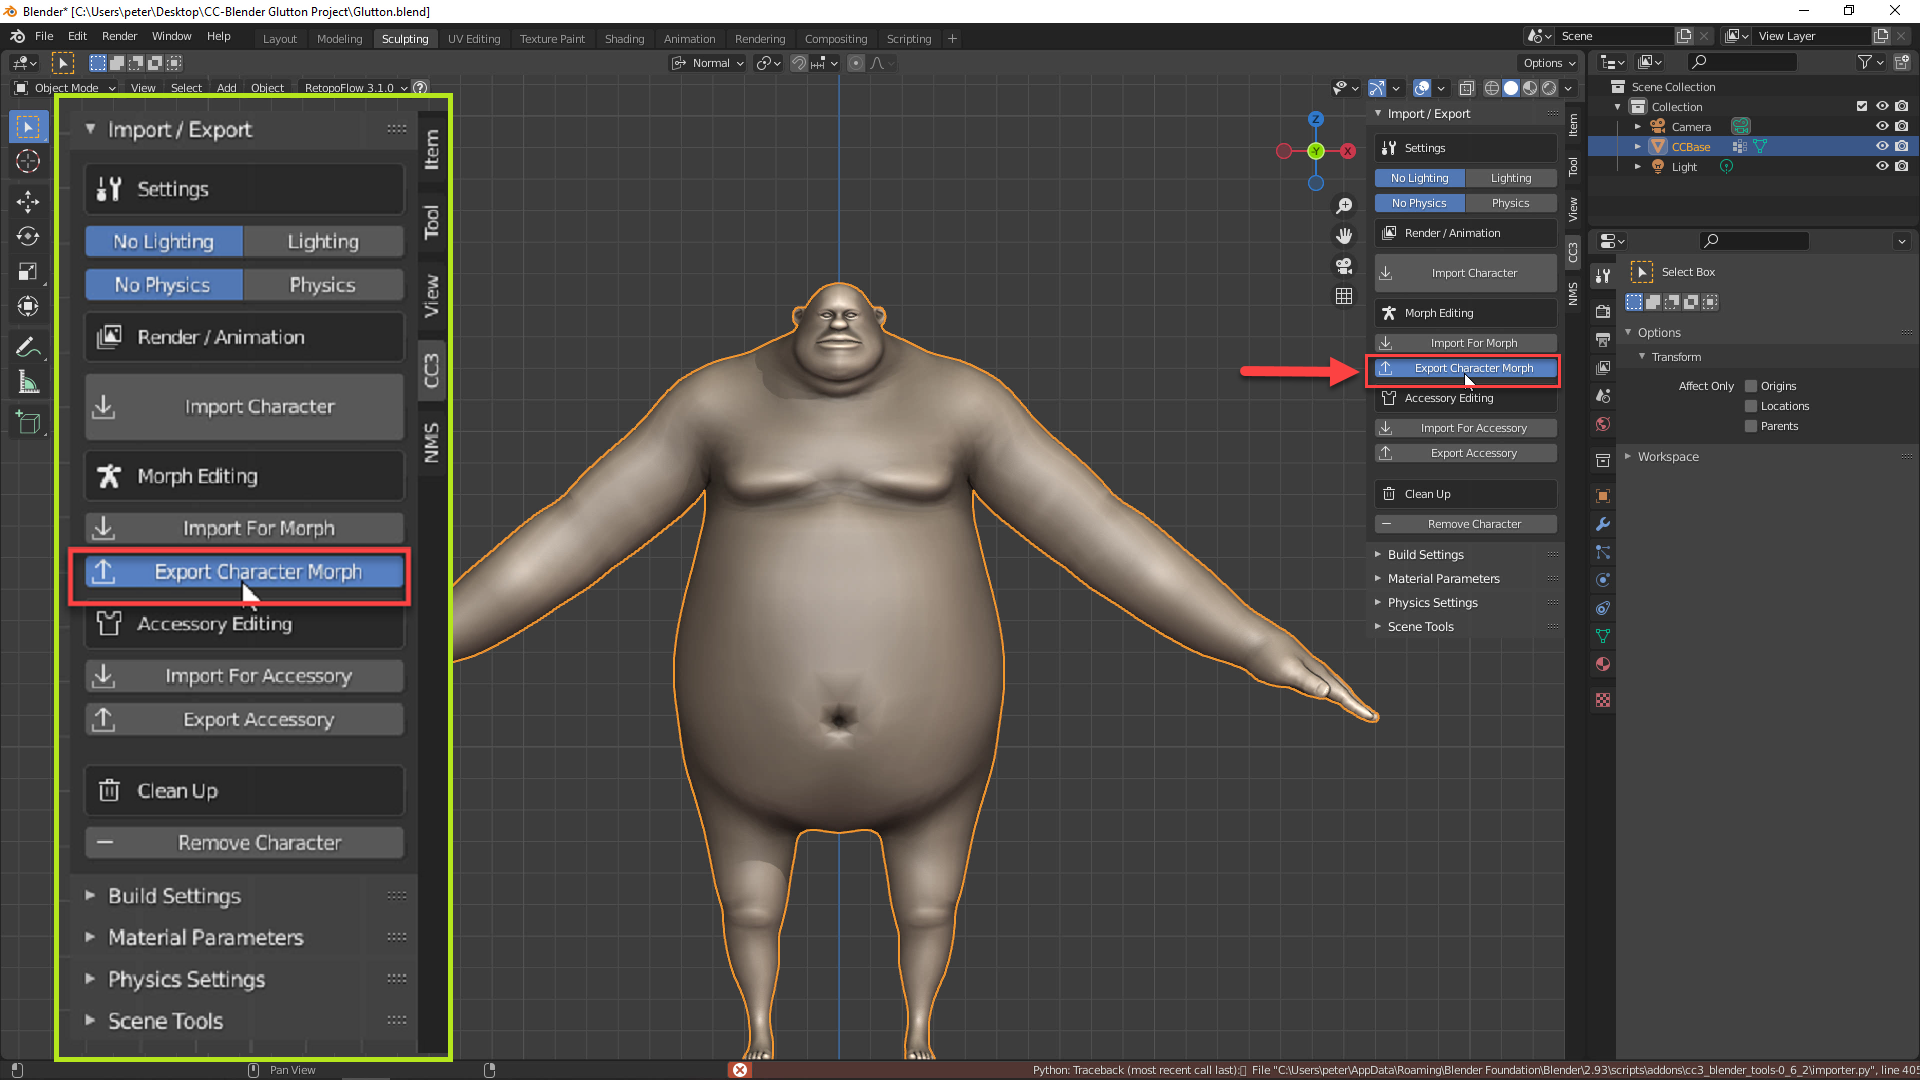
Export Sculpted Character via Auto Setup
When the character is ready for export, choose the ‘Export Character Morph’ option from the CC3 menu provided by the Blender Auto Setup add-on.
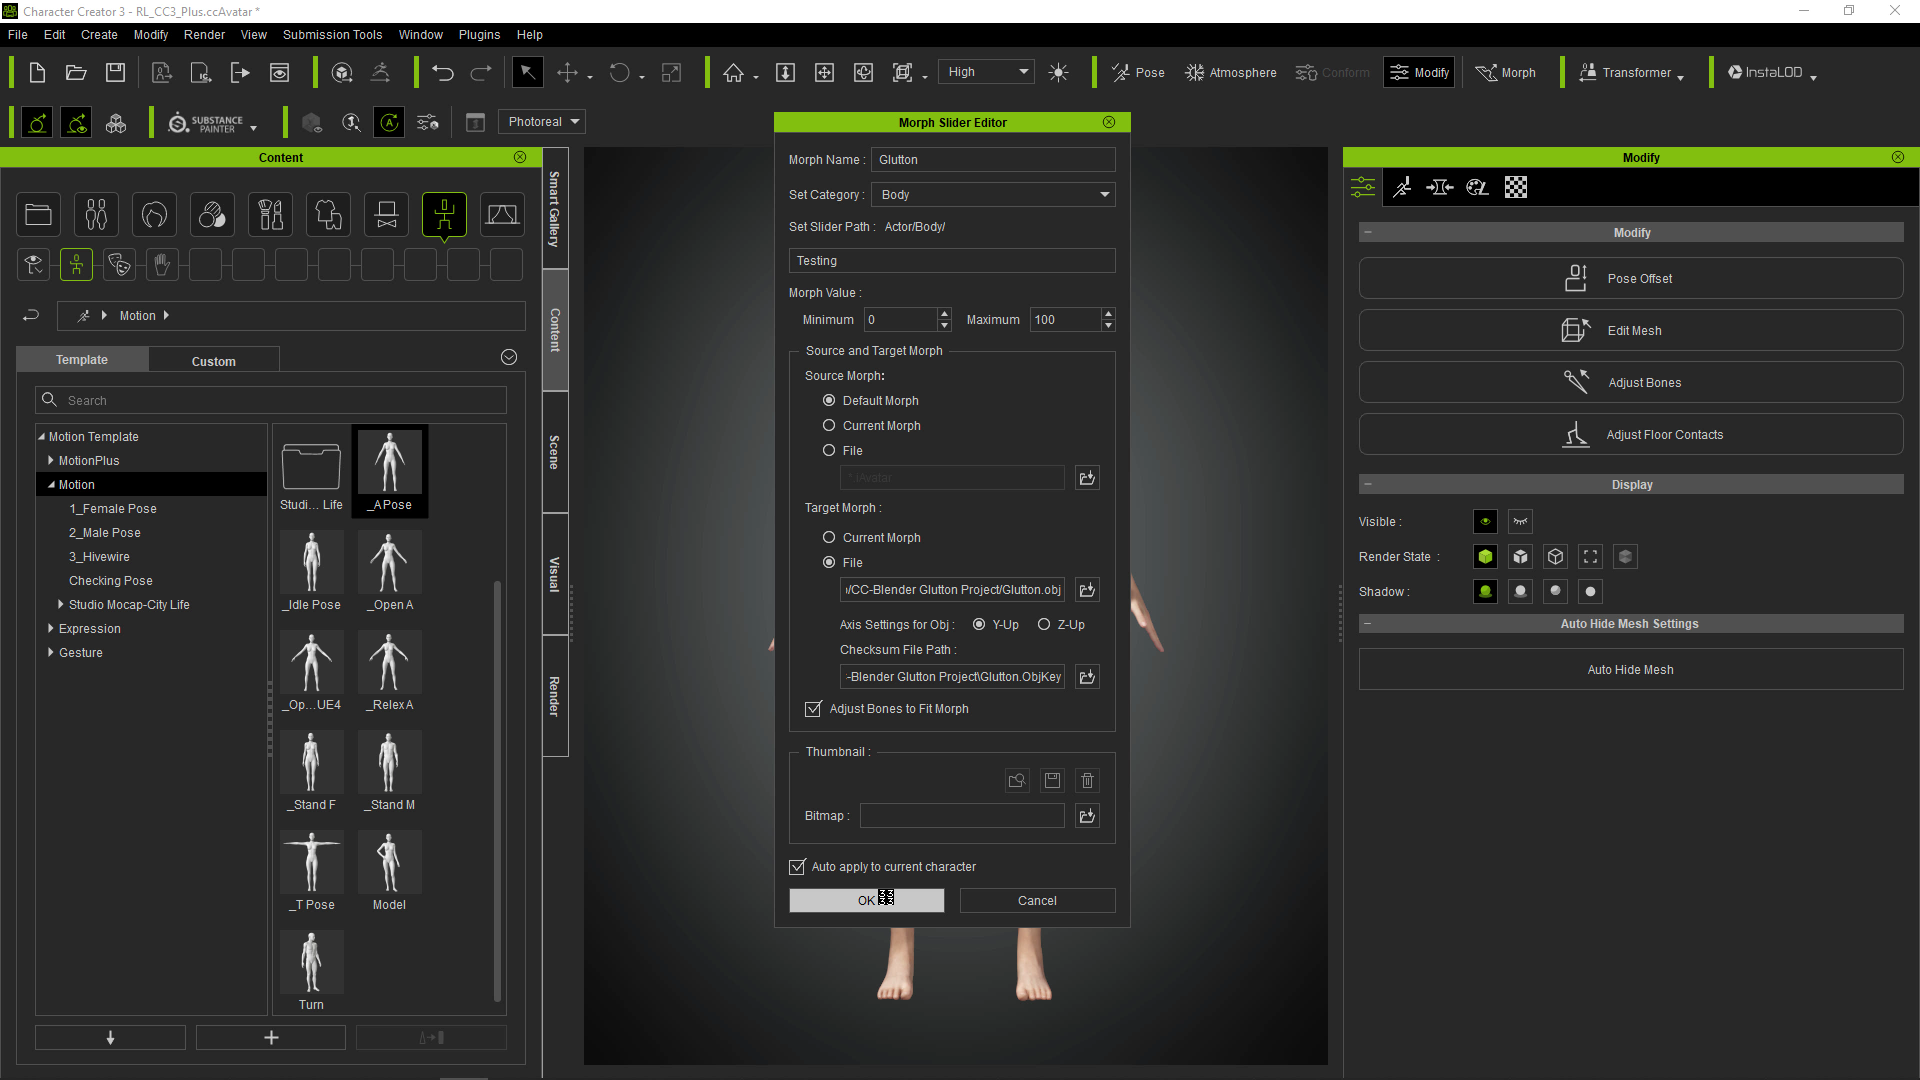
Import Character in Character Creator as Flexibly Controllable Morph Slider
Import the saved character using the Morph Slider Editor. Import the OBJ file under Target Morph, and the OBJ key should be loaded automatically. Check the ‘Adjust Bones to Fit Morph‘ option, and if you want to see immediate results, also check the ‘Auto apply to current character’ option.
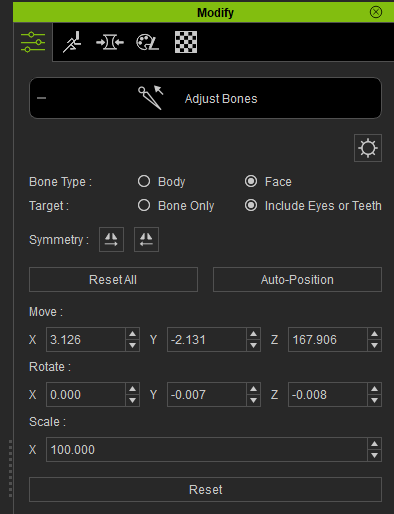
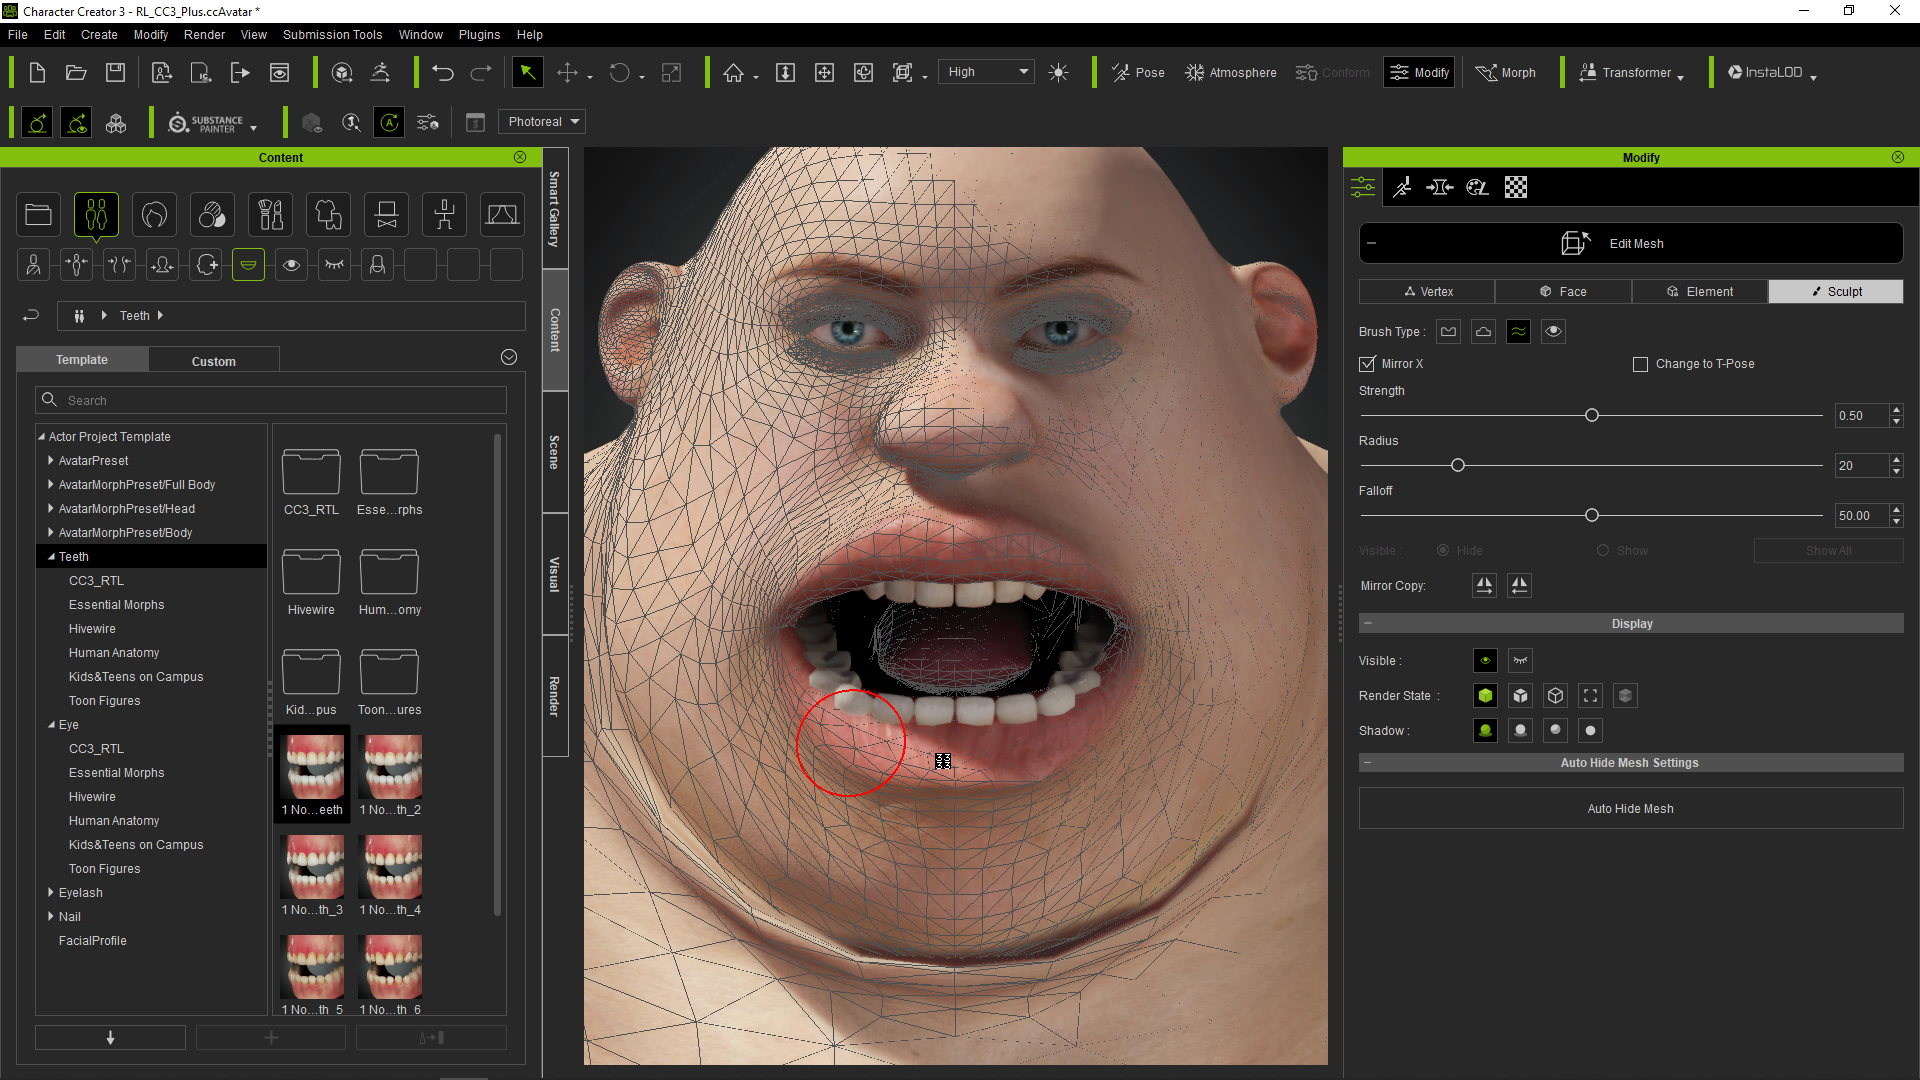
Tips in Eye Relocation, Teeth and Lip Correction
When I imported the character, the eyes didn’t follow correctly. This is probably due to something I neglected during the process. If this happens to you, it’s easy to fix. Select the eyes, and in Edit Mesh mode, move at least one of the eyes into place.
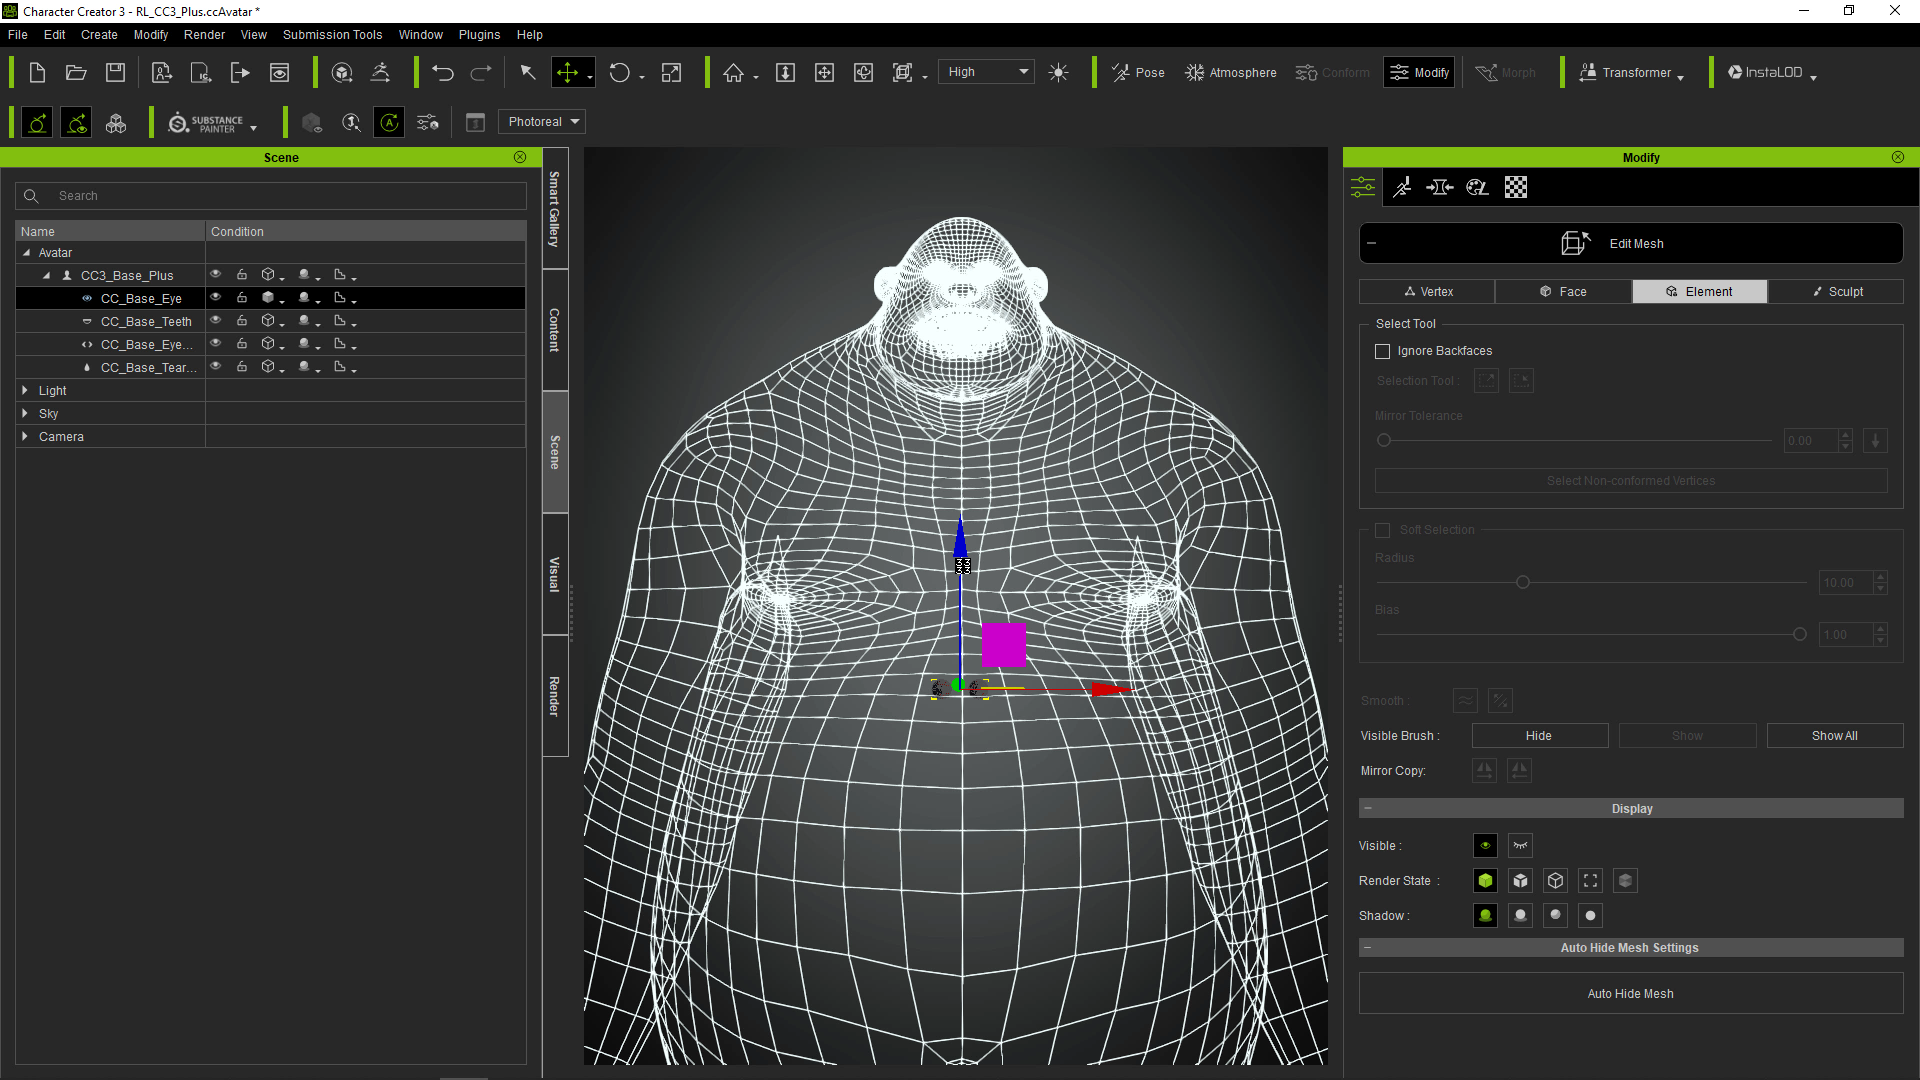
When you’ve done so, go to ‘Adjust Bones’, which will align the bones to the mesh. Also choose Symmetry and the direction you want the symmetry applied to. This will align the other eye to the proper position.
Make any other adjustments necessary to the mesh. In this case I had to correct the teeth and the lips.
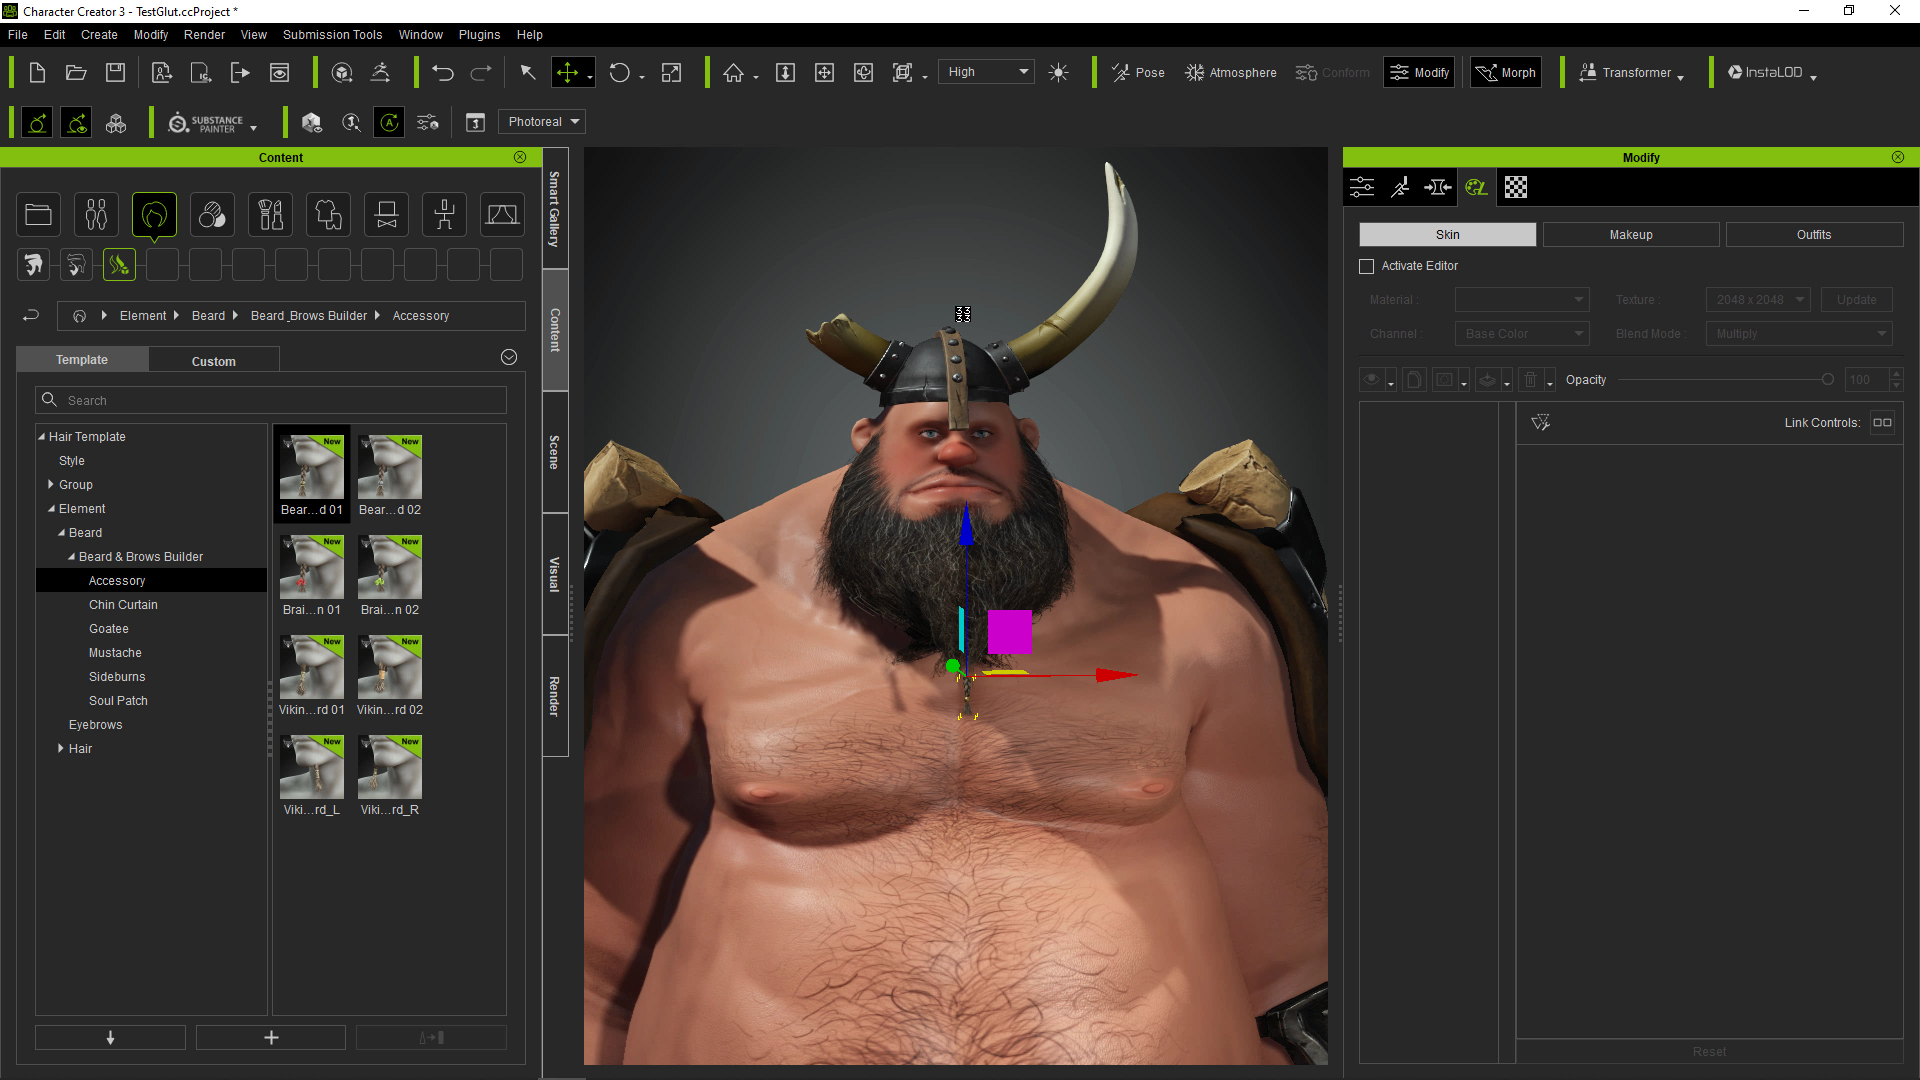
Touch up Character with Skin Details and Clothing Library
Finally using SkinGen, apply a skin base, normal maps, and any other details you think are necessary for your character, as well any hair, clothing or accessories within your library to accommodate your character design.
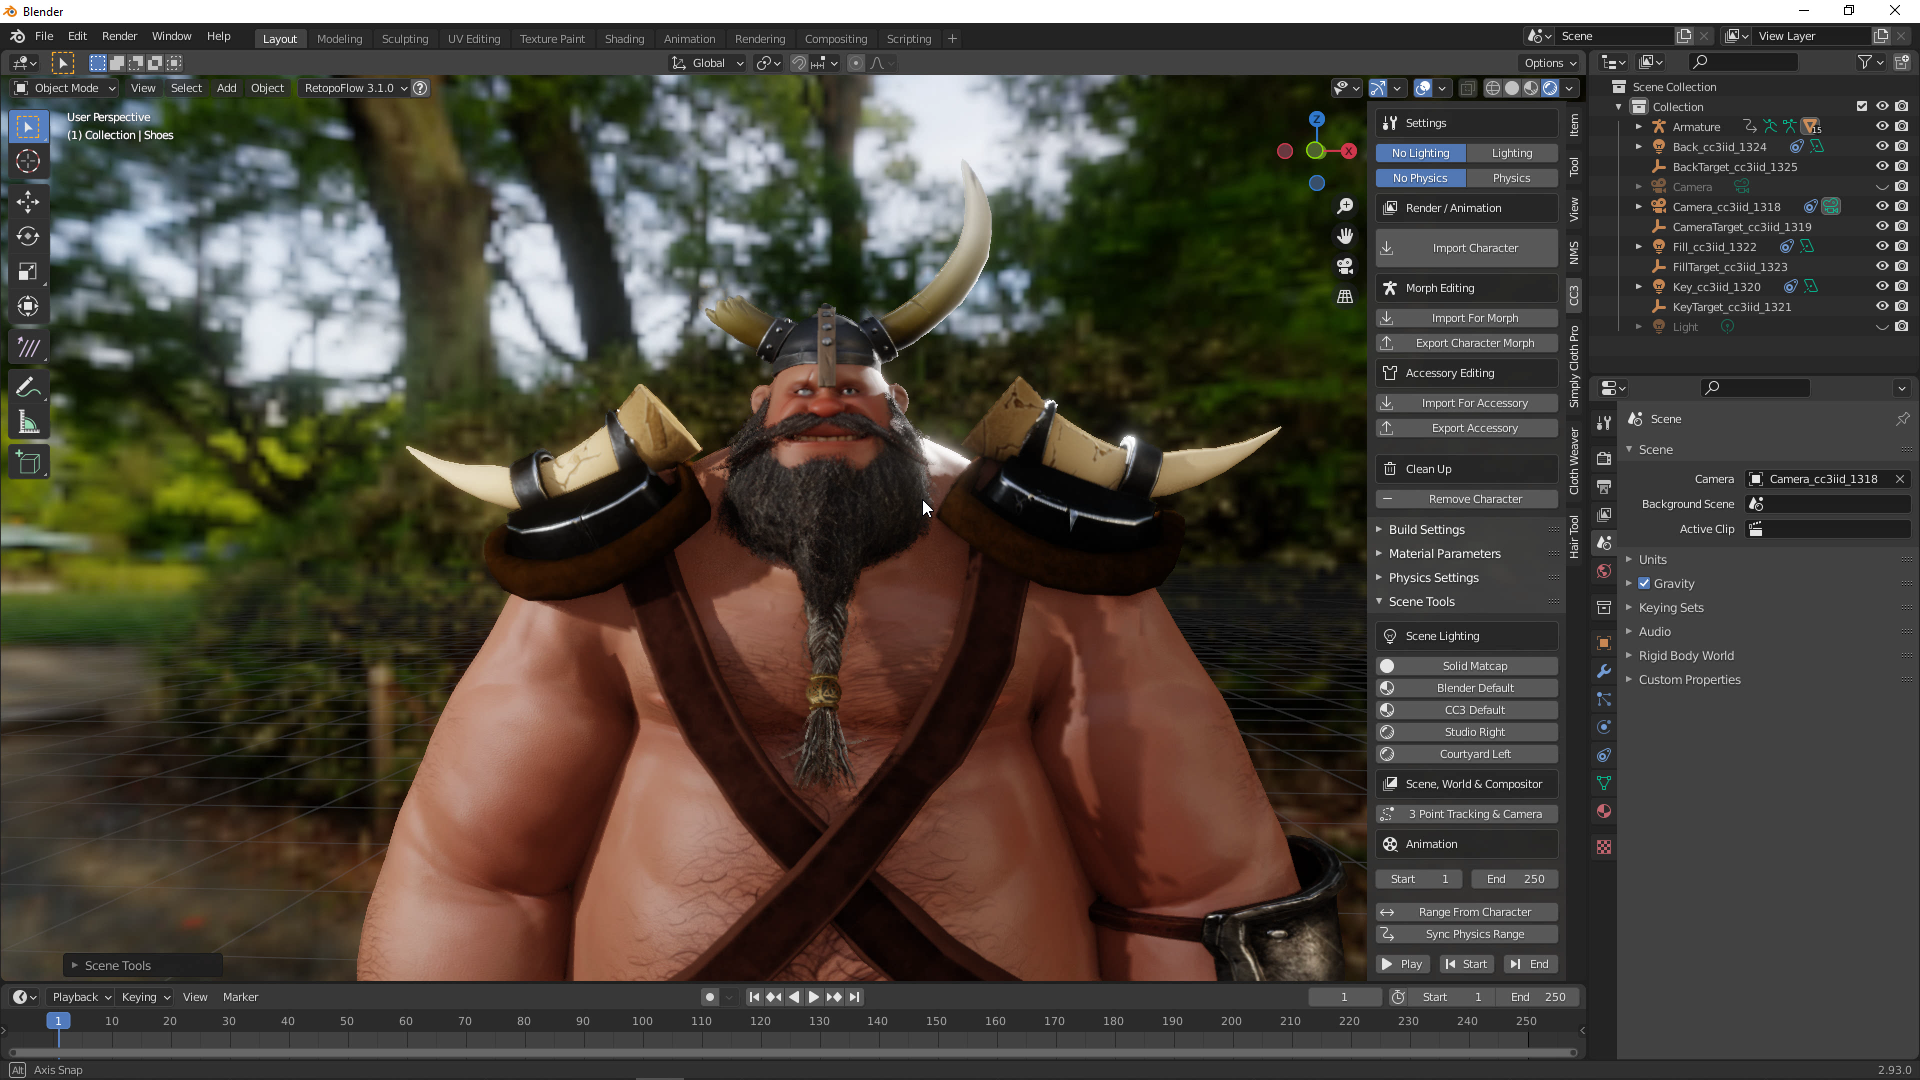
Send Character Back to Blender for Eevee Render via Auto Setup
With your character complete, you can export him or her back into Blender in FBX (with the Current Pose option, or with animations depending on your rendering goals). This time choose the ‘Import Character’ option, which will automatically translate Reallusion’s Digital Human Shader and parameters to Blender Eevee and Cycle. You can further adjust SSS skin, eyes, teeth, and hair dynamically.