
Behind the Scenes: Bathroom by Raul3dRubio
About
My name is Raul and I’m a traditional sculptor from Valencia (Spain). I’ve done 3D art in Blender since Blender 2.47.
I studied Fine Arts at the University of San Carlos in Valencia. I love everything 3D: modeling, sculpting, shaders, scripting… I try to keep up to date as much as I can. I also love traditional sculpting and drawing.
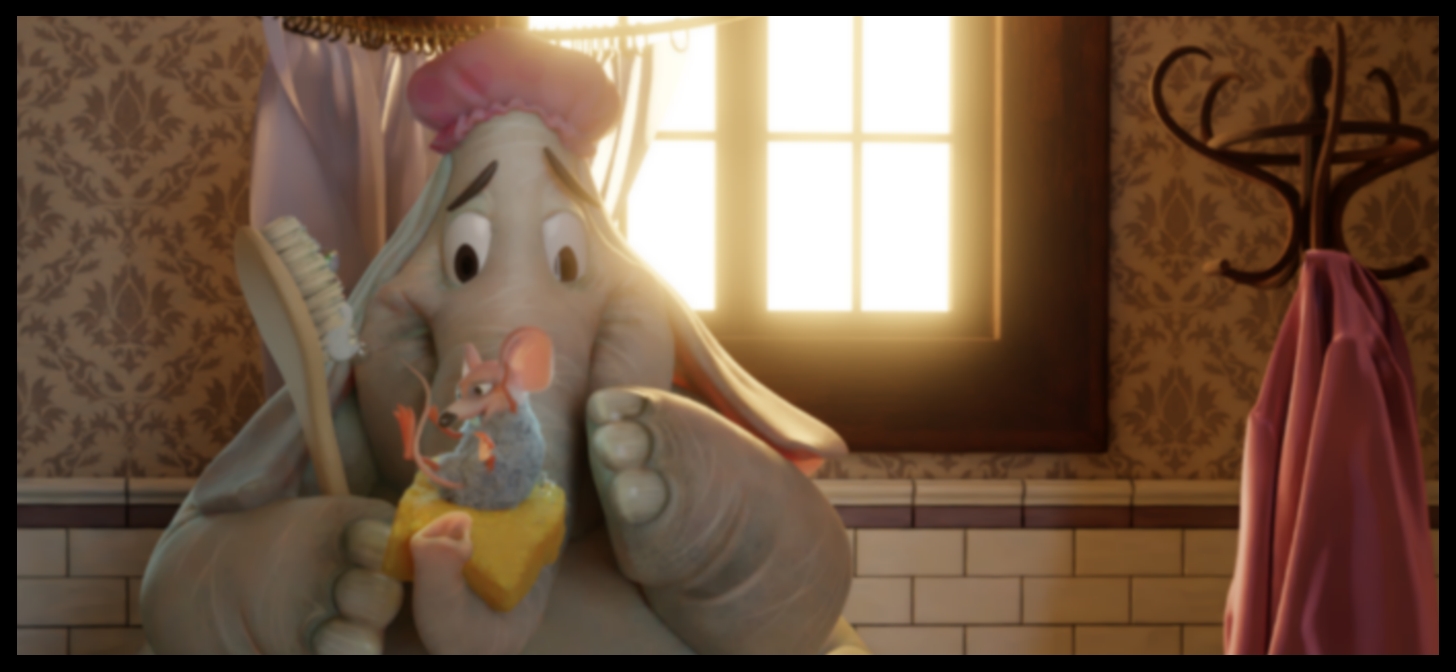
The Bathroom
This work was done in Blender—everything except the gown, which was made in Marvelous Designer. Both the curtain and the carpet are simulated in Blender. My computer is an MSI i7-8750 and Nvidia GTX 1060 laptop.
The intention of creating this image was to try to make a work that, from the beginning to the end, was totally mine, since I had lately made an image from other people’s concepts.
In my work process, drawing is always the beginning. Sketches, sketches, and sketches until I find the definitive idea, or the general idea to continue working on in 3D.
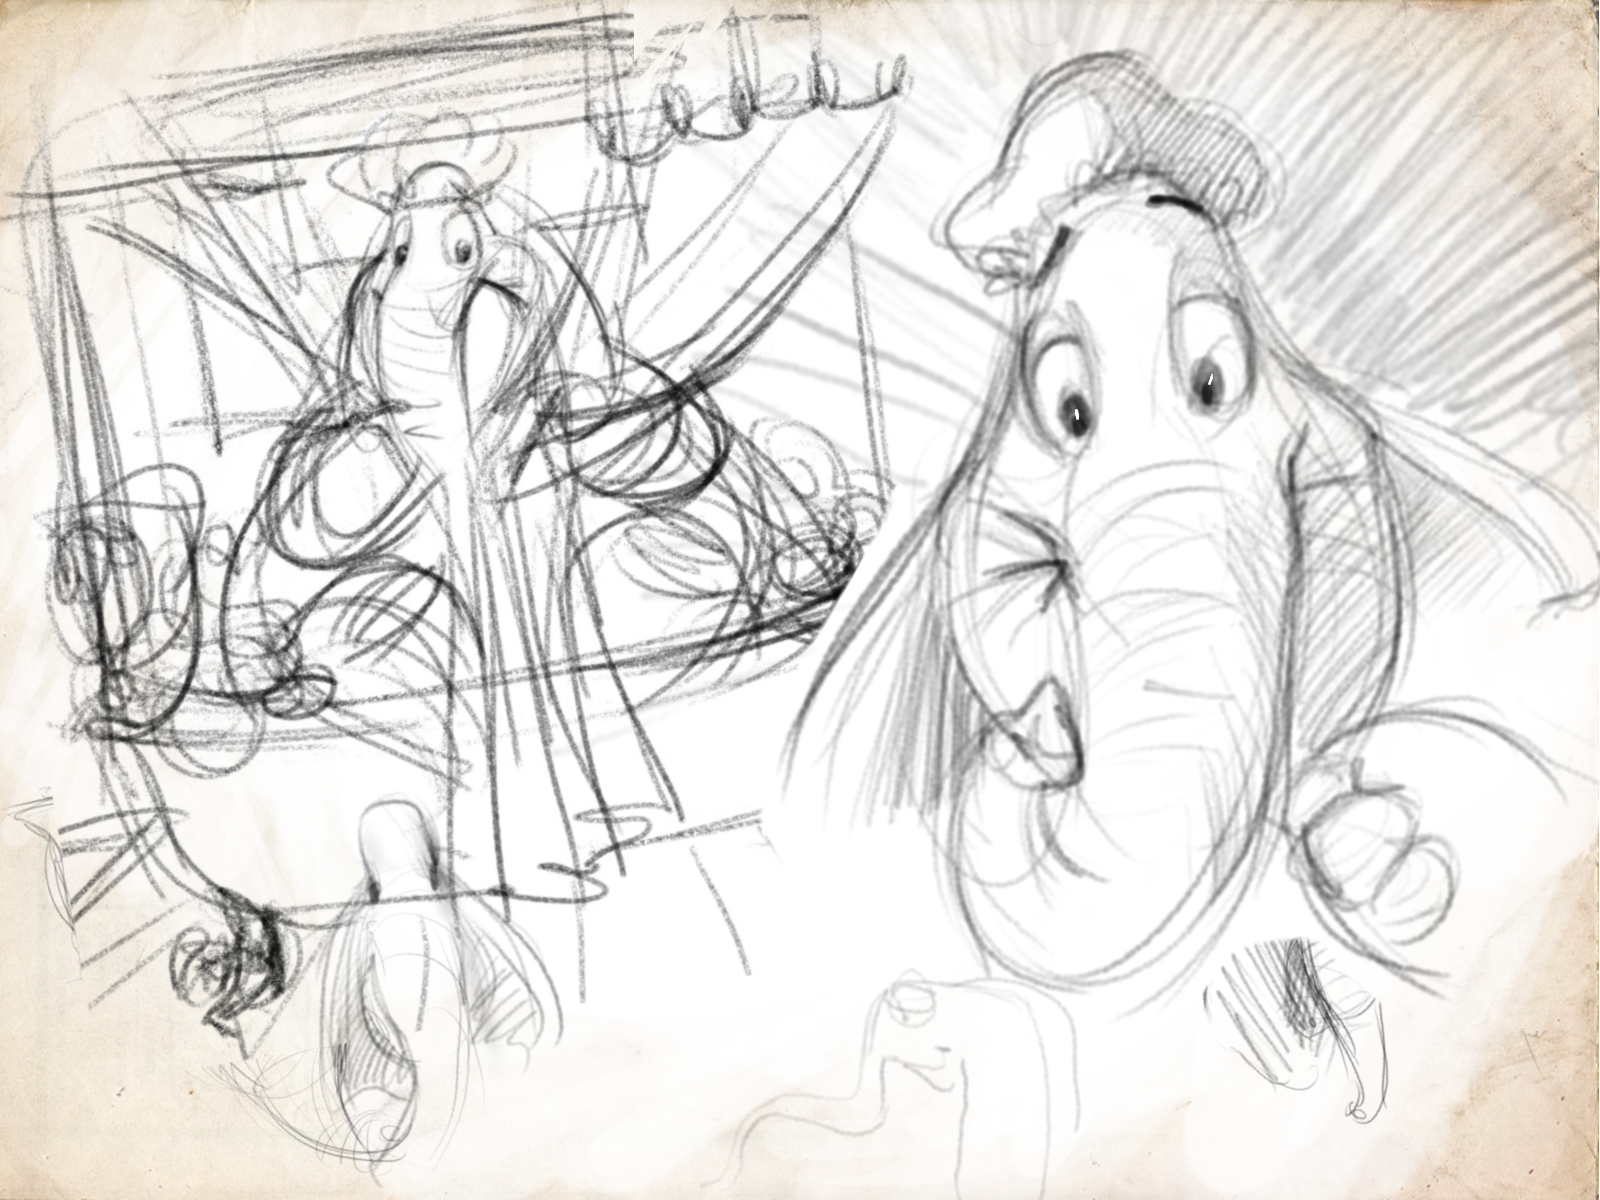
Once the drawing is quite defined, I proceed to insert between sculpting and modeling, always starting with a block-in of the general volumes and, little by little, getting to the details.

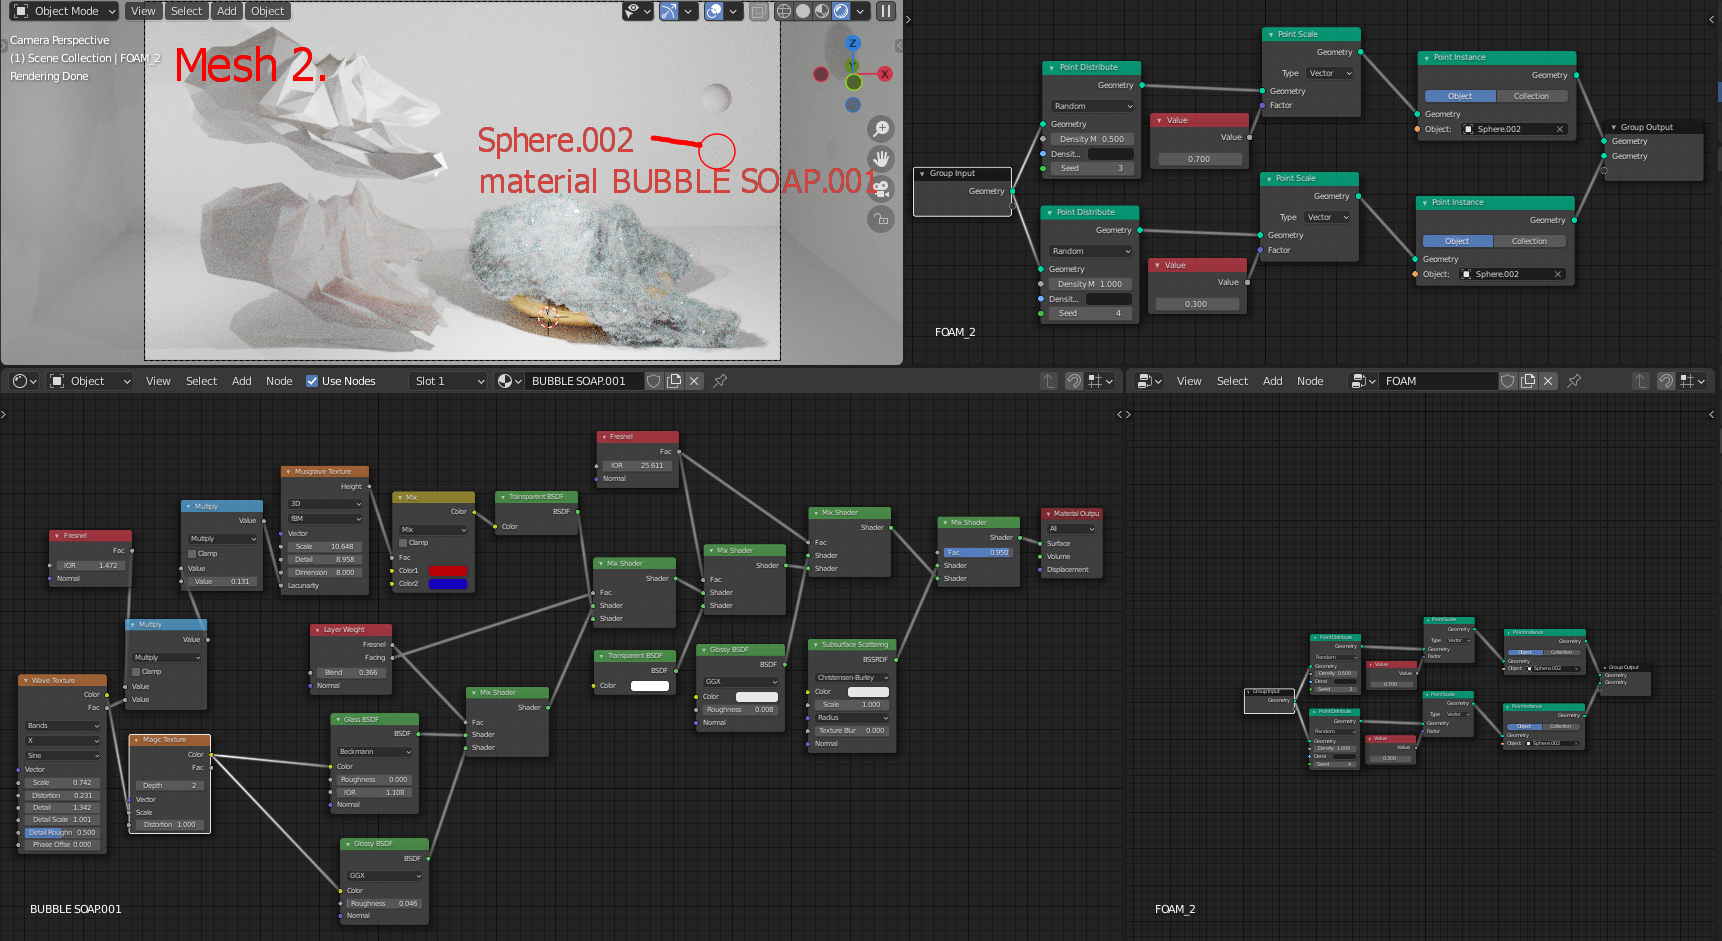
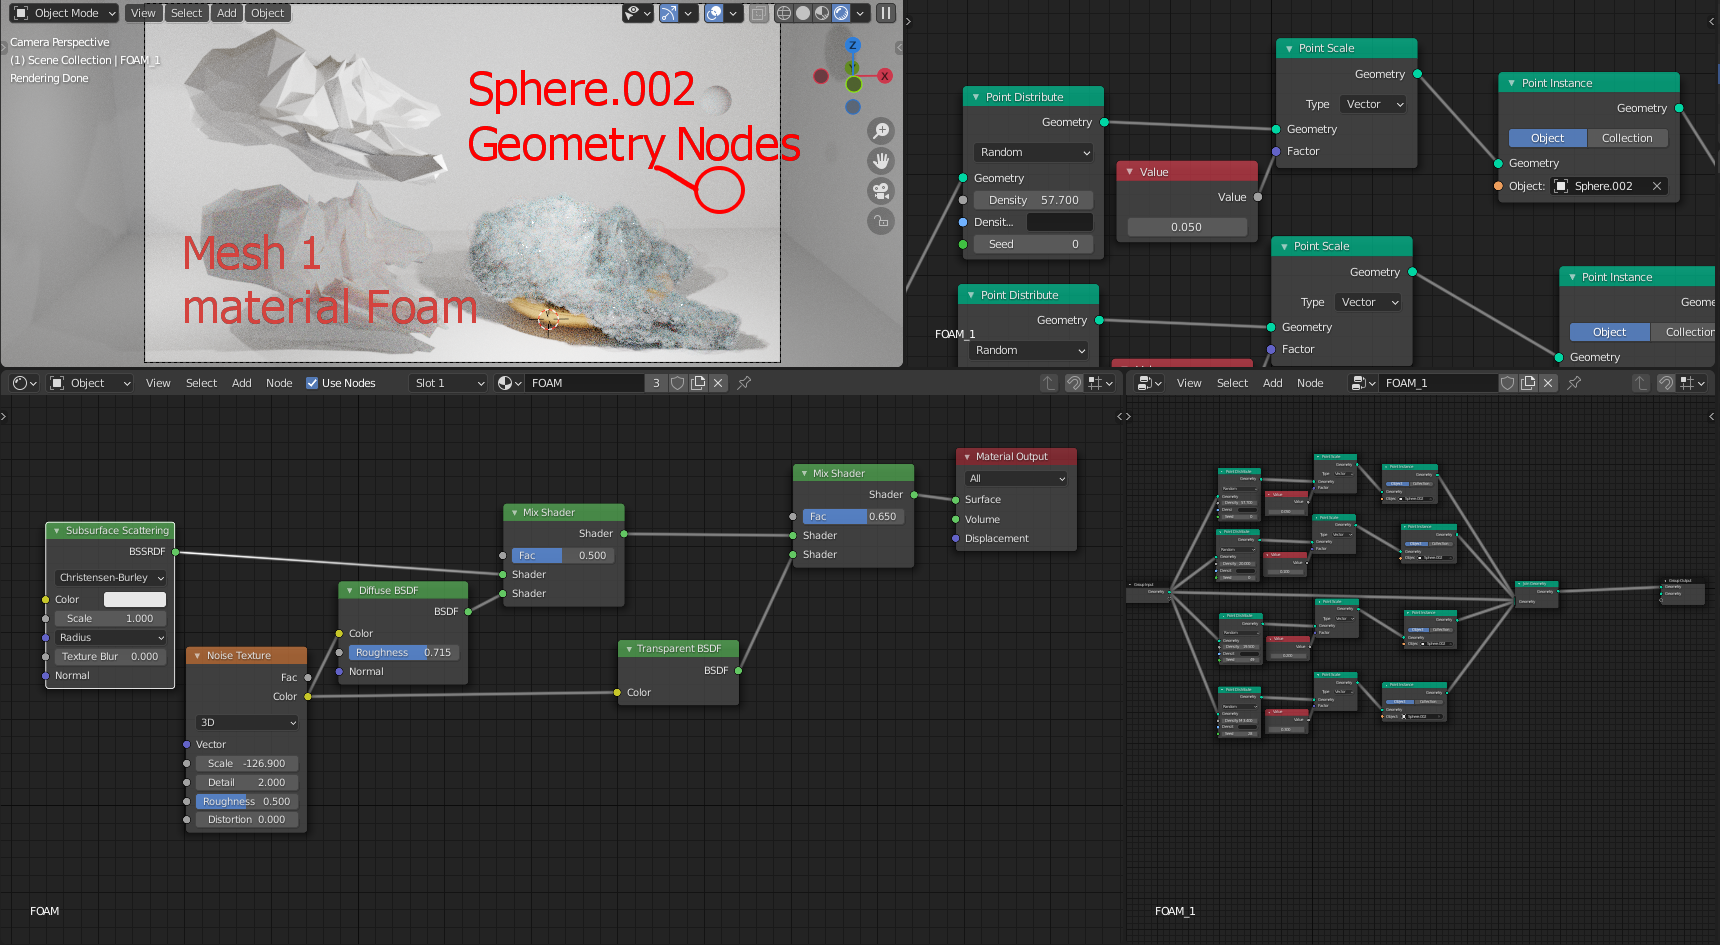
From this image, I will highlight as different from what can usually be seen in any tutorial (modeling, sculpting, etc.) the way in which I have made the foam in the bathtub and the semi-transparency of the window curtain.
Foam
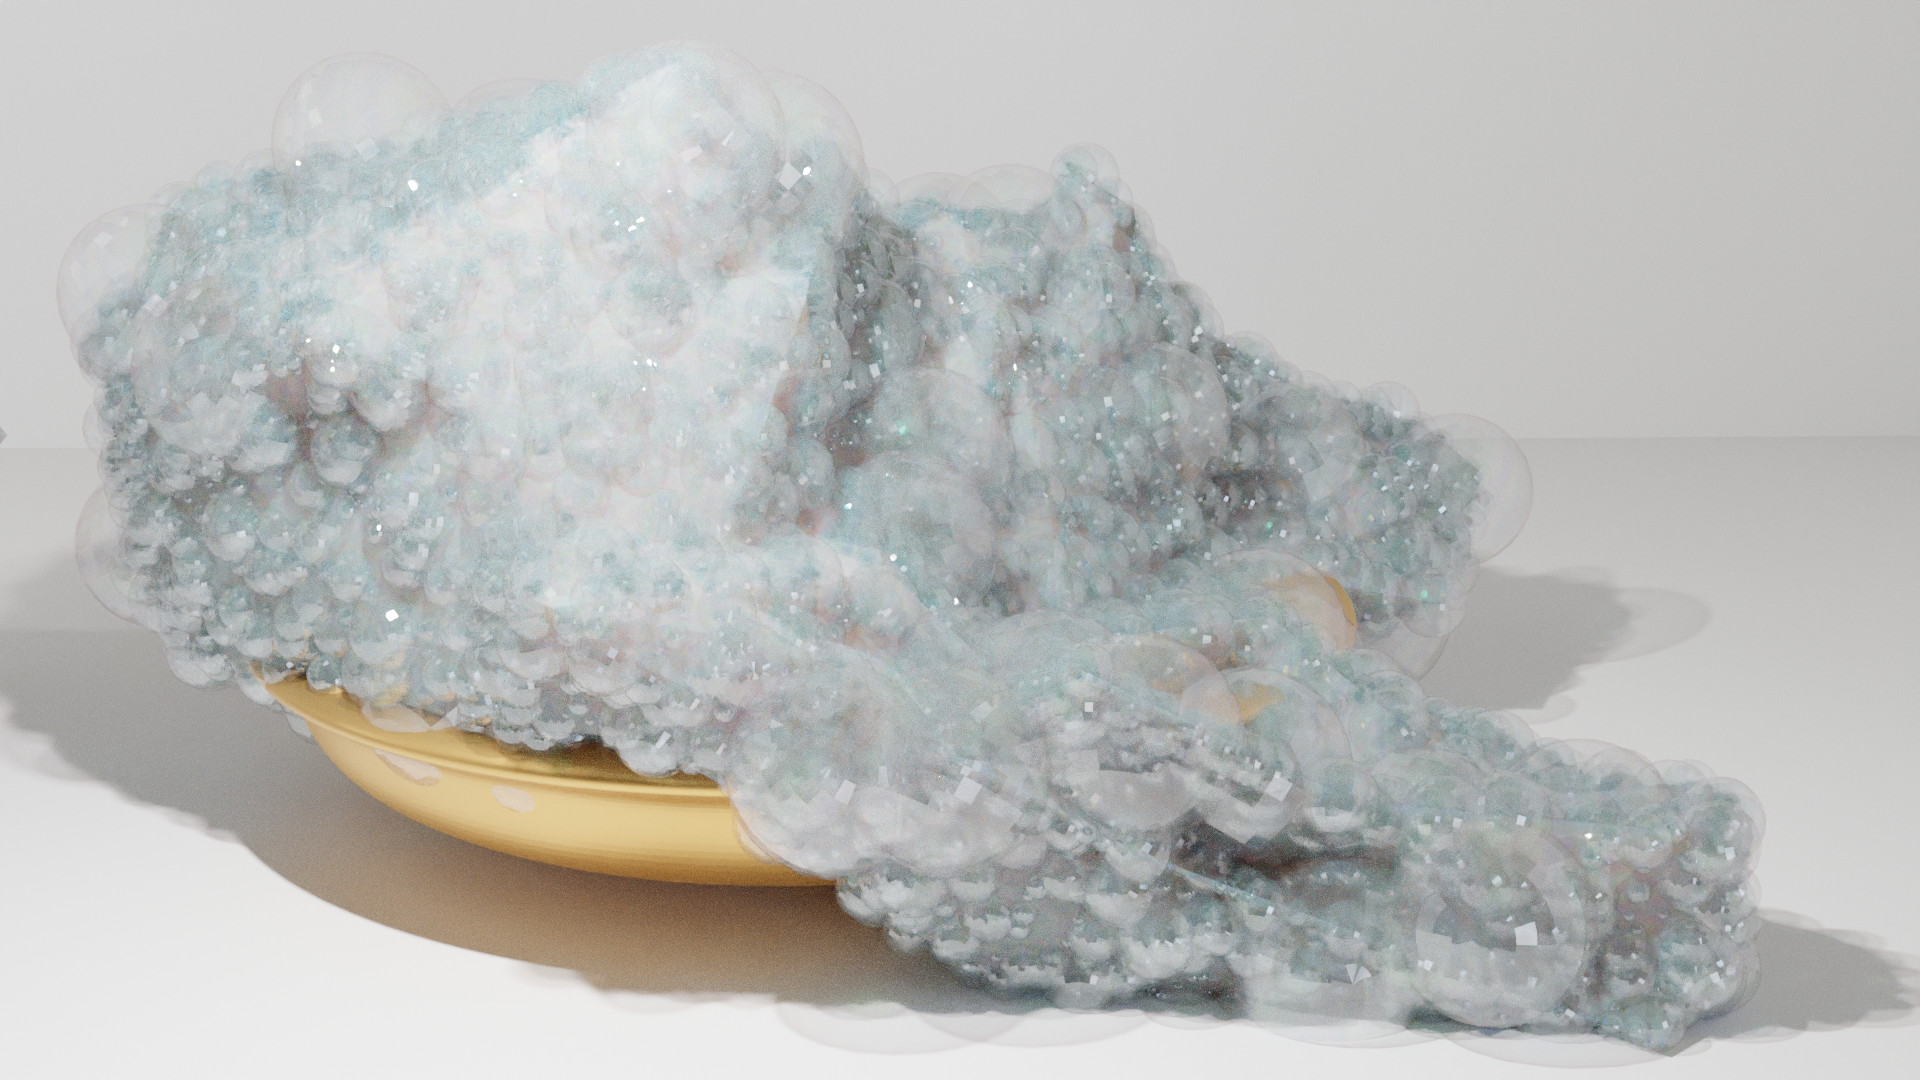
To make the foam, I used geometry nodes. I used two equal meshes, one with subsurface scattering and geometry nodes with small spheres and another with geometry nodes with larger spheres and a bubble material that can be seen in the images.
Curtain
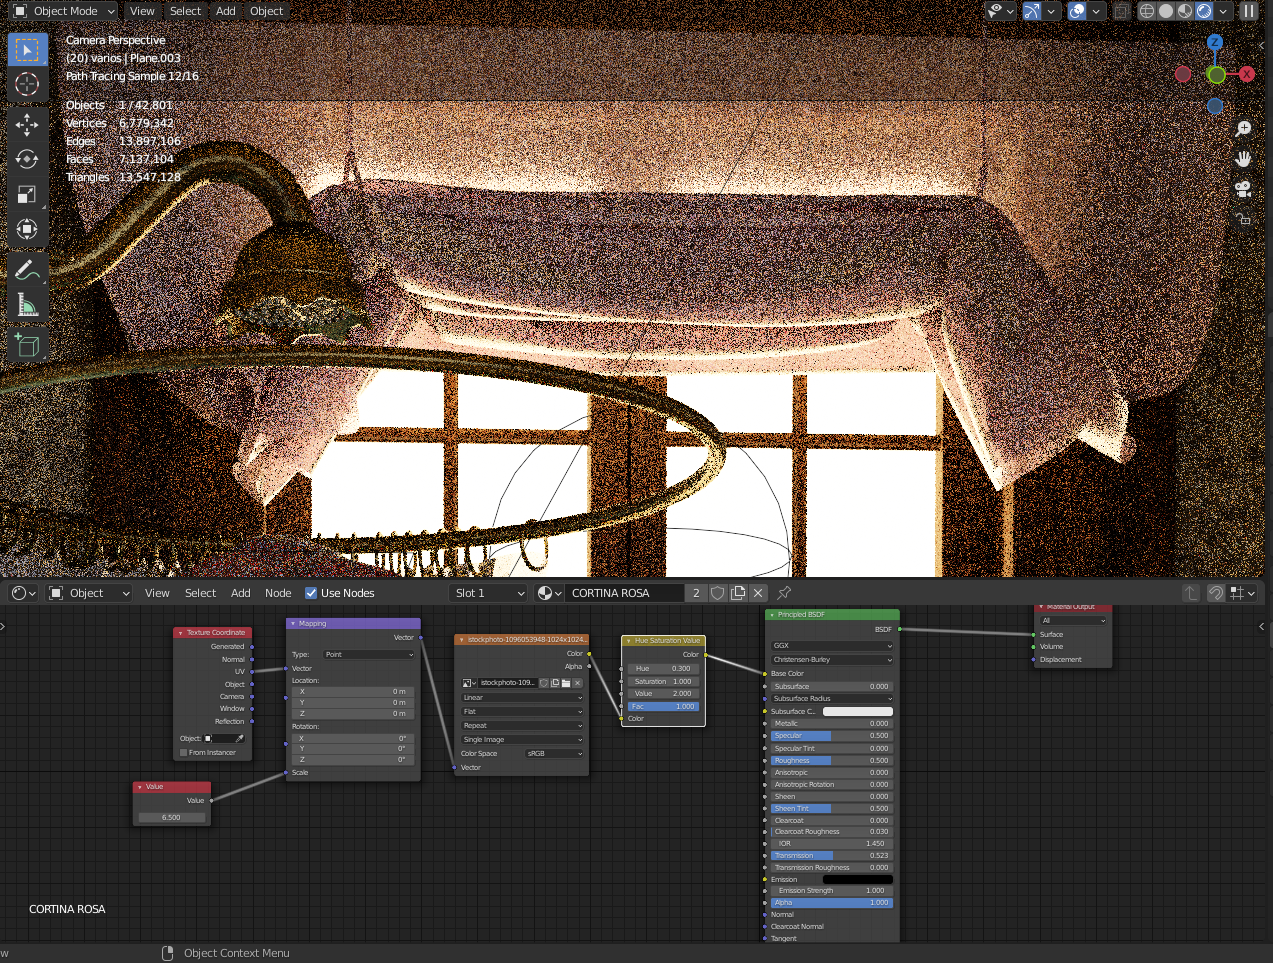
To achieve the semi-transparency of the curtain, I only had to raise the transmission slider of the principled BSDF, which lets the light pass through without losing the material of the curtain.
Compositing
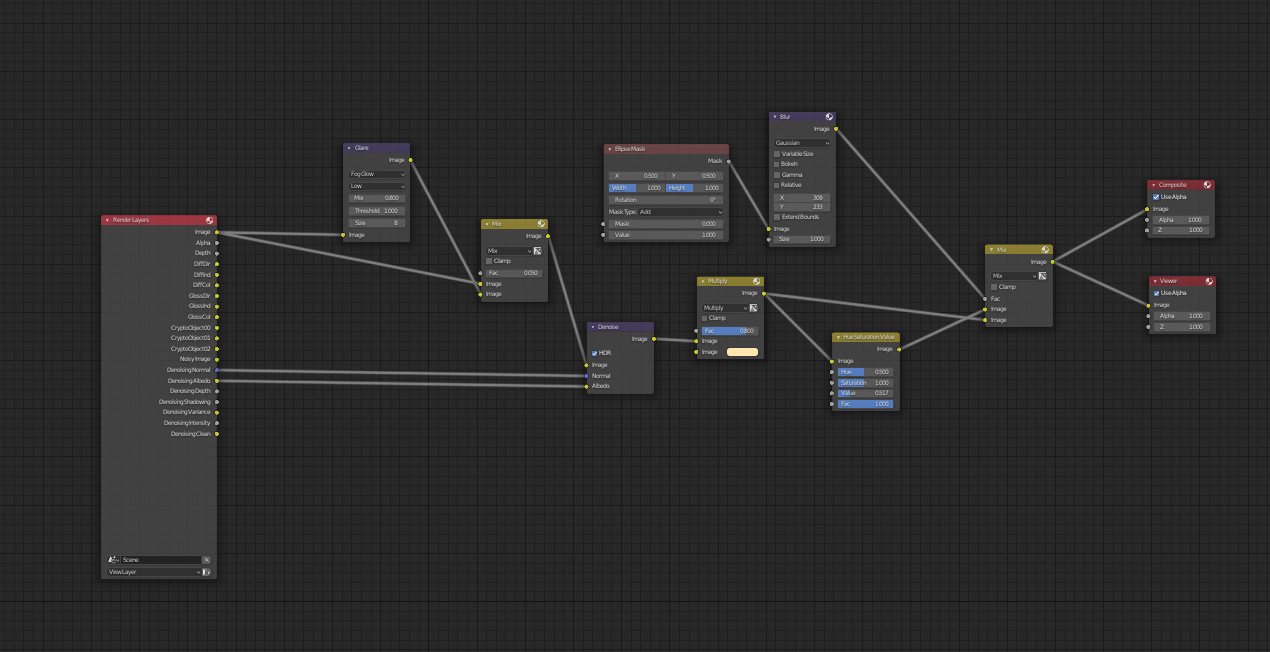
To compose the render, I added a glare for the light from the window, denoised the image, tinted the entire image in a yellowish tone, and finally added a vignette.
I hope you liked this mini tutorial. If anyone has any questions, do not hesitate to contact me through the networks. Thanks for holding out until the end. ;)

About the Author
 Raúl Rubio, Traditional and Digital Sculptor.


