If you’ve been making use of Mixamo or other motion capture to create your character animations in Blender, you probably plan to or have already explored the possibilities of non-linear editing to combine your clips to form a sequence for your scene.
Using motion capture presents a few limitations, however, and one deal-breaking caveat (especially when working with premade animation) is that there will probably be certain parts of the animation that you’d like to adjust. Simpler modifications are relatively easy to manage, but some situations will call for hand animating certain elements on top of a mocap clip.
The first half of this article will be an Auto Rig Pro tutorial, where we’ll go over how the nifty addon can not only quickly create an elaborate rig for your mesh, but also let you use this rig with your motion capture data. After we’ll be going over a few NLA Editor techniques that can be used with or without Auto Rig Pro.
Installation
You can get the addon from Blender Market, and I should point out that we’ll be working with the paid version. It’s 40 dollars well spent in my opinion, and can really save some headache if you’re looking to make animated shorts. If you don’t have the addon yet, go ahead and make the purchase and download the files.
If purchasing the addon is out of the question for you at the moment, you can check out my video on using the NLA editor with Mixamo for a way to edit motion data with free tools.
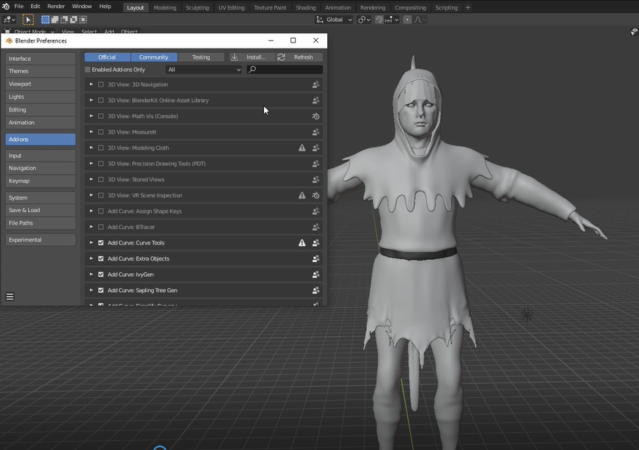
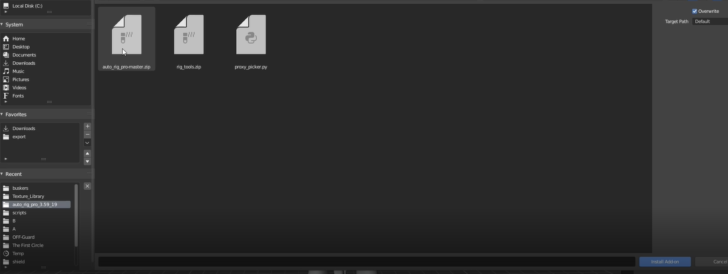
So here in Blender, we’ll head over to preferences and install the addon. We’ll only need to select the main auto rig pro zip for this tutorial.
Rigging
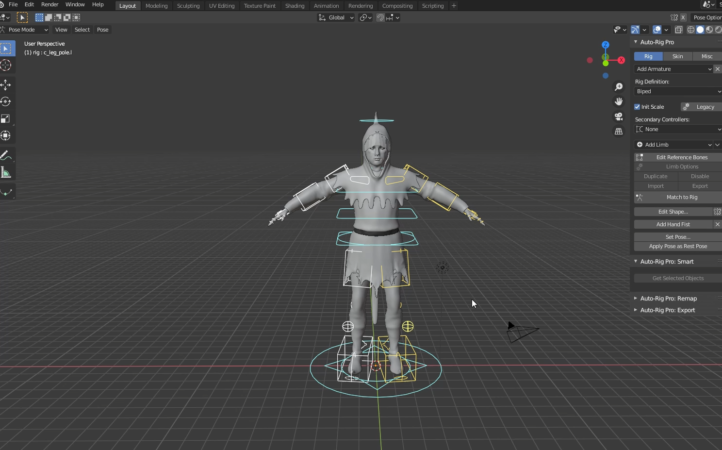
We can find the addon’s controls in our properties tab. We’ll start by selecting our meshes to be rigged, heading over to the auto rig pro smart tab, and hitting get selected objects.
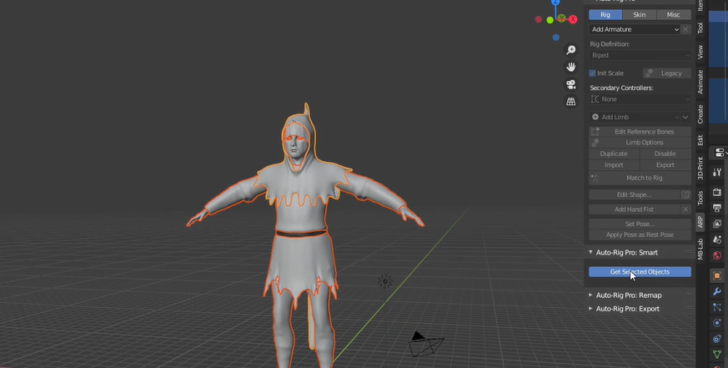
We’ll now be prompted to position a marker for each of the guide areas for the rig.
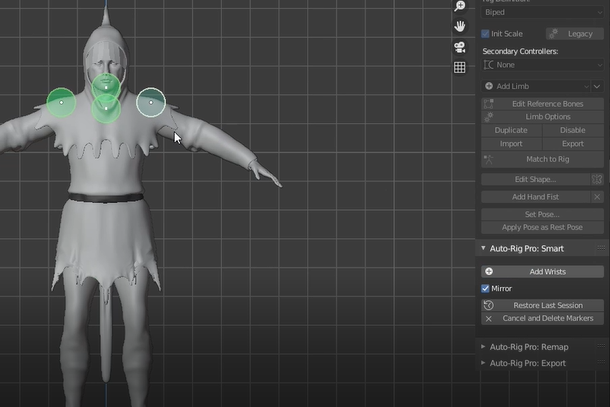
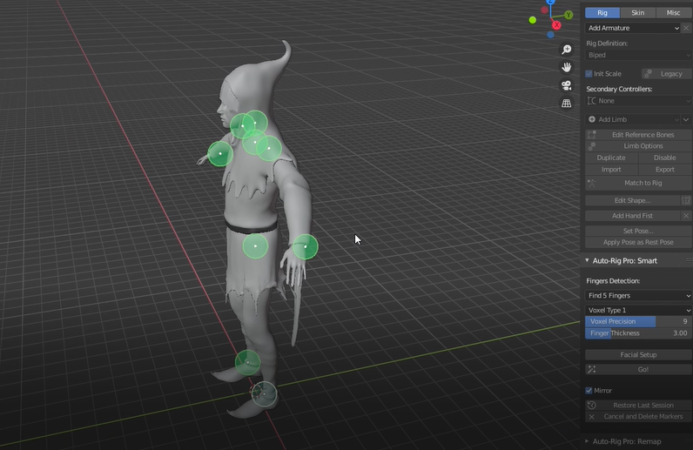

With the markers in place, let’s hit go, and refine the meta rig just a bit.
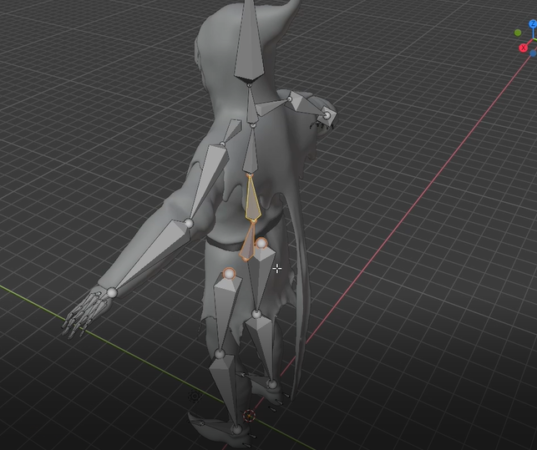
Now let’s hit a match to rig to get our controls,
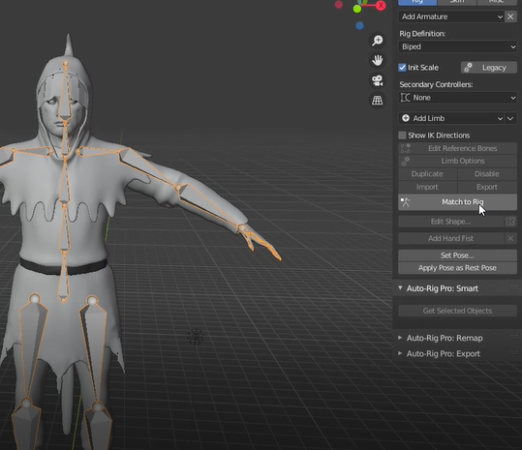
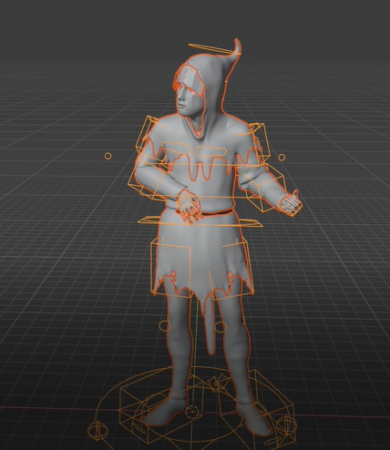
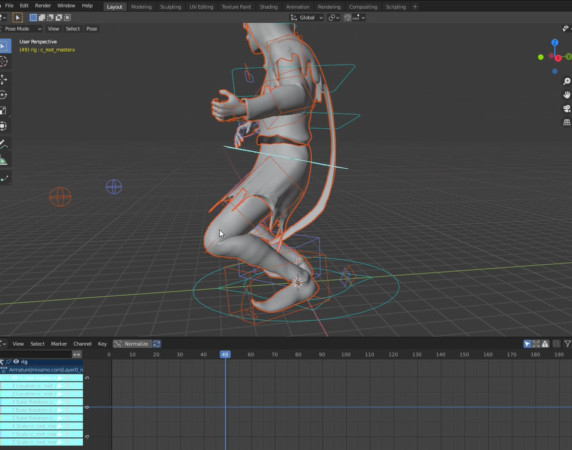
and as you can see we now have an armature that’s much more wieldy than what we get from Mixamo or a bvh file.
Retargeting
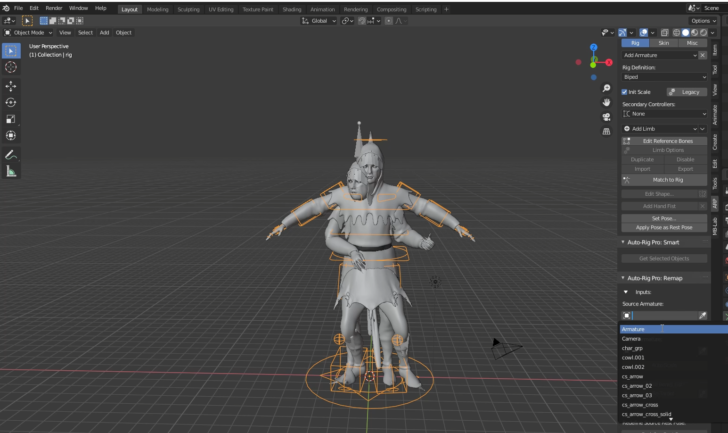
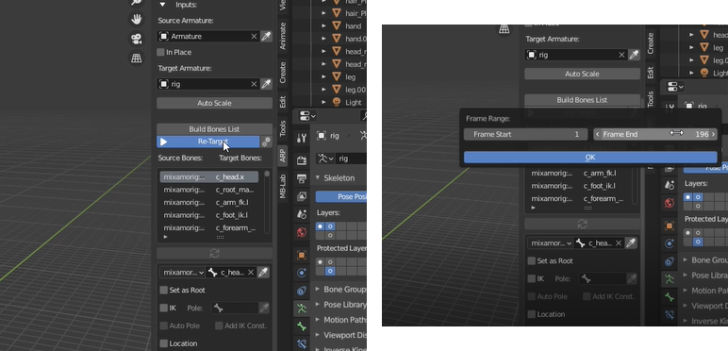
Let’s load in an fbx of this character from Mixamo,
and assign the Mixamo armature as our source armature, and freeze armature.
If an fbx from Mixamo comes in too small, simply clear the scale (ALT +S), and our meshes will be aligned in their rest poses. You can use the autoscale feature to align the scale of both your armatures for other cases.
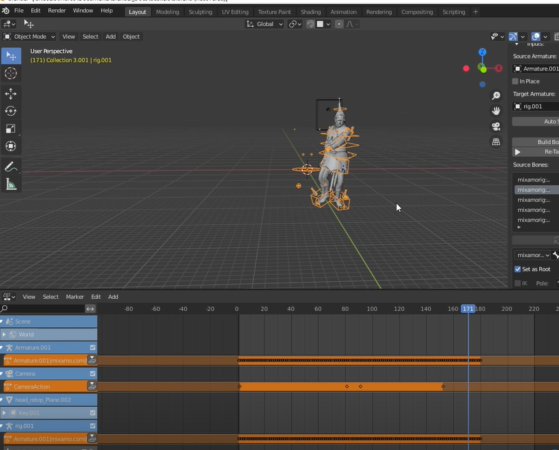
Let’s now assign our generated rig as the target armature, and hit the Build bones list.
Once that’s done we can import the Mixamo Fbx IK preset. This will match the naming conventions of our rig to the mixamo armature.

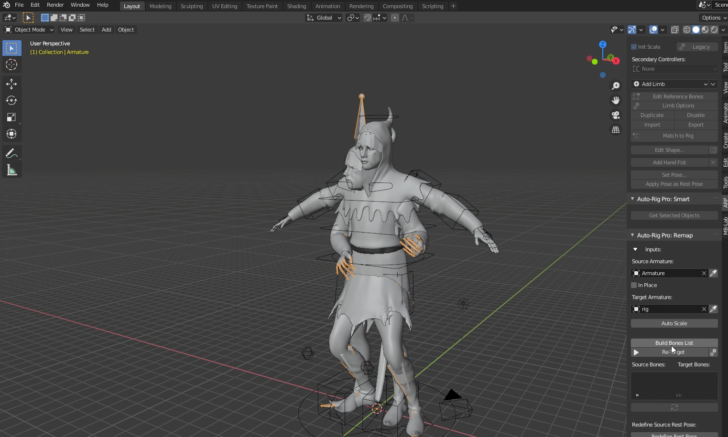
Let’s hit retarget, make sure the frame range specified is correct, and hit ok.
And here’s what we get!
In some cases, minor adjustments can be made by selecting a controller and moving the graph on the channels that need editing,
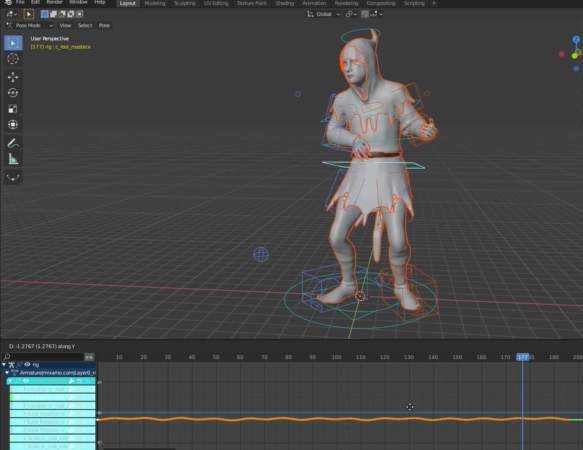
and we can remove keyframes for any controller we want to animate over.

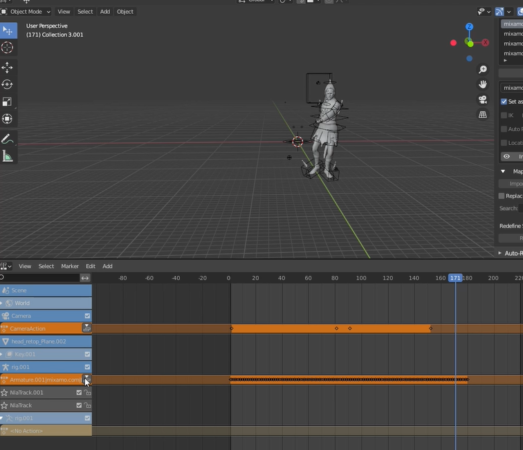
Editing with NLA
Alternatively, we can use the NLA editor to override animation for some of the controls.
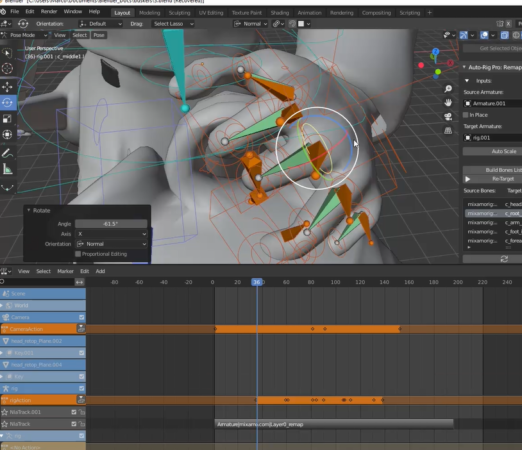
In this instance, I retargeted another animation to the rig, and by pushing down the current animation into action, I move certain joints around and just insert a keyframe after I make the change.
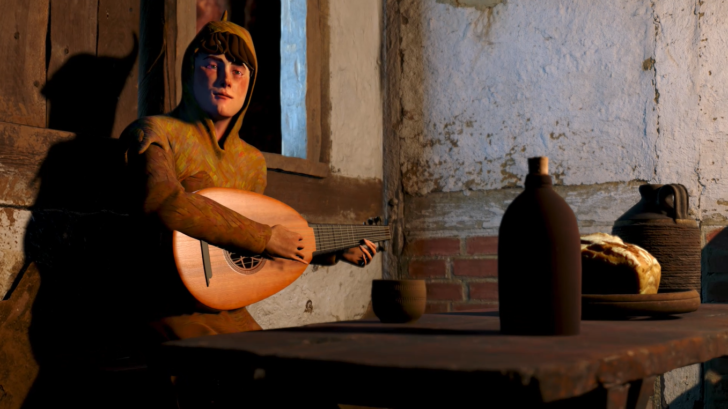
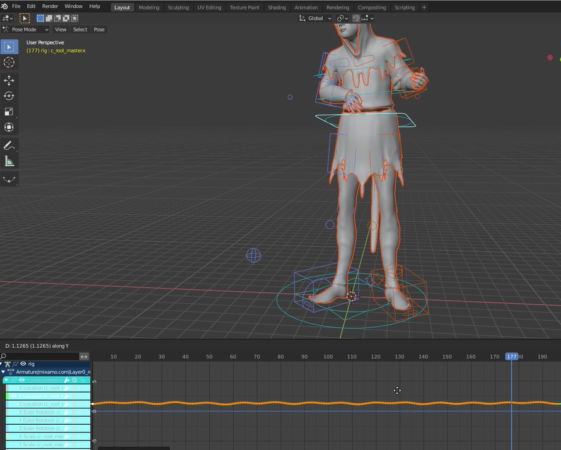
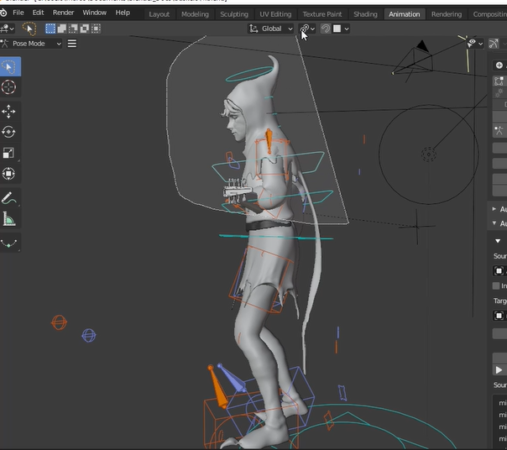
The retargeted animation shows as a new set of keys in the NLA editor. In this example, I will parent the lute and a jug on the character’s hands, and rotating the fingers to grasp these items.
This icon will push the animation down into an action strip on an NLA Track.
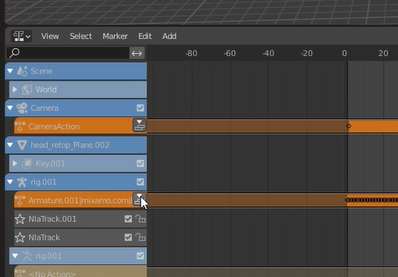
The strip in “NLATrack” is the action strip from the retargeted animation.

The orange strip above our action strip represents new keyframes I made as I was adjusting the character’s hand
(In case you were wondering, I just parented the objects to one of the finger bones so that they would follow the hands as they move).
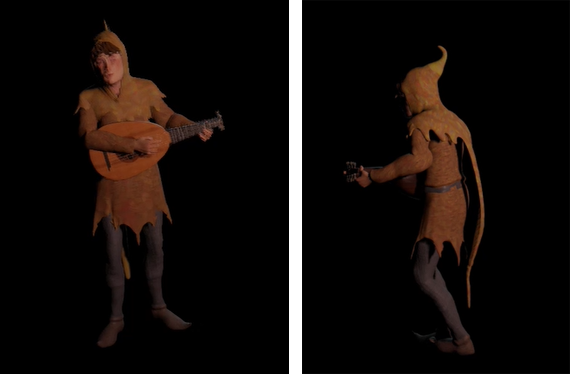
A rendered frame of the resulting animation:

Bonus
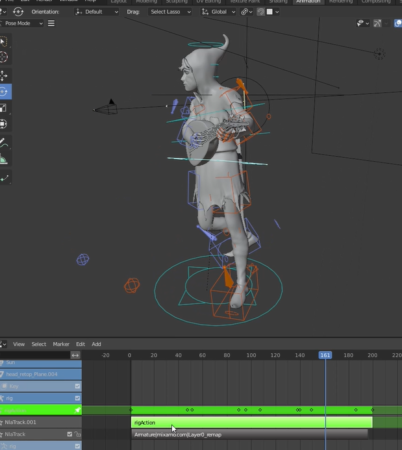
Another cool use case is adding a separate animation over an existing one using the NLA editor, and this can be done without auto rig pro as well
So in this scenario, I want to have this guy play his lute while doing a spin. We’ll use the lute-playing animation we already developed earlier.
To achieve this I’ll retarget a dancing animation from Mixamo, this time adjusting the scale manually since I just used the Mixamo dummy mesh for this one.

Once the animation is retargeted it will override the existing animation. In the NLA editor I’ll push down the new keys into an action strip, and tab into edit mode for the strip.
From here I’ll select all the controls for the upper body of my character and clear out the keyframes.
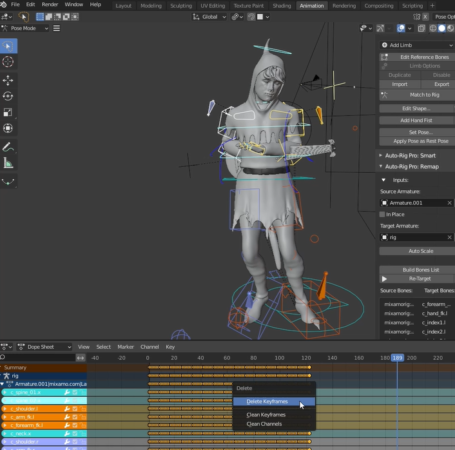
Now Only the spinning animation on the legs and feet is overriding the lute-playing animation below it.
And that concludes this tut! Hope this was useful and as always, happy rendering!
If you're interested in learning more about motion capture, I highly recommend our next tutorial on using Deepmotion to make mocap.