
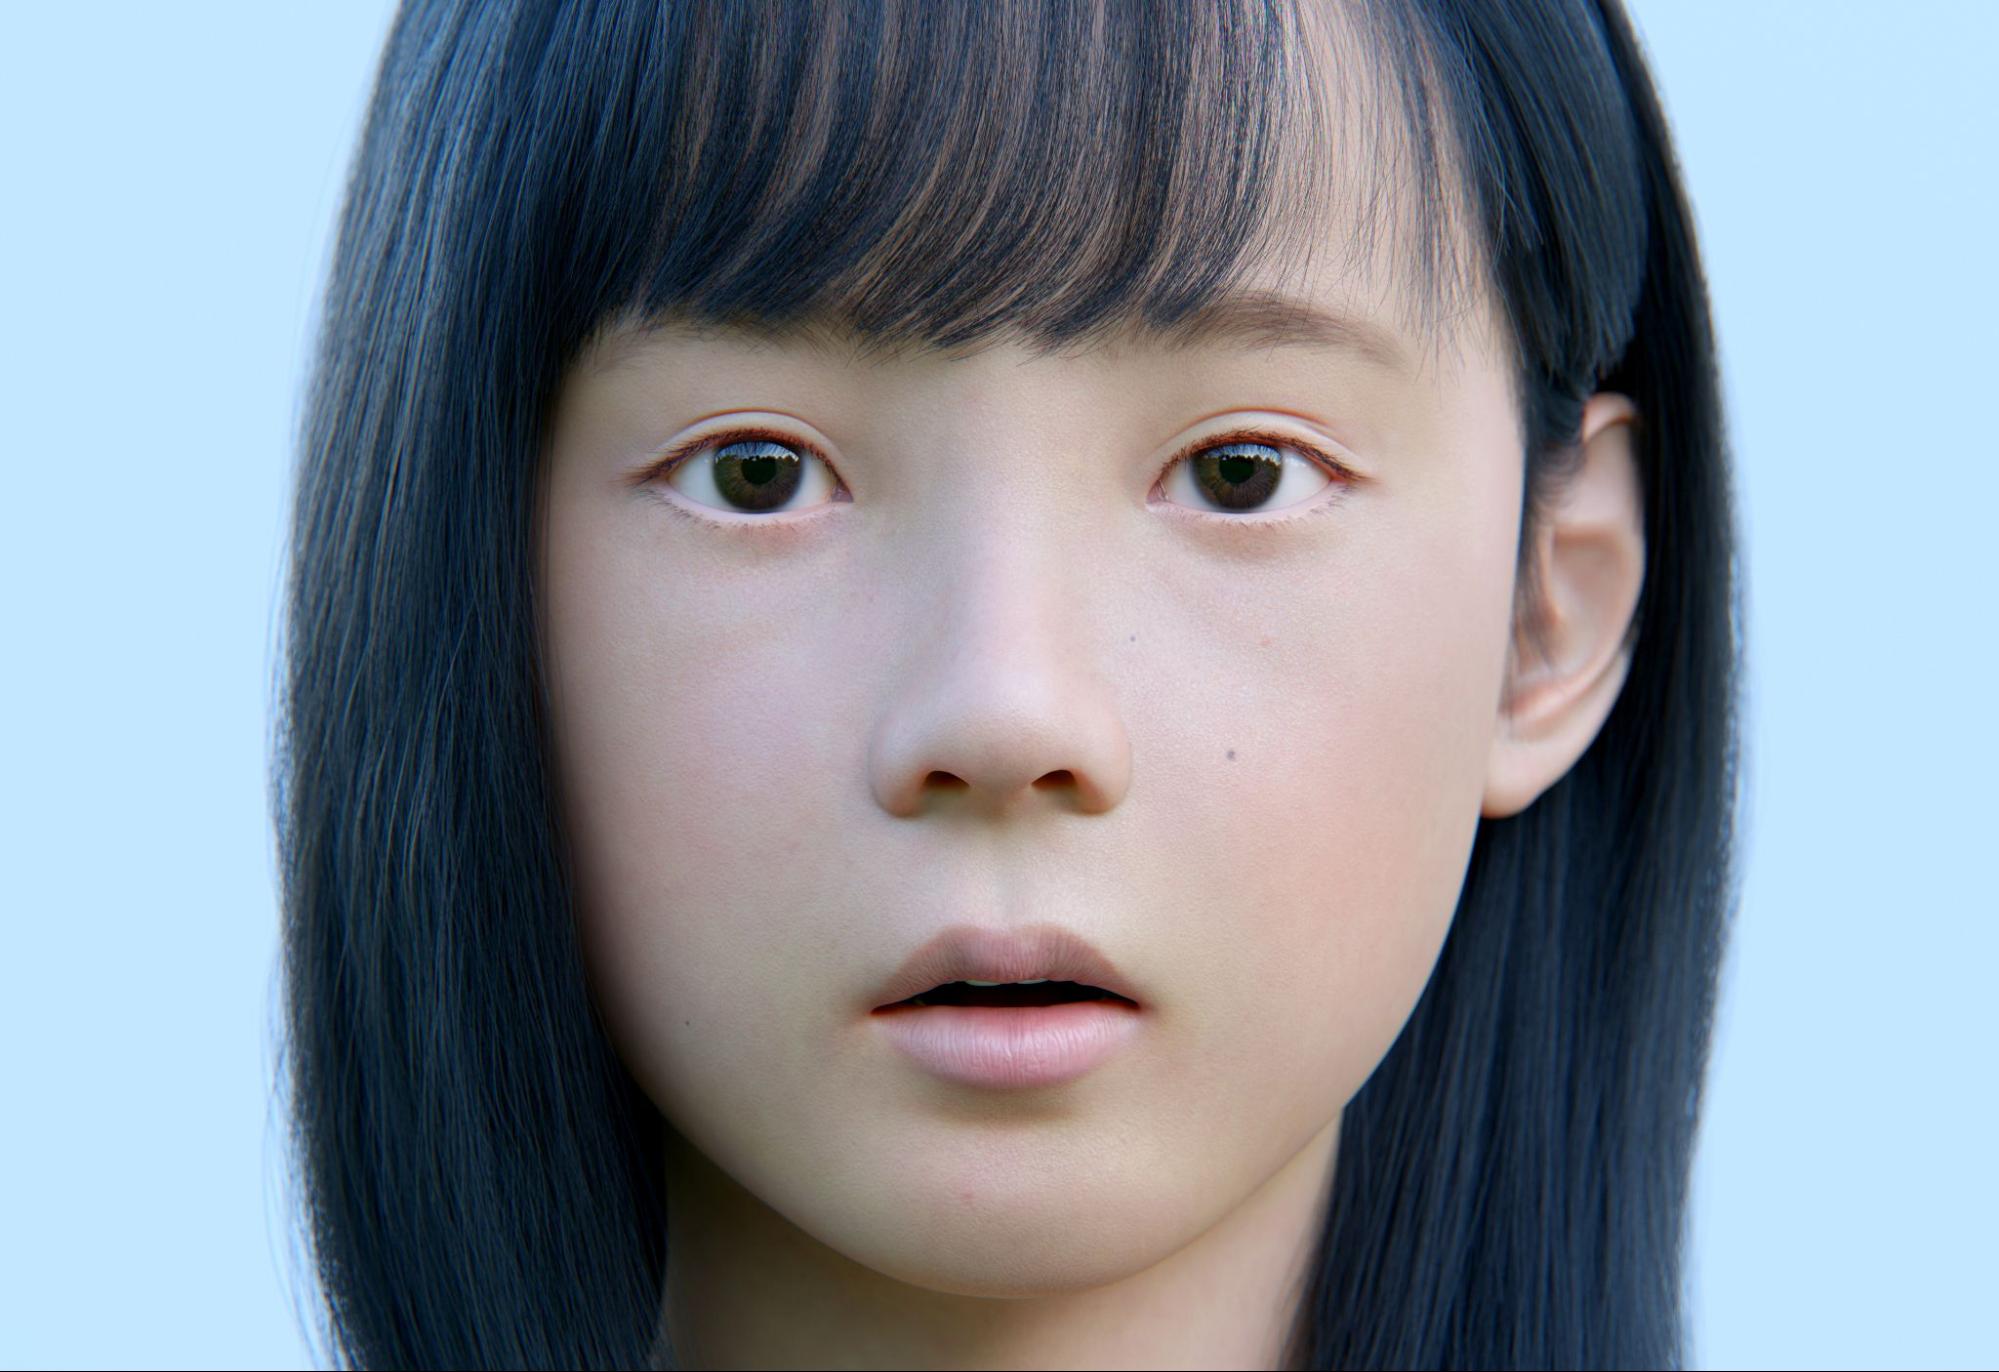
Behind the Scenes: Girl Portrait
Hello, I am Viriel Boyboy, 22 years old from the Philippines.
I started learning 3D back in 2018 when I saw the viral video of Saya, the digital human made by Telyuka. It inspired me to do 3D and I thought at that time I wanted to create characters and bring them to life. I had no background or training in 3D, but I learned through YouTube and observing other artists’ artwork.
Inspiration
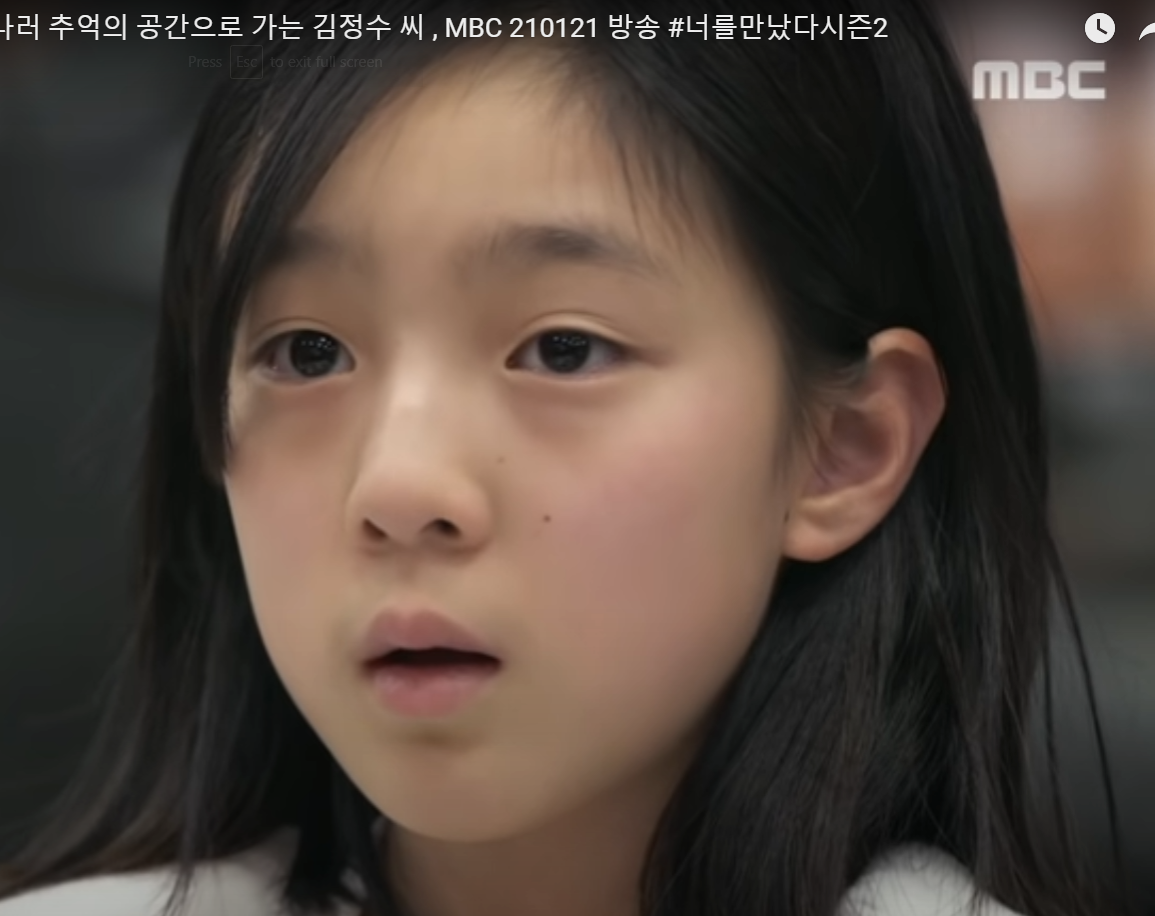
I have this habit that when I see a face to imagine them as 3D characters. Then I came across this YouTube video and saw the reaction of one of the kids and thought, this would be a good reaction for a 3D character.
Tools
I used ZBrush for sculpting, Substance Painter for texturing. Then I used Blender on the rest, including grooming, UV editing, modeling, and rendering.
Sculpting
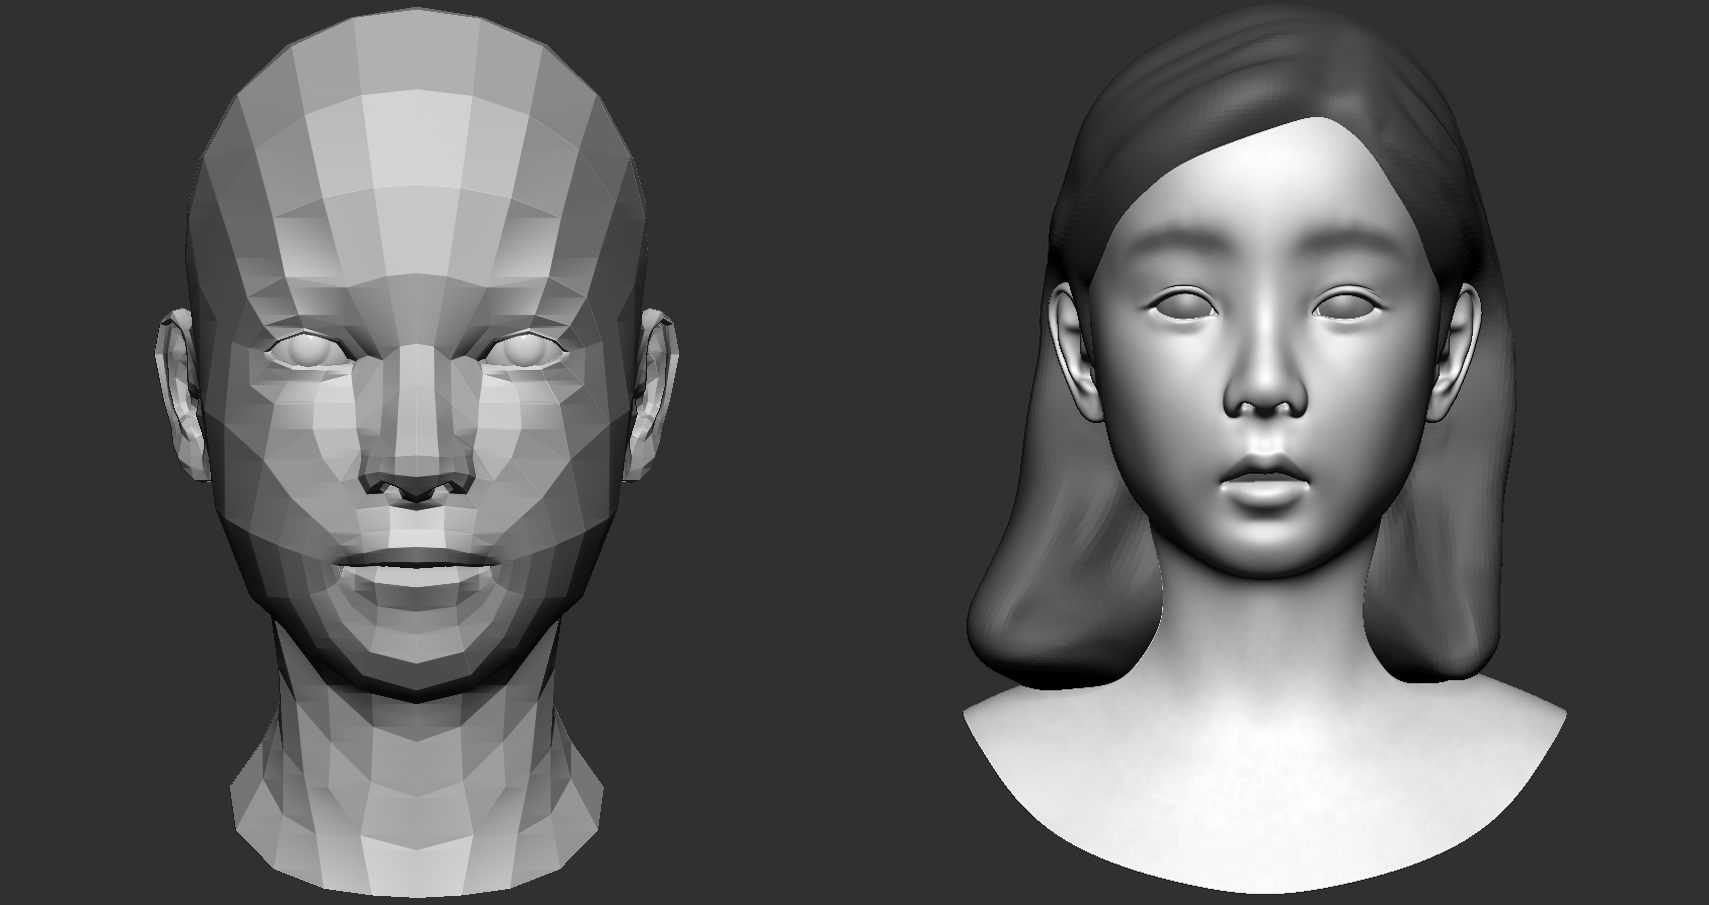
I used a base mesh at the start. I was aiming for an East Asian look while replicating the reaction on my reference.
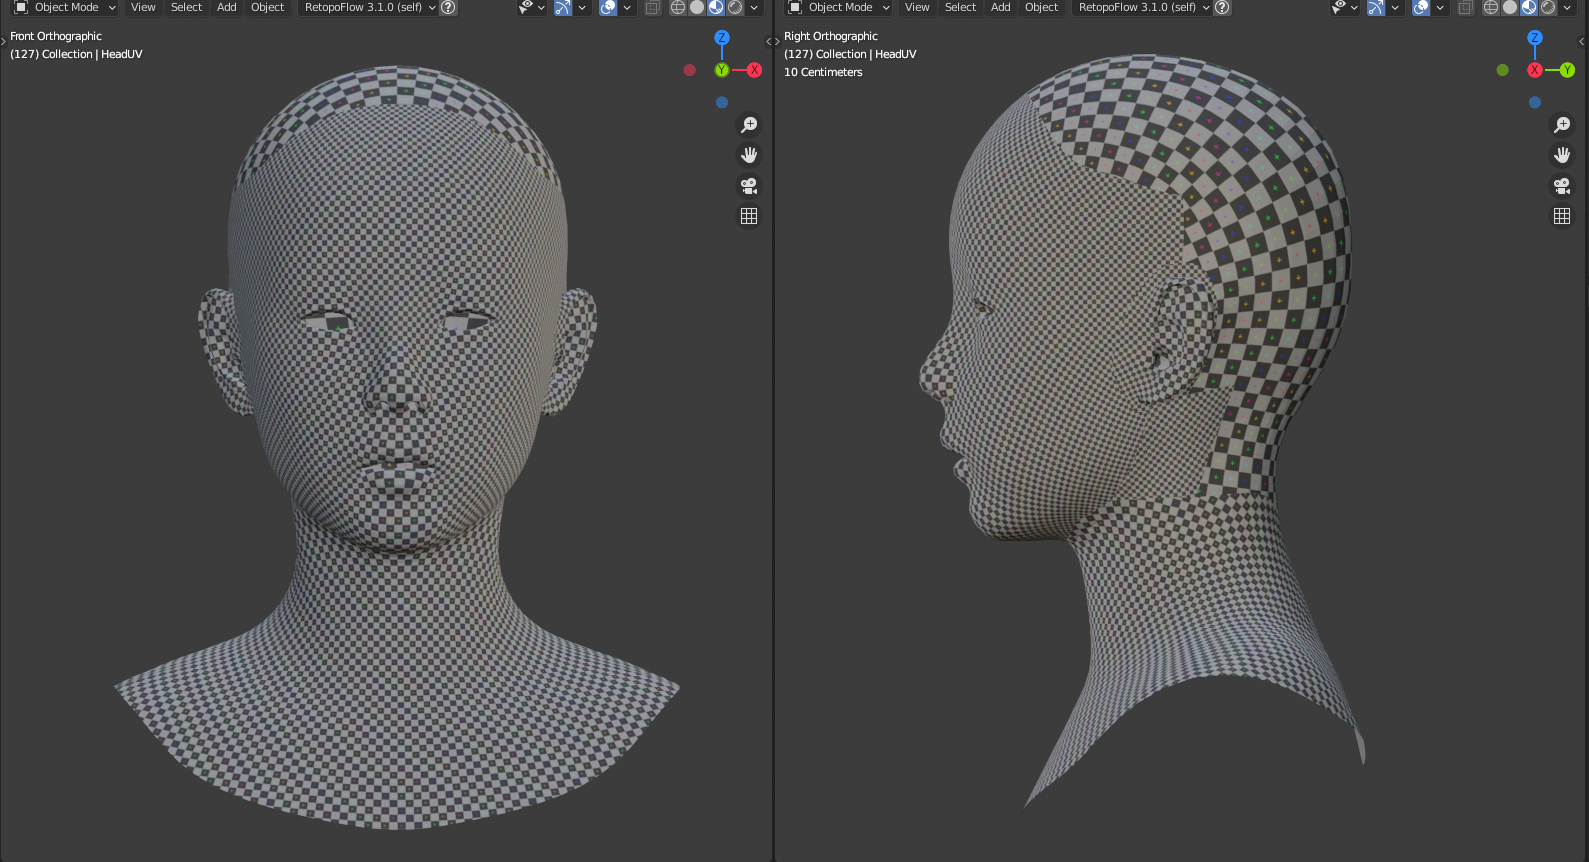
UV Mapping
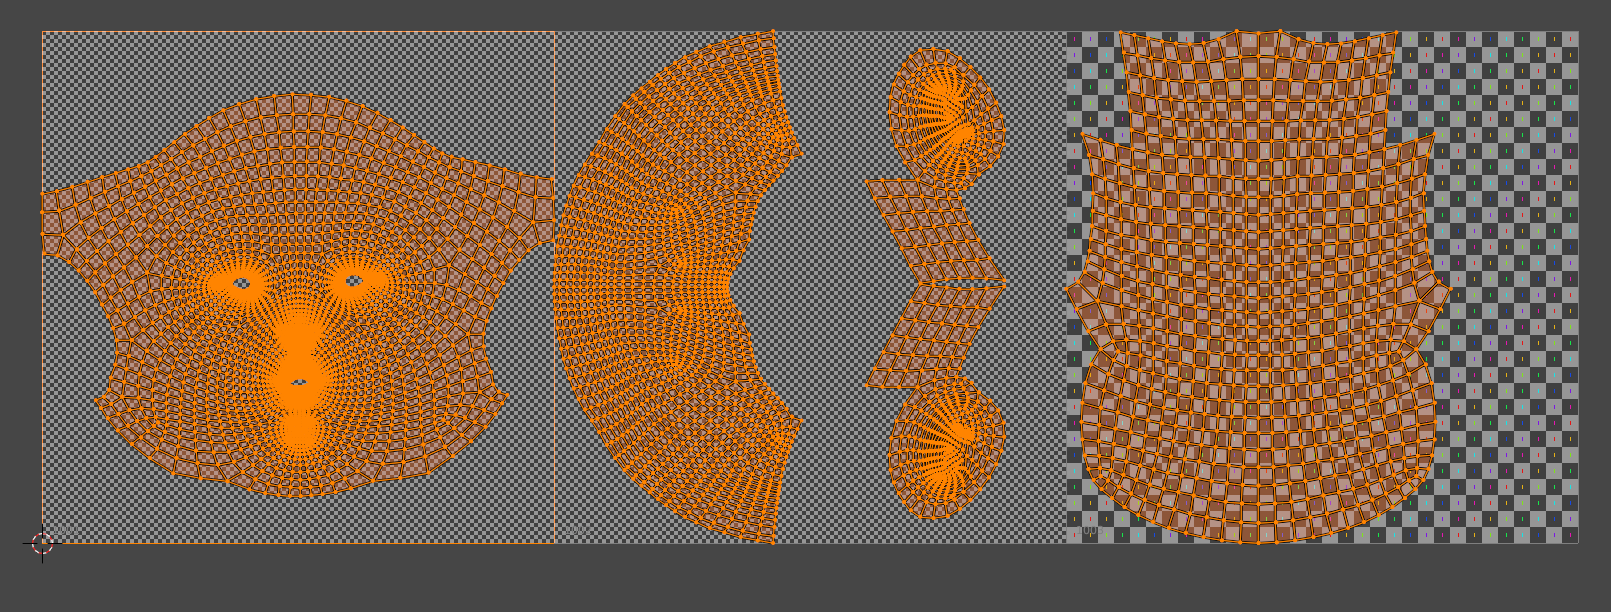
I created the UVs with 3 UDIM tiles in Blender. The first two were at 4K resolution and the last tile was at just 1K since it’s the hair part and would not be visible from the camera.
Texturing
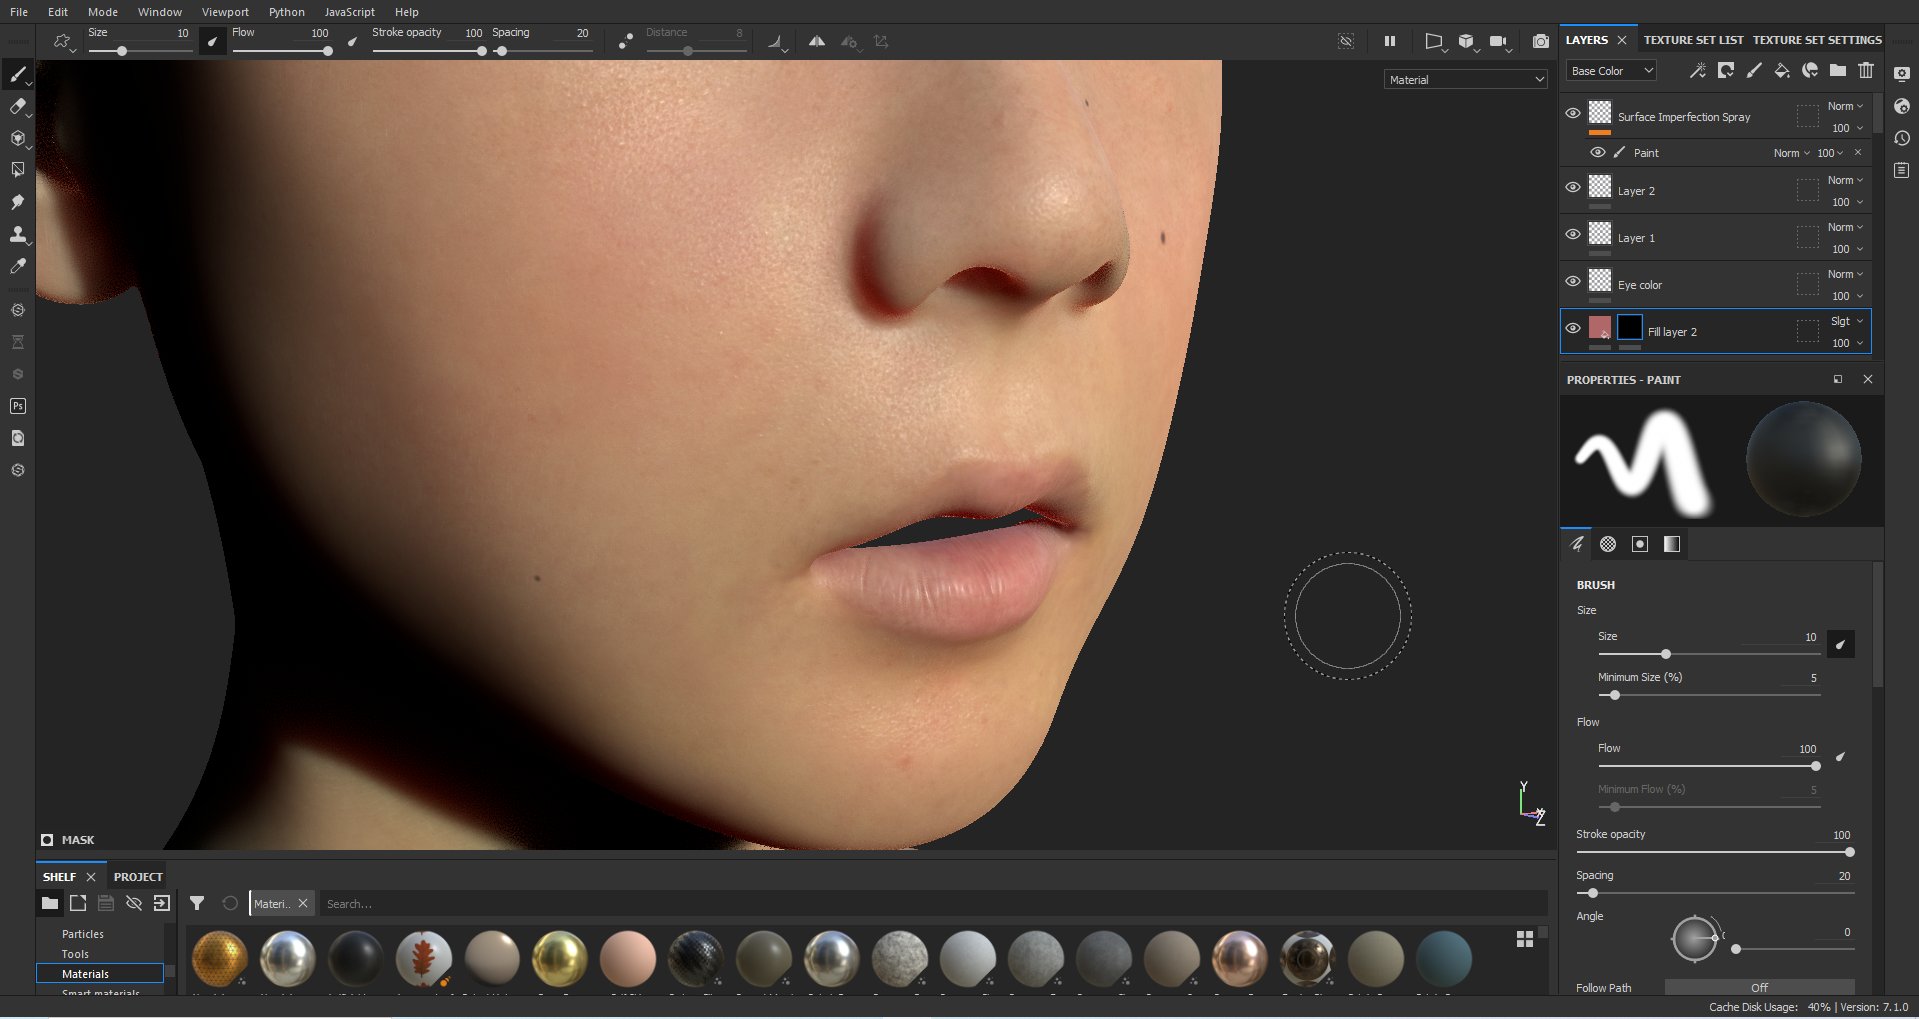
This is the hard part for me, lots of trial and error. I used Texturingxyz maps for this process.
First I did the Base Color—I used Female 20s Multichannel Face #48 for only the base color.
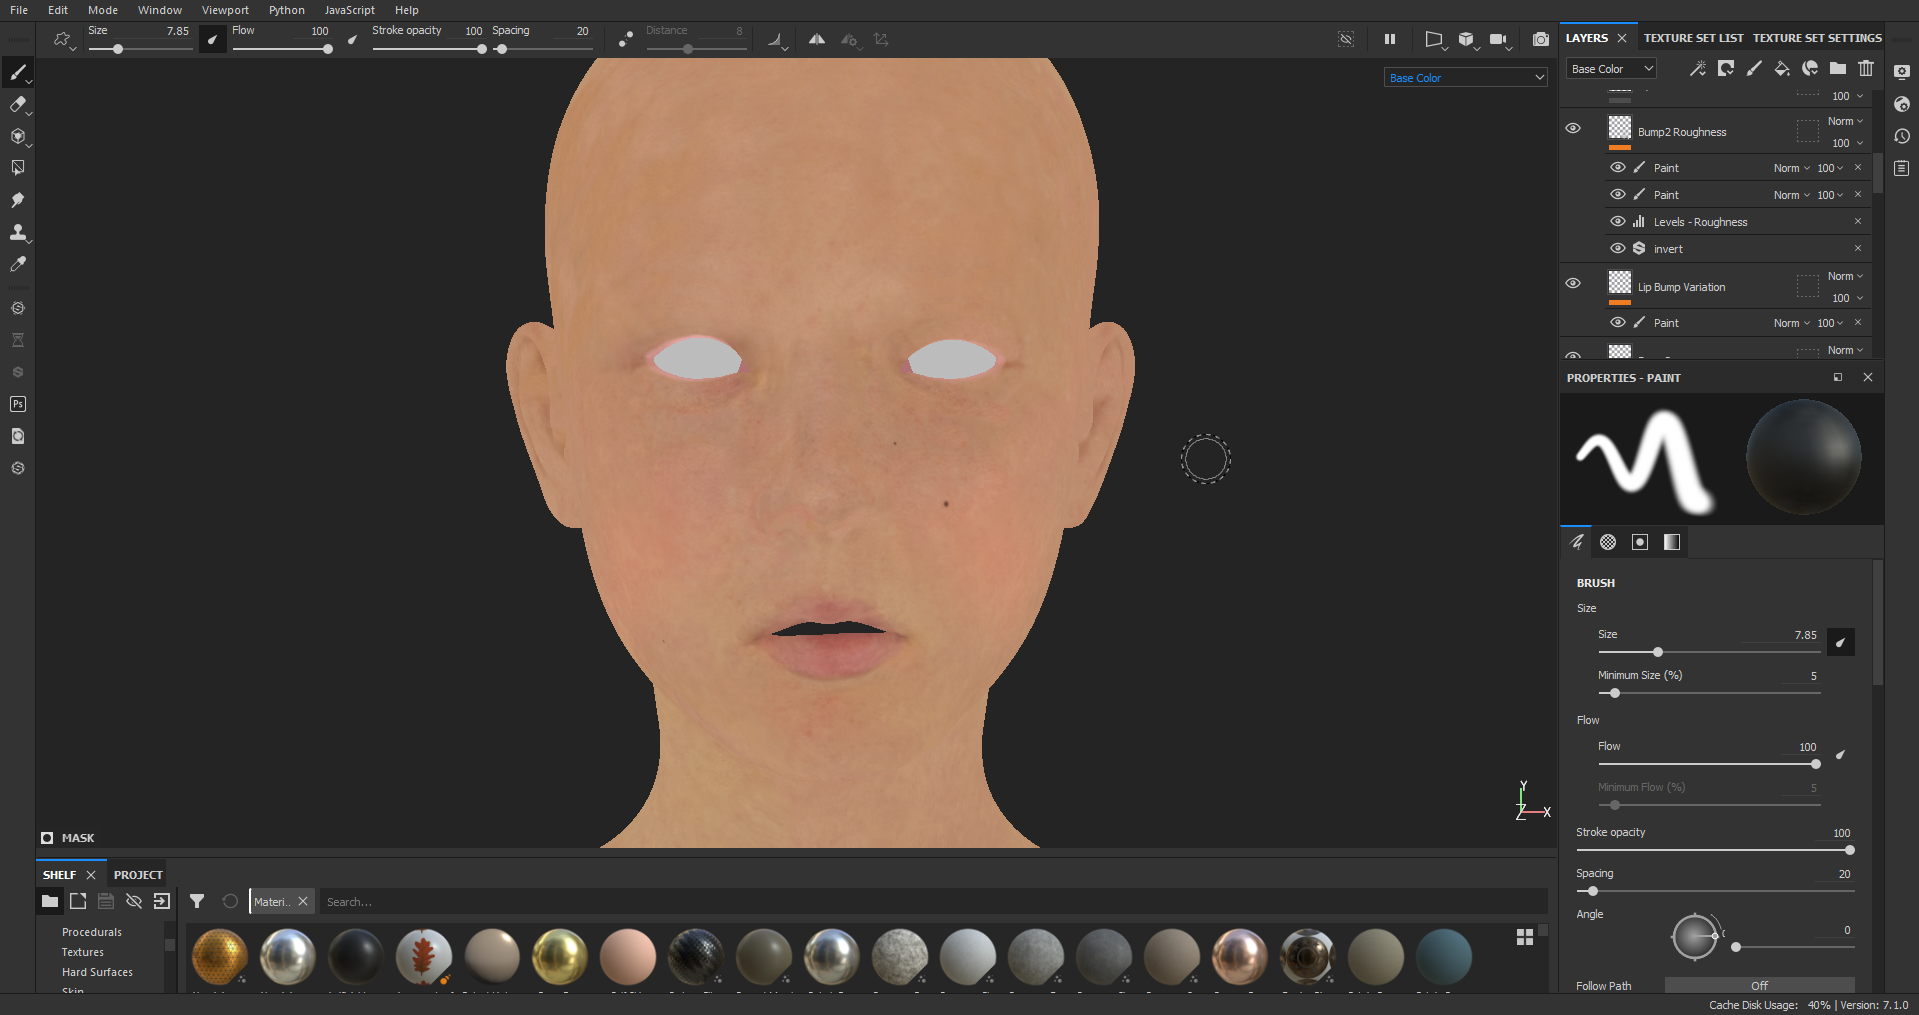
After that, I tried to use the displacement on this channel, but it didn’t feel right since the female age in the texture maps was a lot older than what I was trying to do. So I started again but I kept the displacement on the lips since it looked good already. Then I decided to use MicroSkinFace #01 and I think it suits my character just fine.
After the displacement, I proceeded to do the other maps, then I did the roughness map. I used the displacement data, inverted it, and cranked the levels a little.
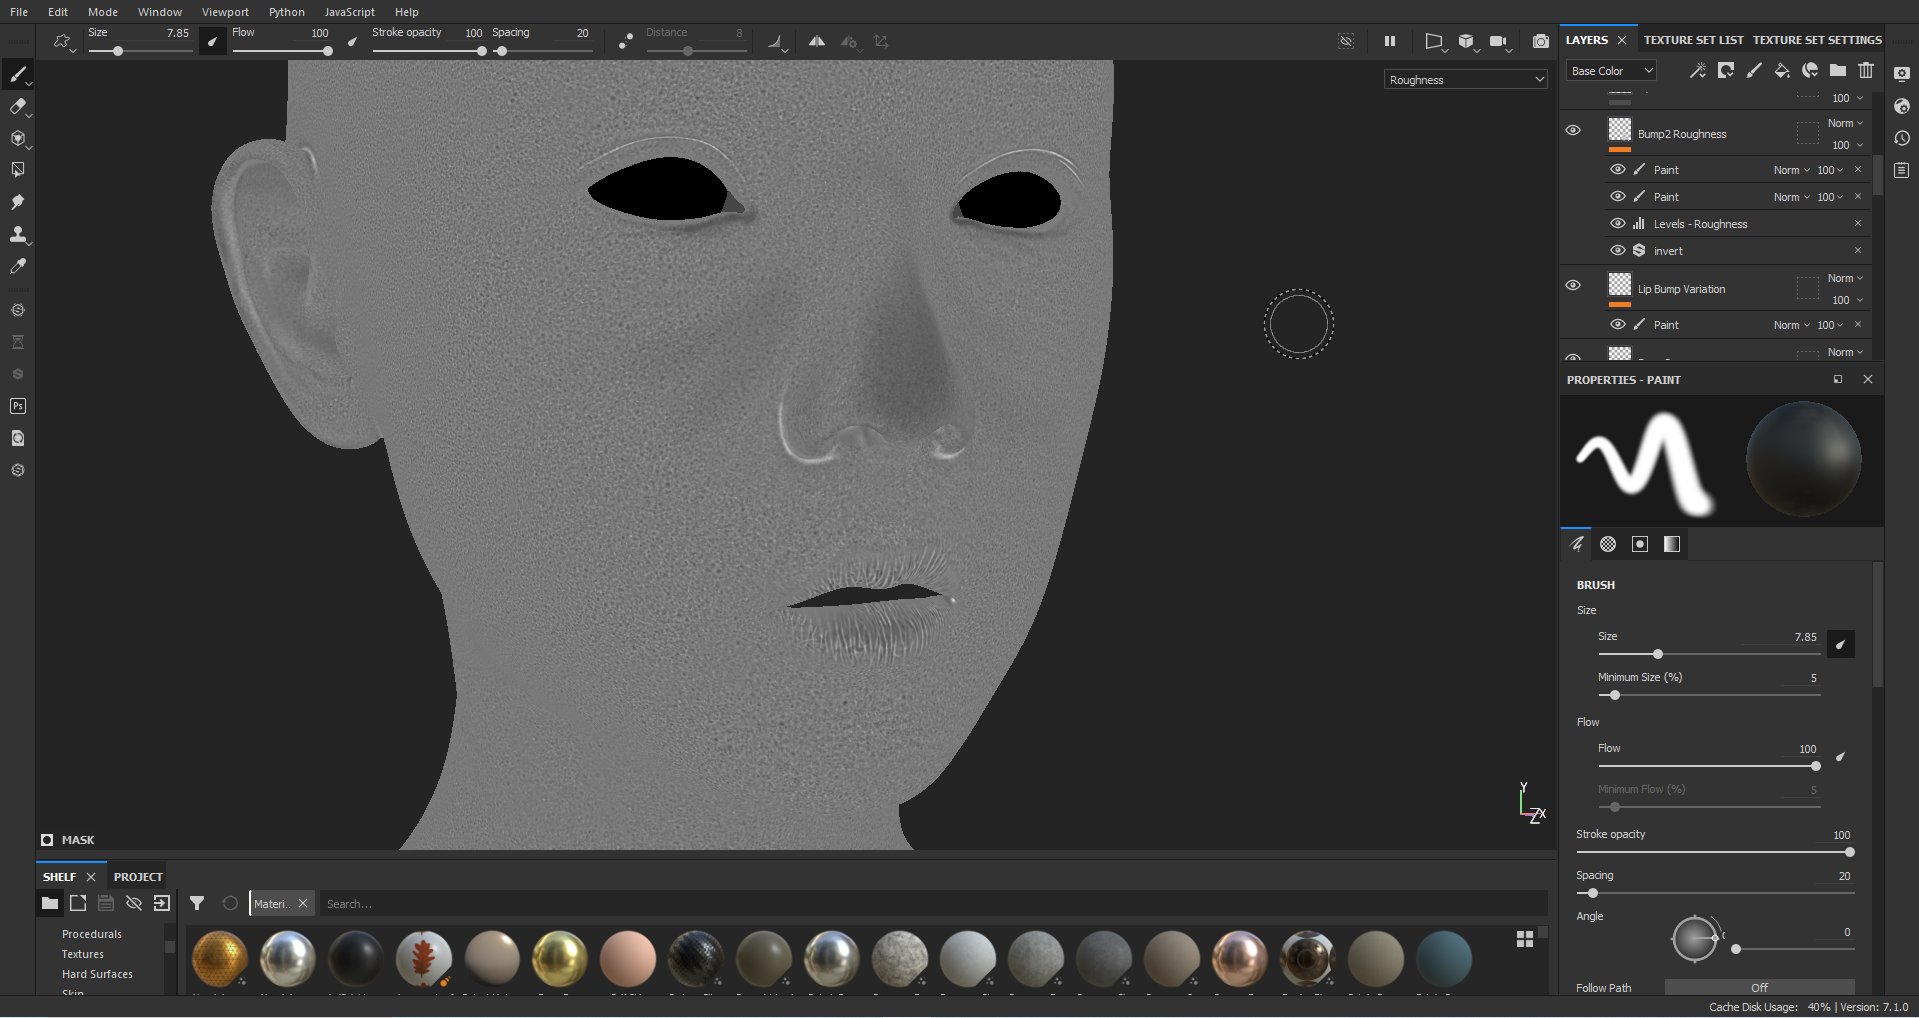
I used the same method to create the Specularity Map but with no need to invert; I just tweaked the values more.

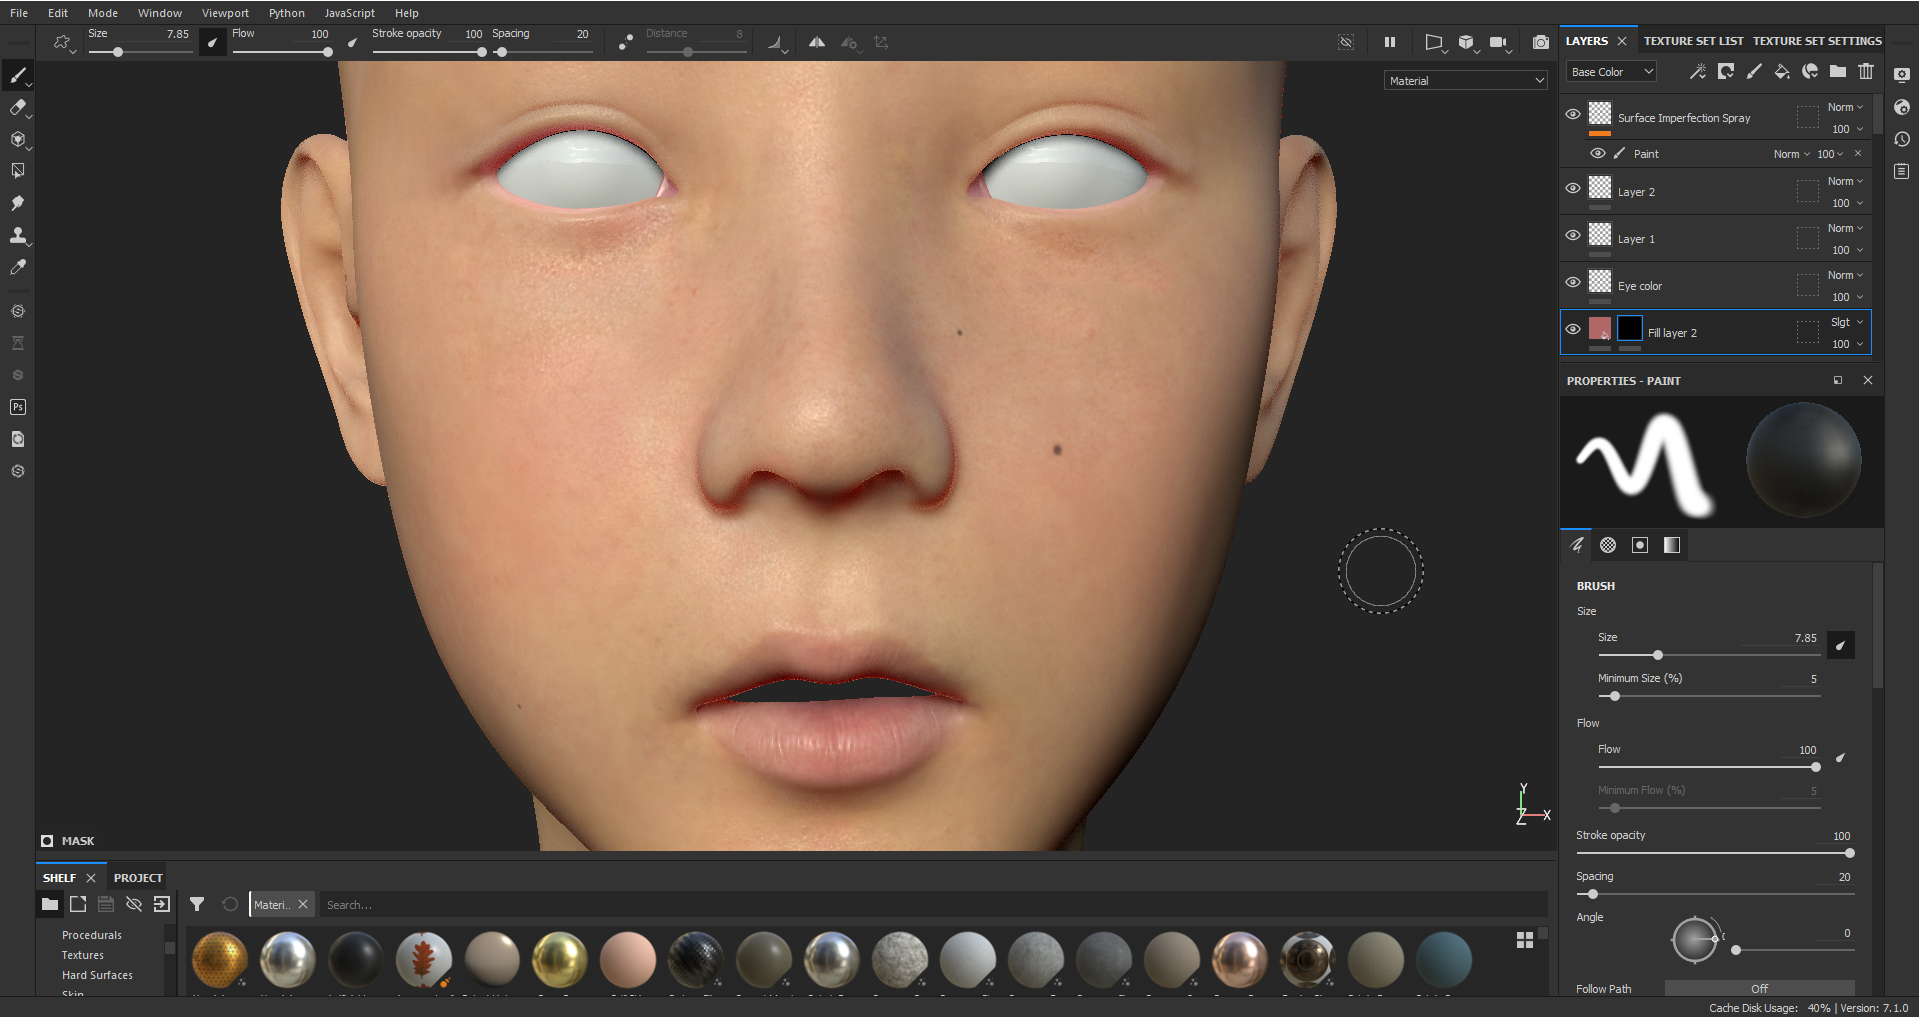
After the Roughness Map and Specularity Map from displacement, I created a layer and painted the areas that needed glossiness, like the nose, cheeks, lips, etc.
Grooming
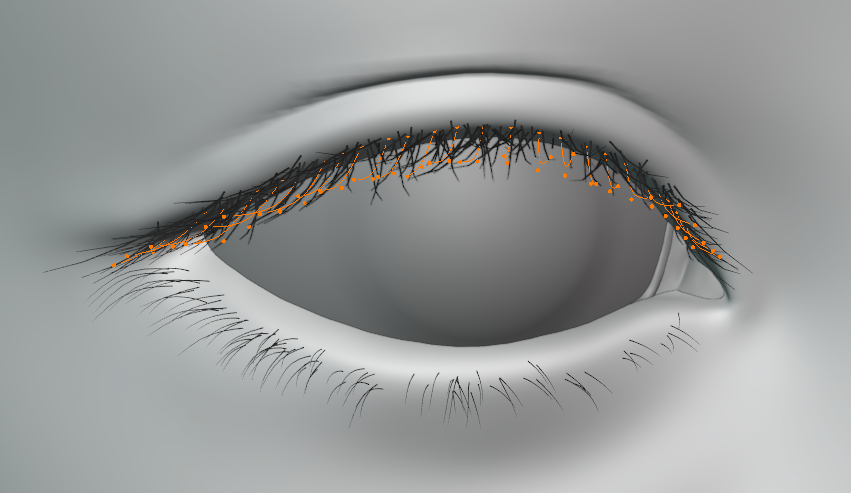
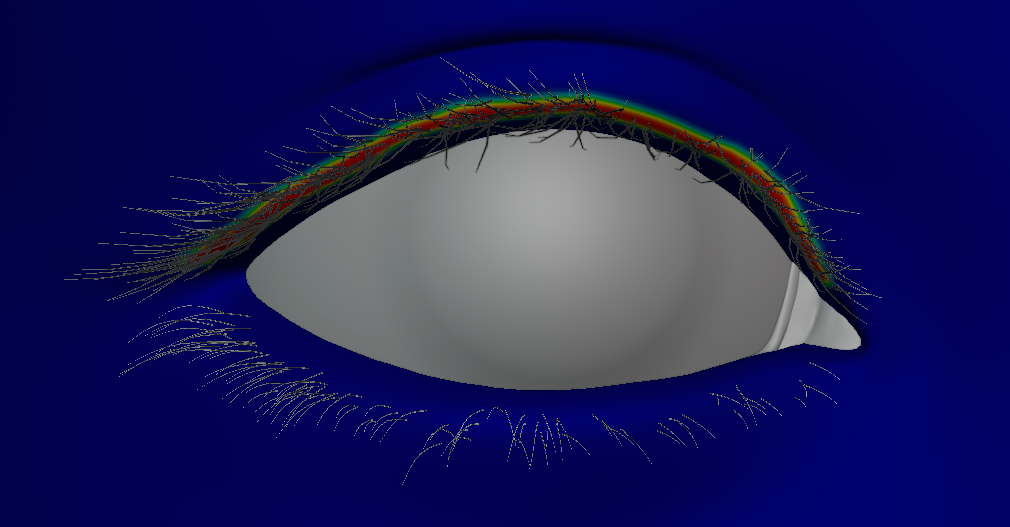
This is the fun part for me. The method I used was the same as Nazar Noschenko’s tutorial.
First, I did the upper eyelashes. I used the Interpolated Children Settings and weight painted for the Density so that the children hair setting would only show on the weight painted areas. Then I did the same method to create the lower eyelashes but with fewer child hairs.
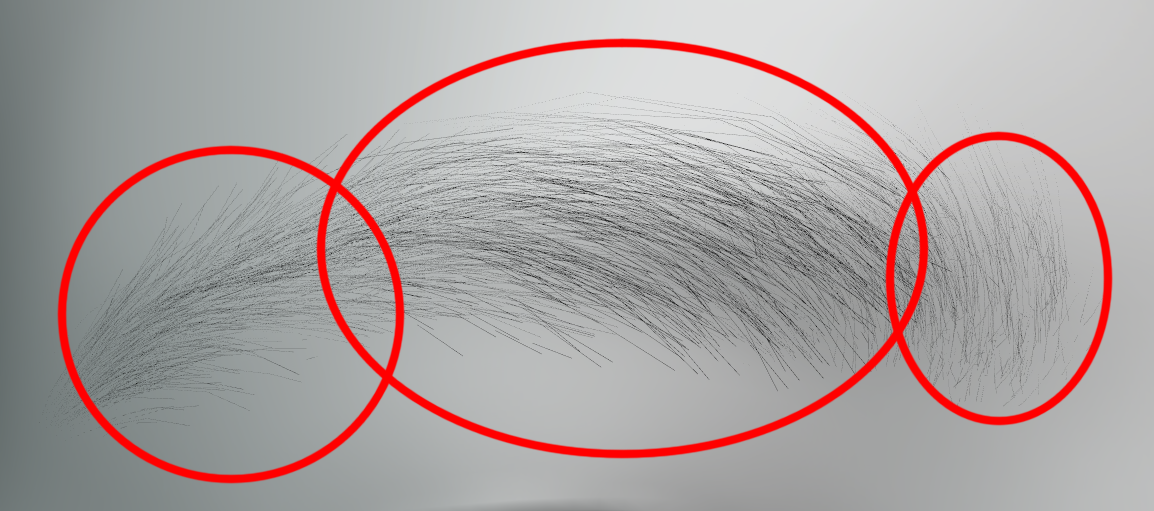
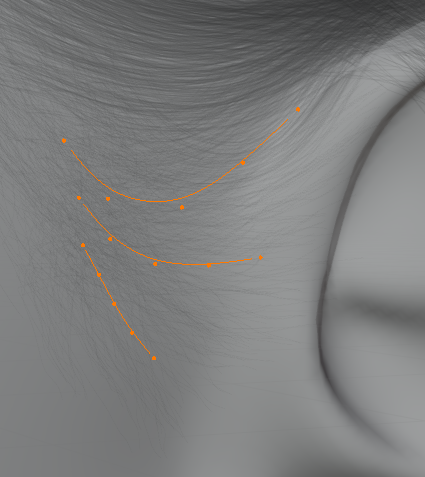
Next was the eyebrow. This one is different from the eyelashes. I created 3 particle groups on the eyebrows and I used the Simple Children setting on all of them and no weight painting. The left circle is where the eyebrows are clumping in the middle, while the middle circle is following the flow of the eyebrow and slightly pointing upwards near the right circle. The right circle is where the hair is pointing more upwards. These hairs also look more random and are shorter than those in the other two areas. It’s good for the endpoint of the hair on the righthand circle to be random to create a natural look with fewer parallel hairs, which would look fake.
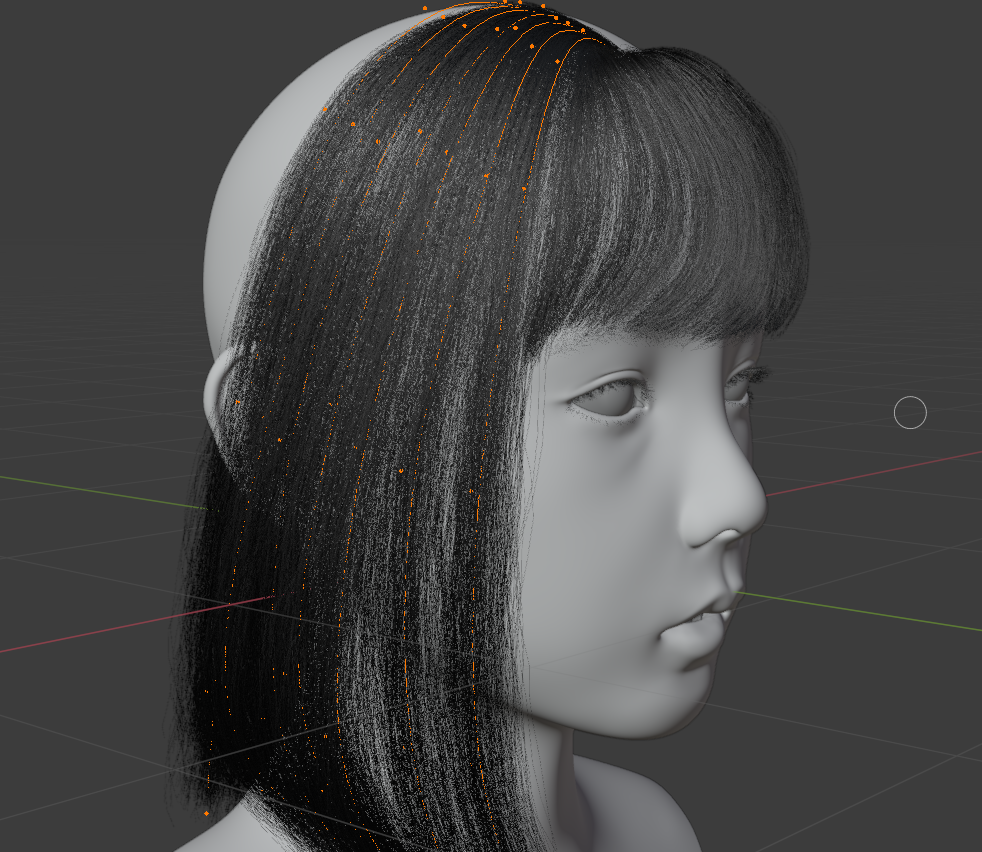
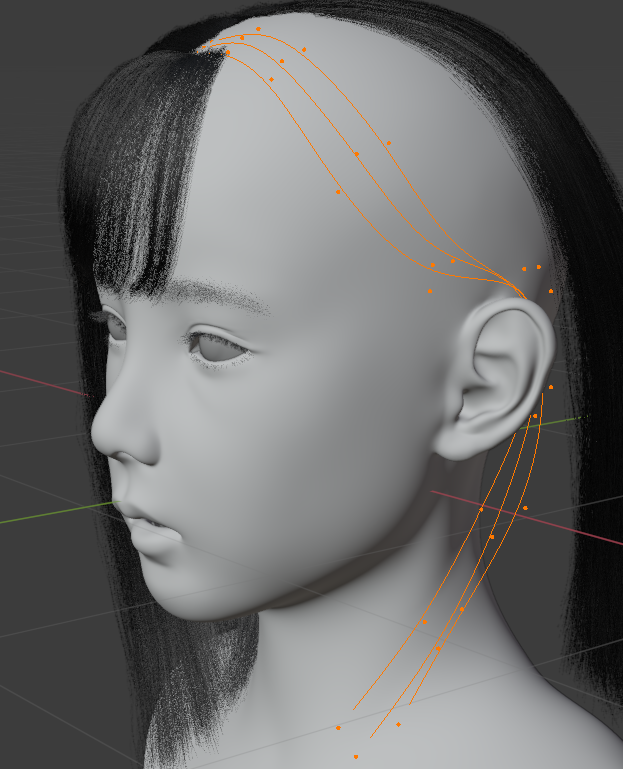
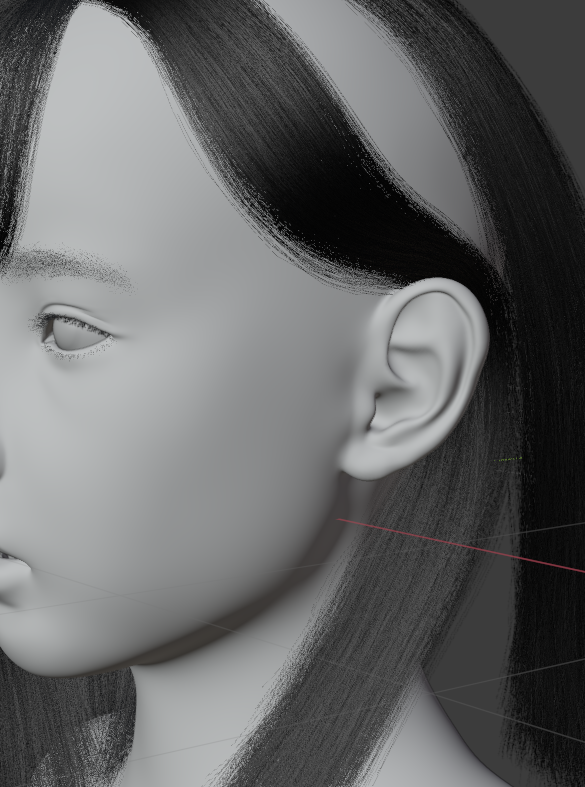
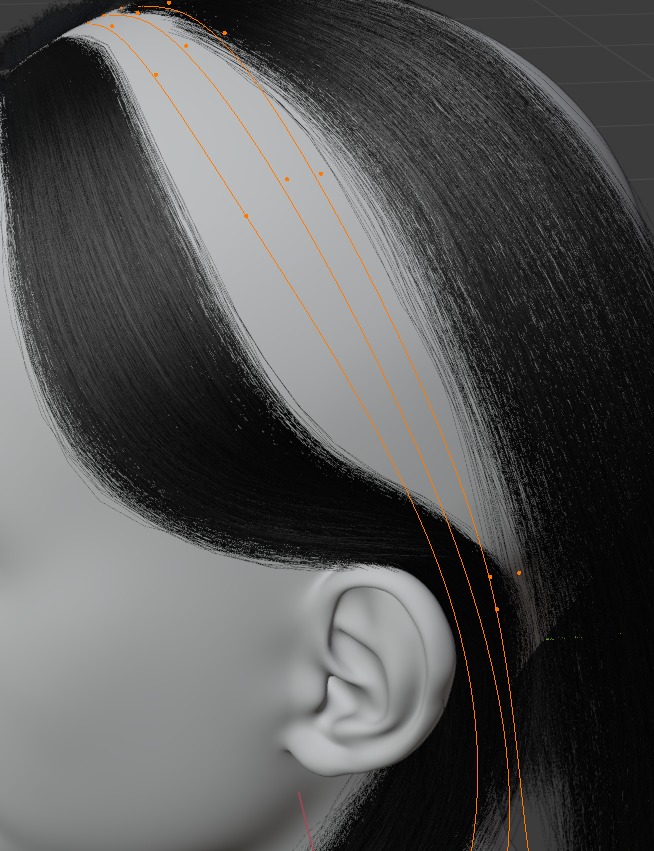
After the eyebrows, I proceeded to create the main hair of the head. First I created the bangs, on which I used the Simple Children setting.
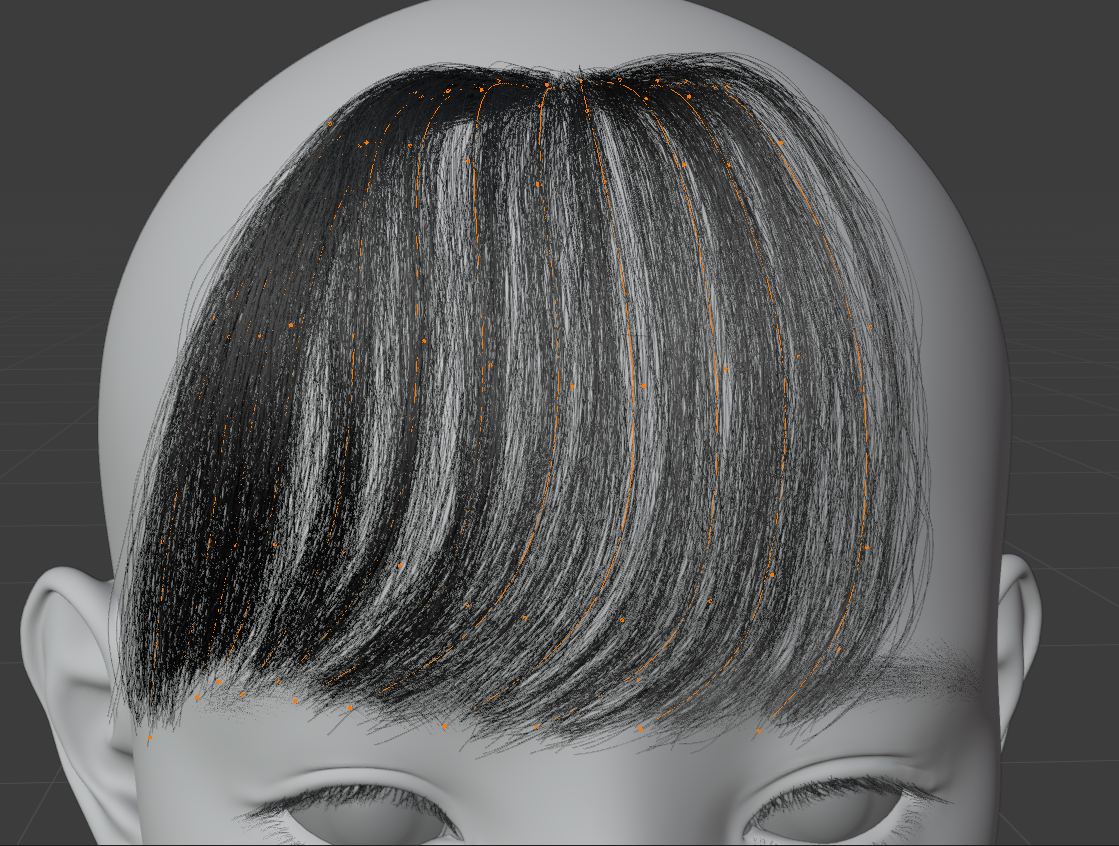
The most important settings tweaks are Endpoint and Random. These settings are what you need to get the look of natural hair and to get rid of the perfectly parallel hairs which give away the realism.

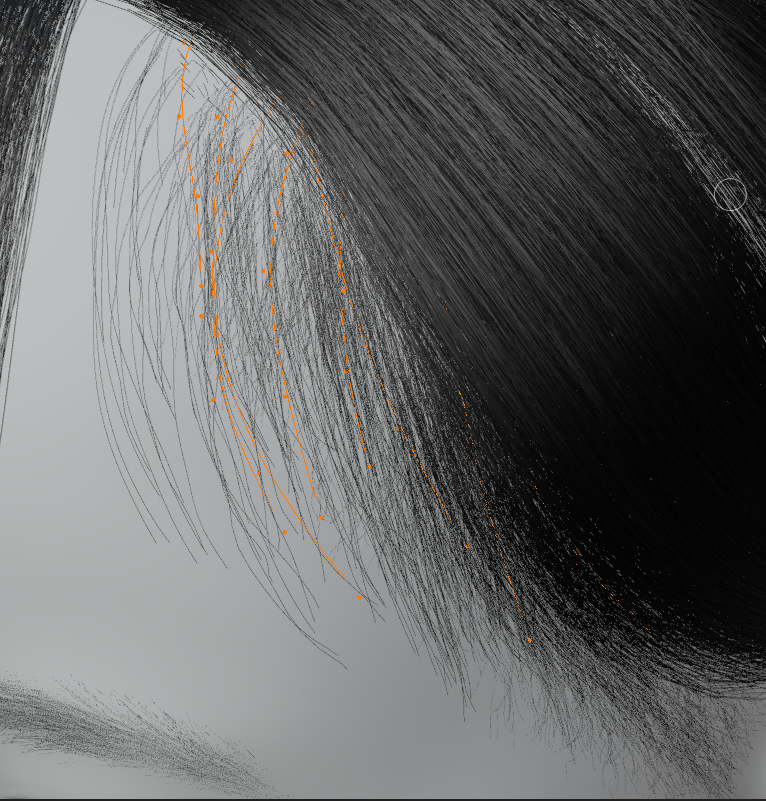
Next is the side hair on her right. I used the same method with the bangs but with more hair and more randomness. Also, the clump is bigger here than on the bangs.
After that, I created the hair on the back of the head. I didn’t fully complete those sections of hair because I just needed to fill the area at the back that would be visible to the camera.
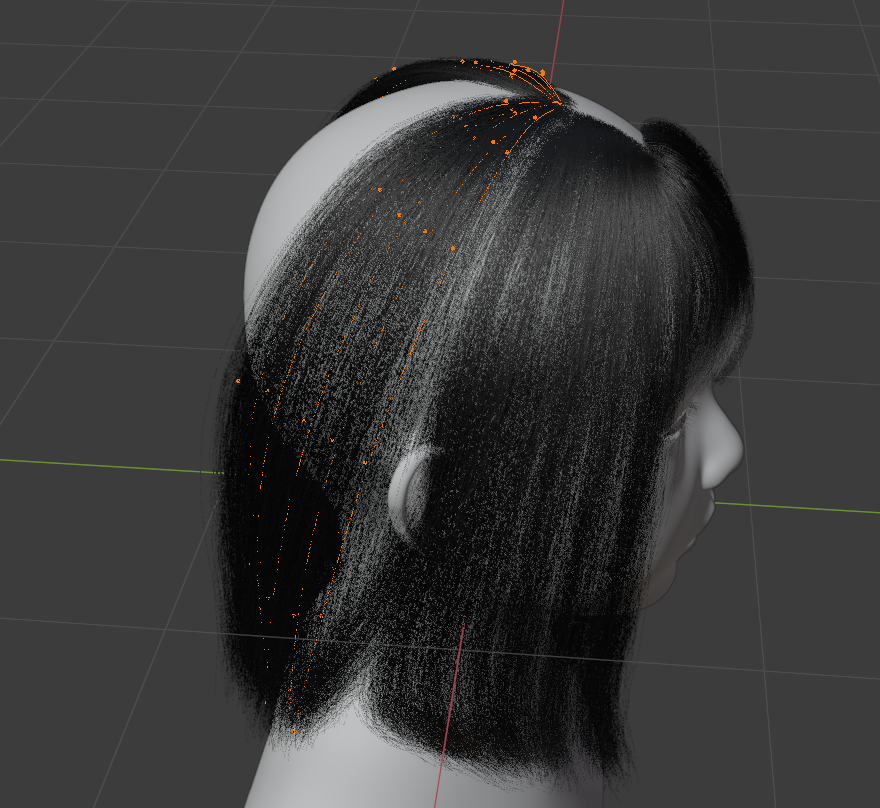
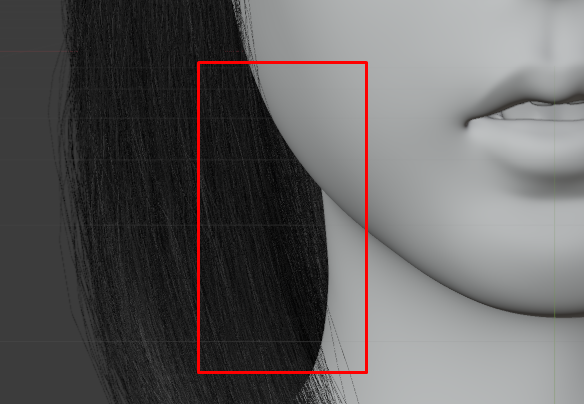
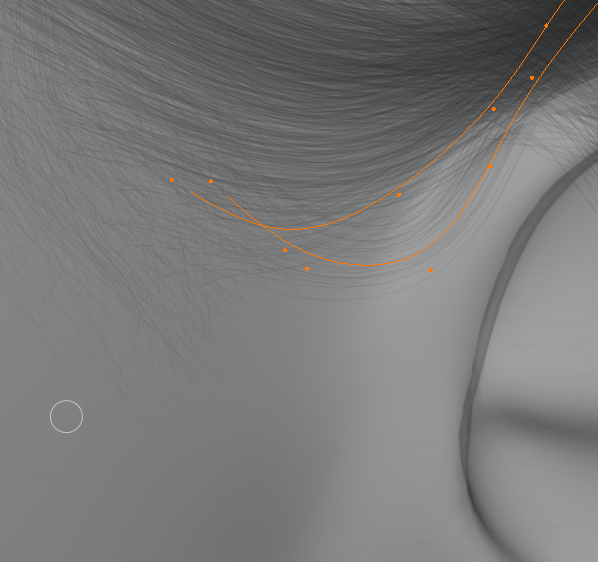
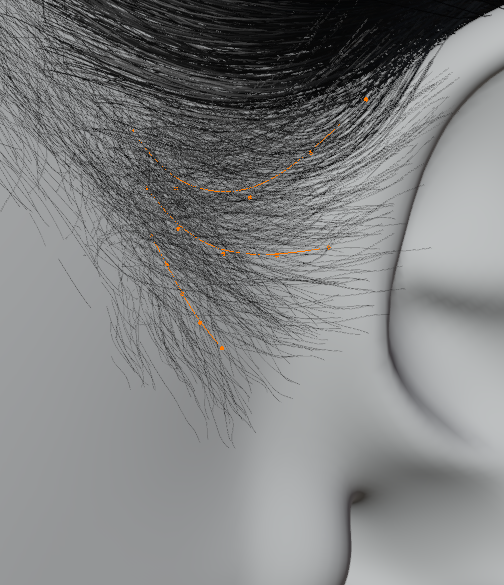
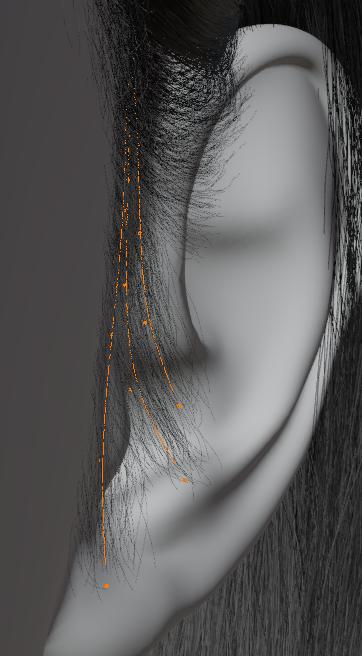
Next is the hair that goes behind the ear. It’s the same method as the others but with more clumping in the middle area behind the ear.
Then I added the hair that connects to the hair in the back. This has the same settings as the hair on the other side.
Next is to add some baby hairs. For this particle, I used the interpolated settings and did some weight painting. I find the interpolated settings good on hair types like baby hair or fur.
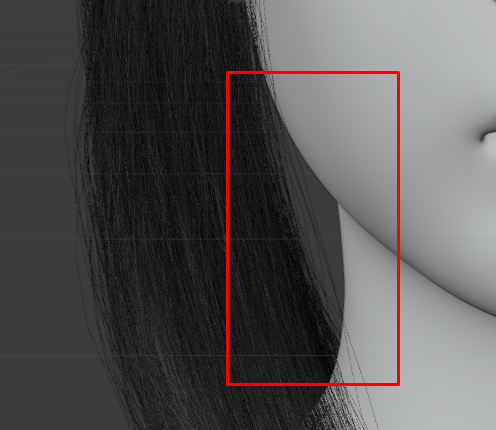
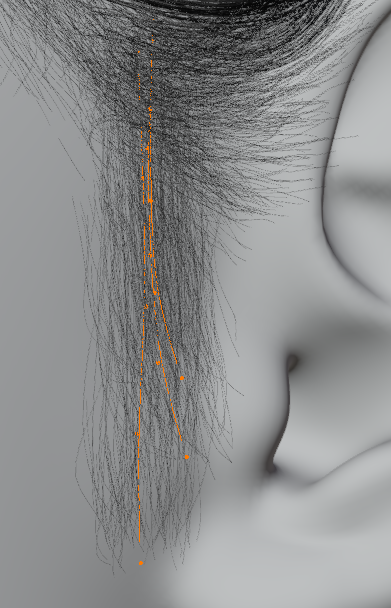
Next are the sideburns. This is the hard part but the most worth it for me. I created 4 different particle groups for the sideburns.
The first one is the upper part where it goes behind the ear too.
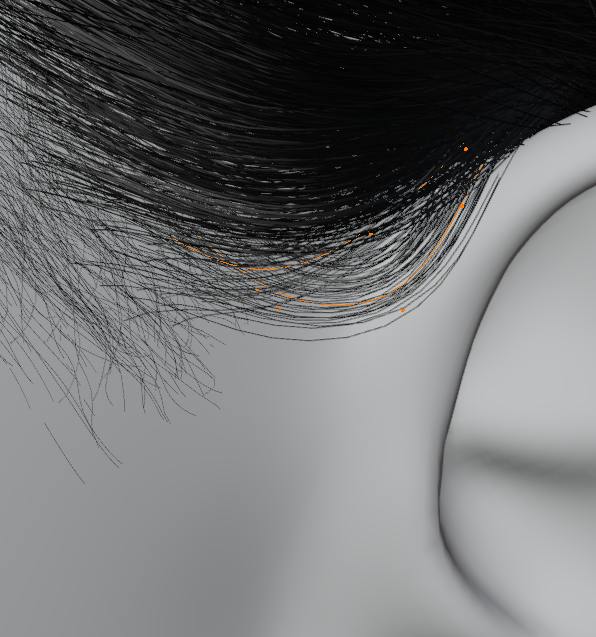
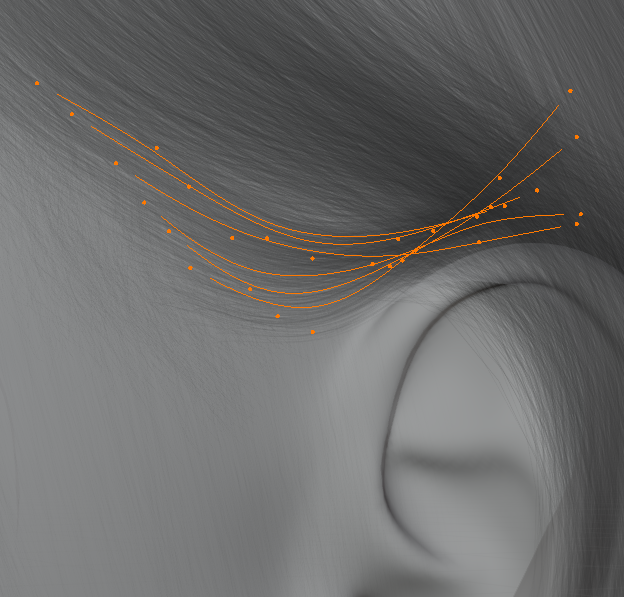
The second is just like the first but with less hair and less clumped.
The third part is the baby hair which is more random and has less thickness and length.
The fourth and last part is the longer strands.

Renders
Above you can see the WIPs I took while making the project. I used Photoshop for post-processing of the final image; I added a little chromatic aberration and fixed the exposure.
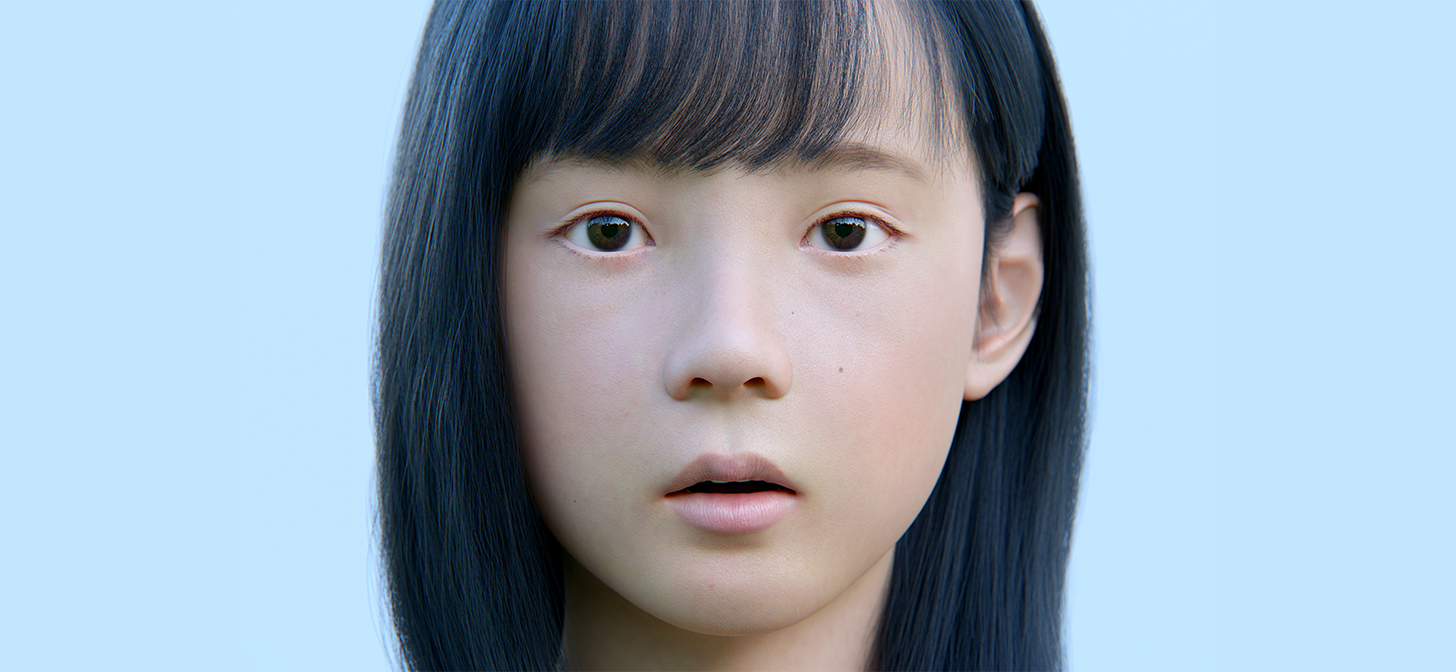
Final Render
About the Author
 Viriel Boyboy, 3D Character Artist


Amazing photorealism and a great lesson
Awesome!
C’est très réussi
Amazing, Thanks for sharing your process!
Only 22? Amazing talent!
this is incredible!