

About
Hello, my name is Michael Yoshimura, and I’m a freelance 3D Artist/Concept Artist from Toronto, Canada.
My background is in architecture, and I studied the subject for both my Bachelor’s and Master’s degrees. I am currently working at an architectural firm doing design work and in-house architectural visualization, as well as the occasional freelance project on the side. I usually always have a personal passion project going on at all times to try and level up my skills and experiment with new techniques. I am currently motivated to transition into the film/gaming industry as a concept artist as the next step in my career.
I was first introduced to 3D during my studies. As an architecture student, you are usually given a creative/technical brief and tasked with executing a building from those metrics. The plans, sections, elevations, and perspectives/renderings are all derived from a 3D model. Rhino 3D and V-Ray were my first introductions to 3D modeling and rendering software. During the end of my time in undergrad, I was becoming deeply interested in arch viz and looking for ways to explore that passion. It wasn’t until my Master’s degree that I started using Blender. I wanted to create a short animated film, Shotengai, for my final thesis project and Blender checked all the boxes for a comprehensive production tool. Everything I know in Blender was self-taught, or learned through Blender's amazing community! I have been using it ever since for all my projects, both professional and personal.
Inspiration
This animation/still was originally done for Jama Jurabaev’s Concept Art For Film mentorship. While we were only asked to create images for the course, I spent some time afterward setting up the shot for animation.
Our creative brief for our concept art project was “Waterworld” with basically the same constraints as the 1995 movie by Kevin Reynolds. It’s a post-apocalyptic future where the planet is entirely covered in water—worldbuild from there. My narrative focused on a team of “Scavengers” who hunt the seas looking for any scraps to sell for money.
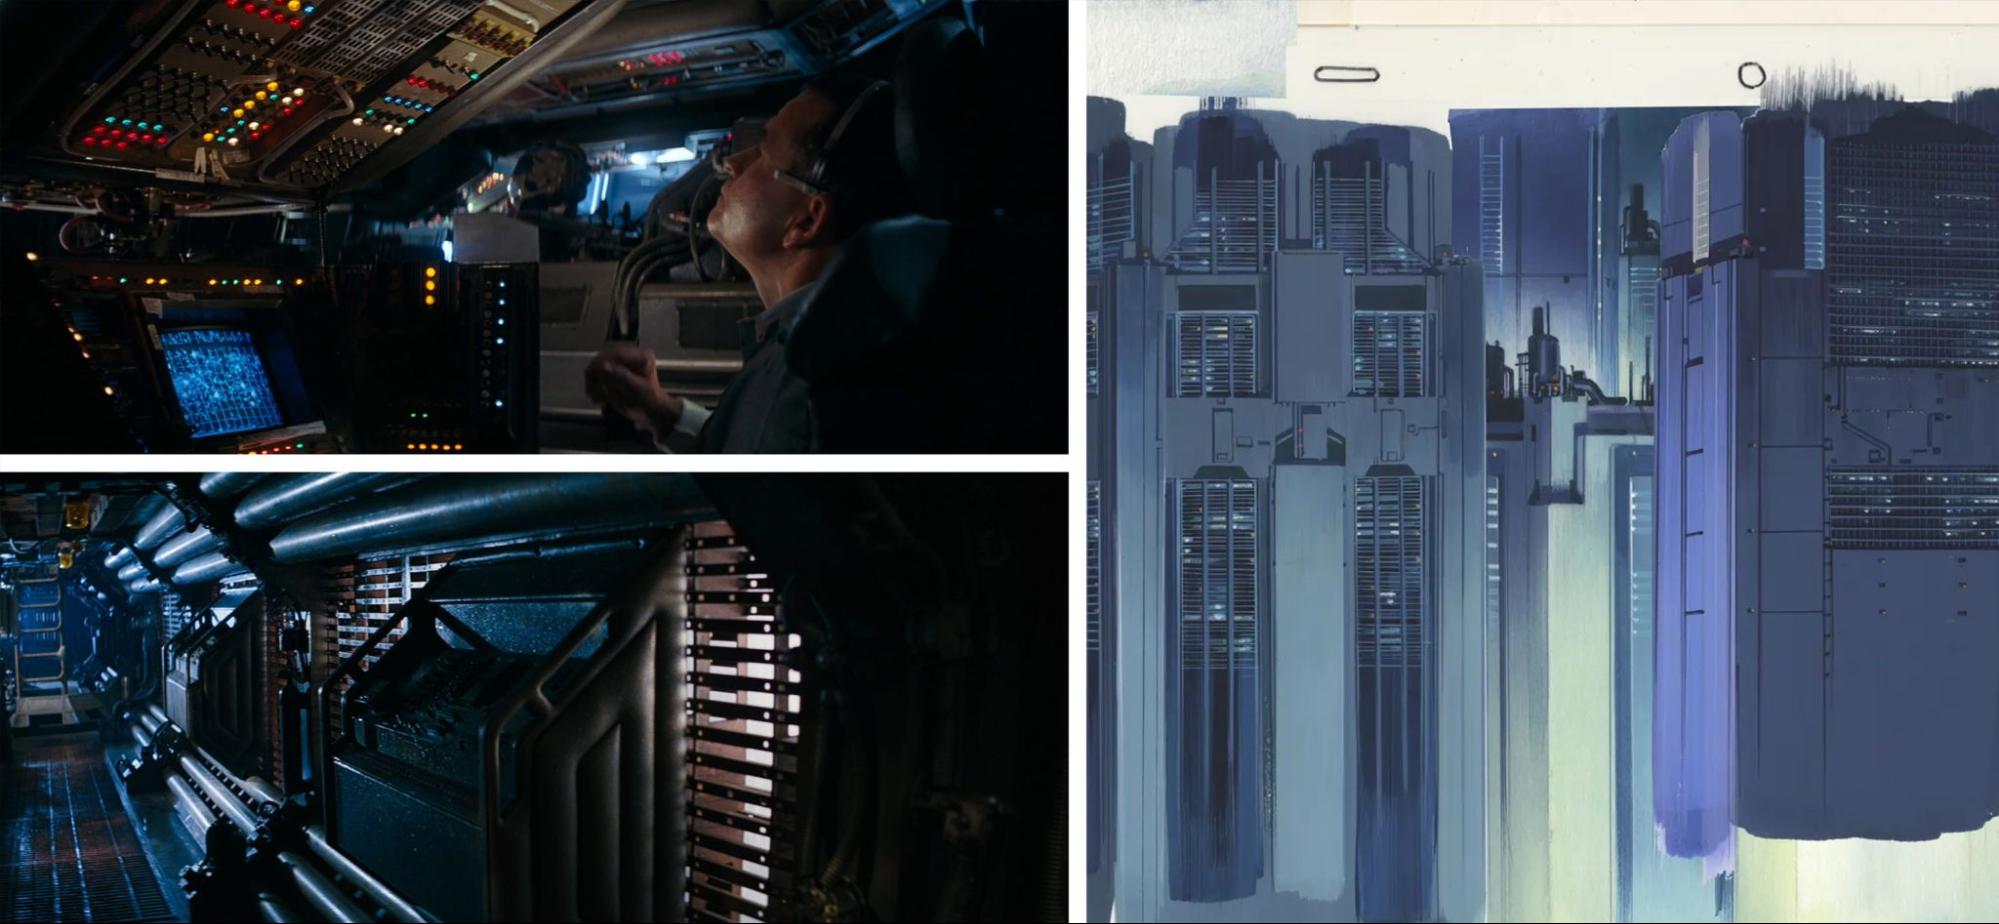
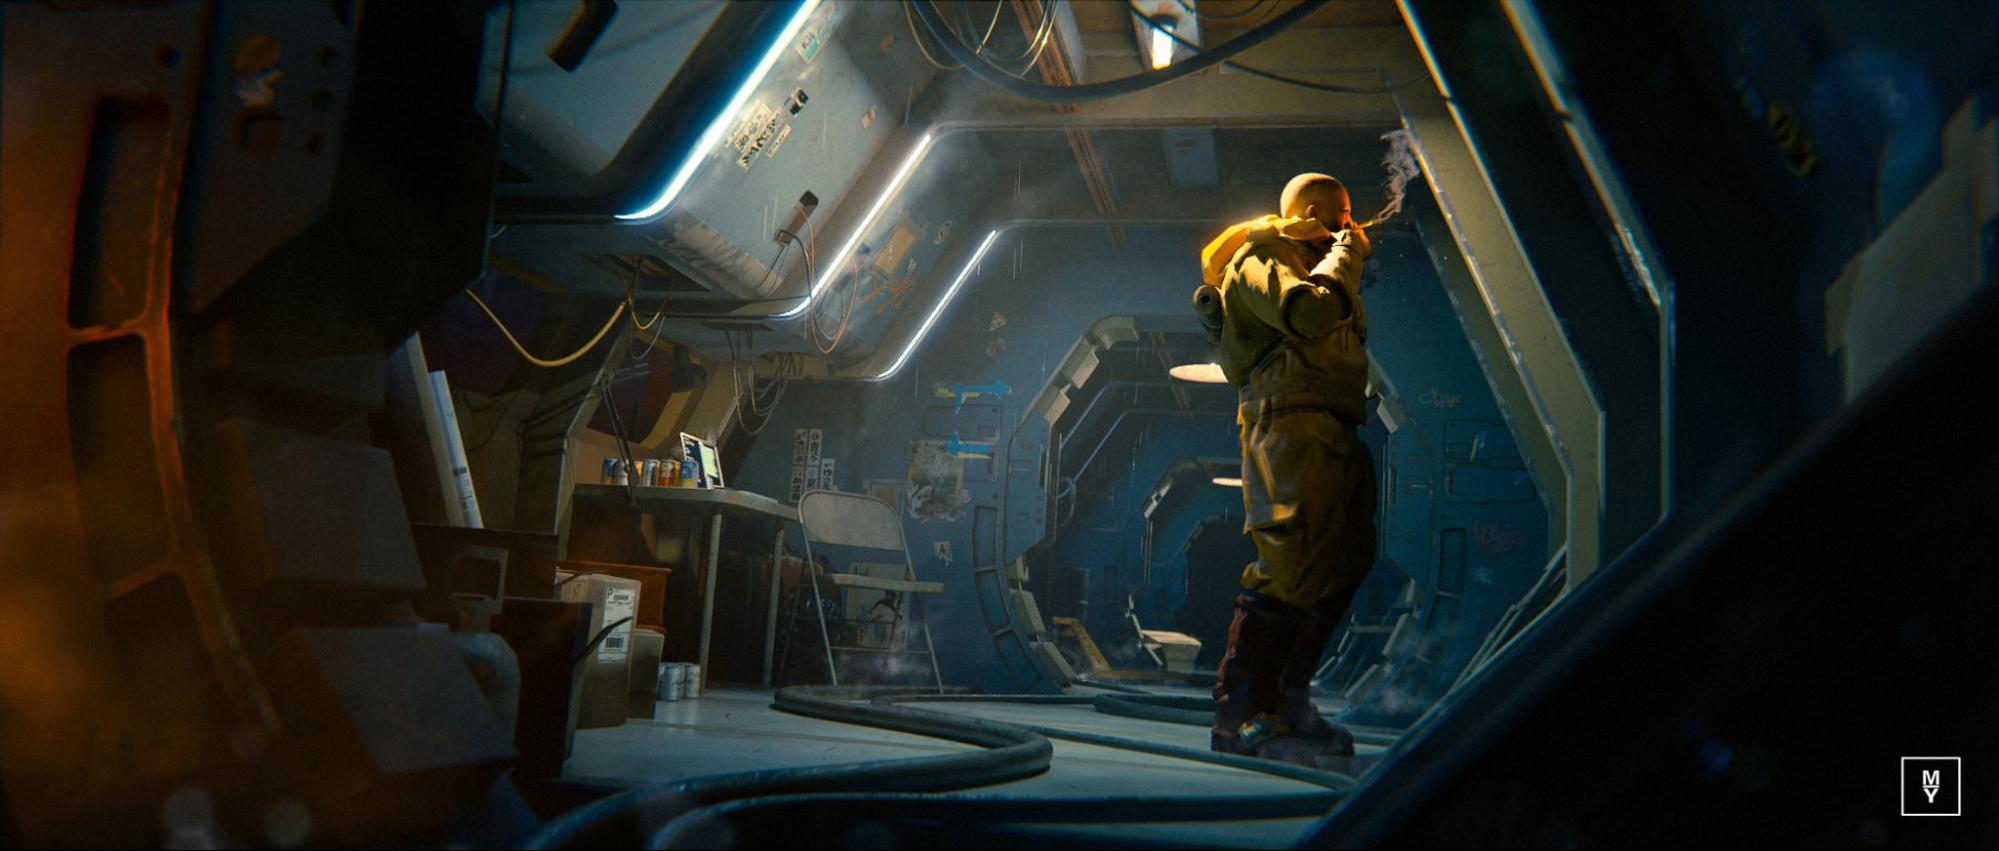
For this shot, I was particularly inspired by Ridley Scott’s 1979 film, Alien, and its cramped claustrophobic ship interiors and hallways. I was also referencing the lighting scenarios of anime celluloids, and the manner in which the artist would blend the acrylic paint to create gradients from the light source (e.g., Ghost in the Shell by Masamune Shirow).
01: Vehicle reference images, and initial 3D block out
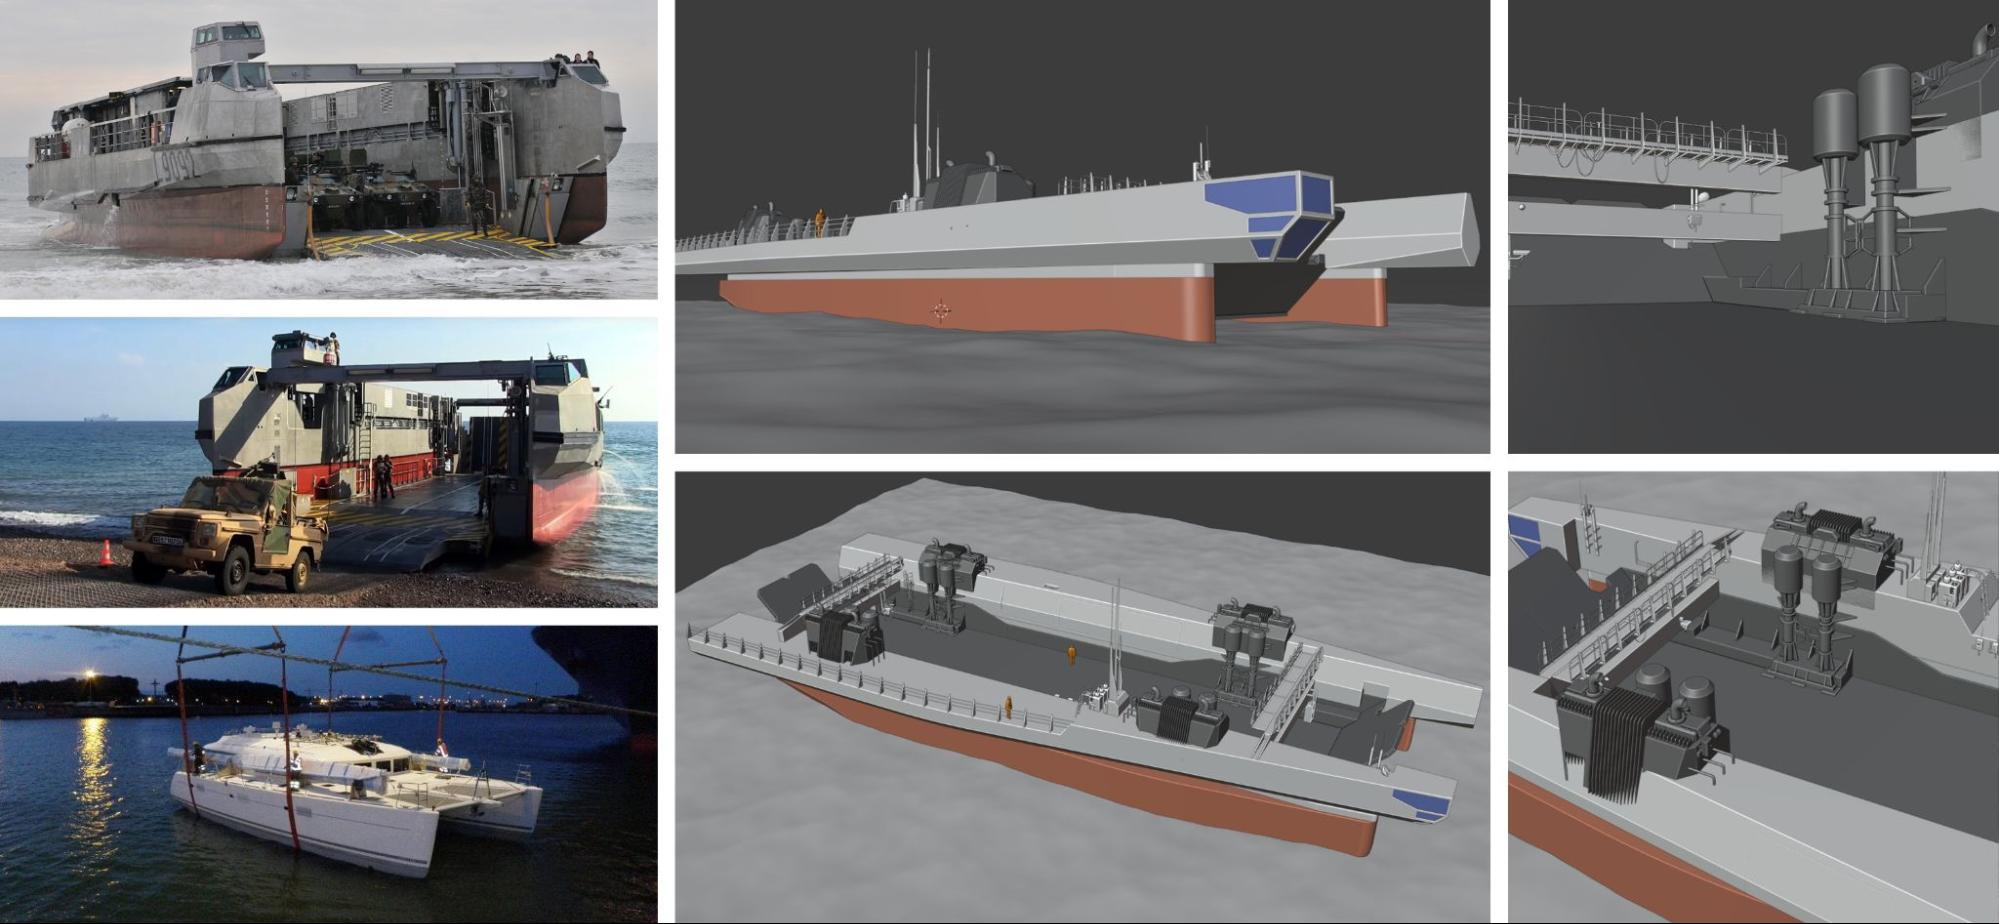
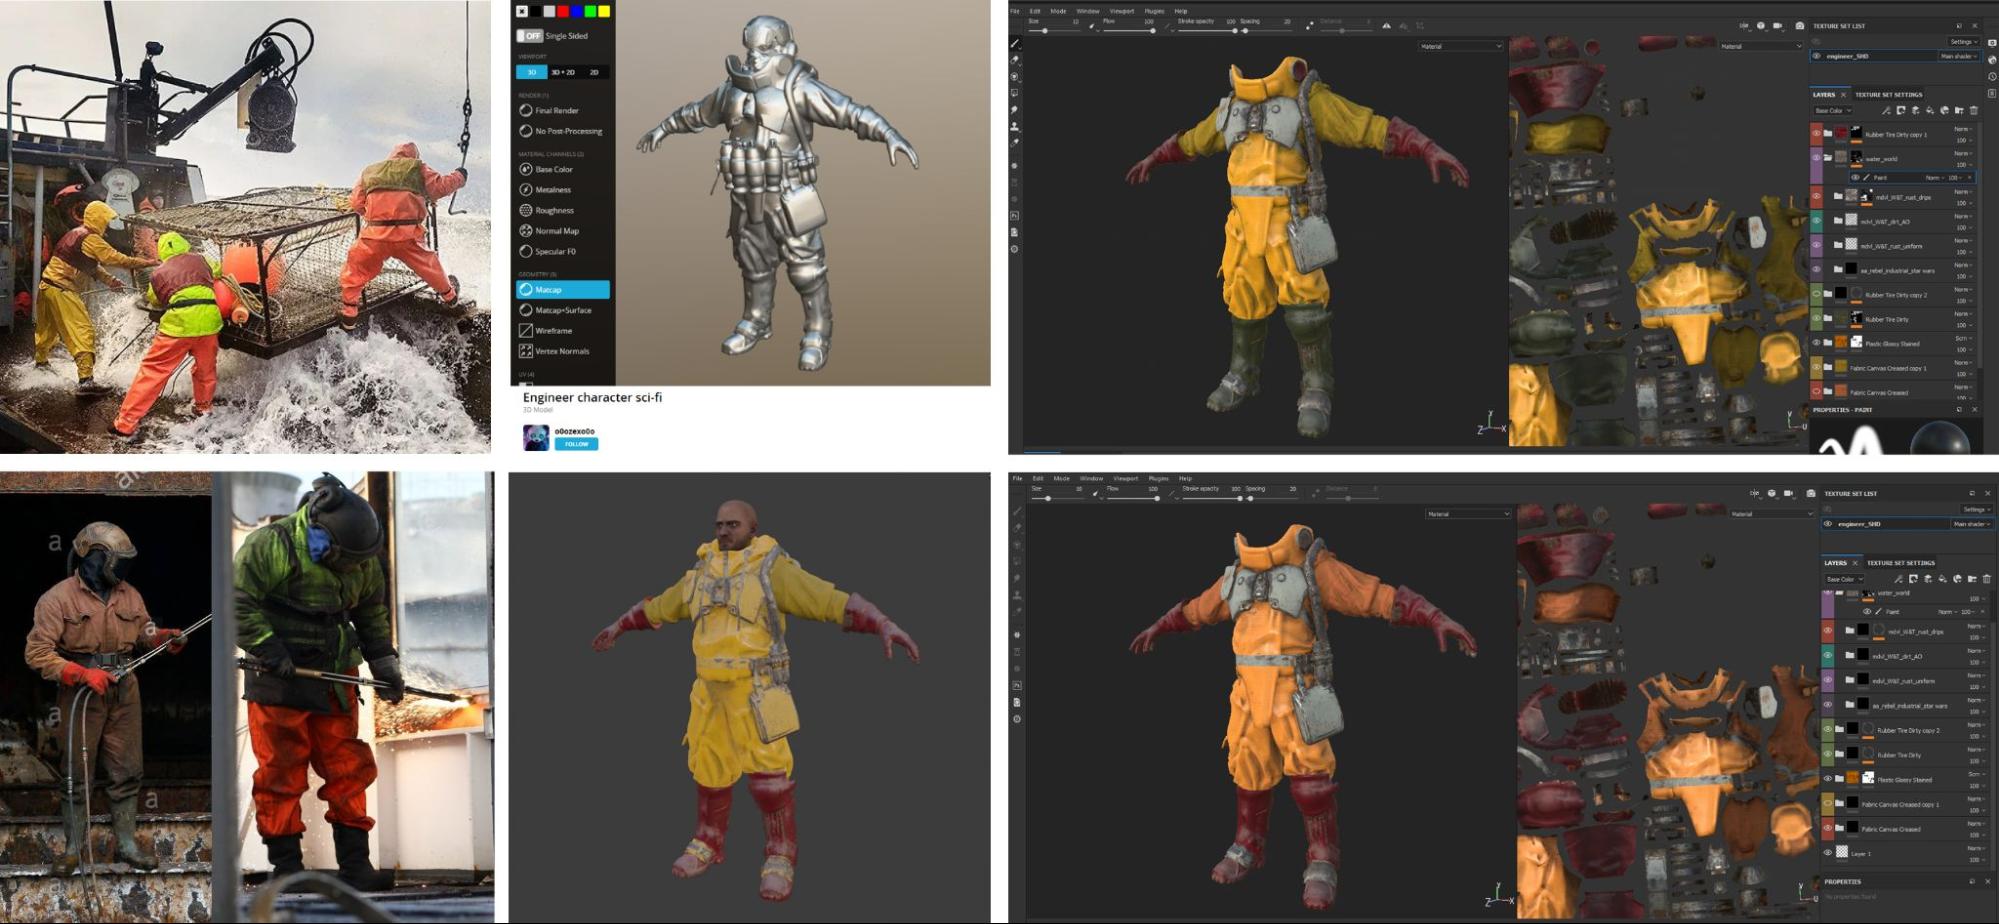
Scavenger Ship: The design was based on a combination of a catamaran and a fast-landing craft (this is about 42m in length). The idea is that the ship would be a giant recycling vessel, with the inner bed being able to load lots of sea junk.
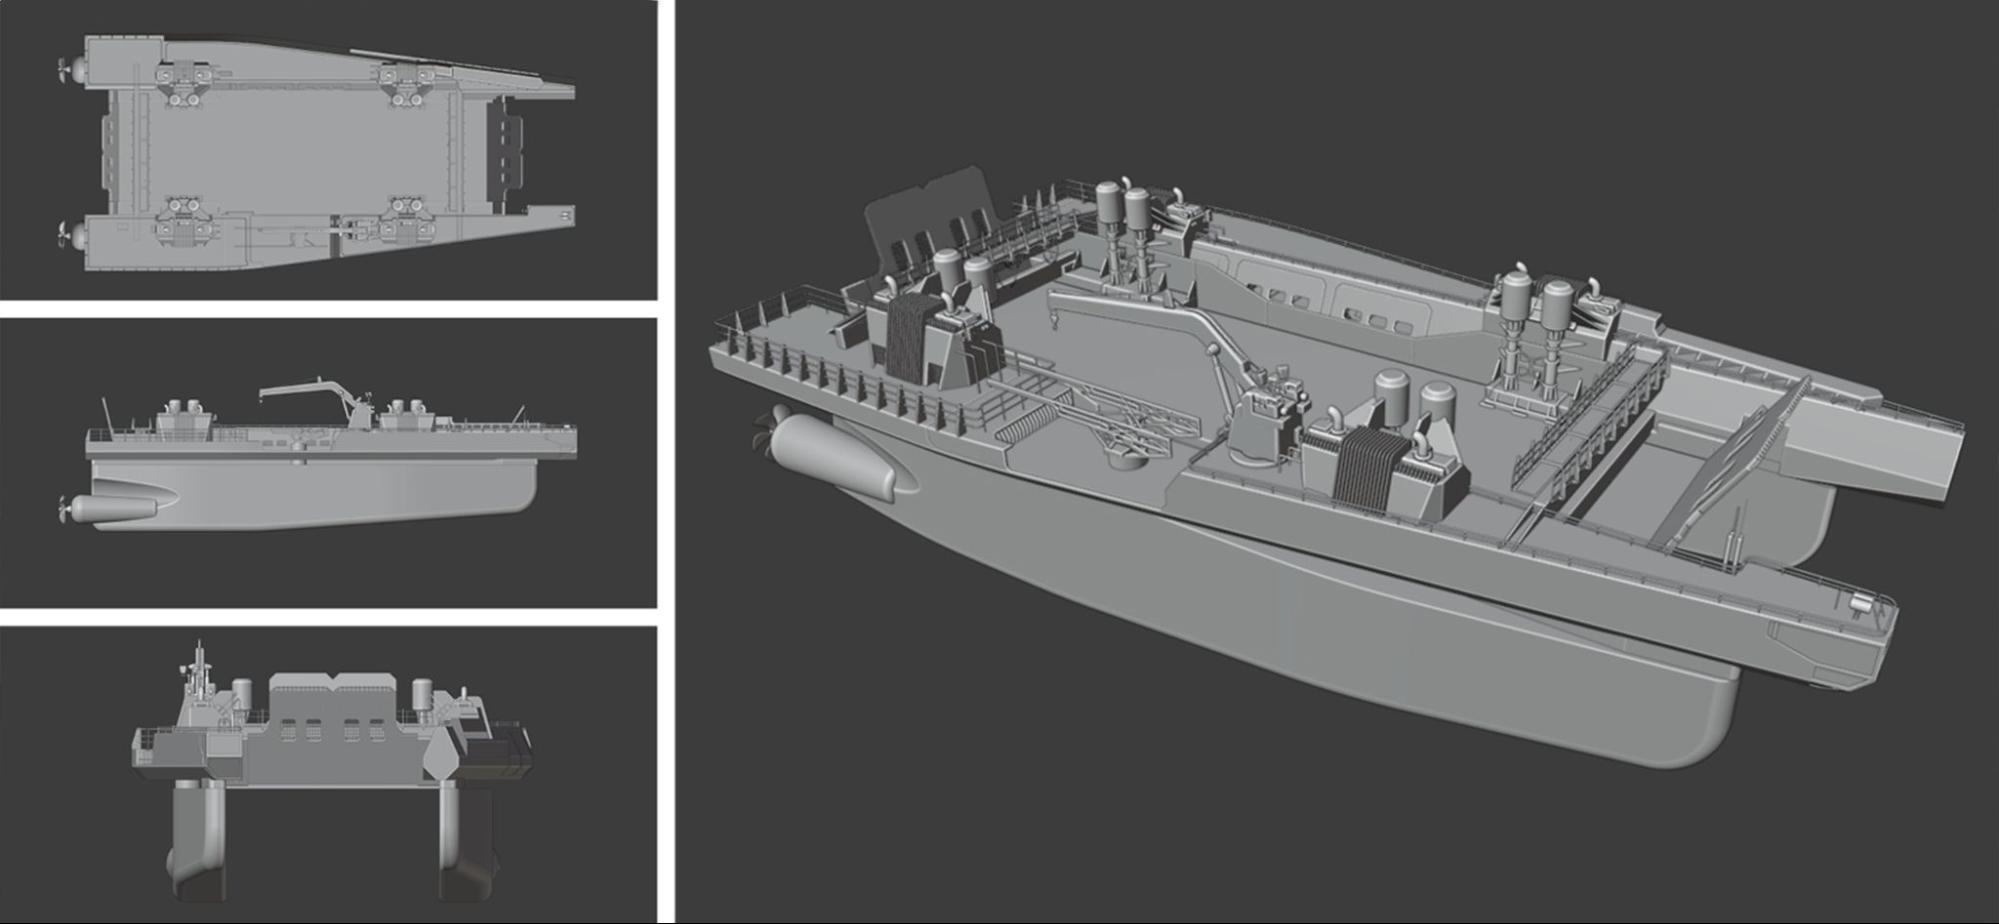
02: Vehicle final blockout
As I knew I wanted to have an interior shot of the ship, I created a fairly simple module that was repeated throughout the 2 main hulls. I mainly referenced the Millennium Falcon’s interior to understand its proportions and design principles for that retro sci-fi look that I wanted to achieve.
03: Vehicle texturing in Substance Painter
I created some smart materials within Substance. This was a straightforward process using mainly smart masks as all surfaces were metal. Adding generous amounts of rust and scratches always helps to give a vehicle character. I really enjoy this stage of the project as you begin to see the design come to life. The colour scheme was inspired by the beautiful colours in ‘80-’90s mecha anime and their acrylic painted celluloid backplates.


04: Vehicle set-dressing, Sketchfab assets, and Megascans assets
Set-dressing the ship interior was the next stage in the process. Because of the short time span of the project, I browsed Sketchfab for some assets to populate the scene—chairs, radio sets, boxes, oil cans, etc. I also raided my Kitbash 3D sets for some other miscellaneous props. Some specific assets and textures were created from scratch as well. I used Megascans for their graffiti decals that added some personality to the walls. For easily adding wires, I use Jayanam’s free plugin called JMesh.


05: Character design
Staying within the constraints of my “Scavenger” narrative, I knew my character's design would be a visual combination of a fisherman, welder, and shipyard breaker. I found a 3D model on Sketchfab which had the basic design principles—I used this as the base then removed some unneeded elements. I then retextured the entire model in Substance Painter, sticking closely to the colour schemes of my real-world references.
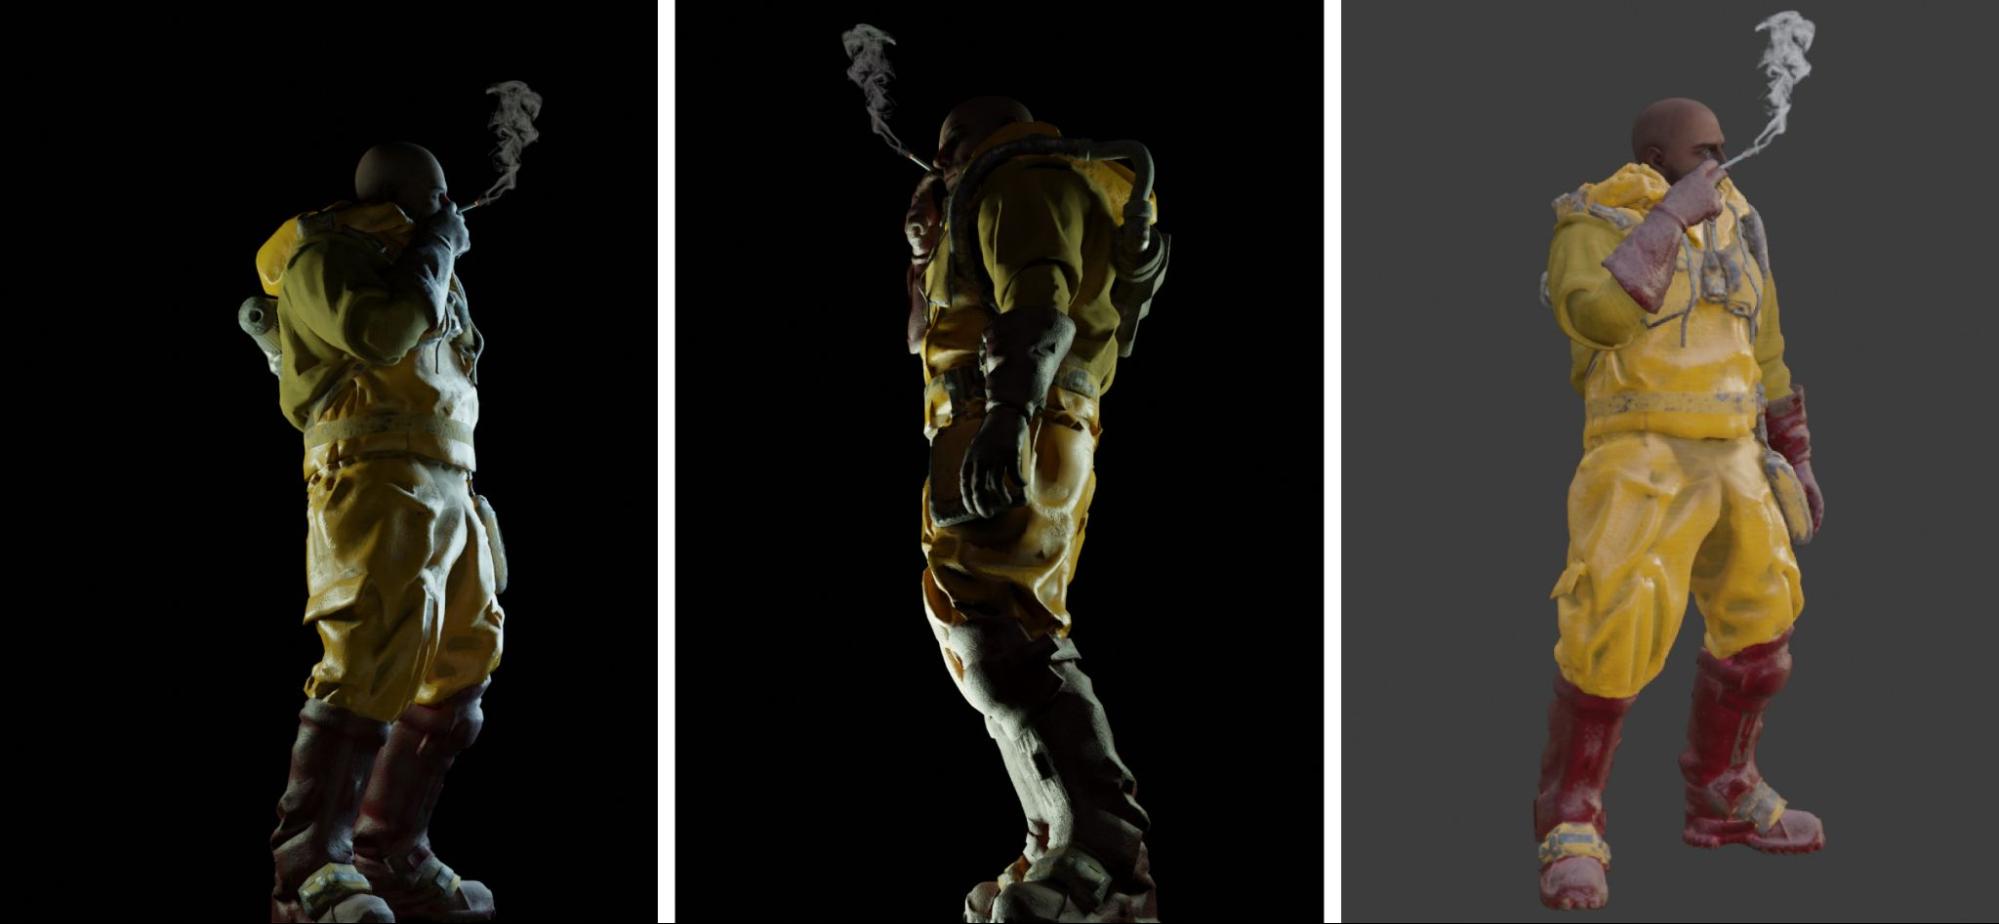
Lastly, the pose and rigging were done in Mixamo. For the animated smoke texture, I used stock footage of some smoke, placed it on a card, and added a slight emission to the texture.
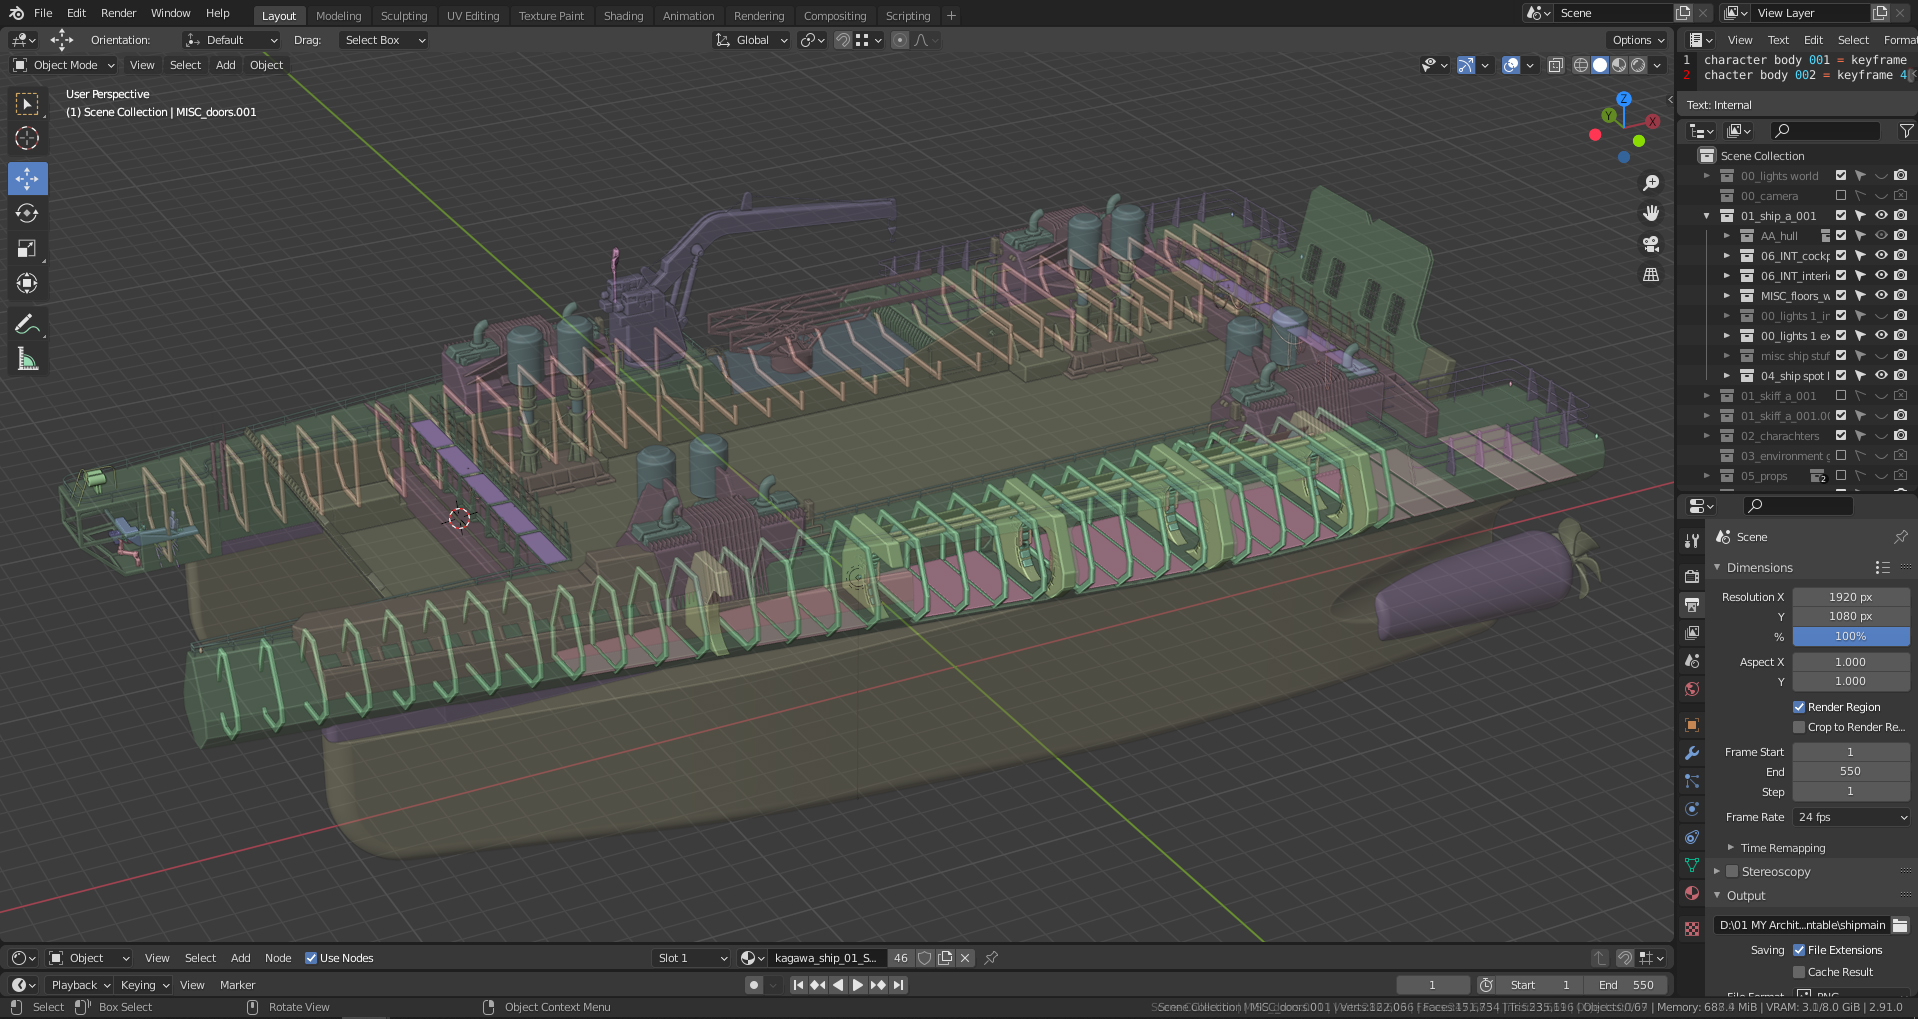
06: Scene set up, blockout, and animation
Lighting and rendering of the animation were done in EEVEE. For the paintover, I rendered the image in Cycles. You can see the gradient light node set-up for Cycles render below. I like using this node-set up to get a stylized look for the colour fall-off from the light.

07: Testing composition, lighting, and framing of the shot


08: Scene walk-through
For final compositing, I used DaVinci Resolve. I did some minor colour grading, added some additional dust elements to the shot, as well as some sound design to give the shot more depth.

09: Final shot + animation
About the Author
 Michael Yoshimura, Freelance 3D Artist/Concept Artist
2 Comments
Amazing, very inspiring!!!
Incredible work! Thank you for sharing.