

About
Hello everyone! My name is Alexander, I am from Russia, I live in the Siberian city of Novosibirsk and at the moment I am engaged in concept art and 3D modeling.
For a long time, I created concept art only in 2D, drawing in Photoshop. 3D, for me, was something incredibly distant and difficult, but that's why it attracts me. I like to learn and try something new all the time. Once my lady of the heart sent me a link to a mini-marathon on creating a simple model of a house in Blender, I decided to try it. I didn’t go through even half of the marathon, but Blender fascinated me, I started using it in my projects and combining it with 2D. It seemed intuitive to me, and those things that I didn’t understand could be found on YouTube. Now I very rarely take a tablet and a stylus in my hands. Now my main tool is Blender.
Van concept
I started working on this piece, or more precisely on a part of this work, for a trivial reason. A client of mine asked me to create a concept for a Chevy van if it were a bit cyberpunk. I did the rest of the work just for myself, for the sake of experiment. I liked this model—it was very simple, so I thought it would work well for my experiment.
My main motive for creating the environment and style was that I missed the style that I got when I painted in Photoshop. The results of my renders in 3D were very different from this style, which was marked by custom brushes and a painted look. Therefore, it was interesting for me to try to merge my two experiences together. At first, I made renders and painted on top of them in Photoshop, but I wanted to make such graphics in a 3D scene.
All work was done in Blender, except for painting textures in Photoshop.
Modeling
I did all of the modeling using standard Blender tools, and I used DECALmachine decals in some places. I randomly arranged the vegetation using a particle system.
Textures
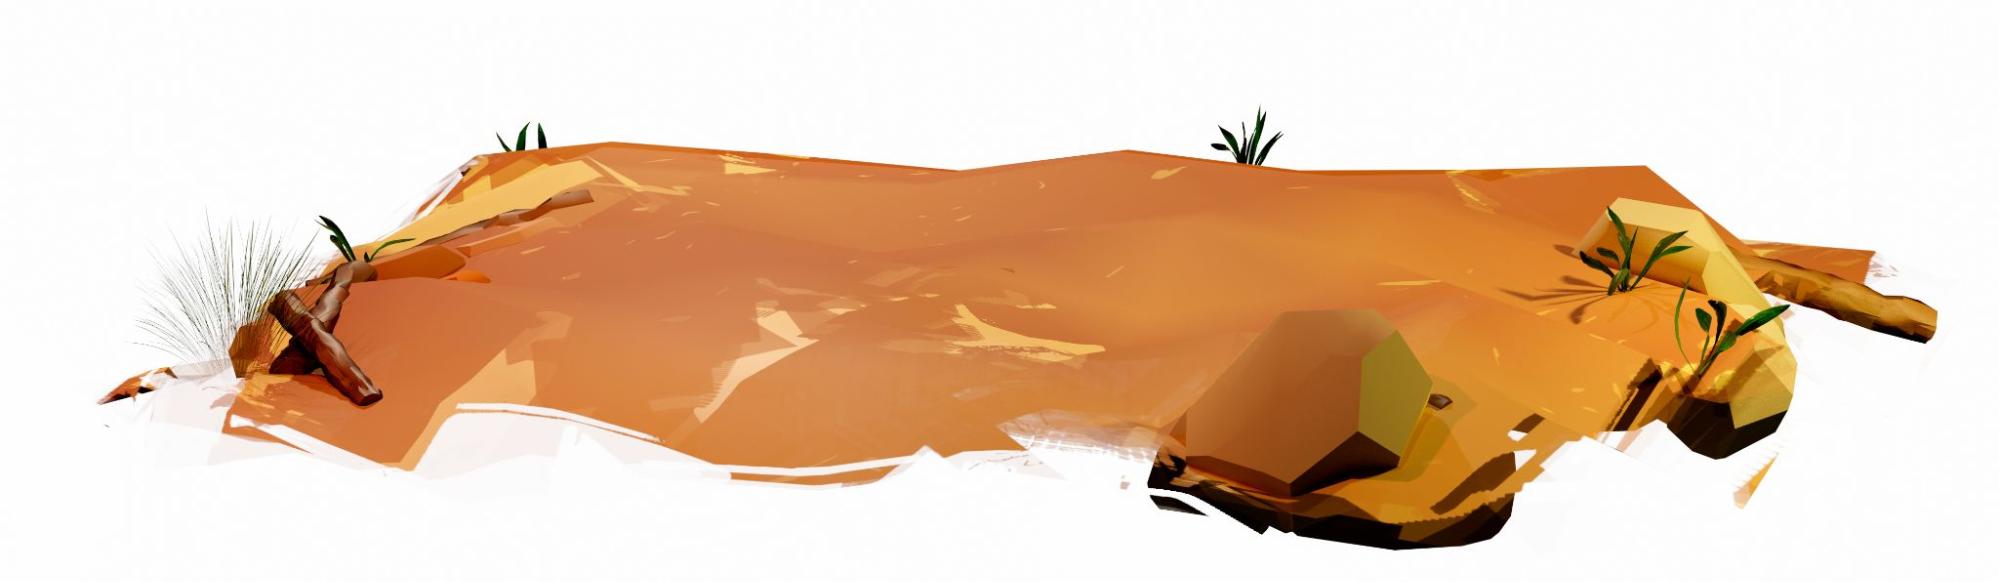
For me, the most interesting part of the work was on the textures, and I'll tell you about the process in more detail, using the landscape as an example.
I ran across the method for creating a dynamic base color on Instagram a long time ago but I didn't use it then. I'm very sorry that now I can’t find or recall who shared it.
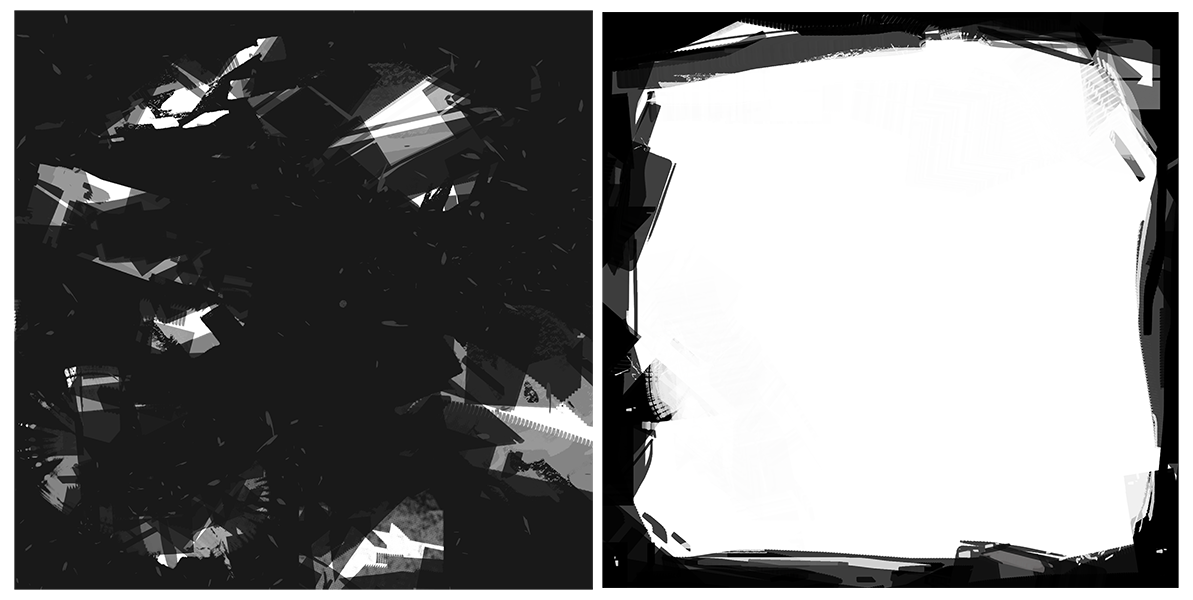
I decided to add a mask texture to the alpha channel to the base shader. To create the style that I wanted, I painted the mask with custom brushes, painting with black where the texture would be transparent, and white where it would be visible.
After that, I wanted to have strokes on the color itself, as if I had painted this landscape a little carelessly. To do this, I made the second image a mask on the same principle, painted with white where the strokes would be.
After that, I created another shader, choosing a different color from the base color and connected both shaders to the mix shader node, where the defining value was the image mask.
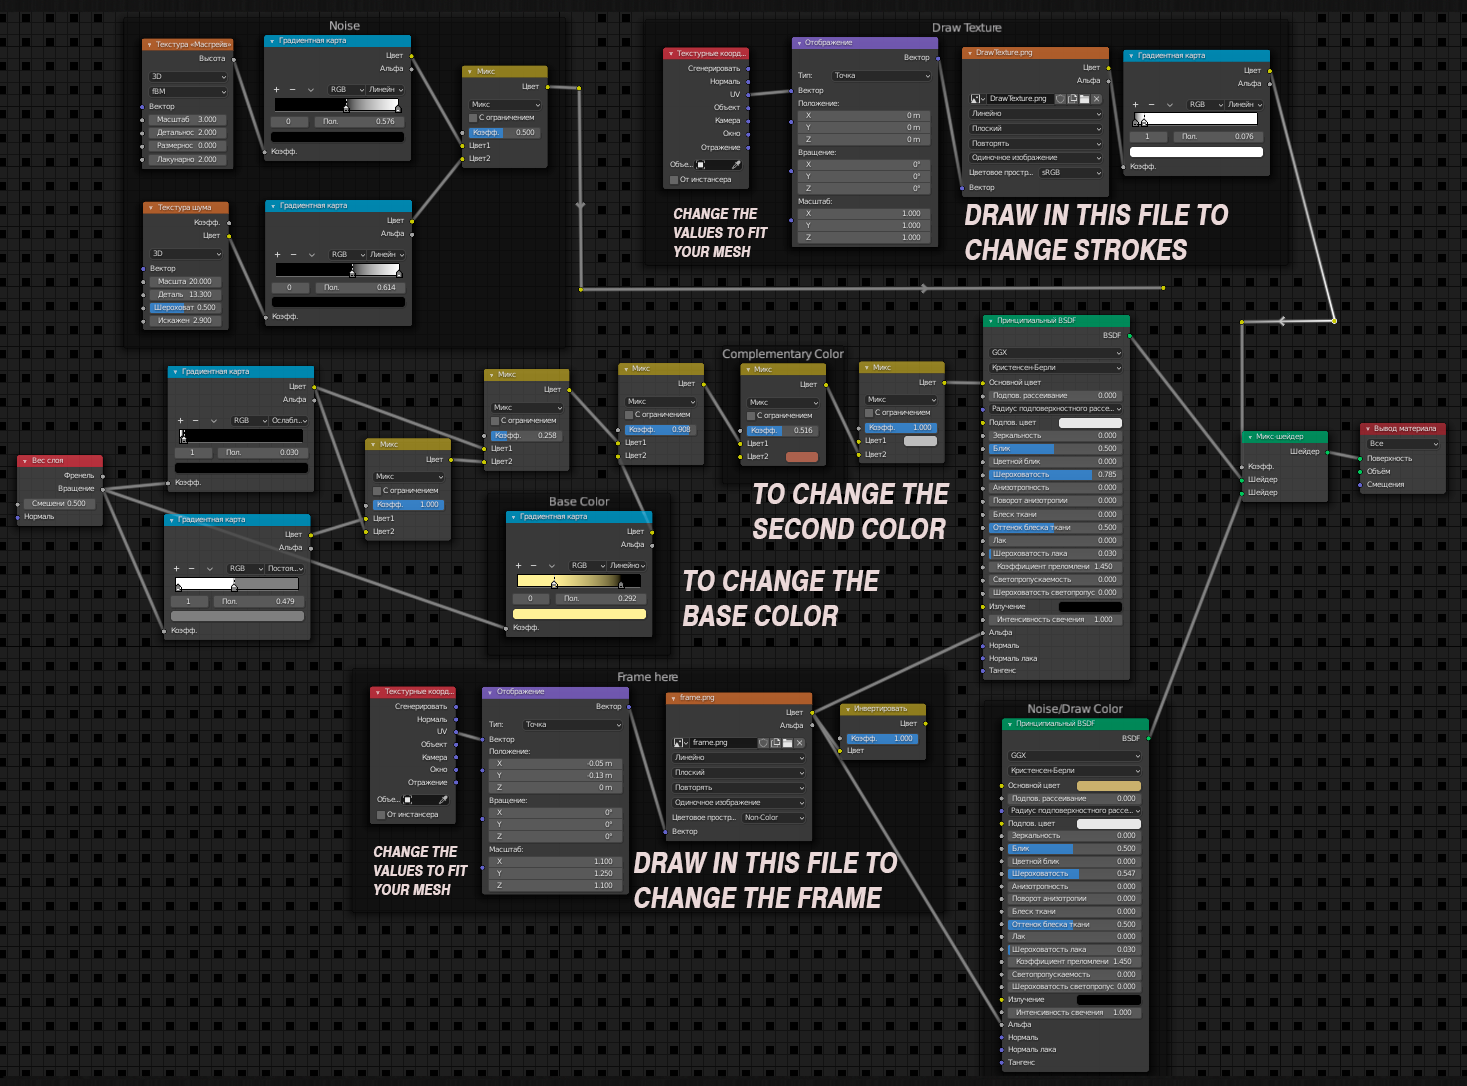
Then this material can be duplicated on other meshes by removing the image from the alpha channel so that the transparency is not everywhere, for example, on rocks and trees it is better not to use the alpha channel. This method seemed to me much easier than drawing a separate texture for each element, so I just changed the colors and roughness in the nodes and sometimes adjusted the shape of the strokes, getting different results each time.
In order for the texture to be displayed correctly, the UV scan needs to be positioned at the right place on the mask, or the coordinate nodes can be used to change the position of the mask image.
If your model has good UV unwrapping it makes it much easier to place the mask image on the mesh.
To make it easier to work with this material for those who want to try to make such a material, I created a Blend file, where everything is ready, and it only requires changing the values of the nodes, and the images of the masks, to get a unique result and new experiments. This file can be downloaded for free on Gumroad.
Final versions

About the Author
 Alexander Volodkin, 3D and 2D Artist.
3 Comments
I downloaded the .rar file twice, and neither downloads could be opened by the archive software I'm using. Did *anyone* have success with this?
Yes, I was able to extract the files. Downloaded from inside M'soft Edge browser. Double clicked on it once downloaded and it was automatically extracted with a prog called BreeZip that was installed by M'soft. (Never heard of it before).
Thanks for the file and all the work. Looks interesting. Still pretty much a Blender noob myself but this is the sort of thing I want to be able to create.