
About
My name is Bo Cheng and I am a 3D artist working at a game company in Stockholm.
My daily job is actually not making characters for games, but it is really fun for me during my spare time.
I took a half-year training course from a CG company in China, then worked as a 3D artist for 3 years. After that, I moved to Sweden and completed a game artist educational program at a vocational university called Futuregames. In the end, I found my dream job: a game artist. It has been over 5 years that I have worked in the video game industry.
Inspiration
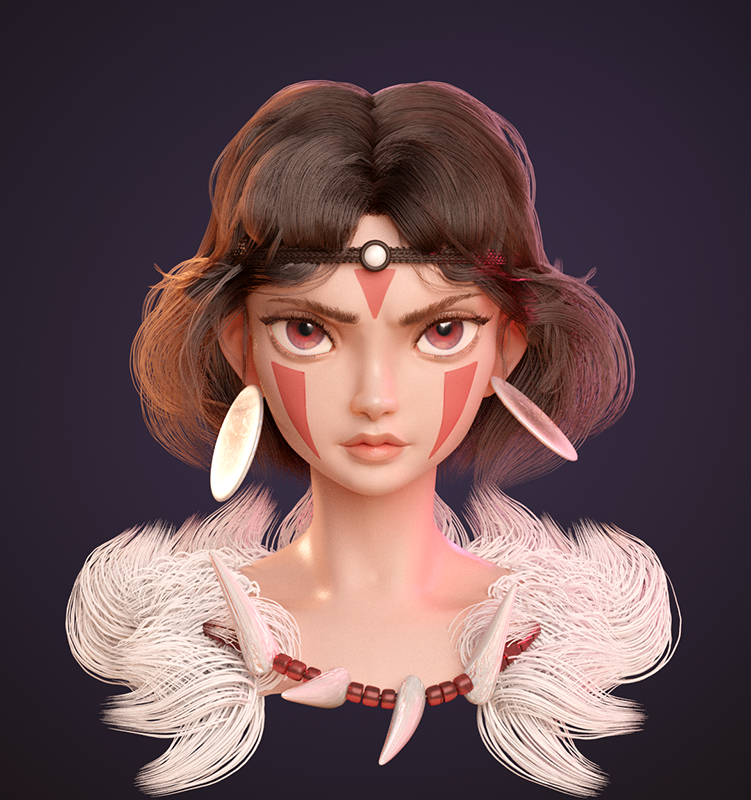
The idea to make this model was in my mind for quite a while. In fact, the concept art is from the artist Mijin Jeon. When I first saw Mononoke by her, I said to myself that I need to make it in 3D with Blender one day and test Blender’s hair system. The hair system has improved a lot over the years and I had not yet had a chance to play with it.
Workflow
For this model, I started from a base mesh I already had. To be honest, it took me quite a long time to reach a satisfying result. In the process of making her head, I readjusted her eyes, nose, and lips several times.

I was fond of using Shape Keys tool to sculpt and adjust the face because they let me go back and forth quickly to compare the differences. For this model, I skipped making the high poly mesh because the low-poly mesh gave me good enough structure for the final version. But if you ever need to do retopology, I recommend trying the RetopoFlow add-on to speed up this step.

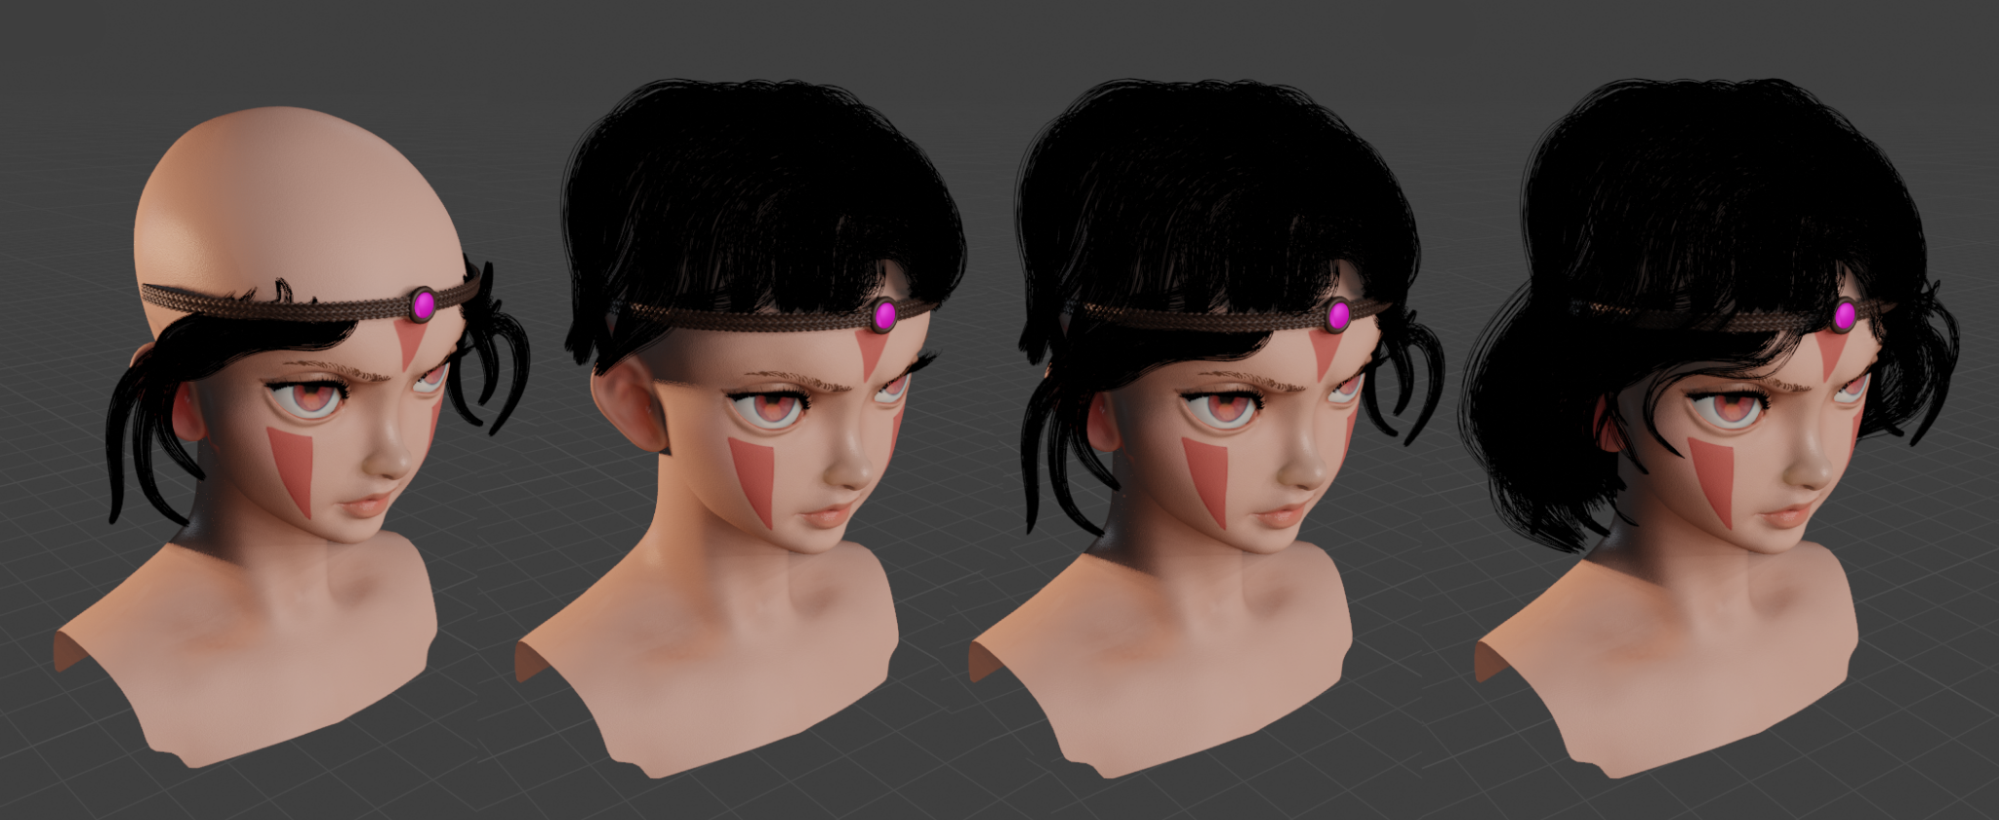
Before I experienced Blender’s hair system, I watched a hair-making tutorial by Nazar. That’s a really helpful tutorial and grouping a character's hair makes it simple to control. However, in my case, she had a headband, which made it kind of difficult to keep her hair bound.

Then I got the idea to separate the hair into two parts: the upper and the lower part. Her headband was essentially a border between the two groups. In this way, styling her hair became much easier.
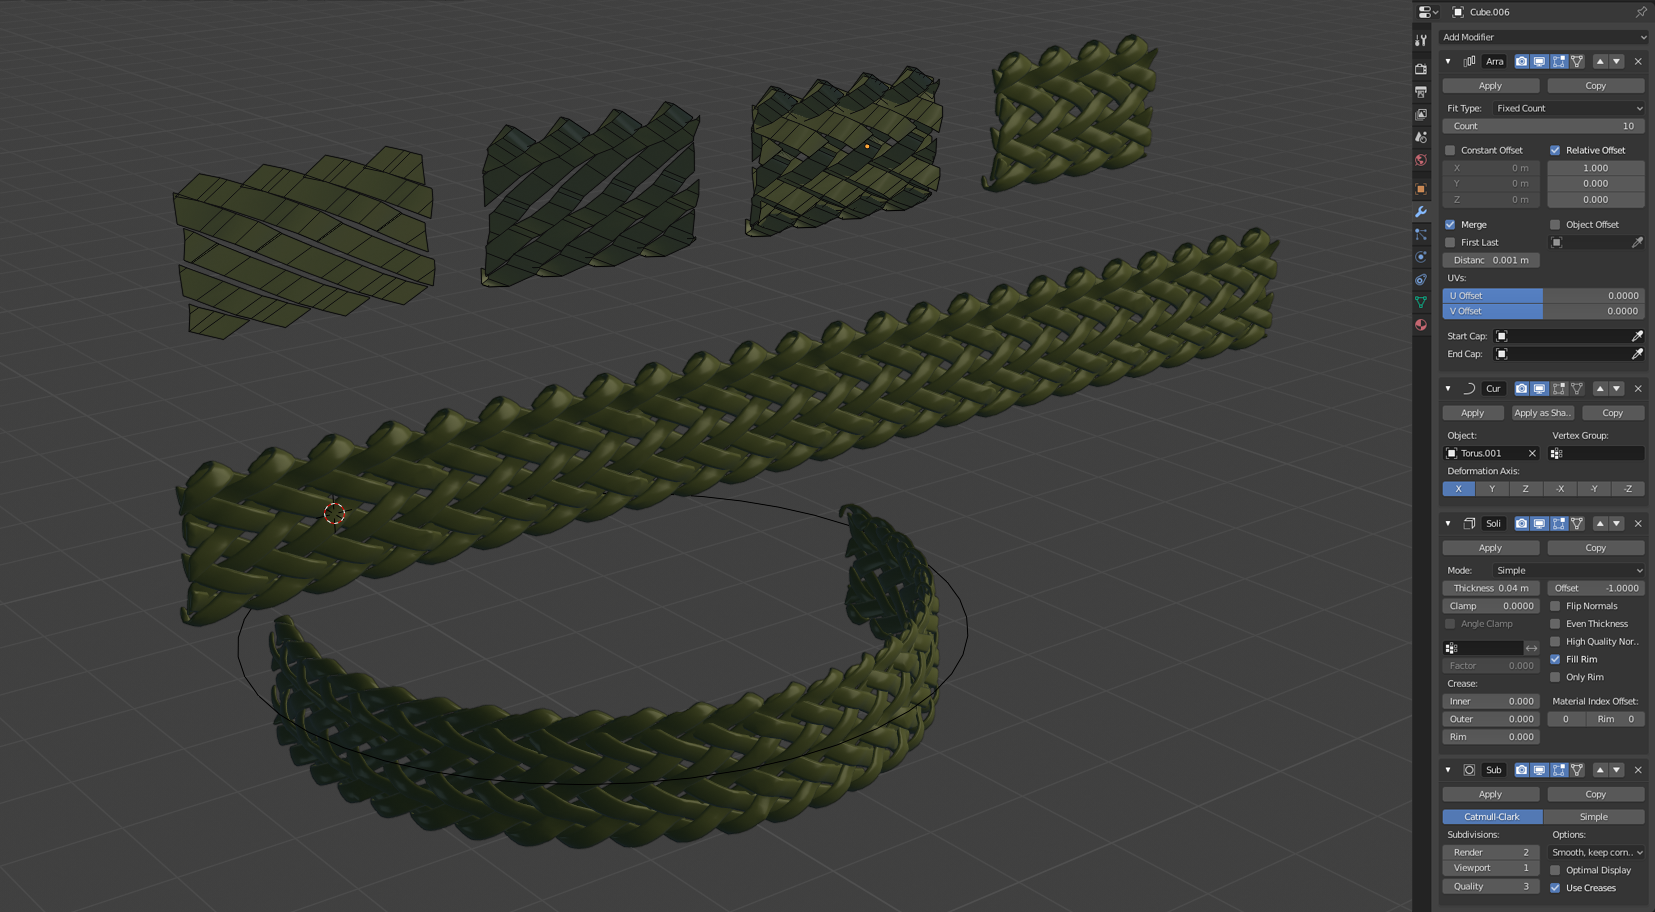
To make the headband, I added 3 modifiers which were my favorites: Array, Solidify, and Curve. In order to make it smoother, I added a Subdivision Surface modifier at the end.
Complete rendering
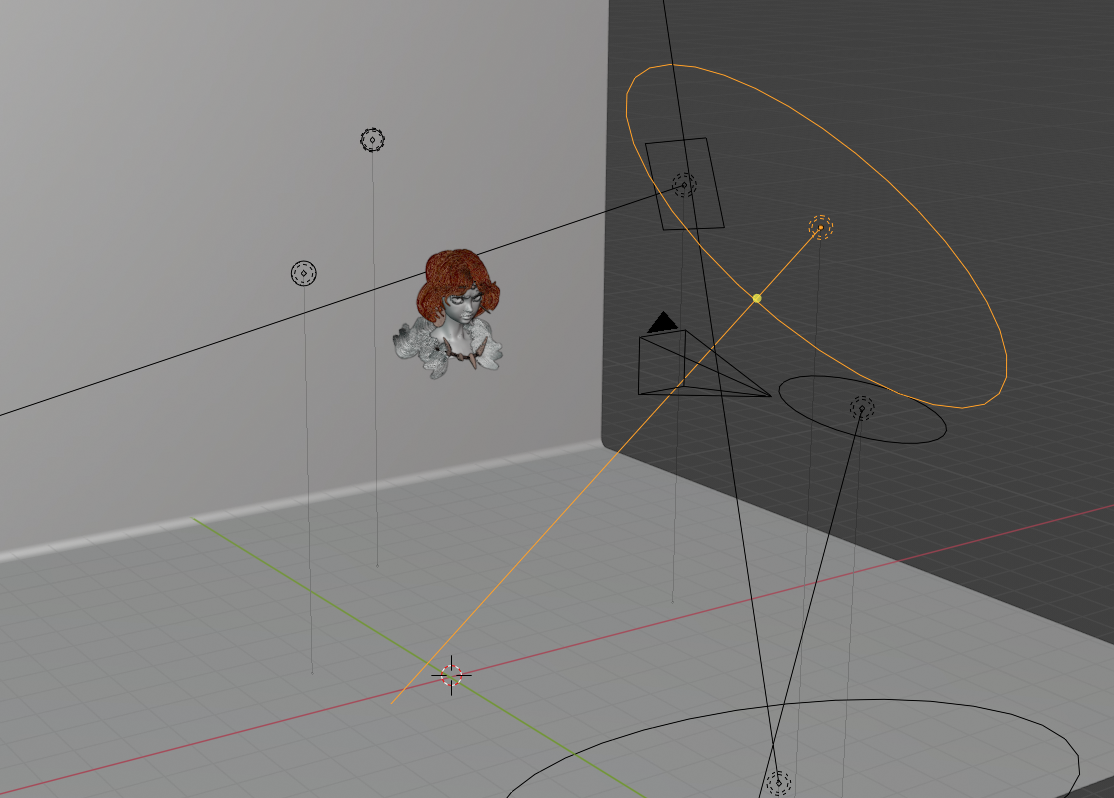
I had one main light for this scene and two lights behind her head (lighting up the hair and giving volume to it). Altogether I used 6 lights to light up this scene. Although I am not a professional lighting artist, with the help of render preview (real-time), I could quickly adjust the light settings and see the results.
The Cycles engine was used for this scene. Even though I loved the EEVEE engine so much, I needed the Principled Hair BSDF shader to get the best result on the hair. For me, it was quite boring to wait during rendering. But I must say, it was worth waiting to get a satisfying render result.
Conclusion
This is just my own workflow and it may change depending on the art itself. The whole process is mixed with fun and pain. Luckily I have learned a lot from this experiment. One thing I have learned is that good reference images are indeed vital during the process. And if you are tired from your work, just have a good rest and get your energy back.
It would be cool if my experience could give some help to you. Big thanks to BlenderNation for giving me a chance to share the story behind this scene.
I would like to make more character art and explore my own art style. So if you want to see more in the future, please follow me from the links below.
About the Author
 Bo Cheng, 3D Artist
5 Comments
You live in Sweden? What was your inspiration for female character? Agnetha from ABBA?
https://youtu.be/GroJ-OiV-EU?t=137
Hi Vlado.
Haha. Not Agnetha. But she is pretty and great singer too. Yes, I live and worked in Sweden.
Love this! Thanks for sharing your process.
Thank you. My pleasure to share it with you.
Art like this one makes you wonder how much longer before Blender becomes the industry standard! Mononoke is a delight to see!