
About me
Hello, My name is Andrew Karpylenko, I am from Kiev, Ukraine. Currently, I am working at Ubisoft Kiev.
I am 28 years old and a self-taught 3D character artist. I have been doing 3D professionally around 5 years, but I first encountered it more than 10 years ago. From the very beginning I wanted to make characters, bring them to life.
I think Harry Potter and the Lord of the Rings had a big influence on me and on my taste in characters. I really love to make fantasy creatures and faeries.
Inspiration
My inspiration for this work was art by Bobby Chiu based on the concept by Iris Compiet.
My plan is to make more faeries and creatures this year as part of some type of fantasy series. :)
Tools
For this work, I used Blender for sculpting, modeling, rendering (Cycles), and also for video editing. All textures were done in Substance Painter. Some final touches and background were done in Krita.
Sculpting and modeling
I made a simple low poly base mesh to start.
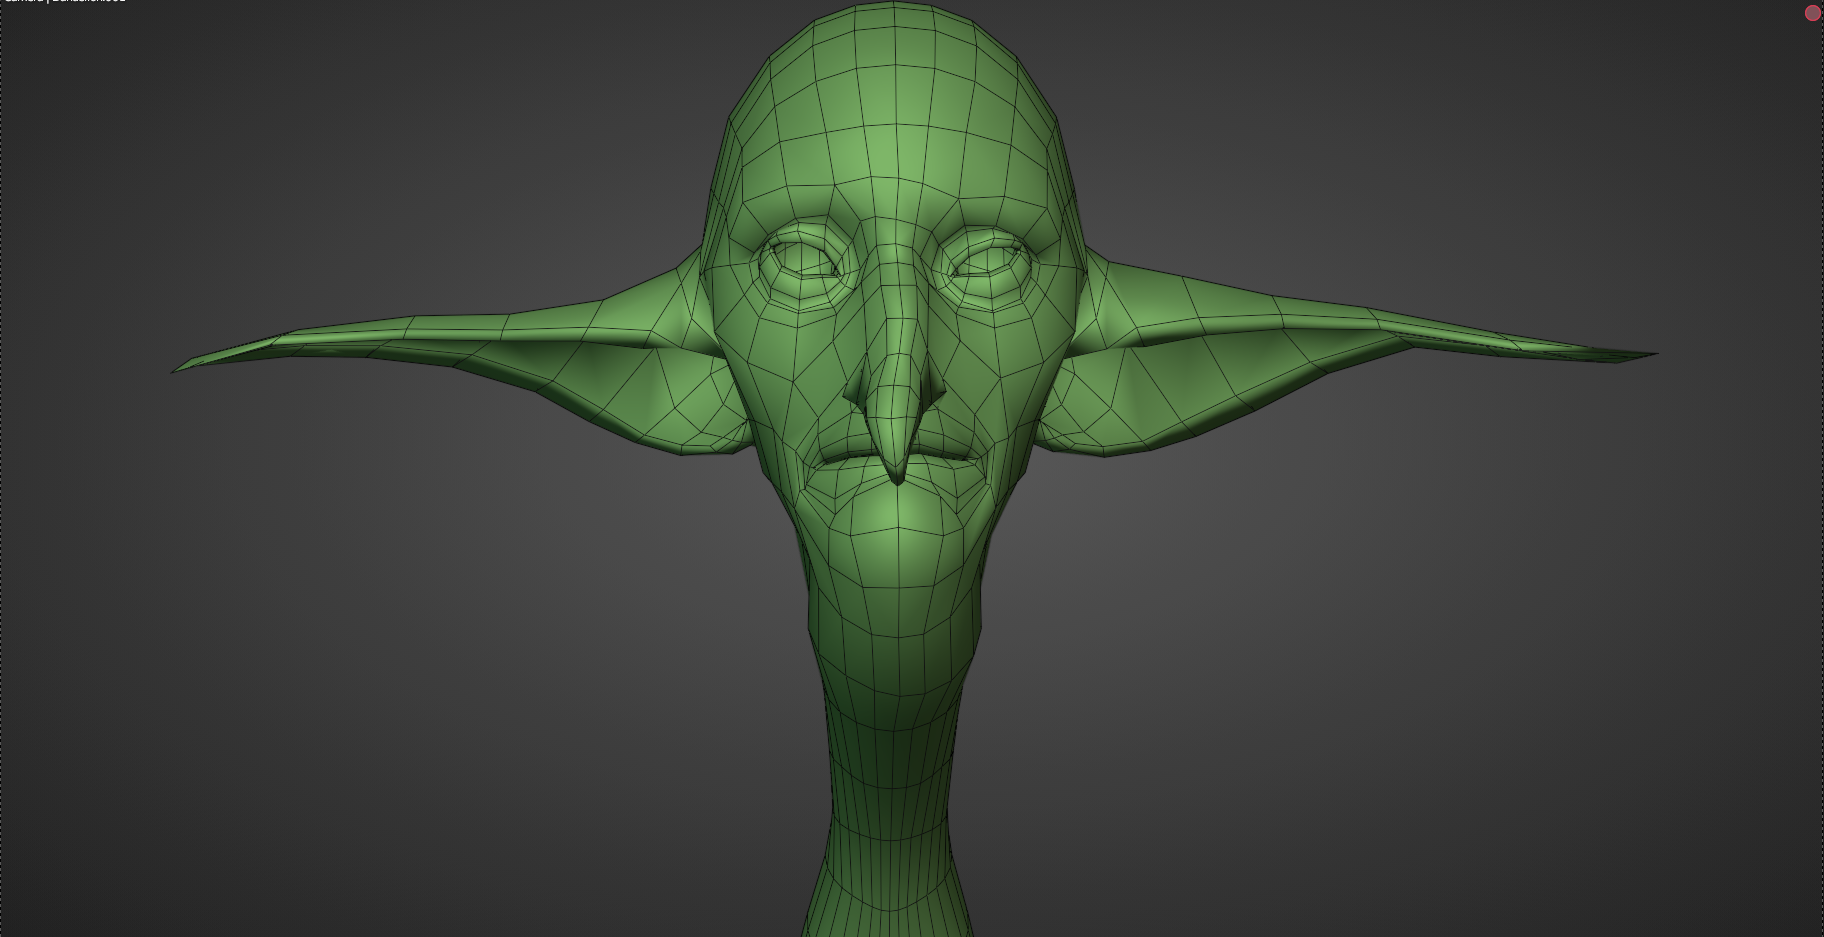
My final topology is the same as the base mesh, just subdivided a few times.

I added a Multires modifier and started to sculpt it.
My final sculpt looks like this:


After the sculpt was done, I did the UVs for it. It has 5 UDIMs for the base body and a few UDIMs for the remaining parts.
For the flower, I created 3 collections with some variation in each of them. I also added some hair to the flower to give it a more interesting look.
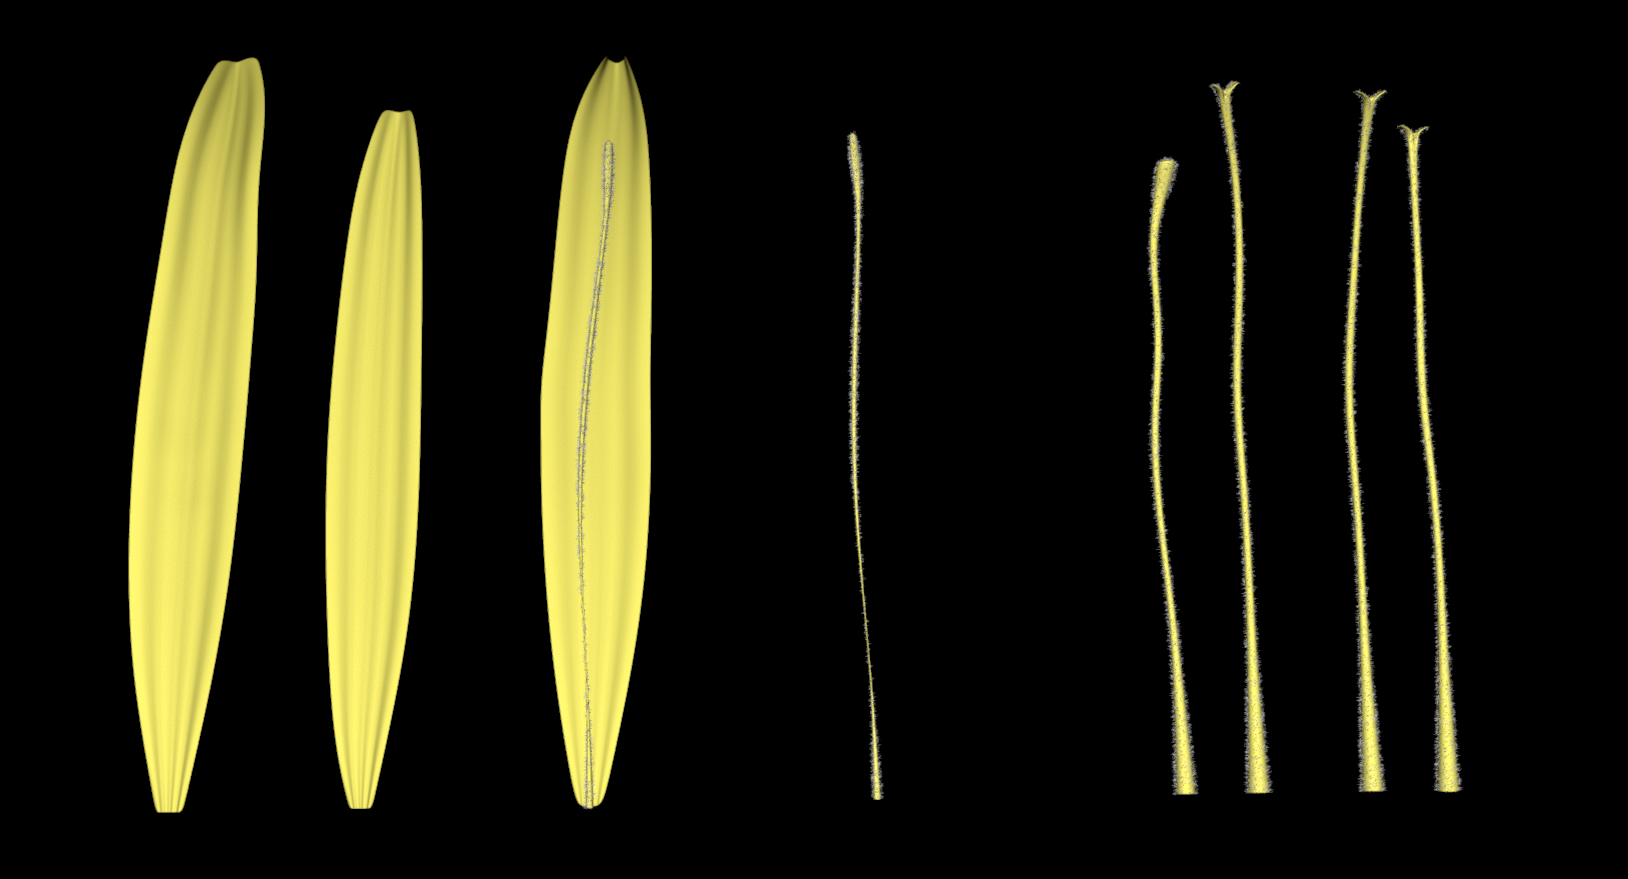
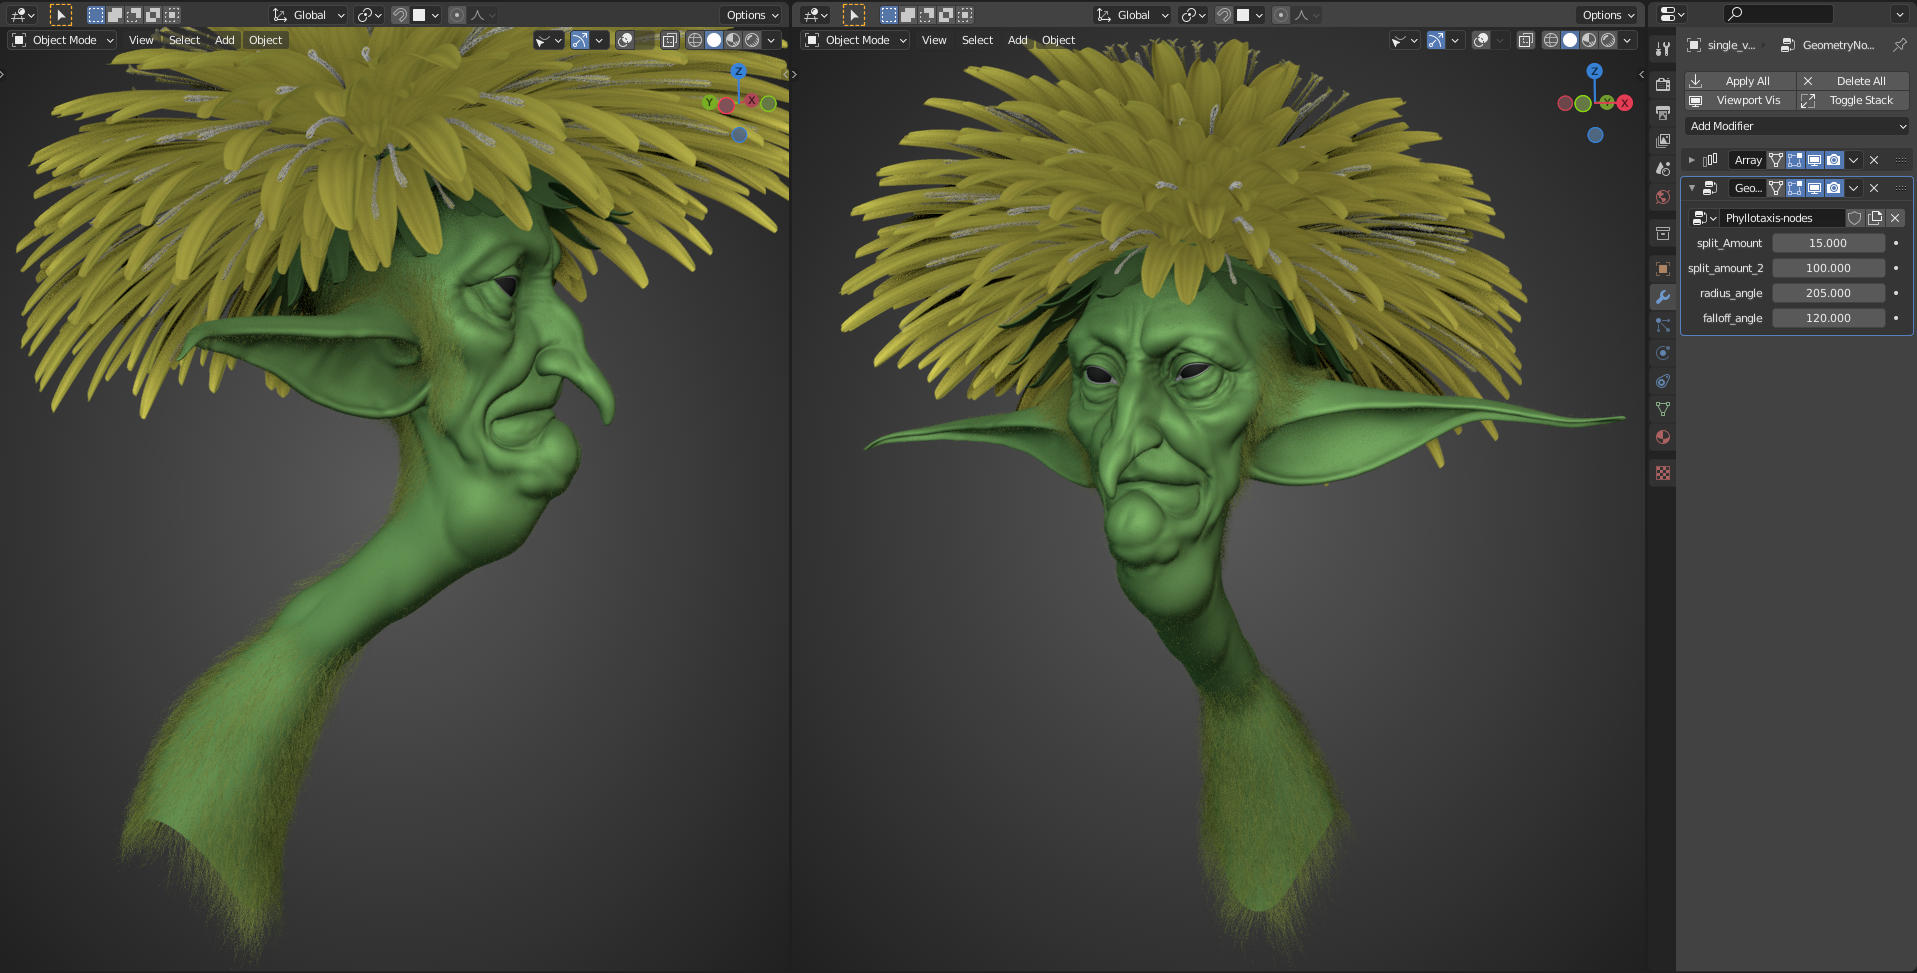
One of the reasons for this work was to test geometry nodes in Blender 2.93 and to learn the new workflow and possibilities that it offers.
Thanks to erindale.xyz and Benny Govaerts for sharing their nodes examples—they were very helpful. You can read more here or on their Twitter accounts. I recommend subscribing to them, they do amazing things with nodes.
I modified their nodes examples to make 2 types of petals (the ones in the middle of the flower and the rest). I used an index attribute to mask the type of petal begins to change.

I also added a hair particle system to create the hair style and the small hairs on his body.
Here is the final result in Blender.
Texturing and shading
I like to paint skin textures from scratch. The amazing YouTube tutorials by Magdalena Dadela have been a big influence on my texture workflow. I recommend watching them. This one has been the most useful for me, but there are a lot of other videos on the channel.
For this work, I decided to make small details in Substance Painter. I used some xyz materials that come with Substance Painter and I also used some custom brushes with alphas.
Here is how it looks, step-by-step.


Final close up:

Here is how the skin base colors look, step-by-step:


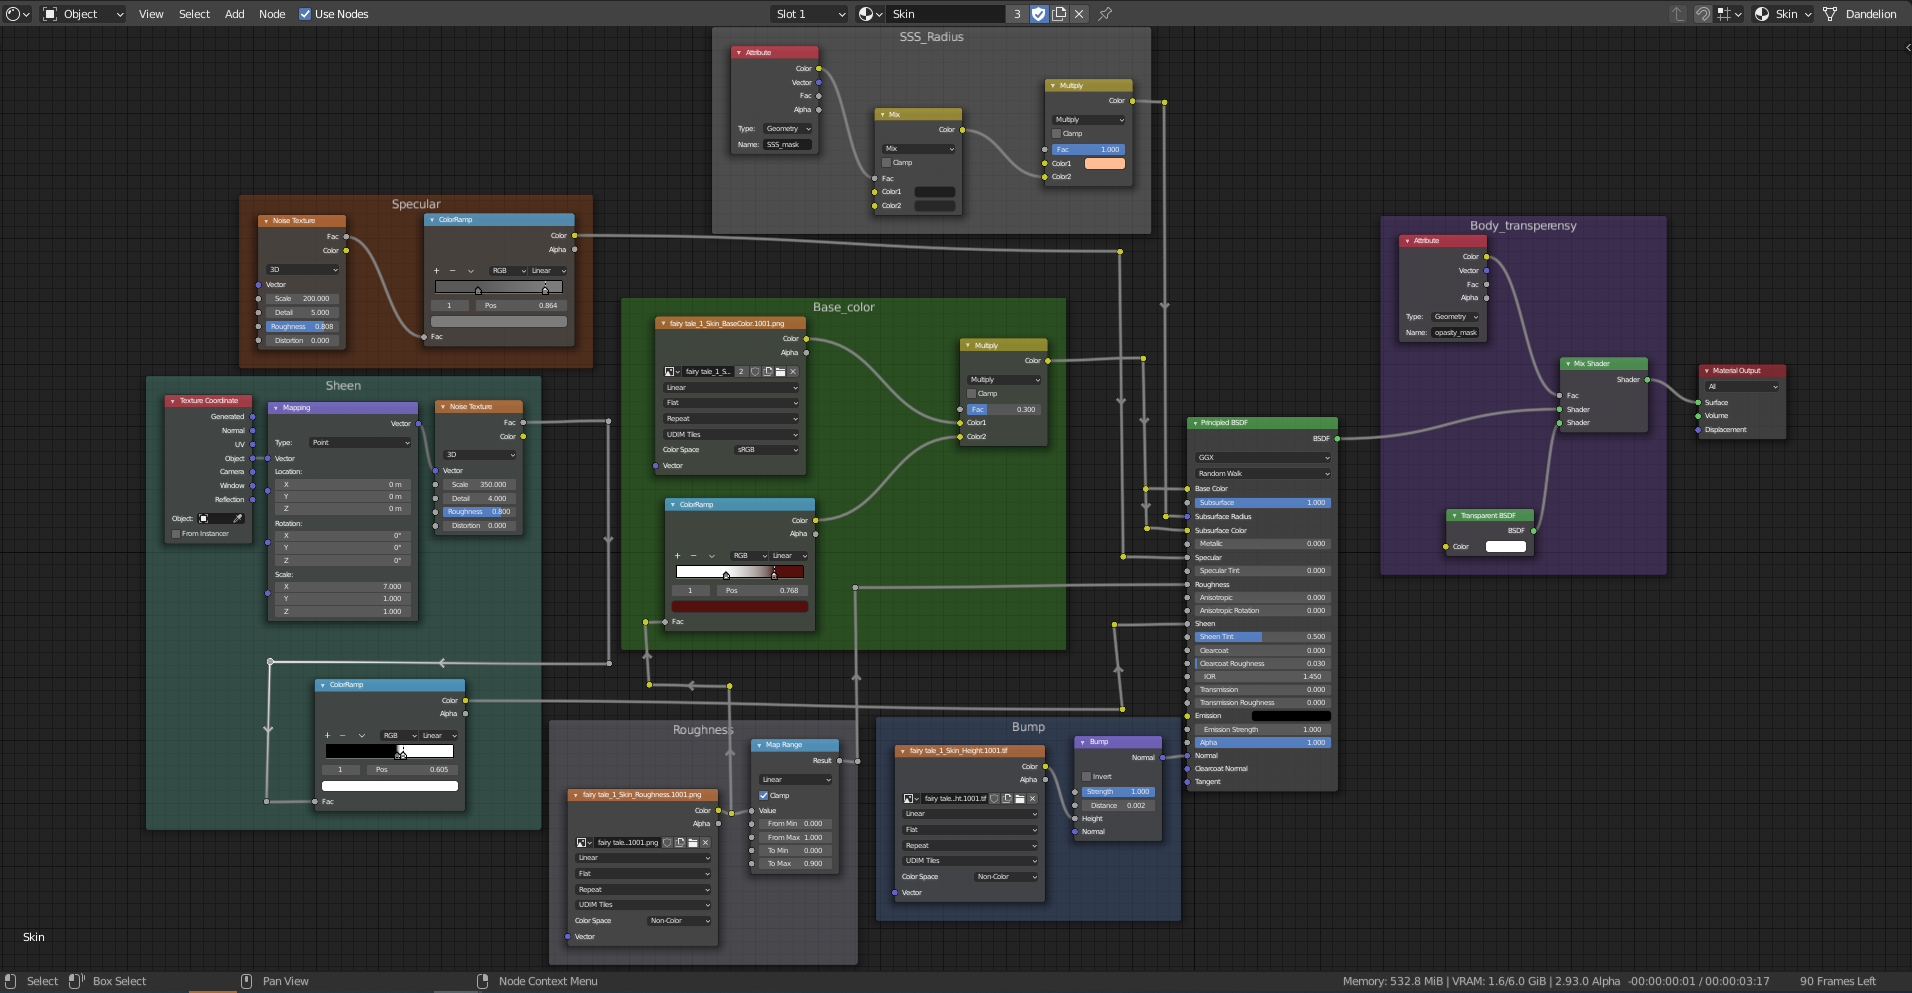
Shading
There is nothing complex in the shading—I prefer to make it as simple as possible. For each camera, I set custom lighting. I like how contour lights illuminate hair, making it look so much better. :)
Here is the skin material:
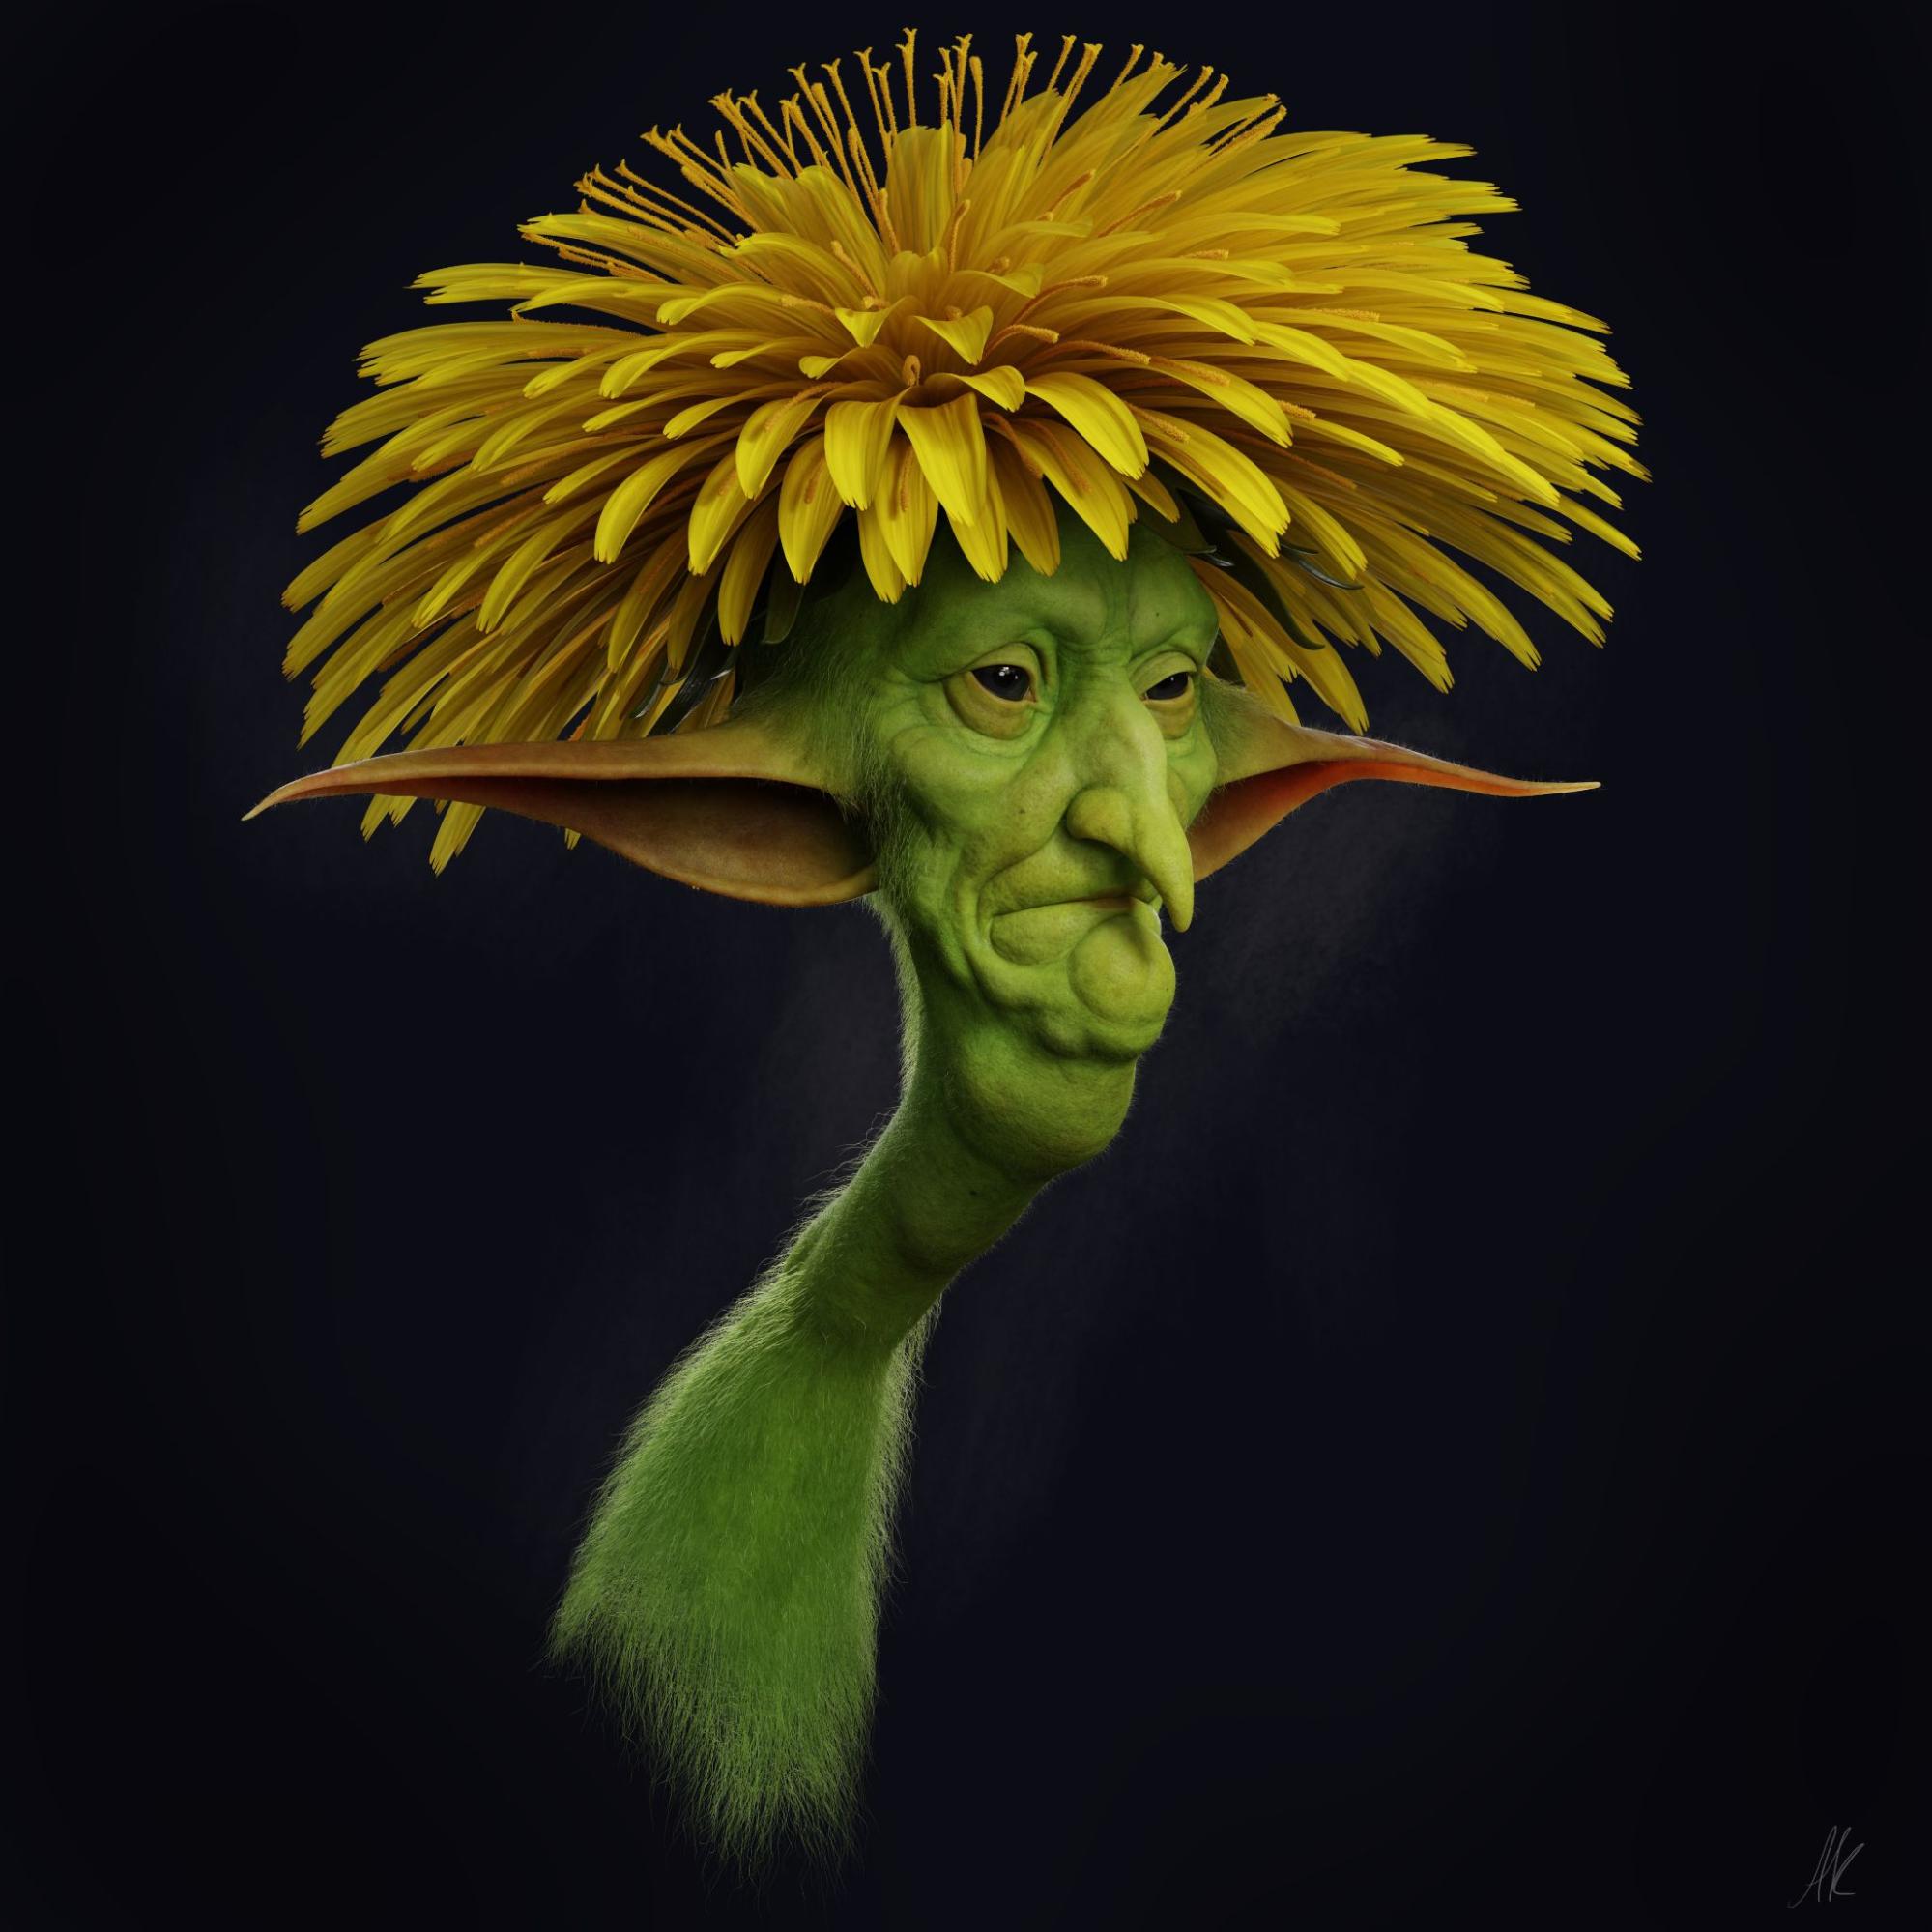
Final render
About the Author
 Andrew Karpylenko, 3D character artist.
4 Comments
very nice
Very well done. At first I though it was inspired by Brian Froud and his book "Faires".
I'm impressed. I love all faery's. :)
I remember seeing this on BA and thinking it was amazing, thank you for the breakdown.