
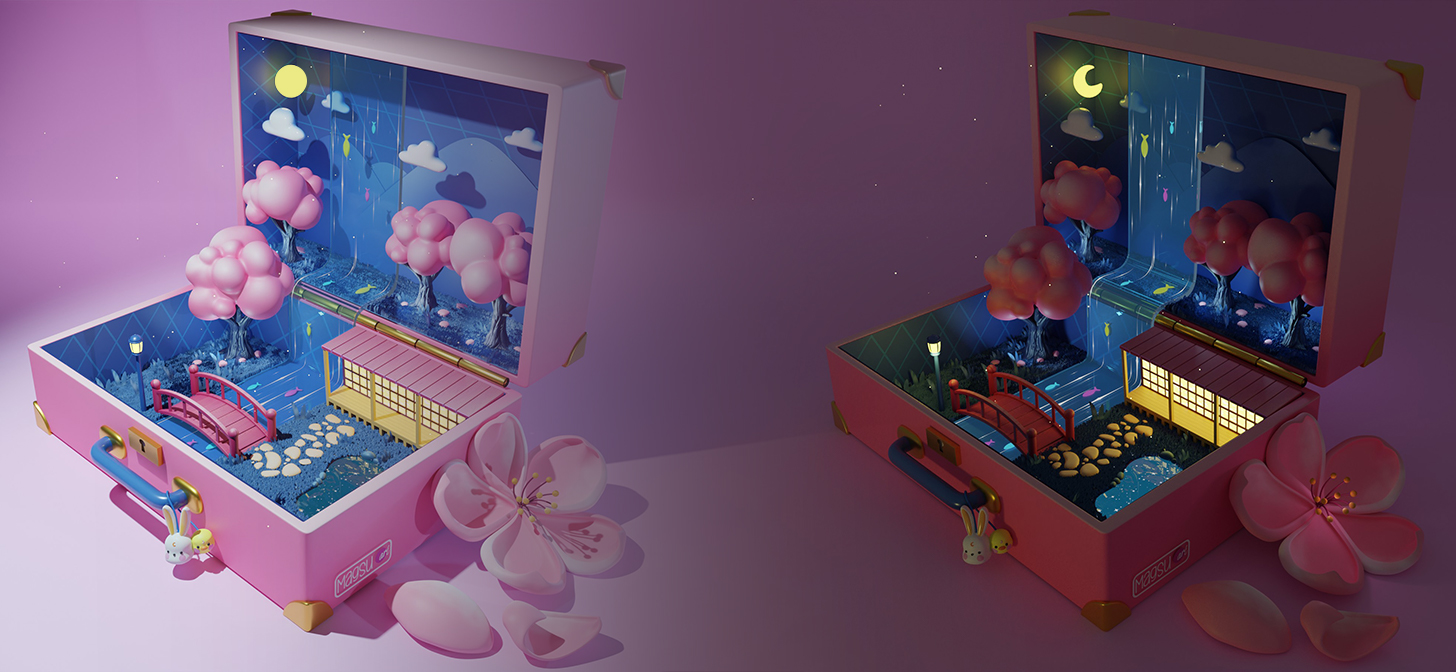
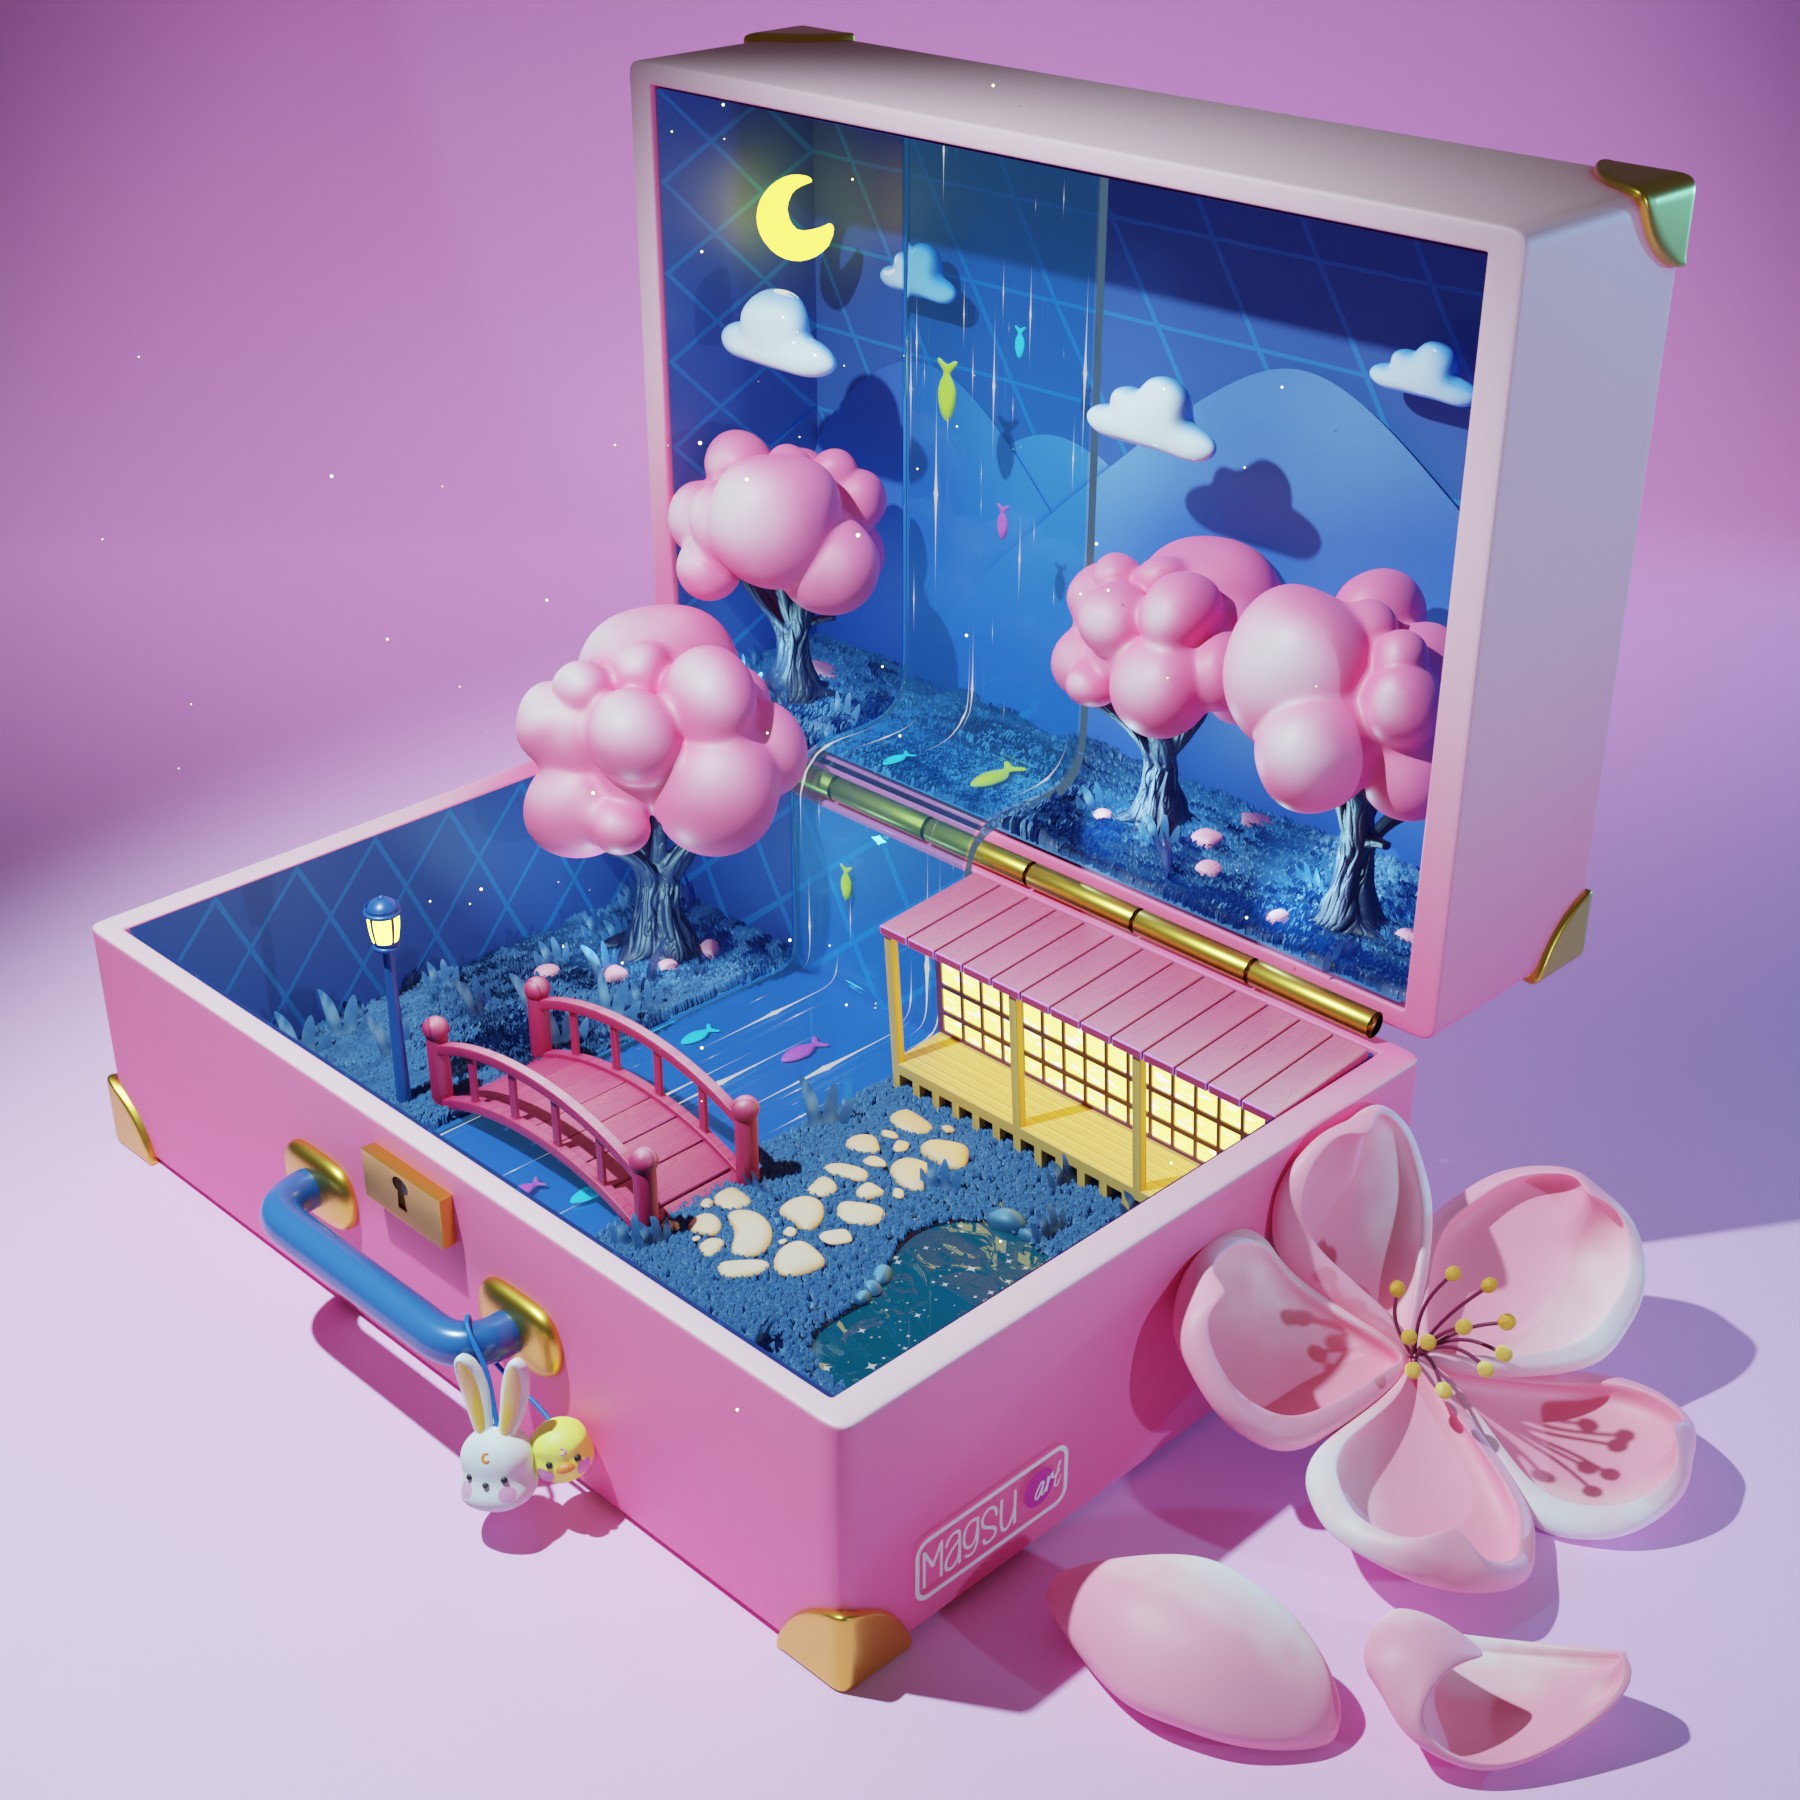
Behind the Scenes: Travel Suitcase
About me
Hi, I’m Magali from France. I am a school teacher who has always used visual arts in my pedagogy to make learning more entertaining and memorable.
I began learning HTML5/CSS3 in 2011, then Photoshop, VFX in After Effects, and editing in 2017. Two years ago I continued my journey by adding more skills to my toolset, especially 3D modeling and animation, Python, C# programming, and game development with Unity. I’m now learning Machine Learning to apply Artificial Intelligence to visual arts, as there have been groundbreaking advances in recent research.
[sponsor id=’qarnot’]
I’m currently participating as a designer in a project to build a new kind of AI-based learning experience.
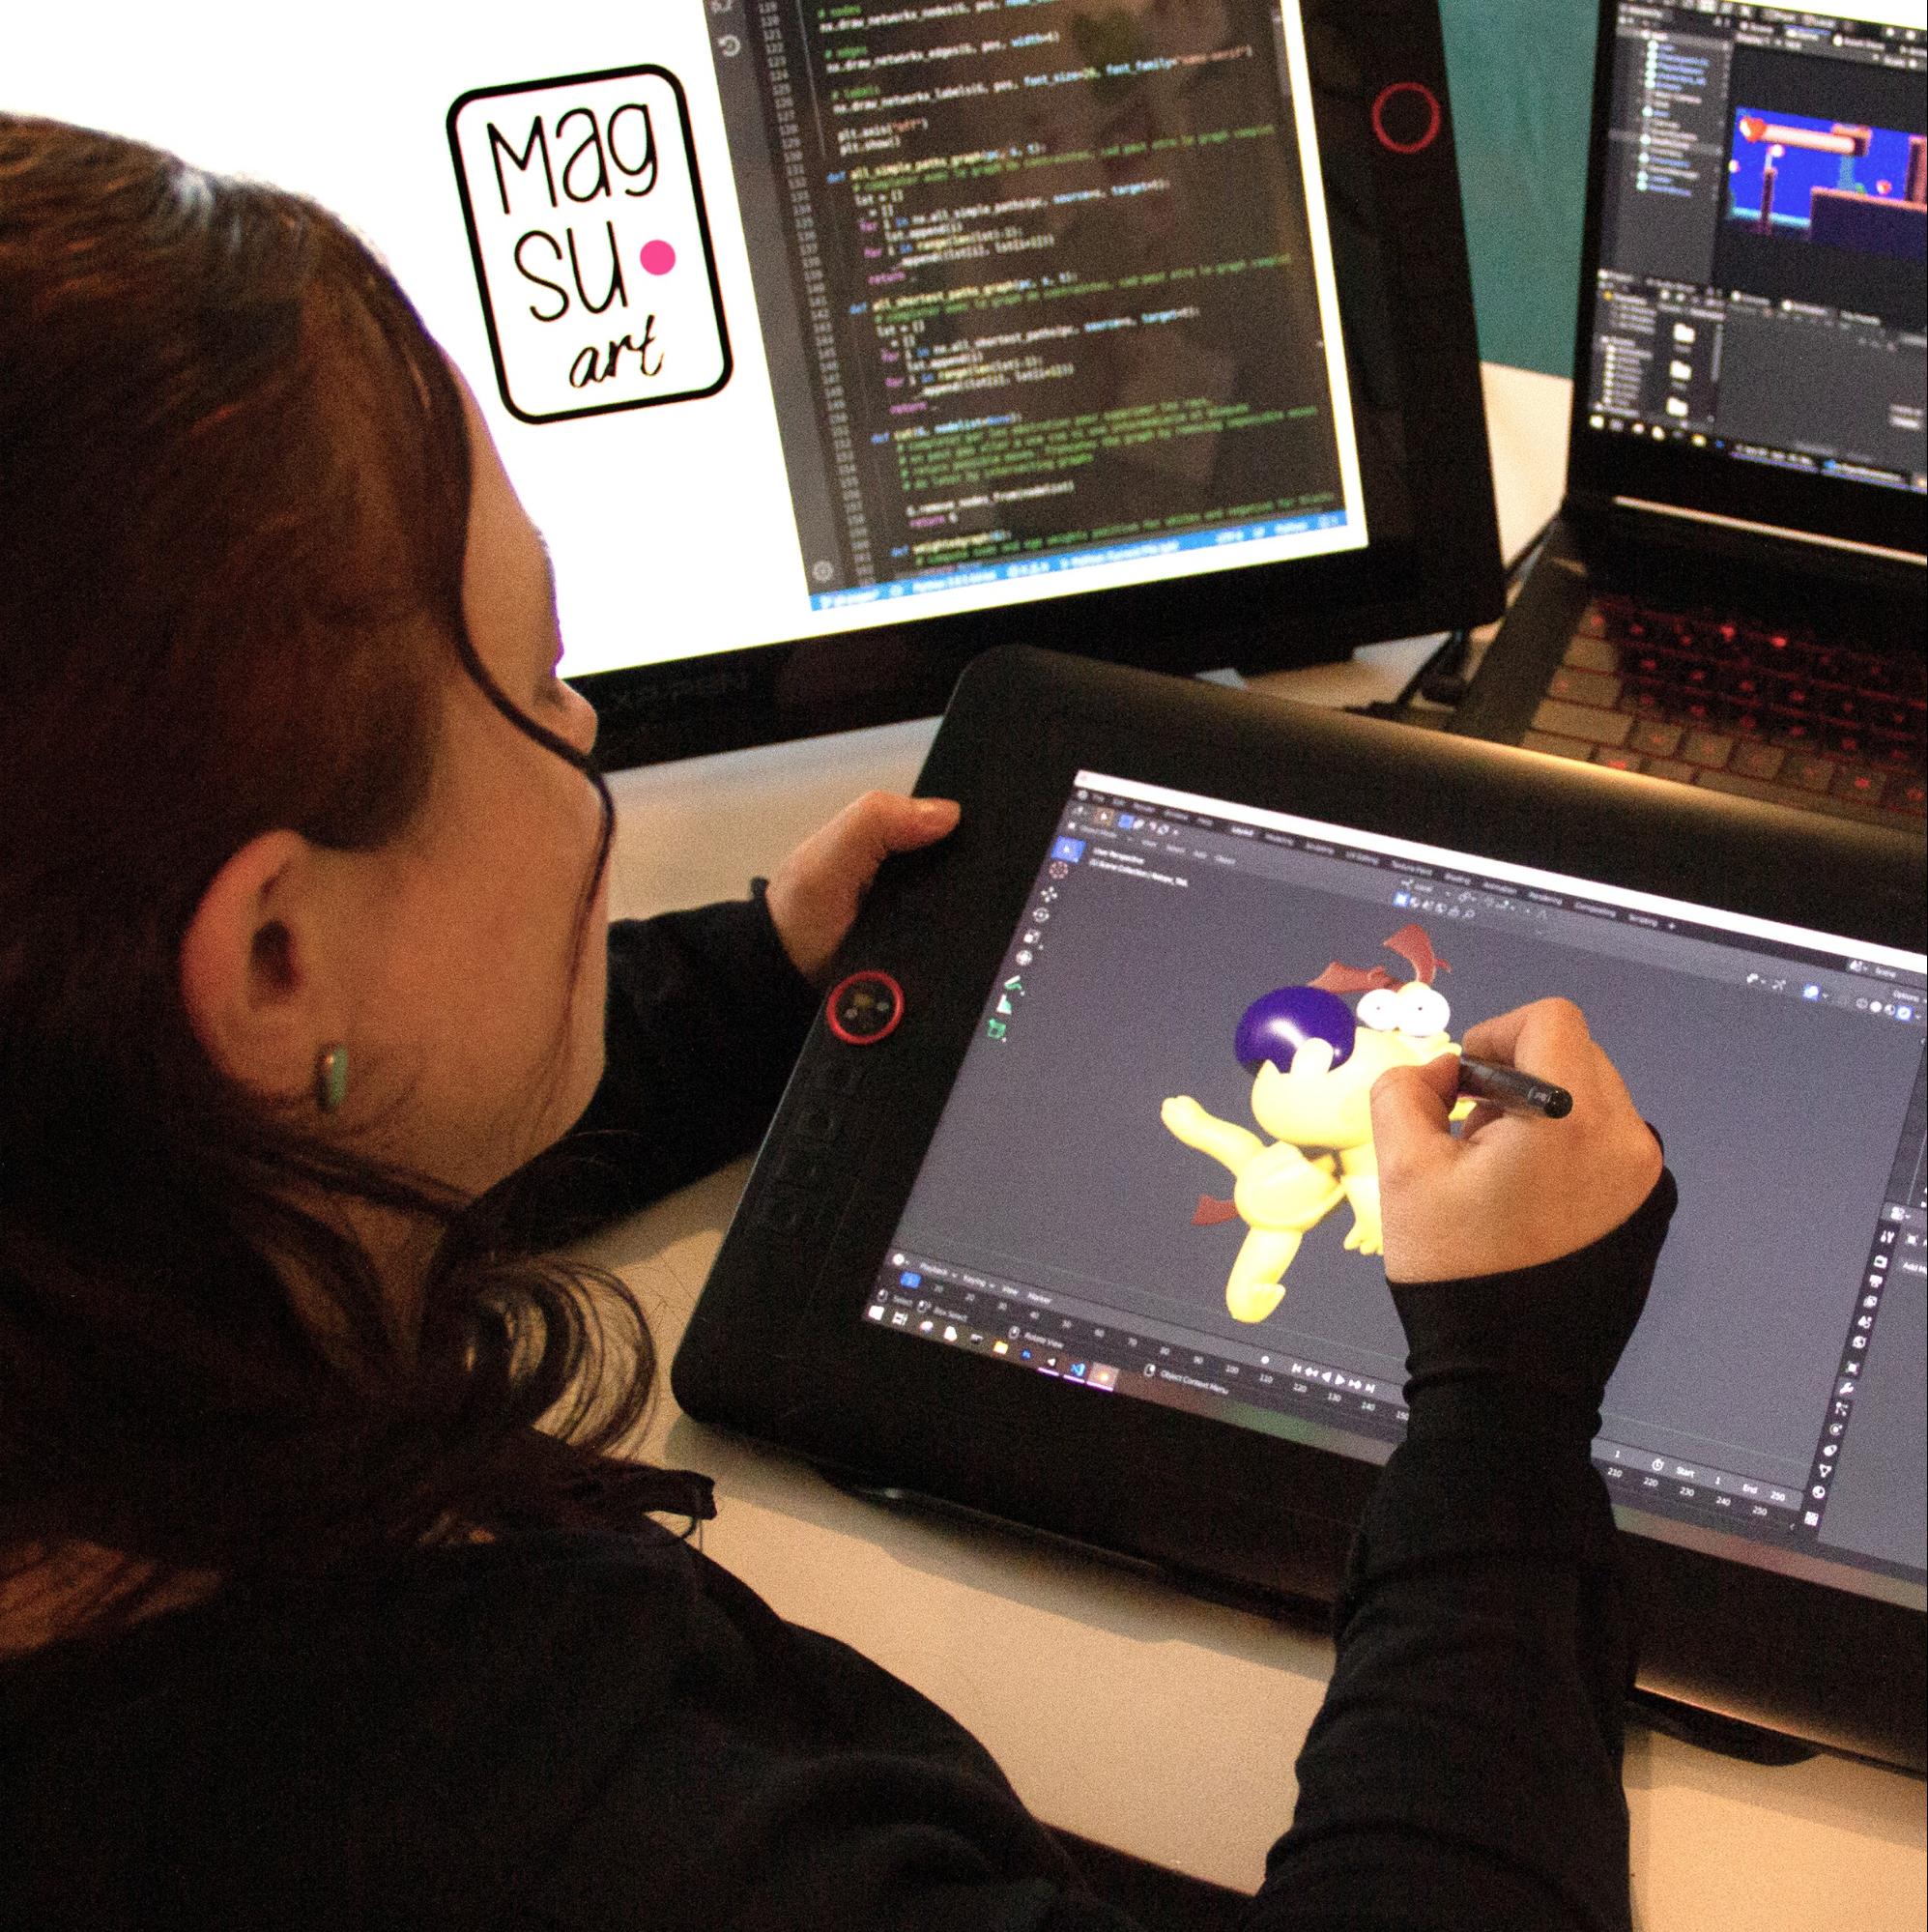
I use a modest MSI laptop with NVIDIA RTX 2060 and also two affordable yet great XP-Pen Display tablets: an Artist 24 Pro and an Artist 15.6 Pro that I mostly use for drawing with paint tools and for Blender jobs like the one in this article.
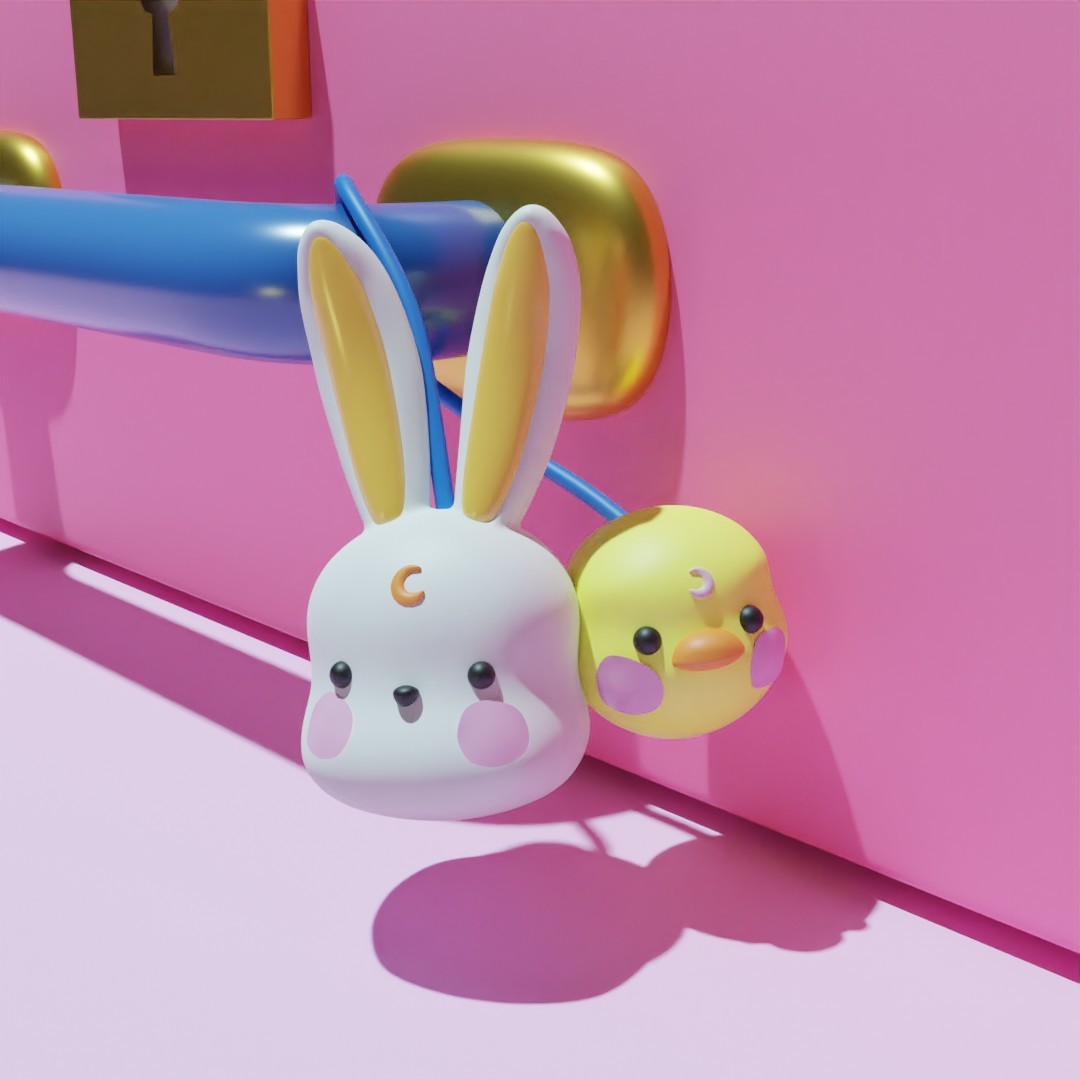
I found @little.yeah’s awesome drawing on Instagram and took up her Draw This in Your Style challenge.
View this post on Instagram
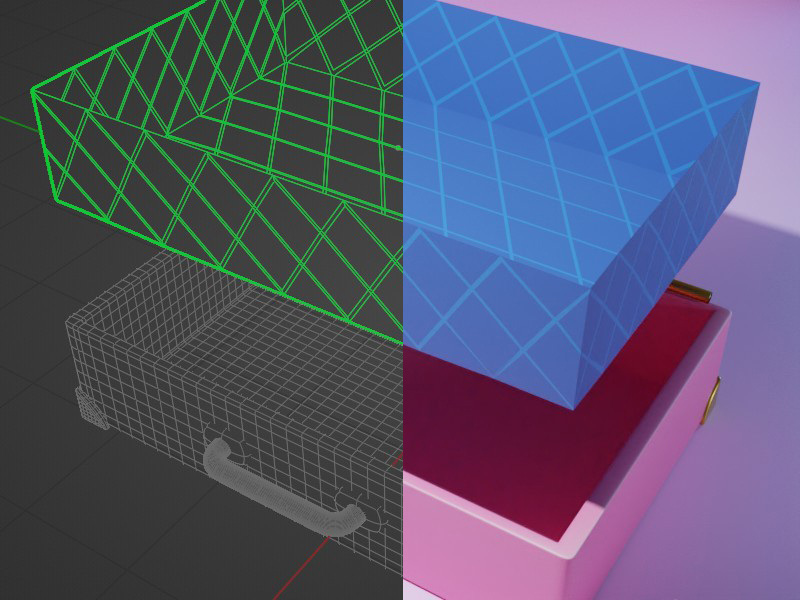
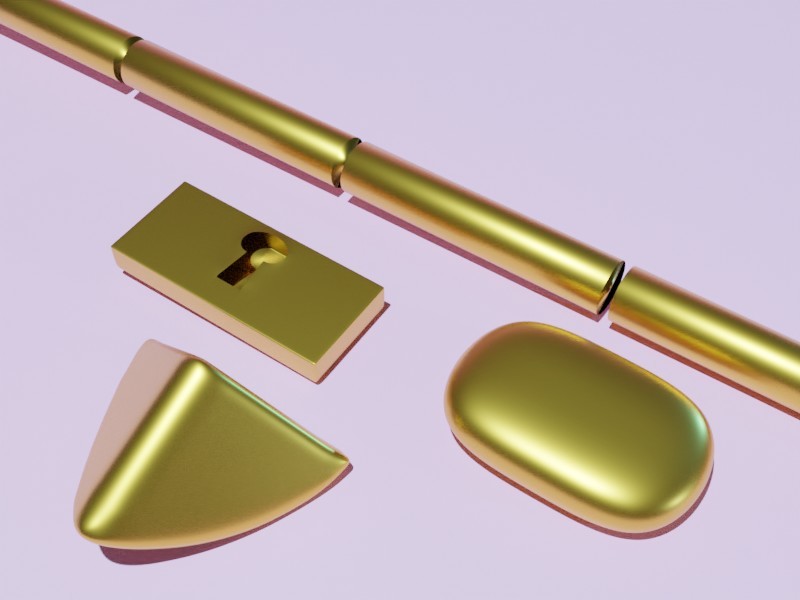
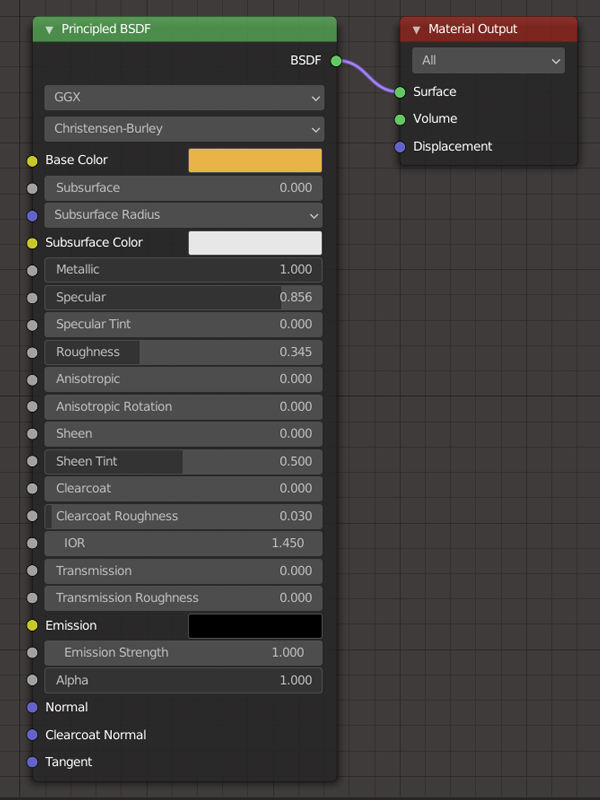
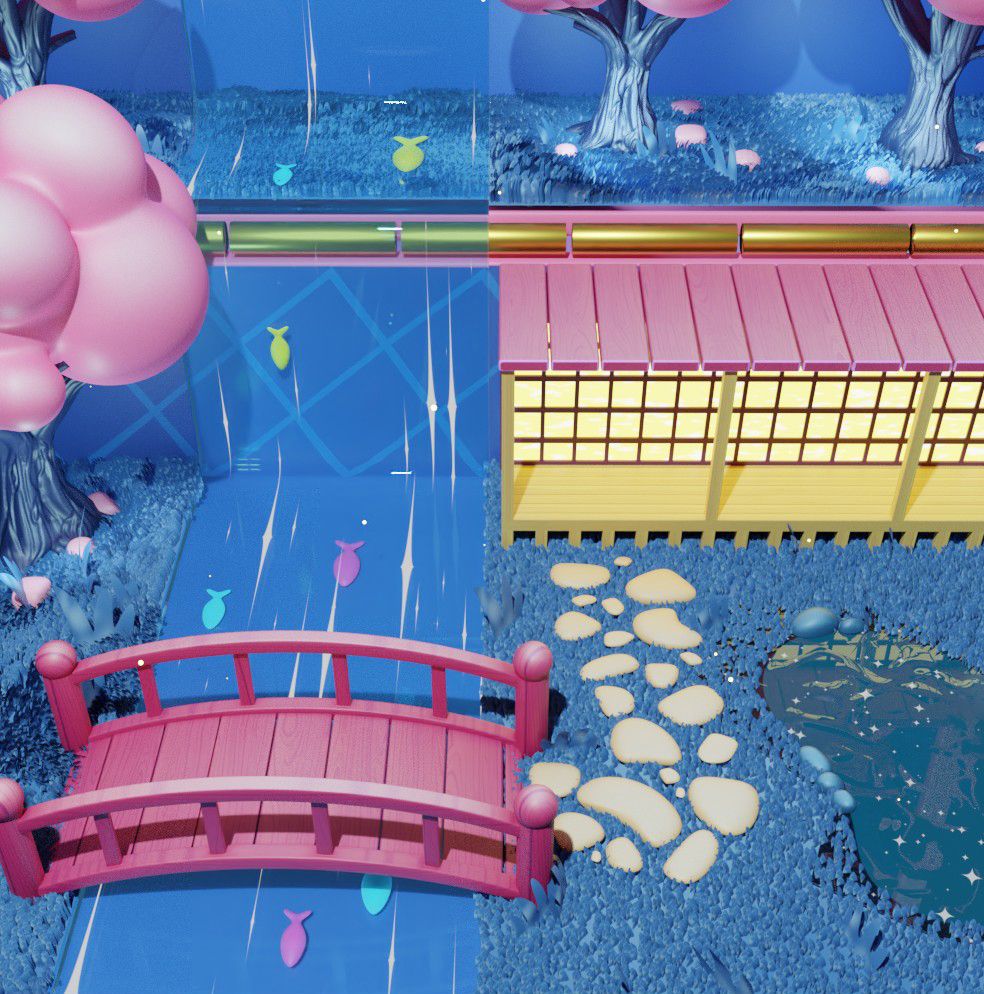
1. The suitcase
I broke down the suitcase into several parts, for instance by separating the interior from the exterior. For the interior, I used the Knife Tool to do the Edges, then I beveled them to make them thicker.
For the metallic parts, the brush gold-plated look was made by setting Metallic at 1.000 and Roughness to 0.345.
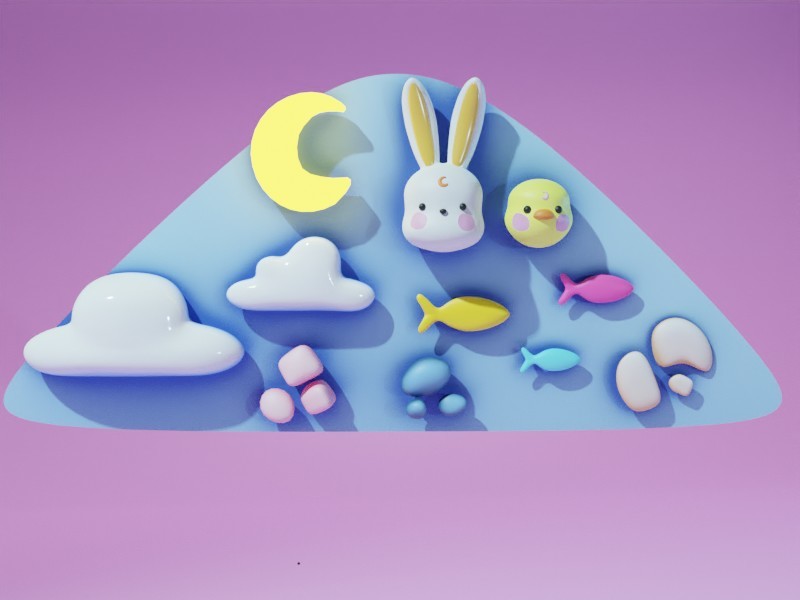
2.The little objects
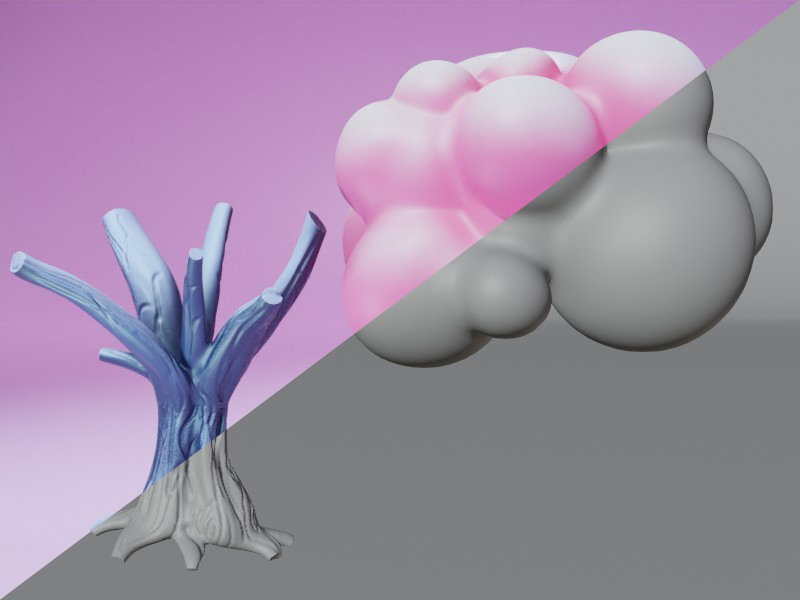
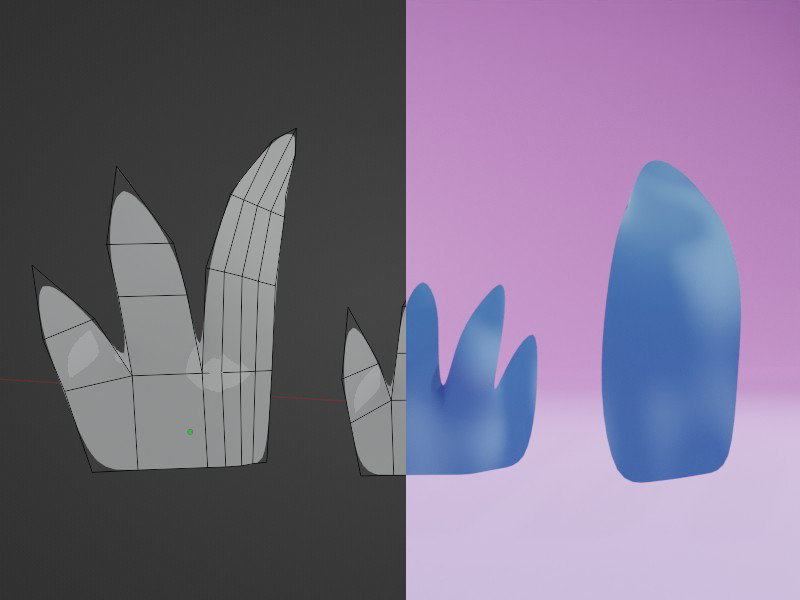
Amongst all the little objects, only a few—such as the trees—needed to be sculpted.
3.The buildings
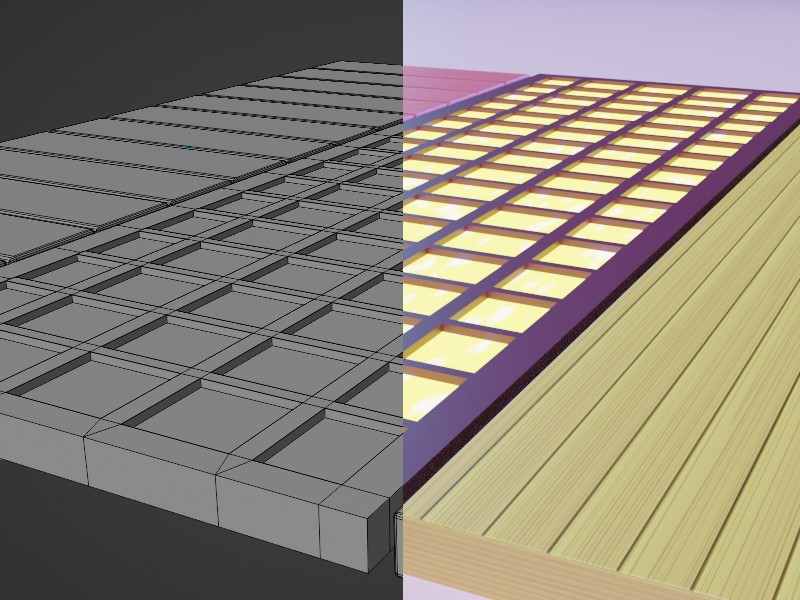
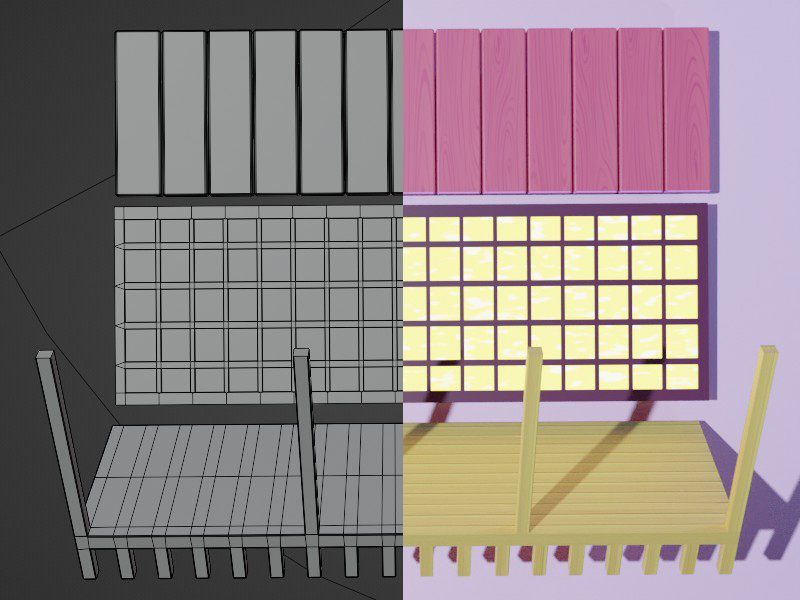
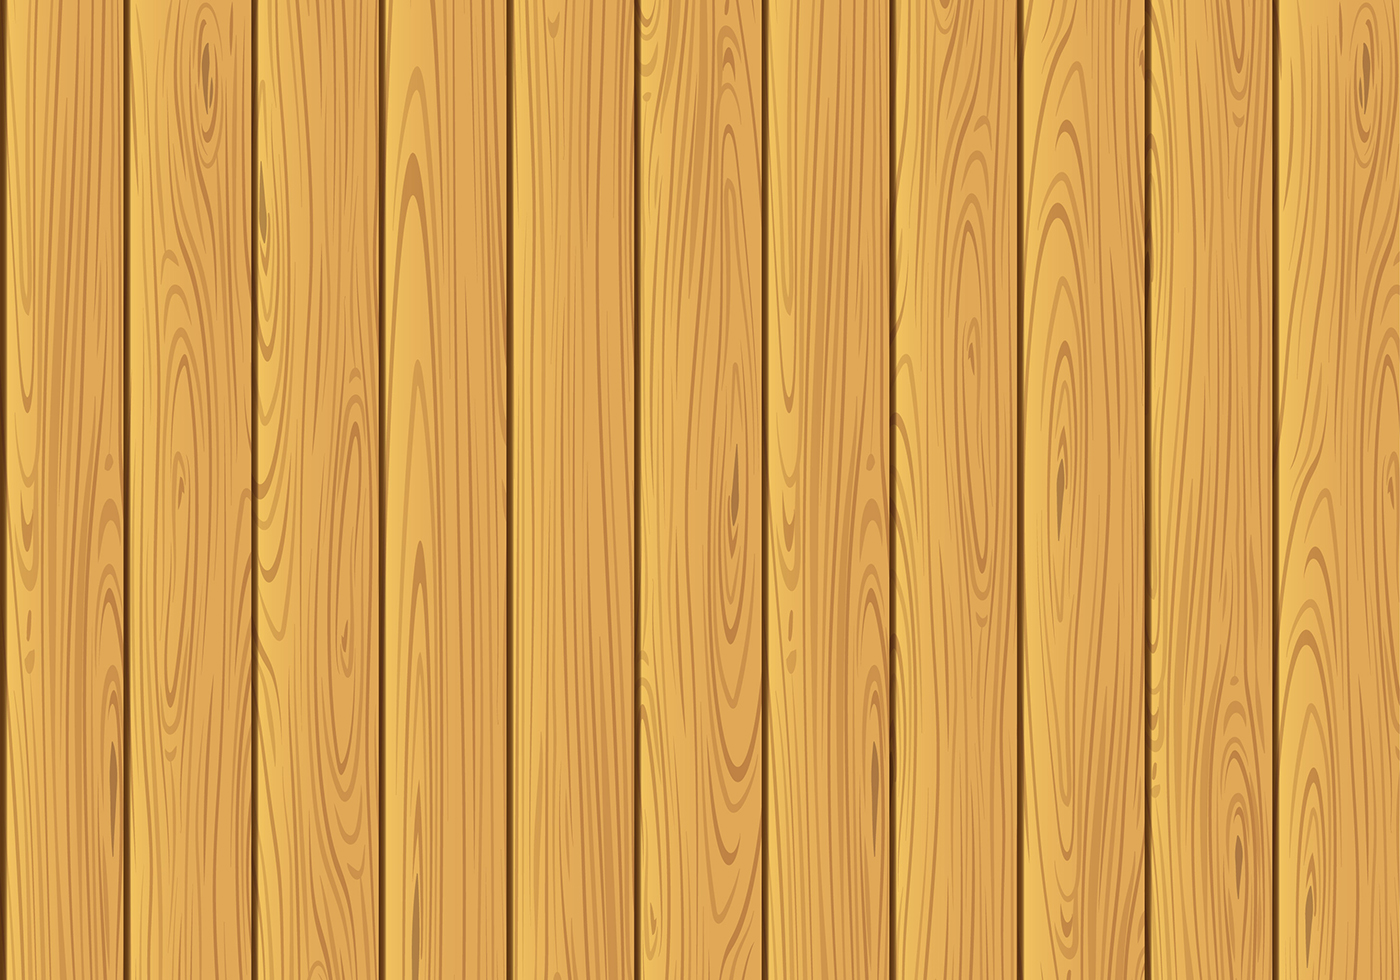
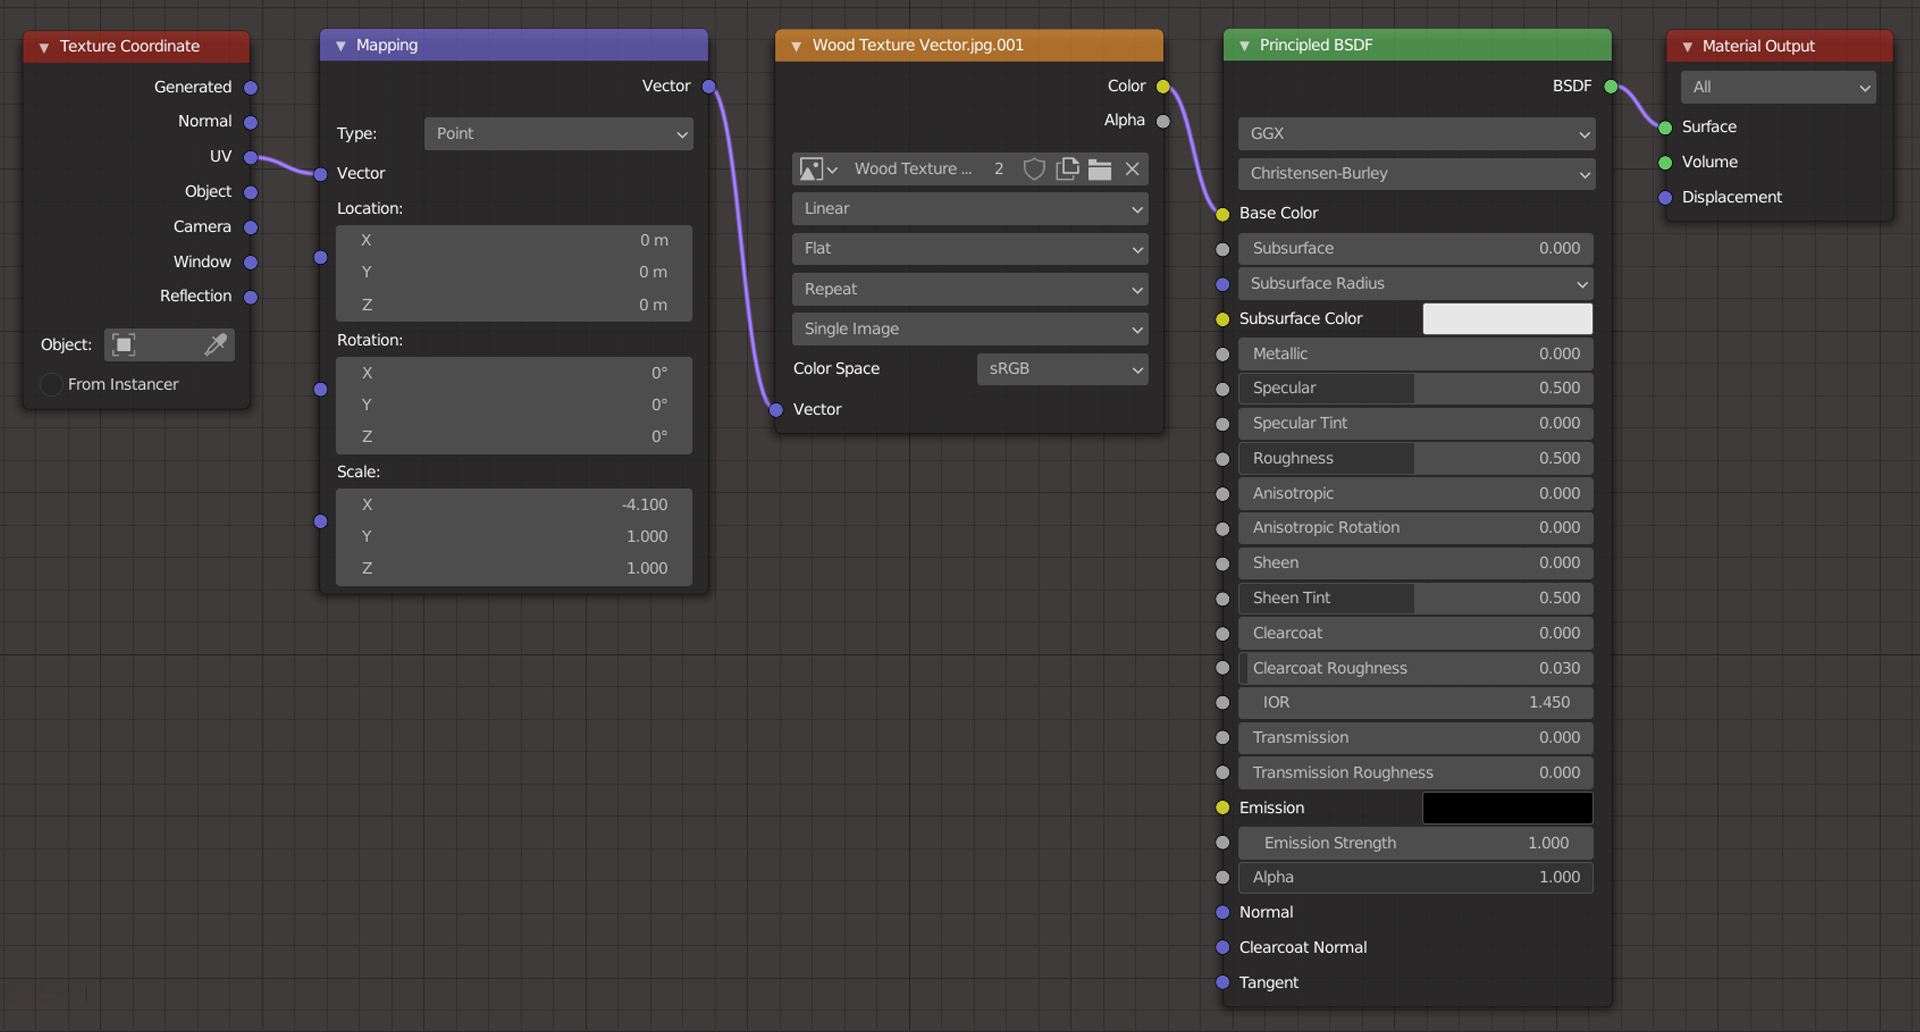
The house was made with three parts: the roof, the ground, and the large tiled window. I chose a simple cartoonish drawing for the wood texture because it had to look like a toy.
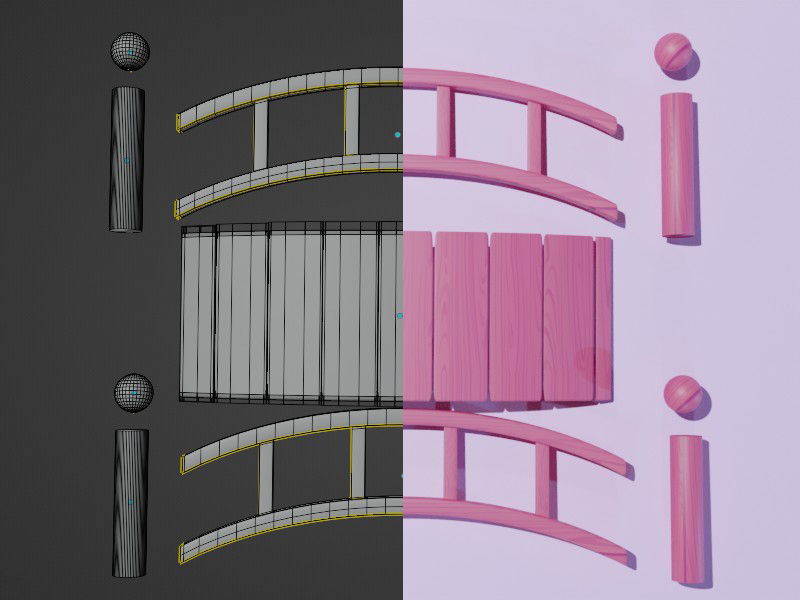
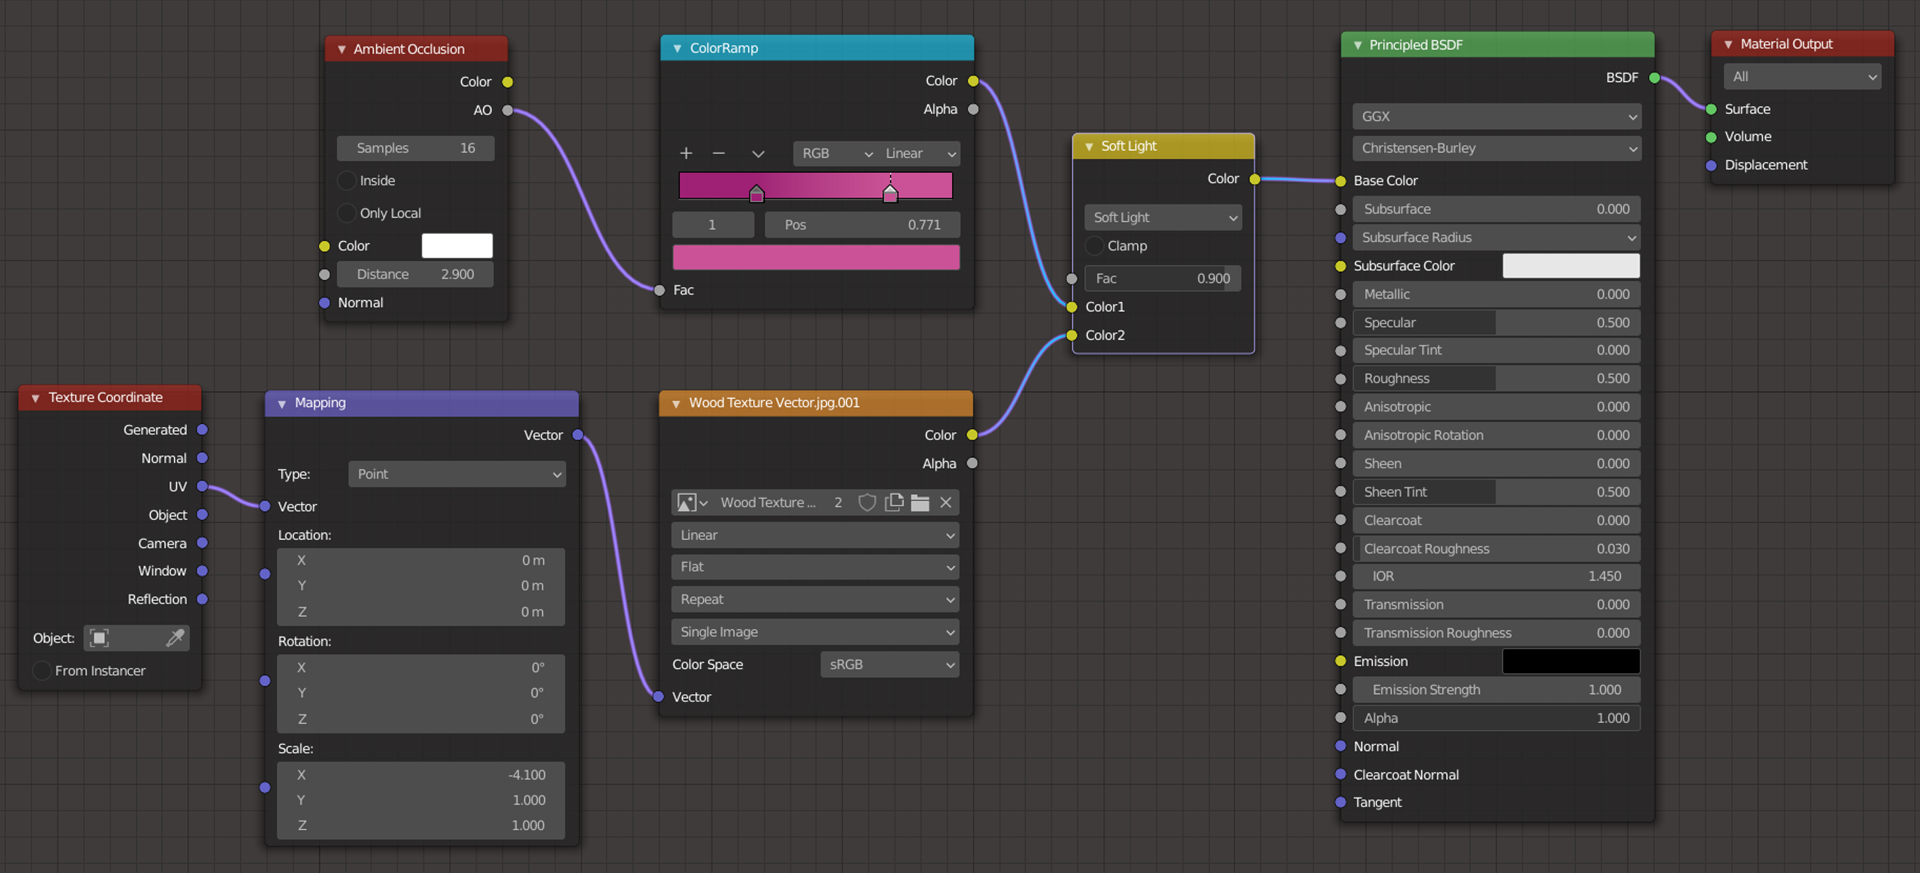
The bridge was also broken into several parts, as you can see below. I marked seams at different places to match the wood texture. The UVs of each part were scaled to match the wooden floorboards.
The wooden structures were colored in pink by connecting a parallel Color Ramp node via a Mix Shader.
4.The vegetation
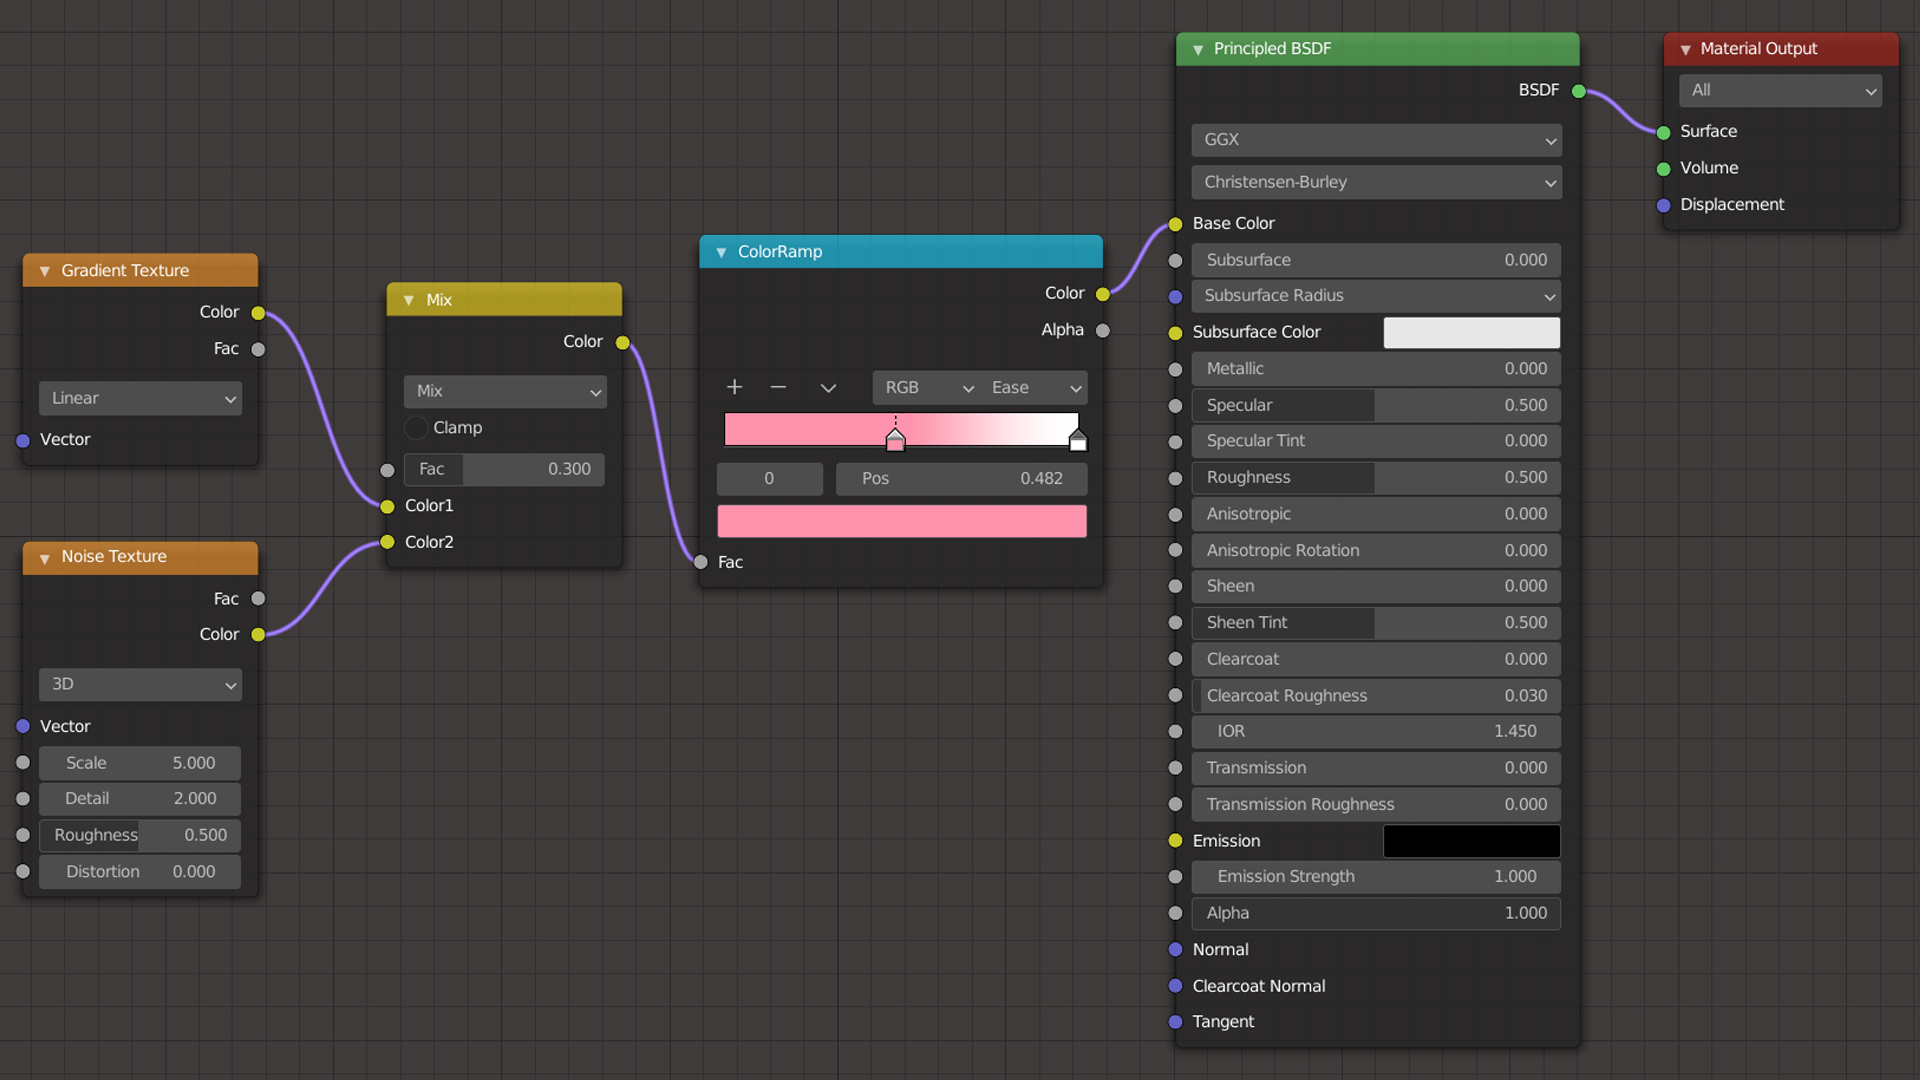
The petals of the cherry blossom had irregular white spots on their pink surface. I tried to replicate the look with a shader that colorized a Noise Texture through a Color Ramp node. I then added a Particles System for the ball of pollen.
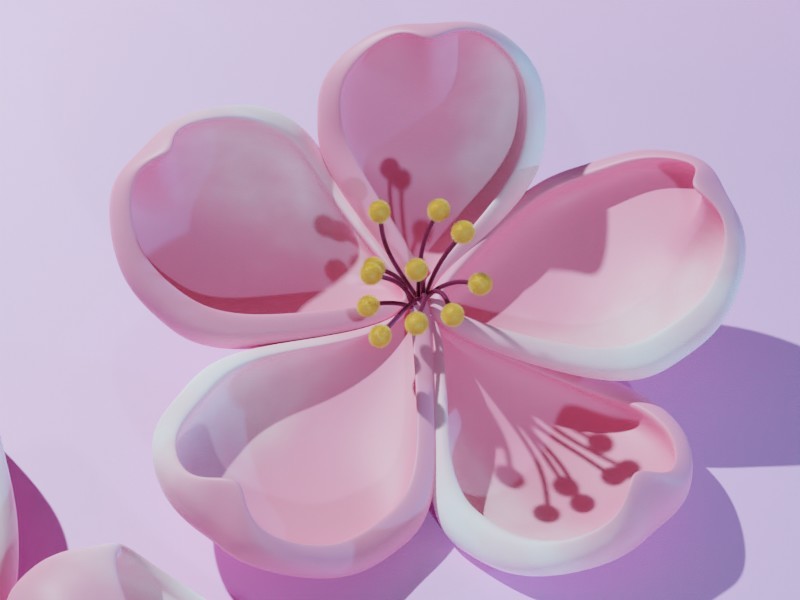
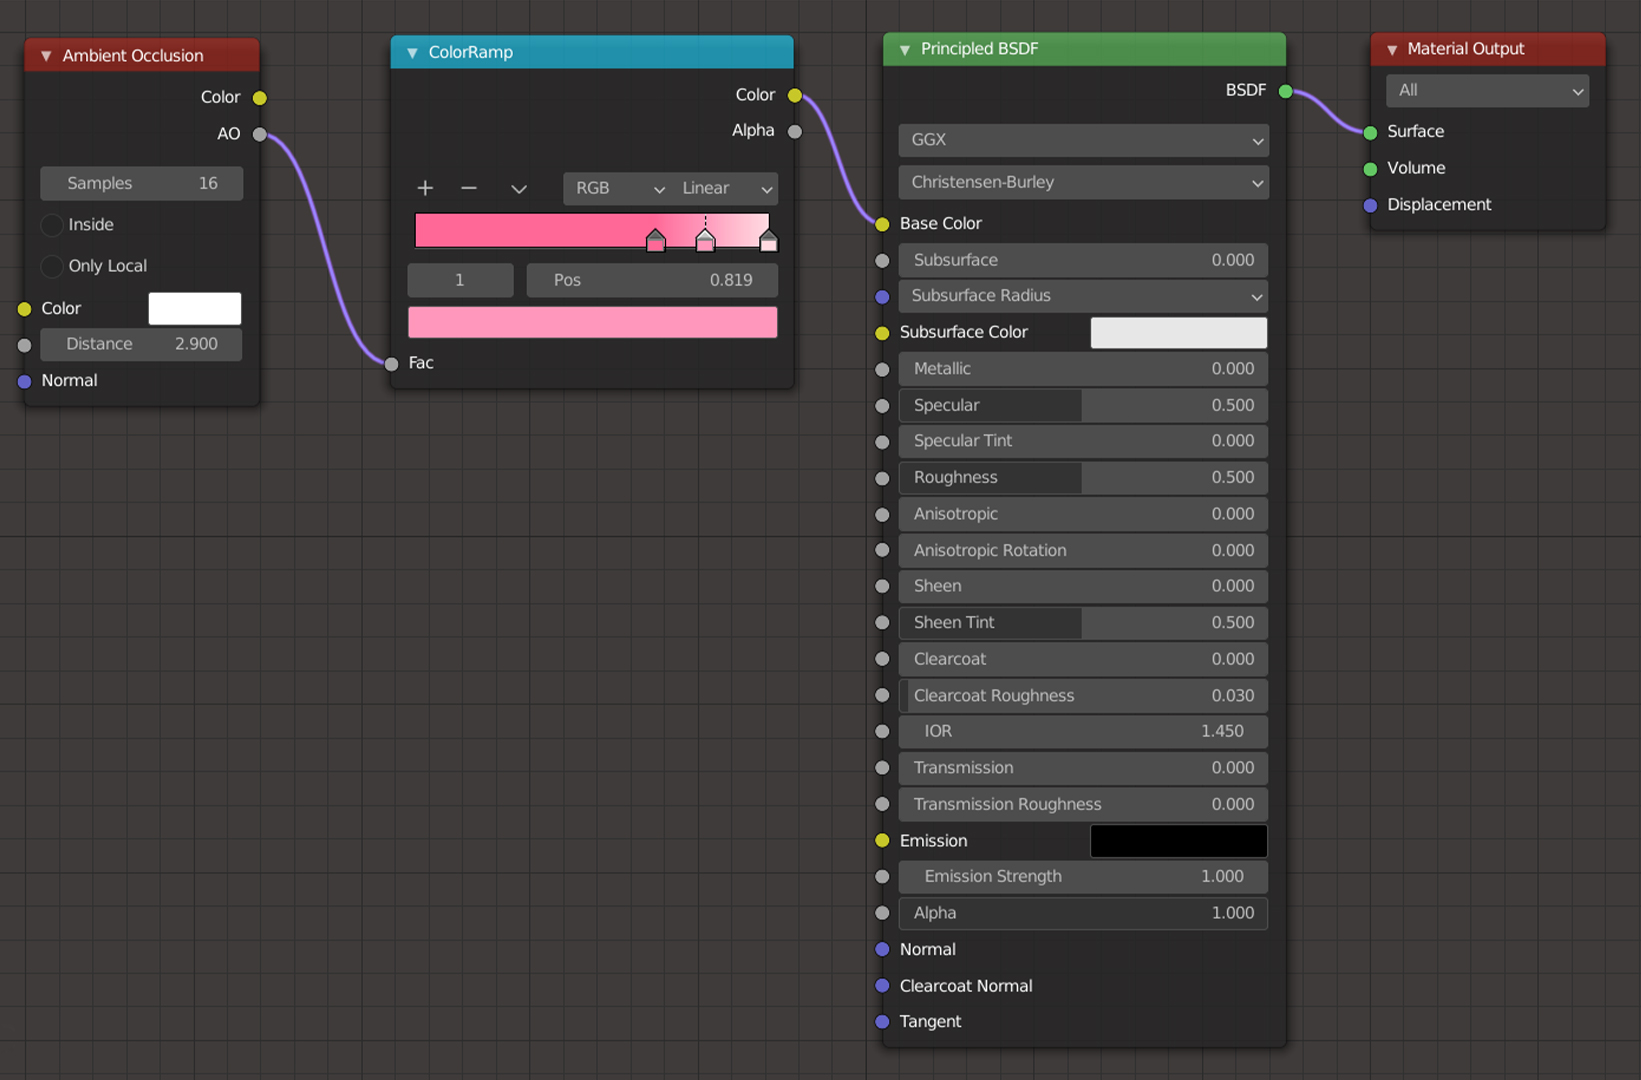
An Ambient Occlusion node went through a Color Ramp node to reduce the plastic-y look and make the foliage and the tree trunks more authentic. I reused this technique for all objects that needed it.
I made three planes for grass. Each plane has two Particles Systems: one for the lawn and another for bigger blades of grass.
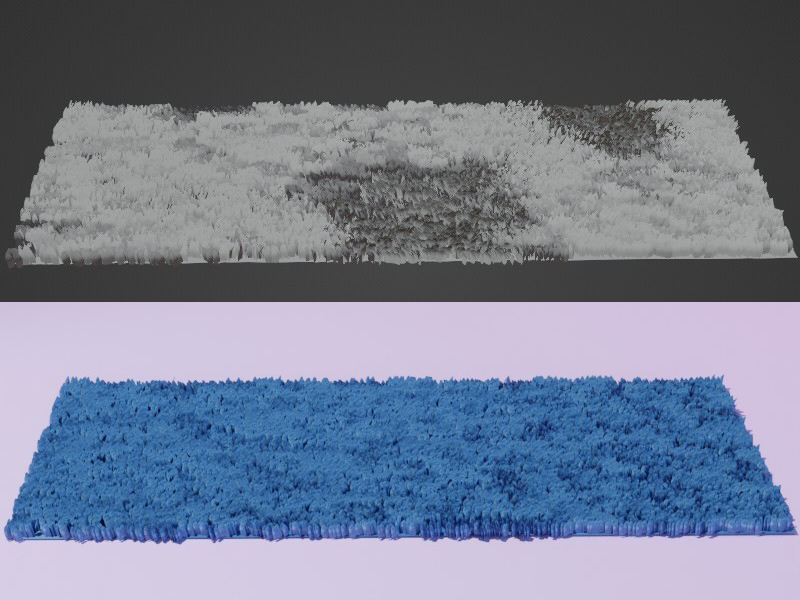
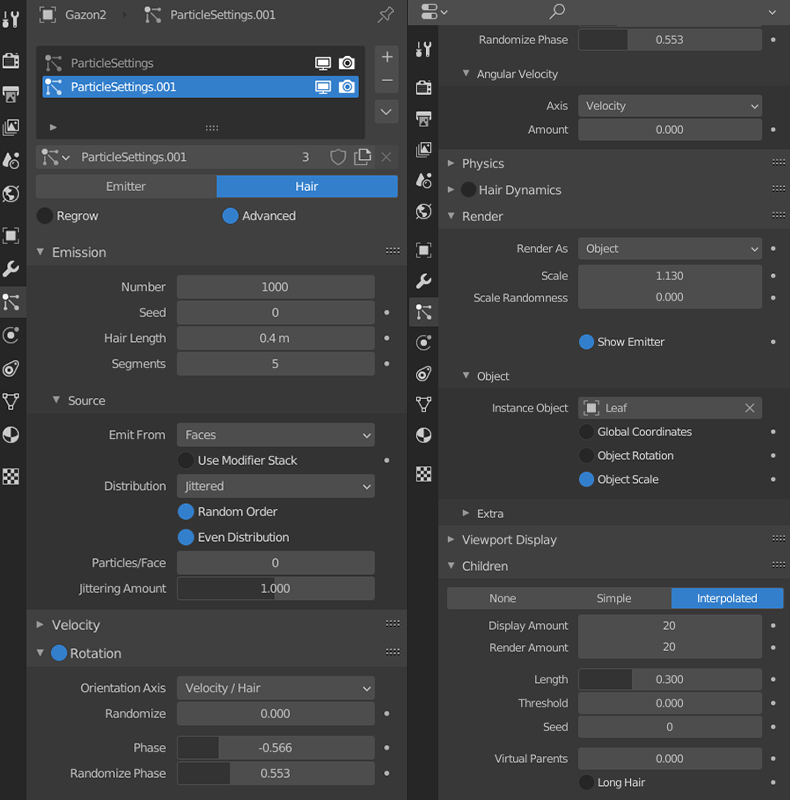
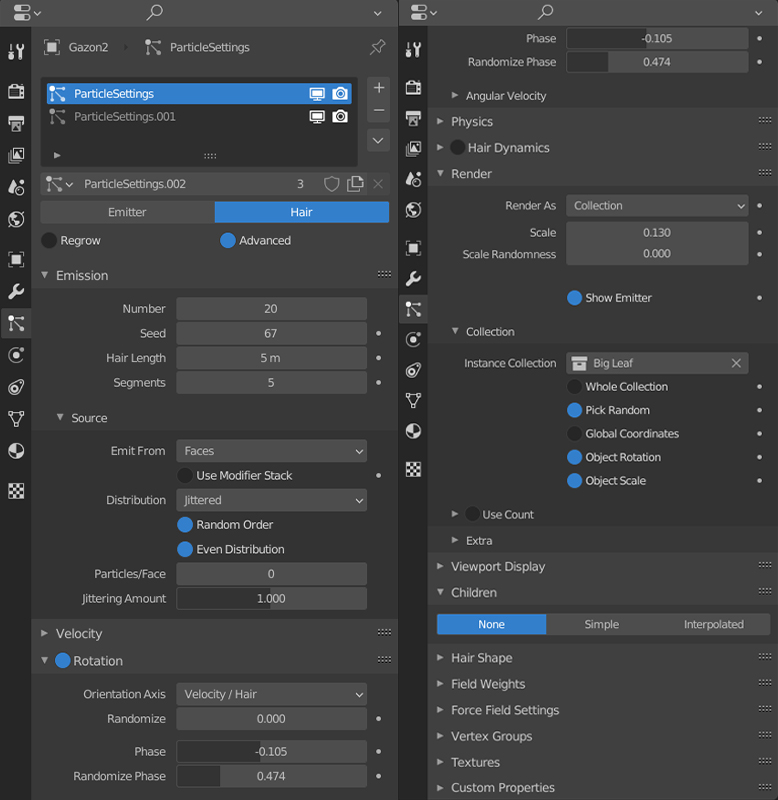
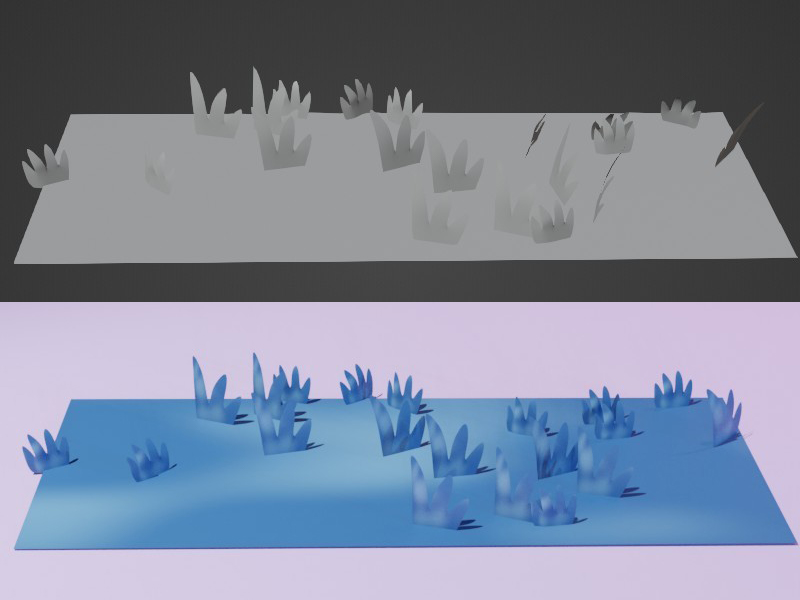
The blades of grass are Instance Objects used in the Particles Systems.
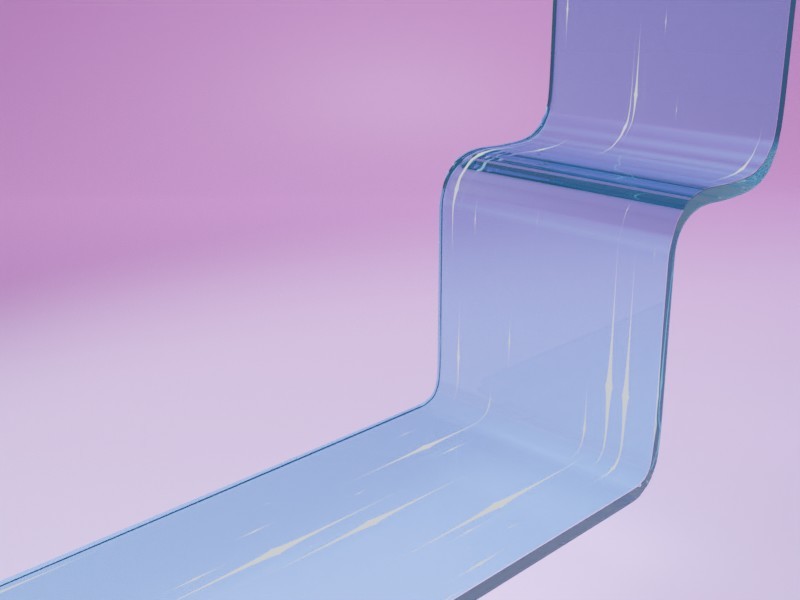
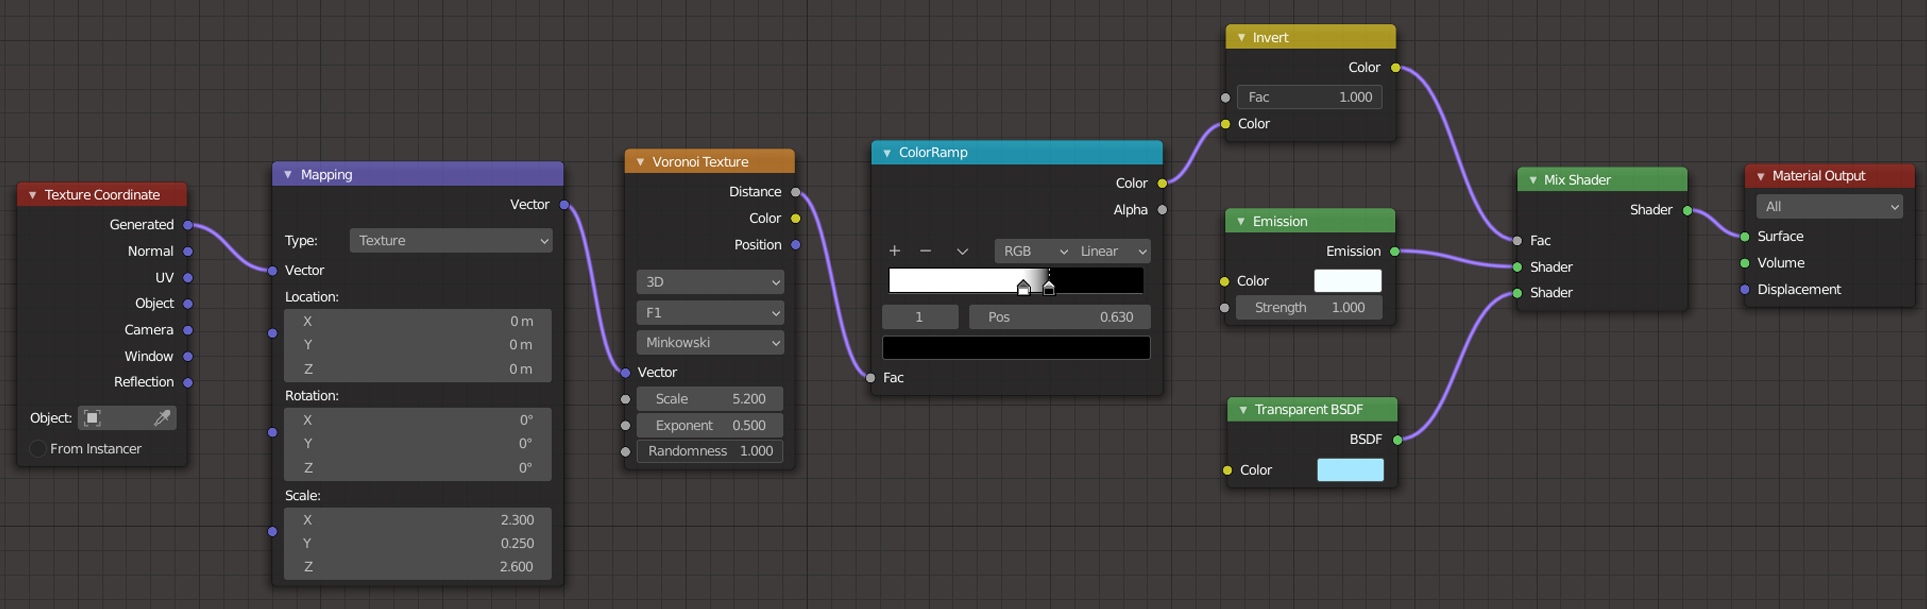
5.The water
I imagined the creek like print-stamped plastic. Thus the lower part was textured with a Glass shader, whereas the upper part was textured with Emission, Transparent, and Voronoi shaders. This gave the water thickness and glossiness for an awesome plexiglass effect.

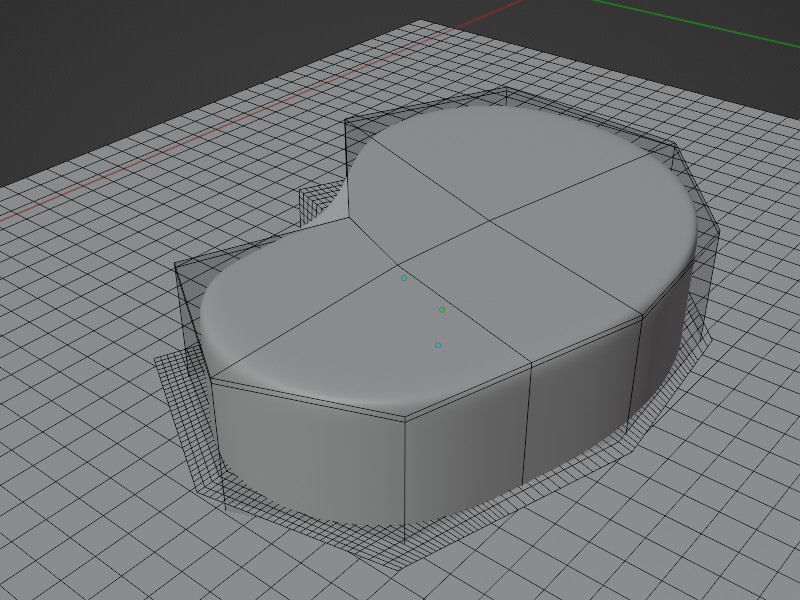
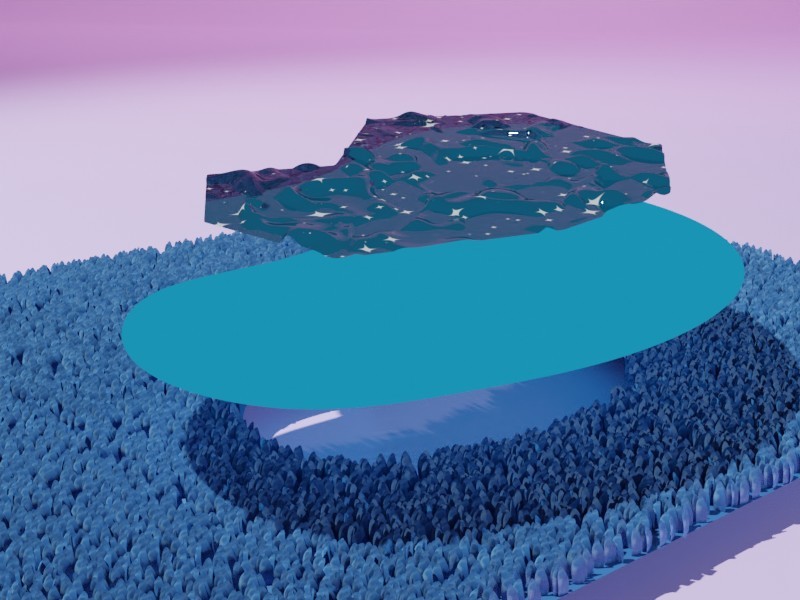
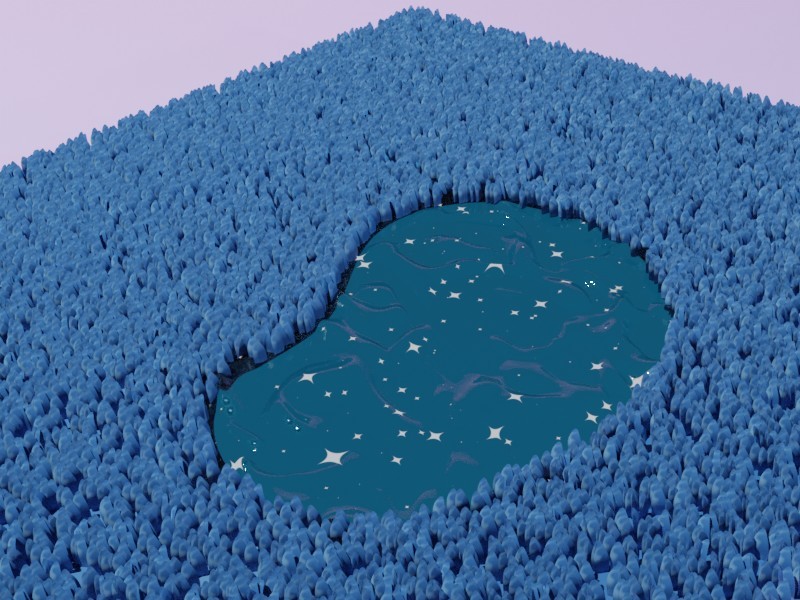
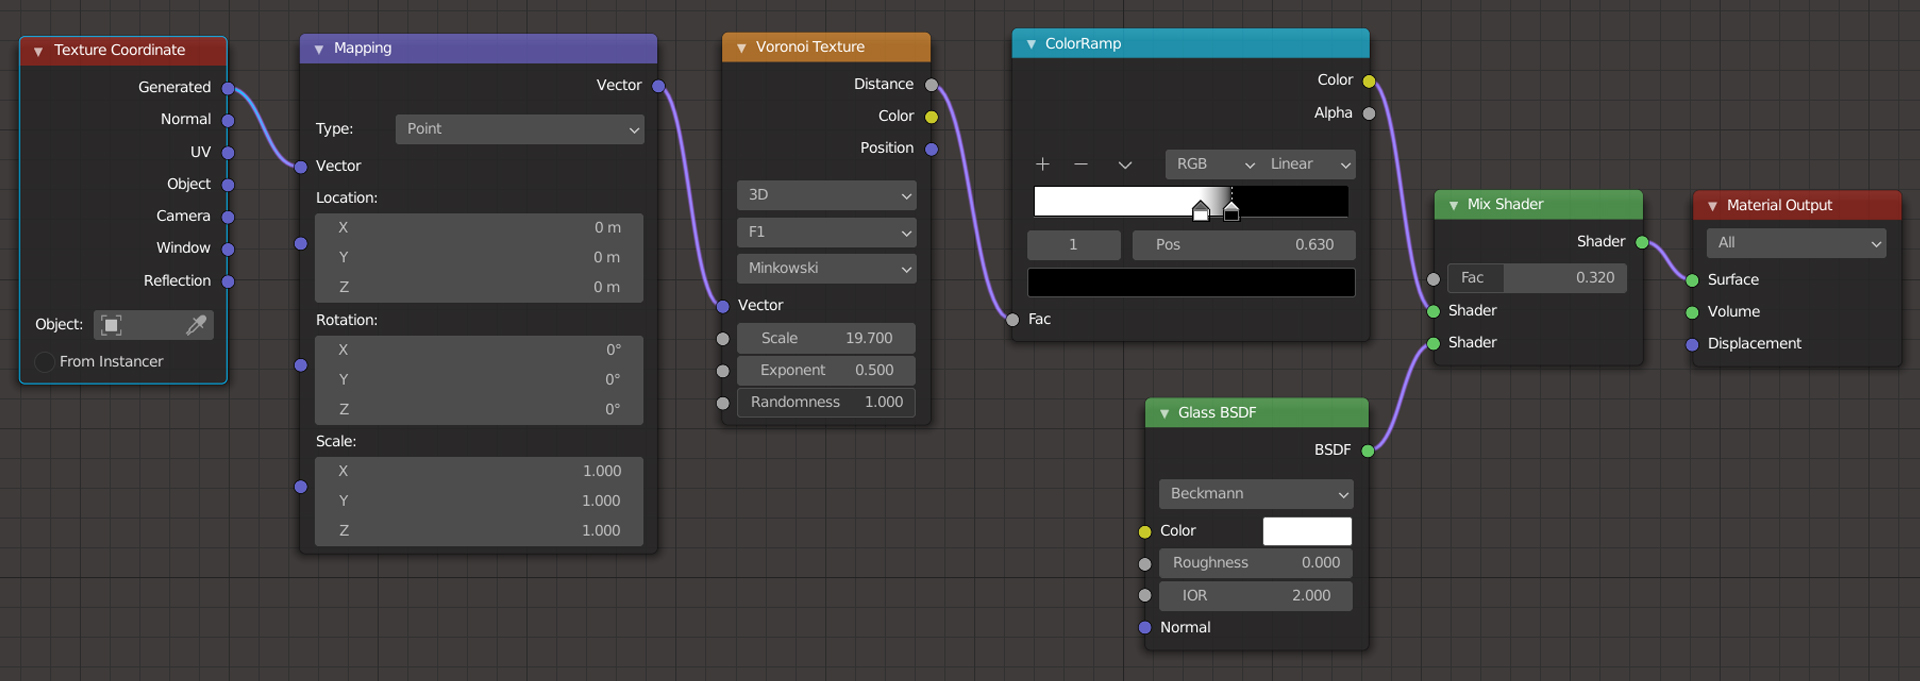
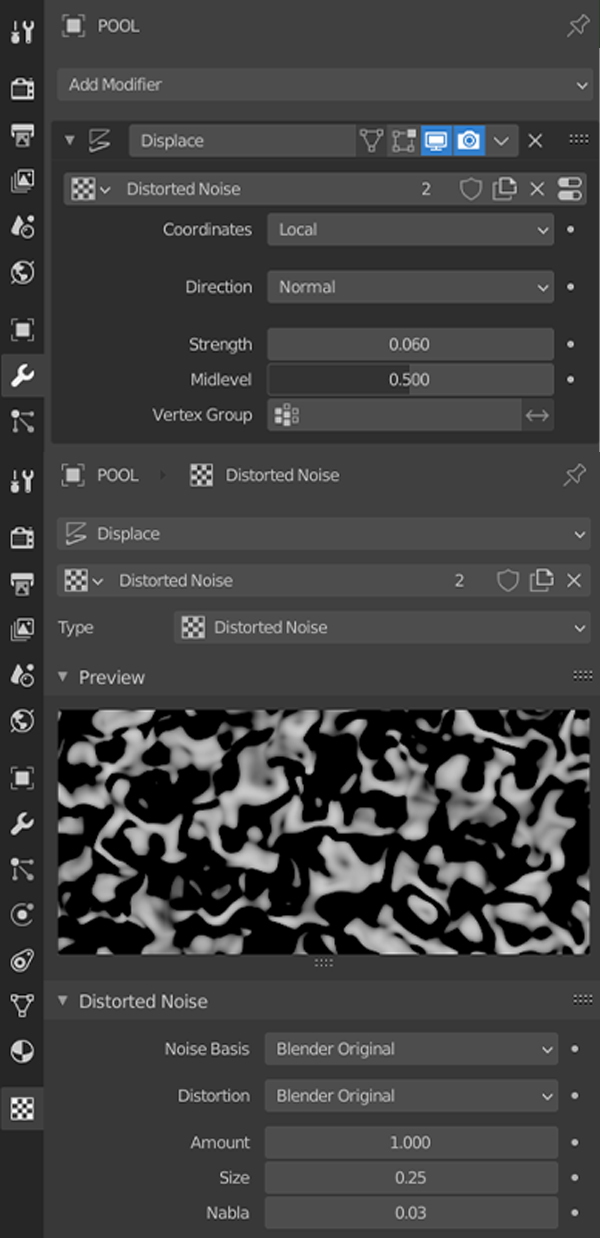
I used a Boolean modifier to dig the pool. A lower part was textured with a blue Emission shader, while the upper part had both a Glass shader and a Voronoi shader for the little sparkles. I also added a Displace Modifier with a Distorted Noise texture to create the waves.
6.The lighting and rendering
I placed eight lights in the whole scene:
Four Areas, one for each tree, to floodlight the trunks and give a magical effect.
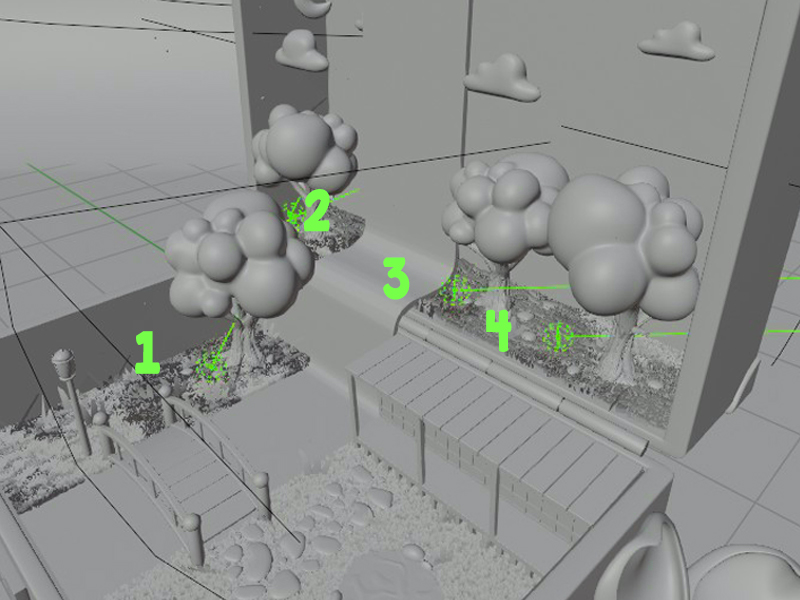
Four spots for the scene with pink and blueish colors, colors that mirror the suitcase.

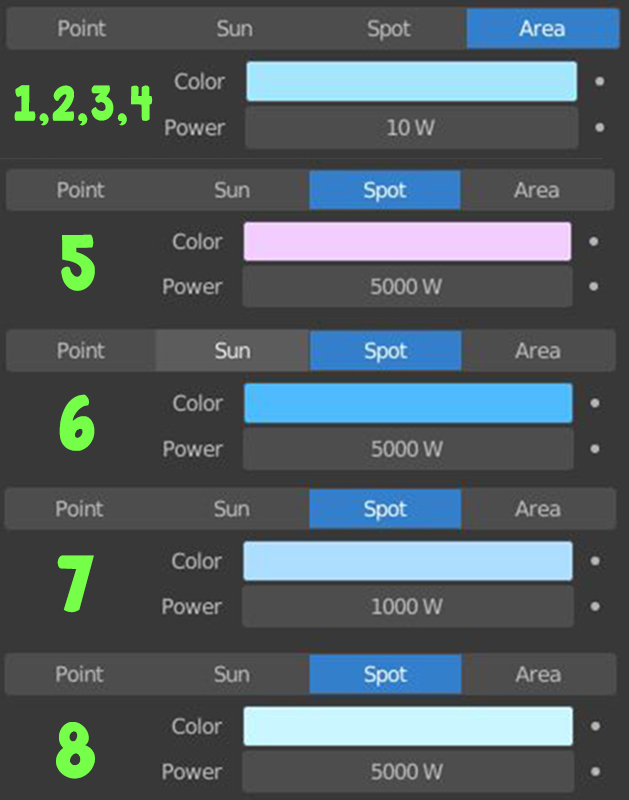
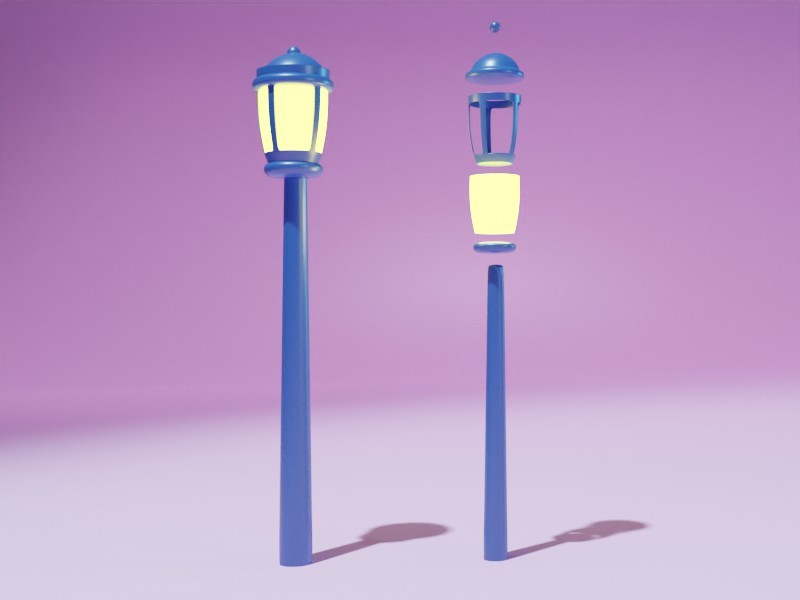
I also used Emission shaders for the moon, the street light, and the wooden house windows.
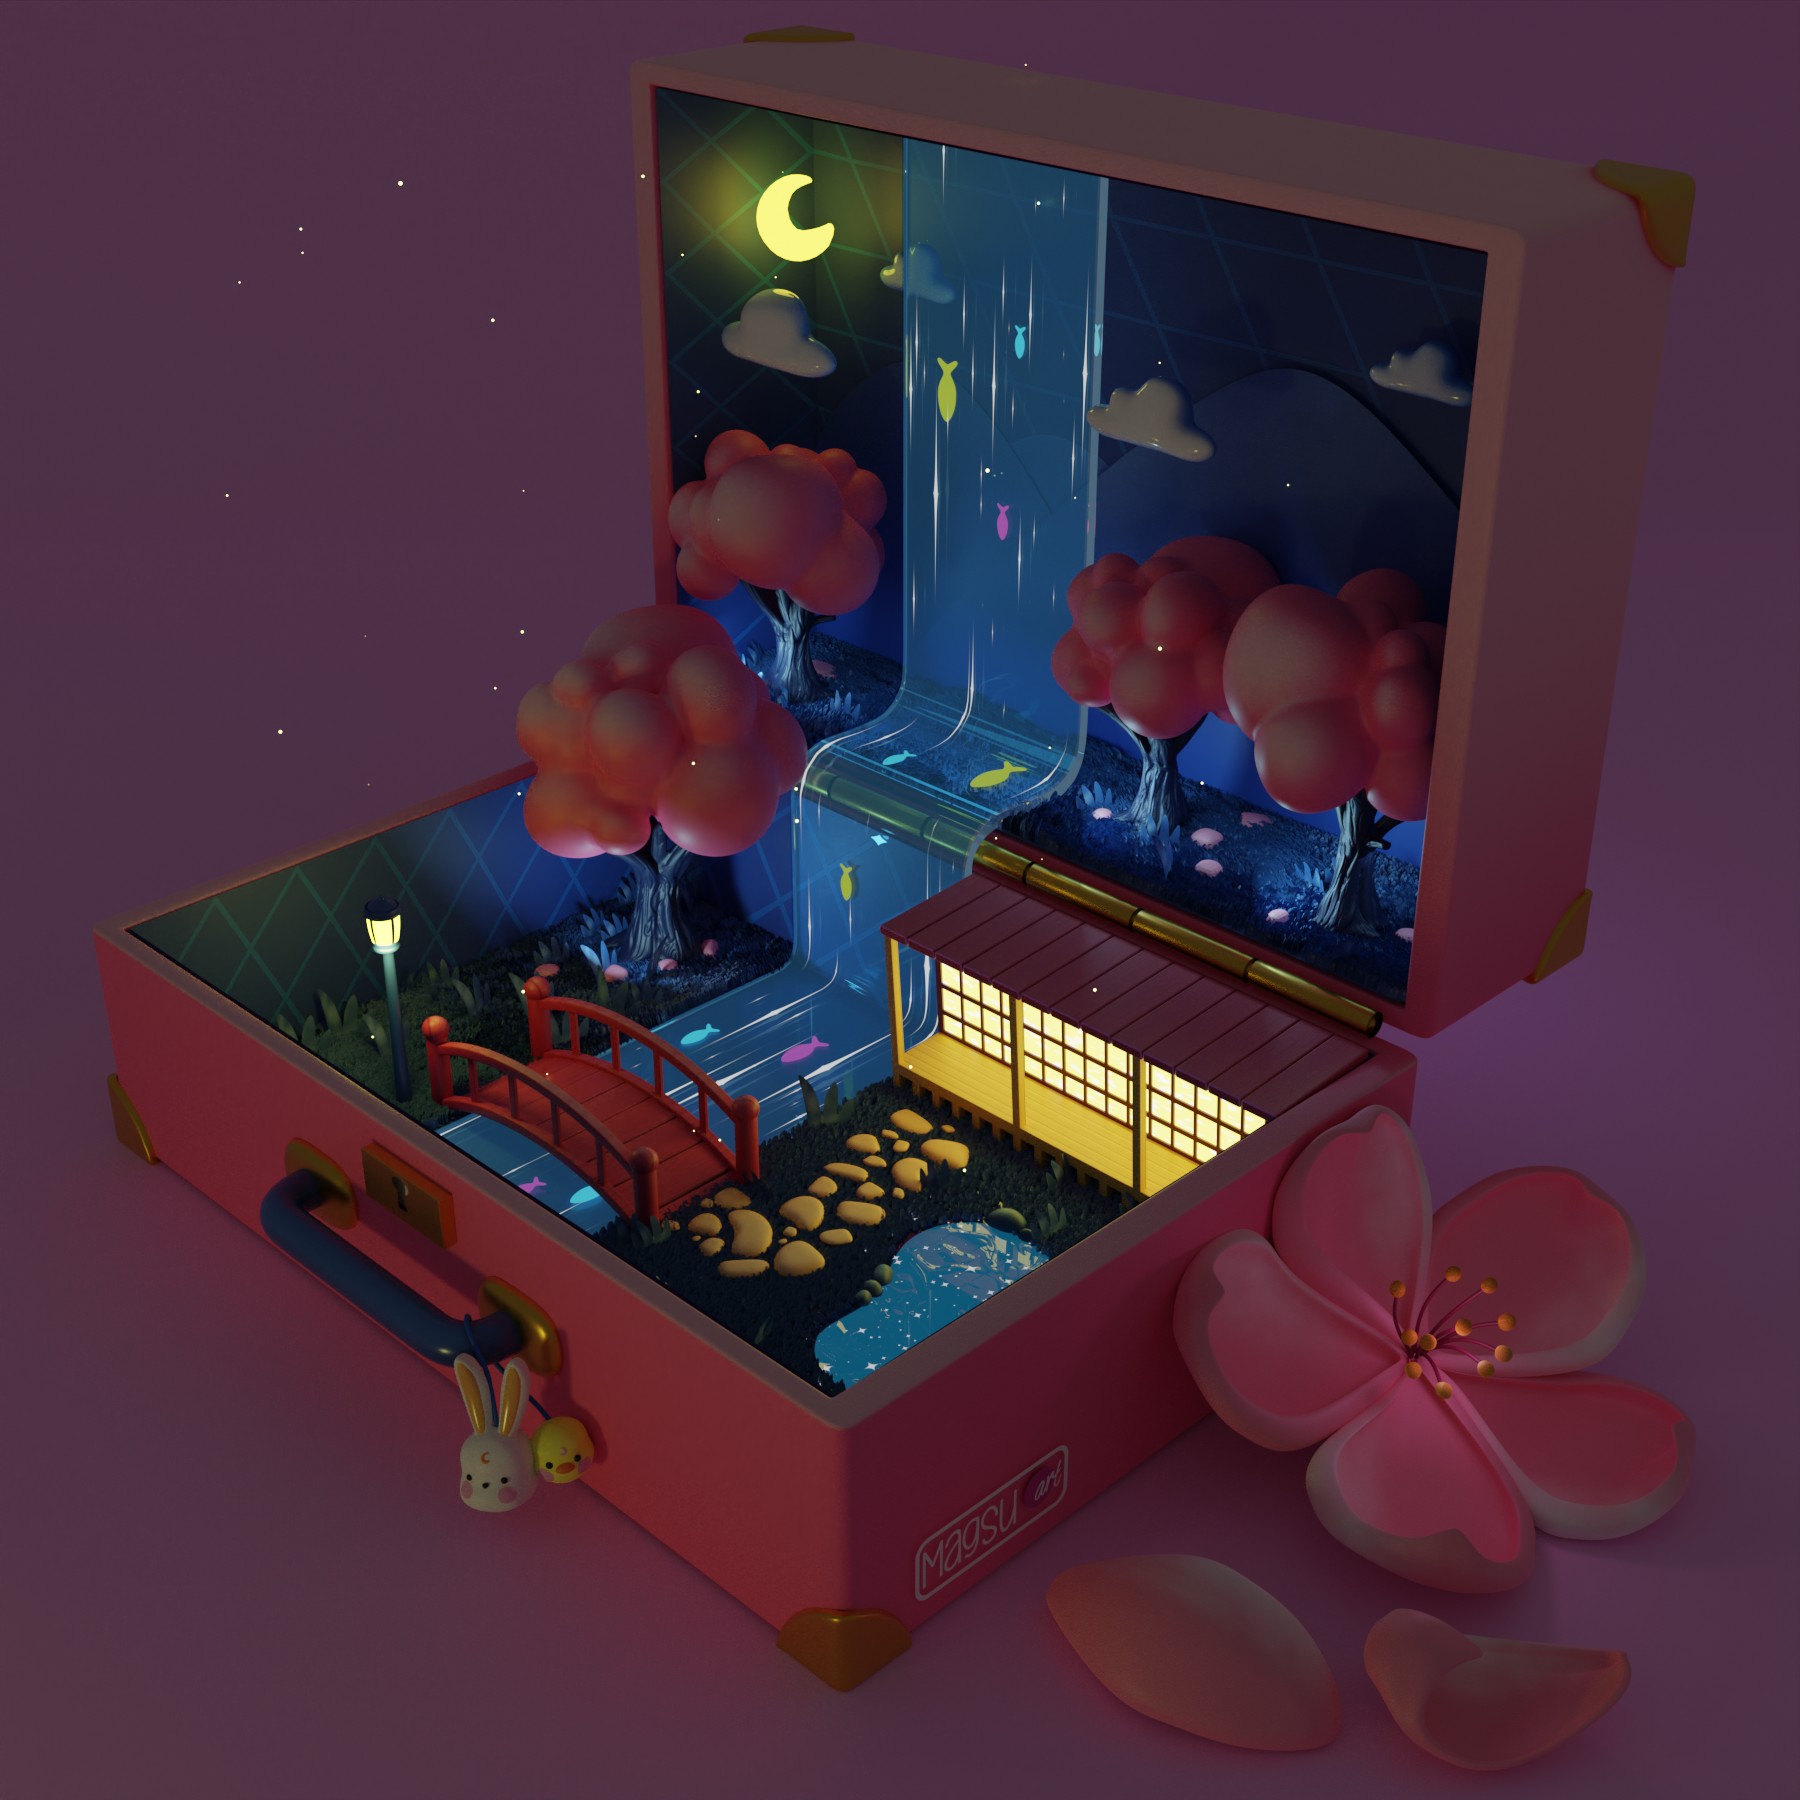
I made an extra night scene. So I disabled the four Spots and I added five Point lights:
- one for the streetlamp to light the grass on the far side and the bridge a little more.
- one placed behind the suitcase.
- one placed at a distance in the front of the suitcase to make it pop out from the background.
- I gave life to the blossom because it was sad and flat in the darkness. One Point right within the pistils did the job.
The vegetation on the lid looked creepy so I gave it a romantic moonlight by using a long and thin Area light just above the grass. This gave relief to the trees and the waterfall.
The final touch was done by adding an Emission shader to the fishes, which, coupled with those that were already placed in the waterfall and in the pool, made the water more vivid and glossy. This nicely reinforced the cozy feeling that the cute scene offers.
I rendered the scenes at a resolution of 1800×1800 pixels with OptiX denoiser activated. Since there are little objects in the scene, for the day scene I chose 2000 samples for a clear and sharp image. As for the night scene, I increased samples to 2500 to reduce the noise in the shadow.
For this project, I rendered it in Cycles because it gives shadows and glass more realism than EEVEE can. Moreover, some techniques like Ambient Occlusion make better sense with Cycles.
I plan to animate the diorama and even integrate it into a mini-game (à la Animal Crossing) that I will probably develop with my 6- and 10-year-old kids using C# in Unity. In any case, the fishes are begging for the water to flow while a gentle breeze helps the grass dance subtly.
About the Author
 Magali, 2D/3D Digital Artist, teacher, coder and what else ?


