
Behind the Scenes: Making my own building in Blender
About
I’m Larry Weiner from Bainbridge Island, Washington (originally LA). I’ve been an advertising art director for 20 years and a mixed media artist for 10. I started my career in film as a lighting gaffer – which would be a big help later when I learned Blender. I’m also a photographer, which was integral in my mixed media art (and Photoshop learning). But then the pandemic hit, and I couldn’t go shoot buildings – so I decided to create them, which is how I ended up spending the past year teaching myself Blender.
I’d had no experience with 3D but found the learning curve pretty easy once I learned to not be freaked out about the nodes system and discovered how much photography knowledge was used in Blender’s camera. I also discovered that any effect you want can pretty much be found on YouTube and, of course, this website.
[sponsor id=’qarnot’]
Ideas and execution
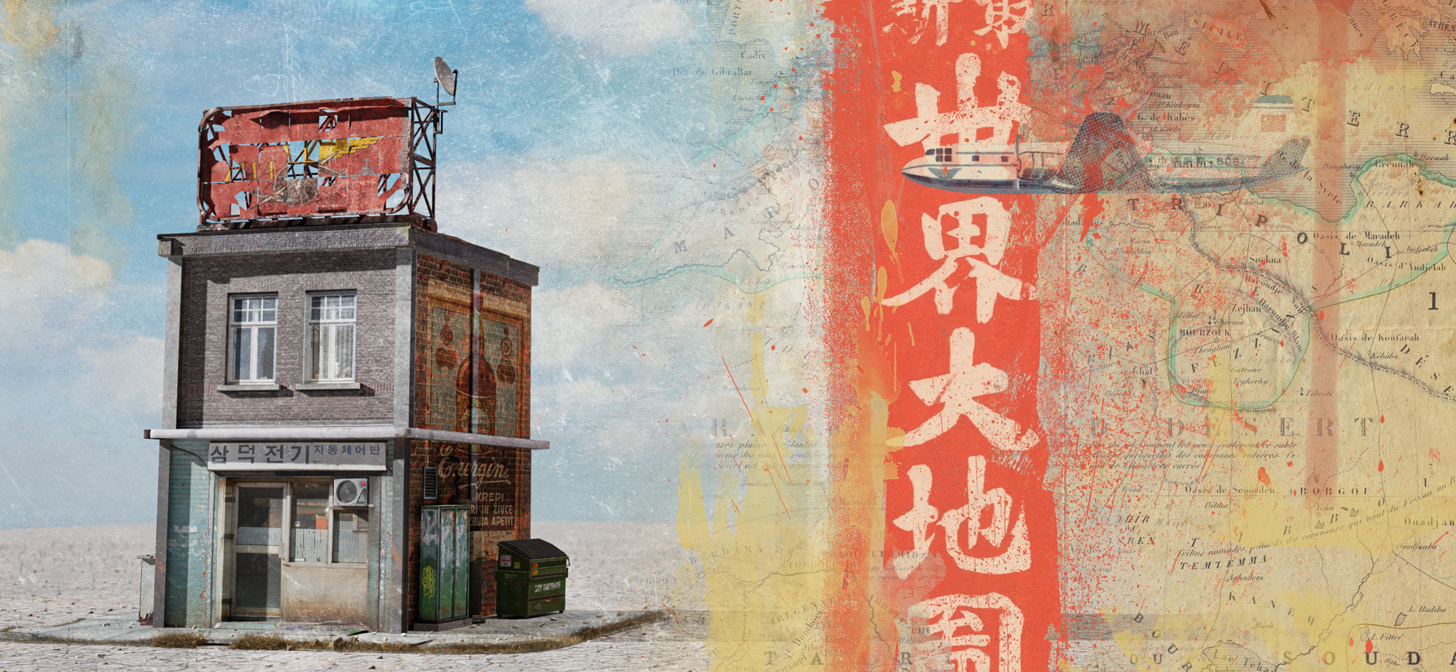
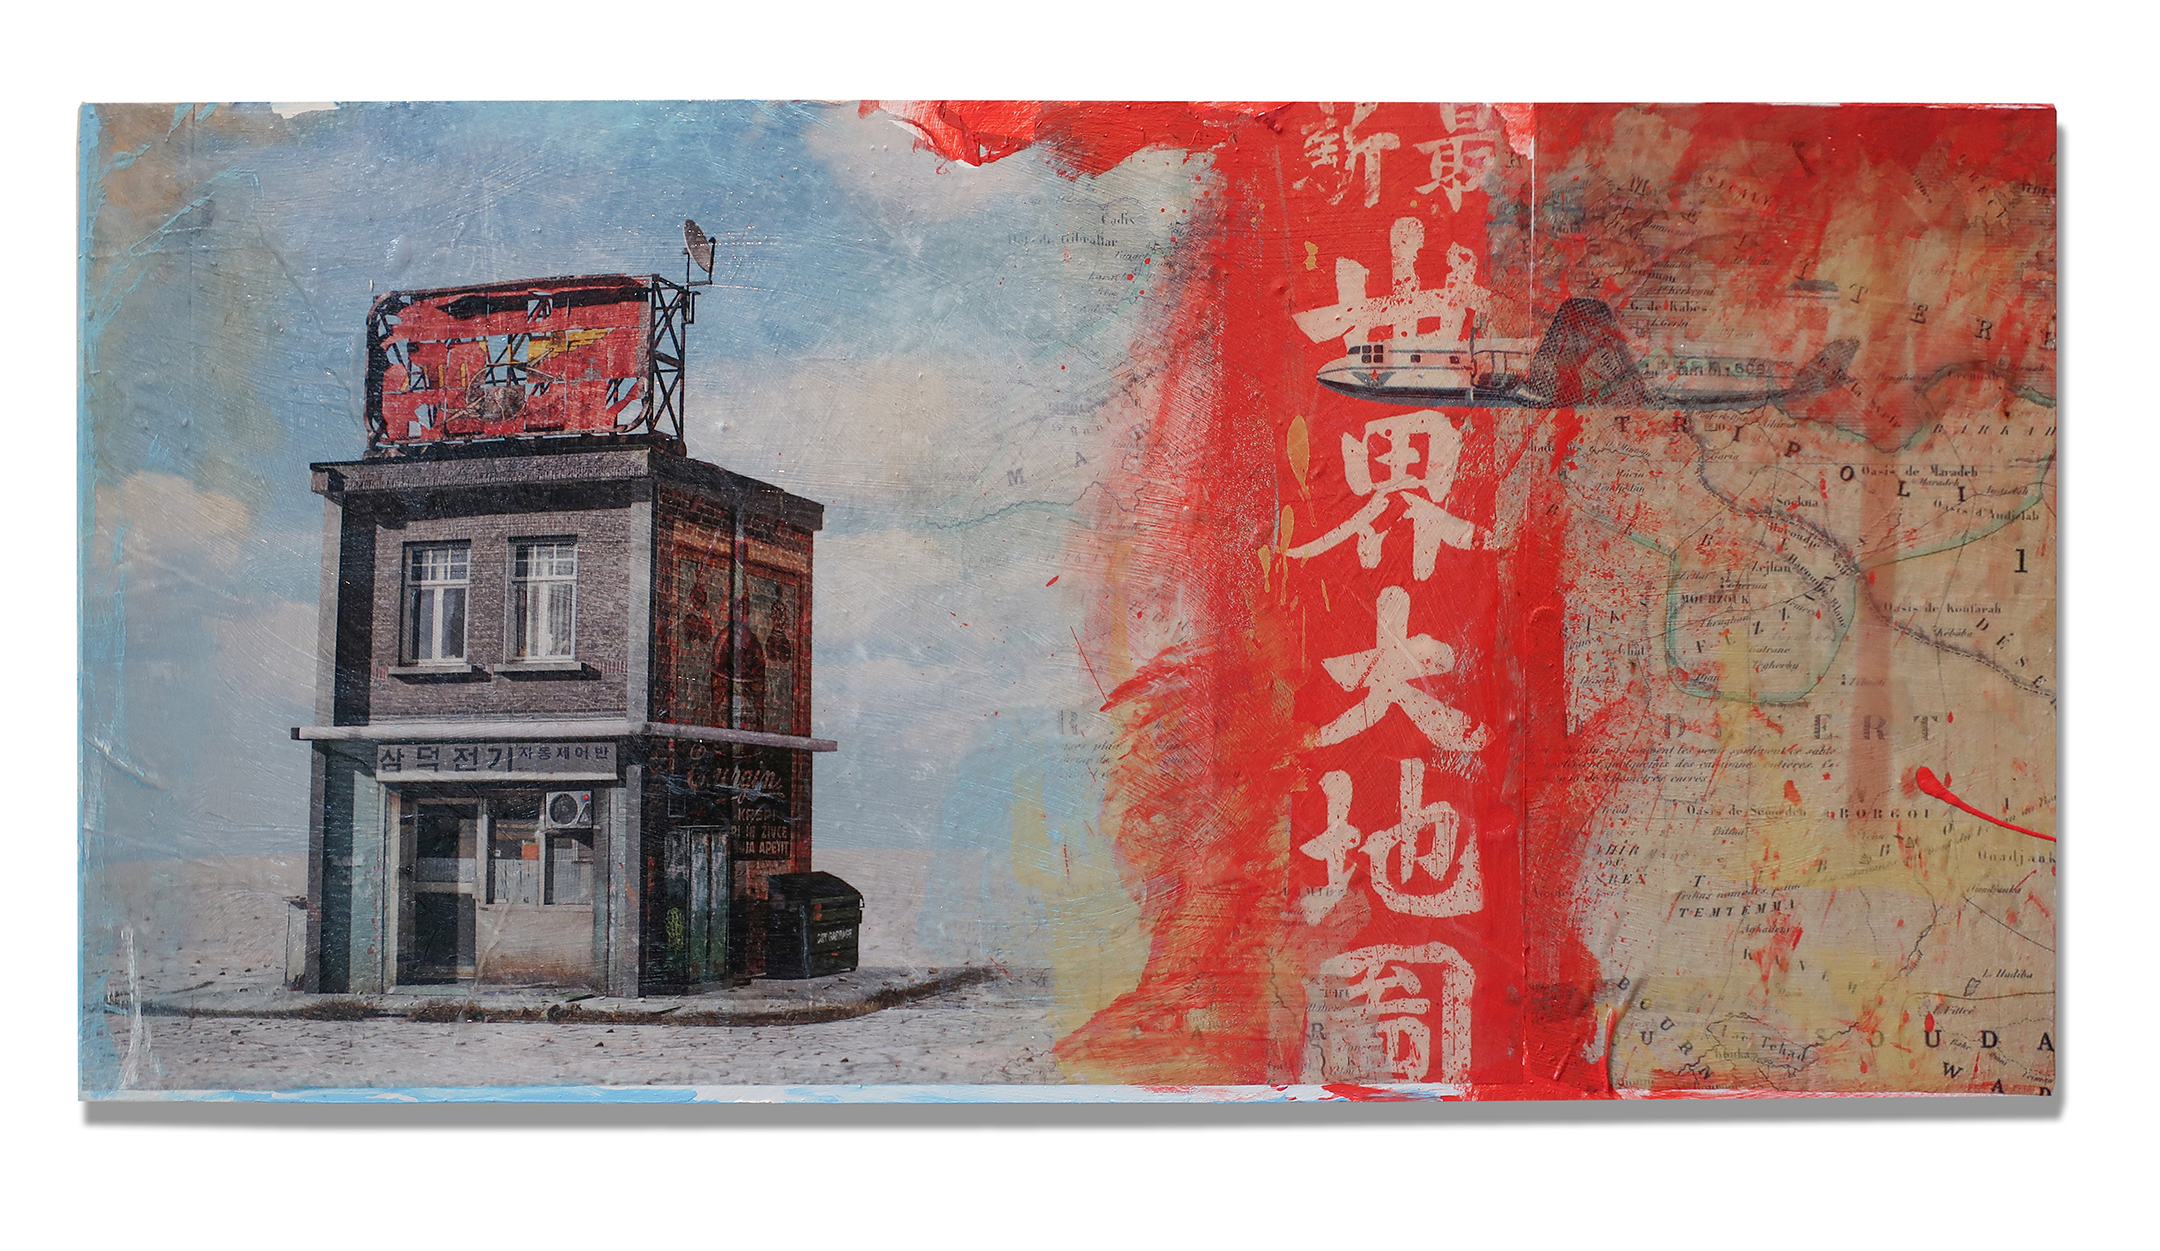
I’d amassed a huge photo file of architecture that I’d burned through in the last decade. I’d also been studying digital matte painting and realized I was tired of shooting things then manipulating them in Photoshop. I wanted to make architecture of my own (mostly) creation AND have the freedom to “shoot” them from any angle and time of day.
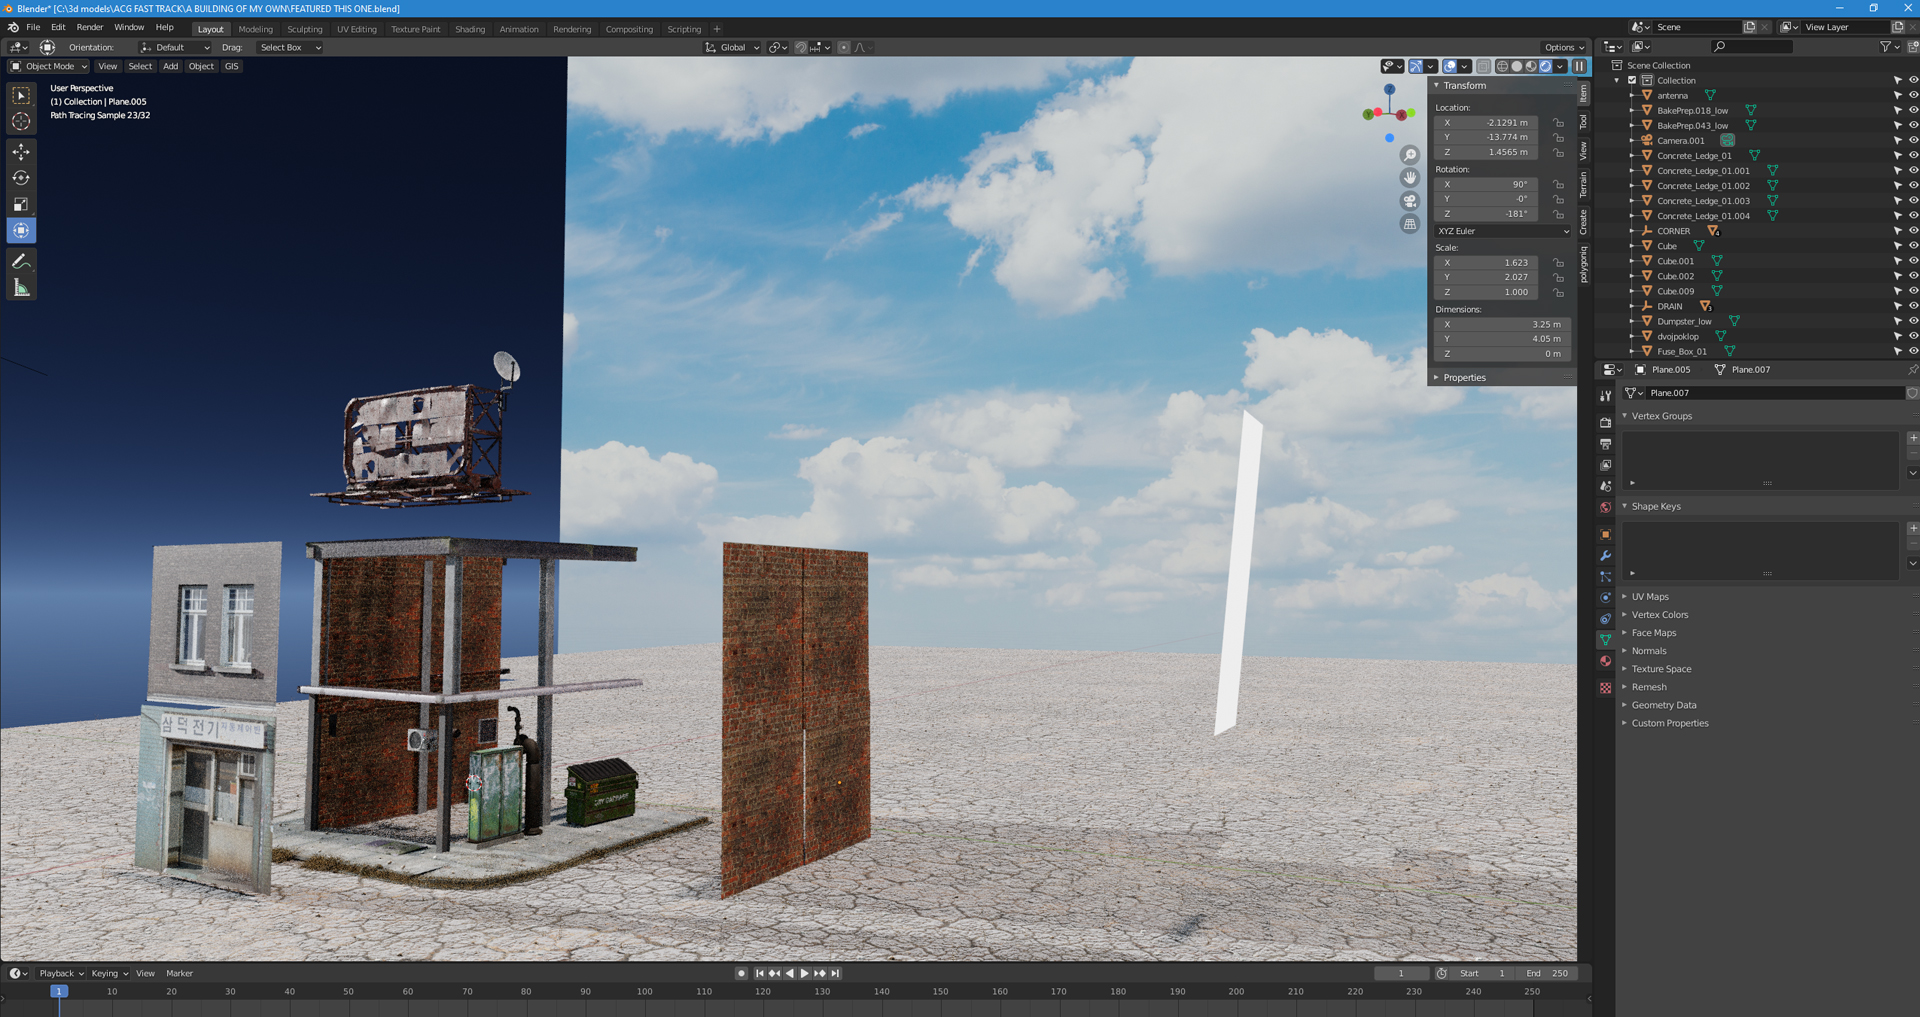
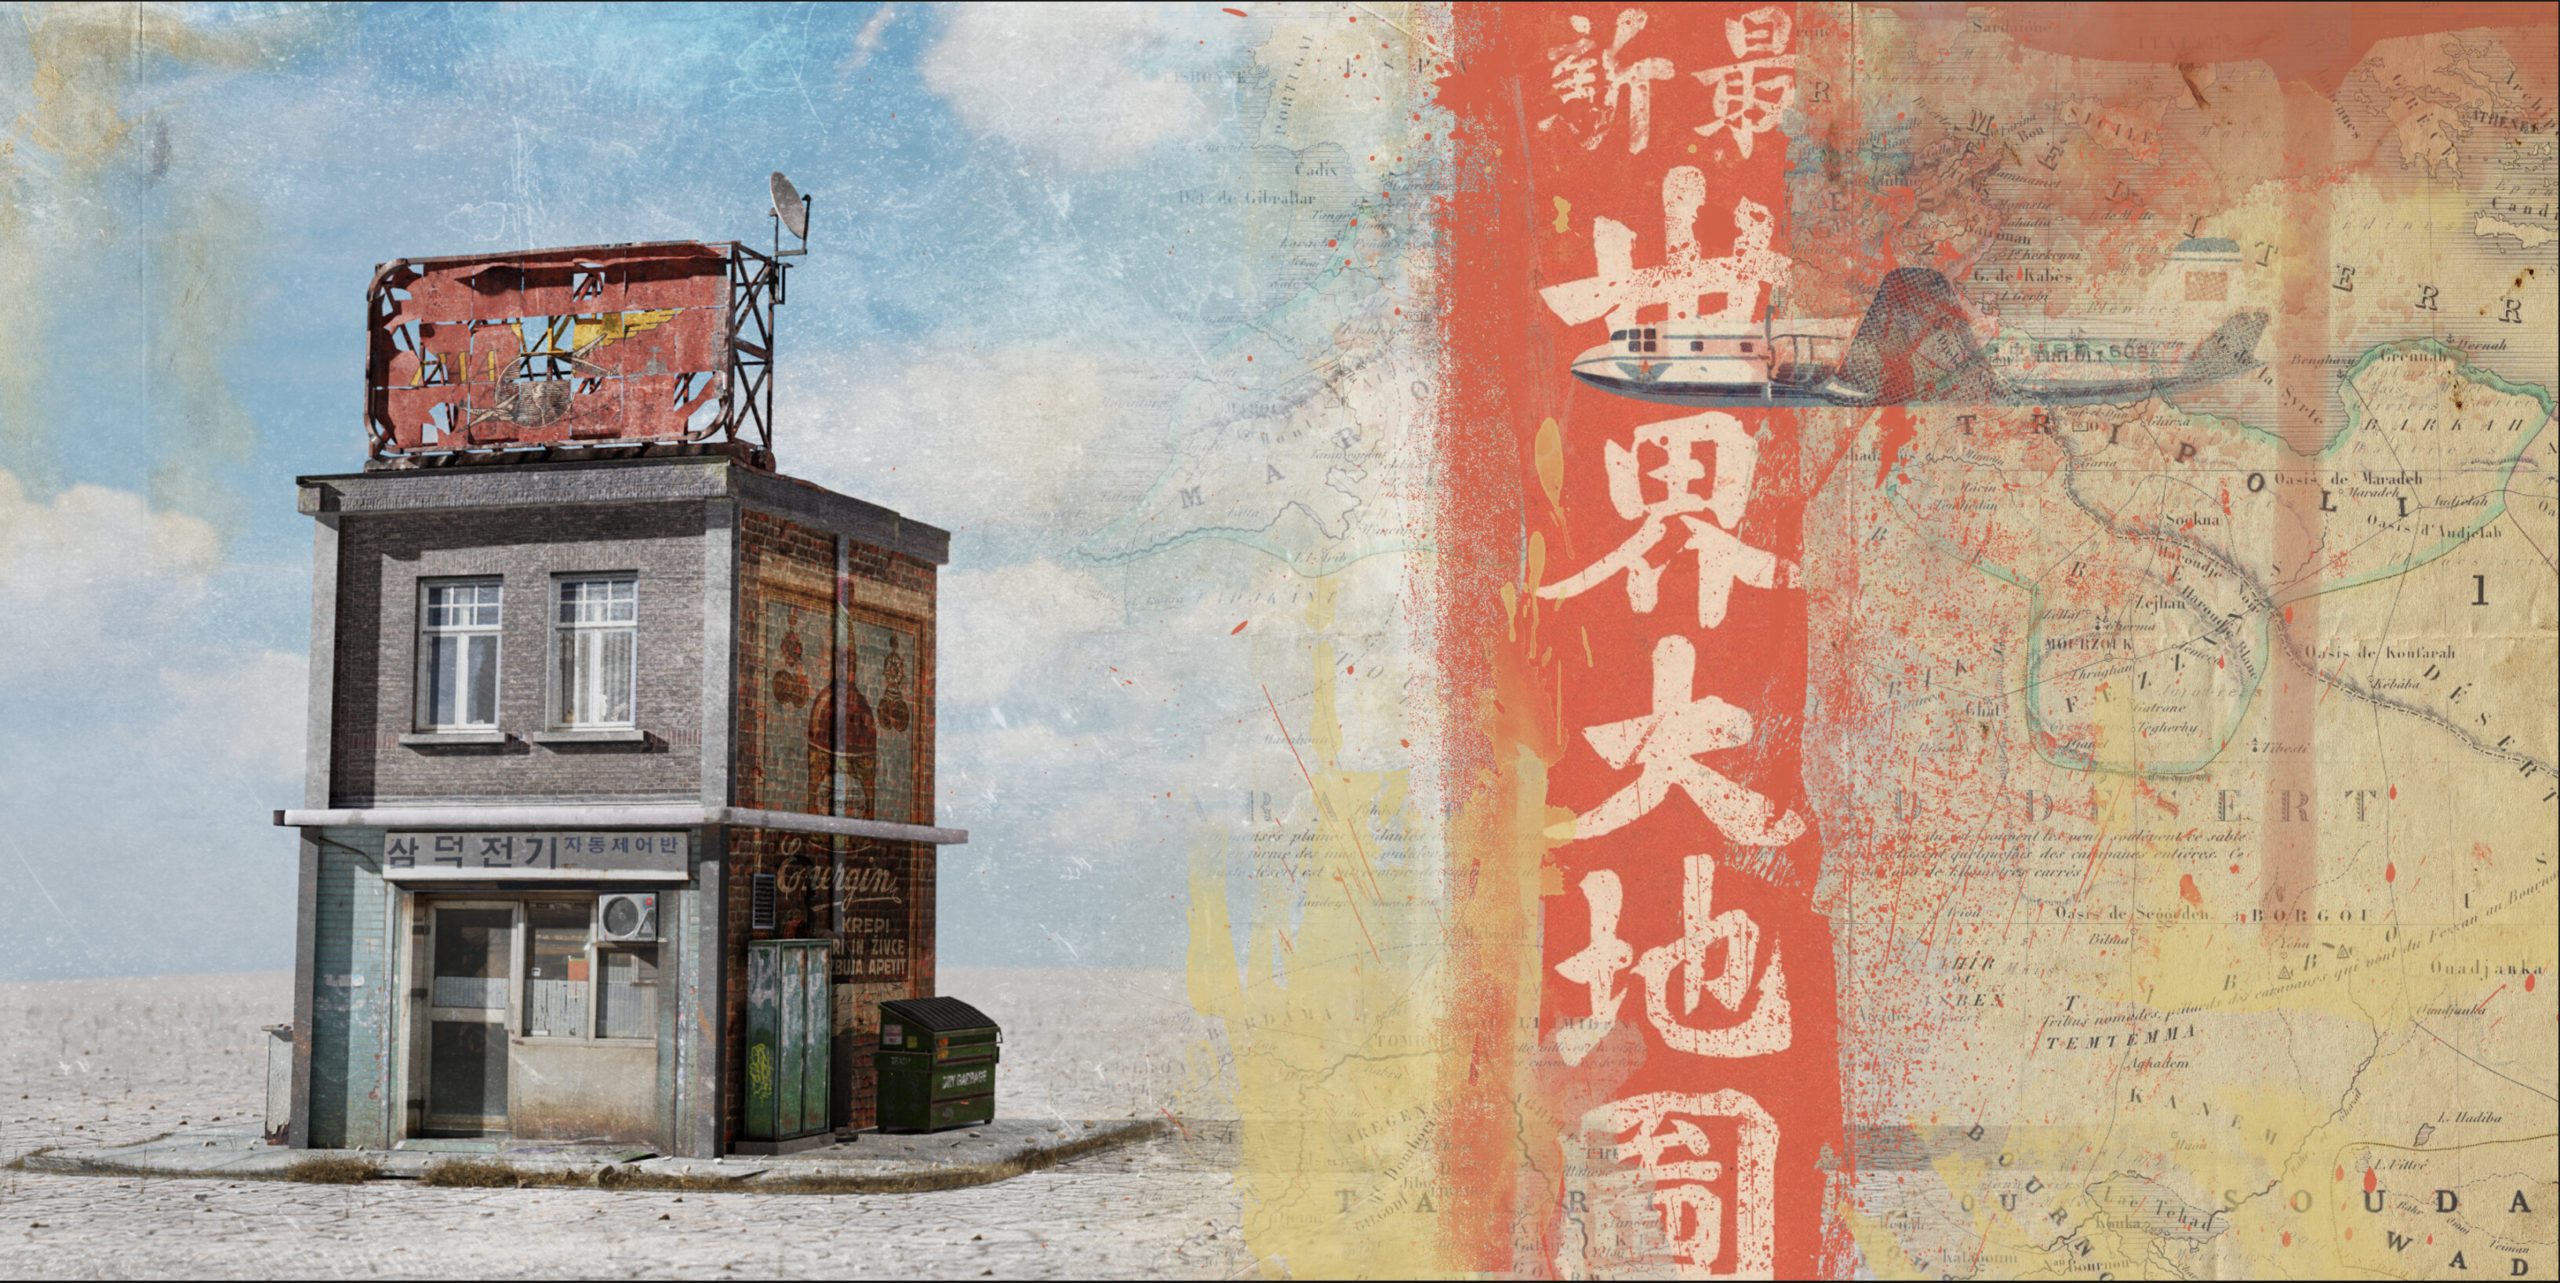
I had the idea of inner-city buildings isolated in the middle of nowhere and that’s where this image came from. I employed what I consider basic techniques, such as creating textured walls and extruding portions of a photograph, to create my buildings.
Scene and light
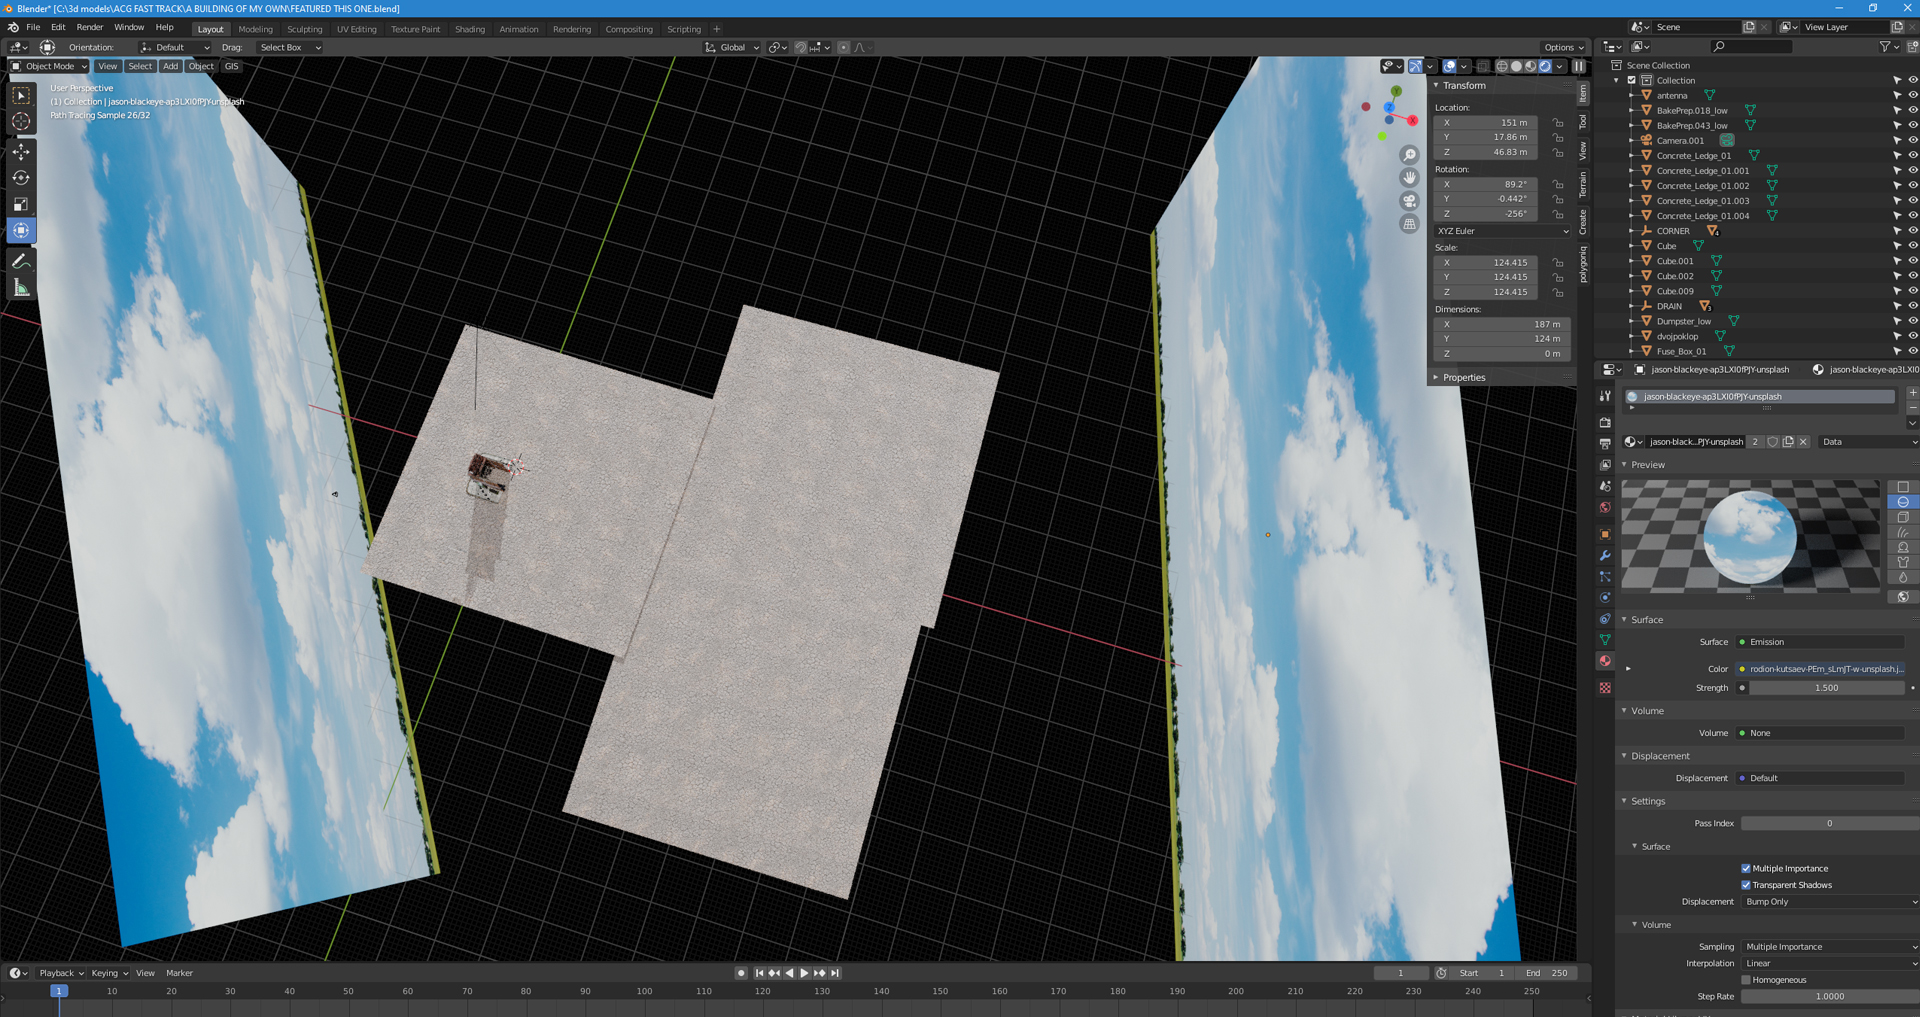
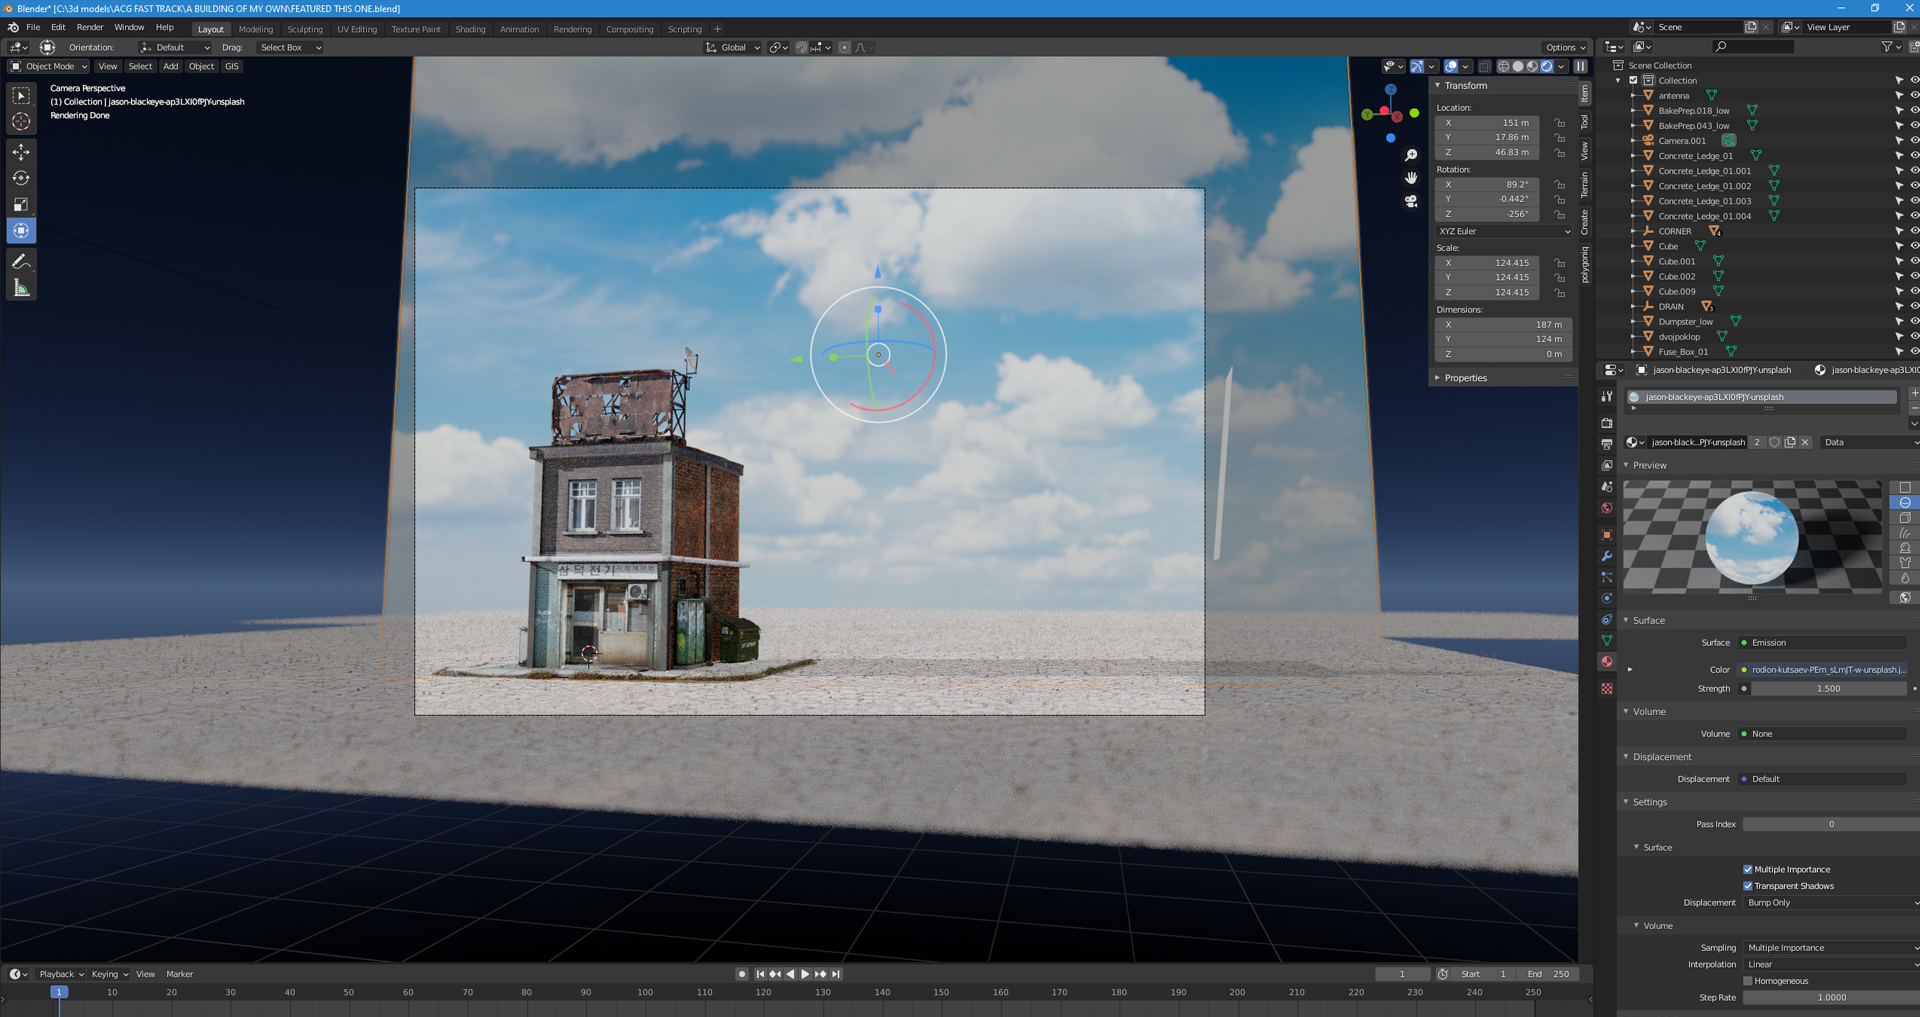
I used the True Terrain add-on as well as Sketchfab for things such as the billboard, dumpster, and utilities box.
Lighting is important to me. I’ve had the opportunity to study under Oscar-winning cinematographer Vimos Zsigmond (Close Encounters of the Third Kind) who stressed simplicity.
For this setup, I used the sky texture Nishita background, one sunlight lamp, and a flat mesh emission surface node as a fill light positioned just out of frame. The background images of clouds are set to emission to create soft even fill light, as well. I’m not a big fan of HDRI backgrounds as they limit the way I focus light. By using the image plane as both a graphic and light source, I have much more control.
Depth of field
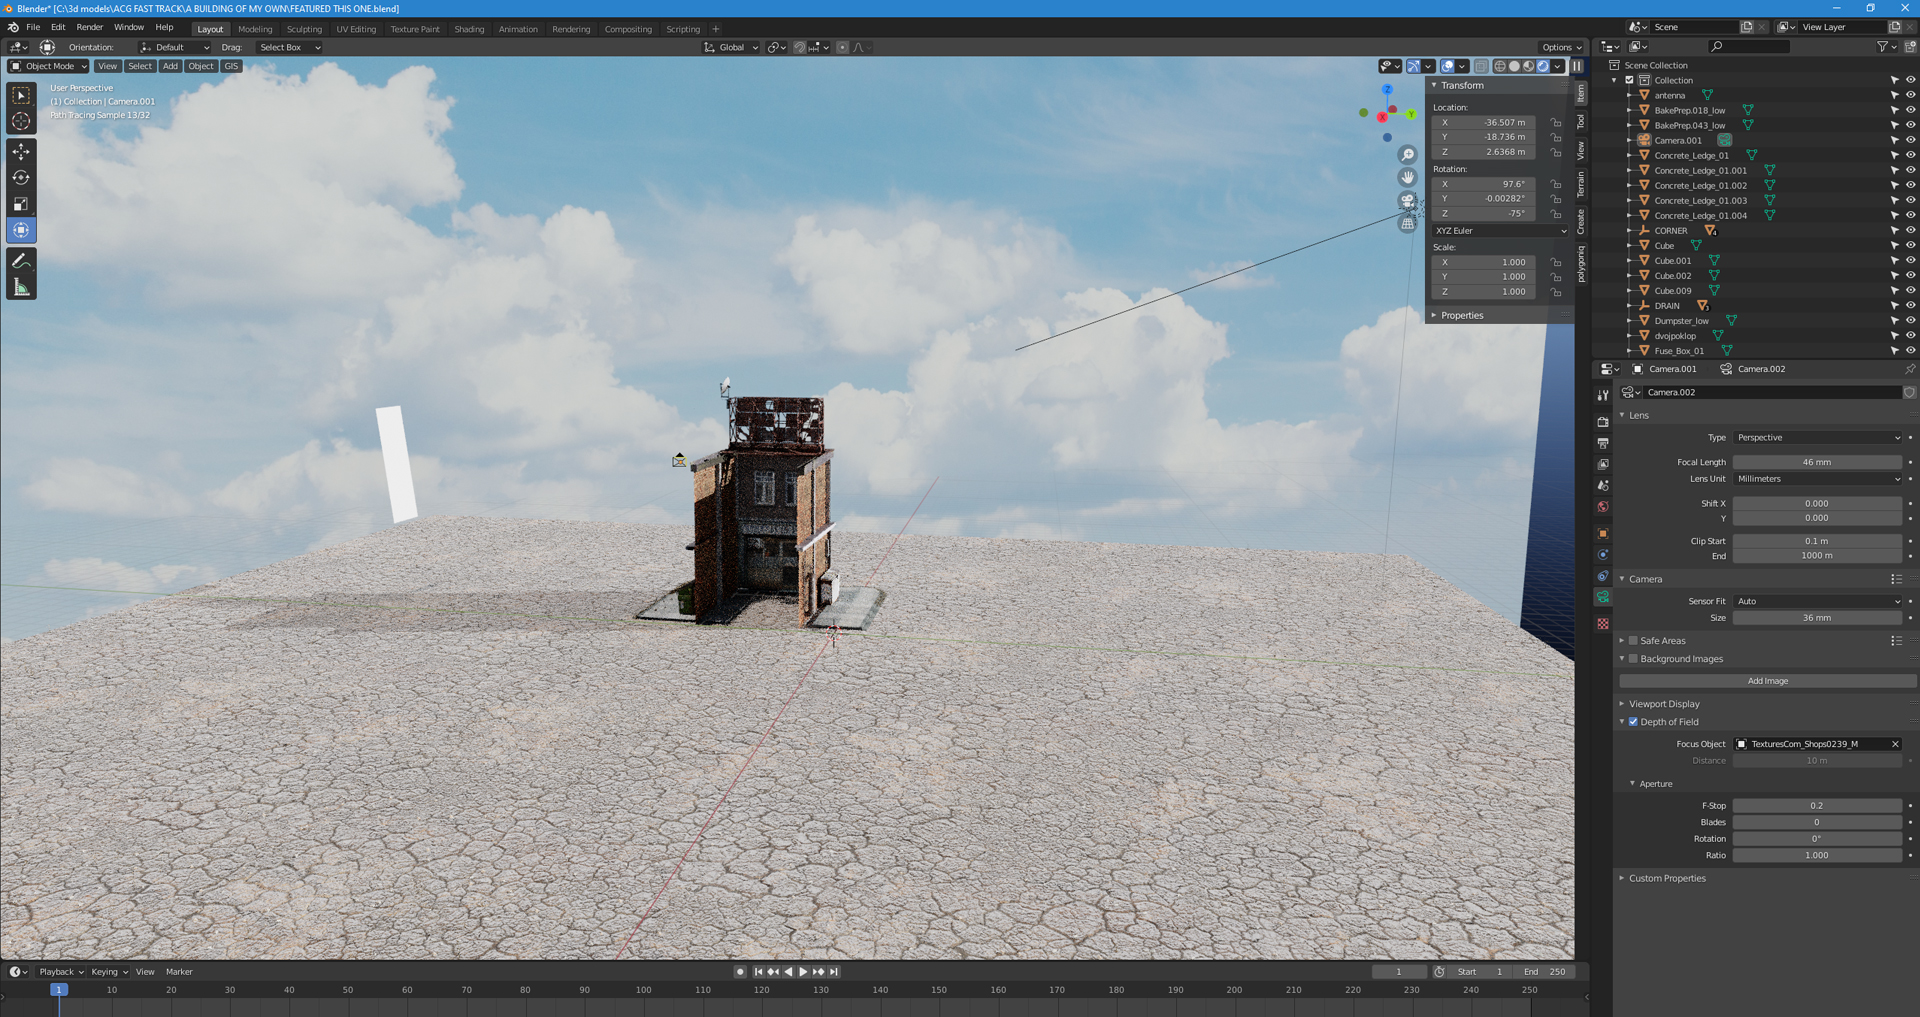
I think Blender’s camera is fantastic. It’s pretty close to the real thing and I love the way it plays with depth of field and lens size. For this shot, I used a 46mm focal length on a 36mm lens. The F-stop is 0.2 and I set the depth of field target on the facade sign at 10m.
Tools (really Photoshop)
Once I compose the image, I do a basic render with the denoise node in compositing. From there I open the file (a TIFF) in Photoshop and begin what I call post-production. Here I’ll make color corrections using the raw camera filter, add density using dust brushes, and add cracks and blemishes with brushes, as well.
I place the raw image over my other art file, which I created in Photoshop—in this case, an aged map—and blend using a variety of watercolor brushes.
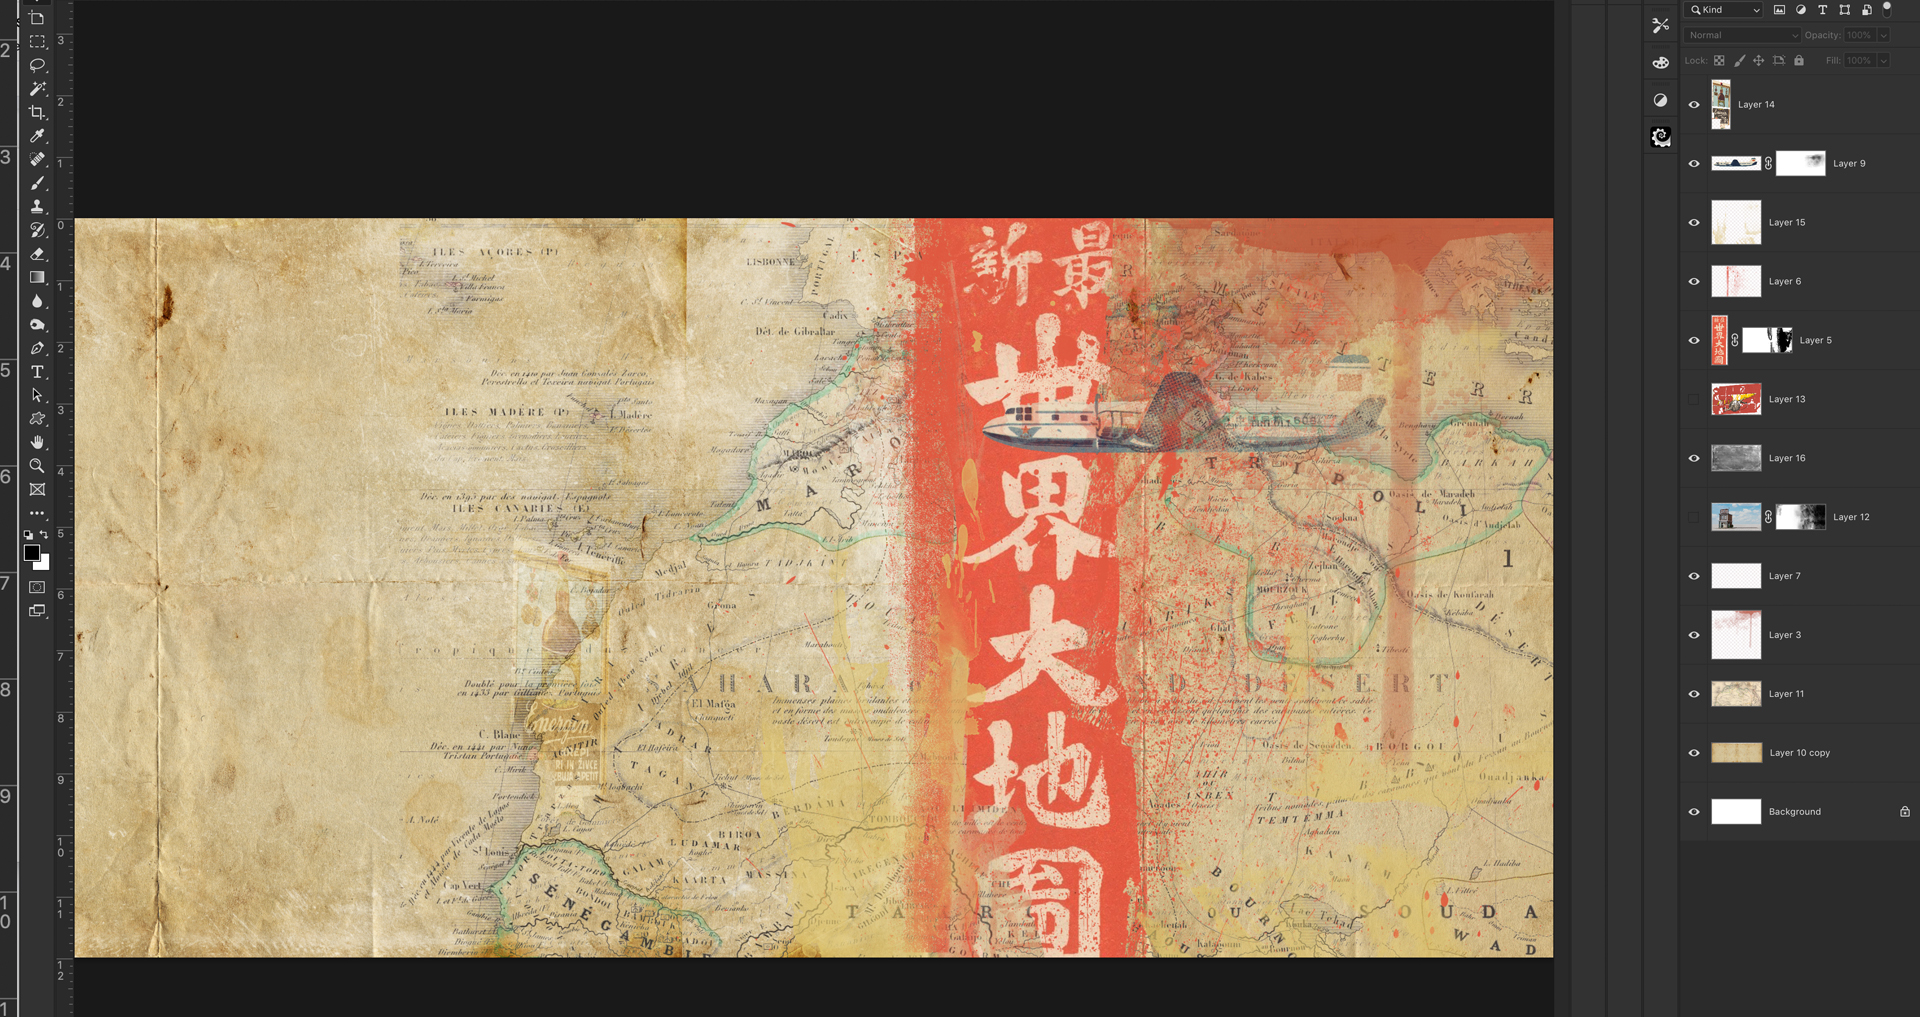
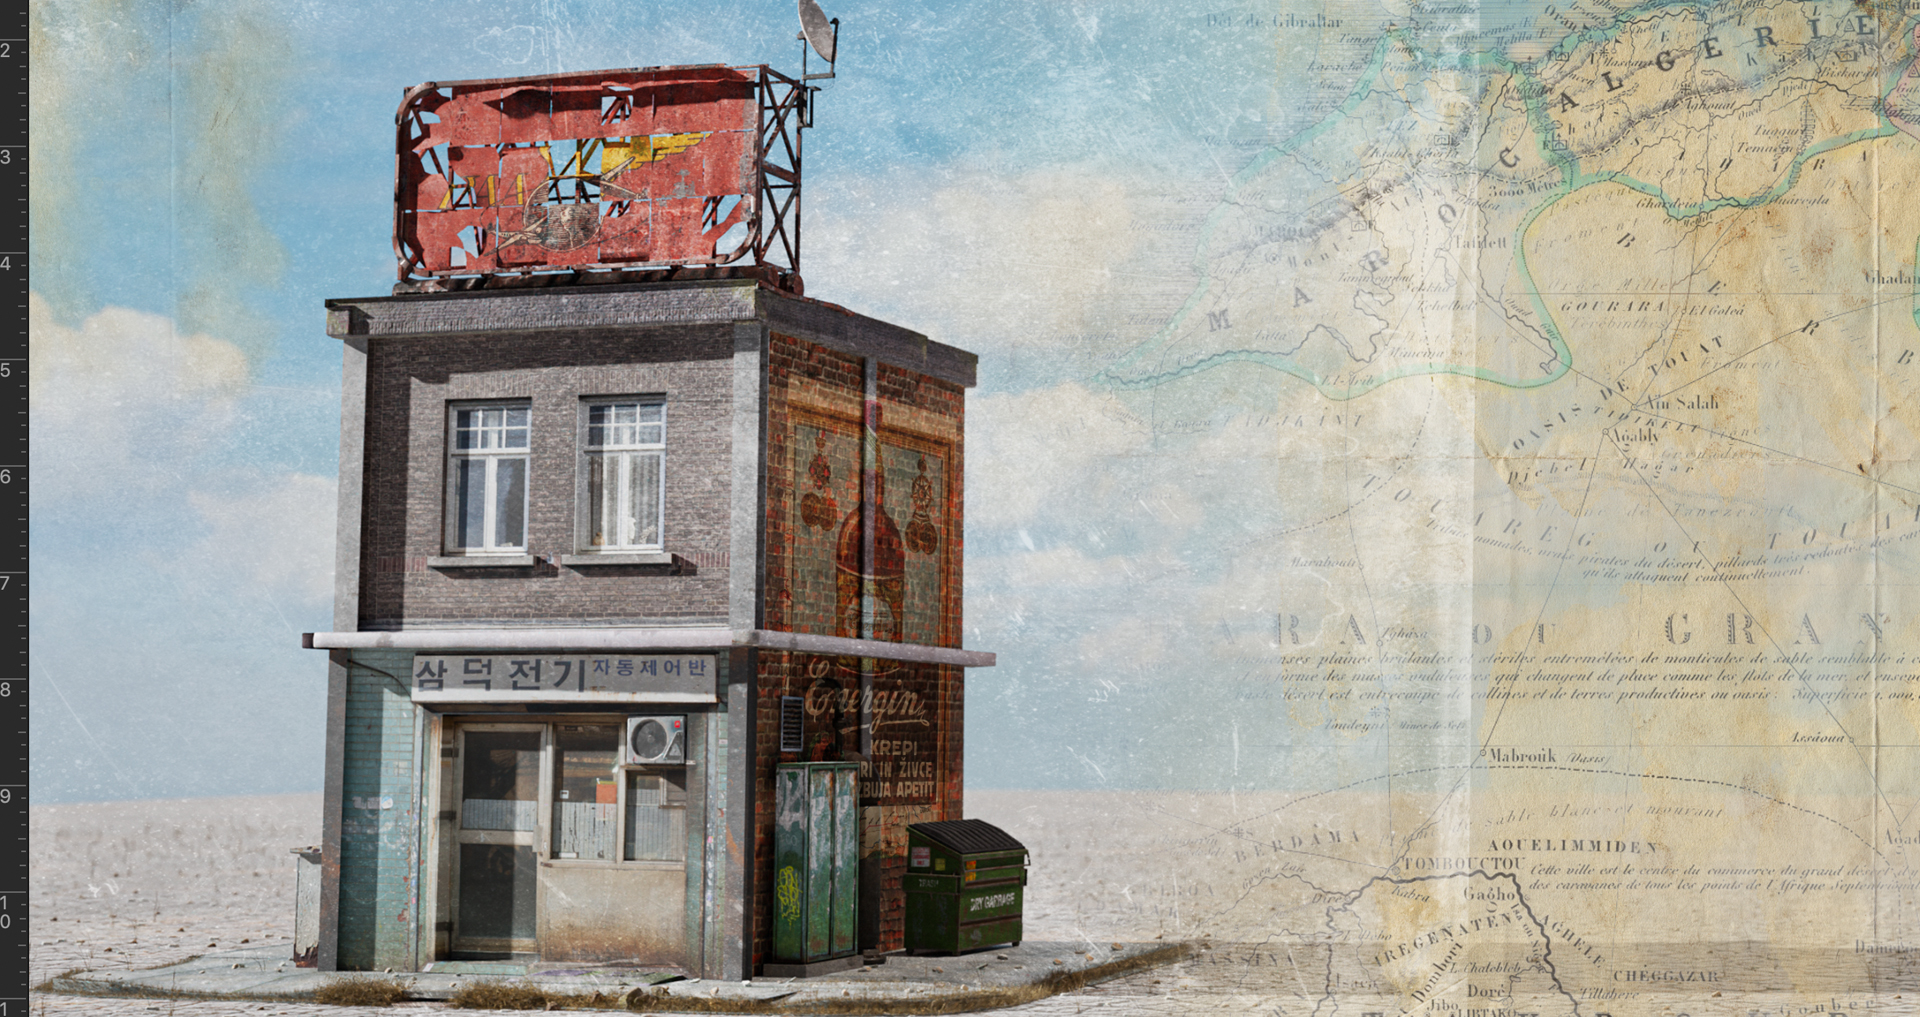
I also add art to the billboard and the side of the building. Then I add texture to the building scene. In the future, I’ll probably incorporate Substance Painter to handle the texturing. But for now it’s just Blender with plug-ins and Photoshop.
There’s another step to this in which I print out the piece, coat it with gel and create a color “gel skin transfer” which I place on cradled wood board and embellish with acrylics. That satisfies my need to have something in my hands.
About the Author
 Larry Weiner, Mixed media artist


Great article. Some helpful tips. I’ve seen Larry’s creations and they are fantastic.
Thanks,
Mookie Gomez
Thanks Mookie!
Eye candy.. inspiration too!
Where can I buy a copy?
Ed: [email protected]
Hi – thanks! You can contact me directly at [email protected]
Larry
Fabulous! I love art like yours where you provide very thoughtfully detailed elements that then enable the viewer to muse on and decide the all important Story.
Jesse
Thanks Jesse. I love doing it.
thats top dollar stuff there. I really like how you did that. I’m amazed. Smilin. Thanks for the tips.
Randall Underwood
Thanks Randall!