

Hello fellow Blenderers, my name is Paulo Brabo, I am a Brazilian illustrator currently living and working in Italy.
Before jumping into Blender as a lockdown measure in June 2020, I had no experience with 3D except for some dabbling in ZBrush. All my experience, more than 25 years of it, rested on 2D illustration work, meaning Z-less software like Illustrator, Krita, and Photoshop.
I distinctly remember installing some version of Blender around 2016, hoping to use it for video editing, but its interface and internal logic seemed to me so arcane that I uninstalled it almost immediately. When I came back to Blender we were all living into the 2.82+ era, meaning the experience felt more flowing and intuitive, even with my total ignorance of 3D terms and workflow. Baking normals? Unwrapping UV? Compositing? I confess I still don’t know how most of these work and to what end they serve.
Learn more on qarnot.com.
Fortunately, Blender’s magic is open to newbies like me, mostly because in my journey I have been guided by Blender’s generous and thriving community. Most of my questions had already been answered in a forum thread somewhere, and an army of YouTubers still compete to answer questions I am not even aware I will have (thank you, guys and girls).
Since then, my goal has been trying to bend Blender into matching the look and feel of my 2D illustration work. My main inspirations are early 20th-century Italian advertising illustrations, Soviet-era propaganda posters, and vintage picture books, meaning flat colors and some touches of airbrush and texture. That also means that most non-photorealistic rendering still looks too realistic for me. In fact, what lured me back to Blender were the wonderful things I saw people doing with Grease Pencil, running aggressively against the 3D grain.
I started my Blender experiments with Grease Pencil, but GP is (or maybe was—who can keep up?) very outline-centered. The look I keep going for requires flat fills without outlines, so I decided that meshes (mostly low-poly) along with simple shaders work best for me.
The Tuscan Sketch
My goal for this piece was to capture in a minimal style the golden, glowing atmosphere of the region of Tuscany in Italy. It had to be simple and stylized, and it would have to cover 360 degrees so that a camera could fly around freely in all directions. Ideally, each frame of the final animation would be as beautiful and well-composed as a single, standalone illustration. As for the rendering engine, EEVEE would be ideal, since I was going in the opposite direction of the photorealism of Cycles.
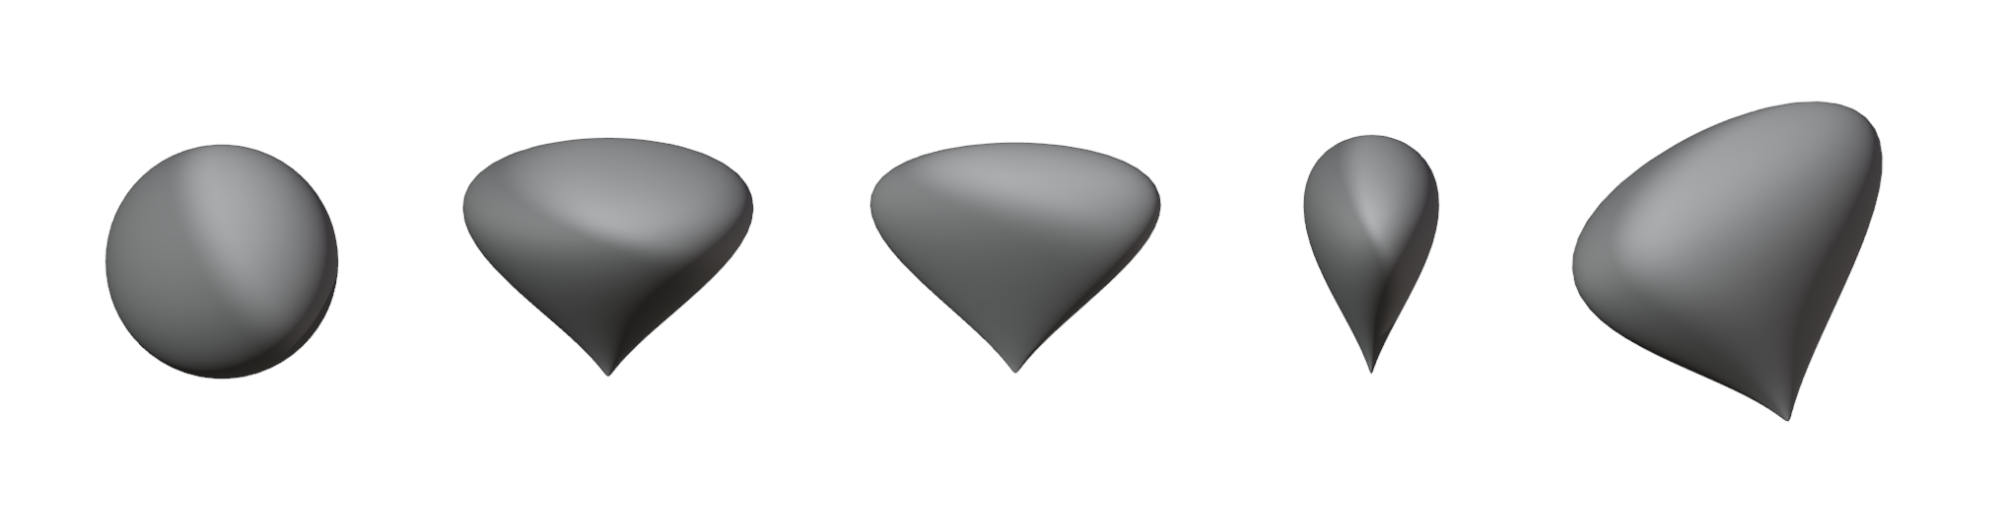
Basic shapes: the inverted teardrop
The basic building block in the composition is a simple UV Sphere with a single modifier. I add a sphere and then apply on it the SimpleDeform modifier, mode set to Taper, Axis set to Z, and Factor set to 1.8.
There you have it, my current favorite shape. Sometimes I squash it by scaling it along the X or Y axis, but that’s mostly it.
A bird’s eye view will reveal that the “terrain” on the picture is formed by the accumulation of the same basic shape, squashed and rotated as needed. Even that huge cloud in the sky is… more of the same.


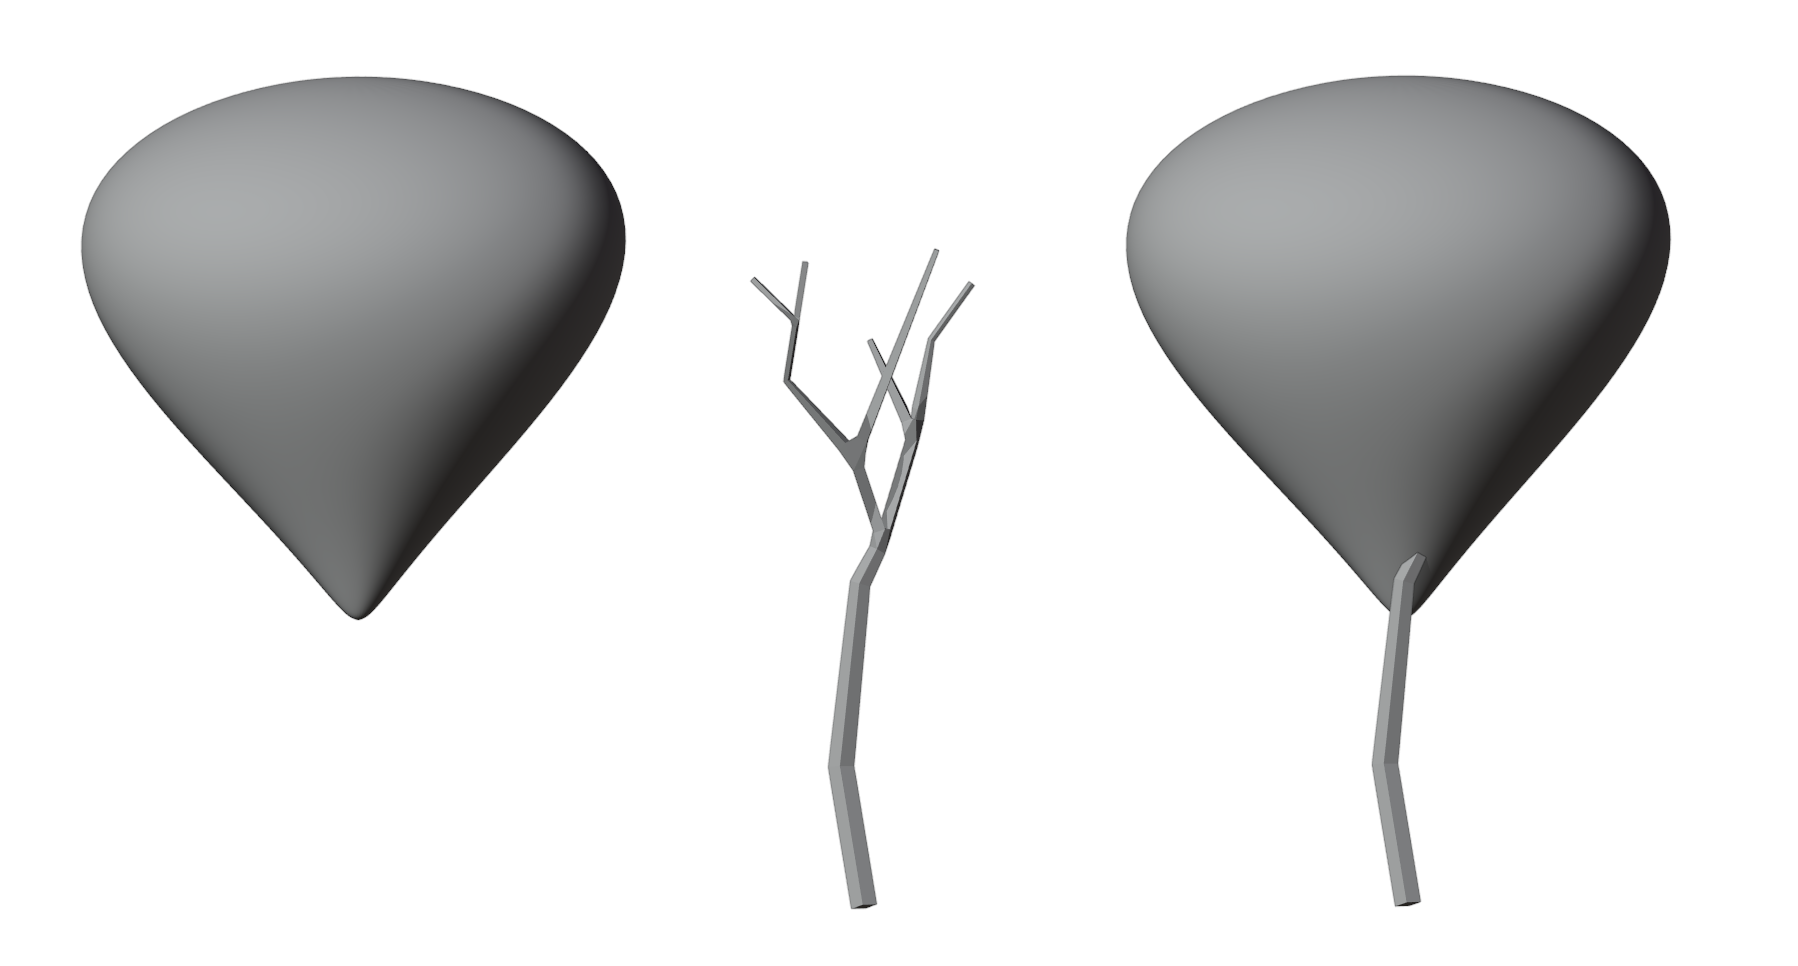
Basic Shapes: the tree trunk
Apart from the cypresses, which are low-poly spheres very roughly modeled in Edit mode, the only piece of “real modeling” in the picture is the tree trunks.
For those, I followed the Youtube tutorial by ManekiNeko (the tutorial is from 2016 but Blender is yours forever). It taught me a fun way of drawing in 3D space, starting with a single vertex and extruding the heck out of it upwards, then finally giving shape to the resulting network with the Skin modifier. I later used the same technique, along with the same basic inverted teardrop shape above, to make the Wanderlust Peacock.


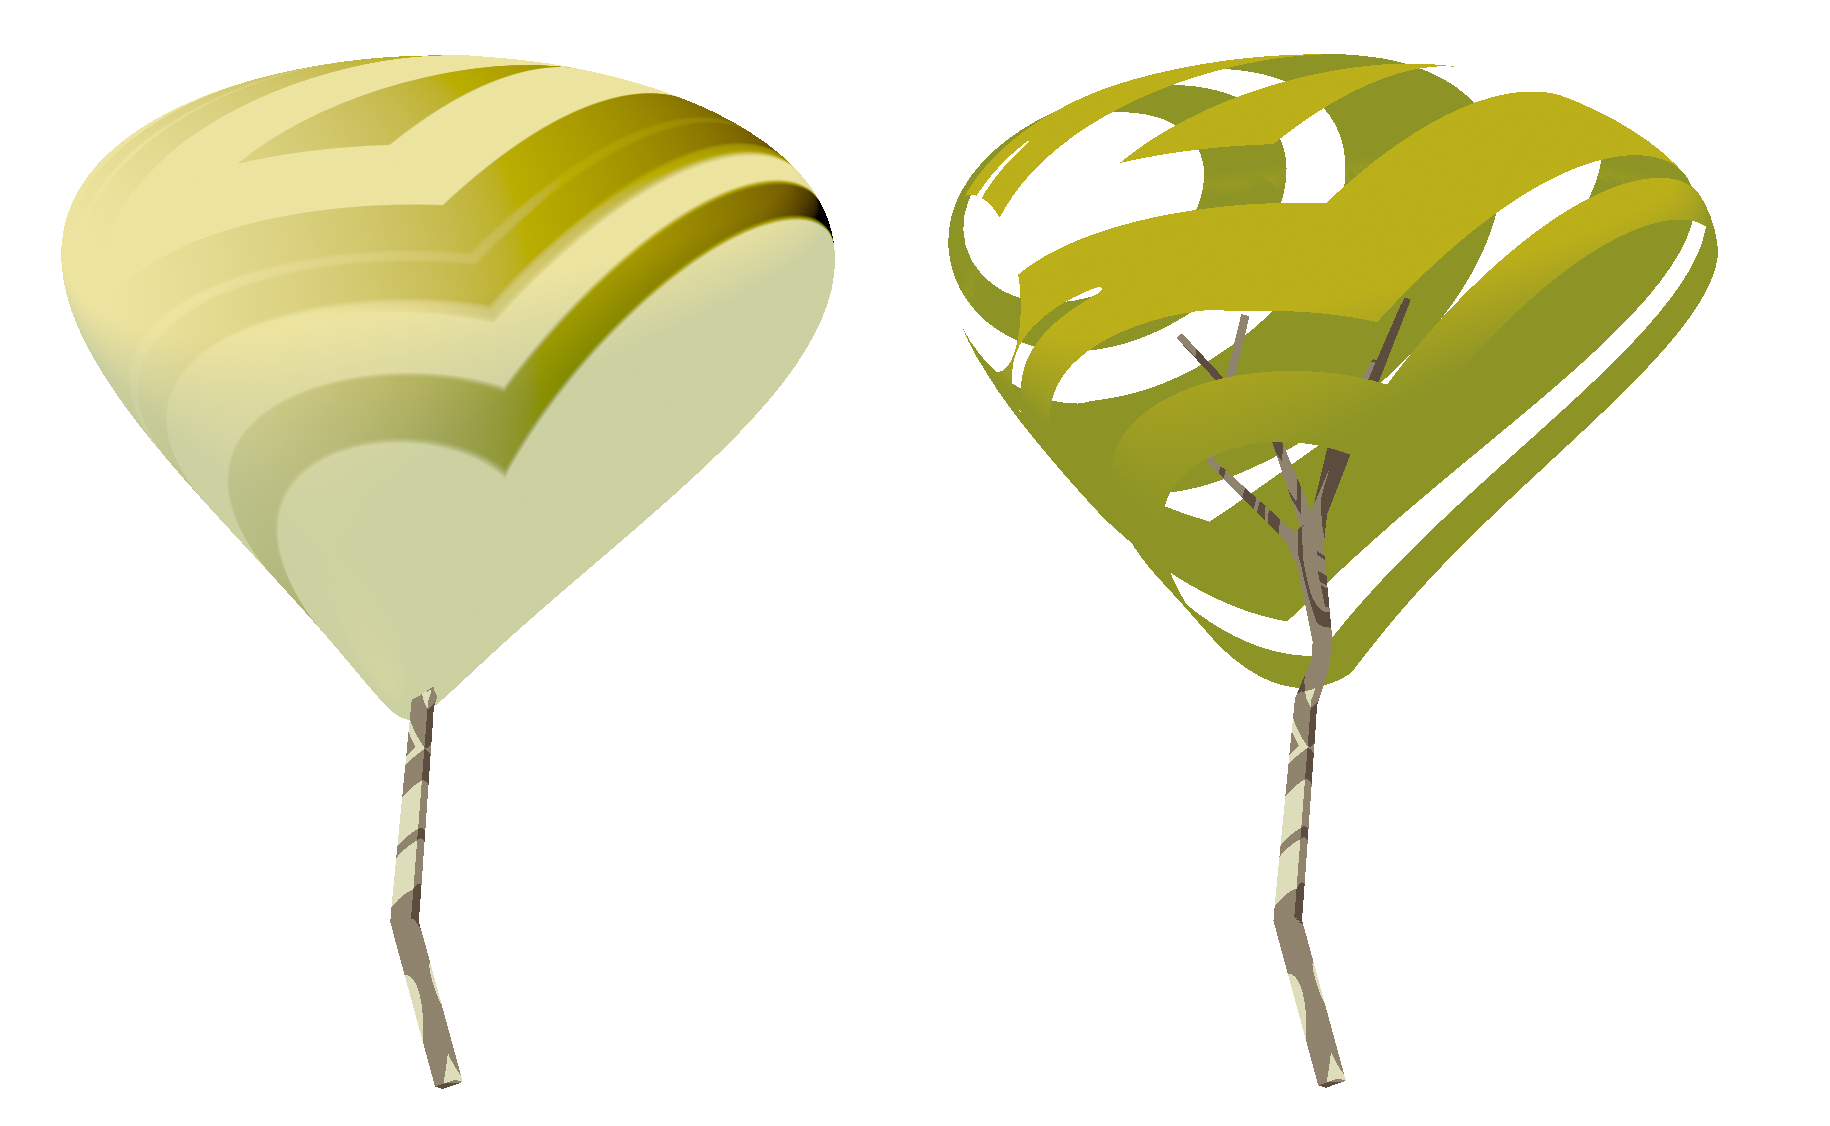
And then, if you put an inverted teardrop shape on the top of that tree trunk, you have the most complex element in this composition: a picture book tree.
Basic Shading: the toon material
For the look we’re going for, the way to start is a simple toon material for EEVEE. You’ll find many variations of this solution around the internet, but in each variation, the internal logic remains the same: you start (1) with the full light information provided by the Diffuse BSDF shader node, (2) convert that information into RGB dialect using a Shader to RGB node and then compress that range into a limited palette of colors (sometimes two will suffice), defined by a ColorRamp node.


To add some texture and interest to the equation, we put an additional layer of imagery upon that last ColorRamp node, mixing the two with a Mix RGB node set to an interesting blend mode. In this case, I used a Gradient Texture node, but not before distorting its mapping with the Noise Texture and Voronoi Texture nodes.


Basic Shading: the masked variation
Instead of using that distorted Gradient Texture as an interest layer on top of the basic toon material, you may use it as a transparency mask which will create an illusion of geometry. Start with the same general setup, accentuate the contrast on the last ColorRamp node and use the thread as the Factor on a Mix Shader node. Into that Mix Shader node, plug (1) an Emission shader with the basic toon material and (2) a Transparent BSDF node. On the material settings set Transparency to Blend or Hashed.
There you have it, some fake geometry and a beautiful minimal tree!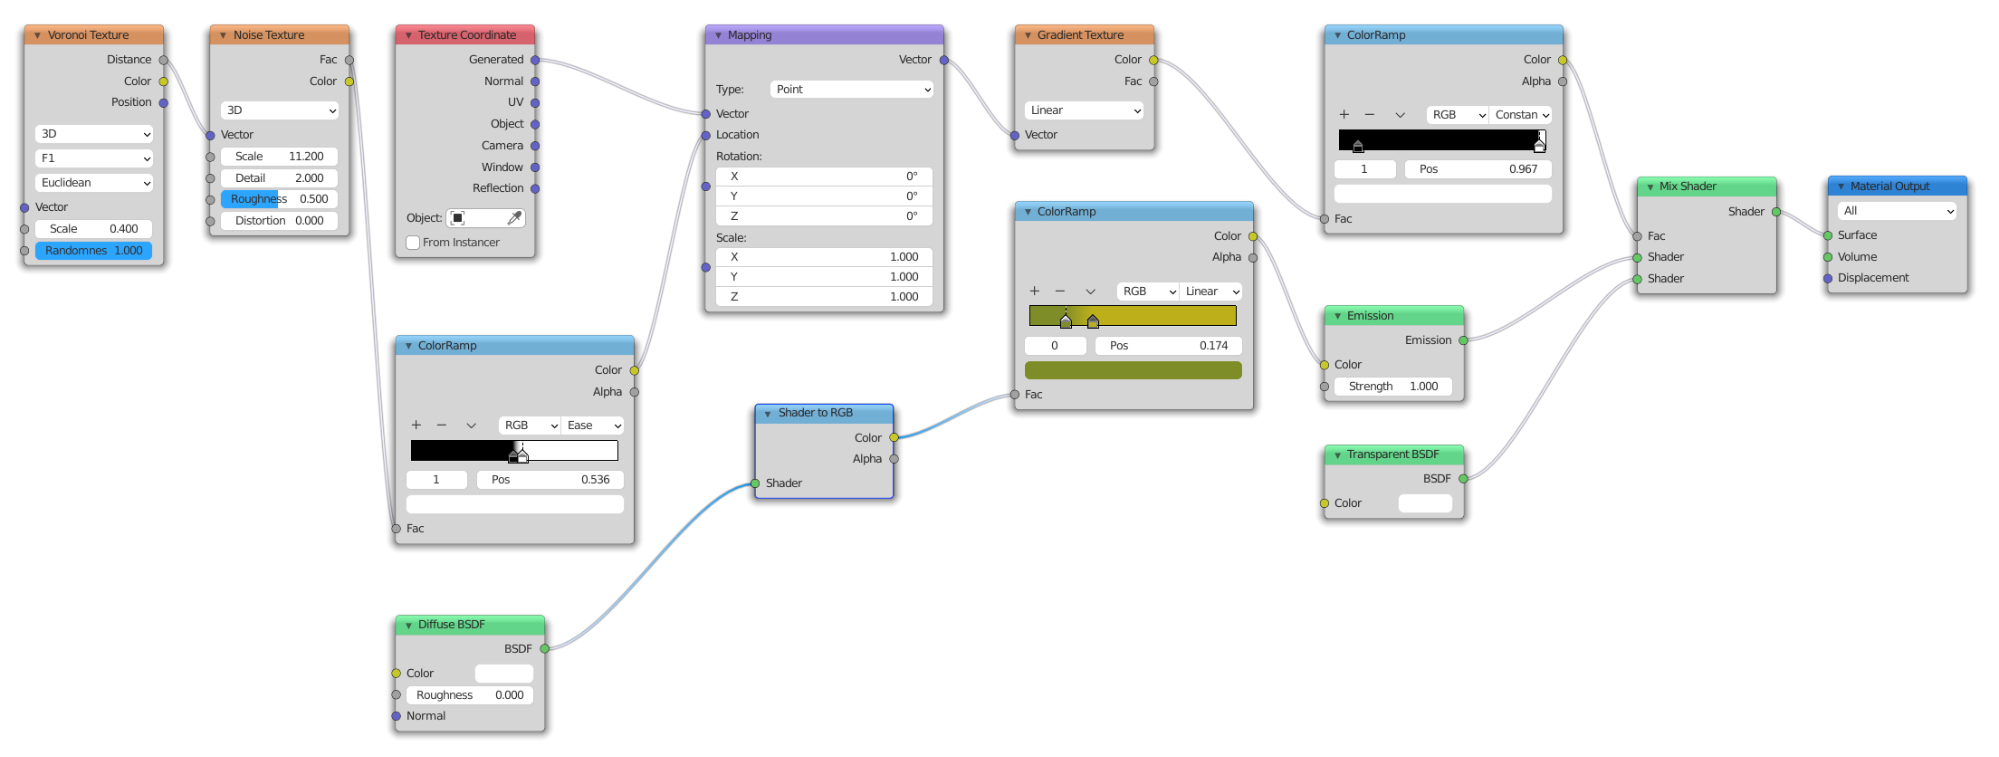
Basic Shading: the World material
The final element is a setup for the World material. It will simulate hilly surroundings when the camera flies around in the final animation. It’s essentially a Gradient Texture defined by a ColorRamp node. On the Mapping node, it’s rotated 90 degrees on the Y-axis so the blue will be on top and the green on the bottom. A Musgrave Texture attached to the Location plug of the Mapping node will provide some wobbling to the Gradient Texture, in order to simulate curvy hills and atmosphere.


The rest is, essentially, composition—which is the old art of distributing the shapes in space in a way that will produce a beautiful, balanced effect on the canvas/camera.
VSE Editor: making it golden
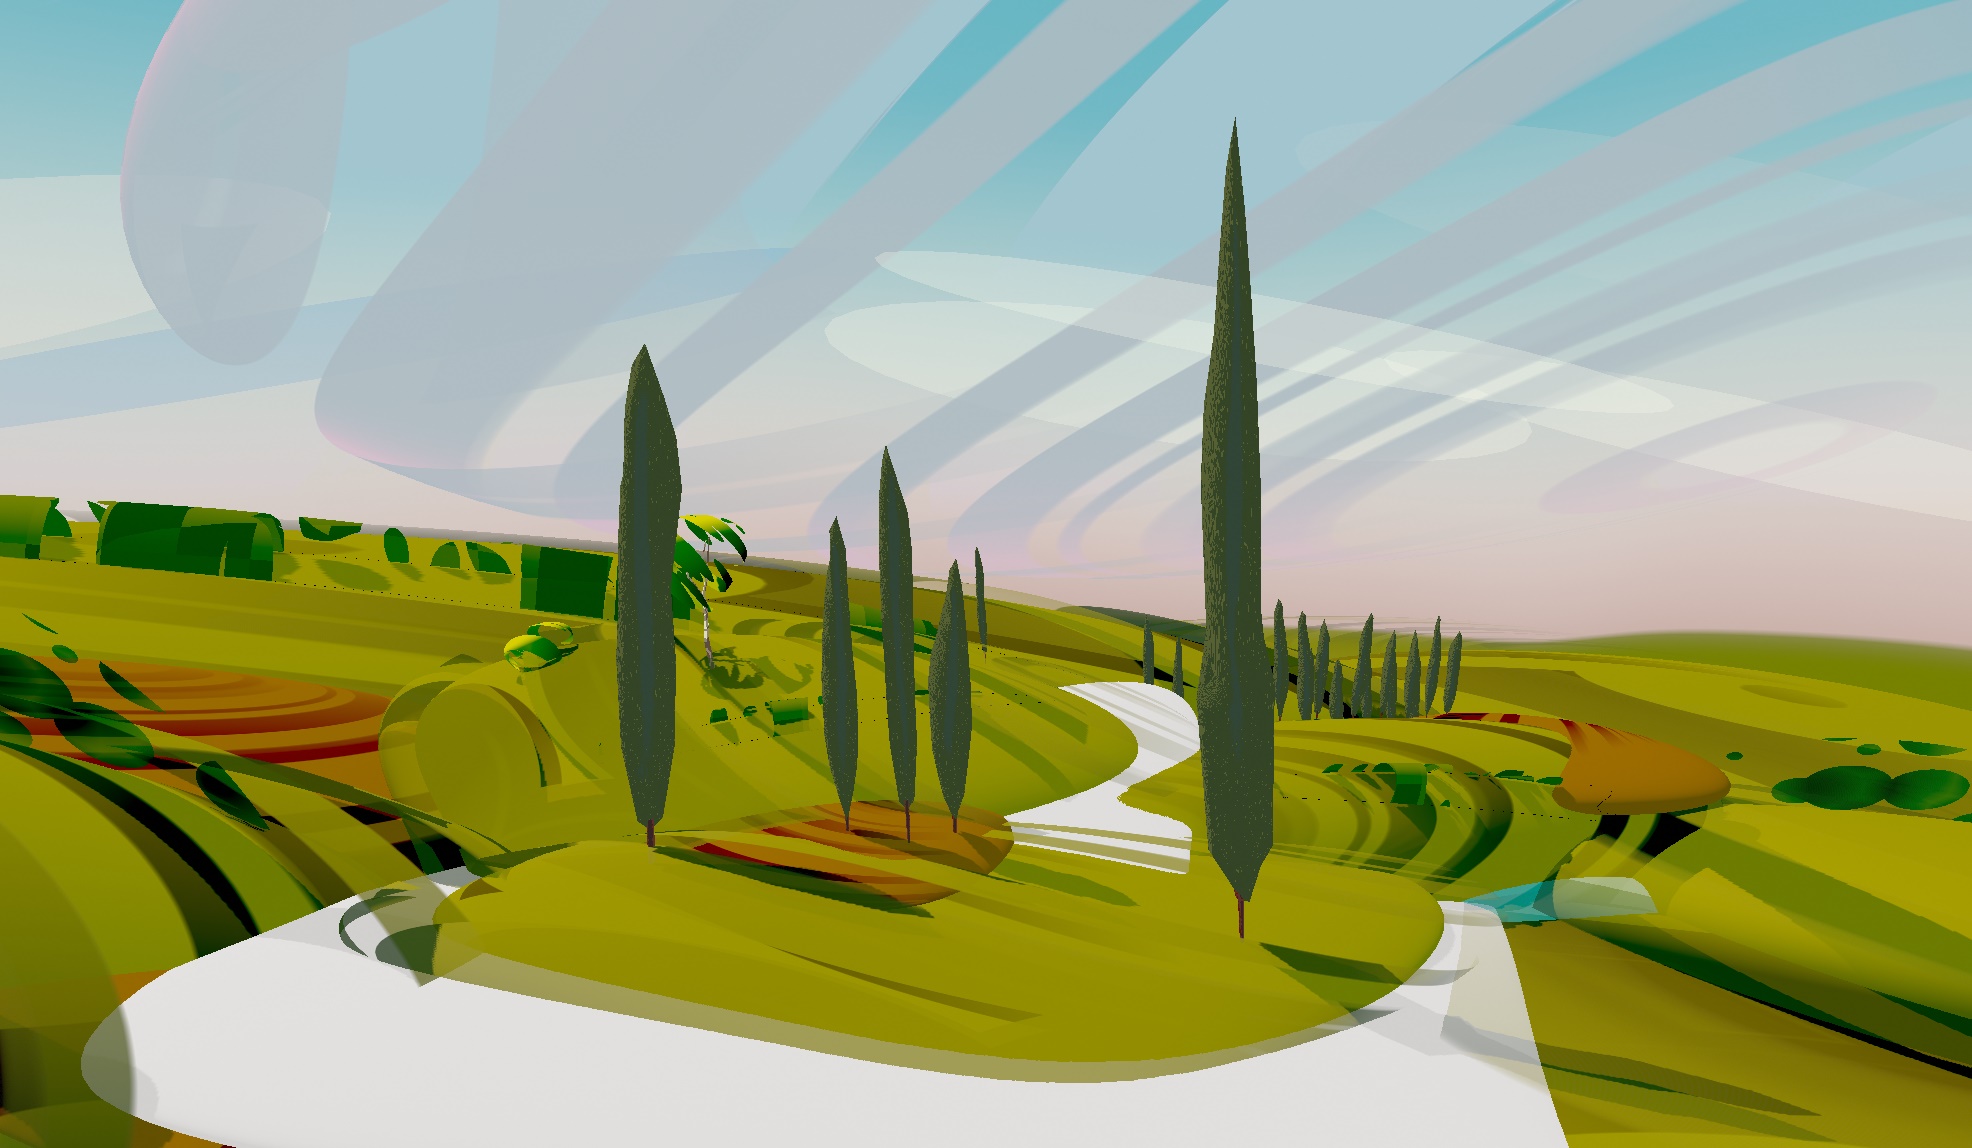
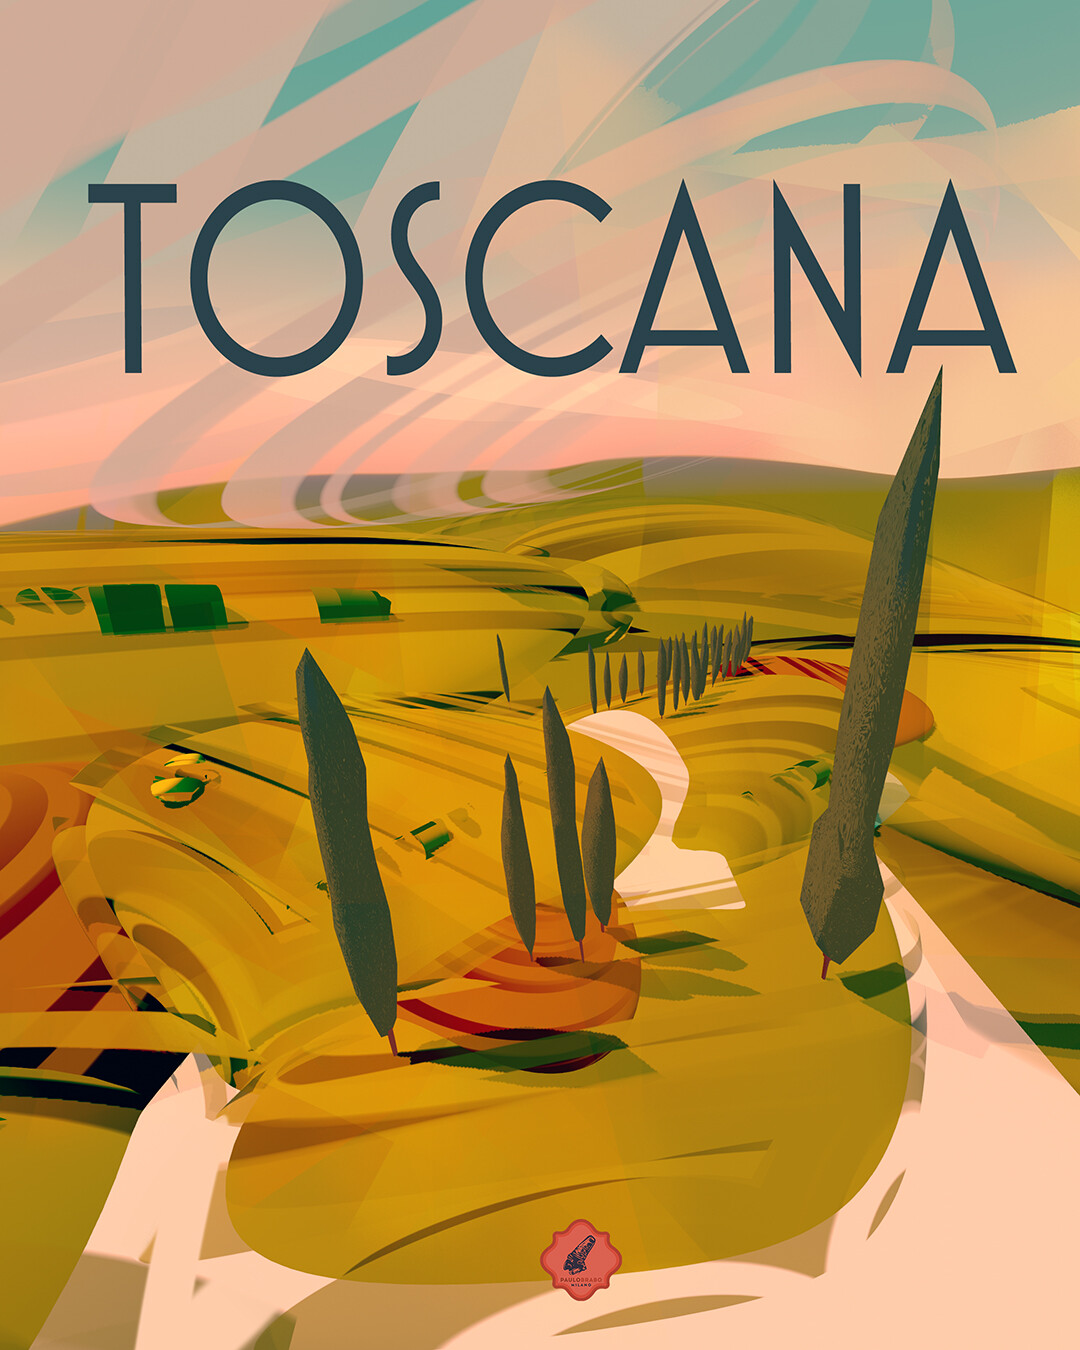
Once the animation is ready I notice that the final rendering doesn't look as golden as I intended, and we’re talking sunny Tuscany here. On the VSE Editor, I add a Color Balance modifier to the image sequence and do some color bending towards yellow and red.
Now it looks perfect.


With the animation ready, I take a single frame and bring it into Photoshop. It will suffice to add a title using the right geometric font and there it is: a vintage Italian touristic poster made almost entirely within Blender.
About the Author
 Paulo Brabo, Barefoot illustrator. I write books, I make drawings and I draw letters. Do follow me on Twitter and Instagram.
3 Comments
This looks really great! And special thank you for detailed information on how you made this (good and on point explanation plus screenshots from your shaders)!
I also looked at your peacock model over at blenderartists. Looks super cool! Are the procedural textures influenced by the view angle ?
Thank you, Rafael! Yes, the shaders I used on the Wanderlust Peacock are influenceiby the viewing angle, and that's an effect rather easy to reproduce. Just add a Geometry node and plug its *Incoming* output practically anywhere on the Mapping node you see in the screenshots above.
It was a real pleasure reading your article, it's so well written and the artwork is beautiful, keep up the good work