Behind the Scenes: Bed and Bathroom

Hi there! My name is Filipe, and I am an architect from Brazil. I have always enjoyed working with ideas and the whole process of bringing them into existence. After failing miserably to portray a project with a cardboard and glue model in mid-college, my 3D journey began. It has been some three years since I started learning Blender by googling every little doubt I had. Today, it has become my main tool in the process of translating things that only exist in someone’s mind into something readable—and hopefully enjoyable—to other people.
[sponsor id=’qarnot’]
About the project
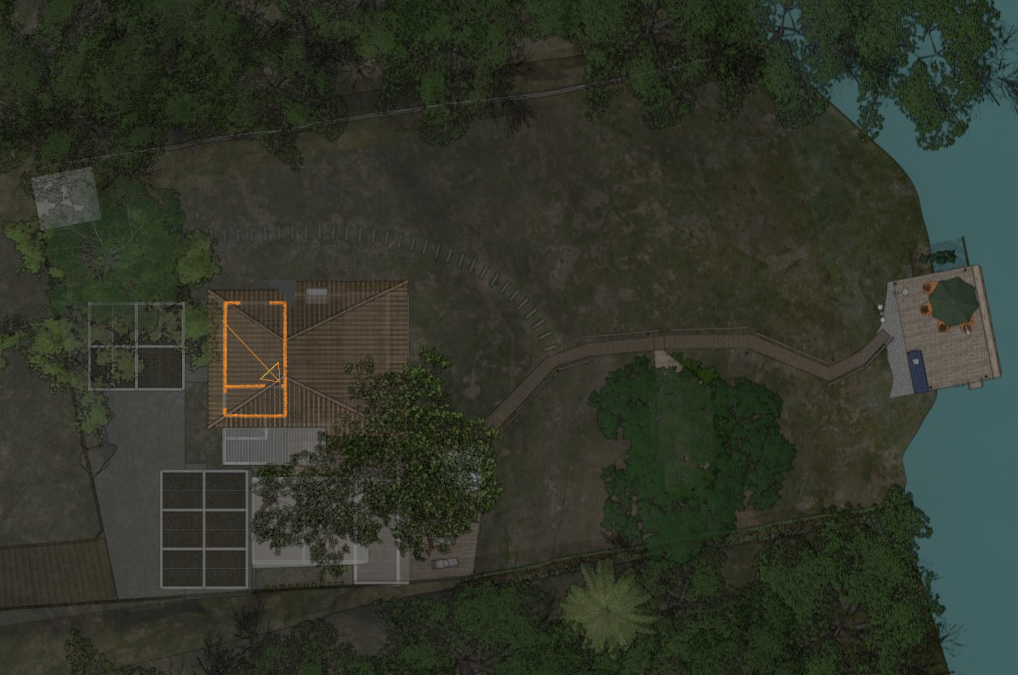
This project was part of a lakeside house renovation, quite a job from a visualization angle. The downside of it—from a purely selfish 3D artist point of view, that is—is that the renovation itself was ongoing while the 3D model was in production and, since I was involved in the detailing process as well, there was not much time to give the deserved attention to the 3D. Most of the images we ended up producing were from a very practical standpoint: viewport interactive render screen grabs for quick feedback, in most cases. These renders from Bed and Bathroom were the first of a series, I hope, of more presentable images from this project. All the credits on the design go to RPeixoto Arquitetura.
Setting up the file
After some time having to do the same routine at the beginning of each project, I came up with a Startup File setup that would allow me to start Blender and get to work. Here is the basic layout that I use most of the time:
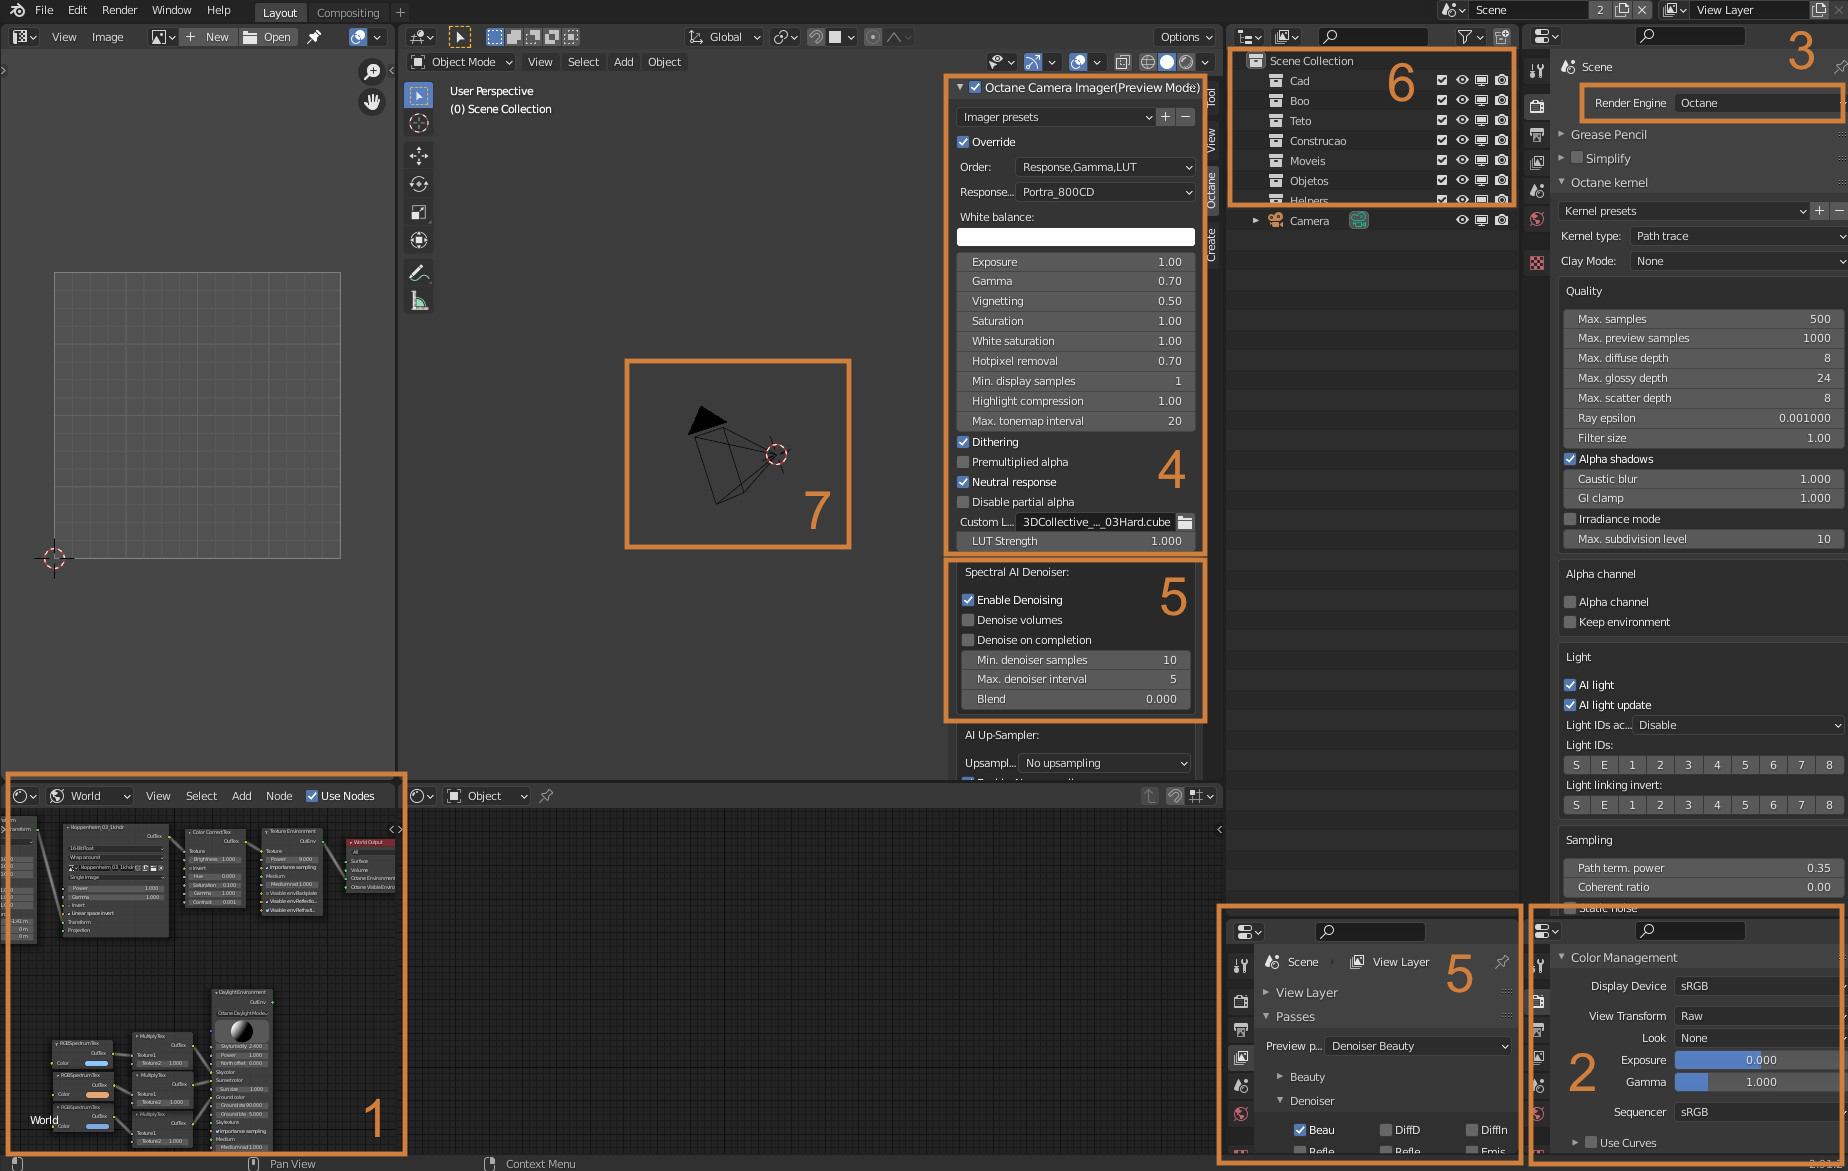
- World settings with an HDRi texture and an alternative Daylight Environment ready to plug if I decide to go for that;
- Blender Color Management setup;
- Octane Render Engine active;
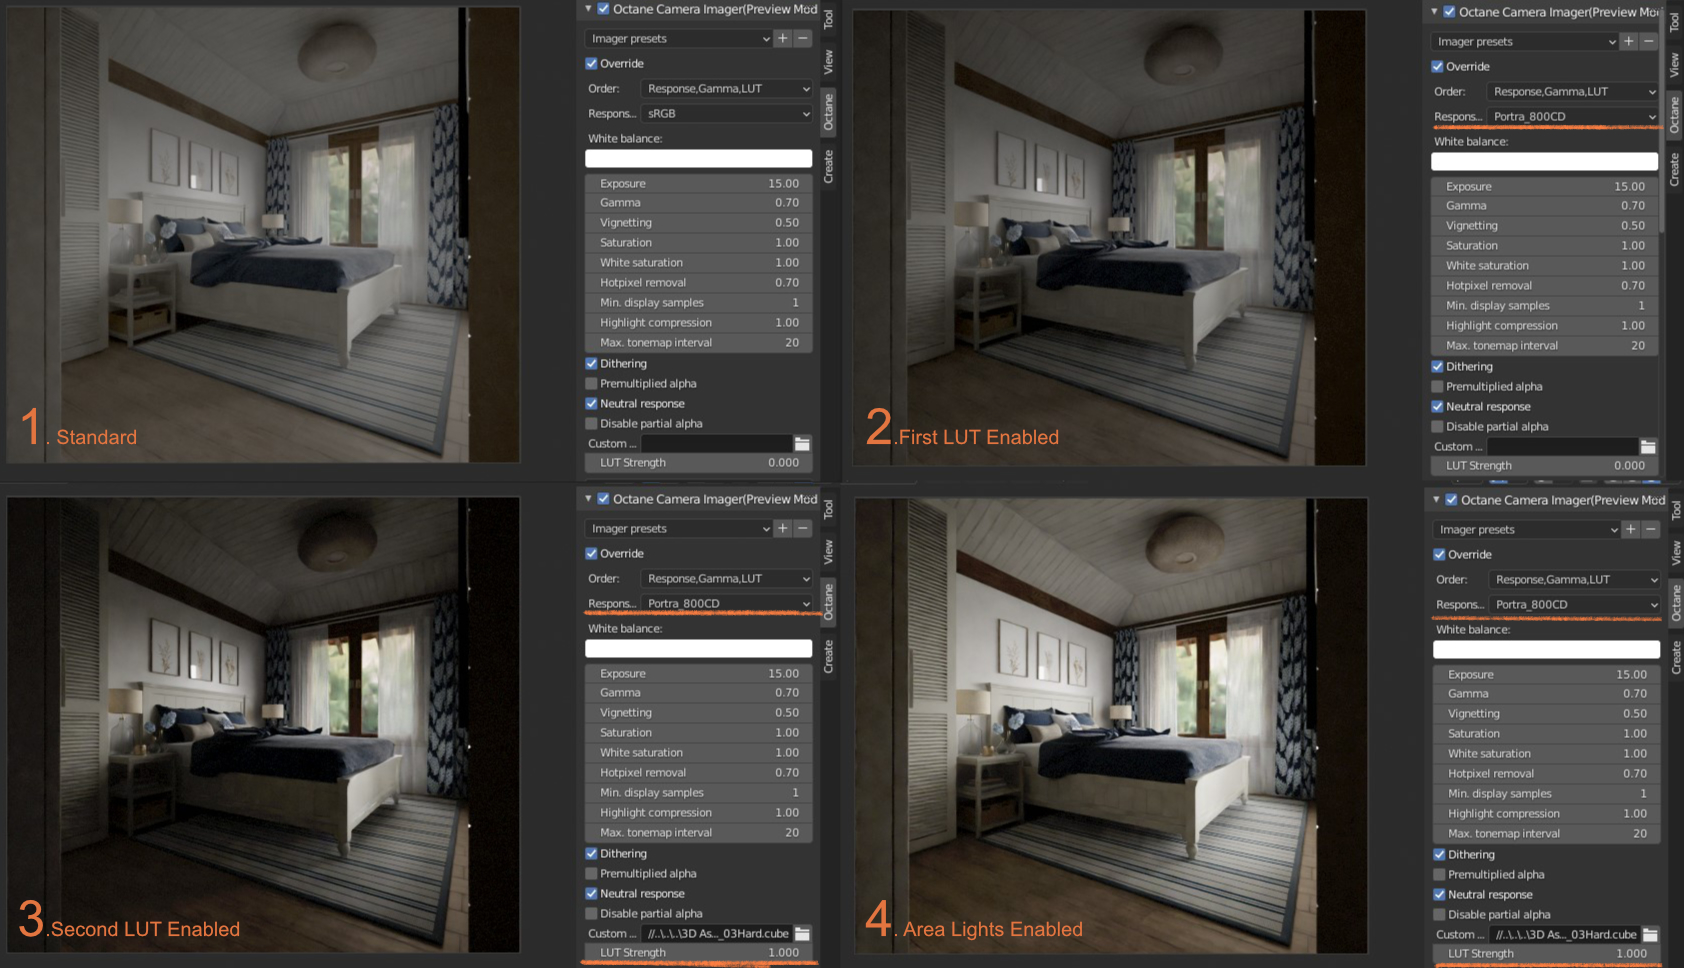
- Octane Color Management setup with Portra_800CD as the Response Type, some other basic settings, and a Custom LUT from 3DCollective;
- Denoiser enabled both at the Octane Camera Imager and at the Scene tab for it to work properly;
- Some Collections that I’m certain I will use at some point;
- A default camera instead of the default cube because, for some reason, Octane won’t render properly unless you have at least one camera in the scene.
These settings will evolve from time to time, but I like having them all set up from the start because, apart from saving me some time, I can have a more accurate preview during the texturing process of what the shaders will look like in the final image.
Modeling
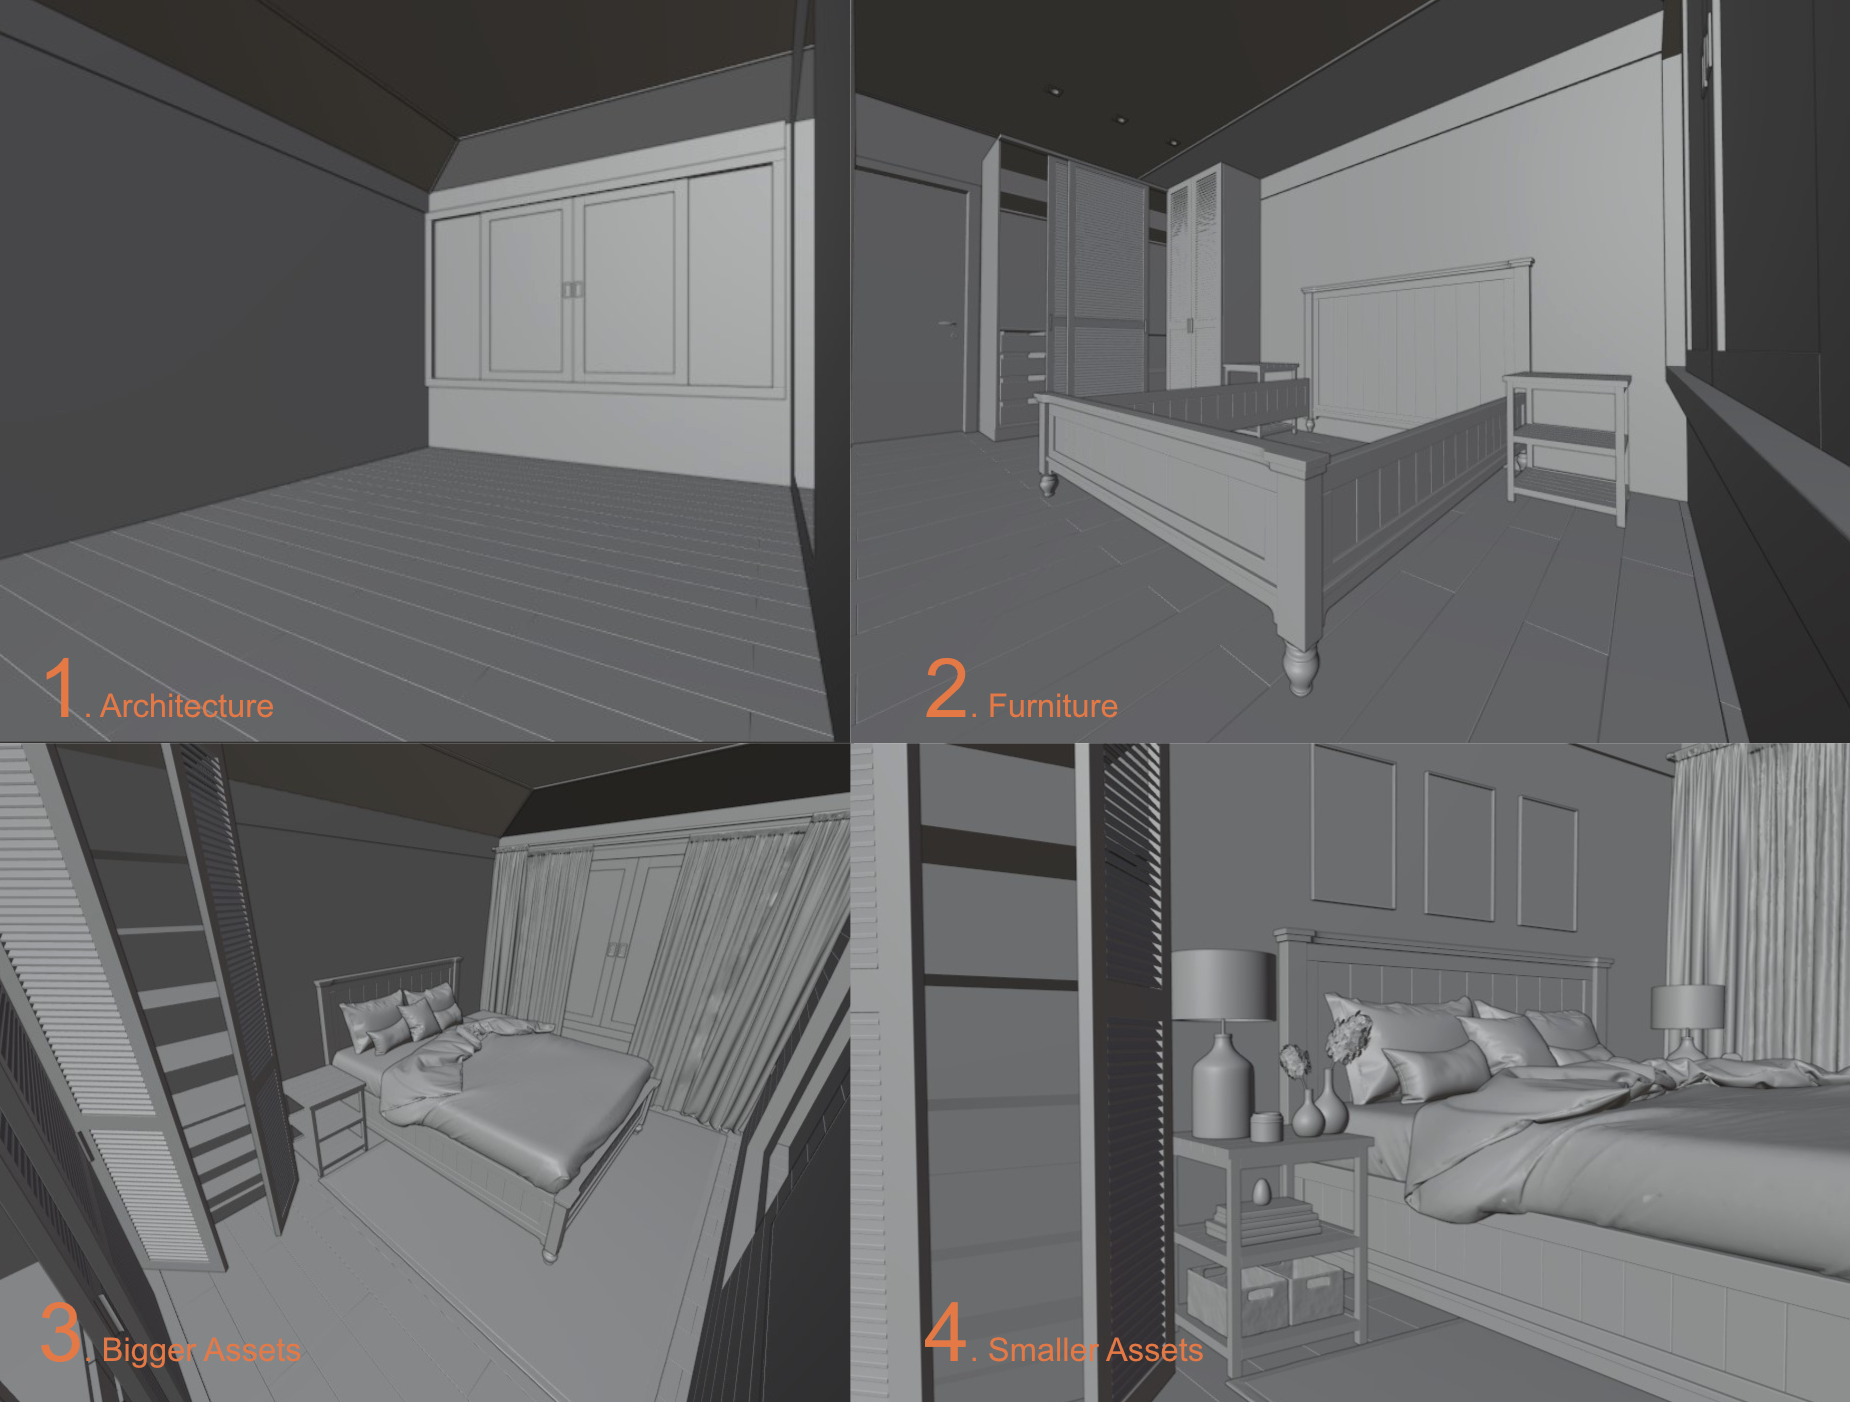
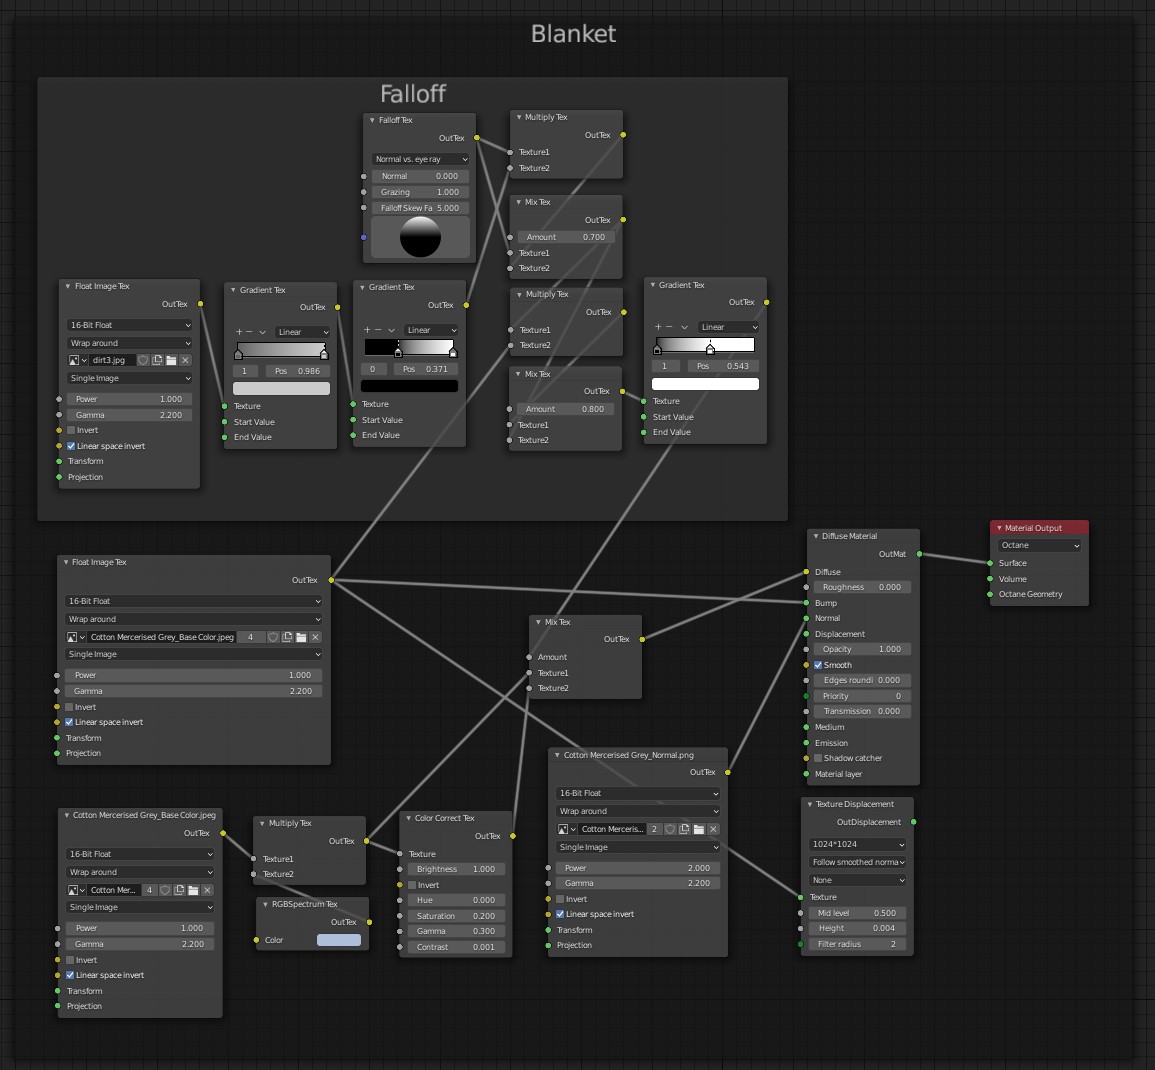
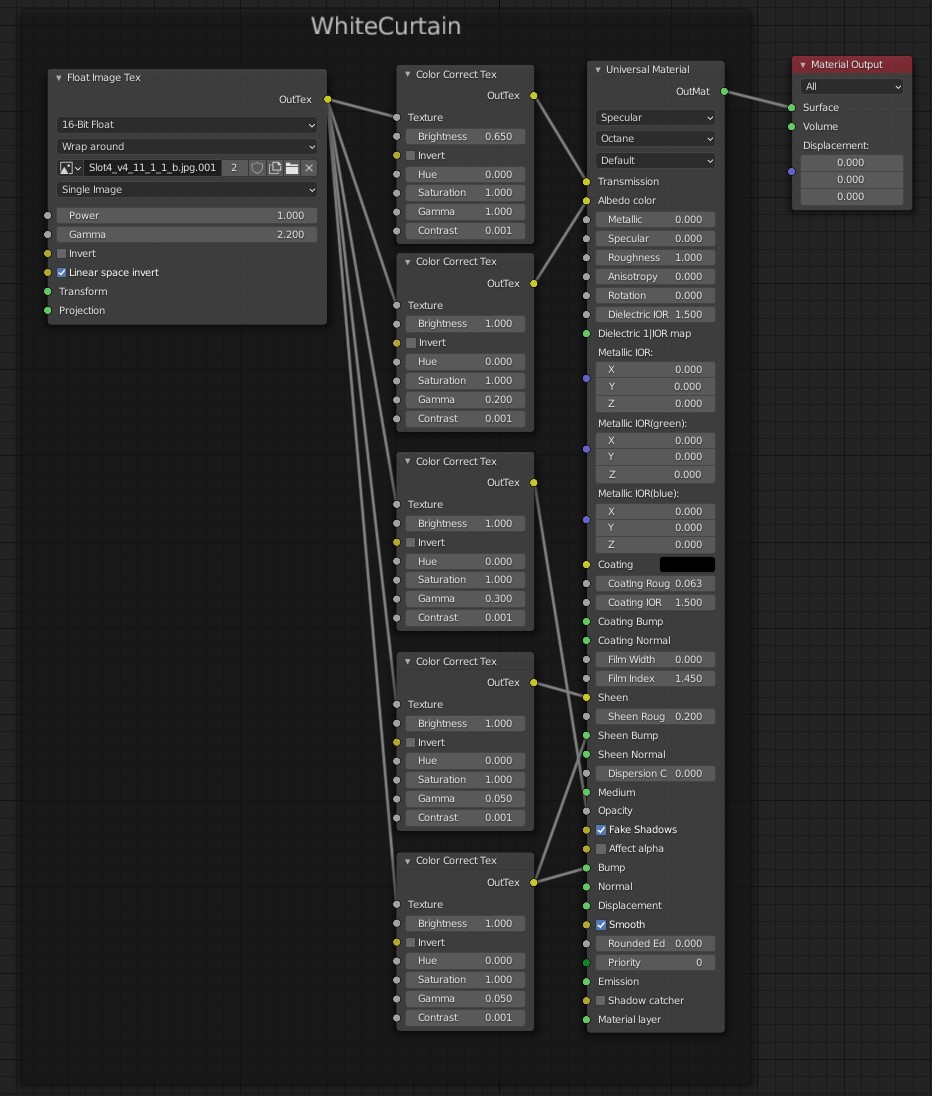
My usual starting point is to import the CAD drawings to Blender as a reference to model the architecture part. With the enclosure done, it’s possible to do some test renders here and there to get familiarized with how things will look. The furniture part varies quite a lot. Some of them are tailor-made for the client and, since we are going to end up producing them in real life, I model them from scratch according to our needs. It was the case with the wardrobe, nightstands, bed base, and bathroom counter. I also modeled the lamps and the seagrass boxes that are at the bottom of the nightstands. Smaller assets and soft objects like the blanket, cushions, and curtains have been downloaded from websites like Chocofur and 3DSky. For some of them, I did some minor sculpting adjustments.
Texturing
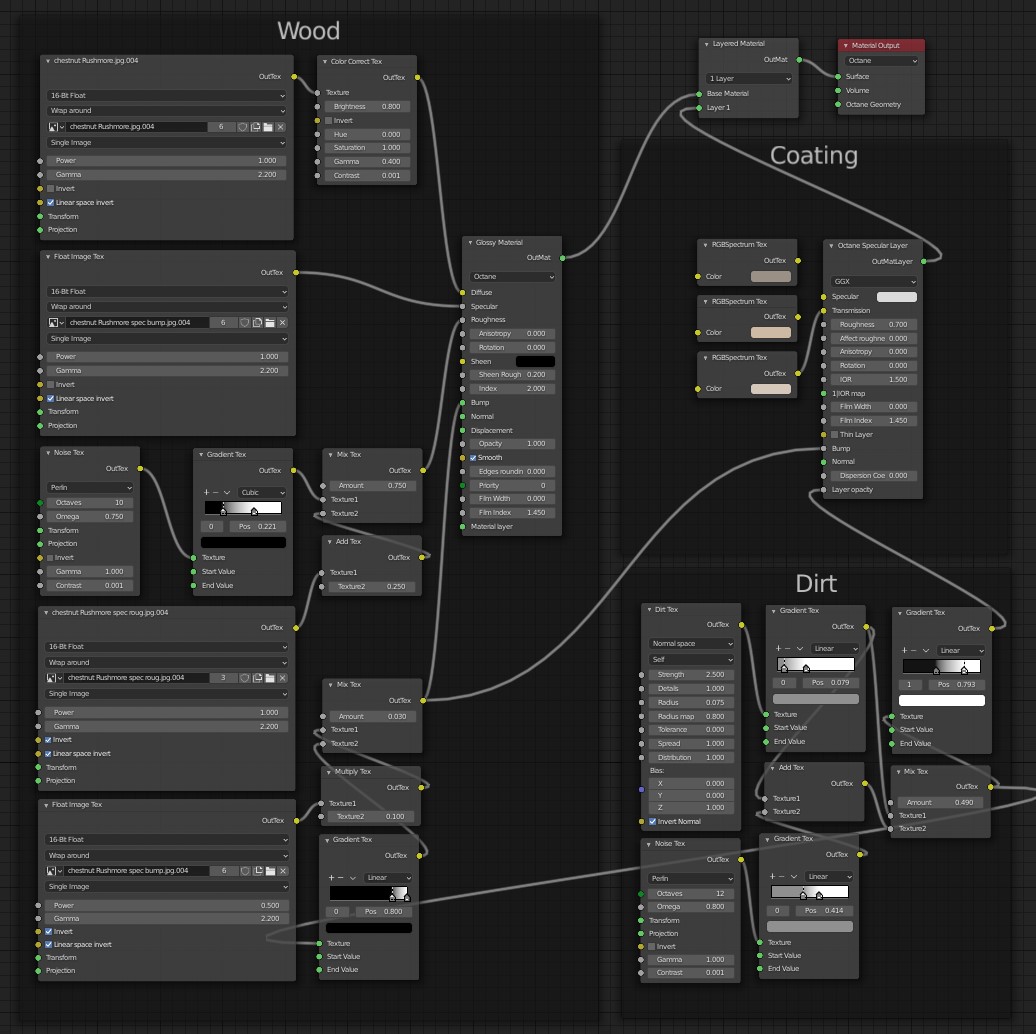
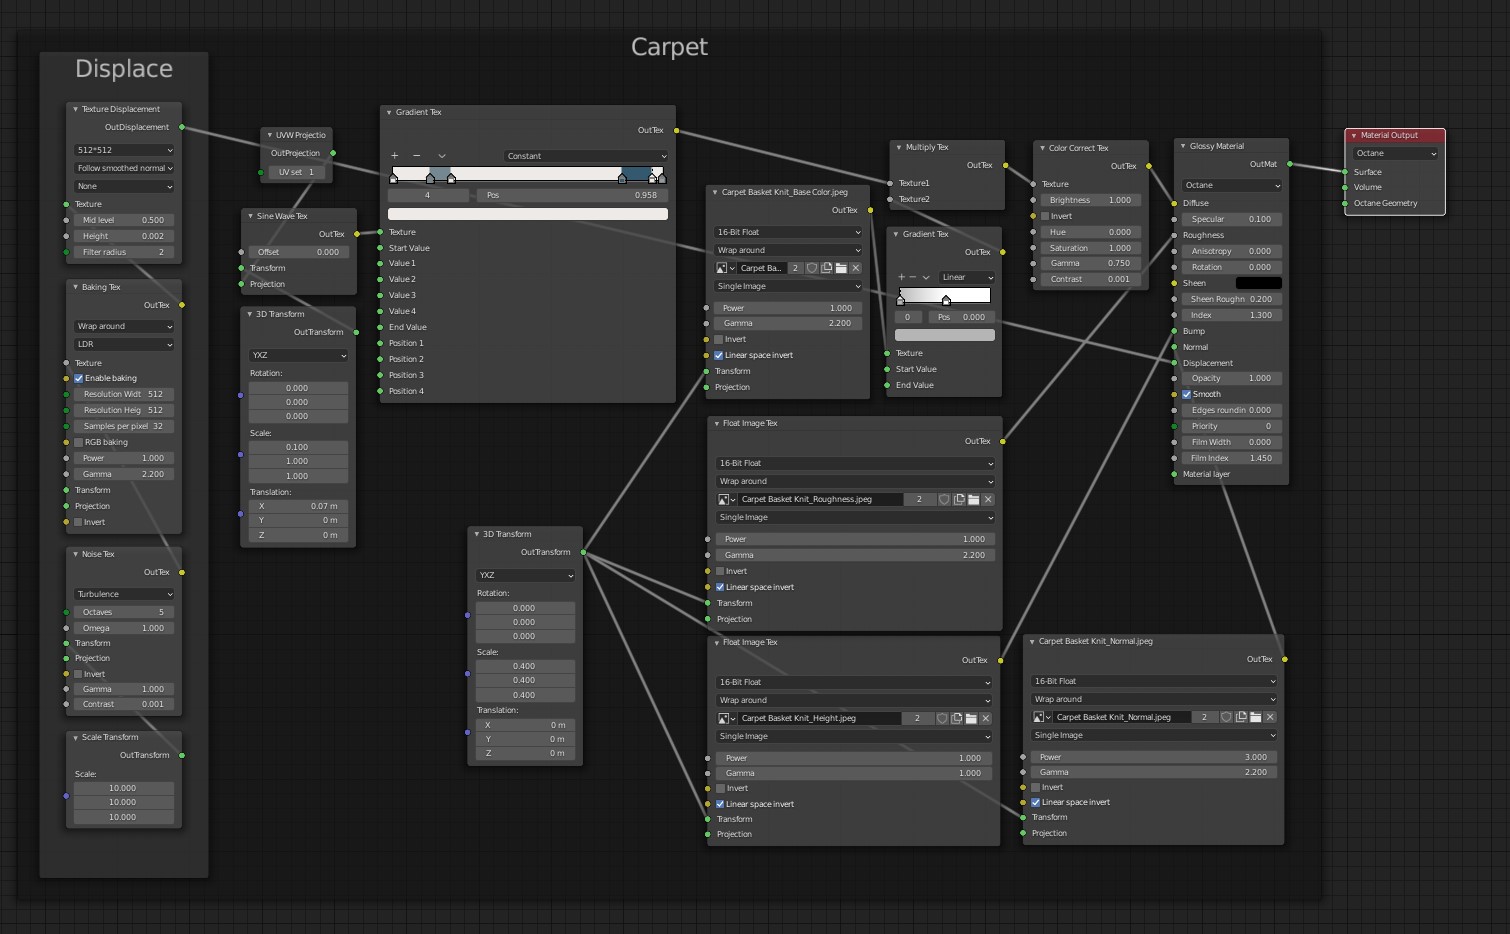
At this stage, I usually isolate each object temporarily so I can work faster on getting the shaders and the UVs right. Most of the textures came from Substance Source and Textures.com and are used in a standard PBR setting with the eventual color correction and adjustments. There were a few with some peculiarities.
Lighting
I tried to keep it as simple as possible while lighting the scene. The idea was to use just an HDRi but the image was taking way too long to clean up regarding the noise. To drive more light into the room, two area lights were placed outside the windows, solving the noise problem at the price of losing some contrast. As simple as the light sources are, the light behavior was greatly influenced by the color management settings.
Post-Processing
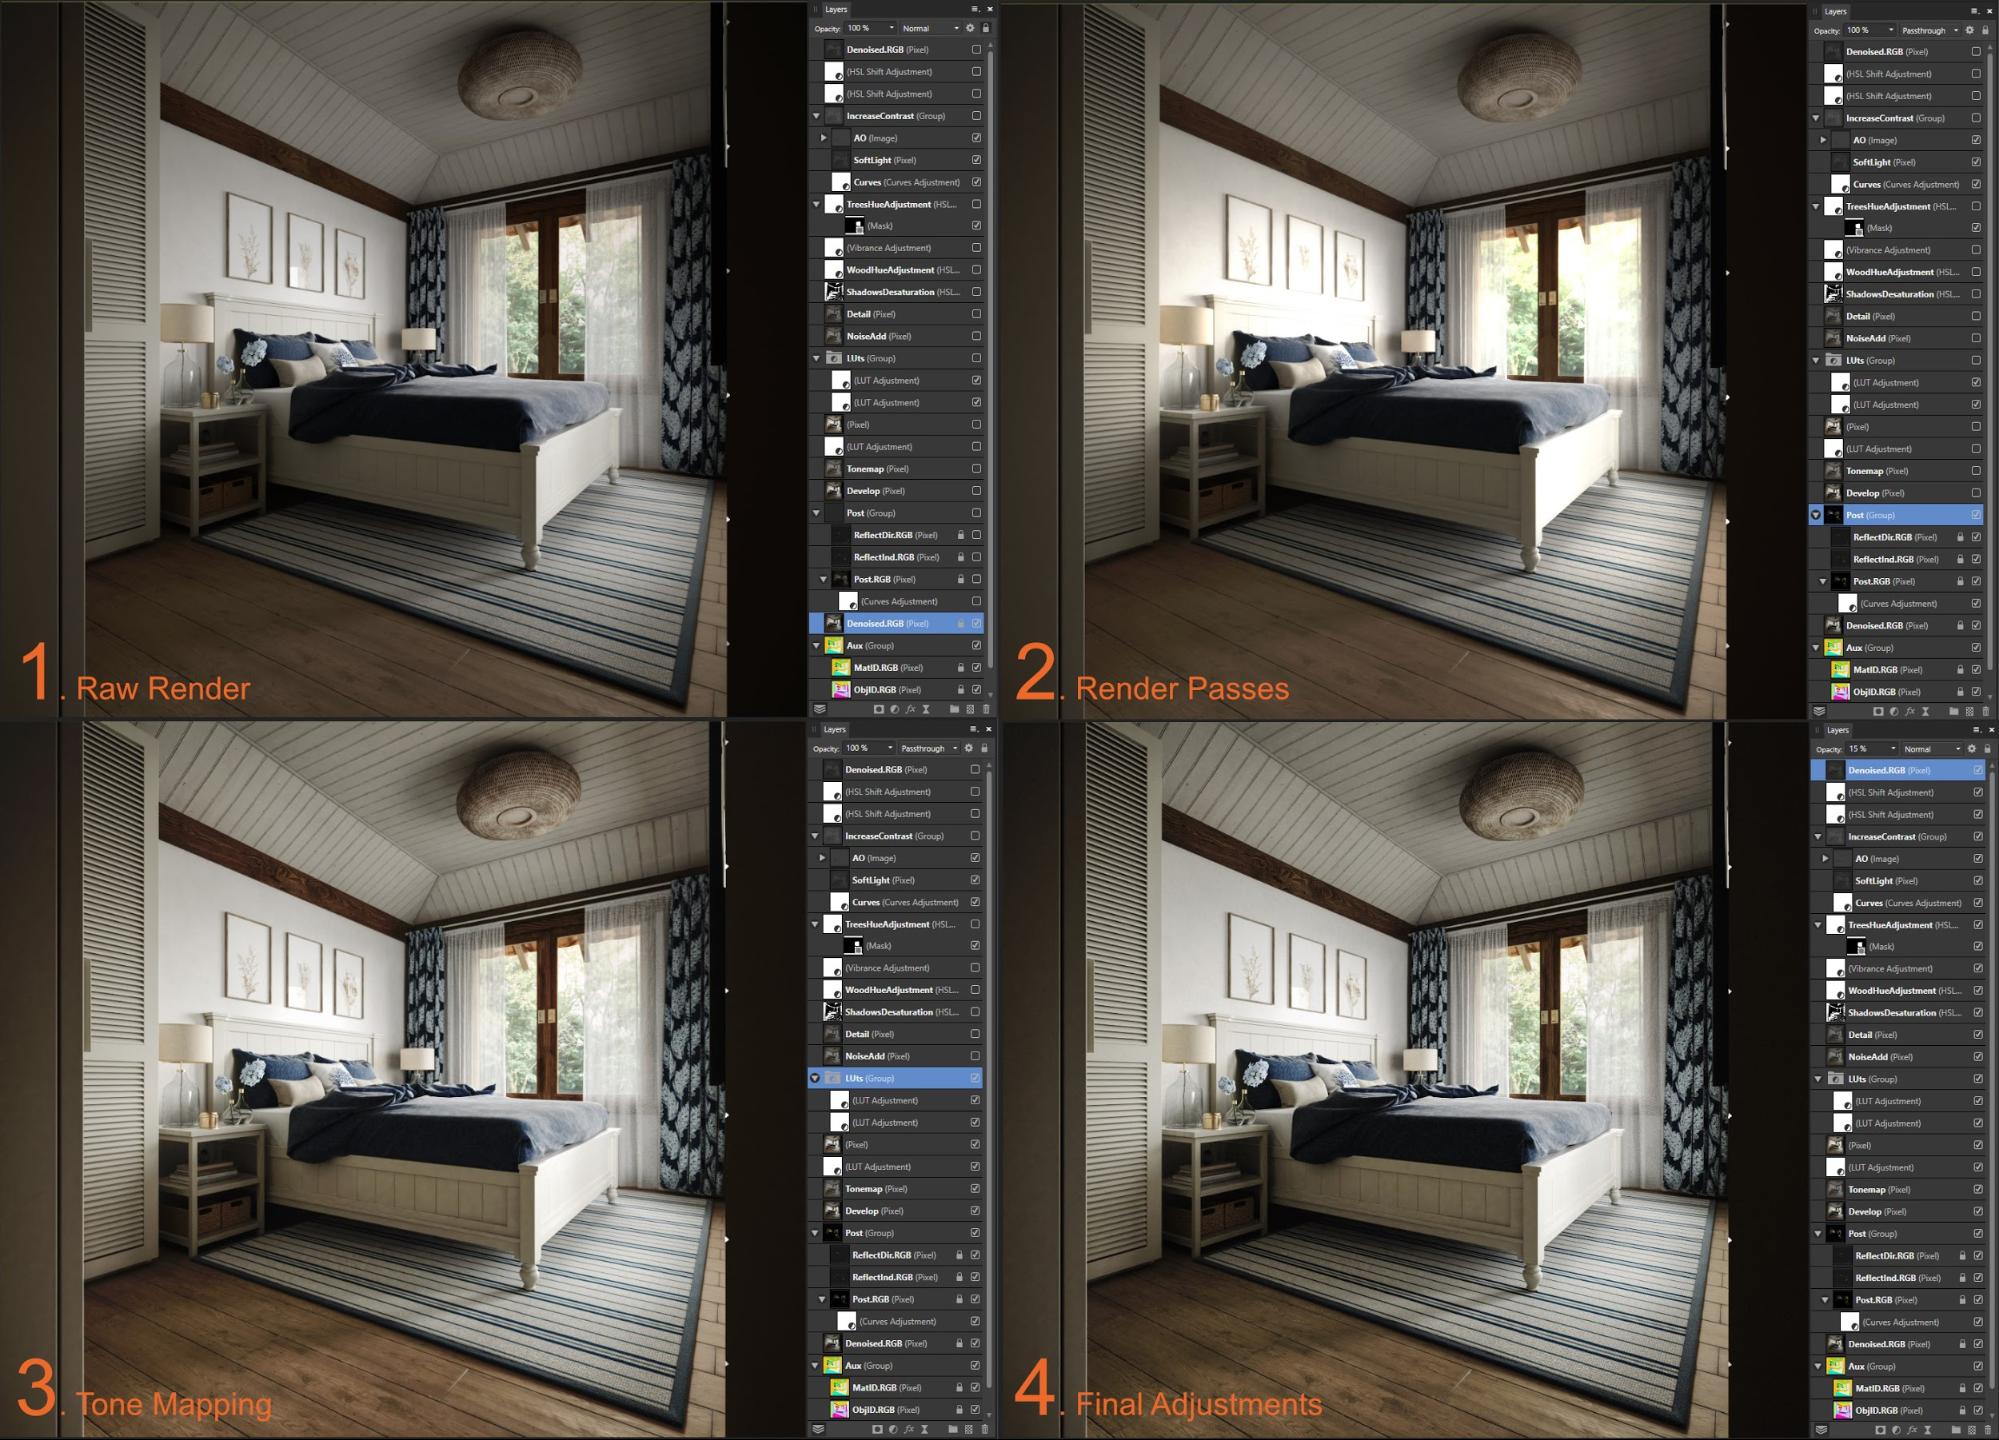
For the post-processing, some passes were rendered along with the image. Object ID and Material ID to make the selection process easier, Reflect Direct and Reflect Indirect to boost the reflections a bit, and a Glare and Bloom pass. After these initial adjustments, I did some tone mapping and other minor tweakings where I thought they were needed. After all that, I placed the raw render layer with low opacity to tone down the overall effect.
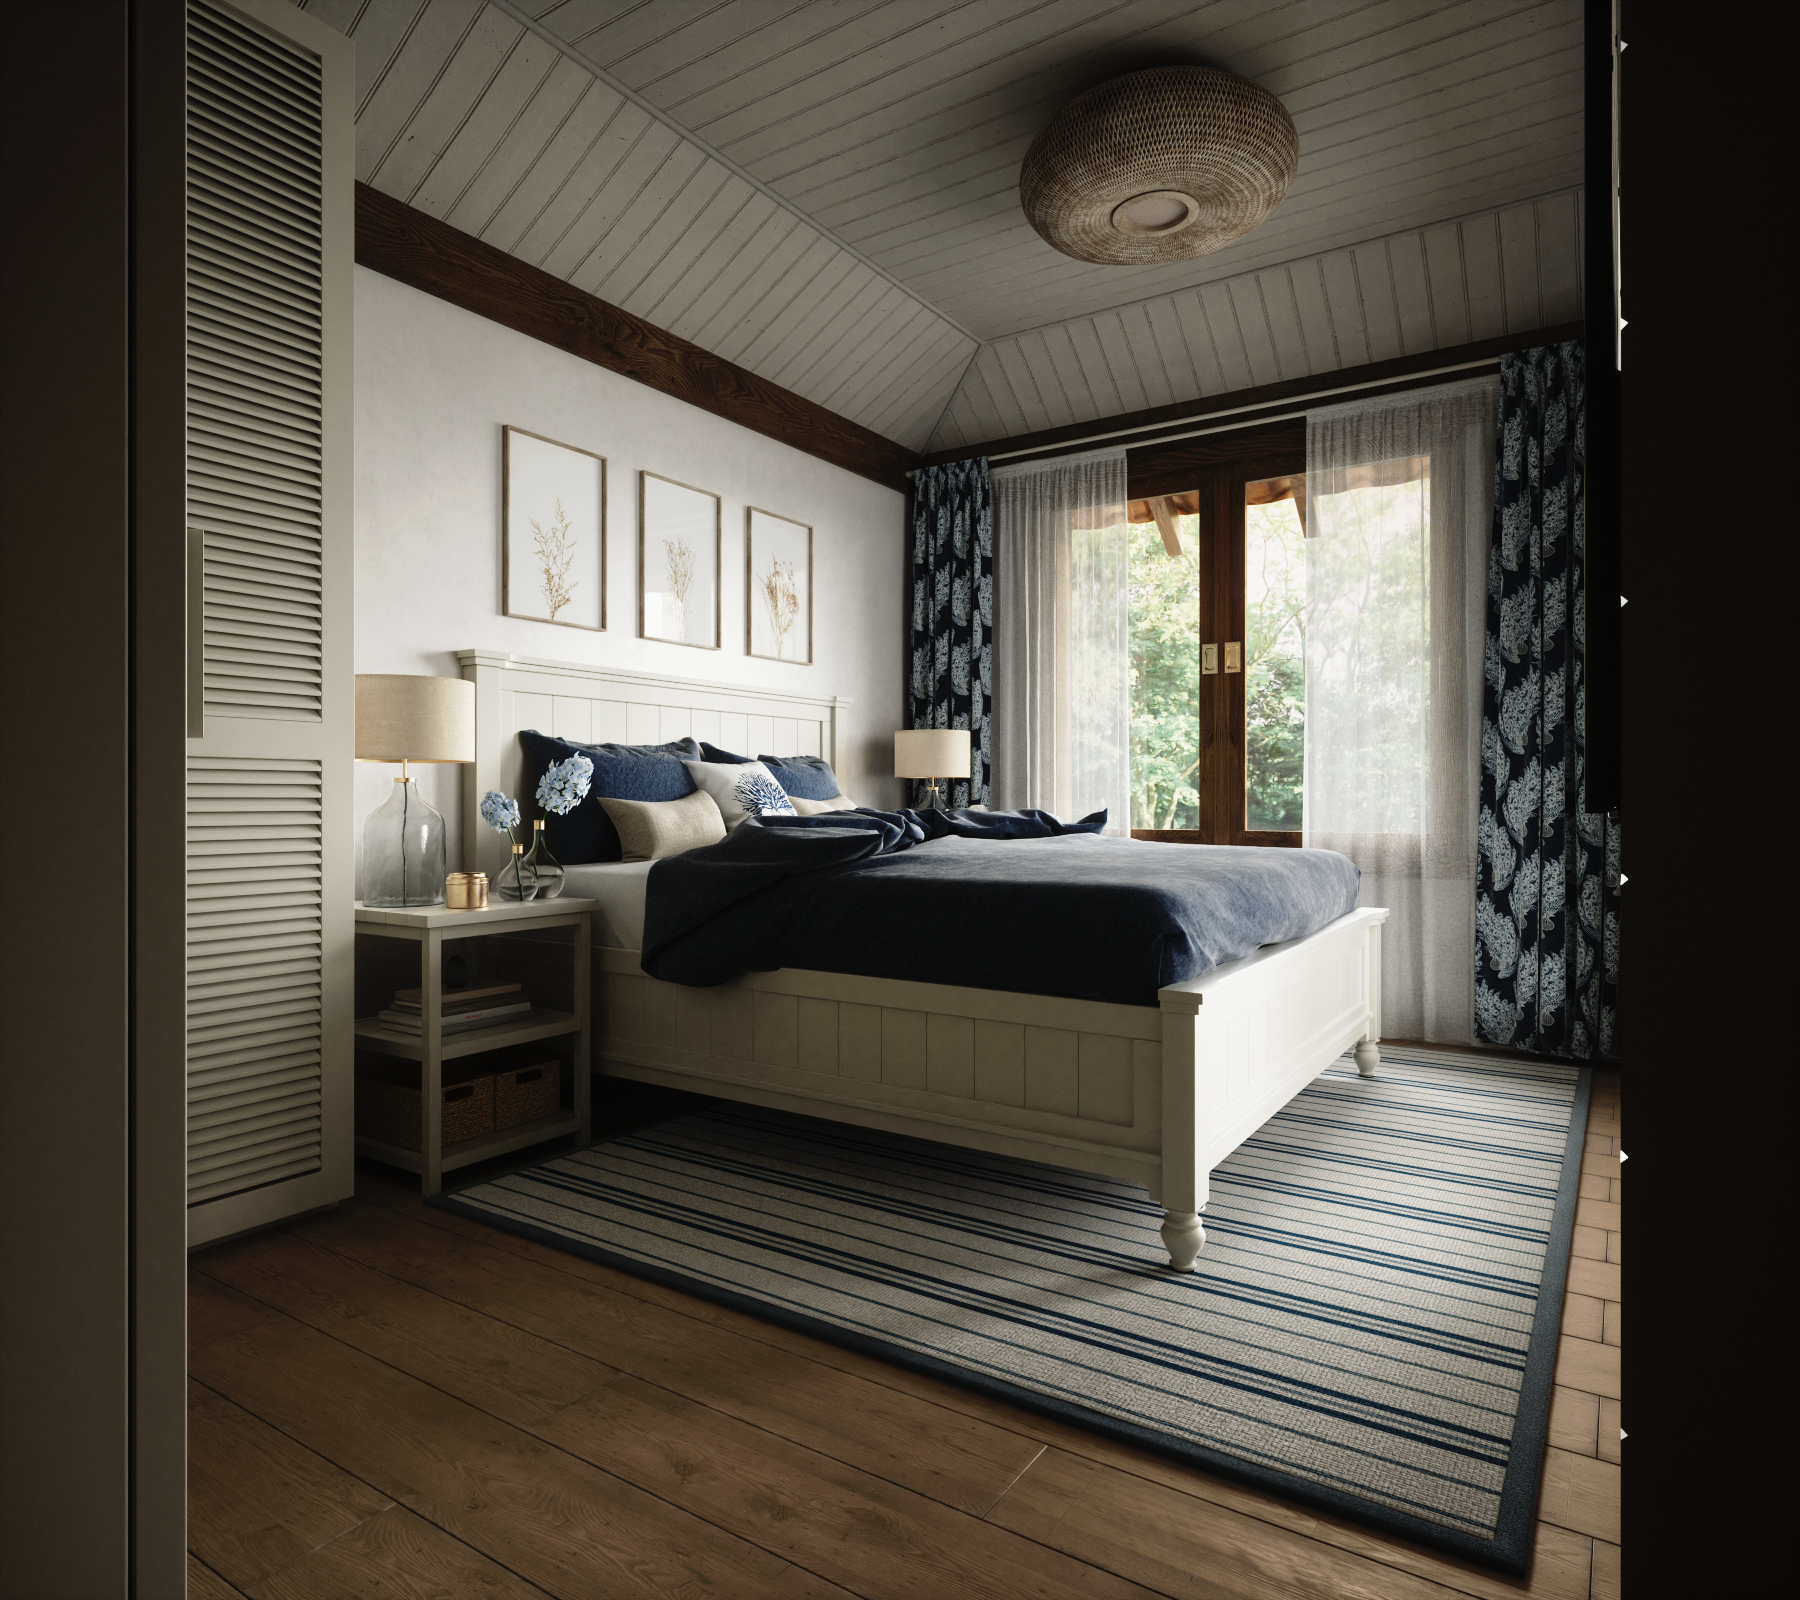
Final Images


Final Thoughts
It was great to spend some more time with this project and start presenting it better. While writing this article and trying to explain why I do things the way I do, a bunch of what-ifs popped into my head and I ended up making some test-renders to see what things would look like. Some interesting things came out of it, including some more playful images. I hope I can continue to revisit this project as I think it has some nice angles yet to explore, especially the rooms with the lake views. You can find more of my work on Behance. Feel free to contact me if you have any questions.

About the Author
 Filipe, Architect and Archviz freelancer


