Behind the Scenes: Bulma
About Me
My name is Bruno Cornelsen Teixeira, I live in Curitiba, Brazil. I’m a self-taught 3D artist and started using 3D software (3Ds Max and Maya) about 16 years ago. Most of my early knowledge came from printed CG magazines and written tutorials available in the very few online CG portals available at the time. I’ve already worked with archviz, educational content, advertisements, AR, VR and even as an instructor in my own school, teaching 3D fundamentals with Blender. Currently I’m a generalist freelancer.
[sponsor id=’qarnot’]
Inspiration
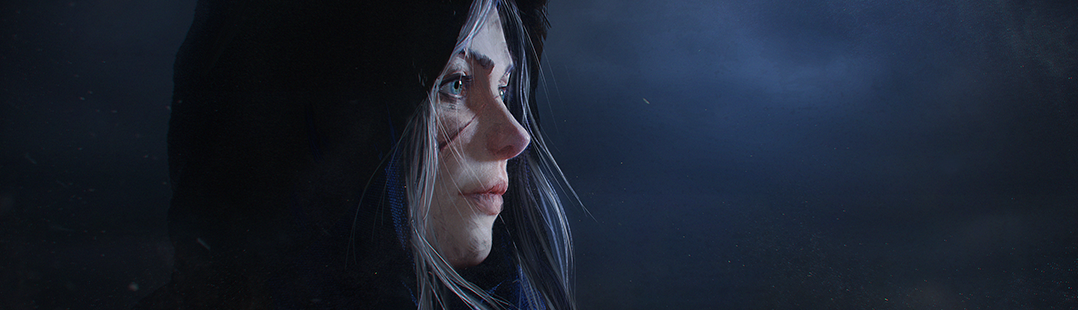
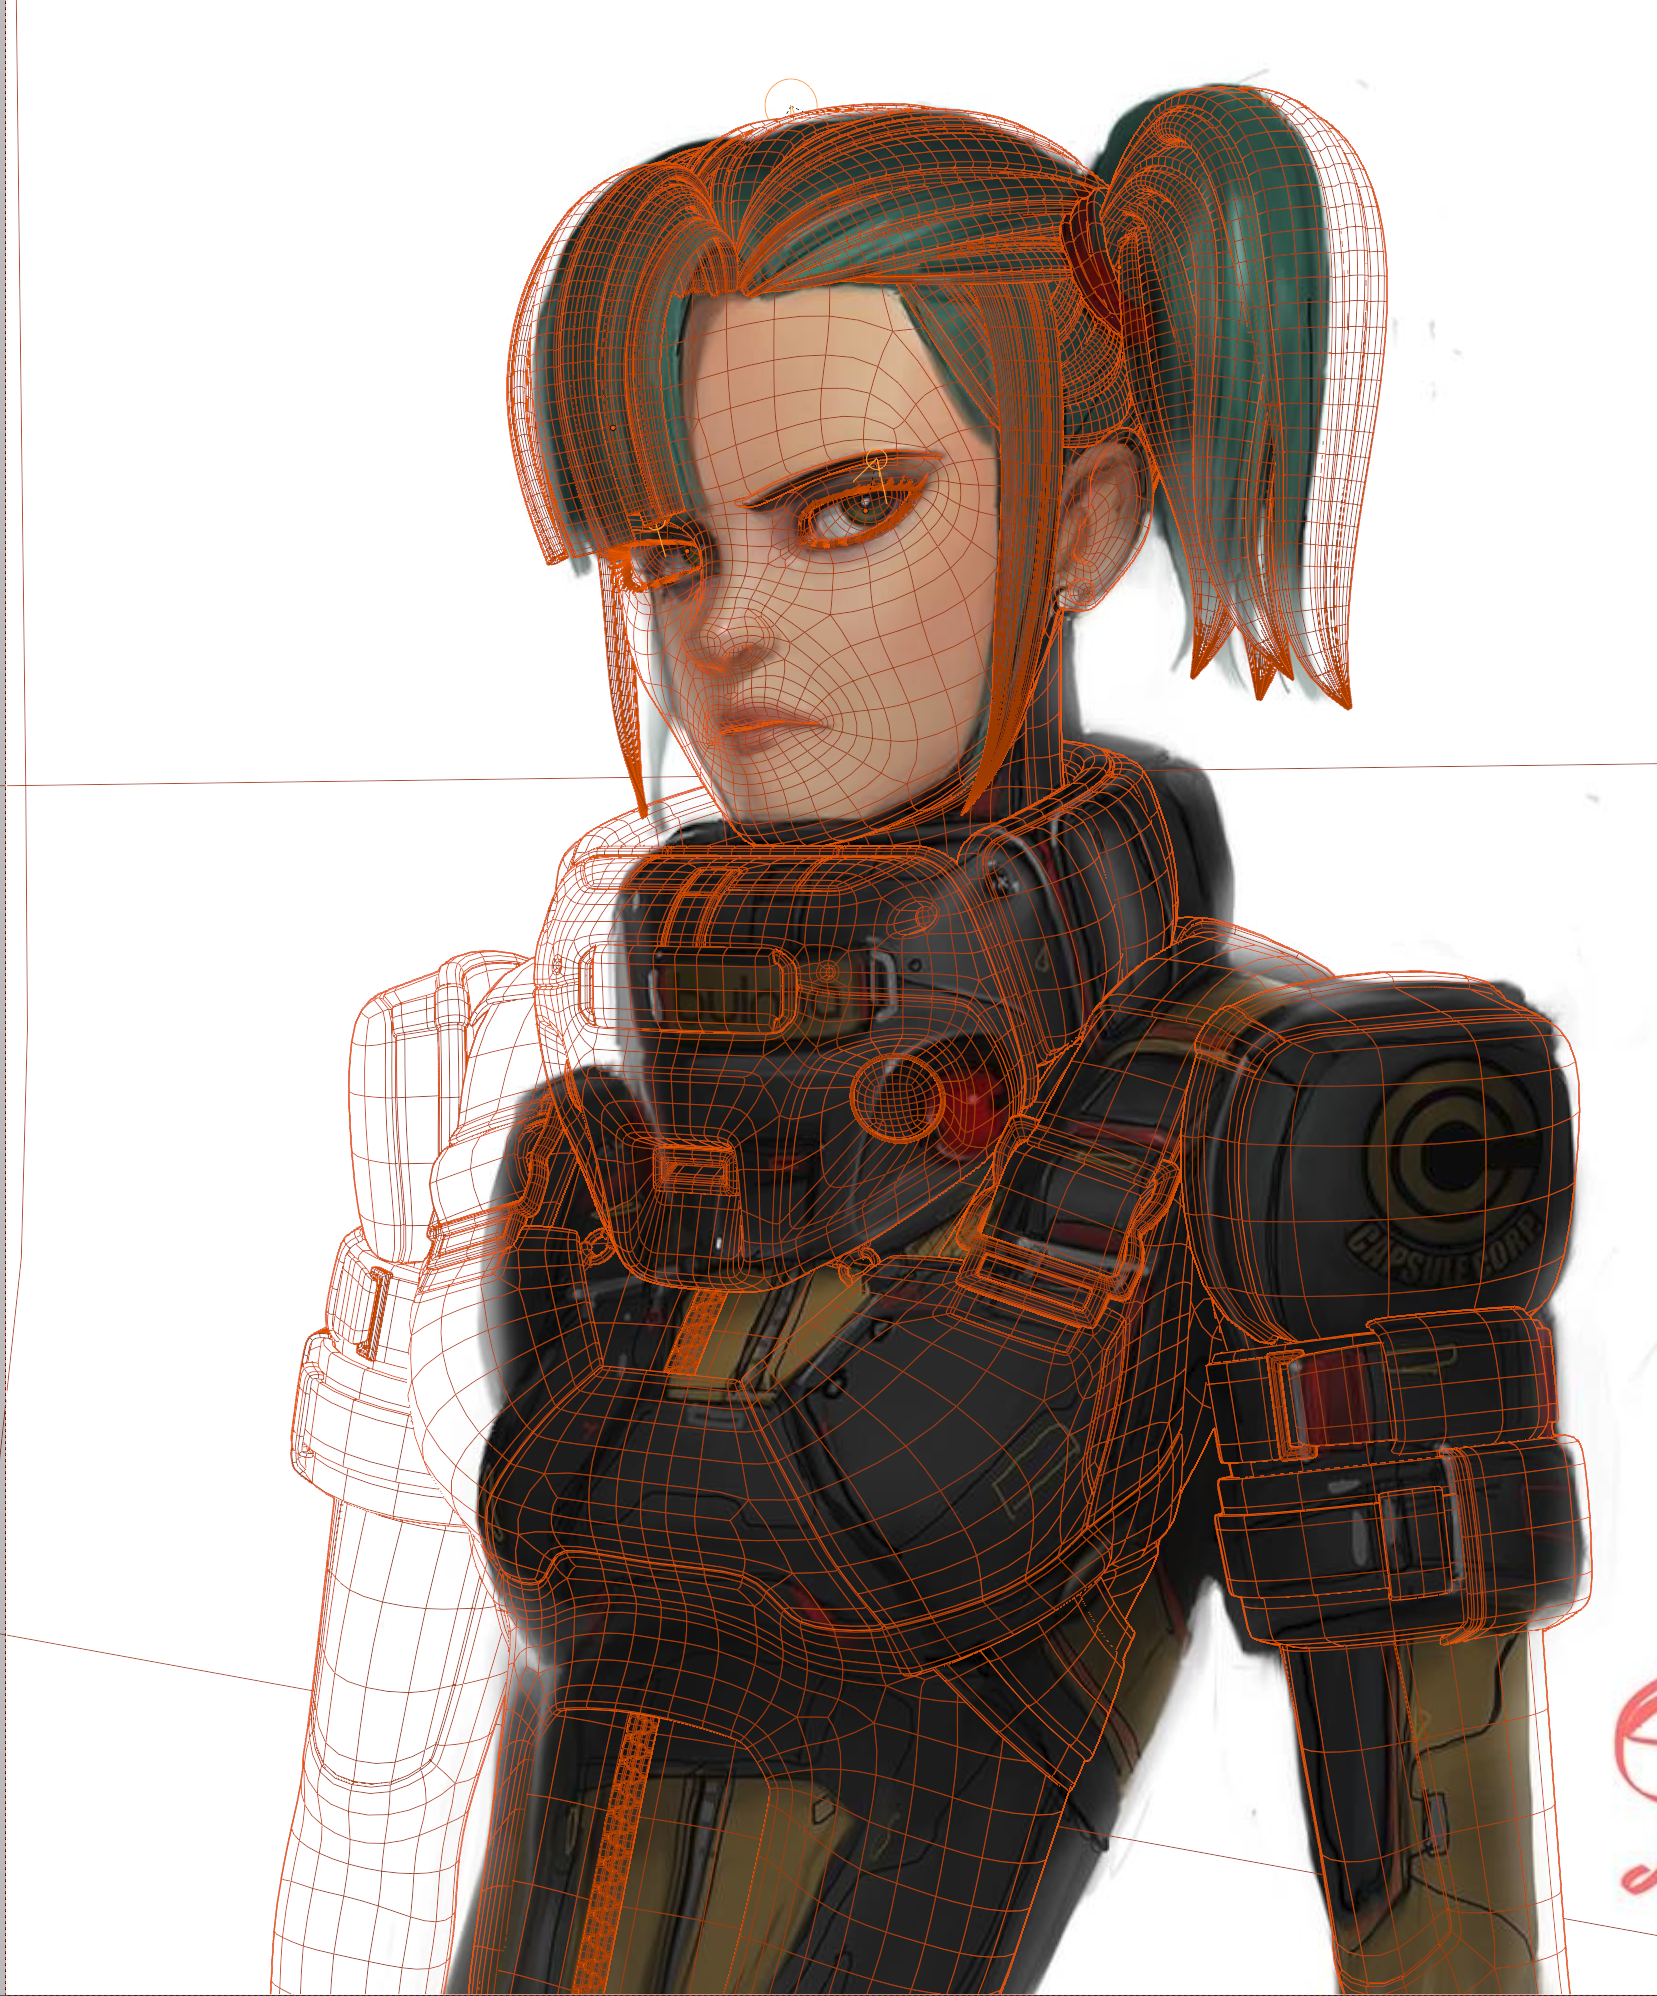
I made this illustration for my portfolio, inspired by one of my favorite artists, Serge Birault (PapaNinja). He posted this concept art a few years ago and it has been in my “To Model” folder for too long.
View this post on Instagram
Tools
My main tool for the last 11 years has been Blender, but in this piece I also used ZBrush for the base sculpting and Substance Painter for all the textures (except the hair and eyes, which are procedural). The final render was done in Blender with Cycles.
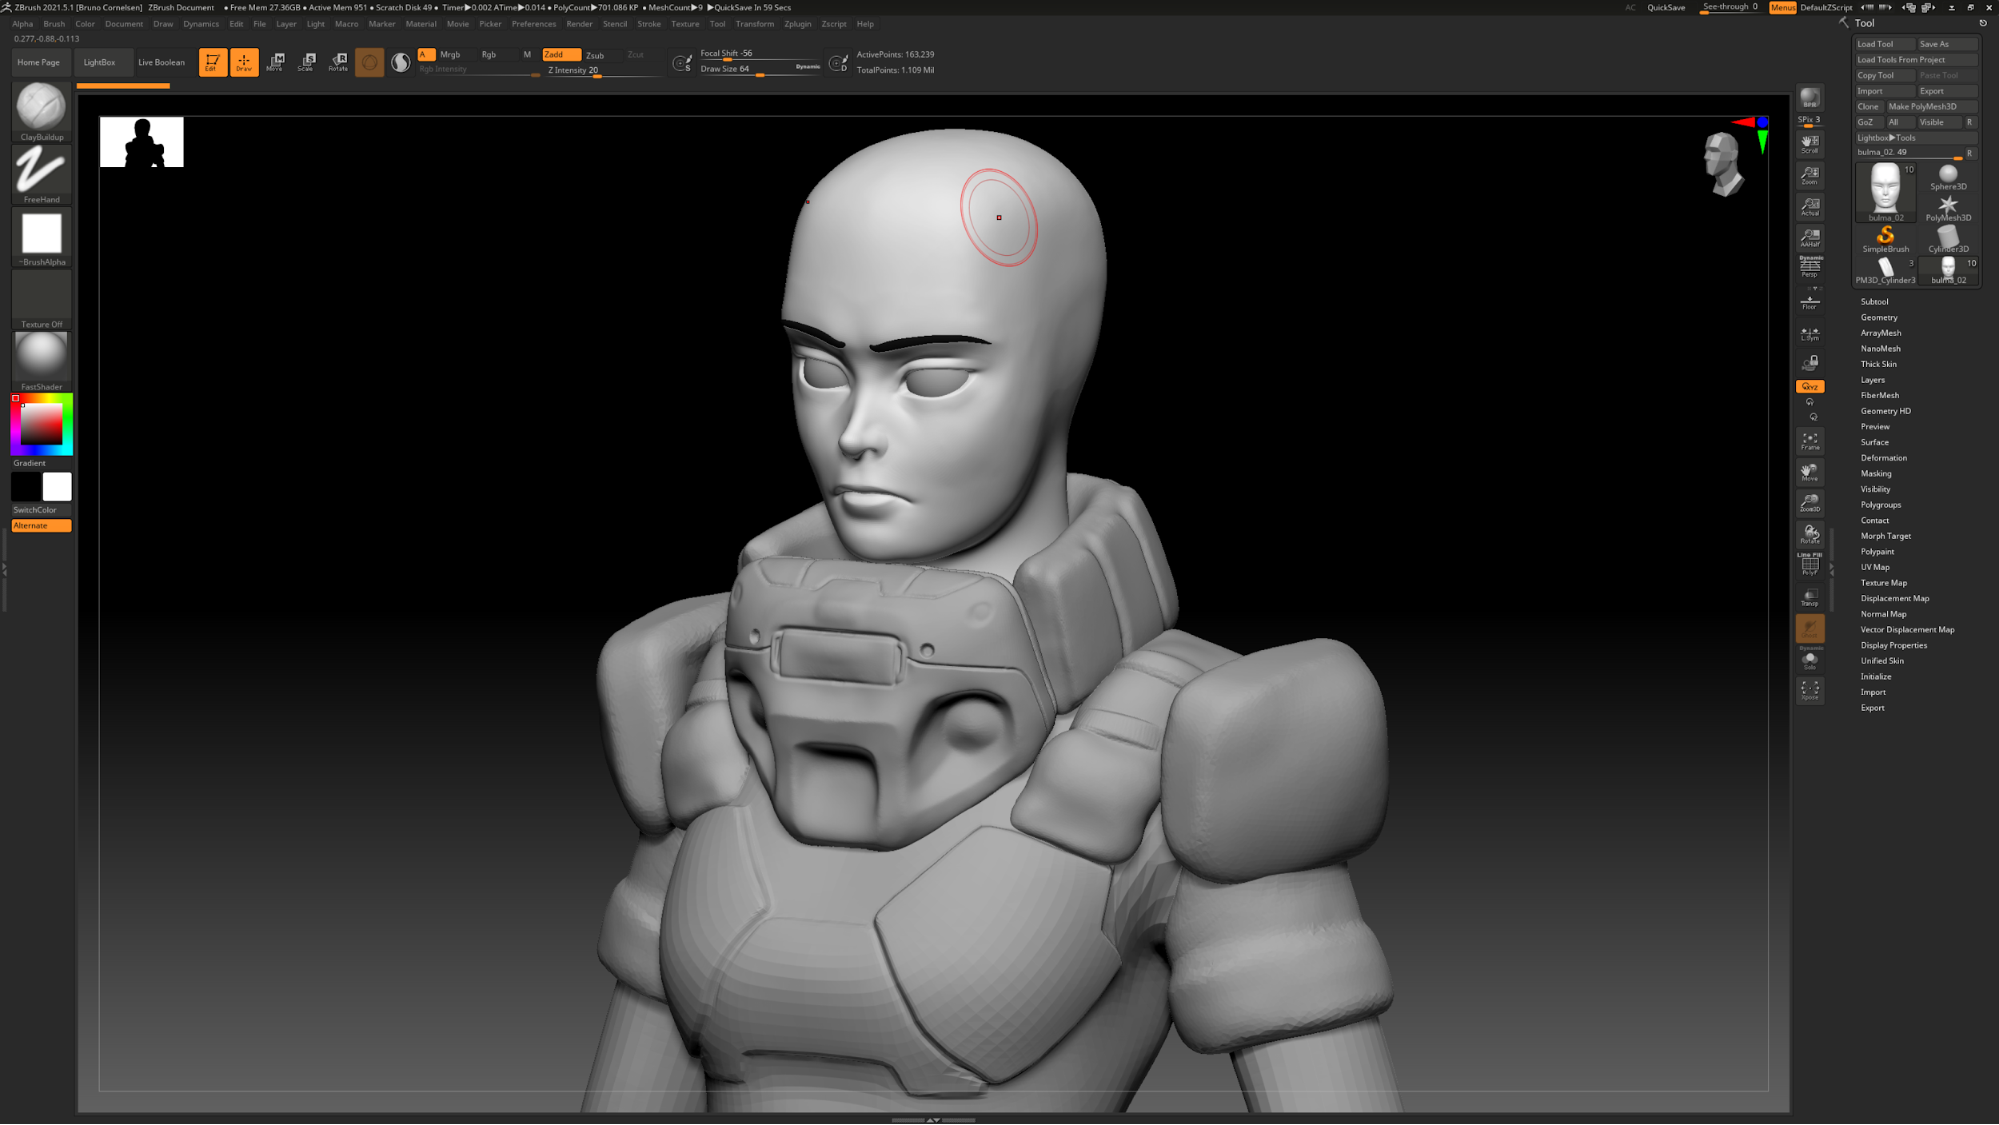
Sculpting
I started with a basic sculpt in ZBrush to quickly define the main volumes. There are a lot of straps on her suit, and since I’m not a heavy ZBrush user yet, I realized that I could model them faster directly in Blender later. The face was the only part that I sculpted to a more definitive shape.
Retopo and modeling
After that, I sent the model to Blender using the useful and free add-on GoB, which makes Blender compatible with the GoZ feature in ZBrush. No need to export/import OBJs or FBXs. Just one click and you’re good to go.
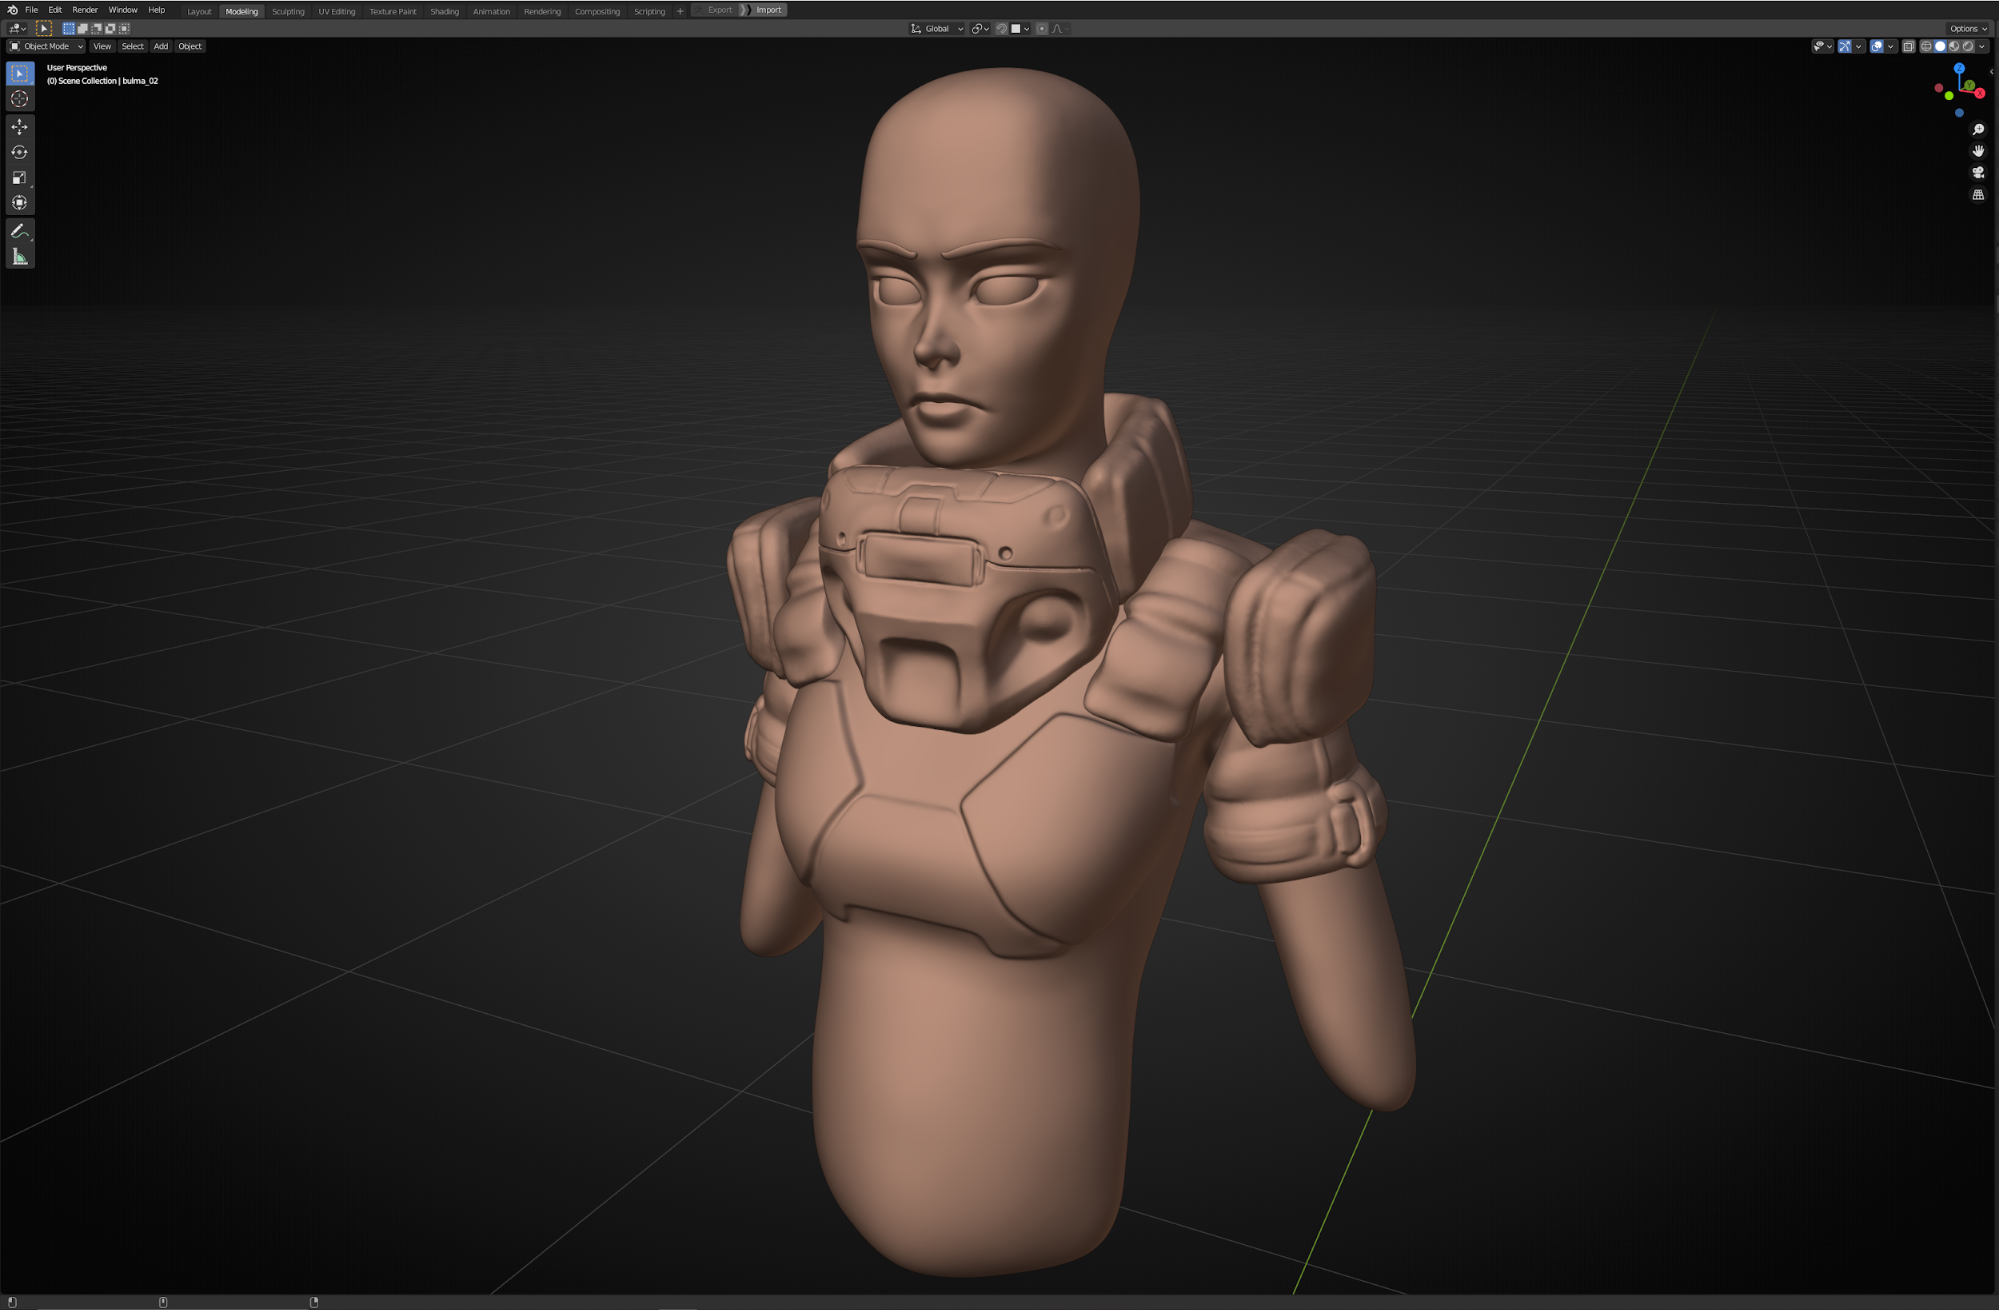
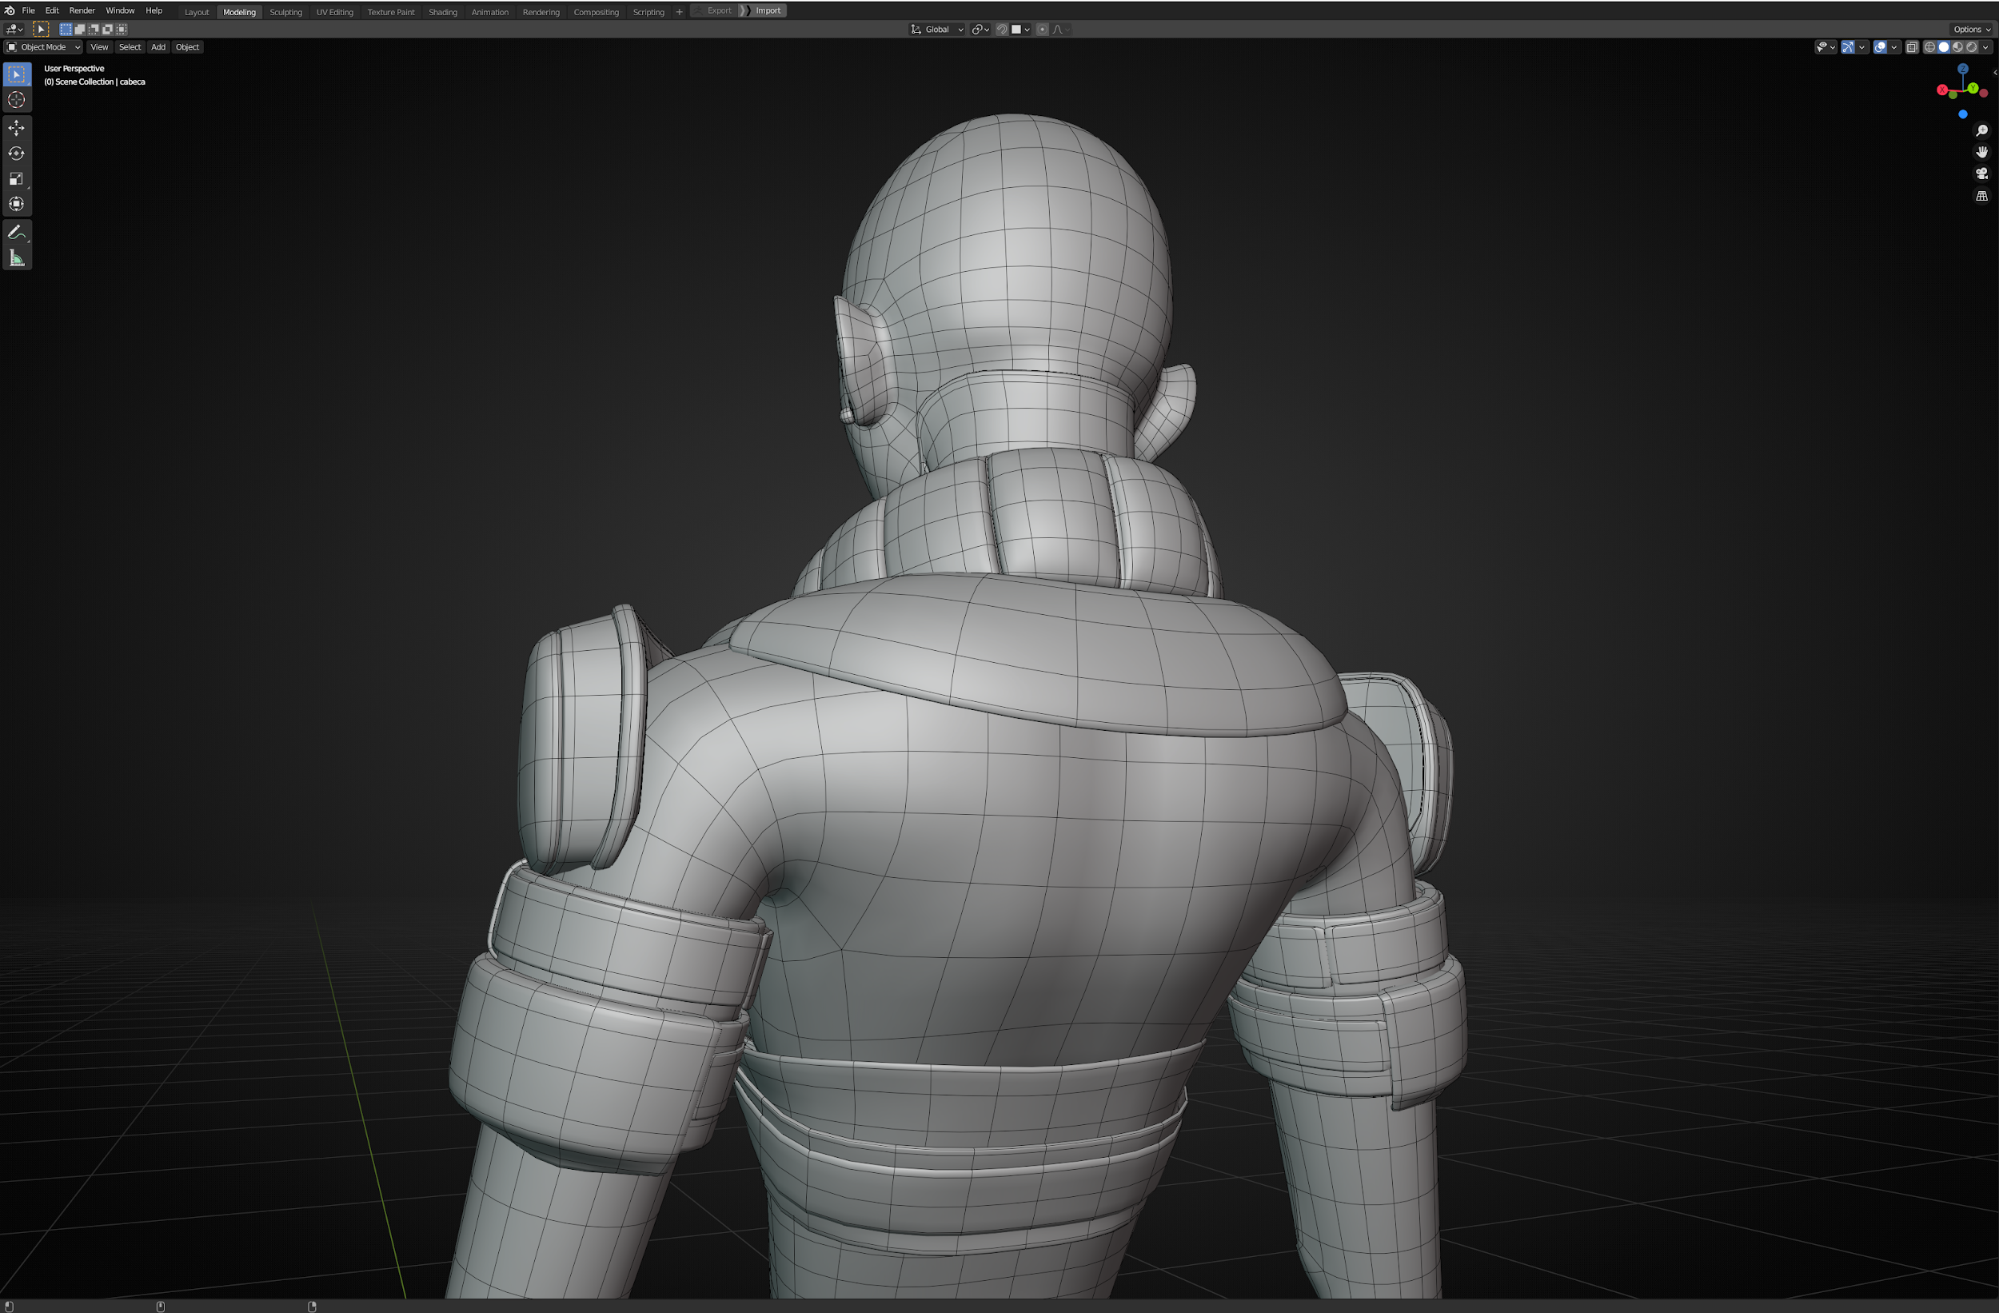
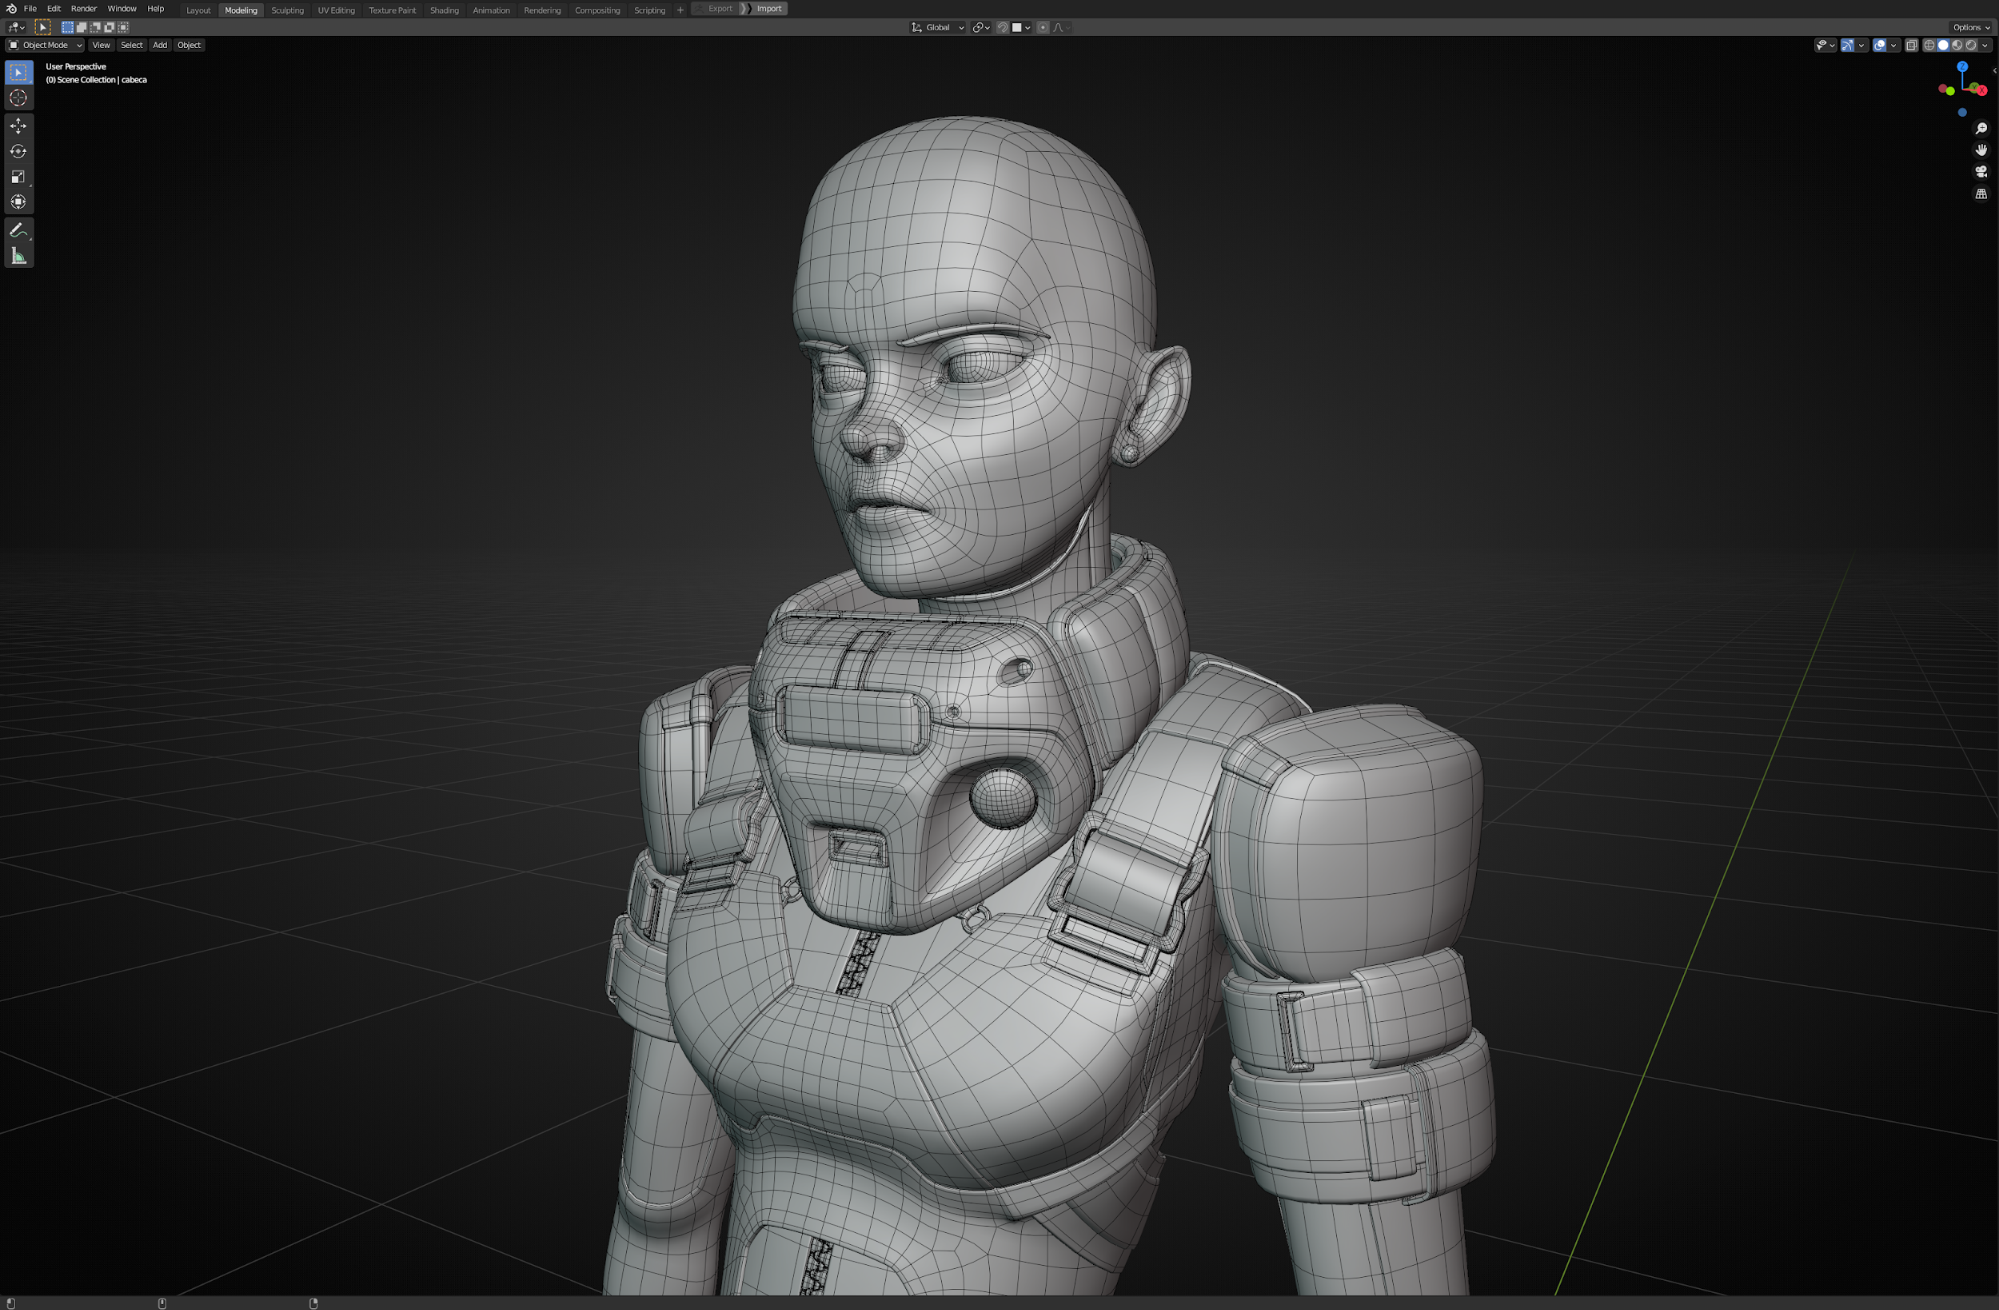
With the sculpture now inside Blender, I created a new object and started the retopology process on the face and poly modeling of the rest.
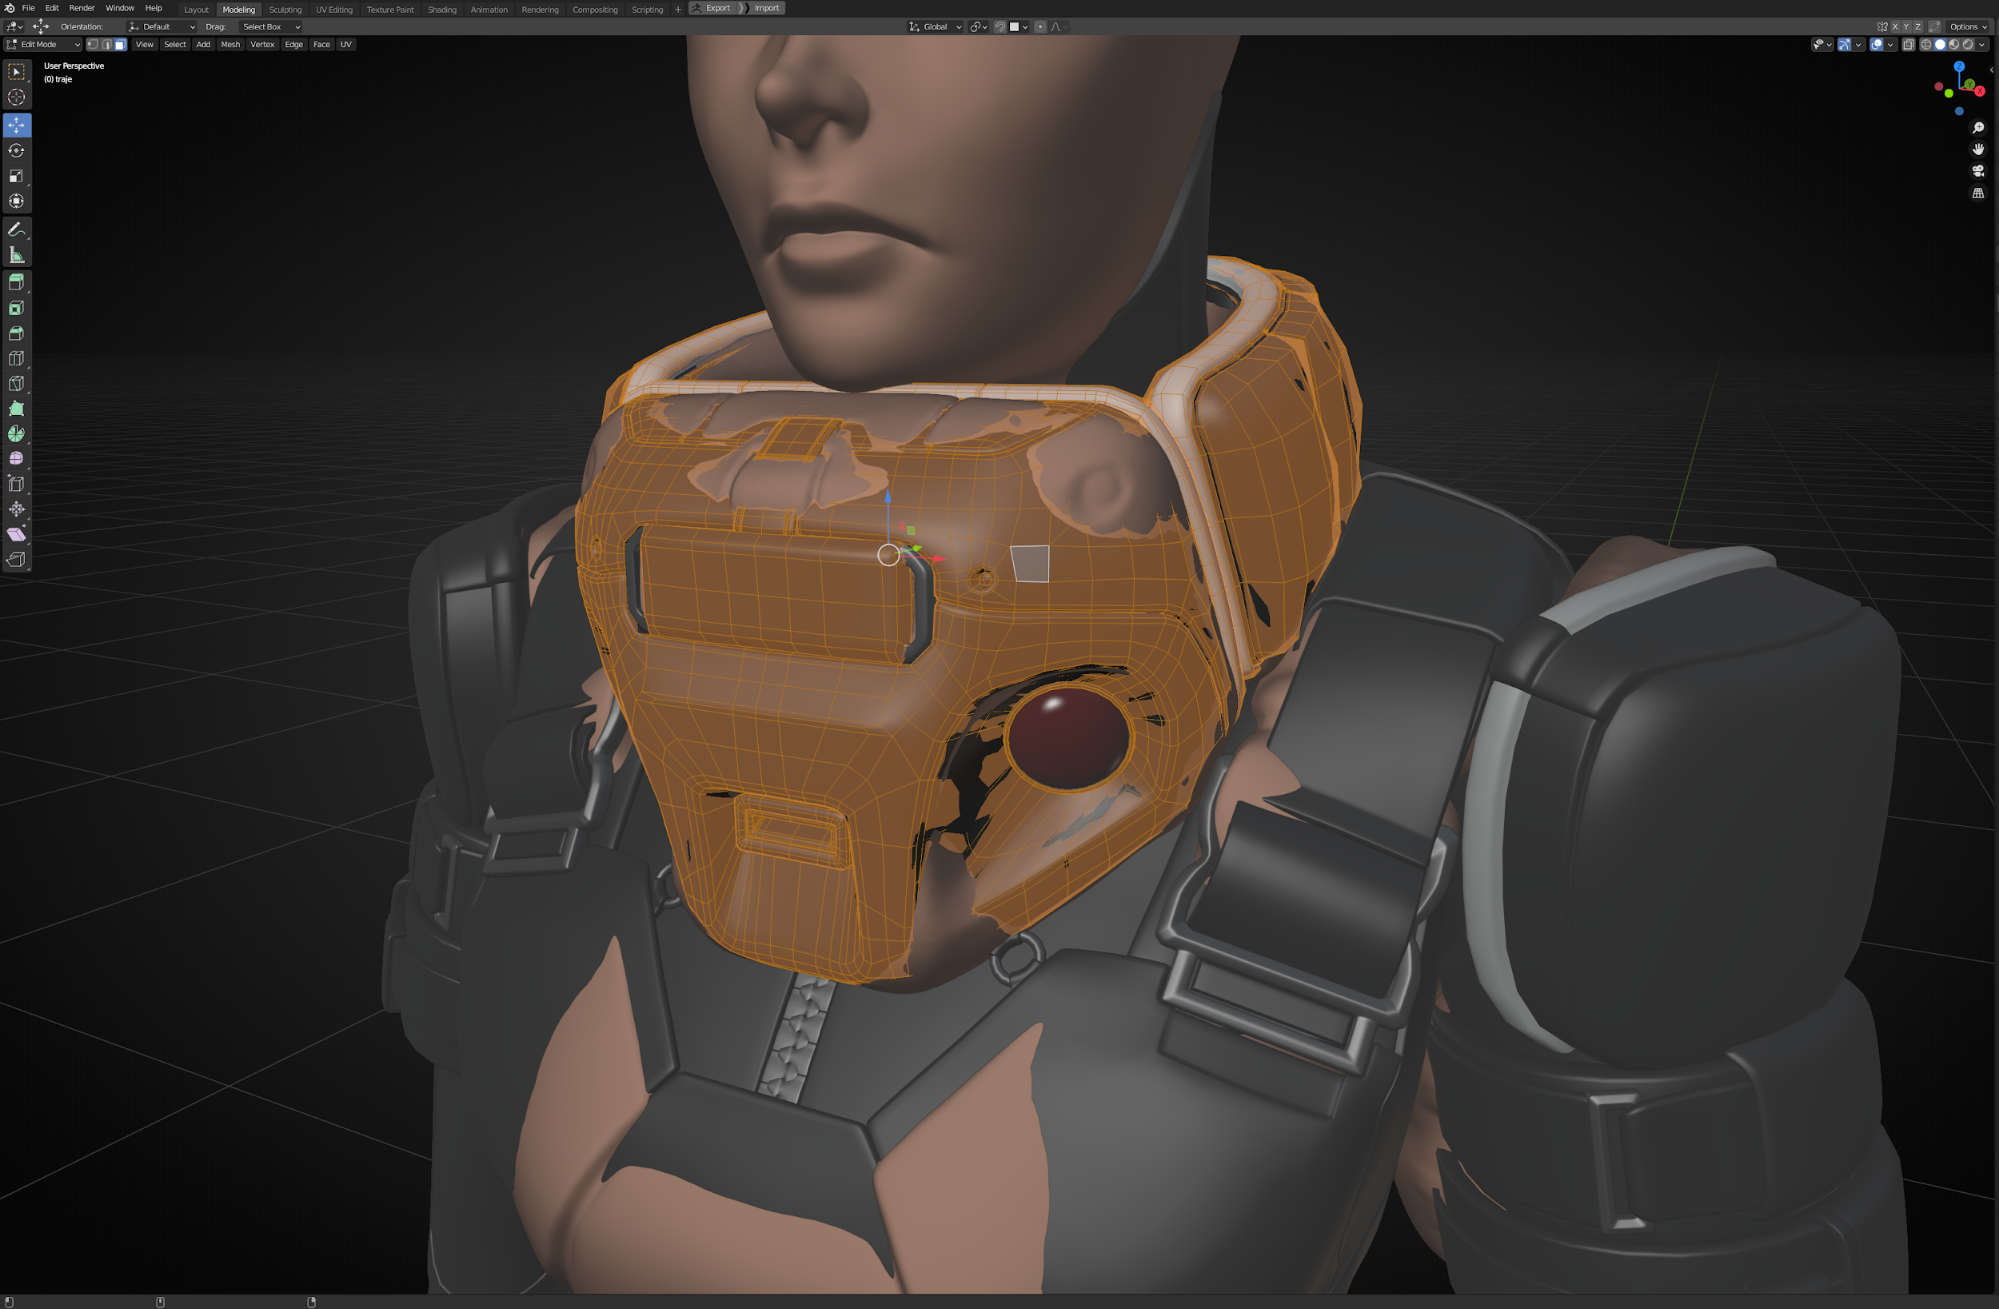
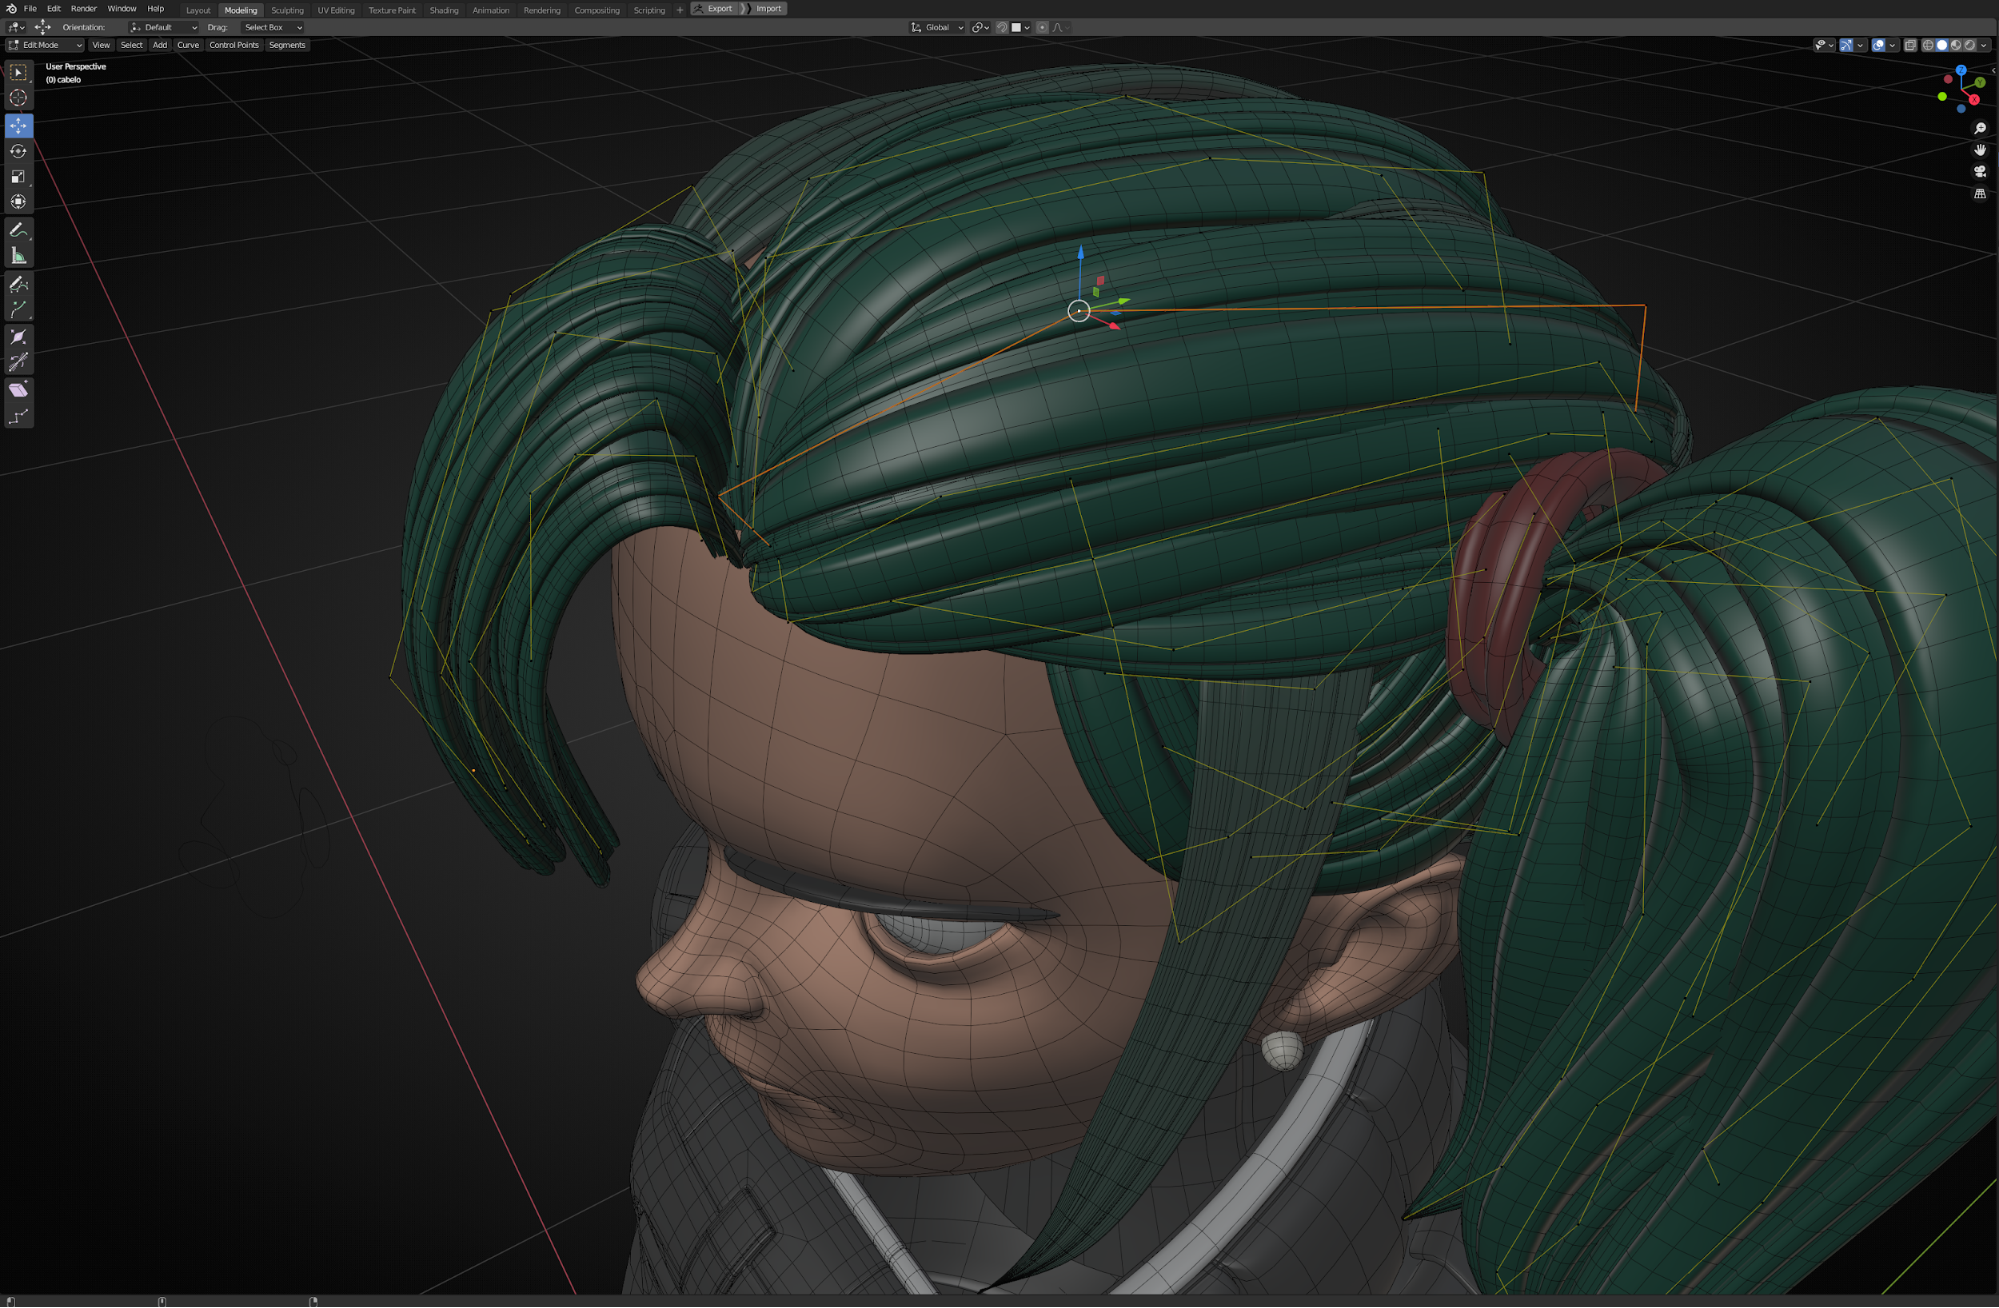
This is how the final model looks. All done with Blender’s standard tools and factory add-ons, like F2 and Loop tools. Since it was meant to be a still image, I didn’t bother doing much on the backside. For some pieces, like the straps, I started with a cylinder and later used the Solidify modifier. The zipper is an object with Array and Curve modifiers, that were later applied.
For the hair, I wanted a stylized look, so I used this cool technique that involves curves and a procedural shader. There’s a complete tutorial for that technique here.
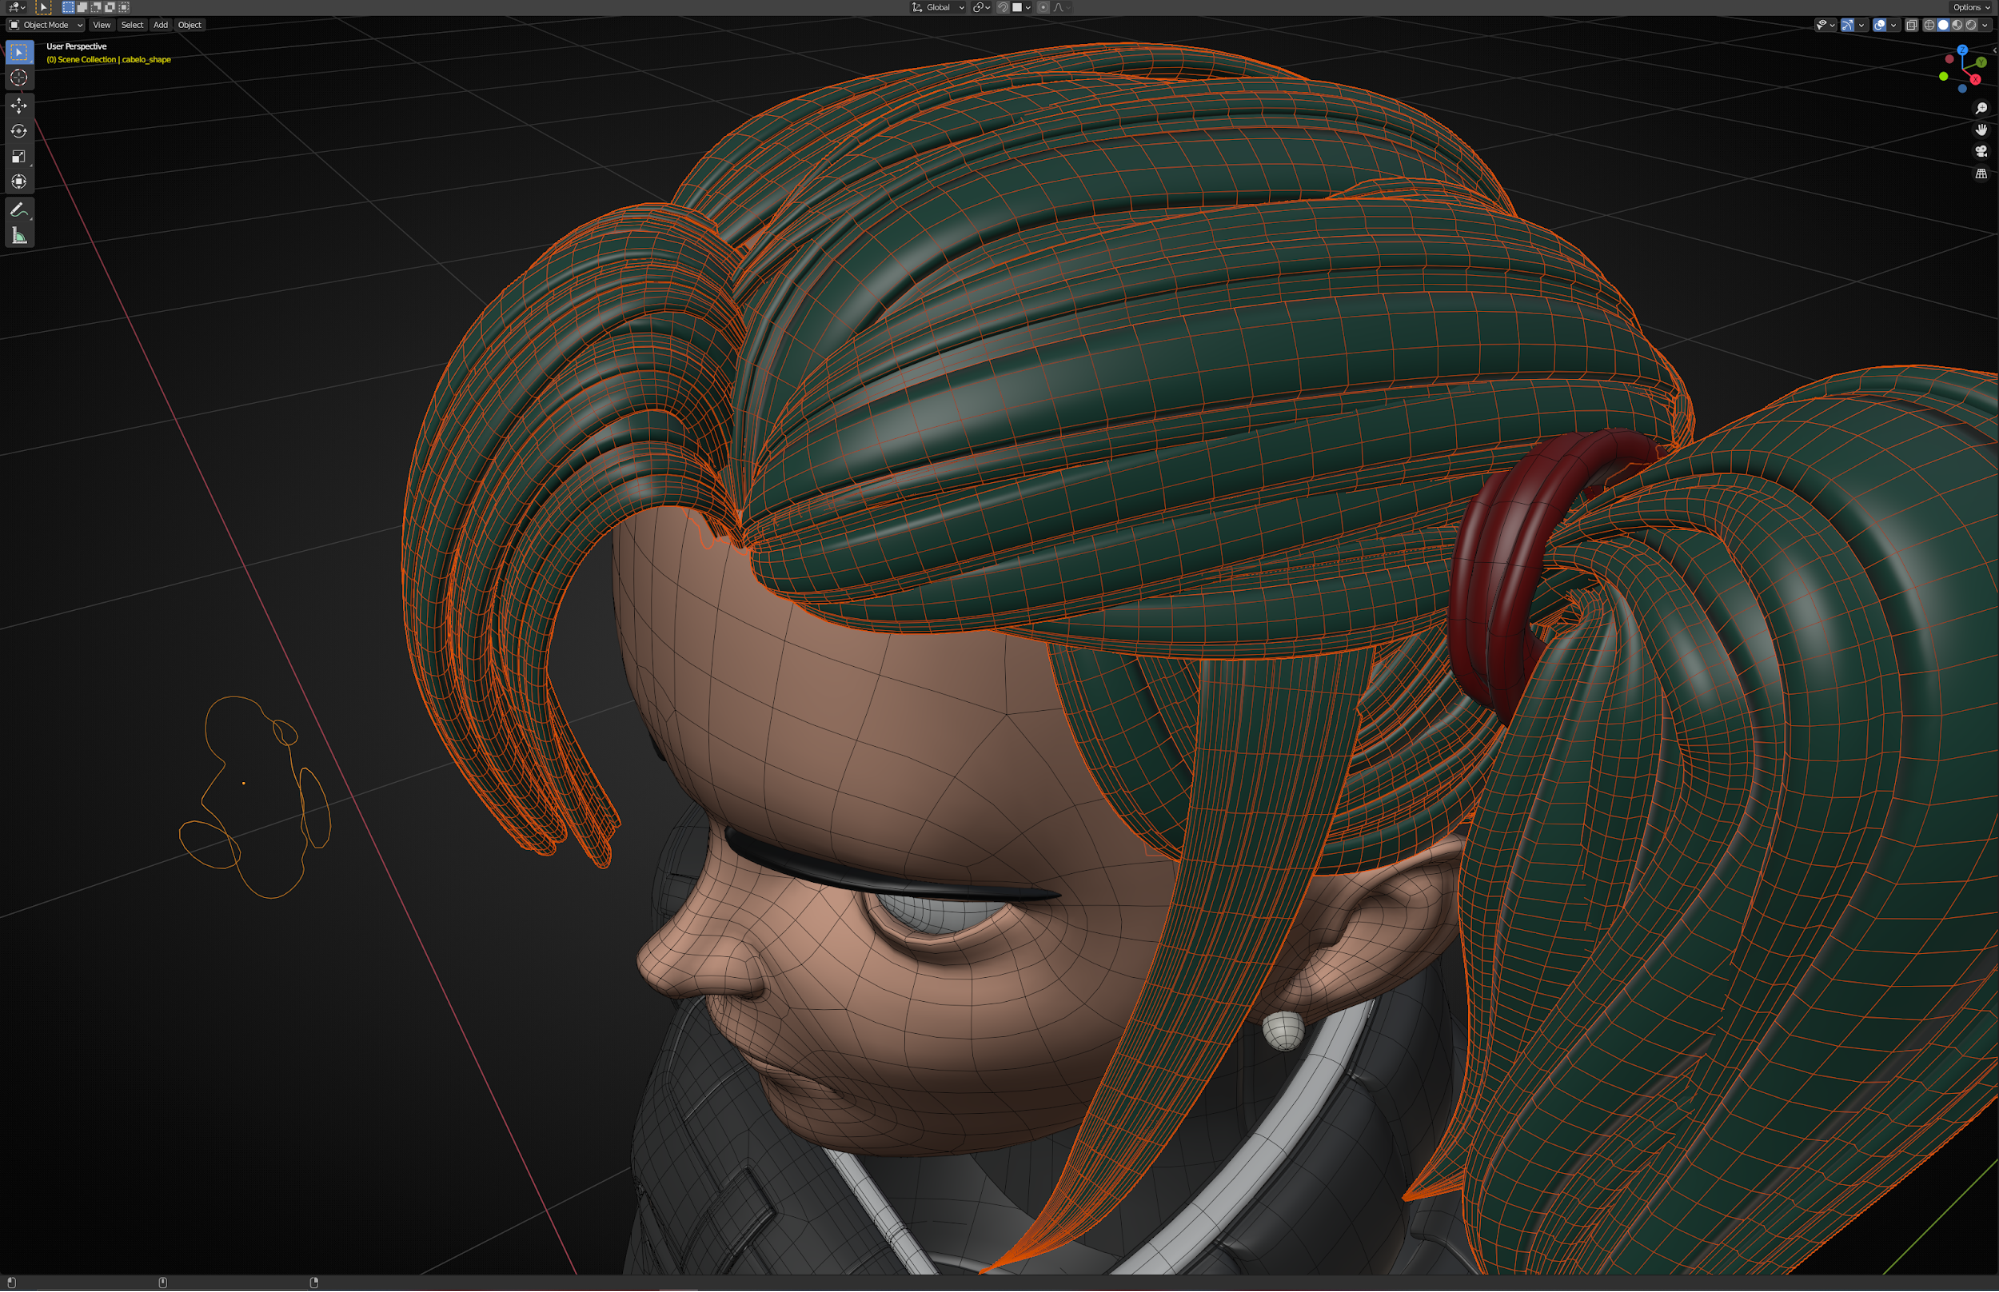
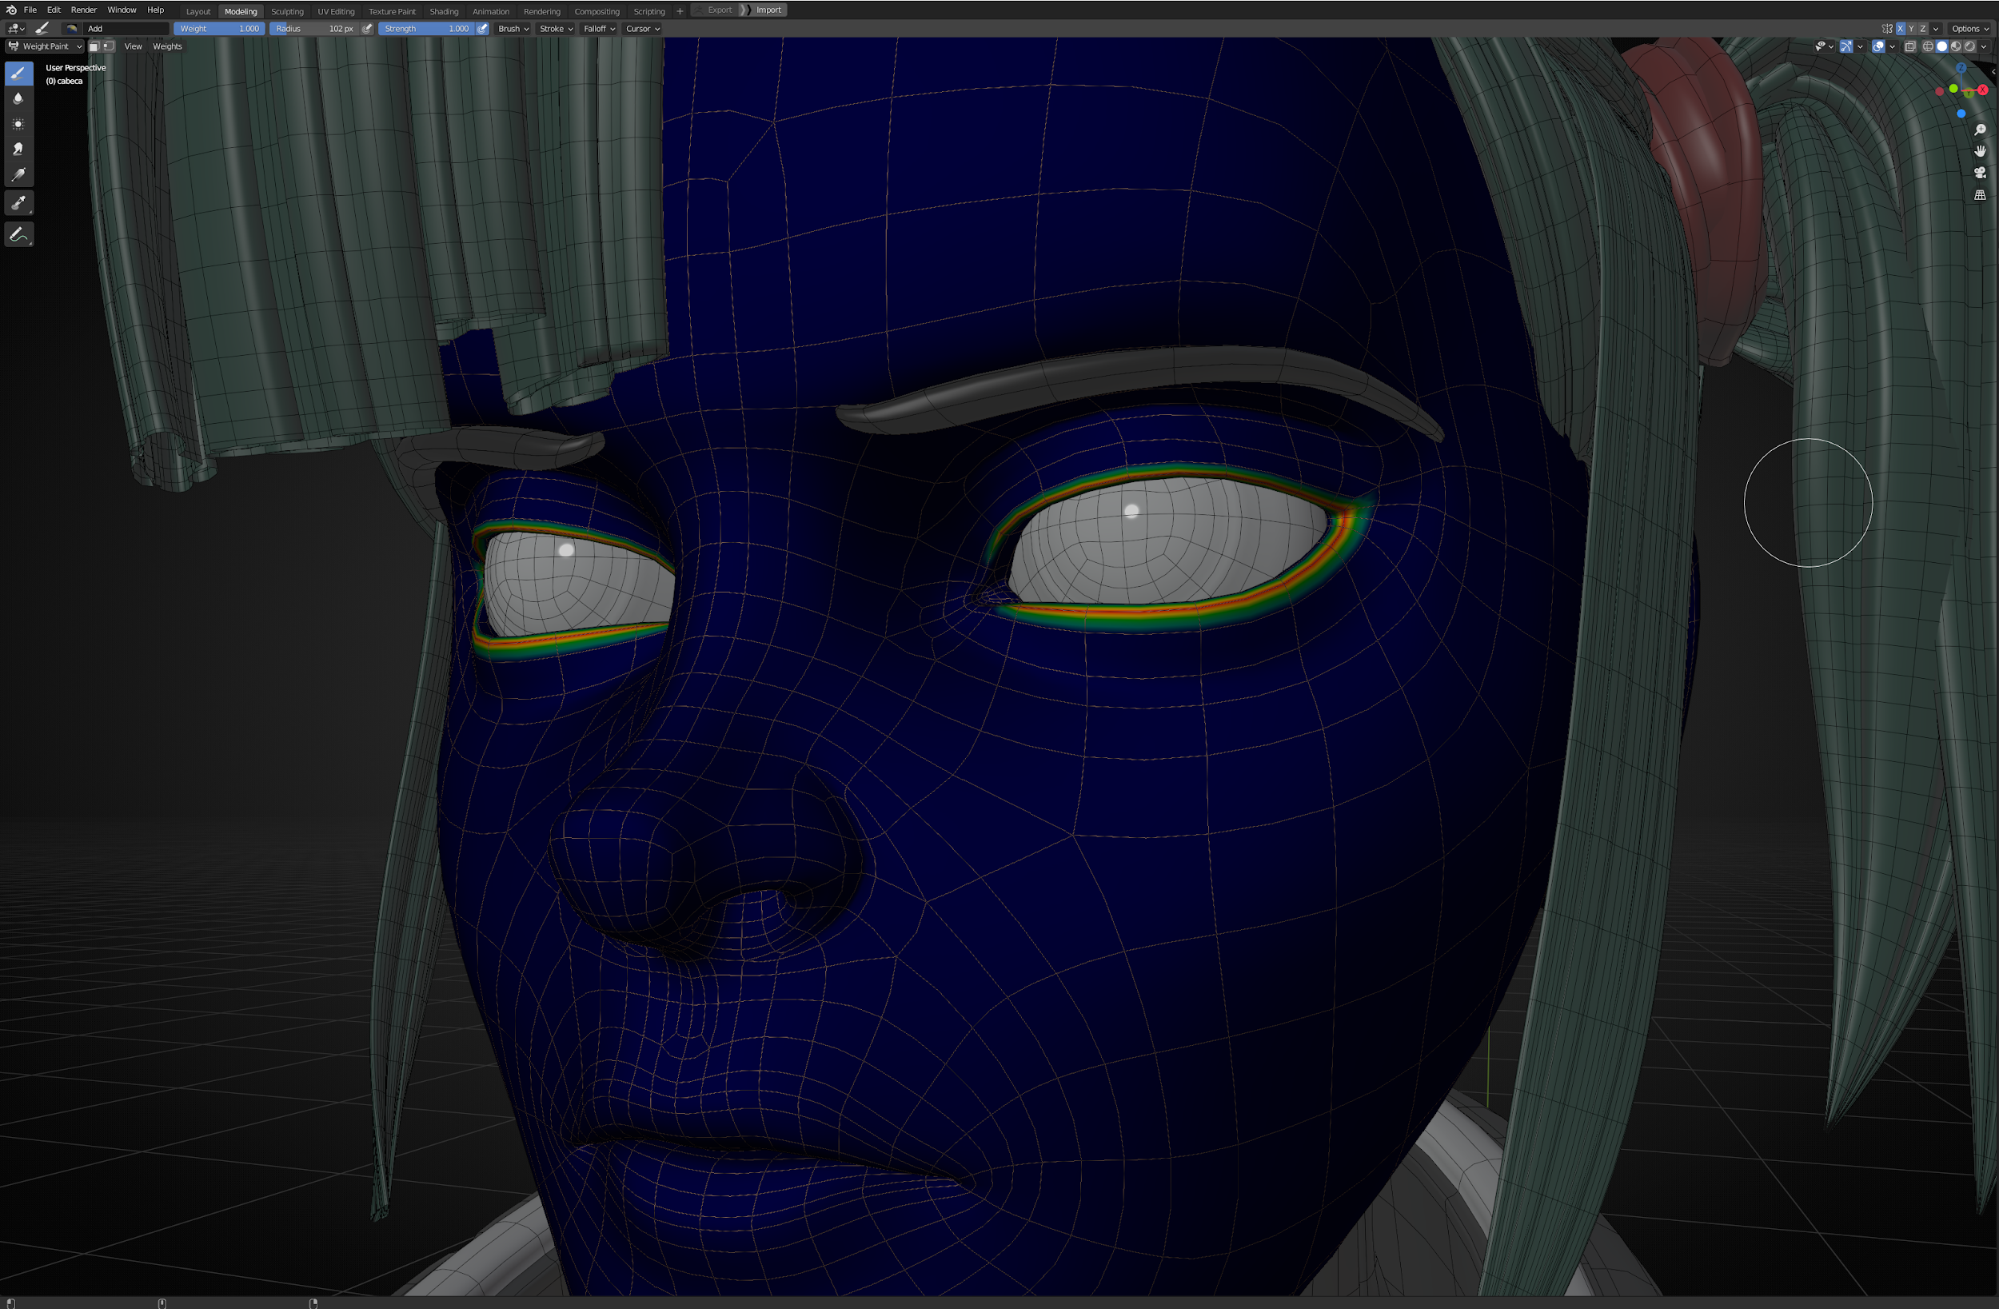
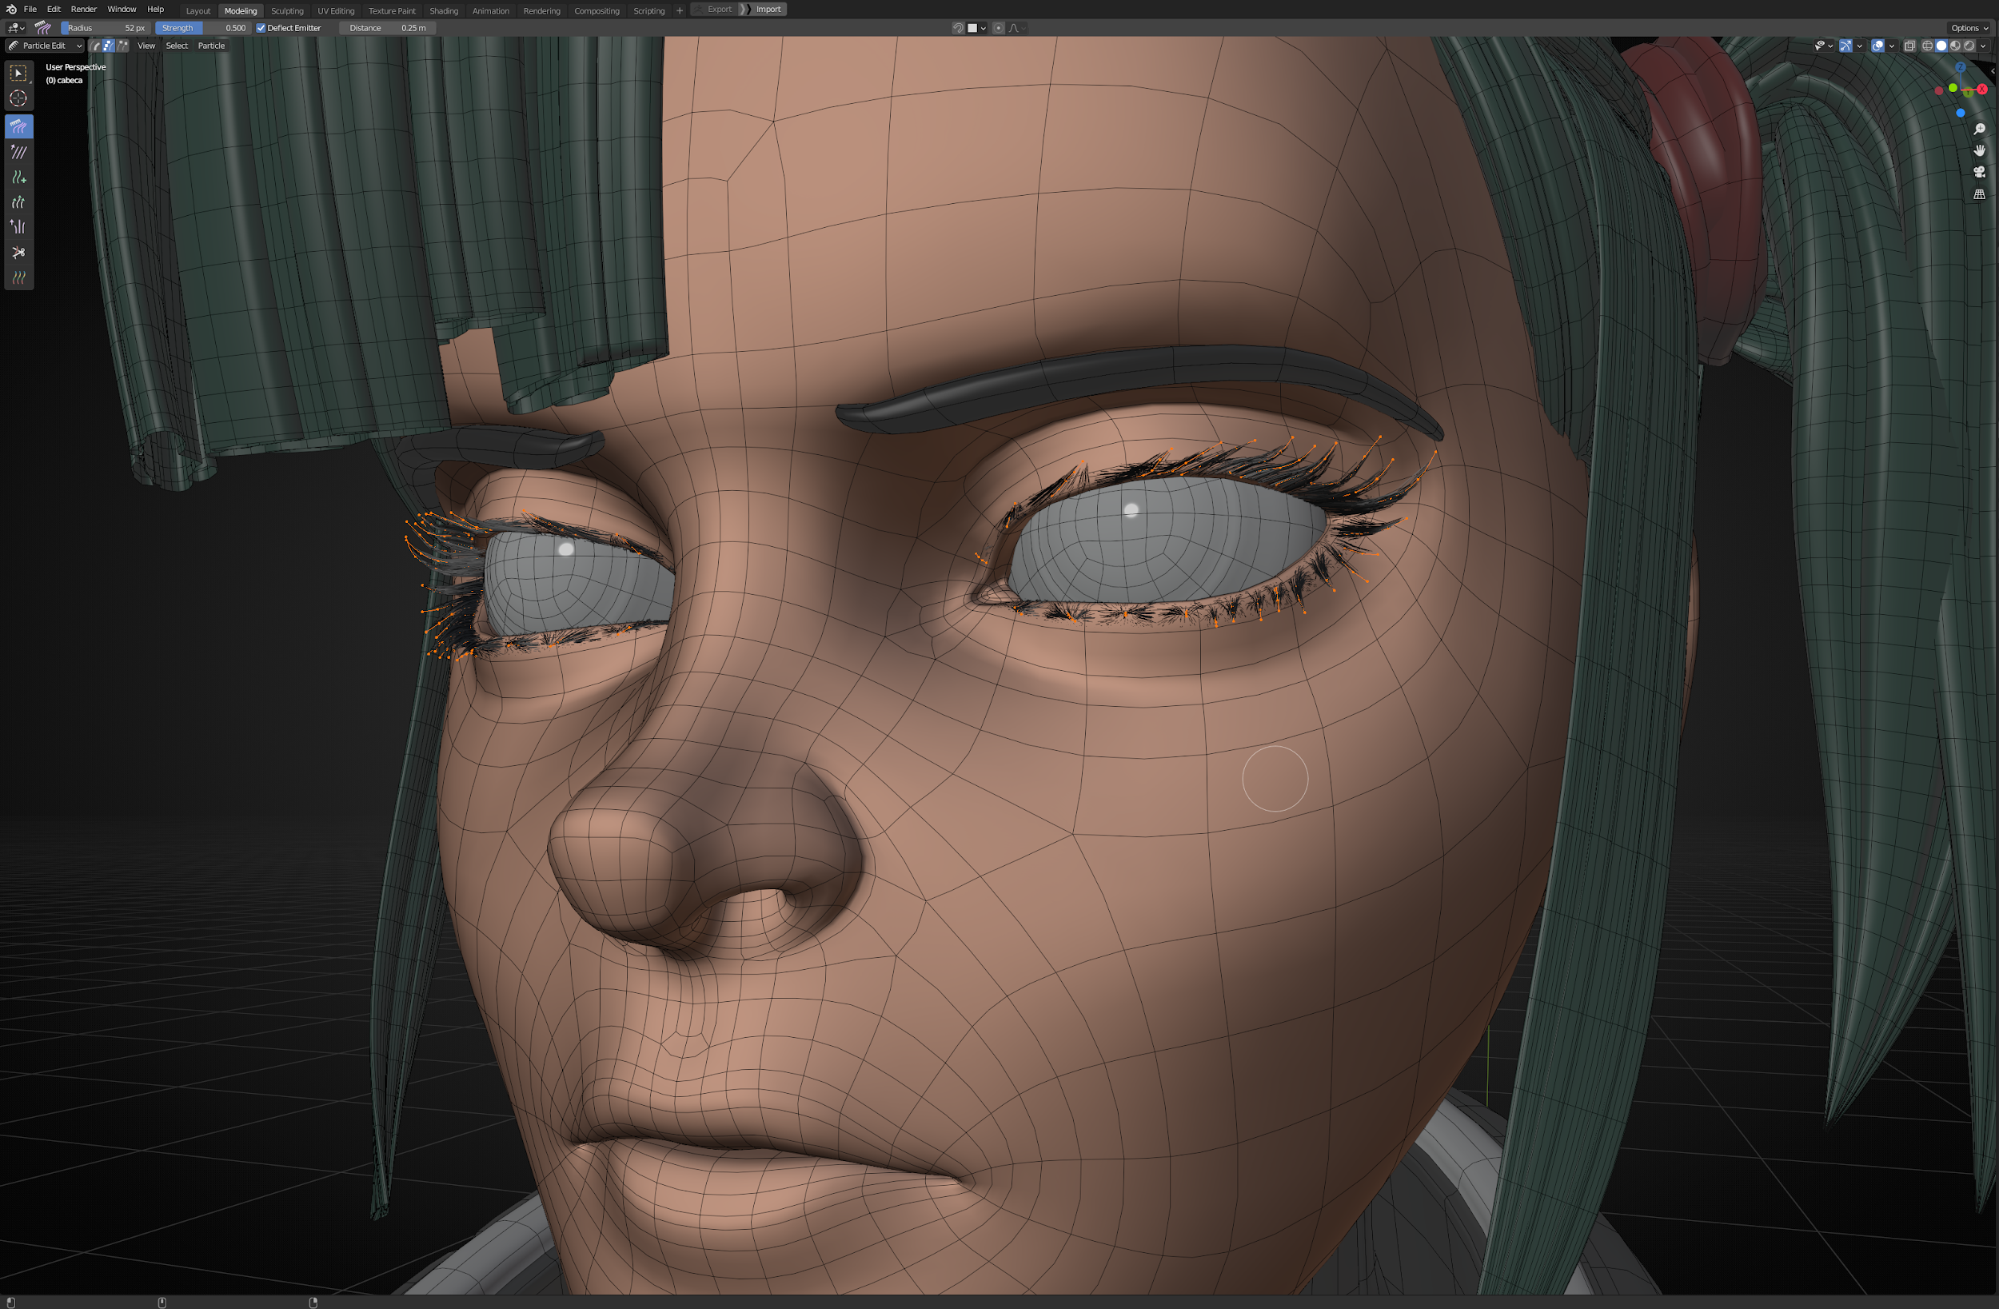
The eyebrows were also hand modeled. Only the eyelashes were done with a particle system. I created a vertex group to localize the emission on the eyelids and combed it in Particle Mode.
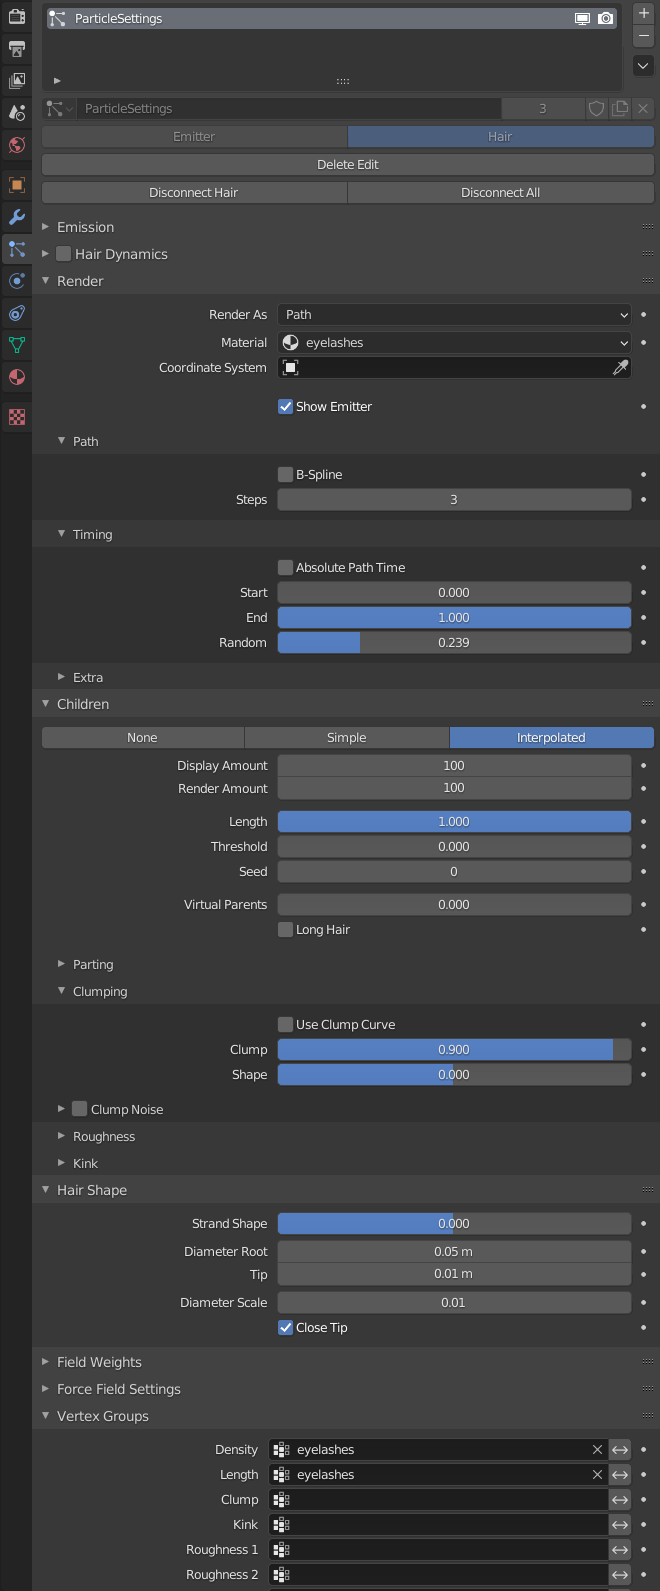
Here’s the particles config.
Shading
Now it’s time for the UVs. I unwrapped together all the objects that would use the same material, even though they were separate objects. Now they’re good to be sent to Substance Painter, via OBJ exporting.
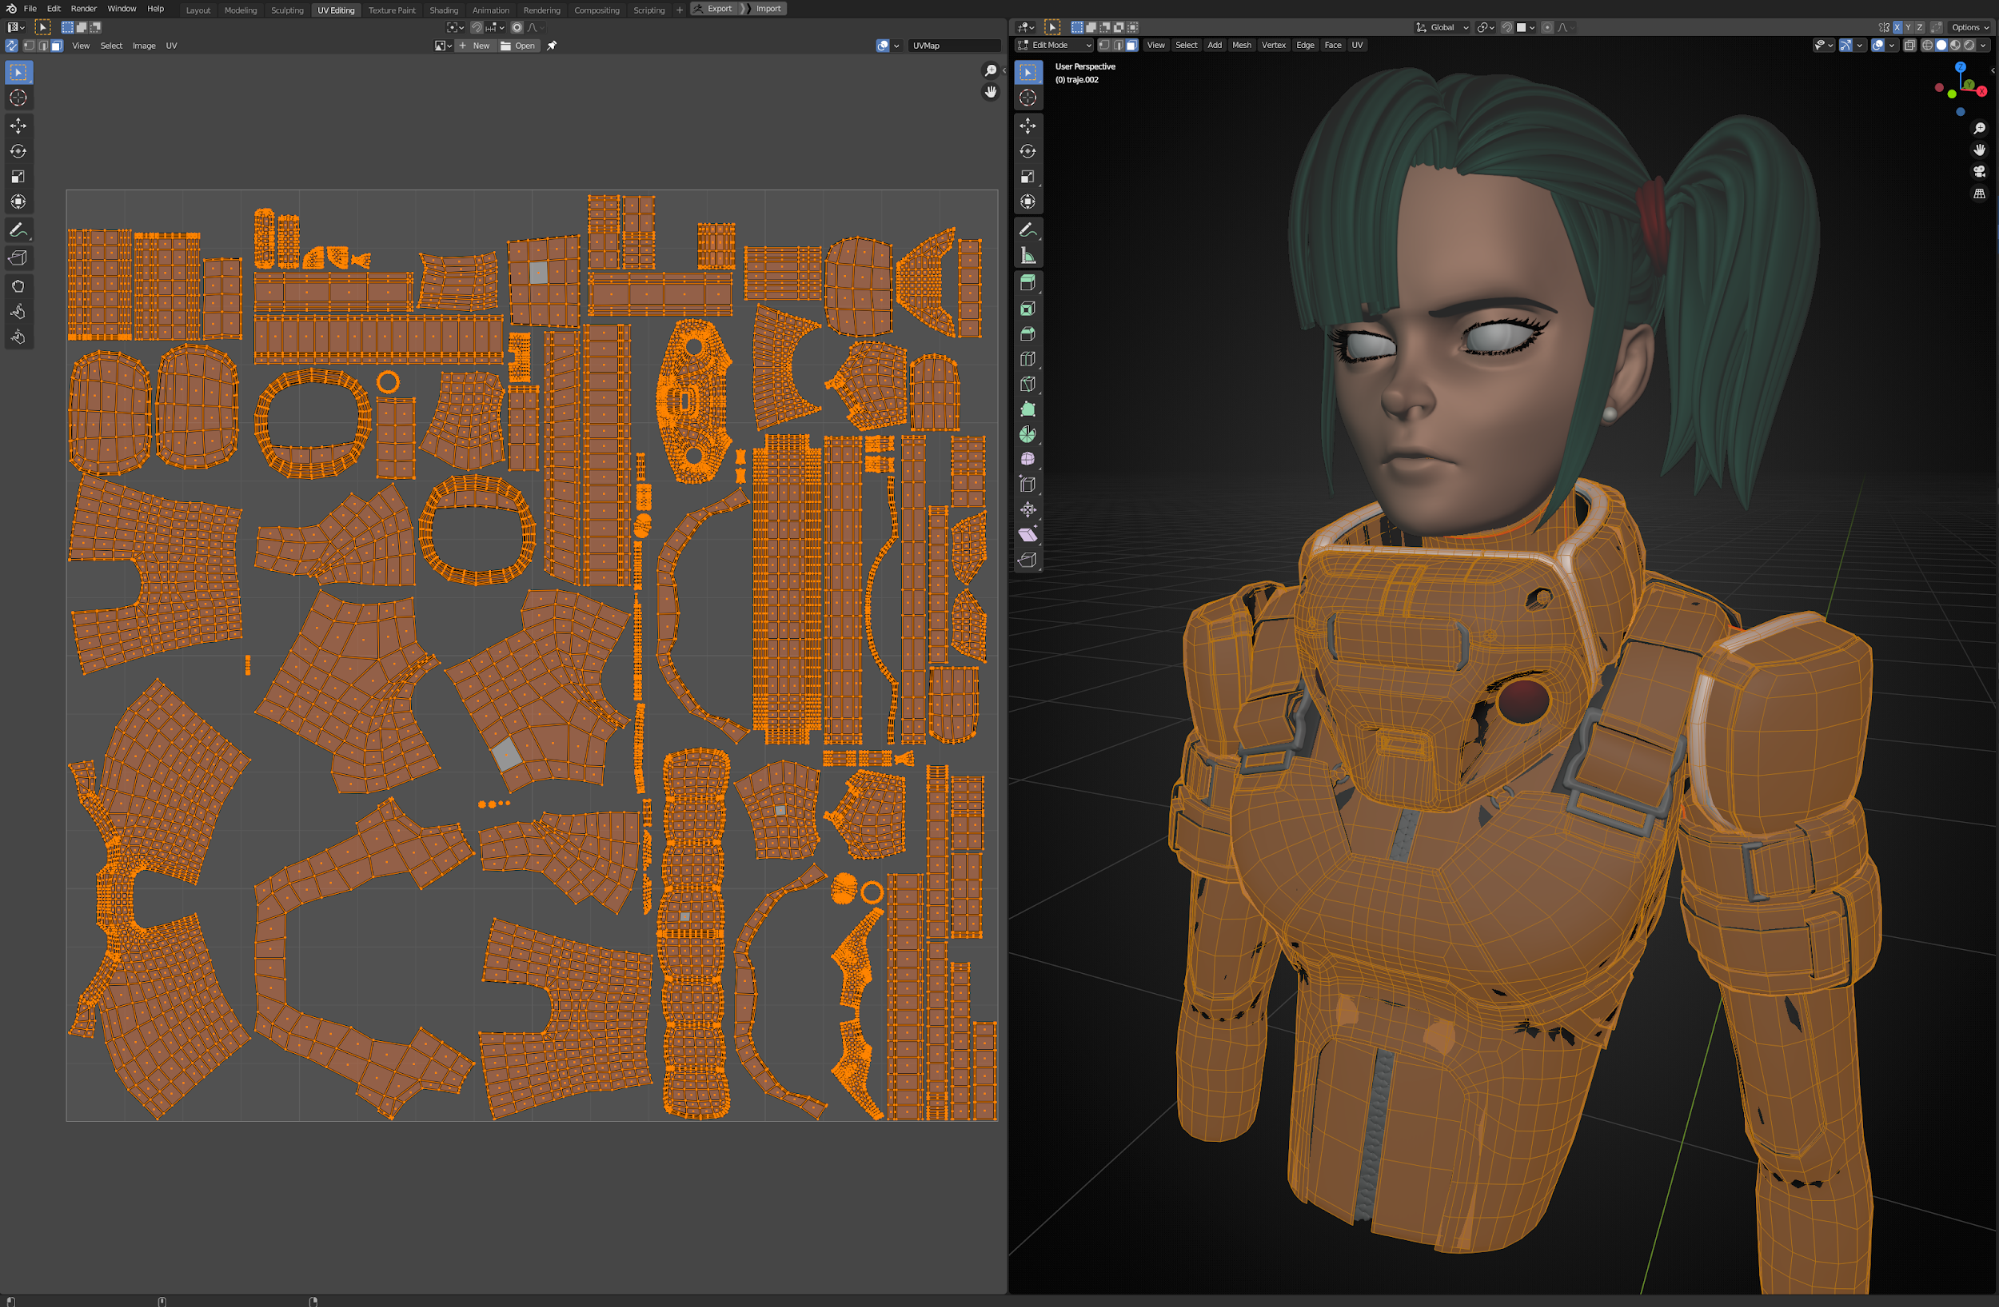
For the suit, I used a mix of a Smart Material with some masks to separate the colors.

I simply drew the smaller bevels and panels, with the help of the lazy mouse, on a height only layer.

For her skin, I made a fairly simple color mix. Some layers for the base skin and some others for her makeup. I didn’t make any pores or wrinkles, because I wanted a more simple, stylized look. I exported all textures as 4k maps (BaseColor, Normal, and Roughness).

Now back in Blender, building the shader with all those textures was really easy. After activating the Node Wrangler add-on, I just created a Principled BSDF shader, selected it, pressed CTRL+SHIFT+T and SHIFT selected all the corresponding maps. Blender automatically creates all the necessary nodes and connections. I only made a few tweaks with a Color Ramp.

The eyes I didn’t model, I simply used the amazing AutoEye add-on from Lucas Falcão. It comes with a crazy super shader with a huge variety of options to tweak, a real time saver.

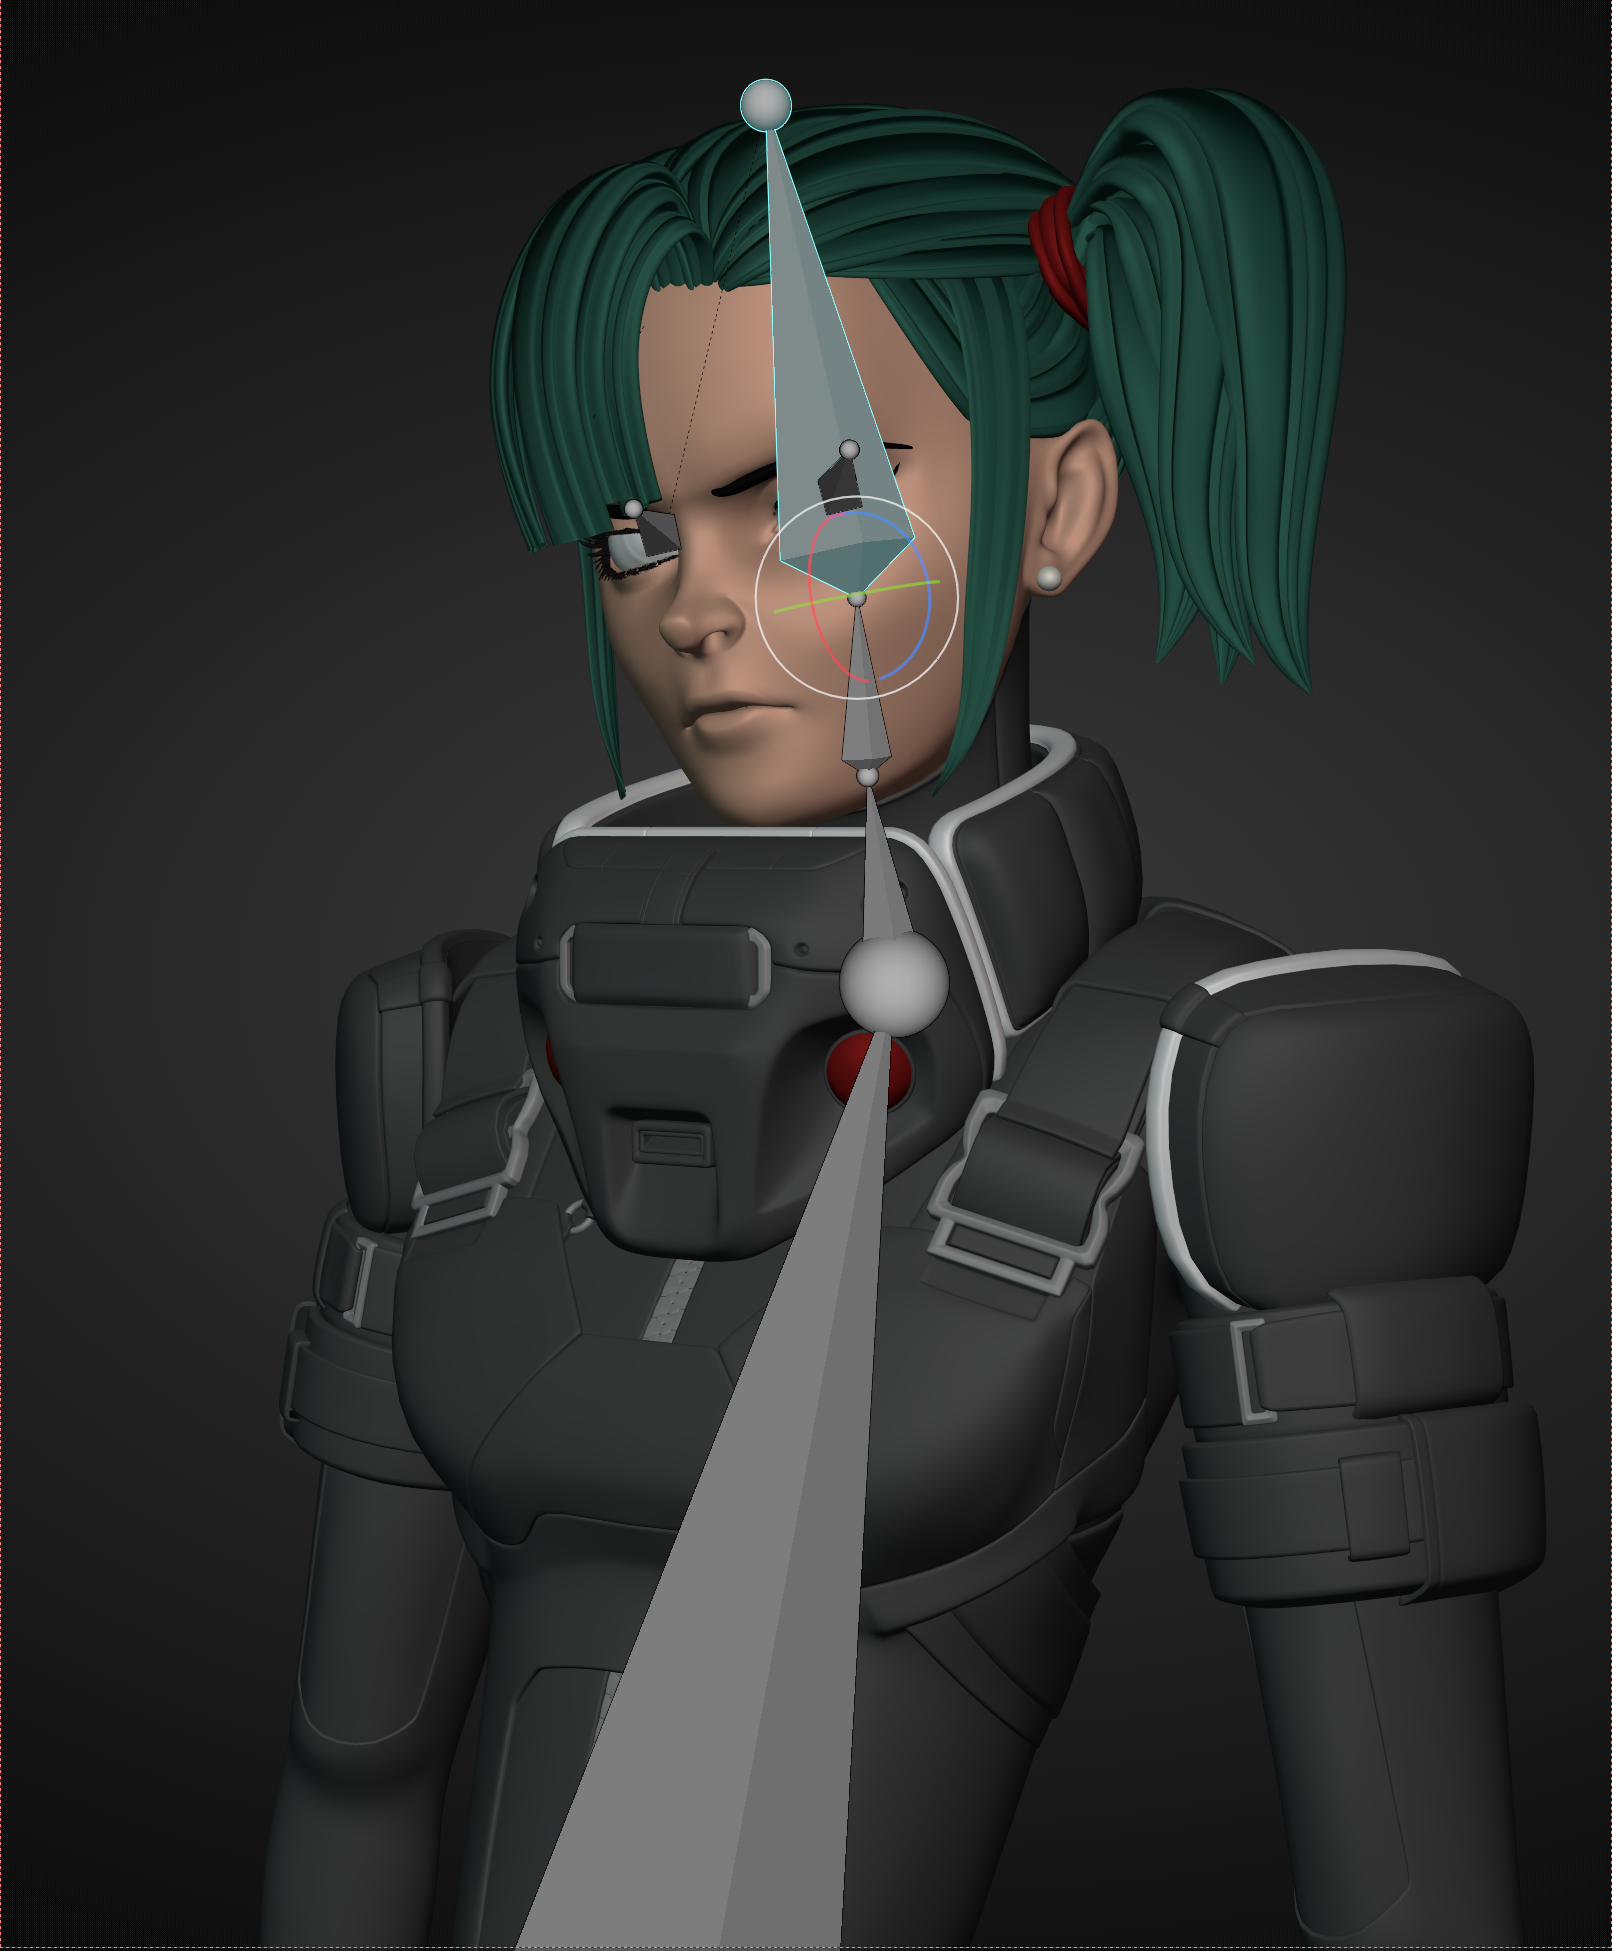
Posing
After all shading was done, I made a simple rig just to pose her as in the concept art. Nothing crazy, just some bones for the body, neck, head, and eyes. I then placed the original art on the background of the Camera to help me to match it as close as I could.
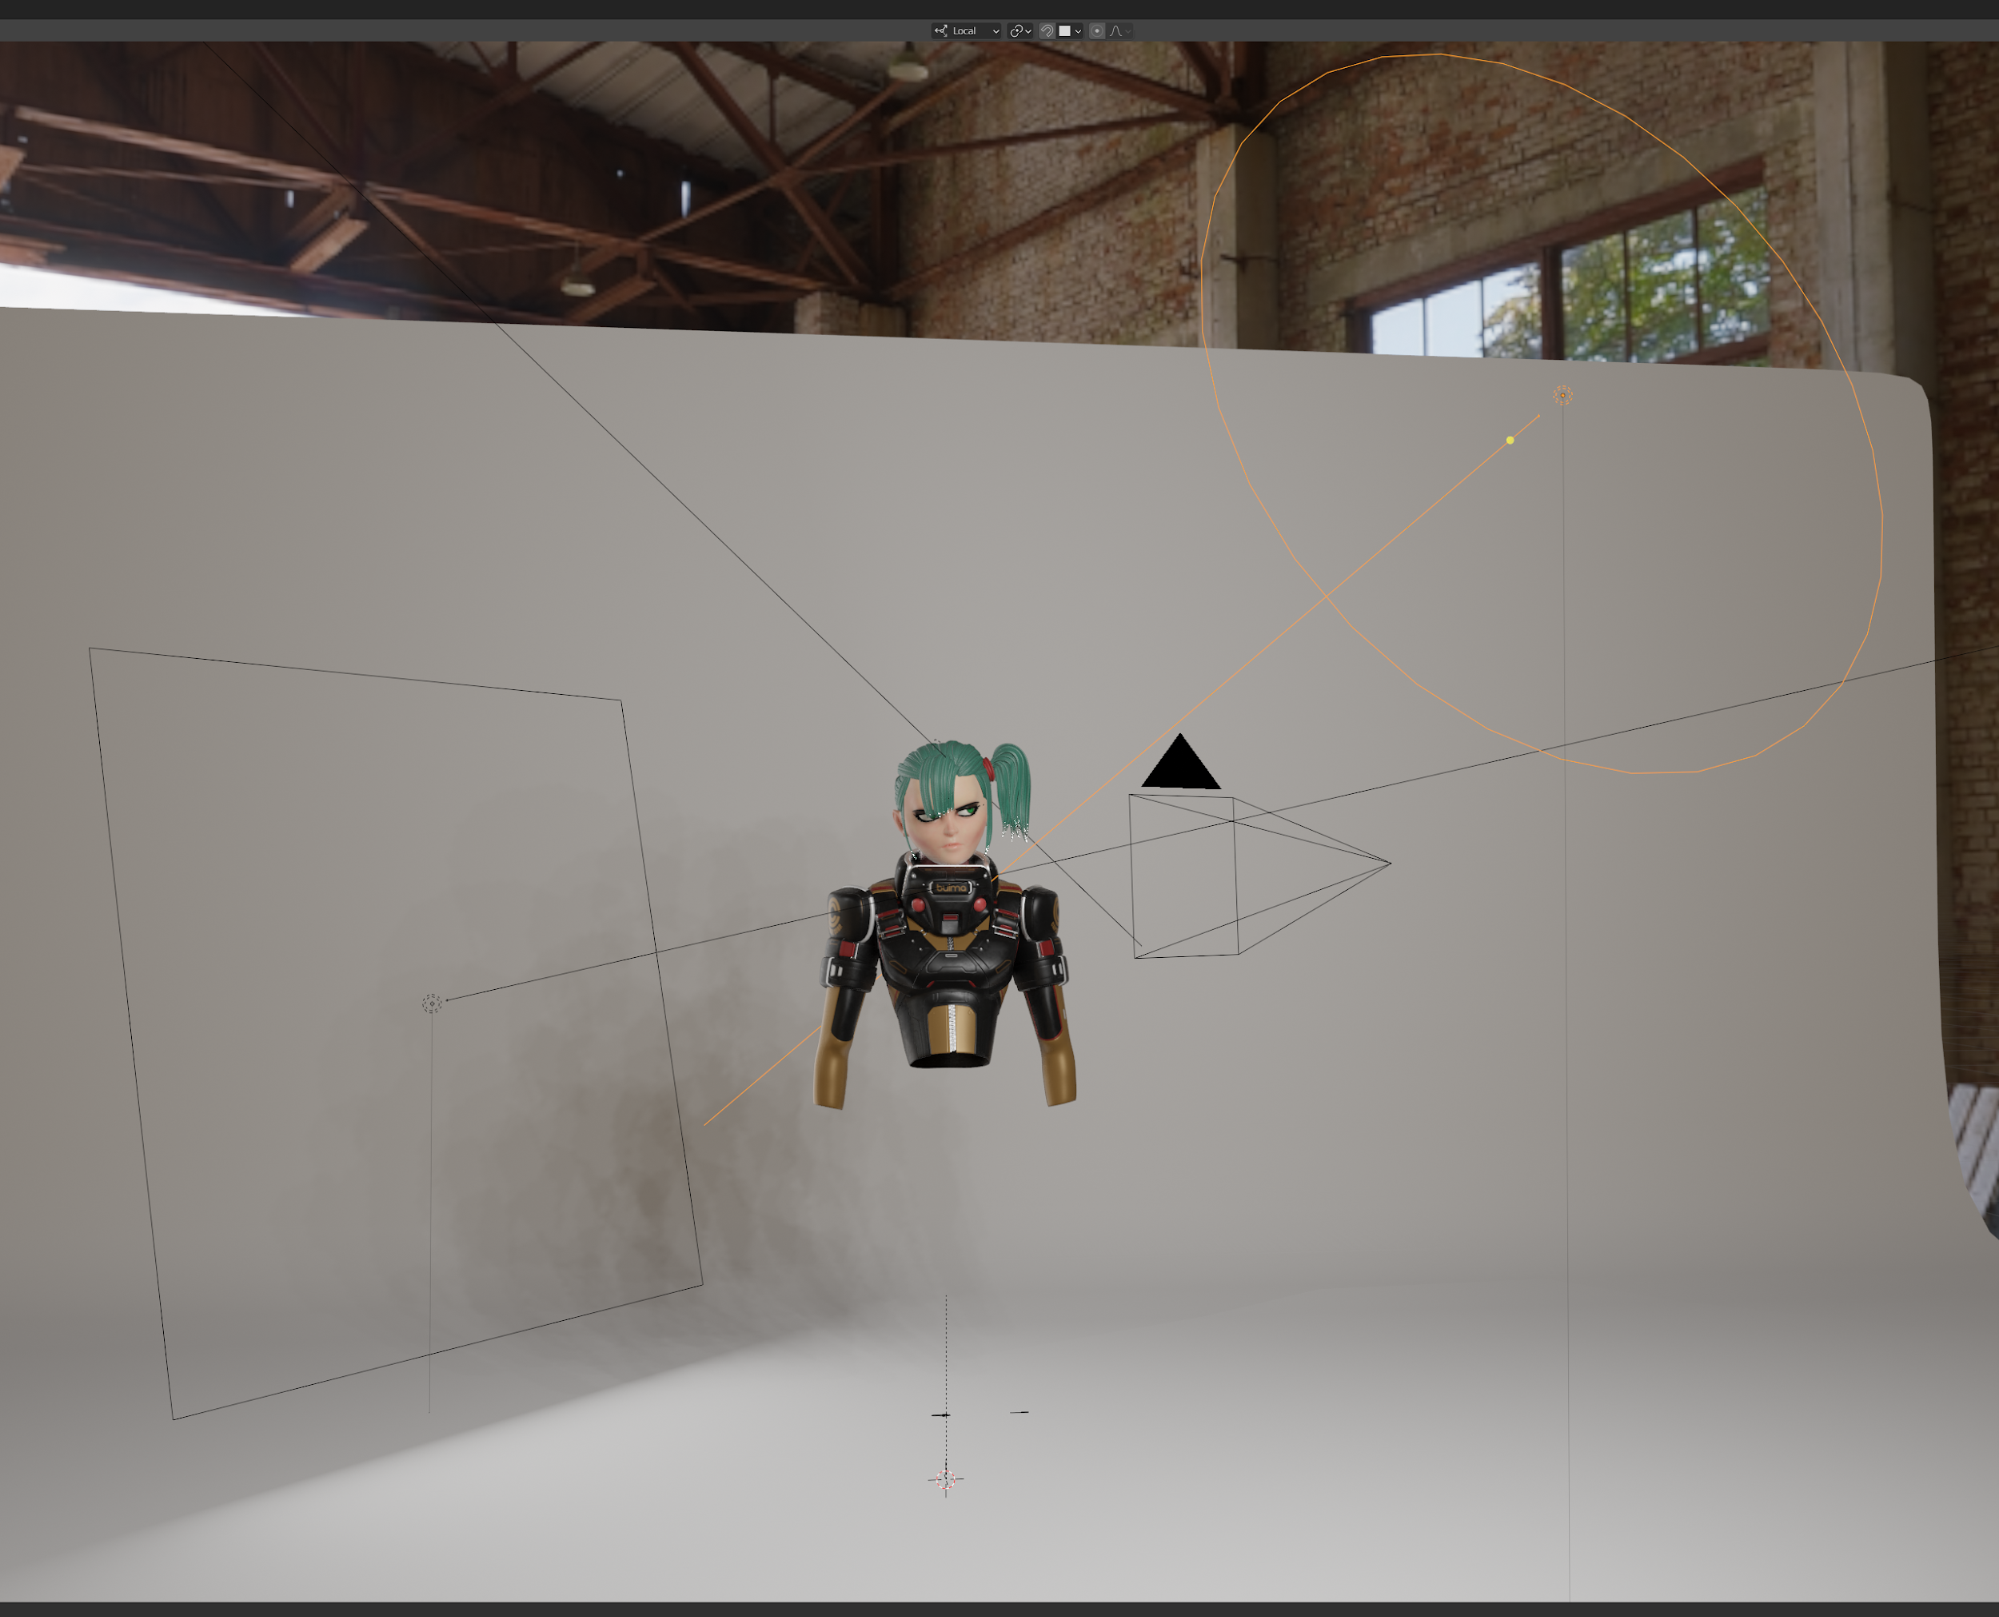
Lighting and Rendering
For the lighting, I used a couple of area lights, a white background and an HDRI (which I got at HDRI Haven). I changed the front area light to a circle shape to make the round reflection on her eyes. The other area light and the background object give the whole image a white rim, like the concept art. The rendering was made with Cycles.
Post-production
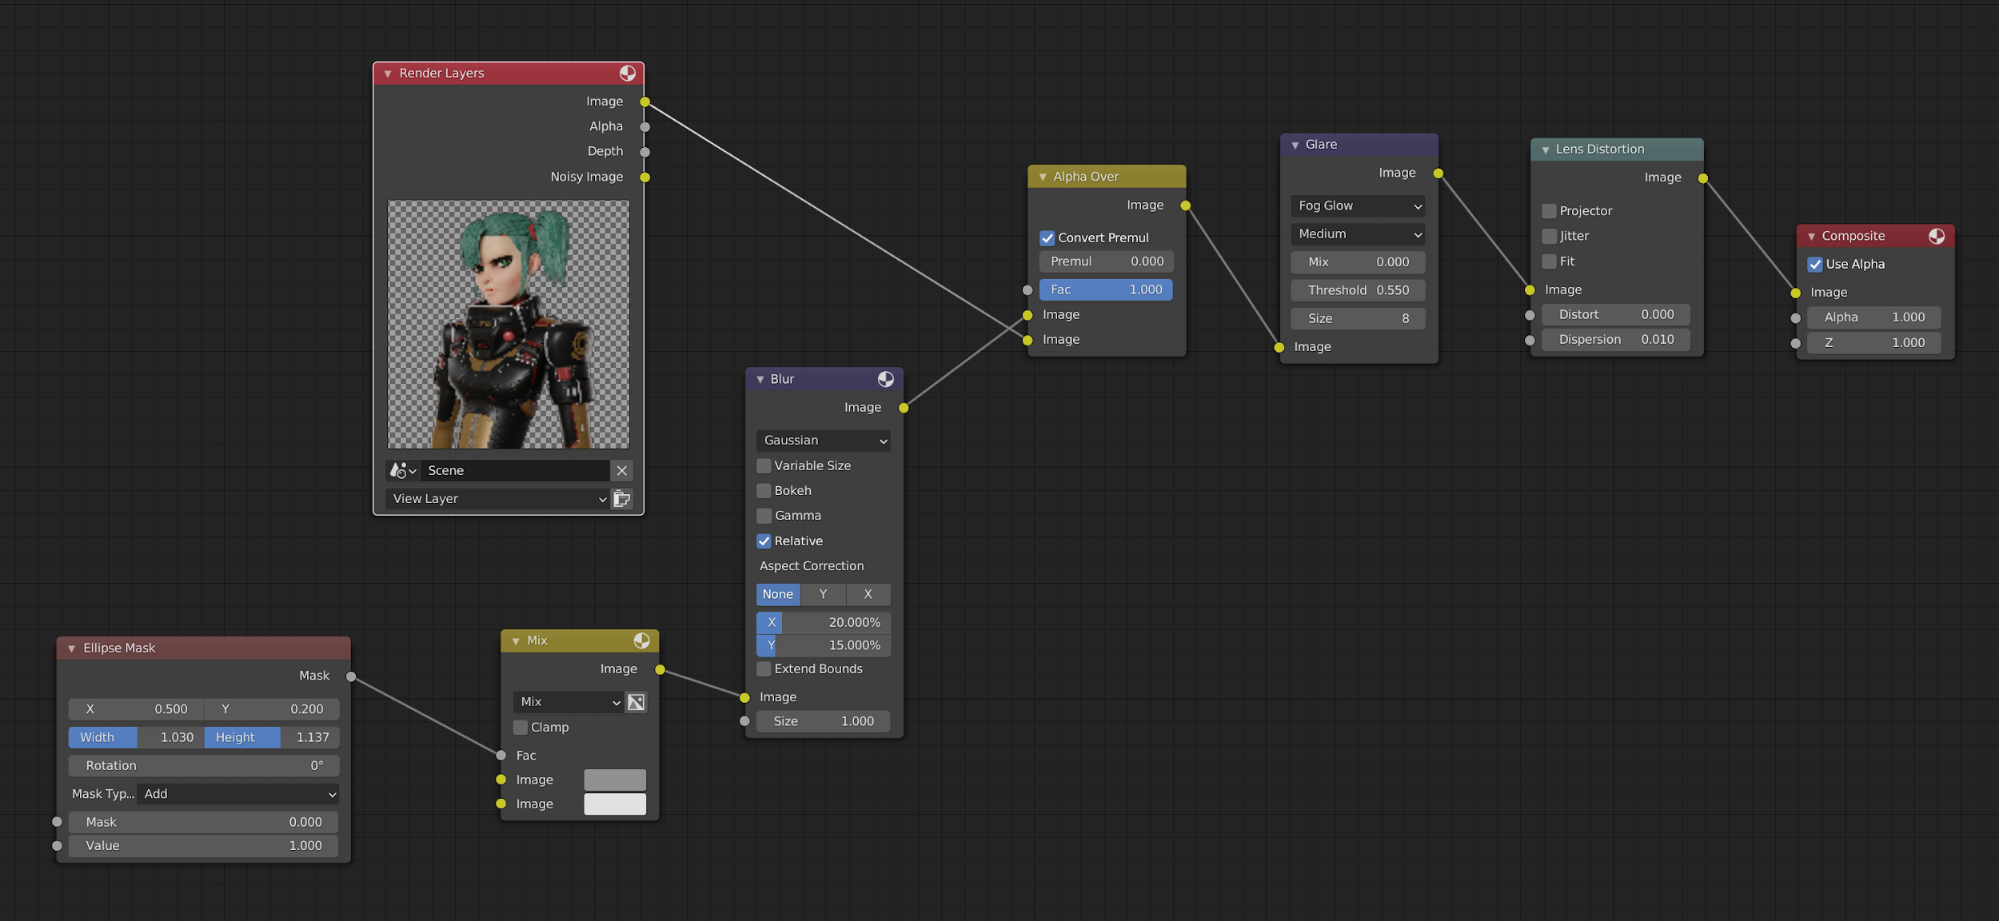
For the final image, I used some nodes in the Compositor. An Ellipse Mask with Blur to create a gradient, a Glare for extra shine and a Lens Distortion, for which I just tuned the Dispersion option to give it a bit of a “film look”. That’s it!
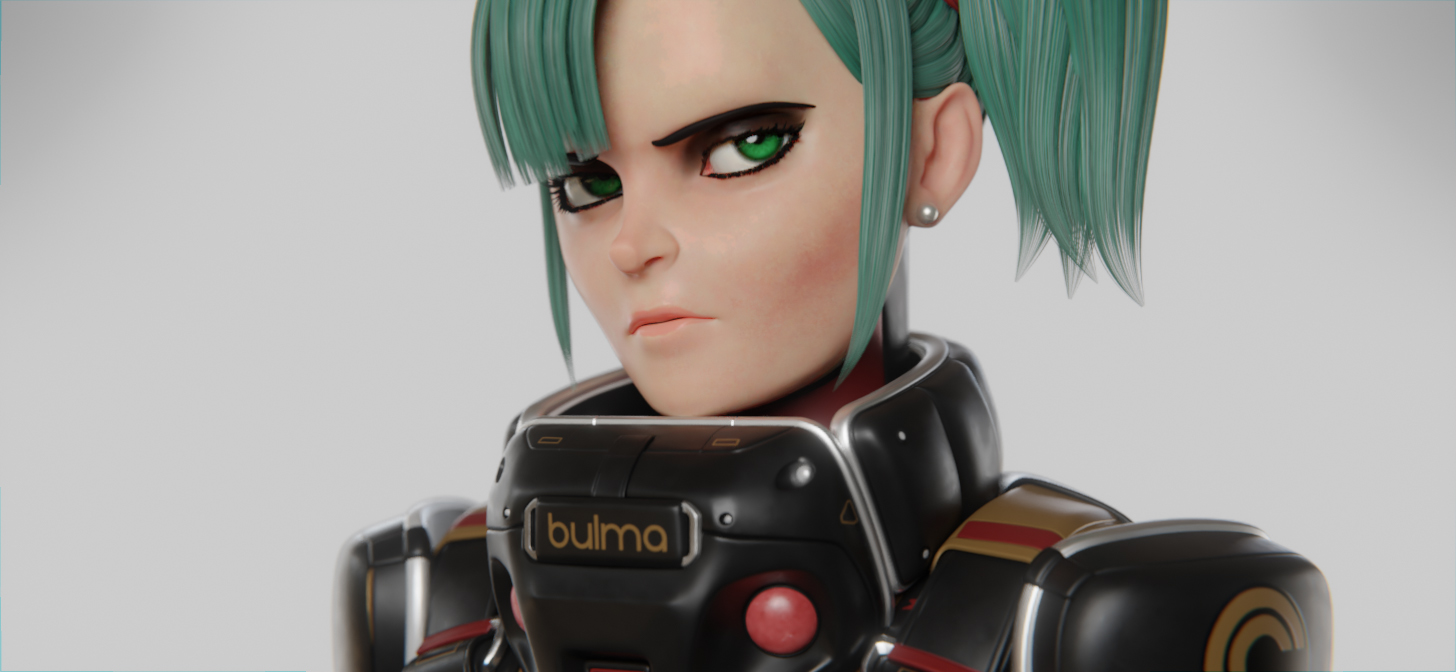
Final Image

About the Author
 Bruno Cornelsen, freelance 3D generalist.


What can I say except…
Serge would be proud !
Thanks! He is, actually, we’re friends on Facebook and he shared my post. Got a lot more likes! LOL
Glad to hear that… Nice work always deserves congratulations.
Cheers !