
Behind the Scenes: Cyberpunk Mechanic

Who I am
My name is Kilian Van Hasten, also known under the name “UnFy”. I’m 20 years old and I’m currently making 3D art as a hobbyist. I will go to study Game Graphics Production (3D School) later this year. I have been practicing 3D for over a year now, since August 2019, and I’ve been loving it so far!
[sponsor id=’qarnot’]
Introduction to the Cyberpunk Mechanic scene
I started this scene right after the release of Cyberpunk 2077. I purchased the game on launch and I’ve been loving it since then. I love the environments and the immersive story. The week after launch there was a new theme for Blender52 called “Mechanic”. (Blender52 is an event where you get a theme each week for the whole year and you have to make something around that in Blender within the week.)
I knew from my first gameplay at launch that I wanted to create something around Cyberpunk for the “mechanic” theme.
Tools used
- Blender (modeling, applying textures, rendering, creating the environment)
- Substance Painter (creating textures for some props)
- Substance Designer (creating a few seamless textures)
- Quixel Bridge (paid texture library)
- Photoshop (post-proccesing)
Blockout
Like I do with every environment, and what is very recommended, is to start off creating a blockmesh for the environment. This gives a clear view of how the scene could look at the end and whether the composition of the scene will be good or not.
Modeling
When it all looked fine, I started off creating the models. Sometimes I edit shapes from the blockmesh and other times I create new assets to replace the blockmesh. At this point, I needed to analyze what’s so characteristic of Cyberpunk, and from what I could see it looked like a lot of shapes had curved edges, so I gave the walls curves instead of sharp edges.
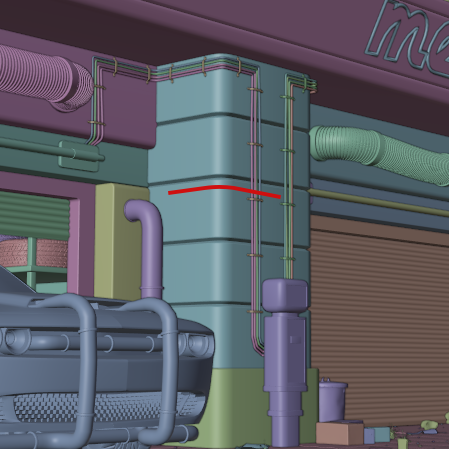
I also created a lot of wires that were just vertices with a skin modifier on top of them. I would place a vertex against the wall and extrude it, and then, when the wire was finished, I just had to give it a skin modifier and subdivision modifier if it was close to the camera.
The neon signs were made with bezier curves, while the text was made using fonts.
There are also a lot of pipes in the scene; most of these pipes have 90° bends. To make the bends, I used a free built-in add-on from Blender (Loop tools) to connect two cylinders. (Select the 2 faces you want to connect and right-click and then click on Loop tools and select bridge, you can add some segments to make it bend better.)

Shading and texturing
I used a pink and blue color palette as I saw these colors a lot in the game, mostly coming from neon signs. The walls, streets, etc. were grey so the lights were the most important thing for color. When every building was done, I could use the lights to make the scene come alive.
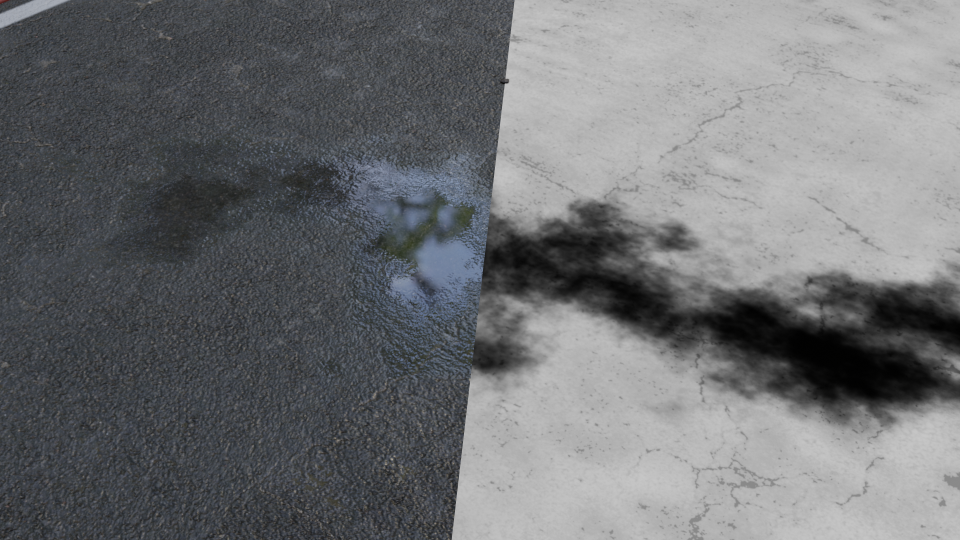
Like most people, I noticed how it is always raining in Cyberpunk 2077, the roads are always wet and show beautiful reflections. The street is a stretched plane in my scene with an asphalt texture on it. To make the water puddles, I added the noise texture node and connected it to a color ramp node that was connected to a mixRGB with the setting on Multiply (this node was mixing the noise with the roughness map).
Rendering
When it is time to render, I always add some contrast, as I feel that it always works well in 3D renders. I rendered in Cycles with 1000 samples with the Denoiser node. In Photoshop, I added some local contrast, changed the colors a little bit to make the purple and blue pop more, and made the highlights of the neon lights stronger.
If you would like to see a whole timelapse of the scene creation, I uploaded the timelapse on my YouTube channel.
Final Render

About the Author
 Kilian Van Hasten (UnFy), I’m 20 years old and I’ve been using Blender as a hobbyist for over a year.


