
")
Hello! My name is Martin Portais and I am a general 3D marketing artist for a video game company. I lived in France for my entire life and recently moved to Montreal. I love creating 3D characters and environments. You can check out my work on my ArtStation page if you’re interested.
Learn more on qarnot.com.
Inspiration
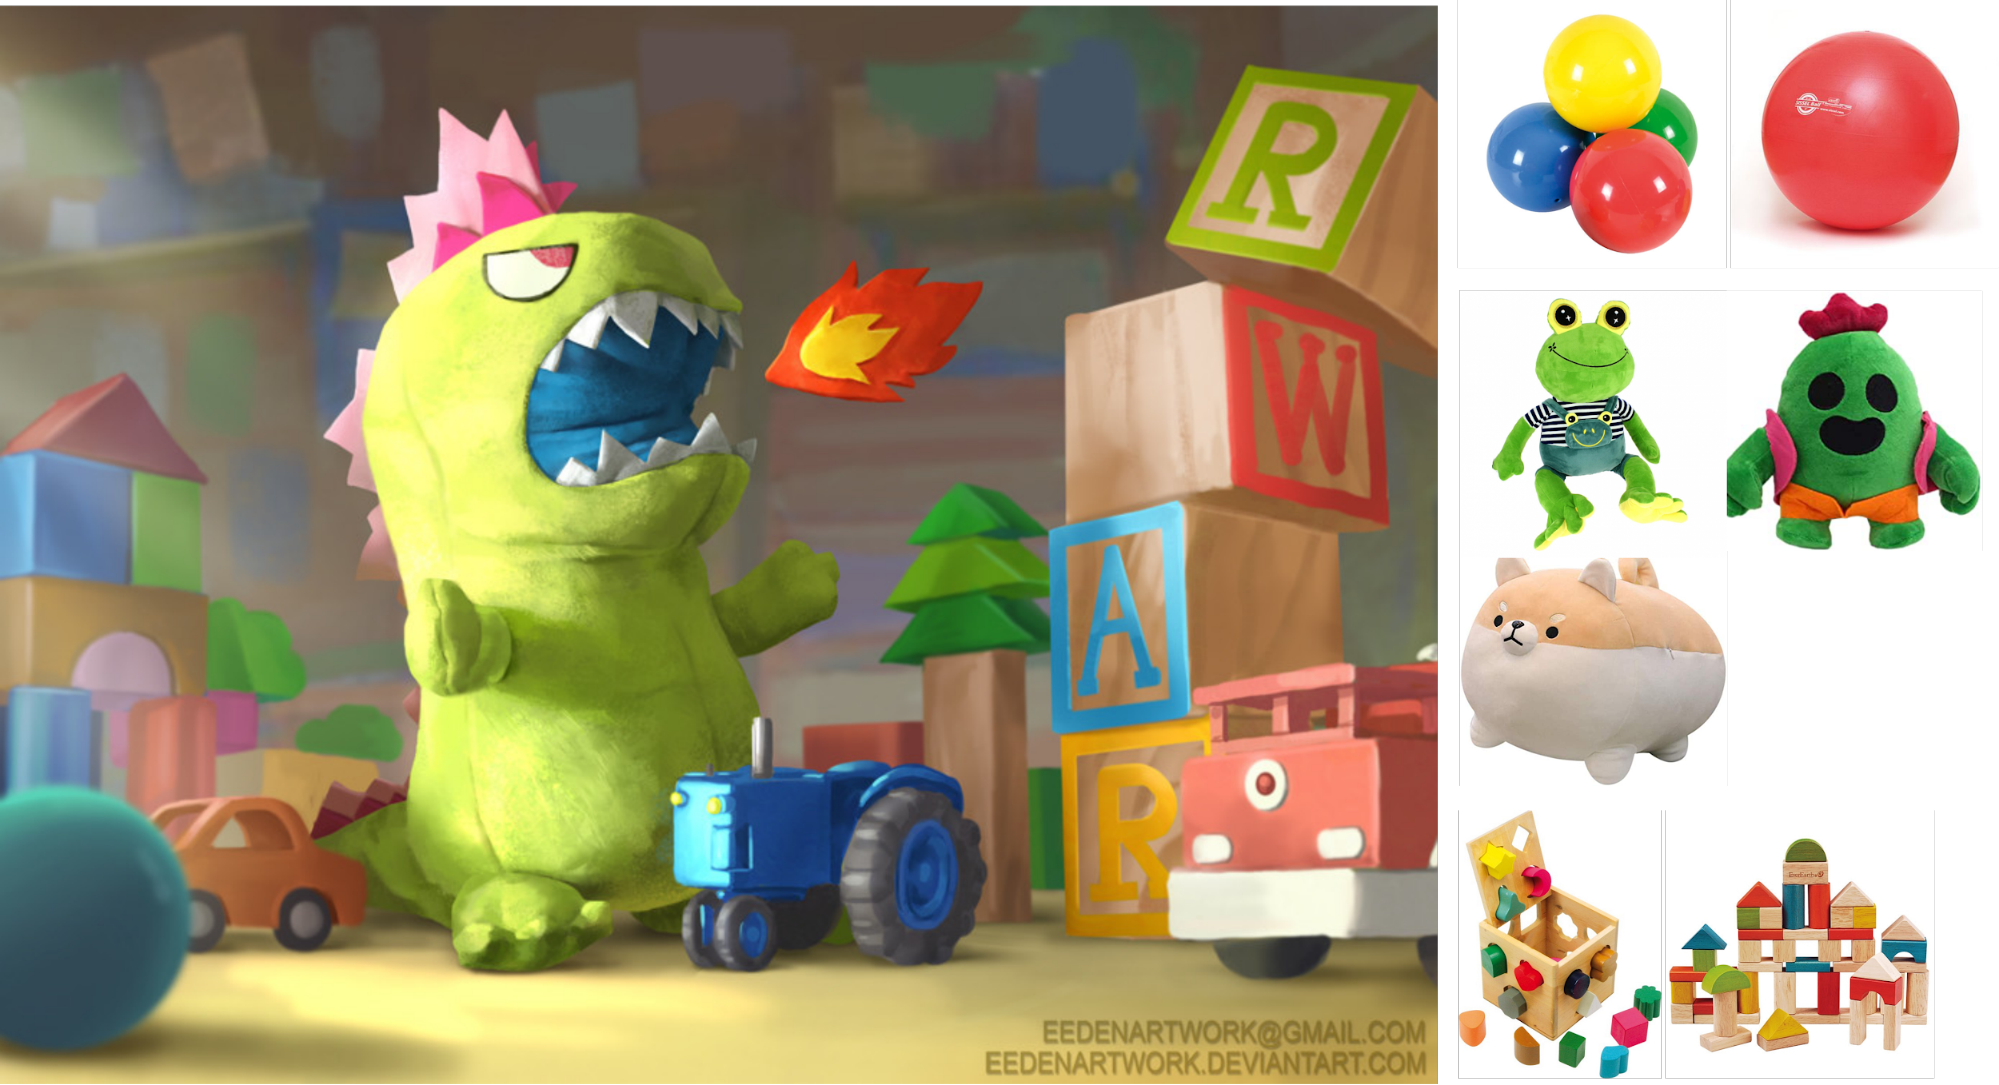
I stumbled upon Jaan Van Eeden's concept, which I immediately enjoyed. It reminded me of the world of Toy Story and, being a big fan of Pixar, I decided to recreate it in 3D.
Always having a little trouble finding time for personal projects, I was looking to make a quick project.
Modeling
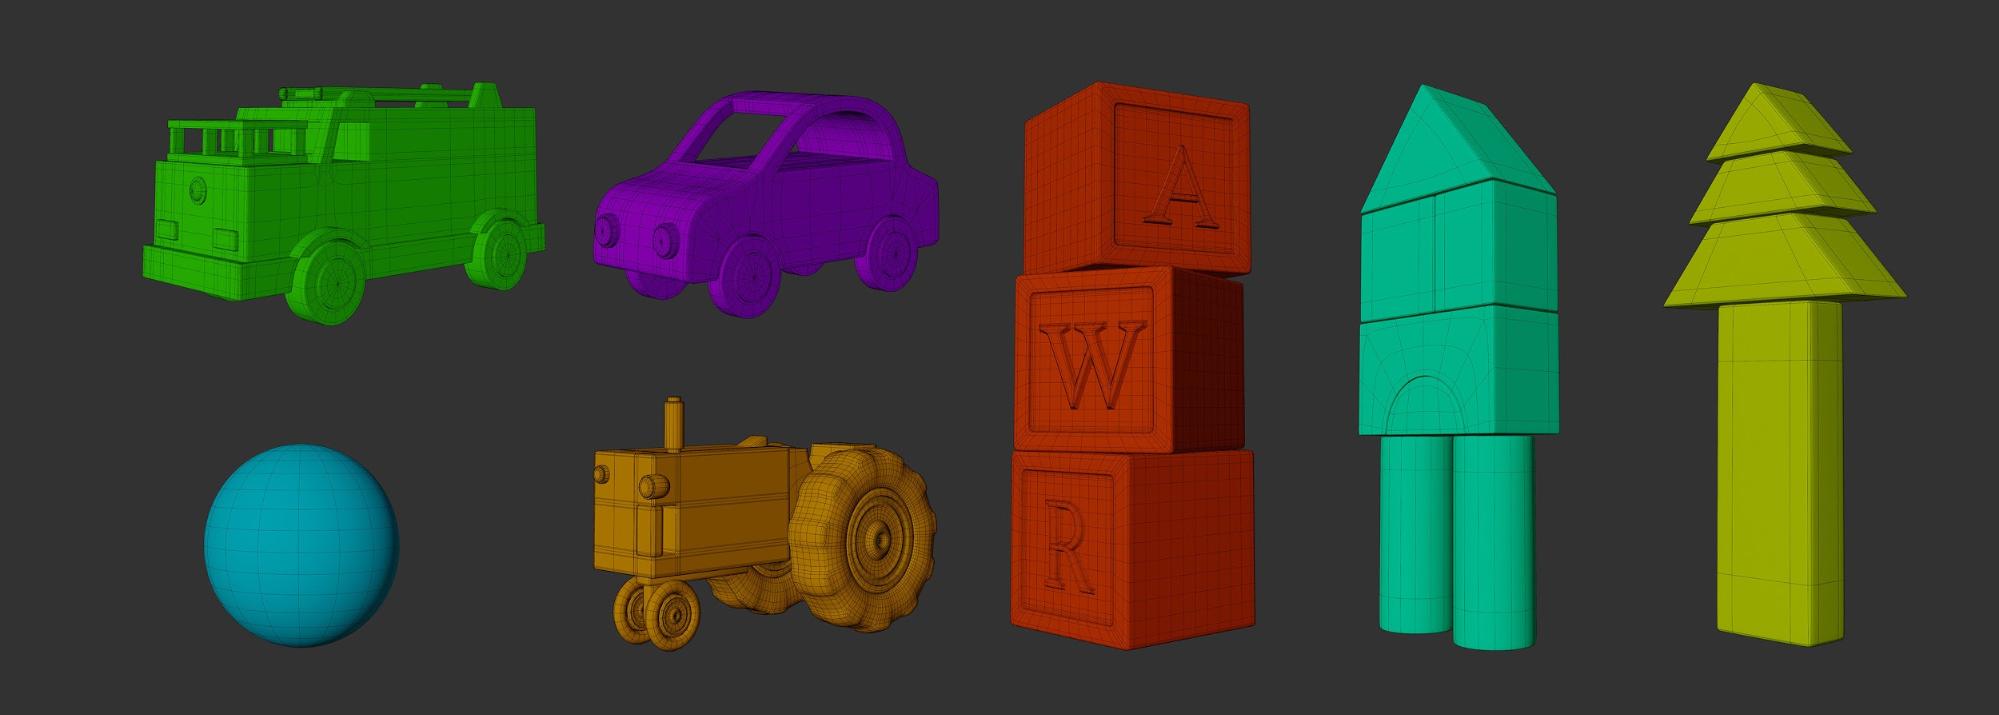
To begin with, I created all the toys around the dinosaur. I used simple shapes to have an idea of their location in the camera’s field of view. When I was satisfied with the composition, I went deeper into the modeling process by adding more details.
For the dinosaur, I proceeded differently. First, I sculpted the general shape, and then I did the retopology of the model and unwrapped the UVs, and then, I exported it to ZBrush to sculpt all the details (wrinkles, etc.). Once happy with the sculpt, I exported all the displacement maps to use them in Blender.
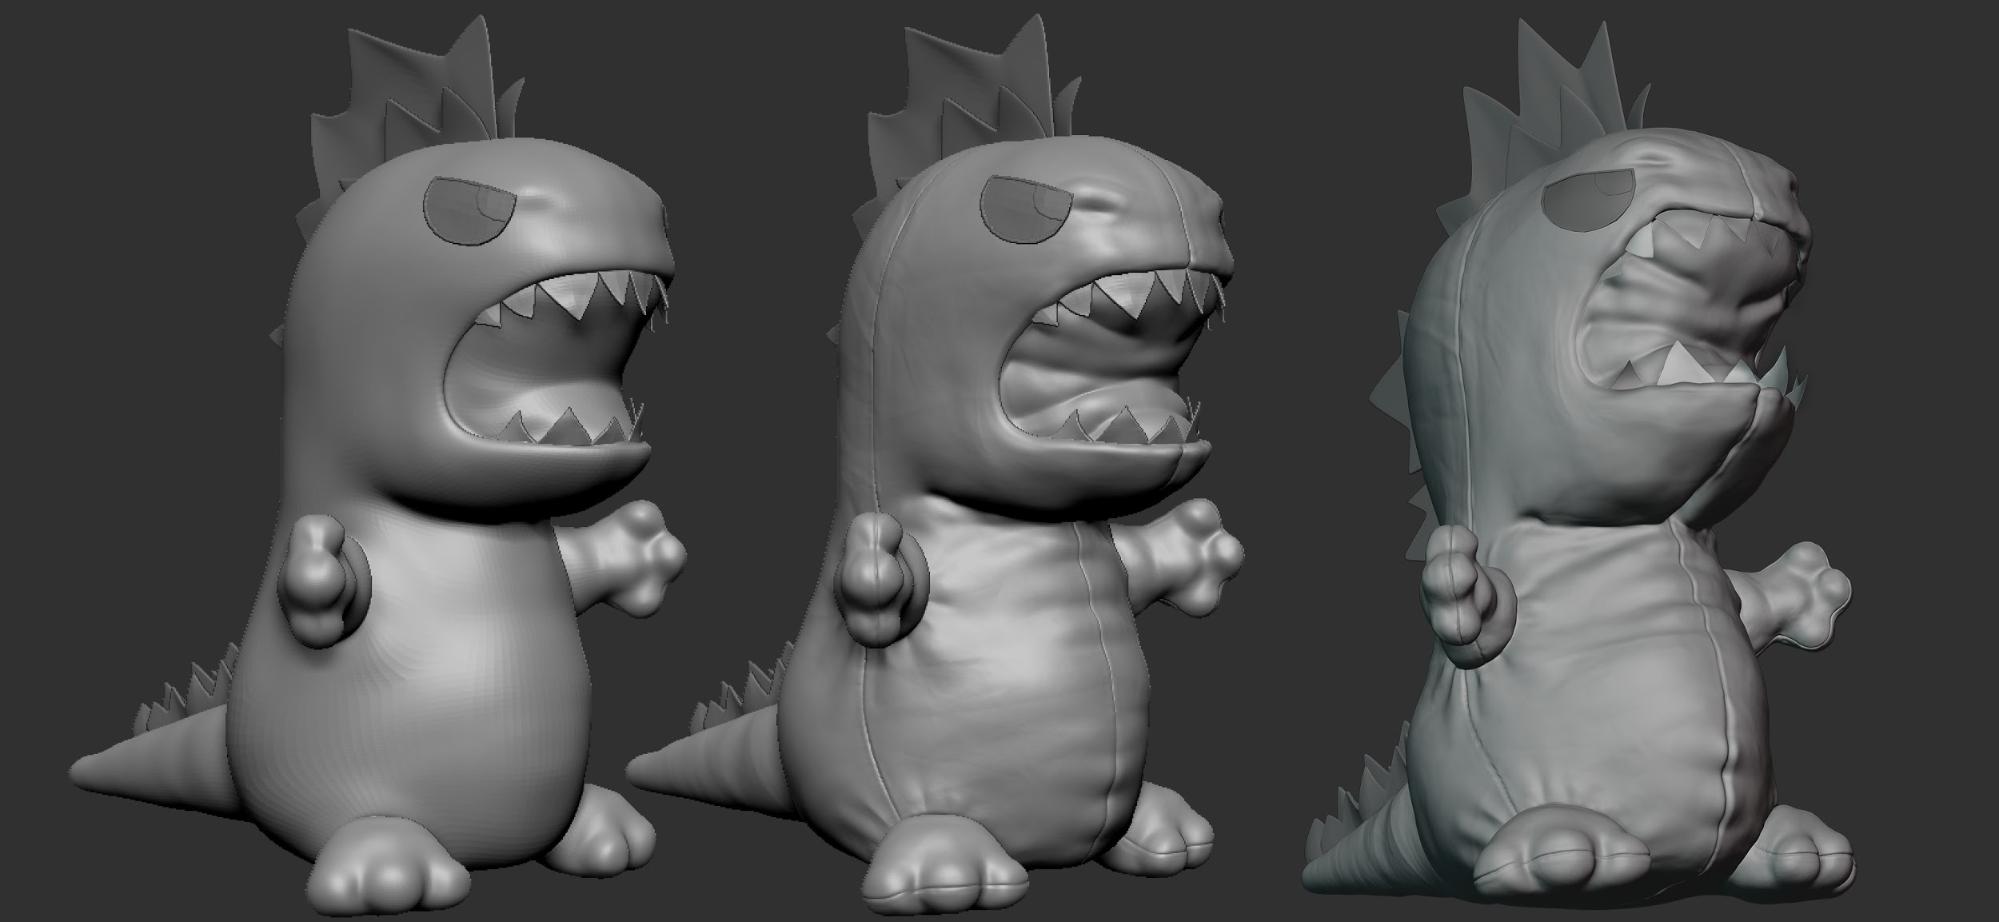
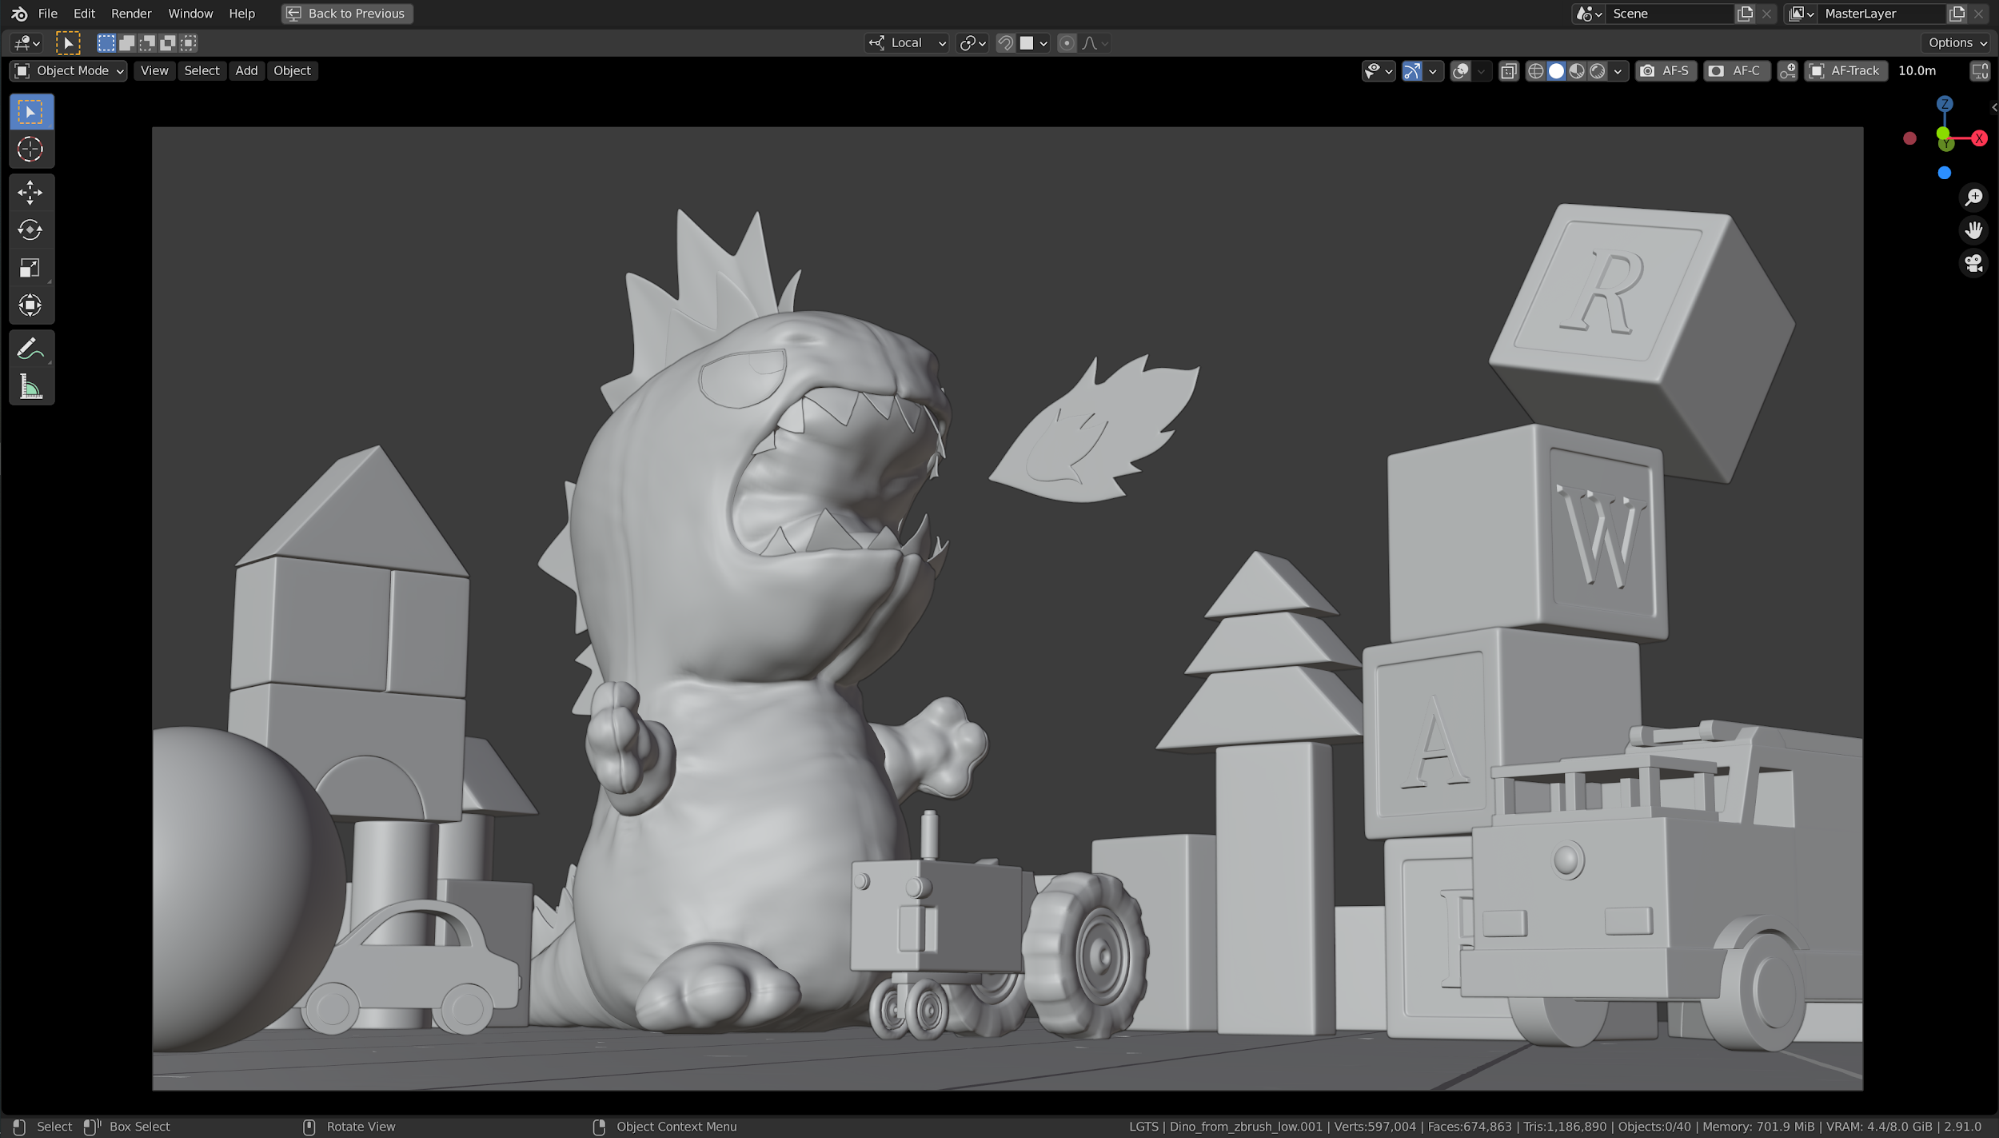
The last step was to adjust the final shape of the dinosaur to match the concept as closely as possible. To do that, I decided to deform it by using shape keys directly in the camera view.
For the little blocks in the background, I just reused the blocks I had already used for the pine tree and the house.
Texturing
First of all, I went on the internet to find references. I already had a lot of information about the concept art of Jaan Van Eeden, so I didn’t download a lot of images, but it is still interesting to have references of what the assets look like in the real world.
To navigate easily from one image to another, I used a software called PureRef. It is really useful, especially when you have a lot of reference images for your project.
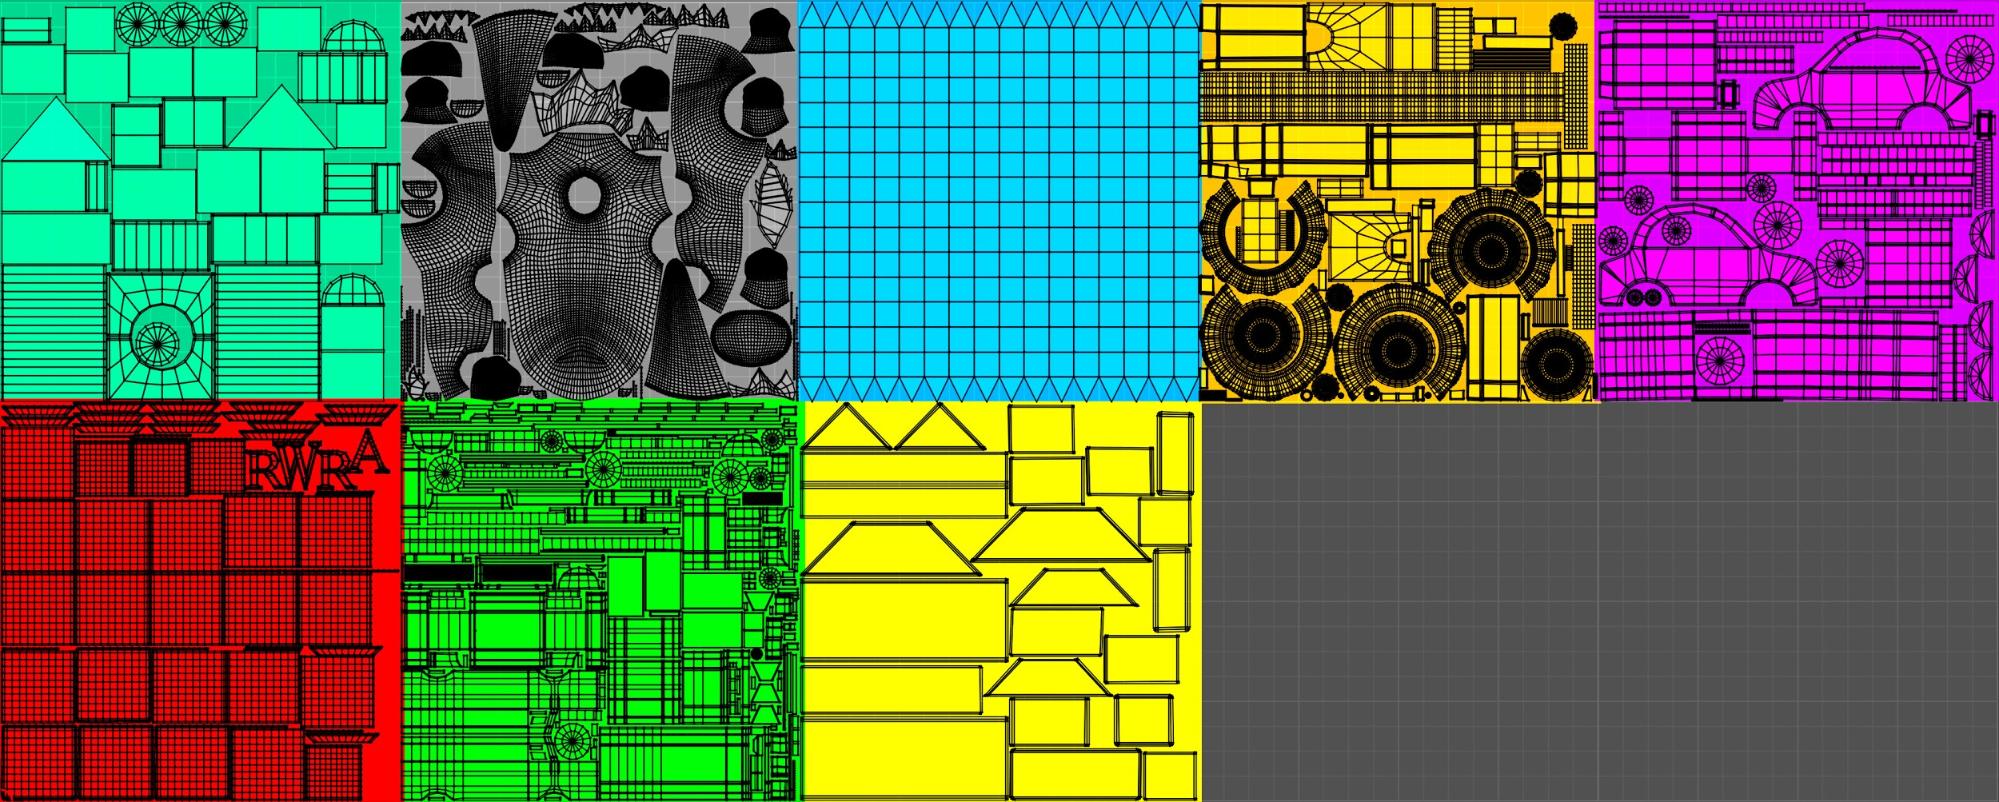
After that, I unwrapped all the UVs. I created a UV tile for each object, except for the cubes, which all share the same UV tile. I did it this way because I wanted to have as much detail as possible on each object in my scene. Also, I used a really great addon called UVPackmaster to minimize the space between the UV islands and optimize the position of all my UVs.
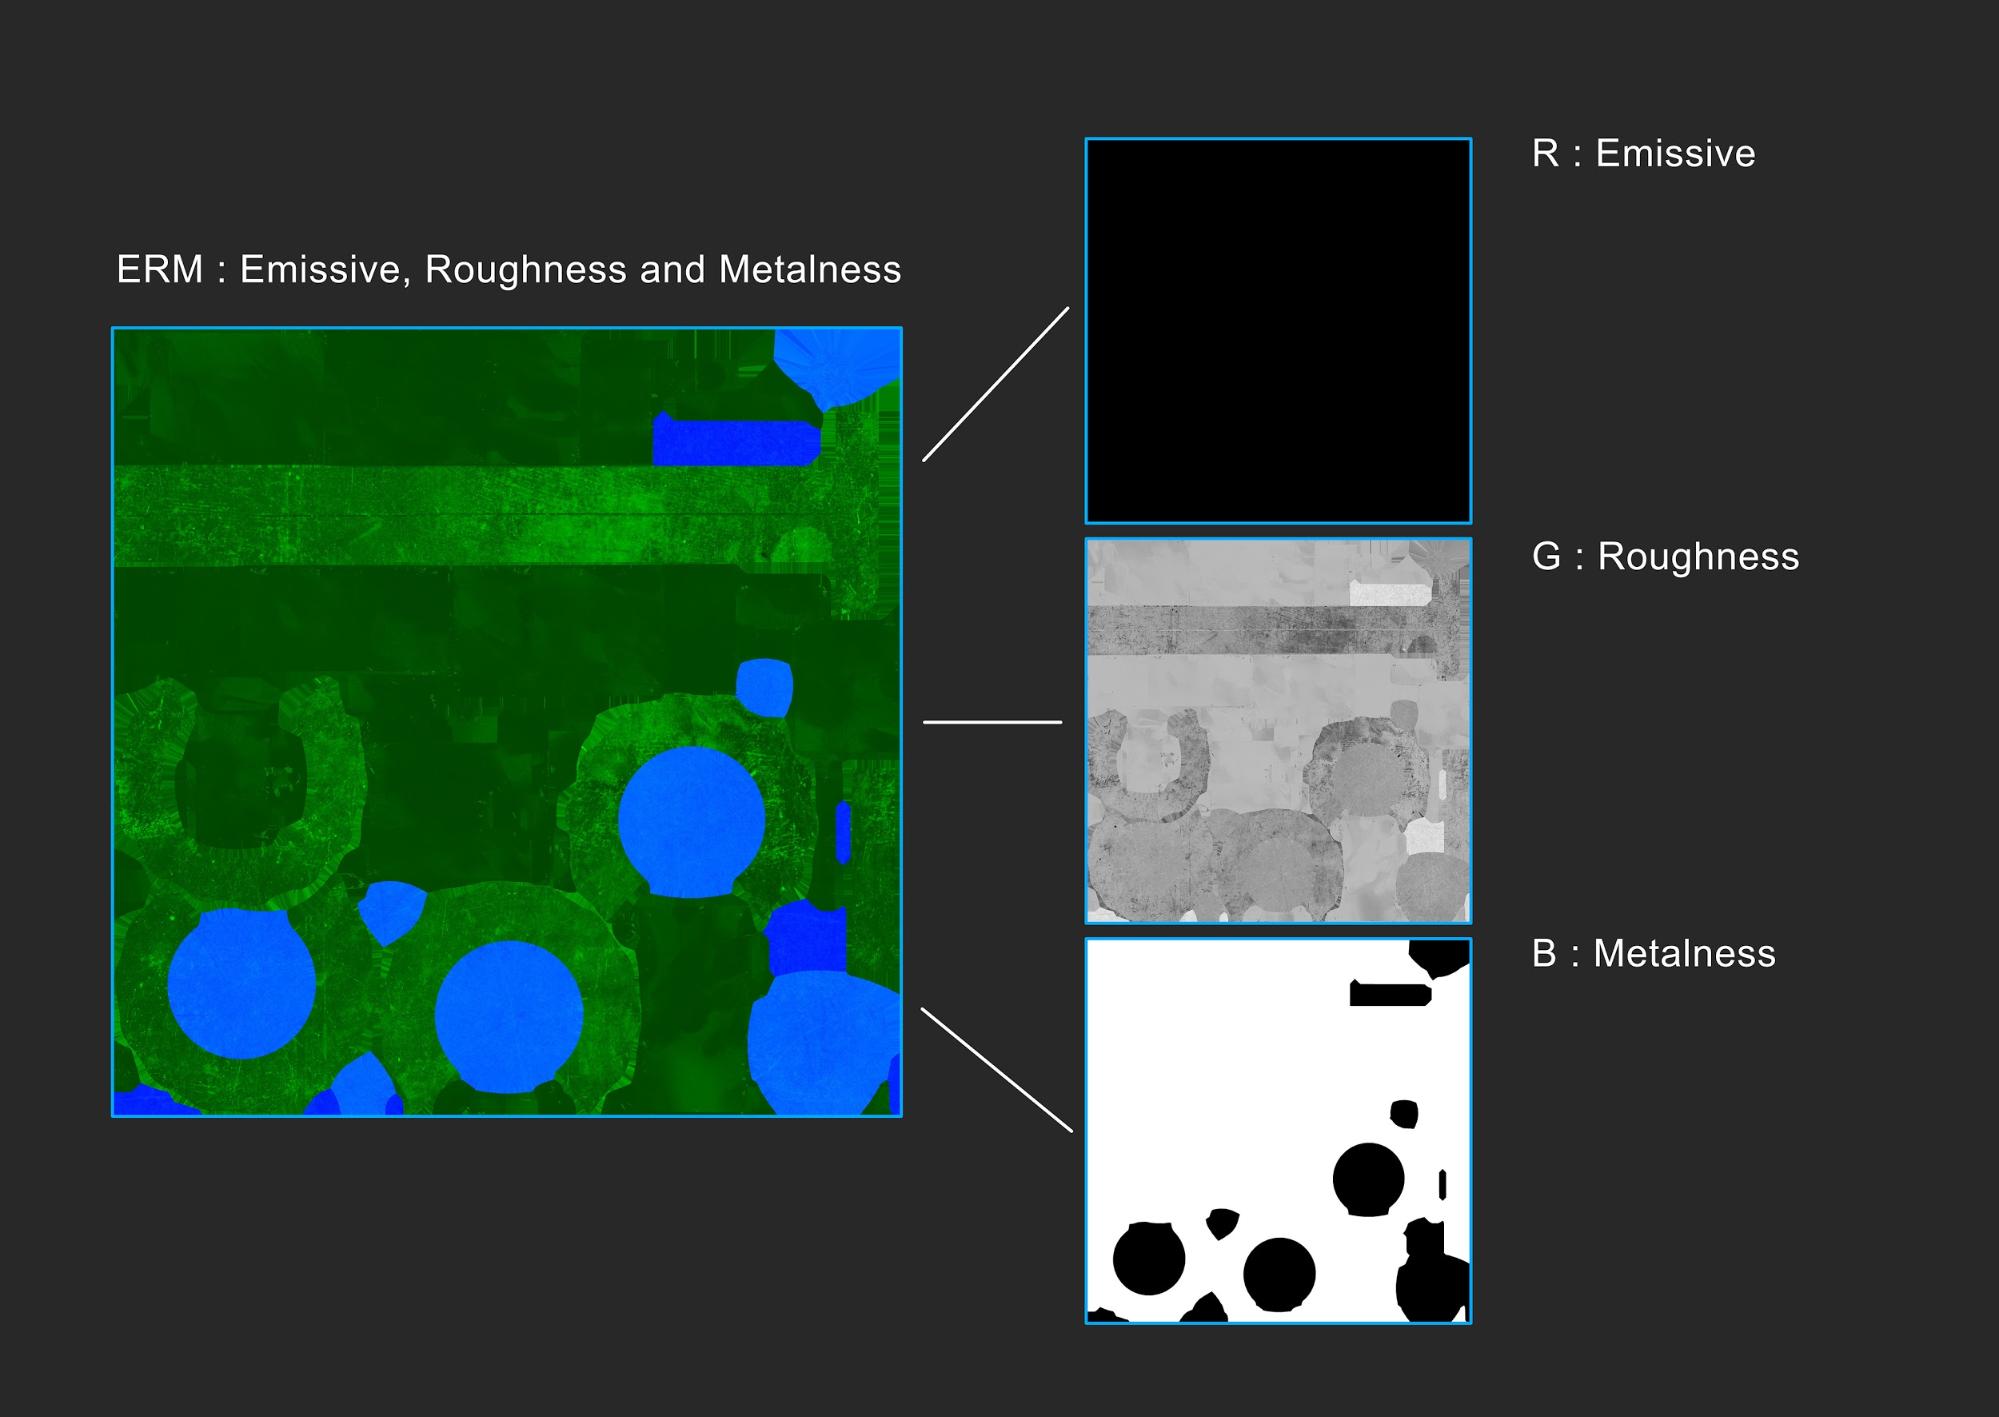
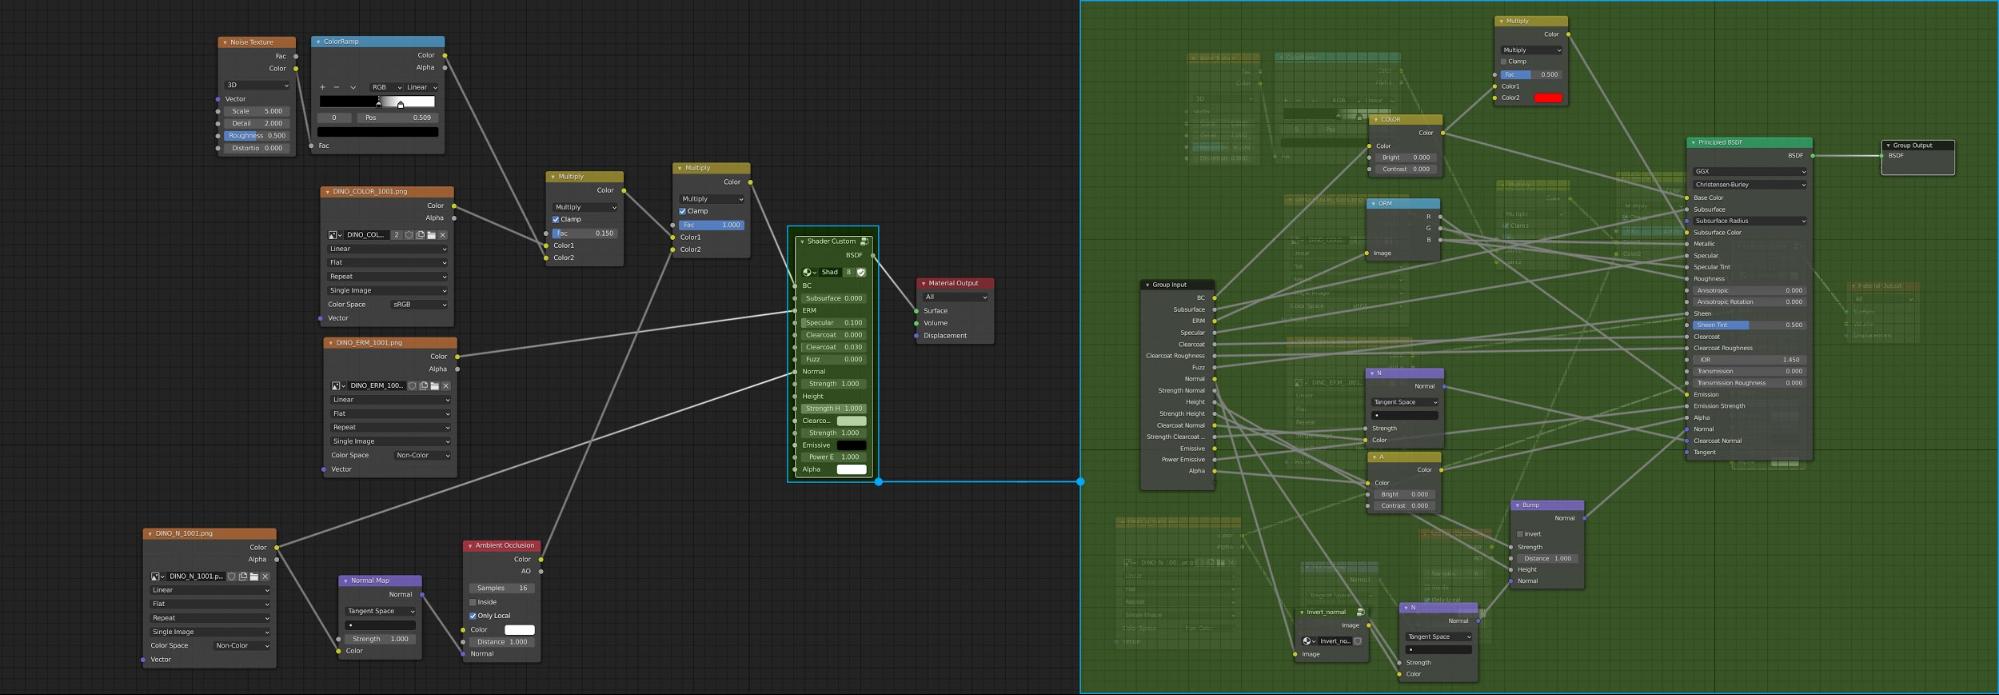
For the next step, I exported all the meshes to Substance Painter. In parallel, I created my own shader in Blender so that it would be faster when connecting all the textures. I used the RGB channels of my textures to merge the emissive, roughness, and metalness into one image to have a smaller file and to reduce the resources and the duration needed for the render.
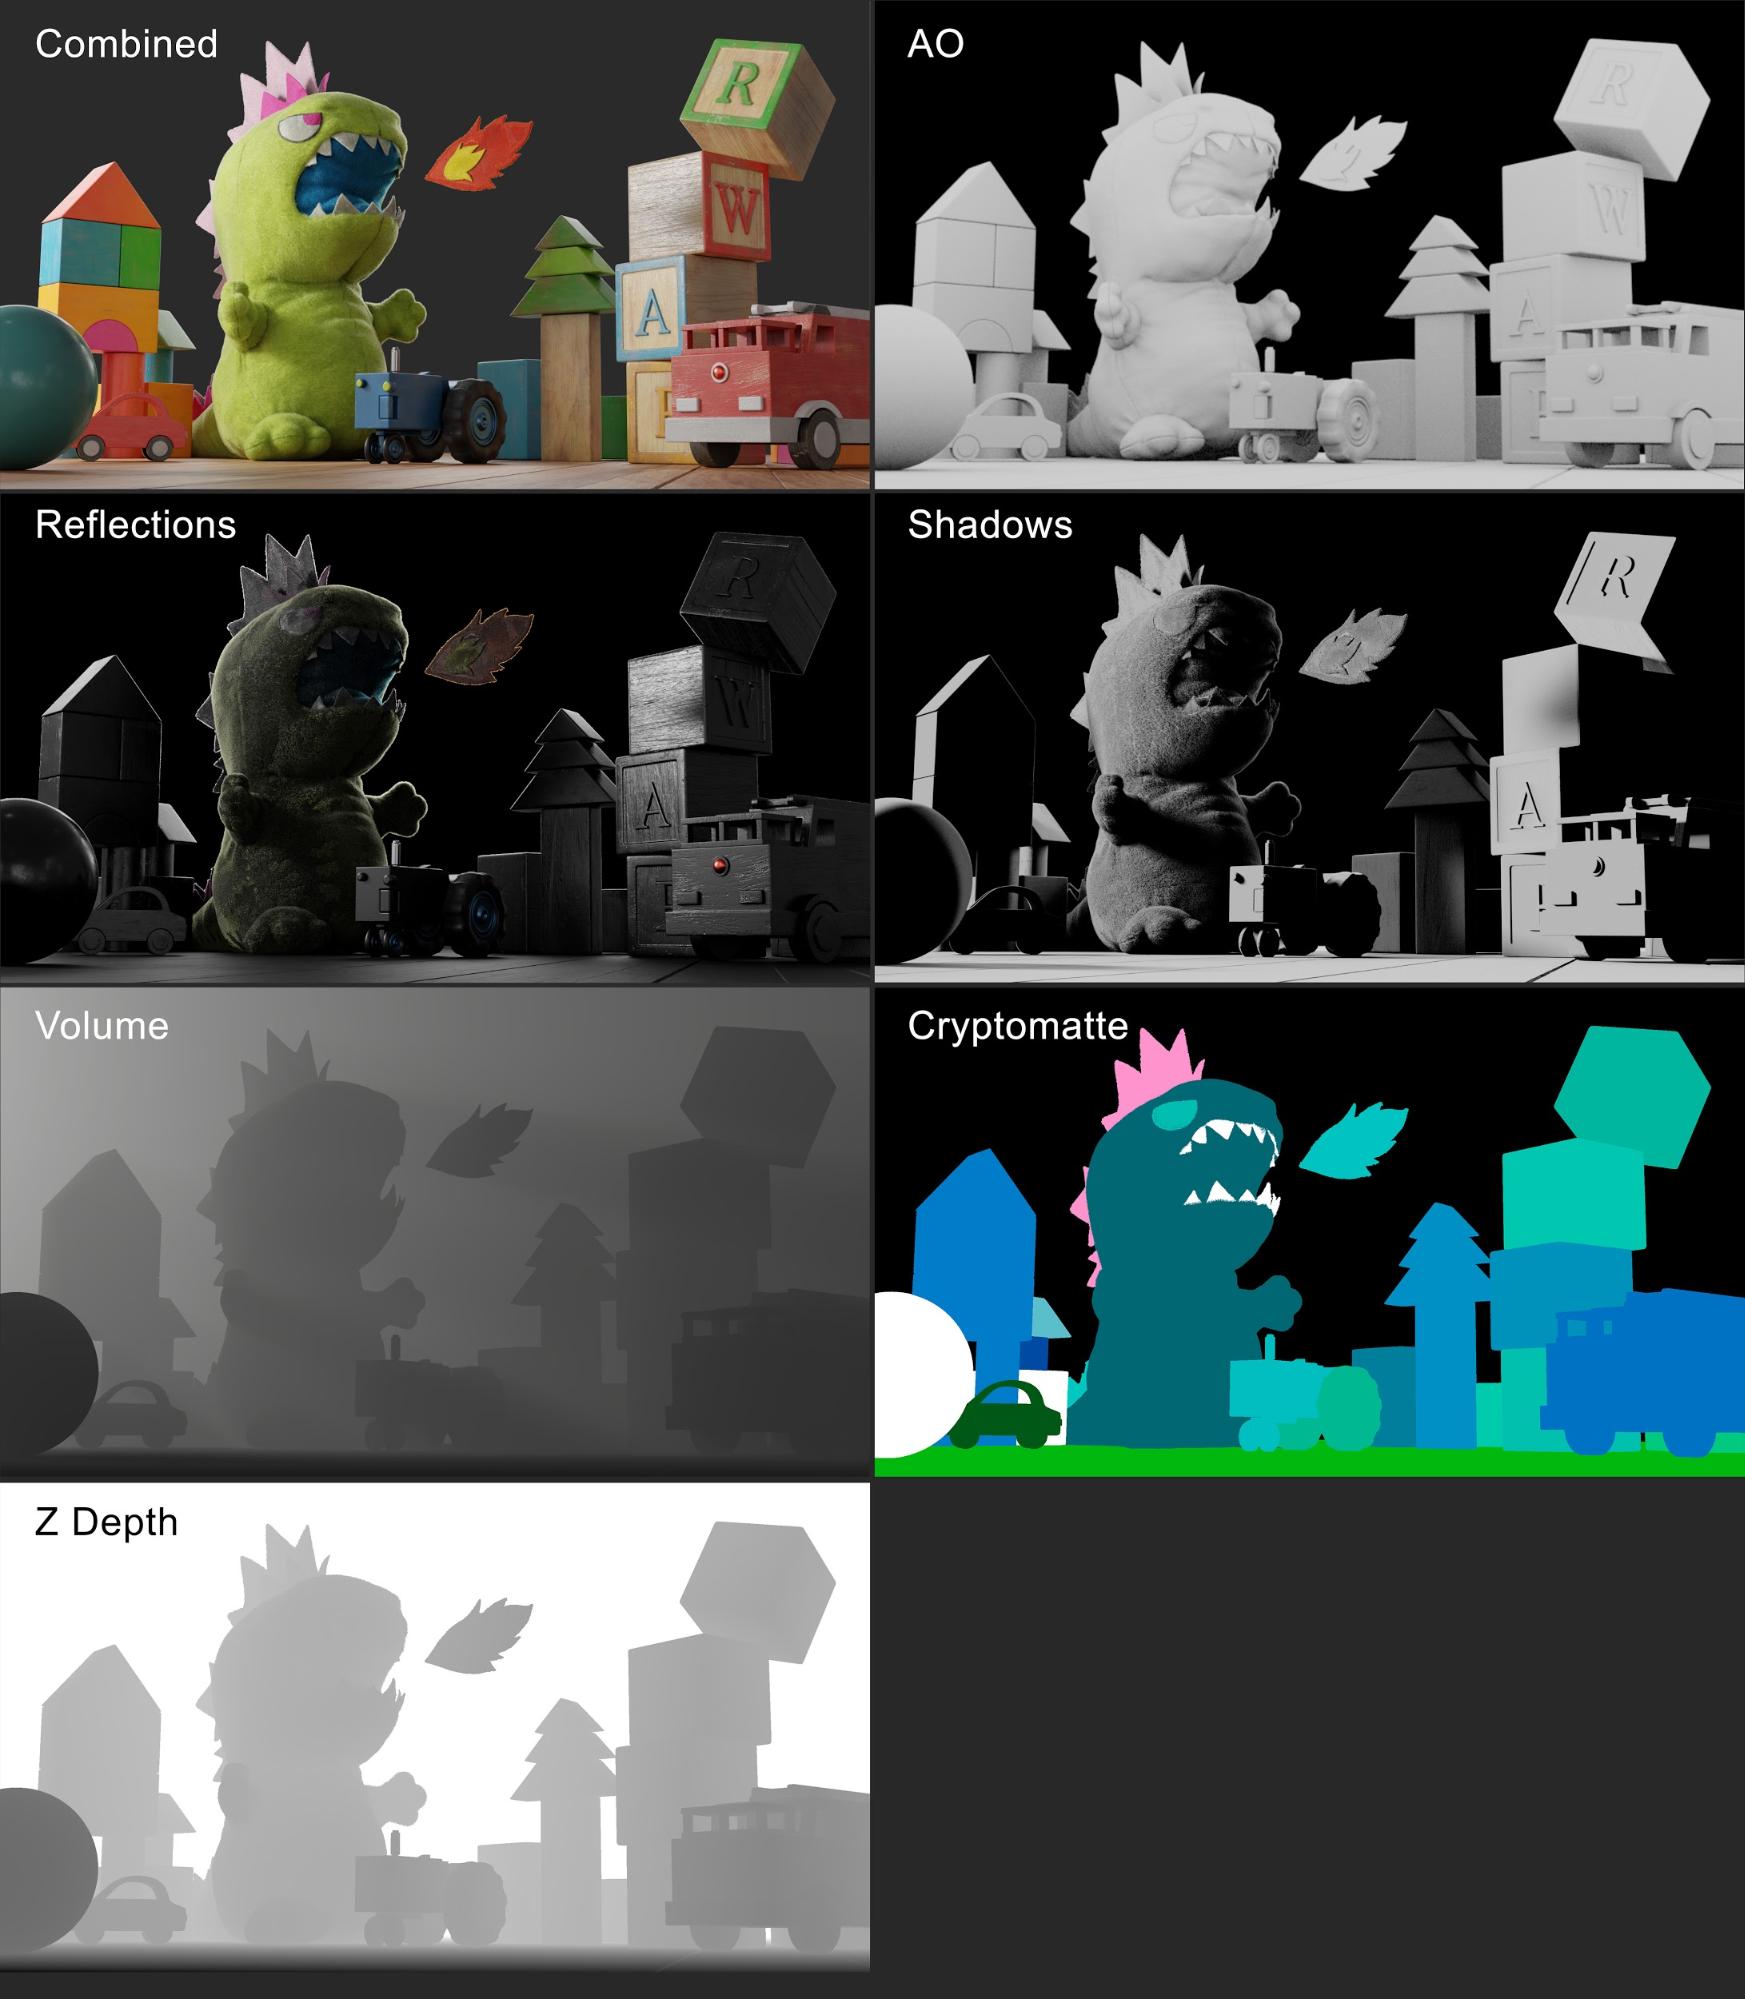
Concerning the blocks in the background, I decided to change their color during the compositing stage rather than duplicating the shader or creating special vertex colors as a mask for each one. To do that, I used the cryptomatte pass, isolated them, and change their color in Photoshop.
For the fluffy effect of the dinosaur, I simply created a Hair Particle System. I played with the length and the roughness of the curves to achieve this effect. I also used a Principled Hair shader with the diffuse color of the dinosaur set to multiply and a noise texture to add some color variations to the model.


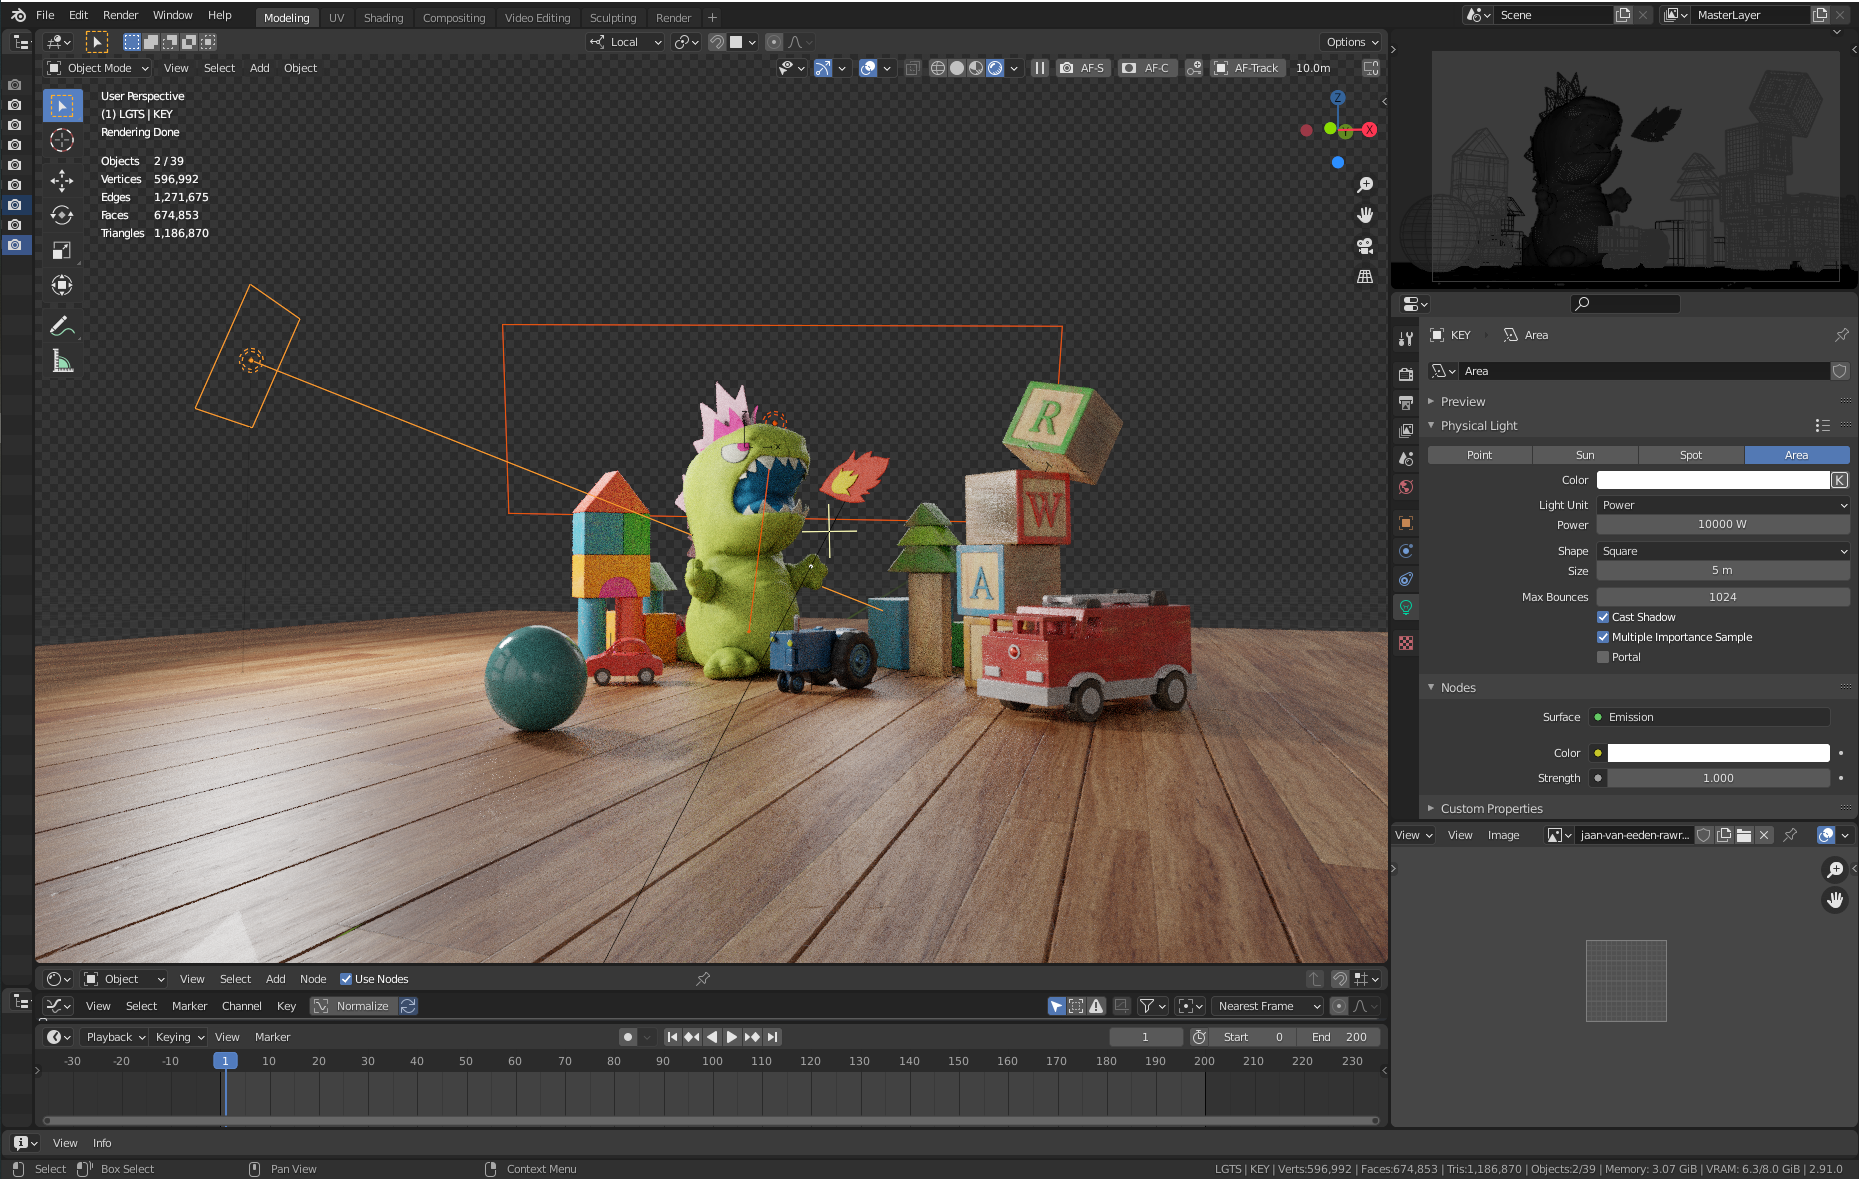
Lighting
Concerning the lighting, I managed to achieve the desired lighting using an HDRI environment light, a key light, and a back light to separate the scene from the background. Additionally, the back light added some rim lights to the toys and the fur of the plush. The HDRI helped me to avoid having too-dark shadows and it also added some reflections to create a more realistic render.
I also made another render layer to create a volume pass in EEVEE so that I could add some volumetric effects to the final render. I did this render in EEVEE because it is faster than Cycles and far less noisy.
Compositing
I decided to use Photoshop to do the compositing. I rendered all the passes I needed plus the extra volume pass. To summarise, all the retouches are mainly the beauty image multiplied by the Ambient Occlusion. I improved some reflections, adjusted the levels, did some color grading, and used the Z pass to add more depth and a lens effect.
For the background, I used a photograph of my bedroom that I had blurred with a gaussian filter.
Lastly
I would like to thank BlenderNation for giving me the opportunity to write a “Behind the Scenes” for this project. I hope you enjoyed reading this article! :)
About the author
 Martin Portais, 3D Marketing Artist at Behaviour Interactive.
1 Comment
Nice bro. Keep going. Congratulations.