Behind the Scenes: Scorpio
HI! I am Javi, from Orizaba, Mex. I am a Software Engineering student. I am passionate about the film industry and looking to become a part of it.
I opened a 3D program for the first time in July of 2019, but 2020 was when I decided to take it seriously and start my online training. I have been learning 3D by taking courses online. I have been using Crehana and Domestika, but mostly, YouTube, where I have found a lot of awesome content that has taught me almost everything.
[sponsor id=’qarnot’]
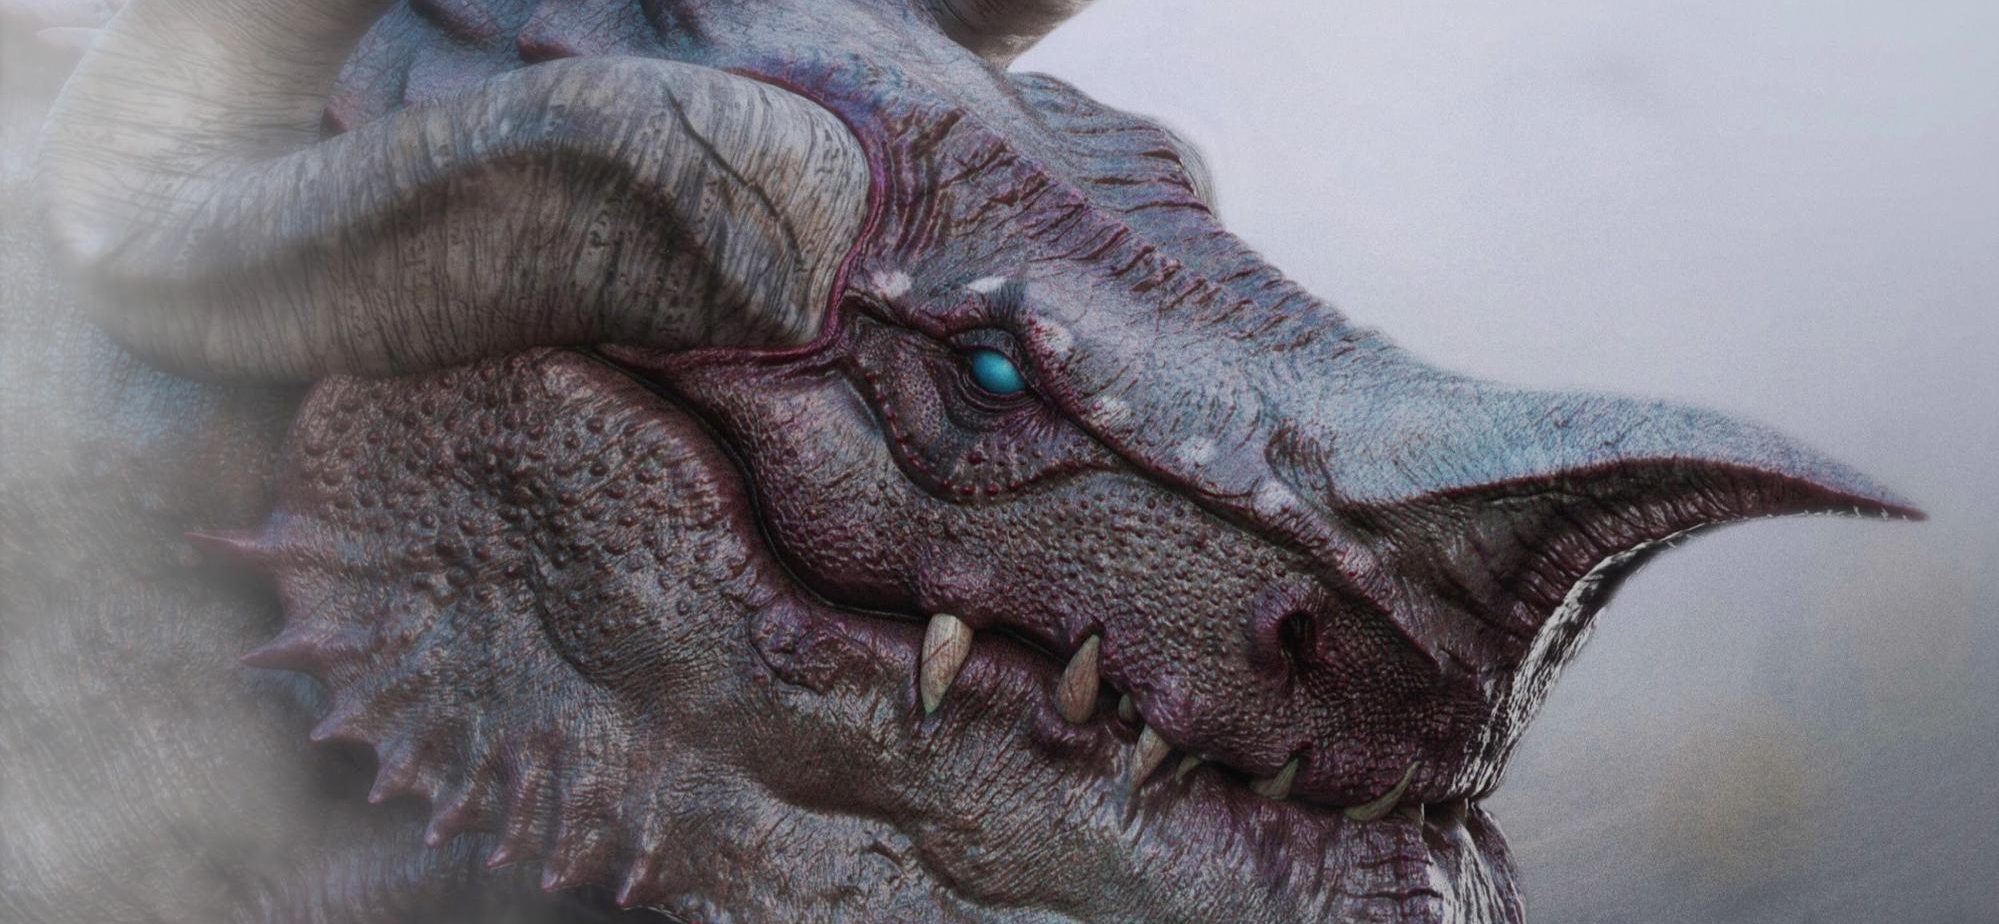
Inspiration
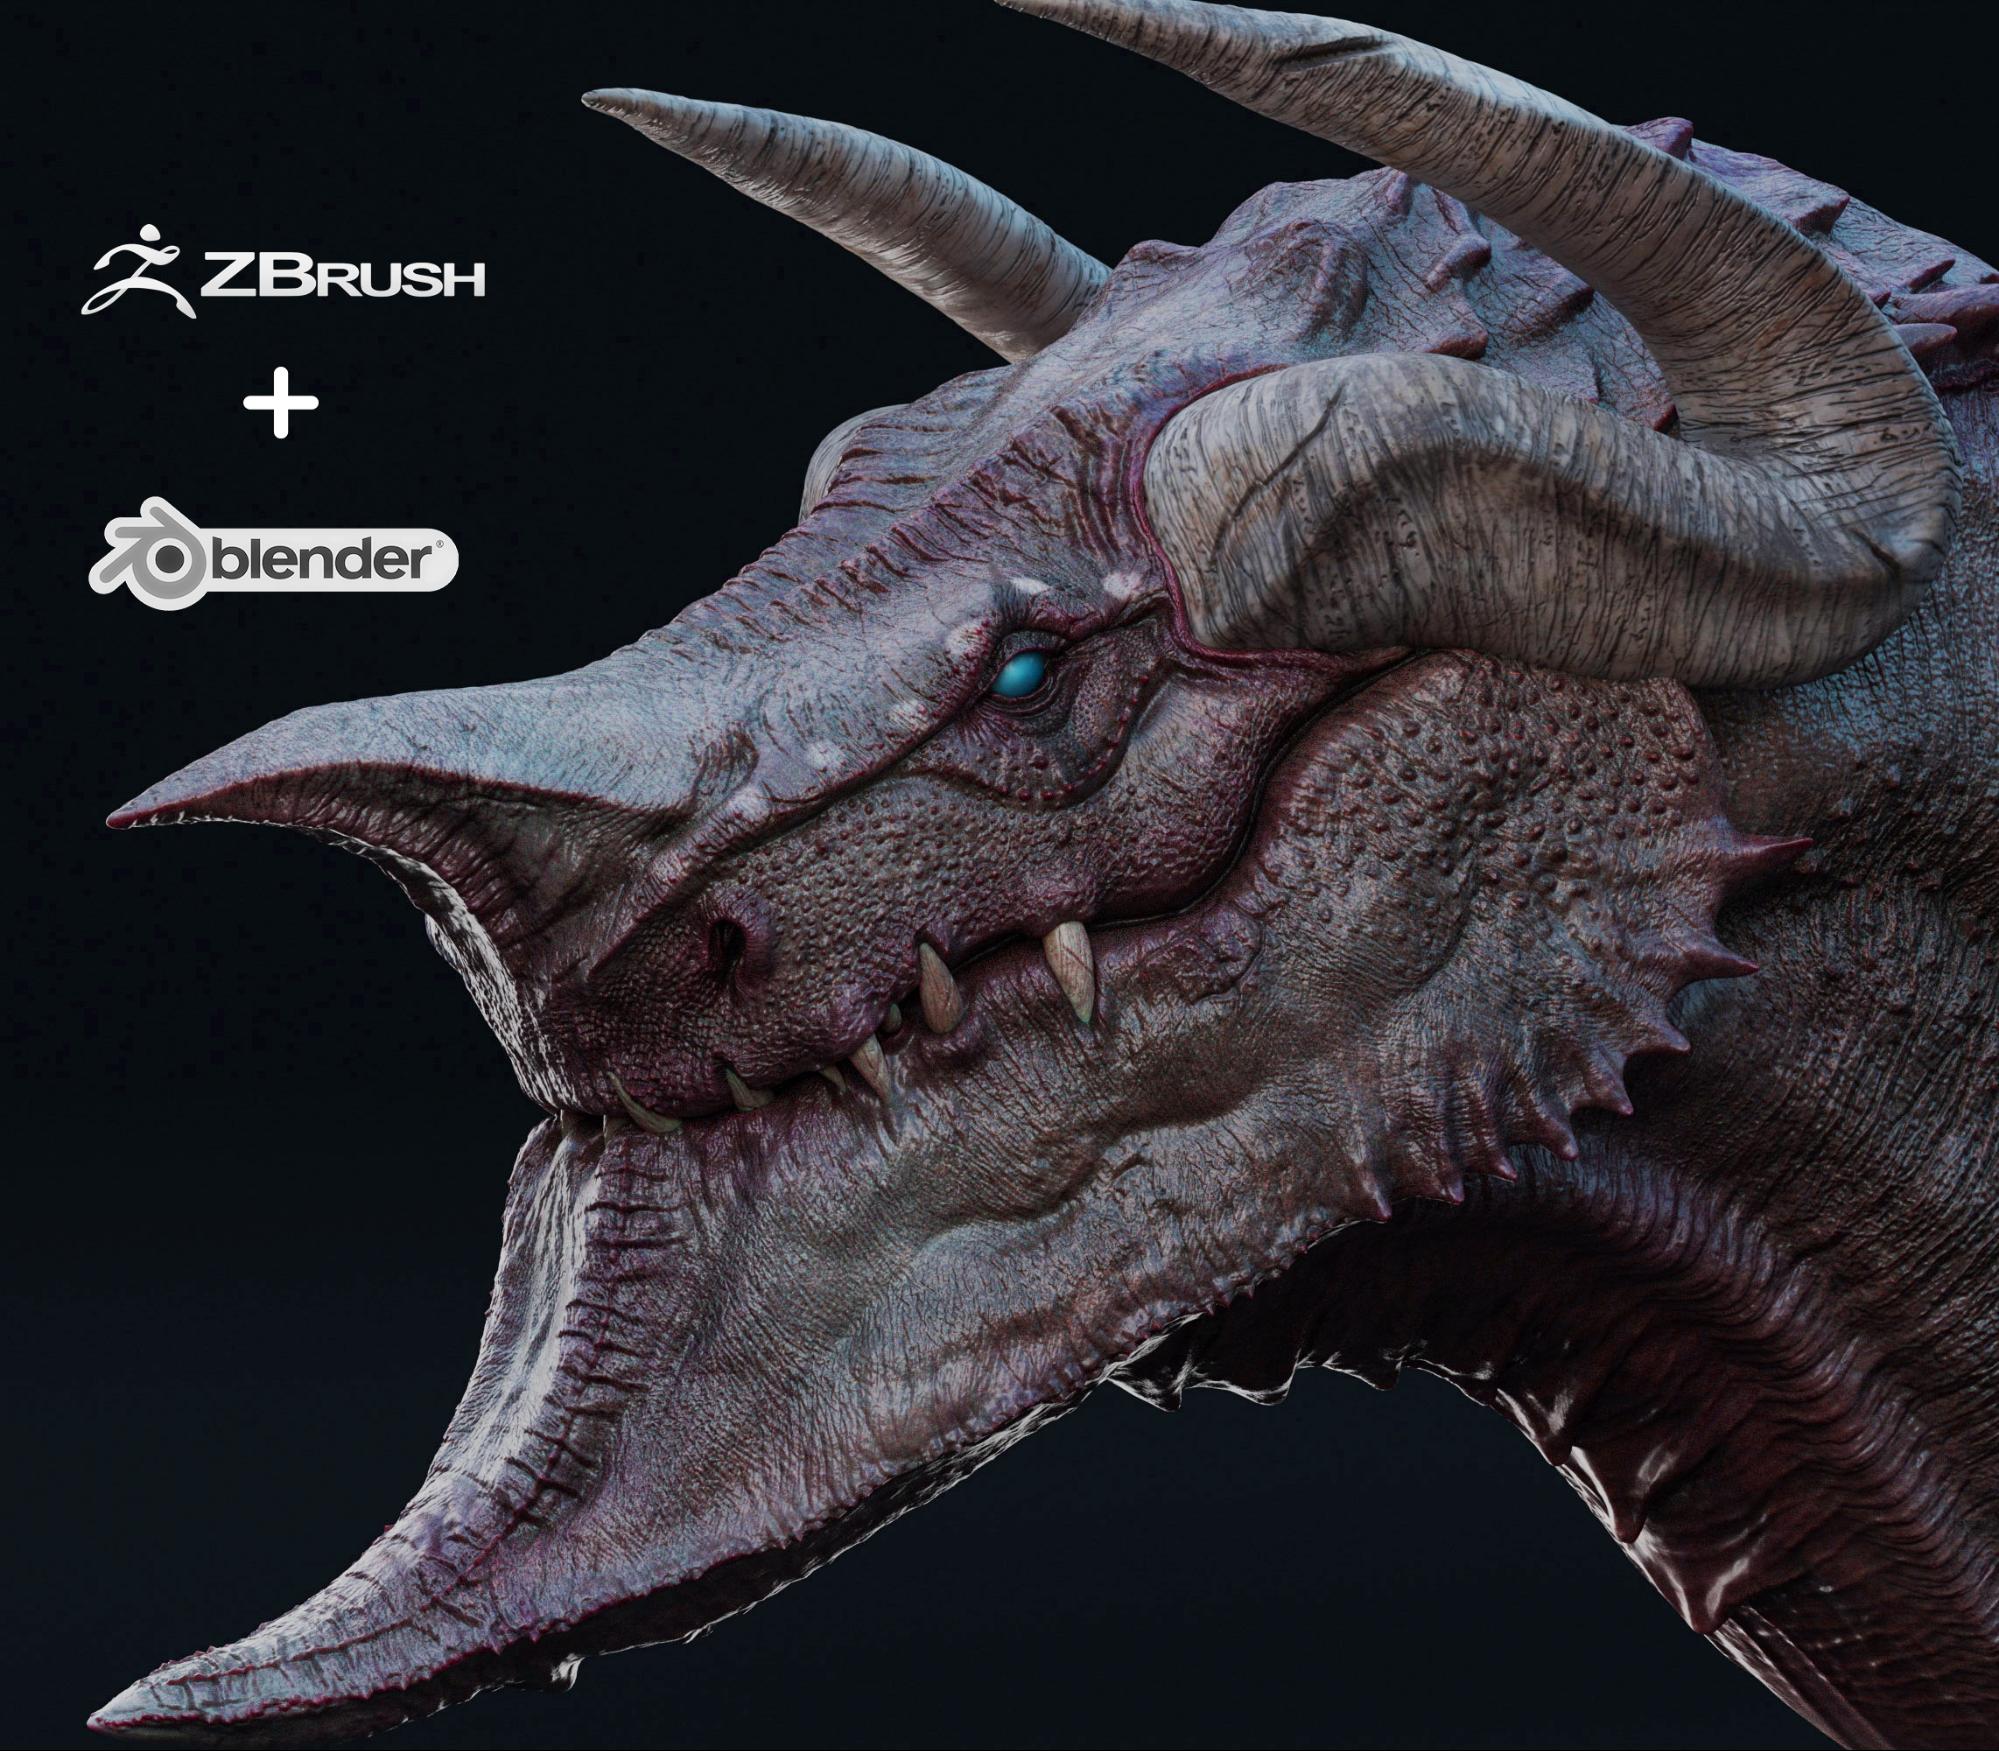
When I was thinking about creating a new creature, I decided to translate something from 2D to 3D. I contacted an awesome artist to ask for permission to take some of his concept art and he said yes. I decided to create one of his creatures in 3D and he really loved it. The whole project made me feel so cool, and now it’s my favorite project.
I find a lot of inspiration on Instagram. I log on to Instagram and see awesome works in progress, finished artworks, and such cool people. It’s nice to be able to meet people who are working at the best studios and realize they are such cool people. That’s why I love this industry.
Tools
In my workflow, I usually use ZBrush and Blender. In ZBrush, I sculpt the model and prepare the textures, while I use Blender for the lookdev, lighting, and rendering—although, almost everything I make can be done entirely in Blender. Sometimes when I want something very specific I use Substance Painter to make the textures, but mostly I texture in ZBrush.
Workflow
ZBrush
So, the first step I take when starting a new project is to get a bunch of references. If the subject is something that has been made by other artists, I search on YouTube to see if someone has already sculpted it. Then comes one of my favorite and hardest steps, sculpting.

When I sculpt, I use references of everything that might help. For example, if I’m sculpting a dinosaur, I look at every kind of animal anatomy to understand what the muscles look like and how they work. I would say this is the most important part of a project since if the anatomy is wrong, it won’t look right. So, this is the part where I try to spend most of the time.
Then comes texturing, the most fun part in which you can play with colors and the final look of the creature. I use a dirt texture as a base color, then some other tones of dirt texture to enhance the various parts of the body. Finally, I use the mask to make the details bright, and there it is, ready for all the technical aspects.
Blender
At this stage, I start using Blender. Currently, I am using blender 2.81. First, I import every OBJ and apply the displacement maps.
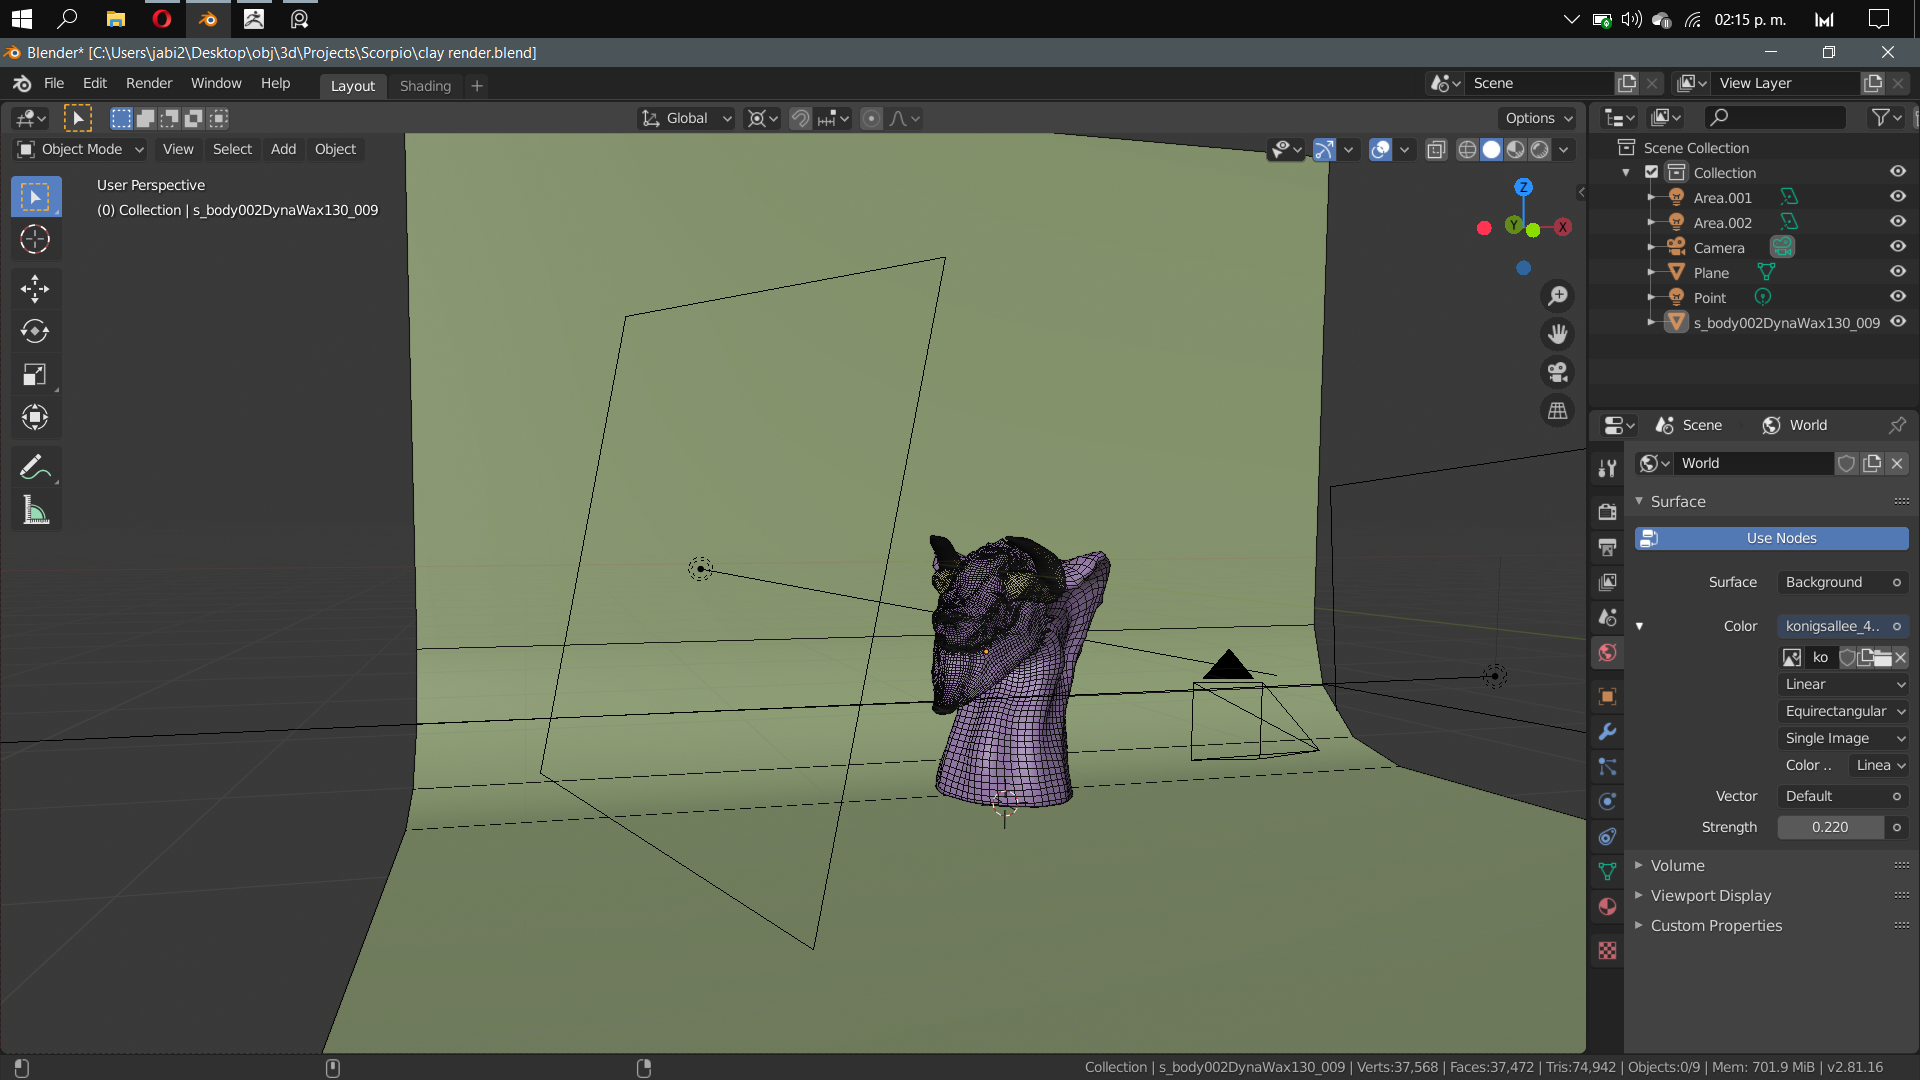
Then, using EEVEE, I start with the lighting. I usually set an area light next to the main OBJ to highlight the shape, then I start playing with some other lights. I also use an HDRI with a really low strength.
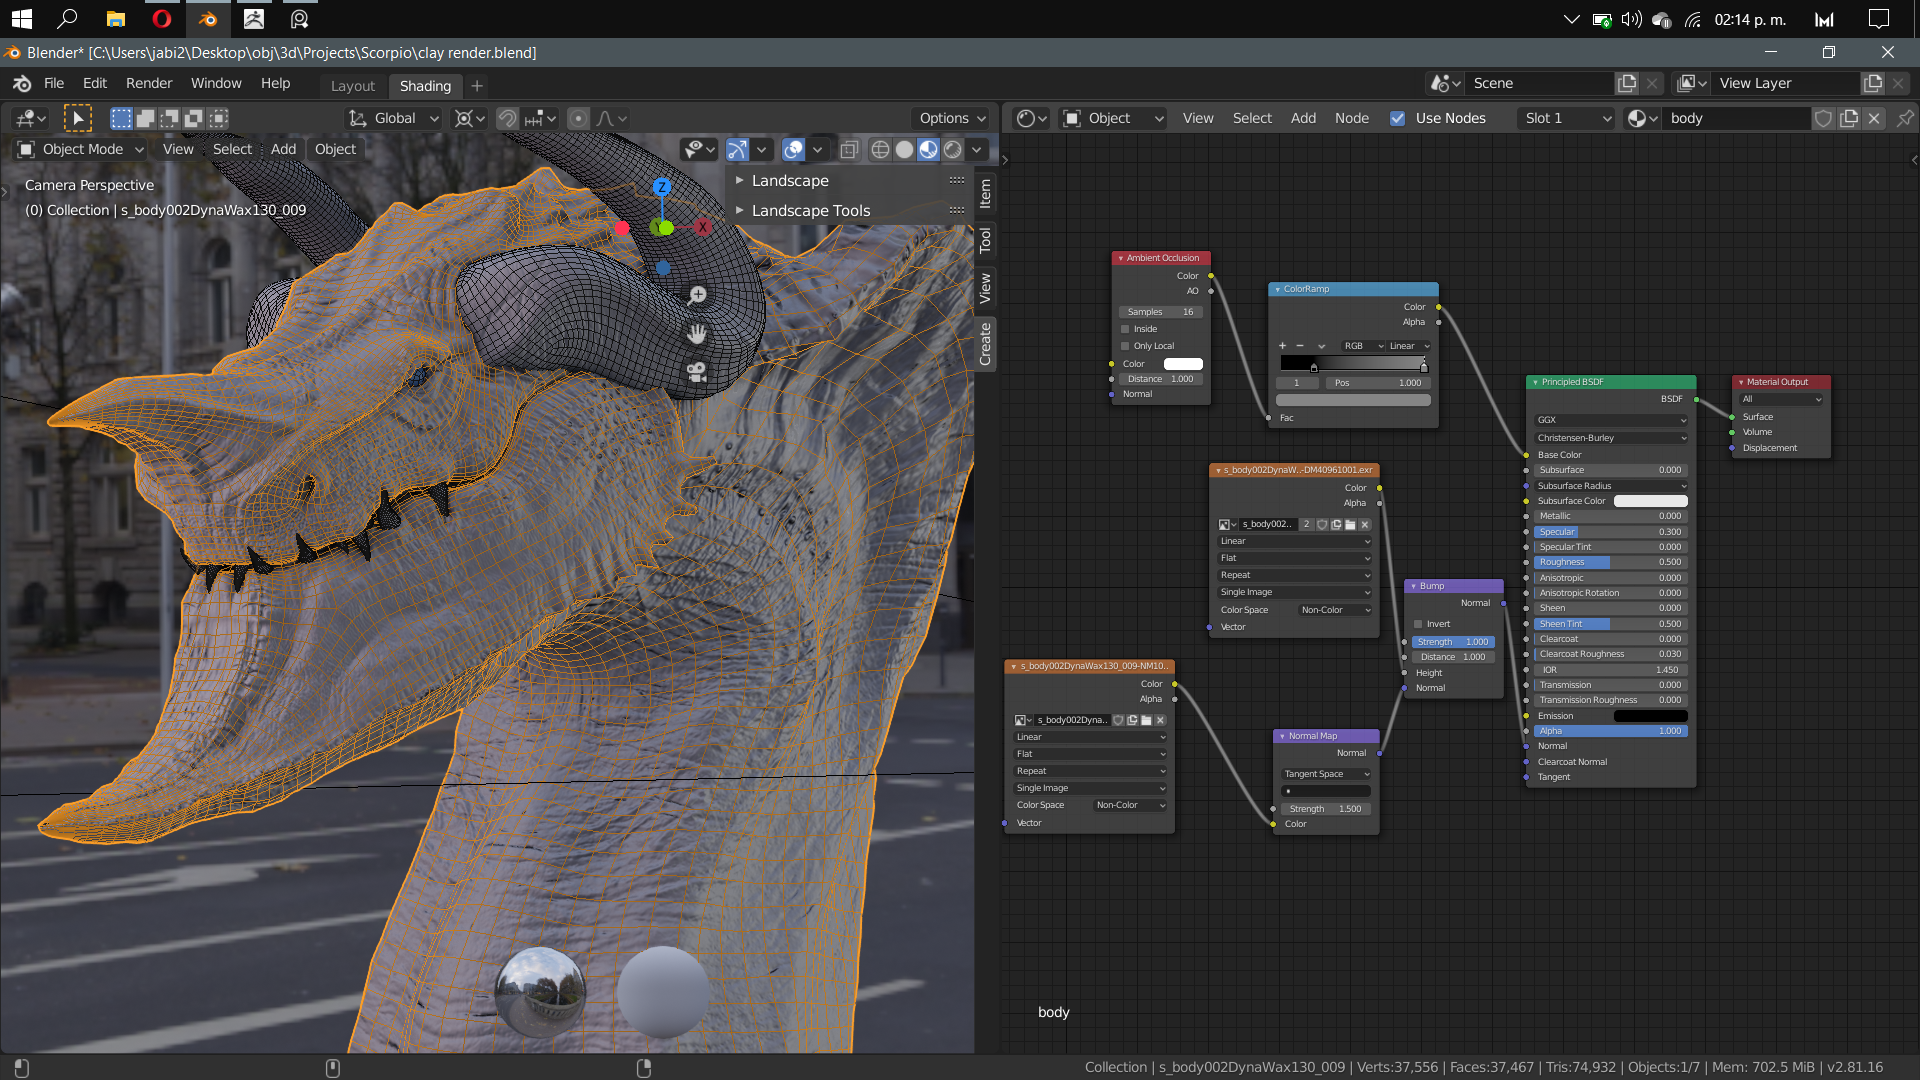
Then comes lookdev. When I began using Blender, shading was one of the hardest steps, because if you don’t have good materials, the final result will be awful. So, for the creature’s skin, I used the diffuse map as an SSS map, just increasing the saturation and setting it on the SSS color of the BSDF shader.
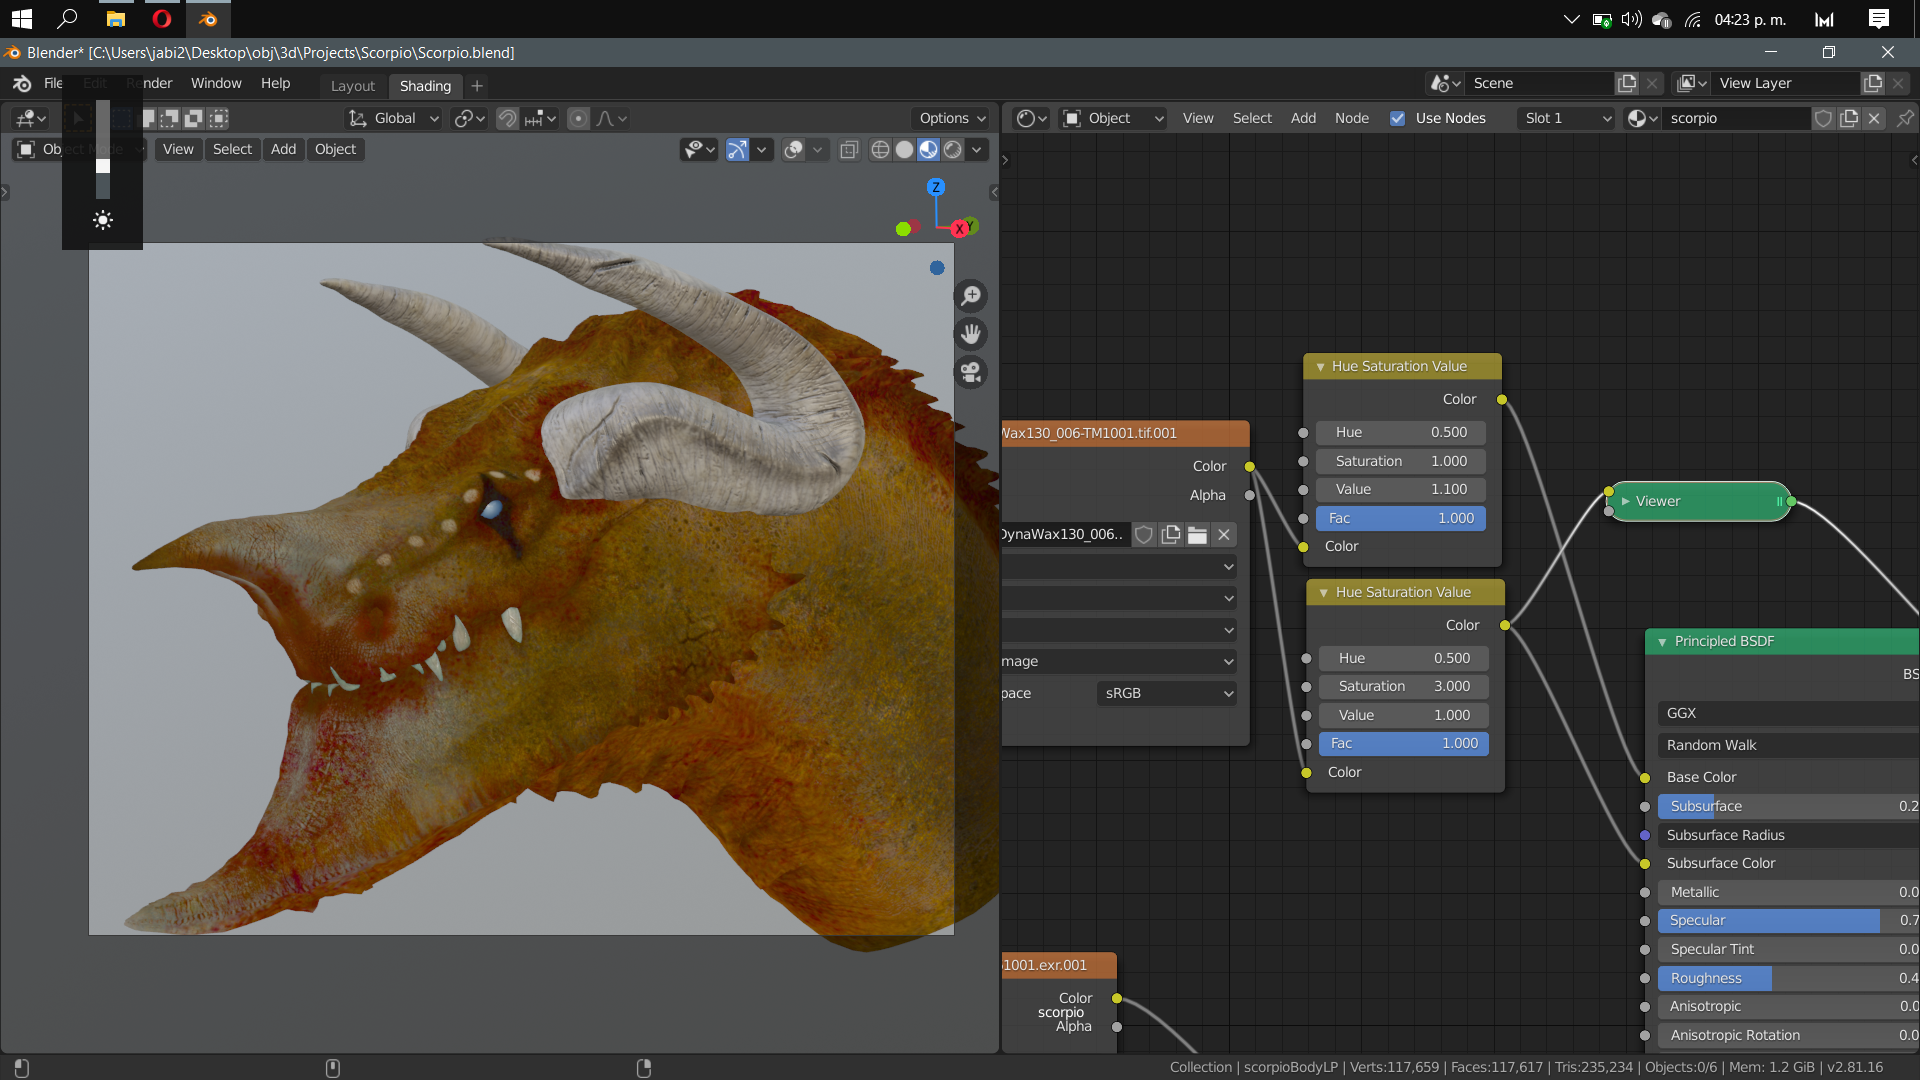
Then I apply the other maps. The shader is not complex, but it’s a tiny bit difficult to get the correct values—I just play around until I get some nice materials.
I recommend this tutorial on YouTube that talks about skin shading in Blender and how to get a really cool result. Also make sure to have a good skin texture—if it looks good before shading, it will look even better when you make the material.
Finally, I rendered it in Cycles and did some simple post-production and color correction in Photoshop, testing different kinds of backgrounds and playing with some smoke brushes. Basically, I increased the exposure and contrast and decreased the saturation, playing around with various values until I got some nice results.
So, I hope you find this useful and maybe get inspired to bring to life some idea you have. Remember, we make magic, we create creatures, dreams, and illusions, so if you have any questions about 3D, feel free to contact me on Instagram, you will find me as “Javviic”, I would love to help you!
Be a good person and see you around! :D
About the Author
 Javi, 3D artist


