Behind the Scenes: Skall
About me
My name is Rafael Pereira Nogueira. I’m 35 years old, married, and I have two children, a boy and a girl. I live in a small town in Tocantins, Brasil. I like video games, movies, anime, and, of course, computer graphics. Currently, I’m working as a 3D artist. I’m now creating an indie game with some international freelancers as a team; we also did a pilot episode of a children’s animation for TV, called The Diddlys. If you want to know more about me and my artwork, you can follow me on my Instagram.
[sponsor id=’qarnot’]
About the project
The Skall is a piece I did for the Unhide Contest. This contest is open to everyone to participate and you can do anything related to CG, matte painting, digital drawing, 3D, etc…. For me, art contests are a way to get involved and practice digital art to improve myself while getting good feedback from professionals. I like to create funny characters and the theme of this challenge was Nordic Mythology. I did not do too much research, I just had an idea the other day and I started drawing it on my tablet, giving myself something to start with in 3D.
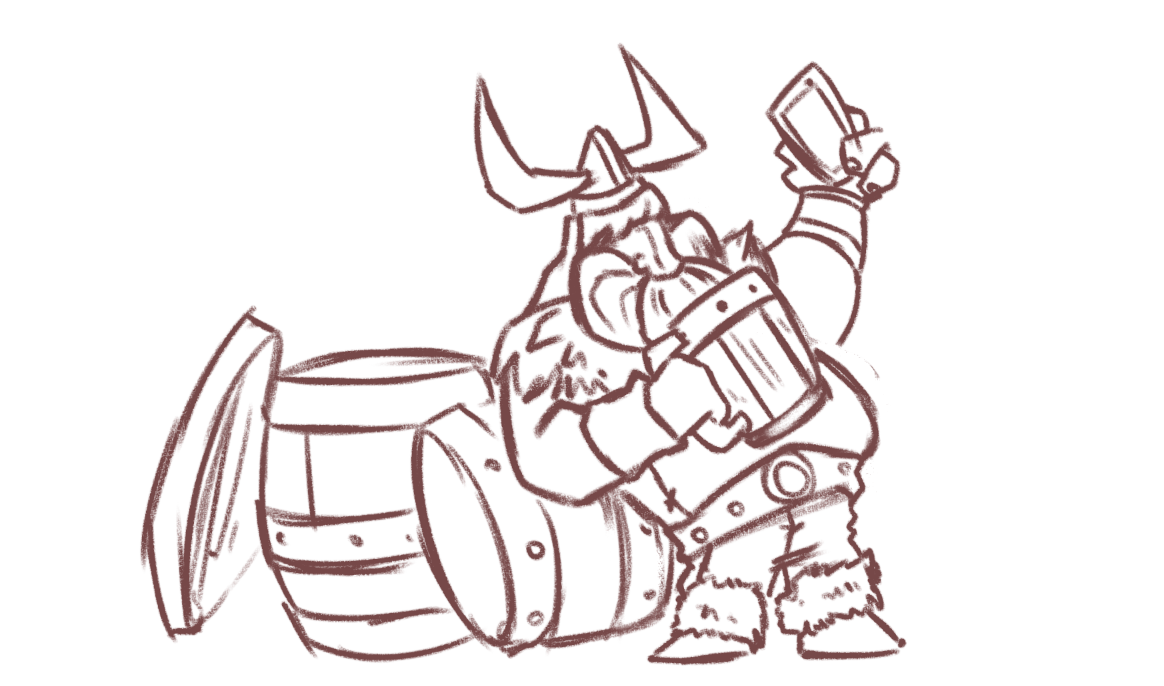
Idea
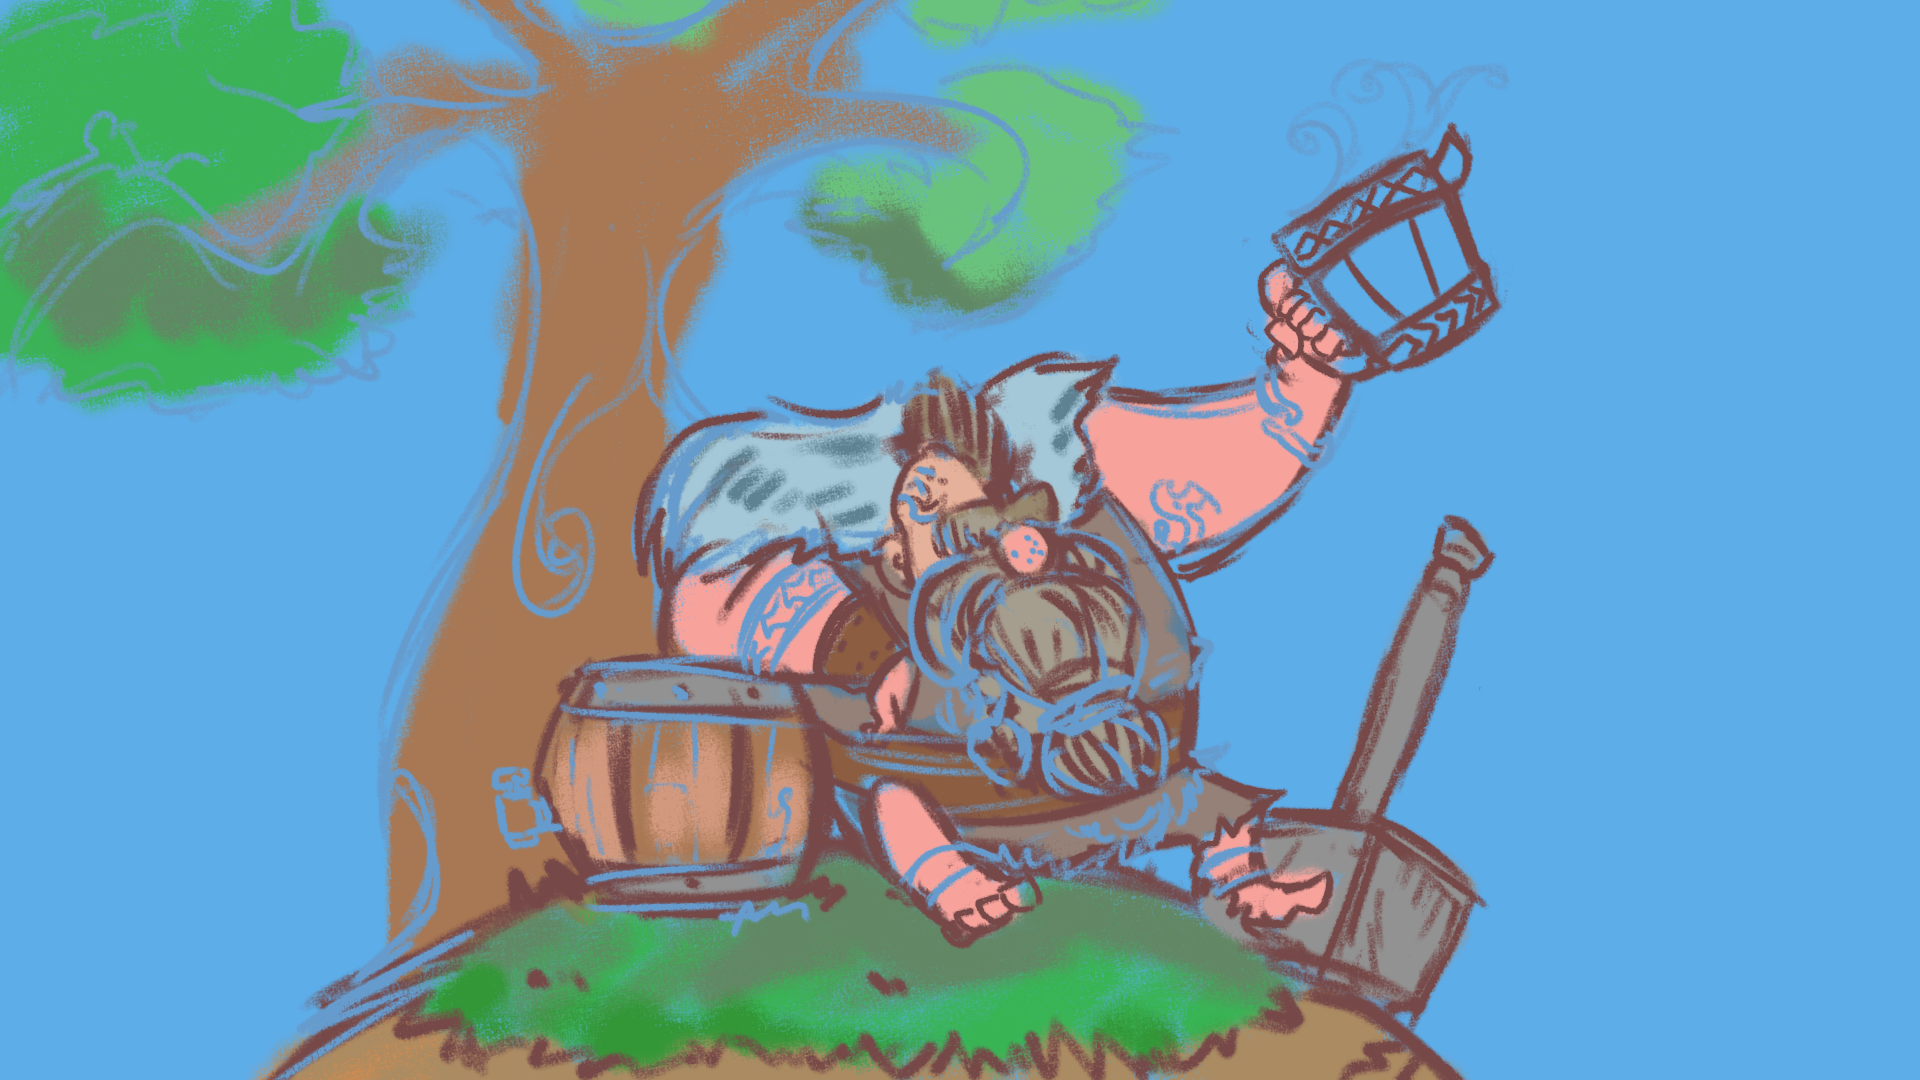
So my idea was to make a simple character in an environment for a still image, but I didn’t want too many things in the scene because I had to create it in a short time. So I started to draw some ideas in Krita from my imagination. After some drawings, I liked this one:
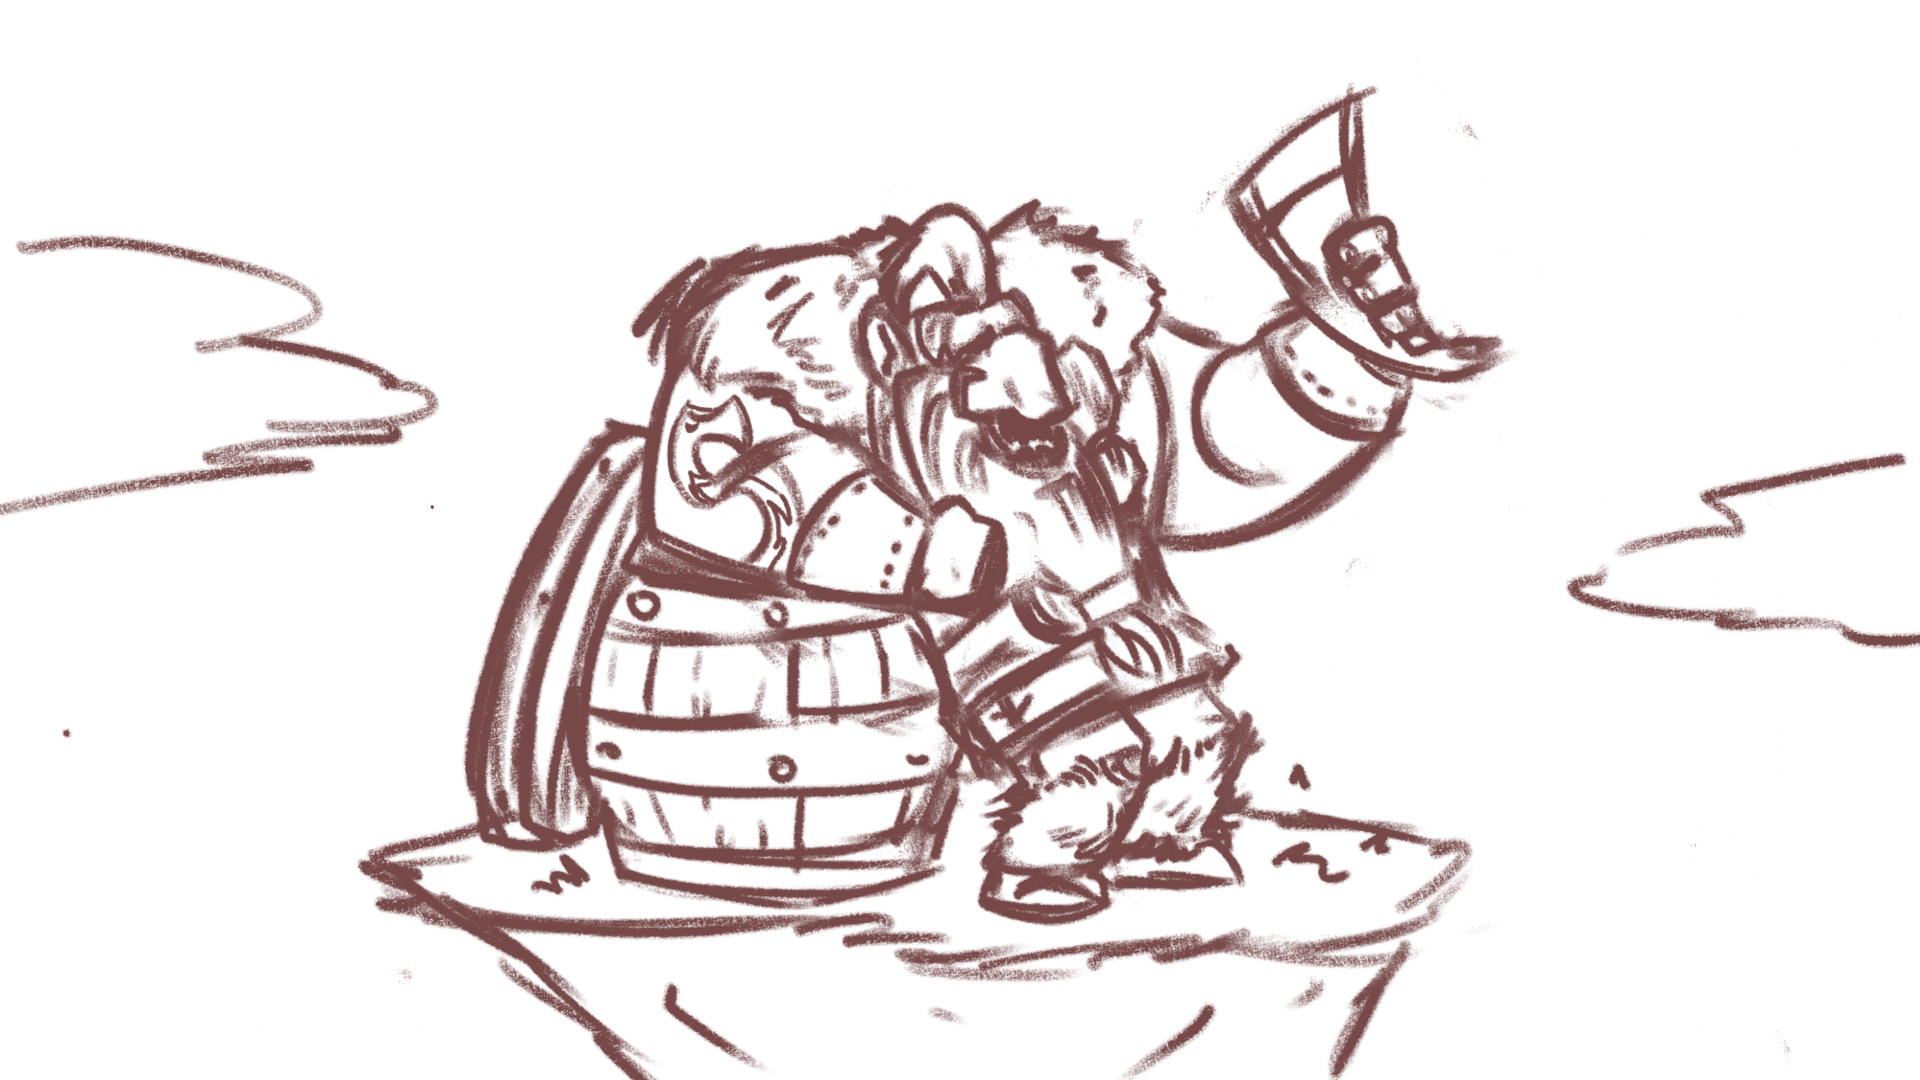
These are the ones I didn’t like:
I decided not to take long on this stage.
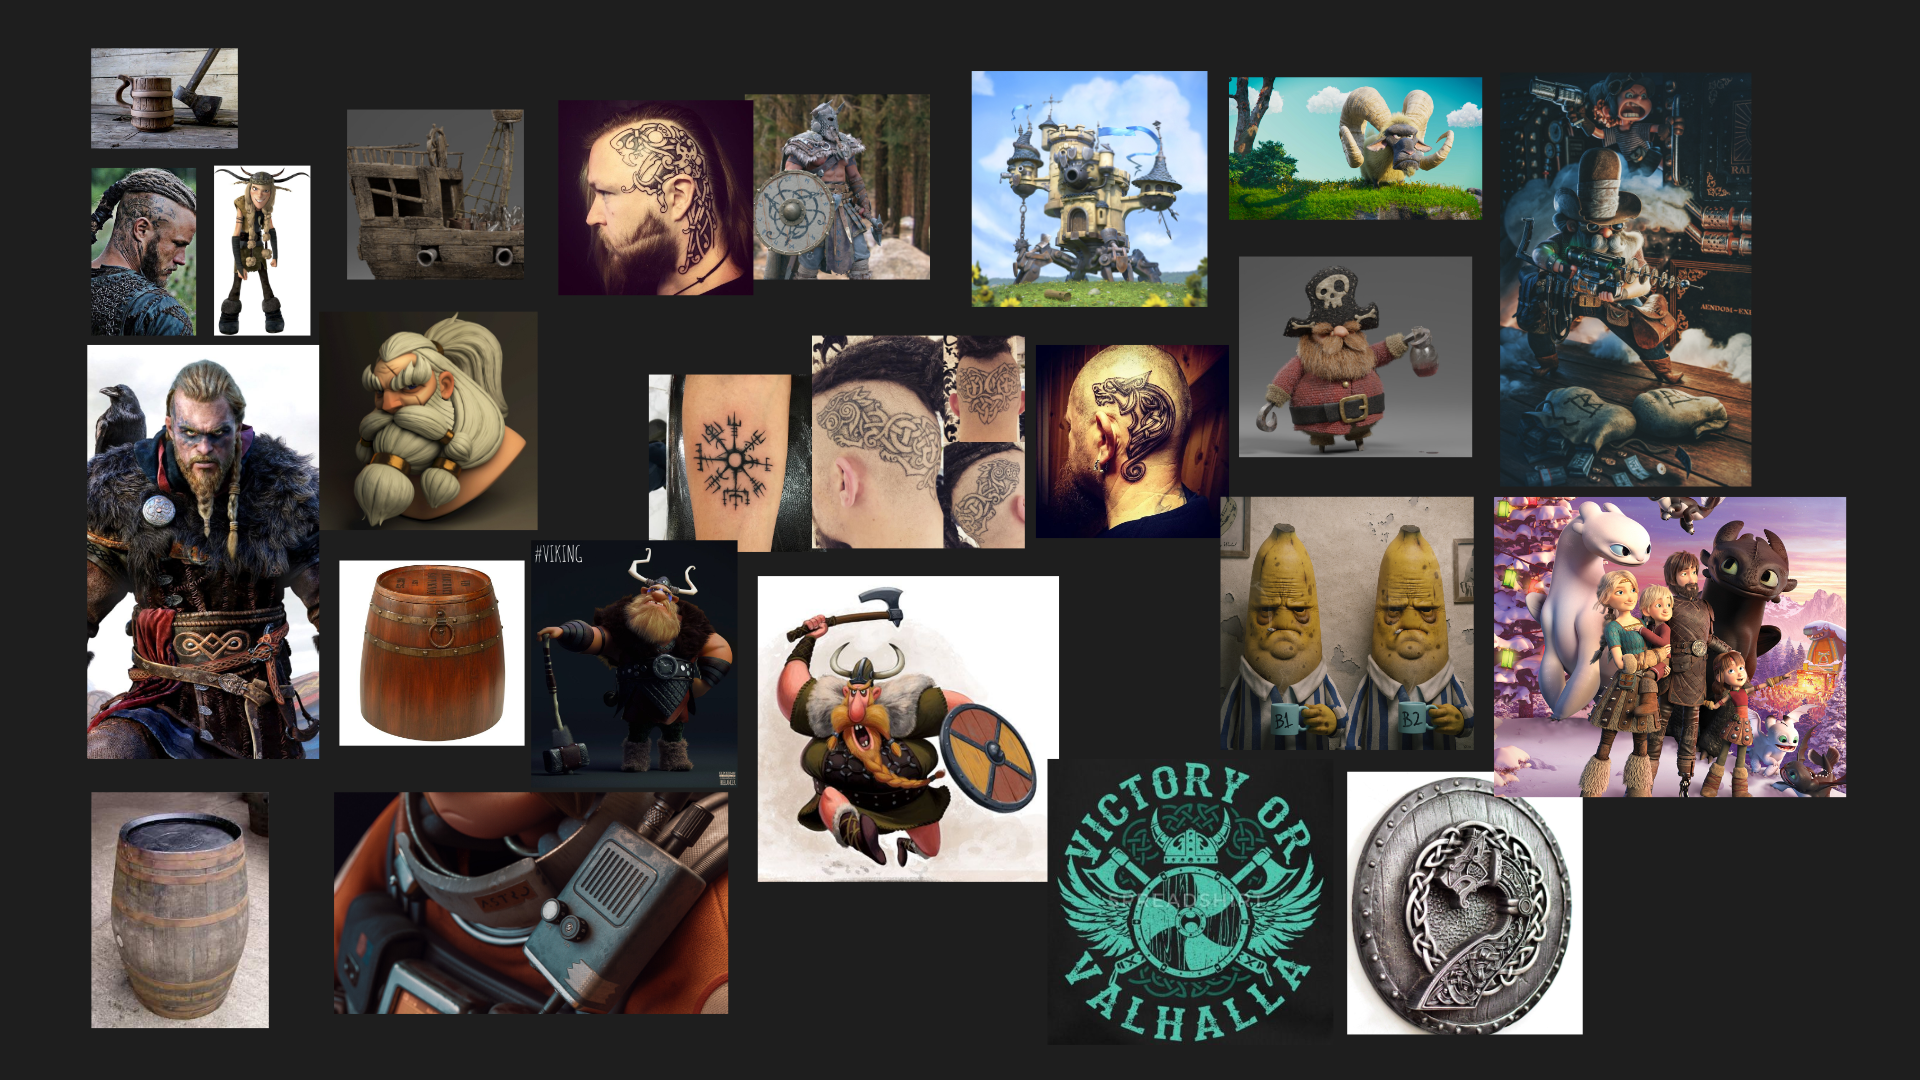
After that, I also gathered some images as reference and inspiration:
Sculpting & modeling
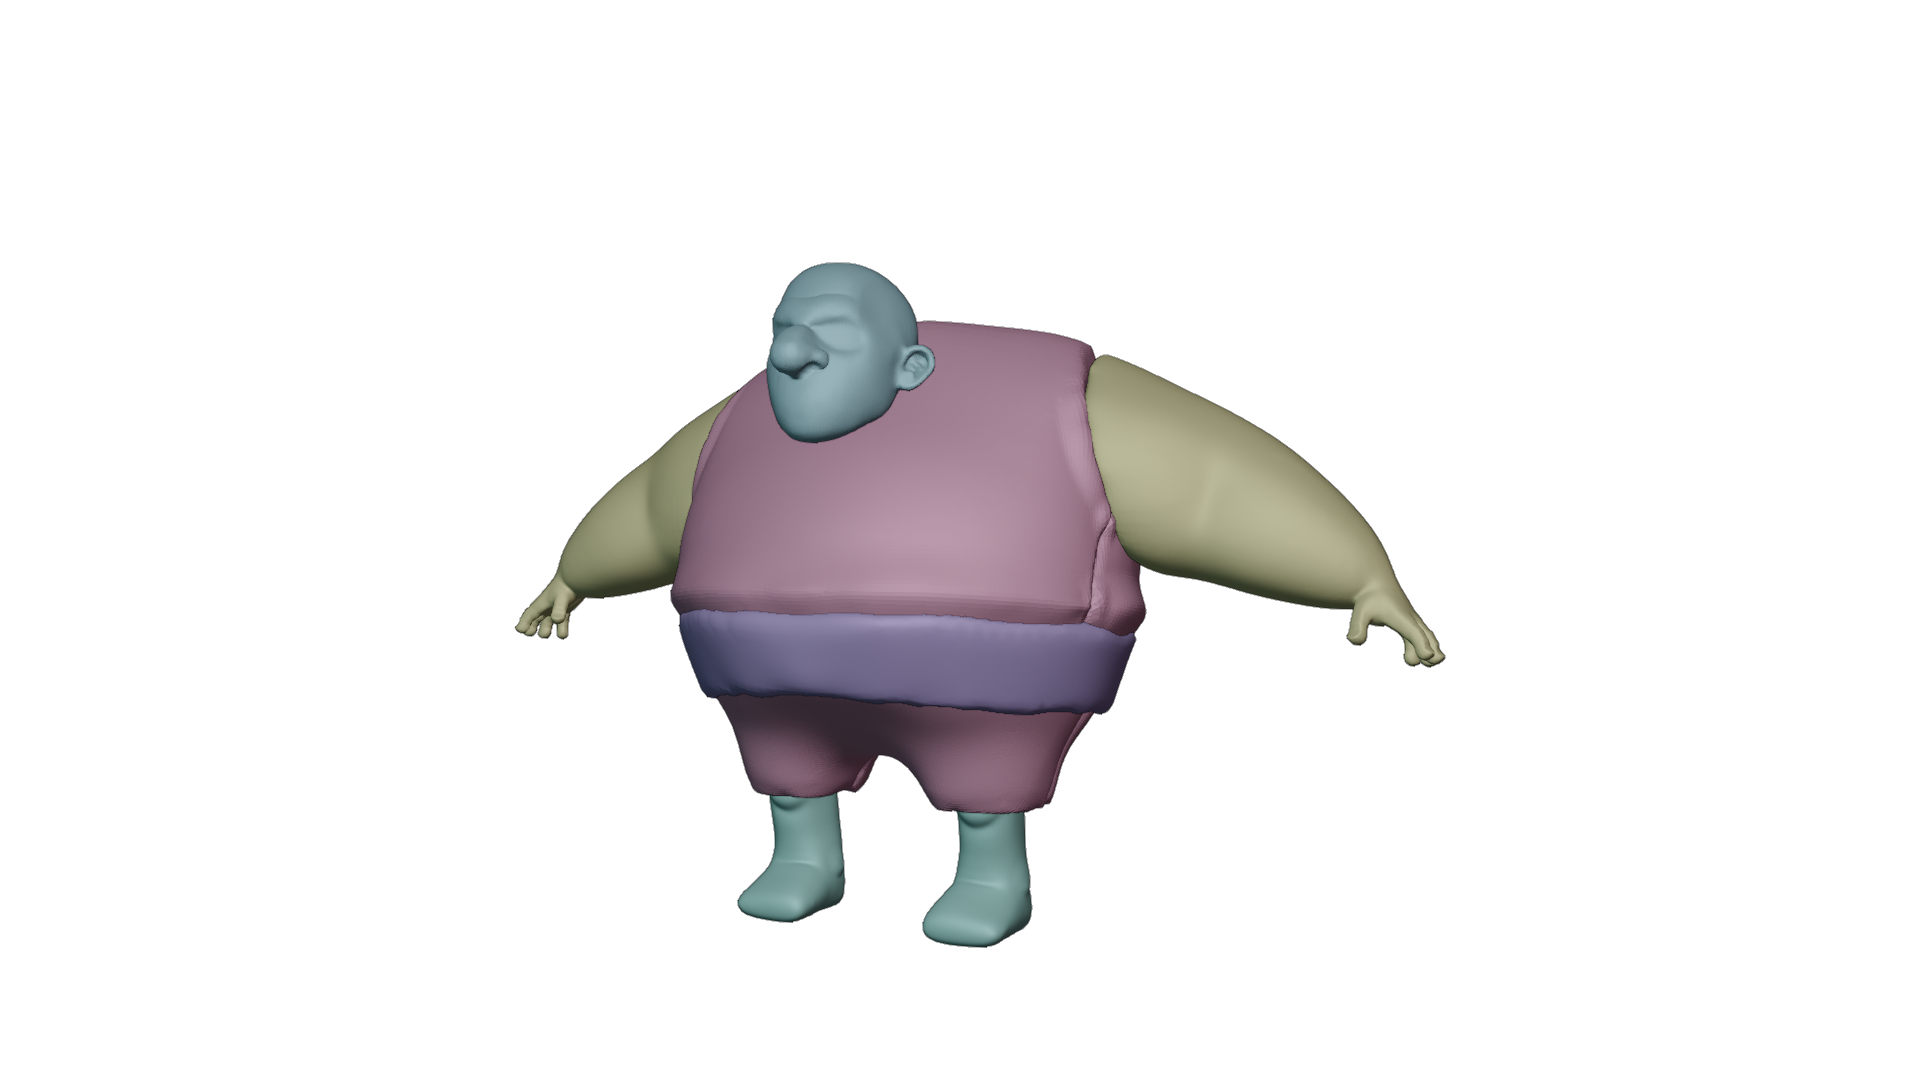
In Blender, I started blocking the model with primitives meshes:
At this stage, I try my best to fit the proportions of the concept and adapt the 2D drawing into 3D.
So after that, I get into sculpt mode. I like to use the voxel remesher, working first with a low resolution to do the big forms, and bit-by-bit I increase the resolution to do the small details. The toes of the feet, for example, are not there because I want to do them with poly modeling. In this case, I downloaded the hands as a free FBX model to get them done faster and tweaked them in sculpt mode to better fit my model.
Some guys I like as references for learning to sculpt are: Yan Sculpts, Rafael Grassetti, Danny Mac, Sebastian Cavazzoli, Yan Blanco, and Rafa Souza.
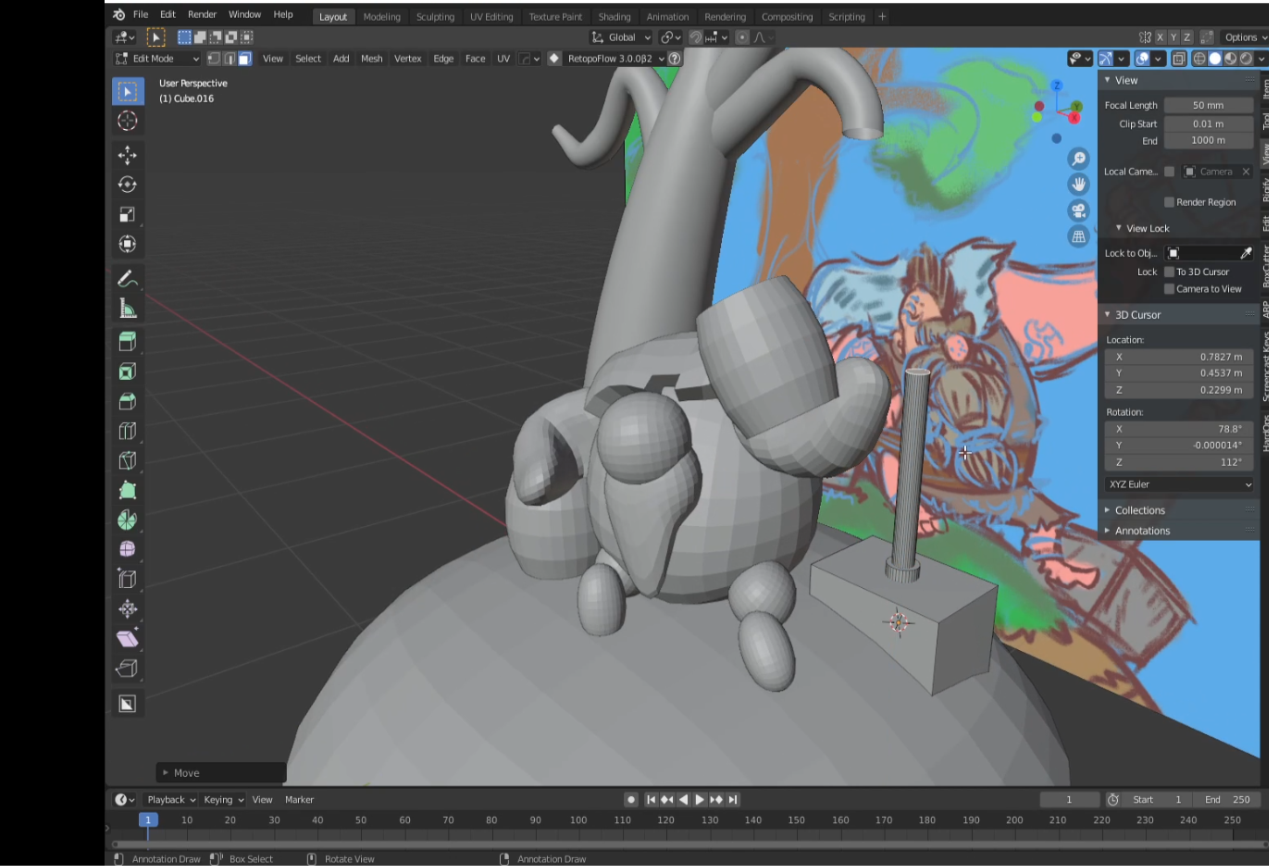
Retopology
For retopology, I like to use RetopoFlow, which is an amazing add-on. I got a really nice result in a relatively short time. I didn’t care much about the face loops, because the intention here was a still image, and he doesn’t have eyes. For the other assets, I didn’t need to do a retopo because I made them directly with poly modeling.
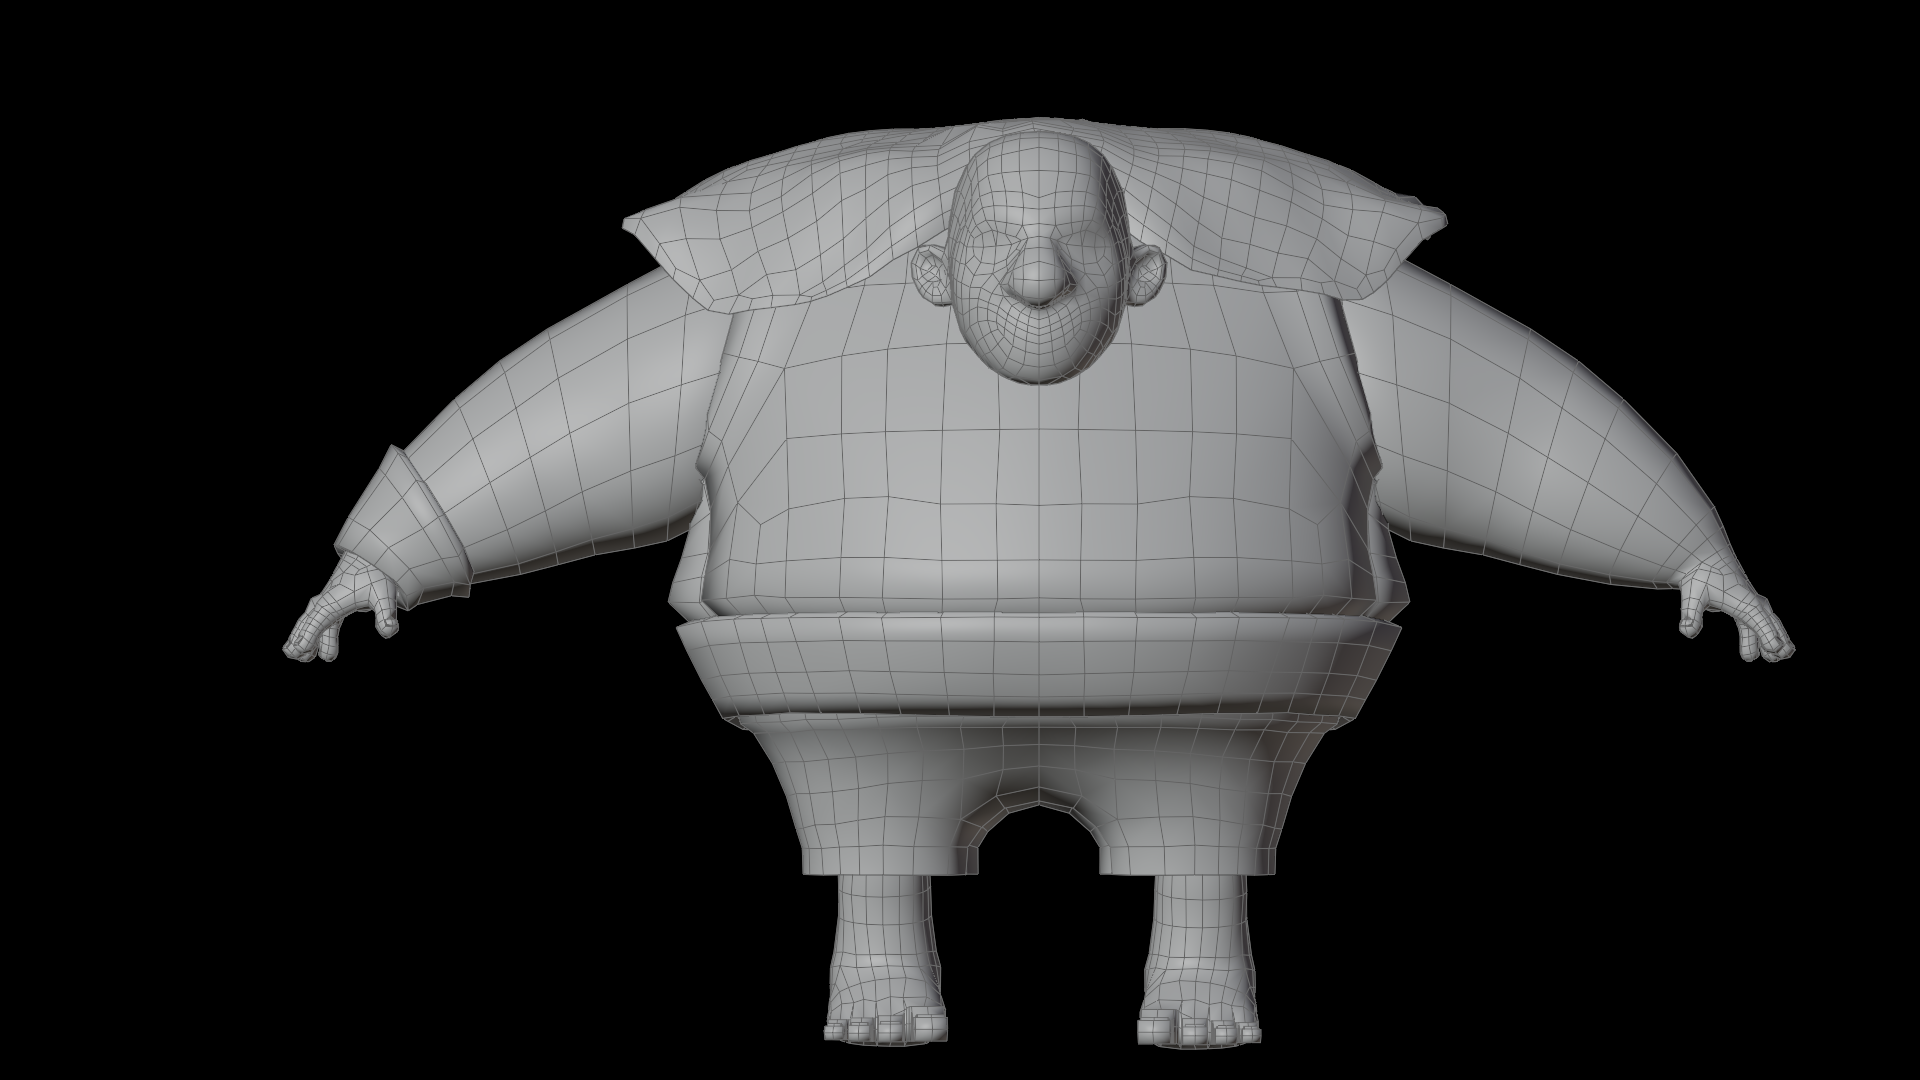
After the retopology, I had lost a lot of details of the head. With Blender it is very easy to get them back.
First, I get the low poly and high poly head in the same place, scale, and rotation.
Then, with the low poly head selected, I add a Multiresolution modifier with 3 subdivision levels, at least, and a Shrinkwrap modifier with Wrap Method in: Project and Negative and Positive checkboxes enabled. The high poly head model goes in the target slot.

After that, I checked that everything was ok and applied the shrinkwrap modifier. All the sculpt information was then in the Multires modifier of the low poly model. :) Very nice!

This way the scene is more responsive with all the sculpted details, which can also be baked as a normal map.
For the clothes, I did the details after the retopology with a multiresolution modifier in sculpt mode. I used the new cloth brush a bit, along with the crease brush, and smooth. The liquid in the cup is made of metaballs joined and with a voxel remesher to get a smooth shape.
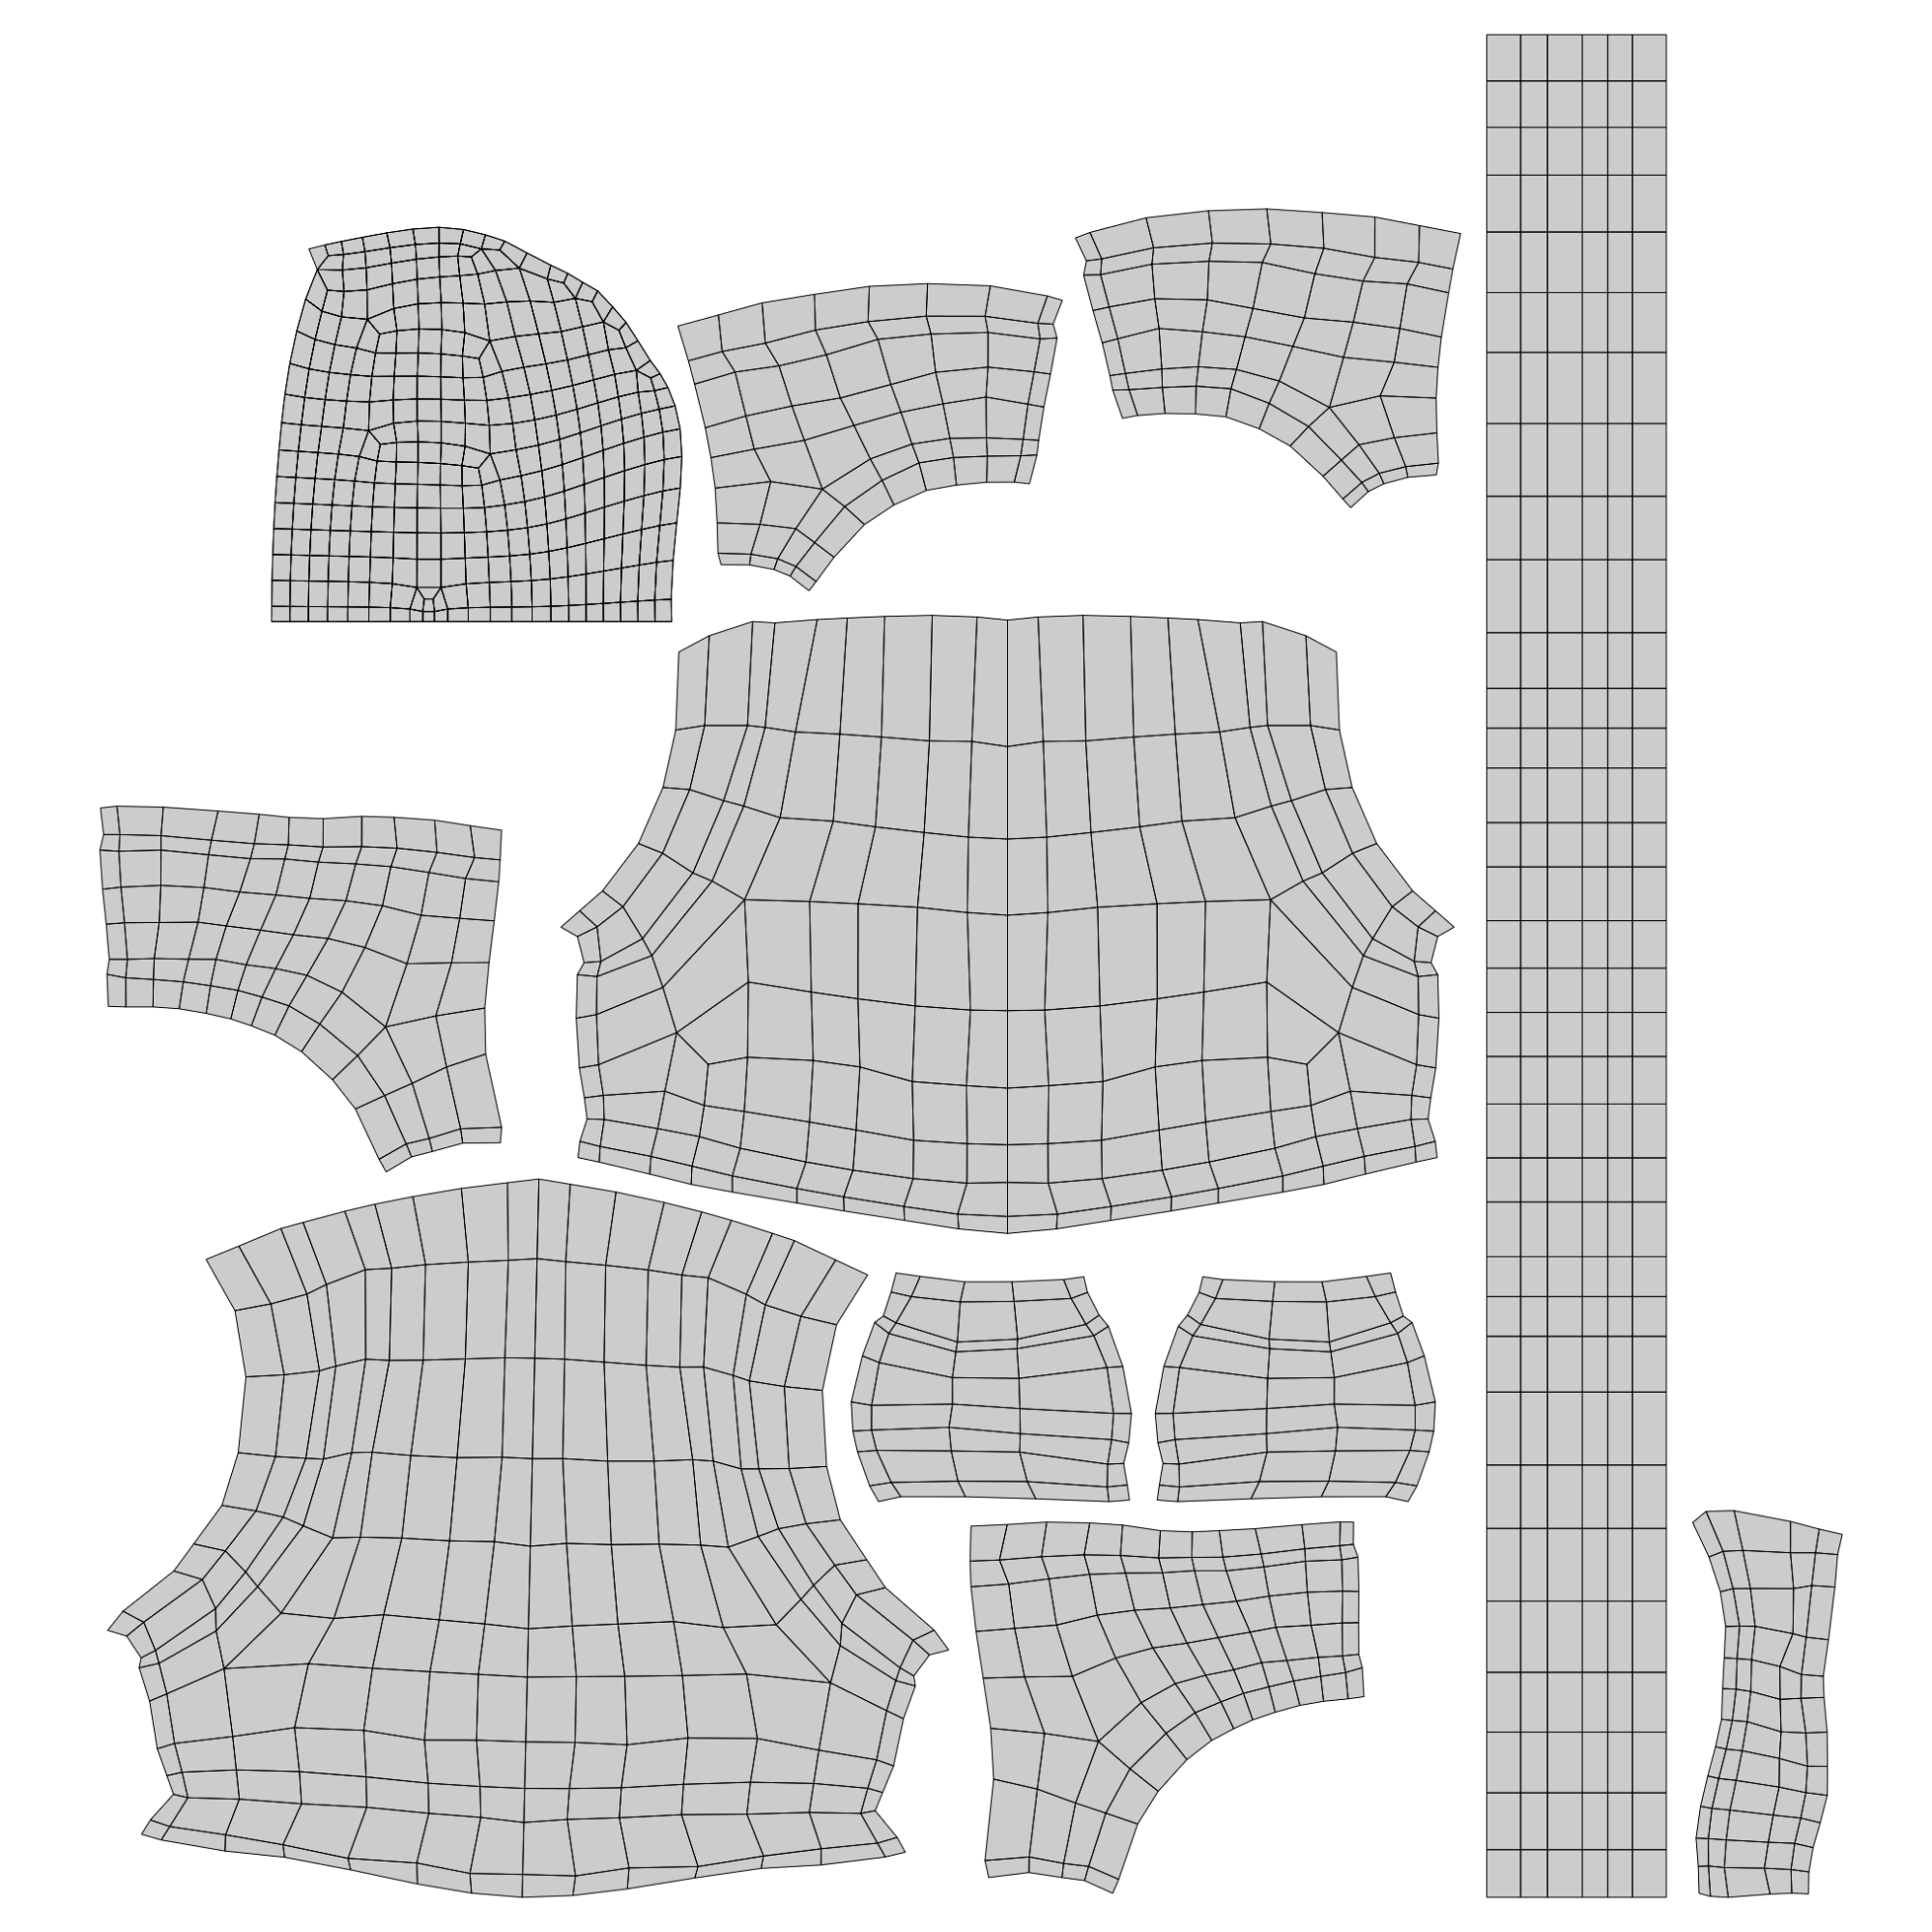
UV unwrap
For UV unwrap, I like to make separate UV islands for each piece and then join them together in groups, like clothes, skin, assets, and ground.
To check if the UVs are good, I like to use the TexTools addon. It has a button that creates a checker map on the model and it also comes with a button that turns UV islands into squares. Blender’s native tools can do this, too, but I think it is a bit faster with this addon. To organise everything, I also used the Pack Islands and Average Islands Scale commands a lot. For the clothes, I took care to have them lined up with the fiber of the clothes.
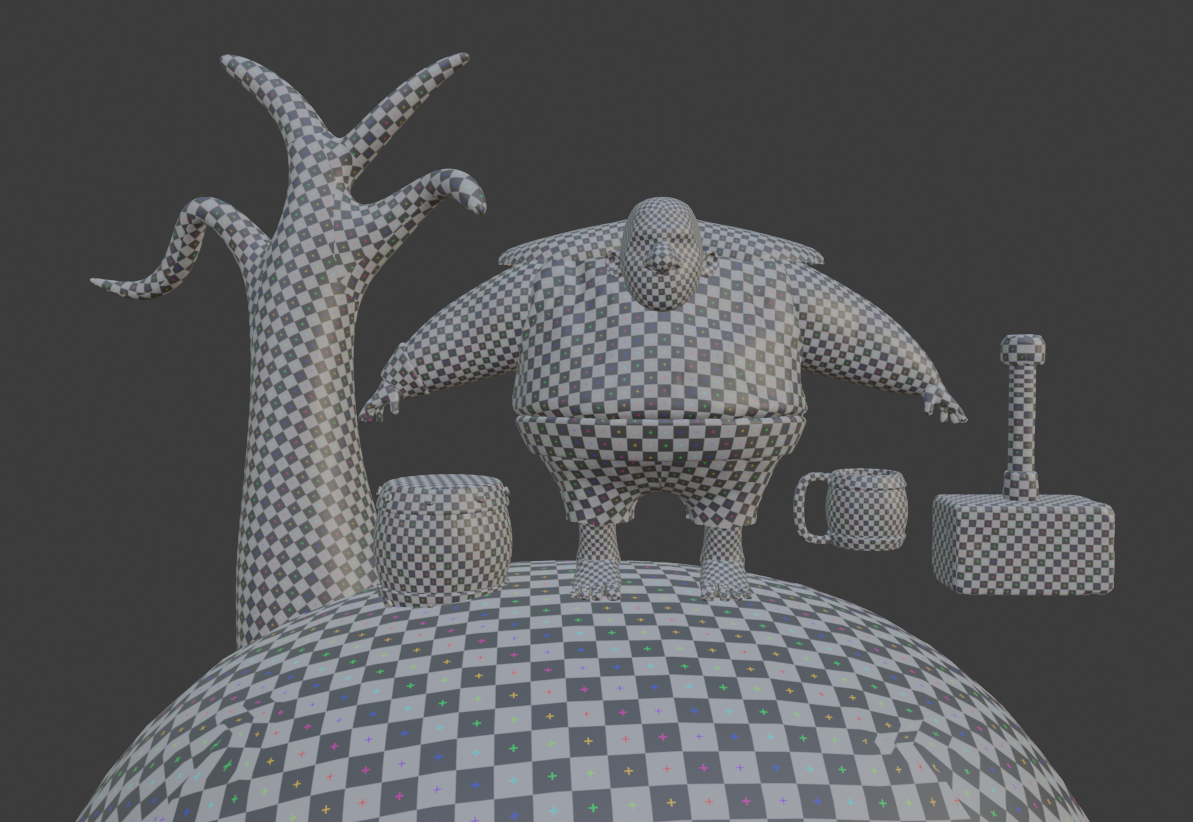
I reviewed everything with this checker map texture to see if everything was alright before proceeding to the next step.

Textures and shading
The character and some assets textures I did in Substance Painter. I first exported the character model from Blender as a FBX file, then I exported the hammer, barrel, and the cup in a separate file. The ground and the tree I textured with PBR textures downloaded from the internet.
I put more time and effort into the character. I gave more attention to the skin, which I like with a lot of details on it. So, in Substance Painter I painted masks, filled in colors, made some procedural textures, and eventually I decided it was time to export back to Blender.
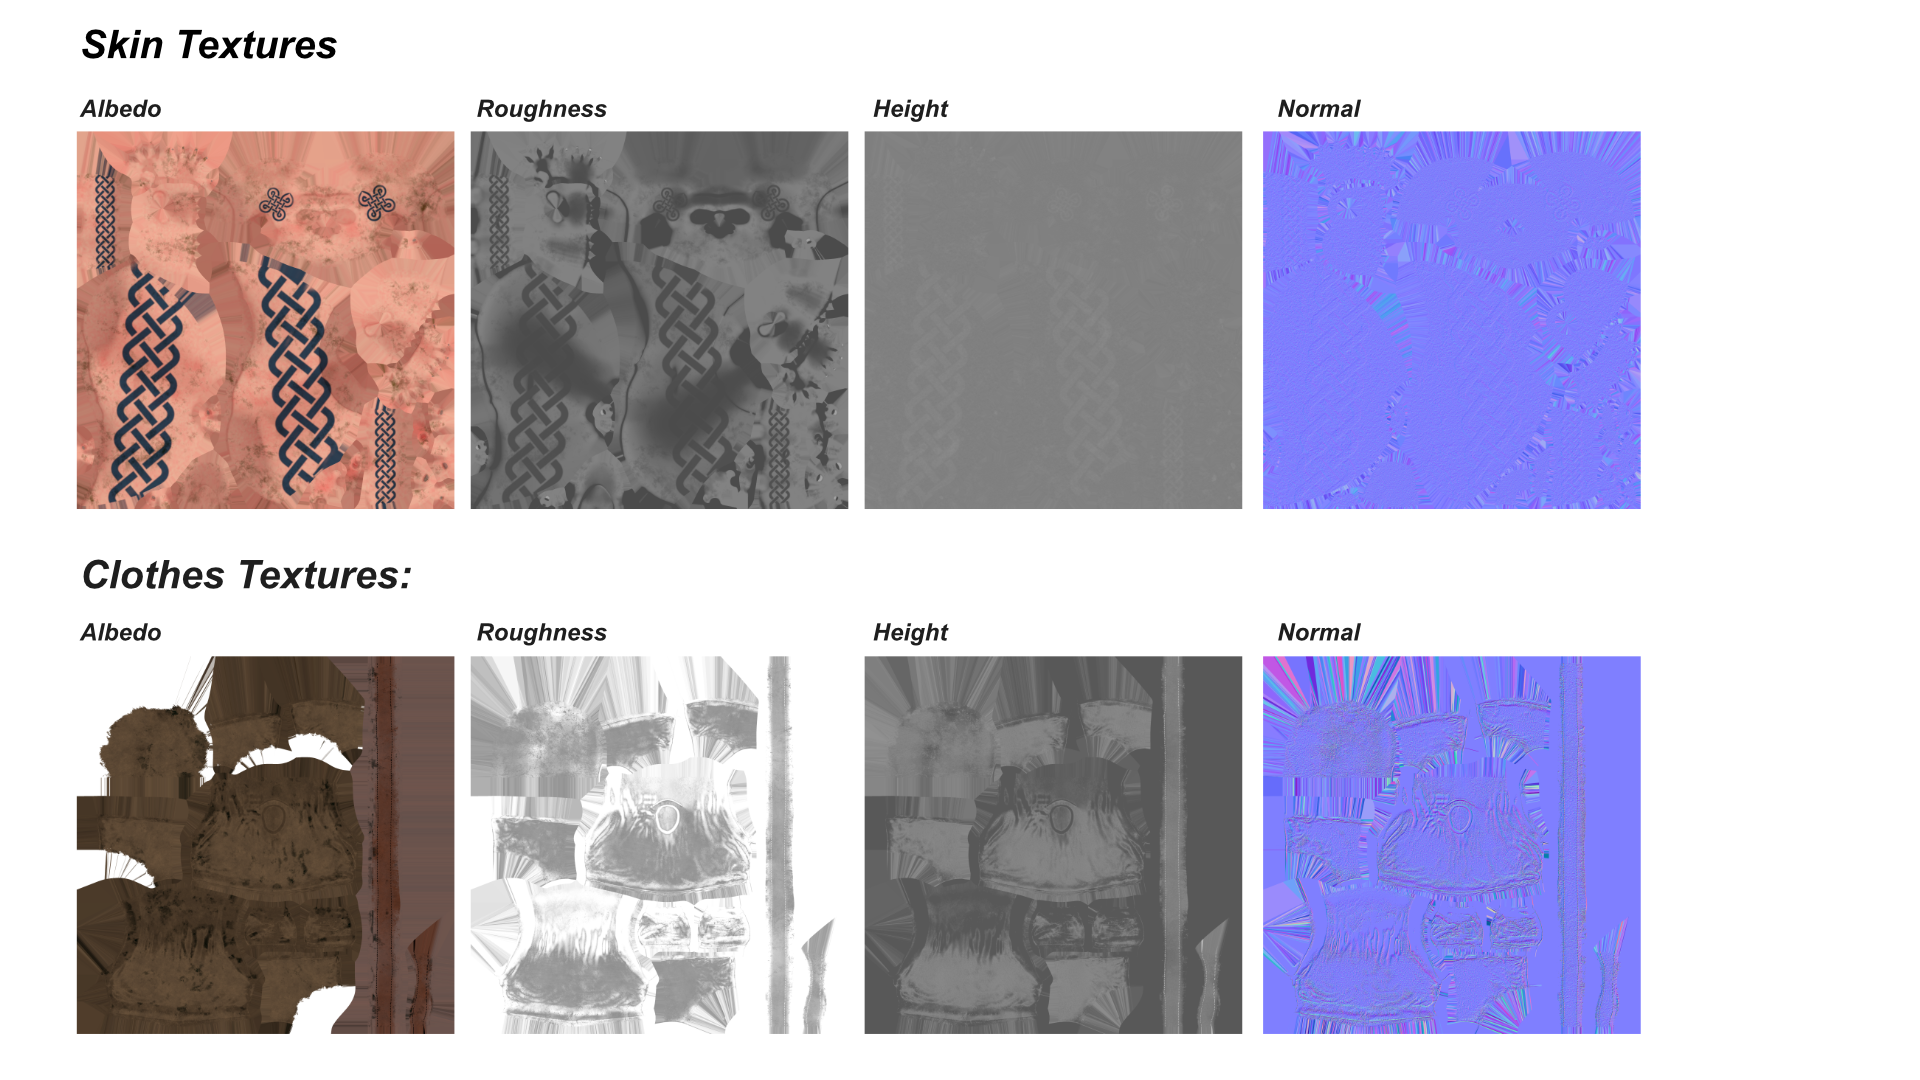
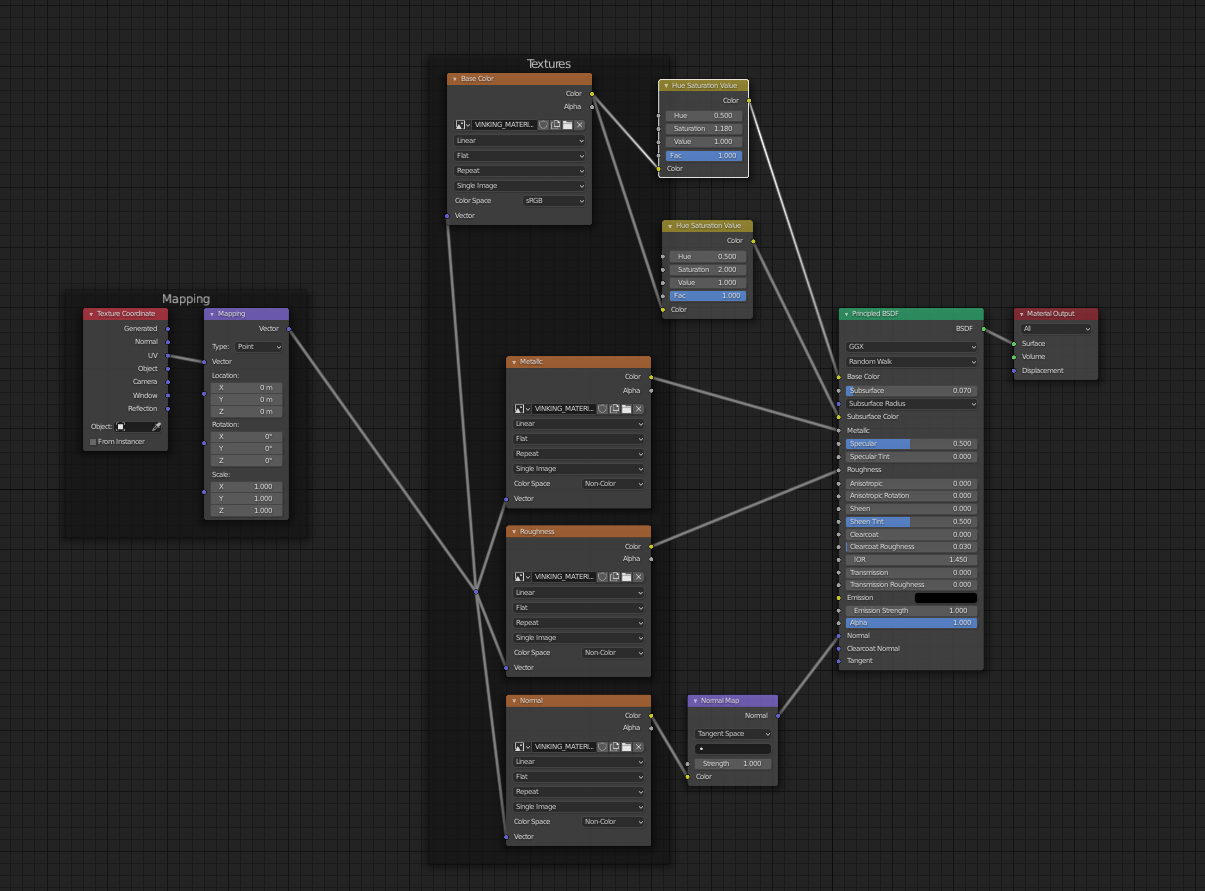
My skin shader is nothing fancy, just the texture nodes plugged into the Principled BSDF shader. To get a nice SSS look, I plugged the skin texture into the hue and saturation node, and I cranked up the saturation value, which gave a nice result for the skin.
And I used a few textures from Poliigon as well, for the ground and the tree.
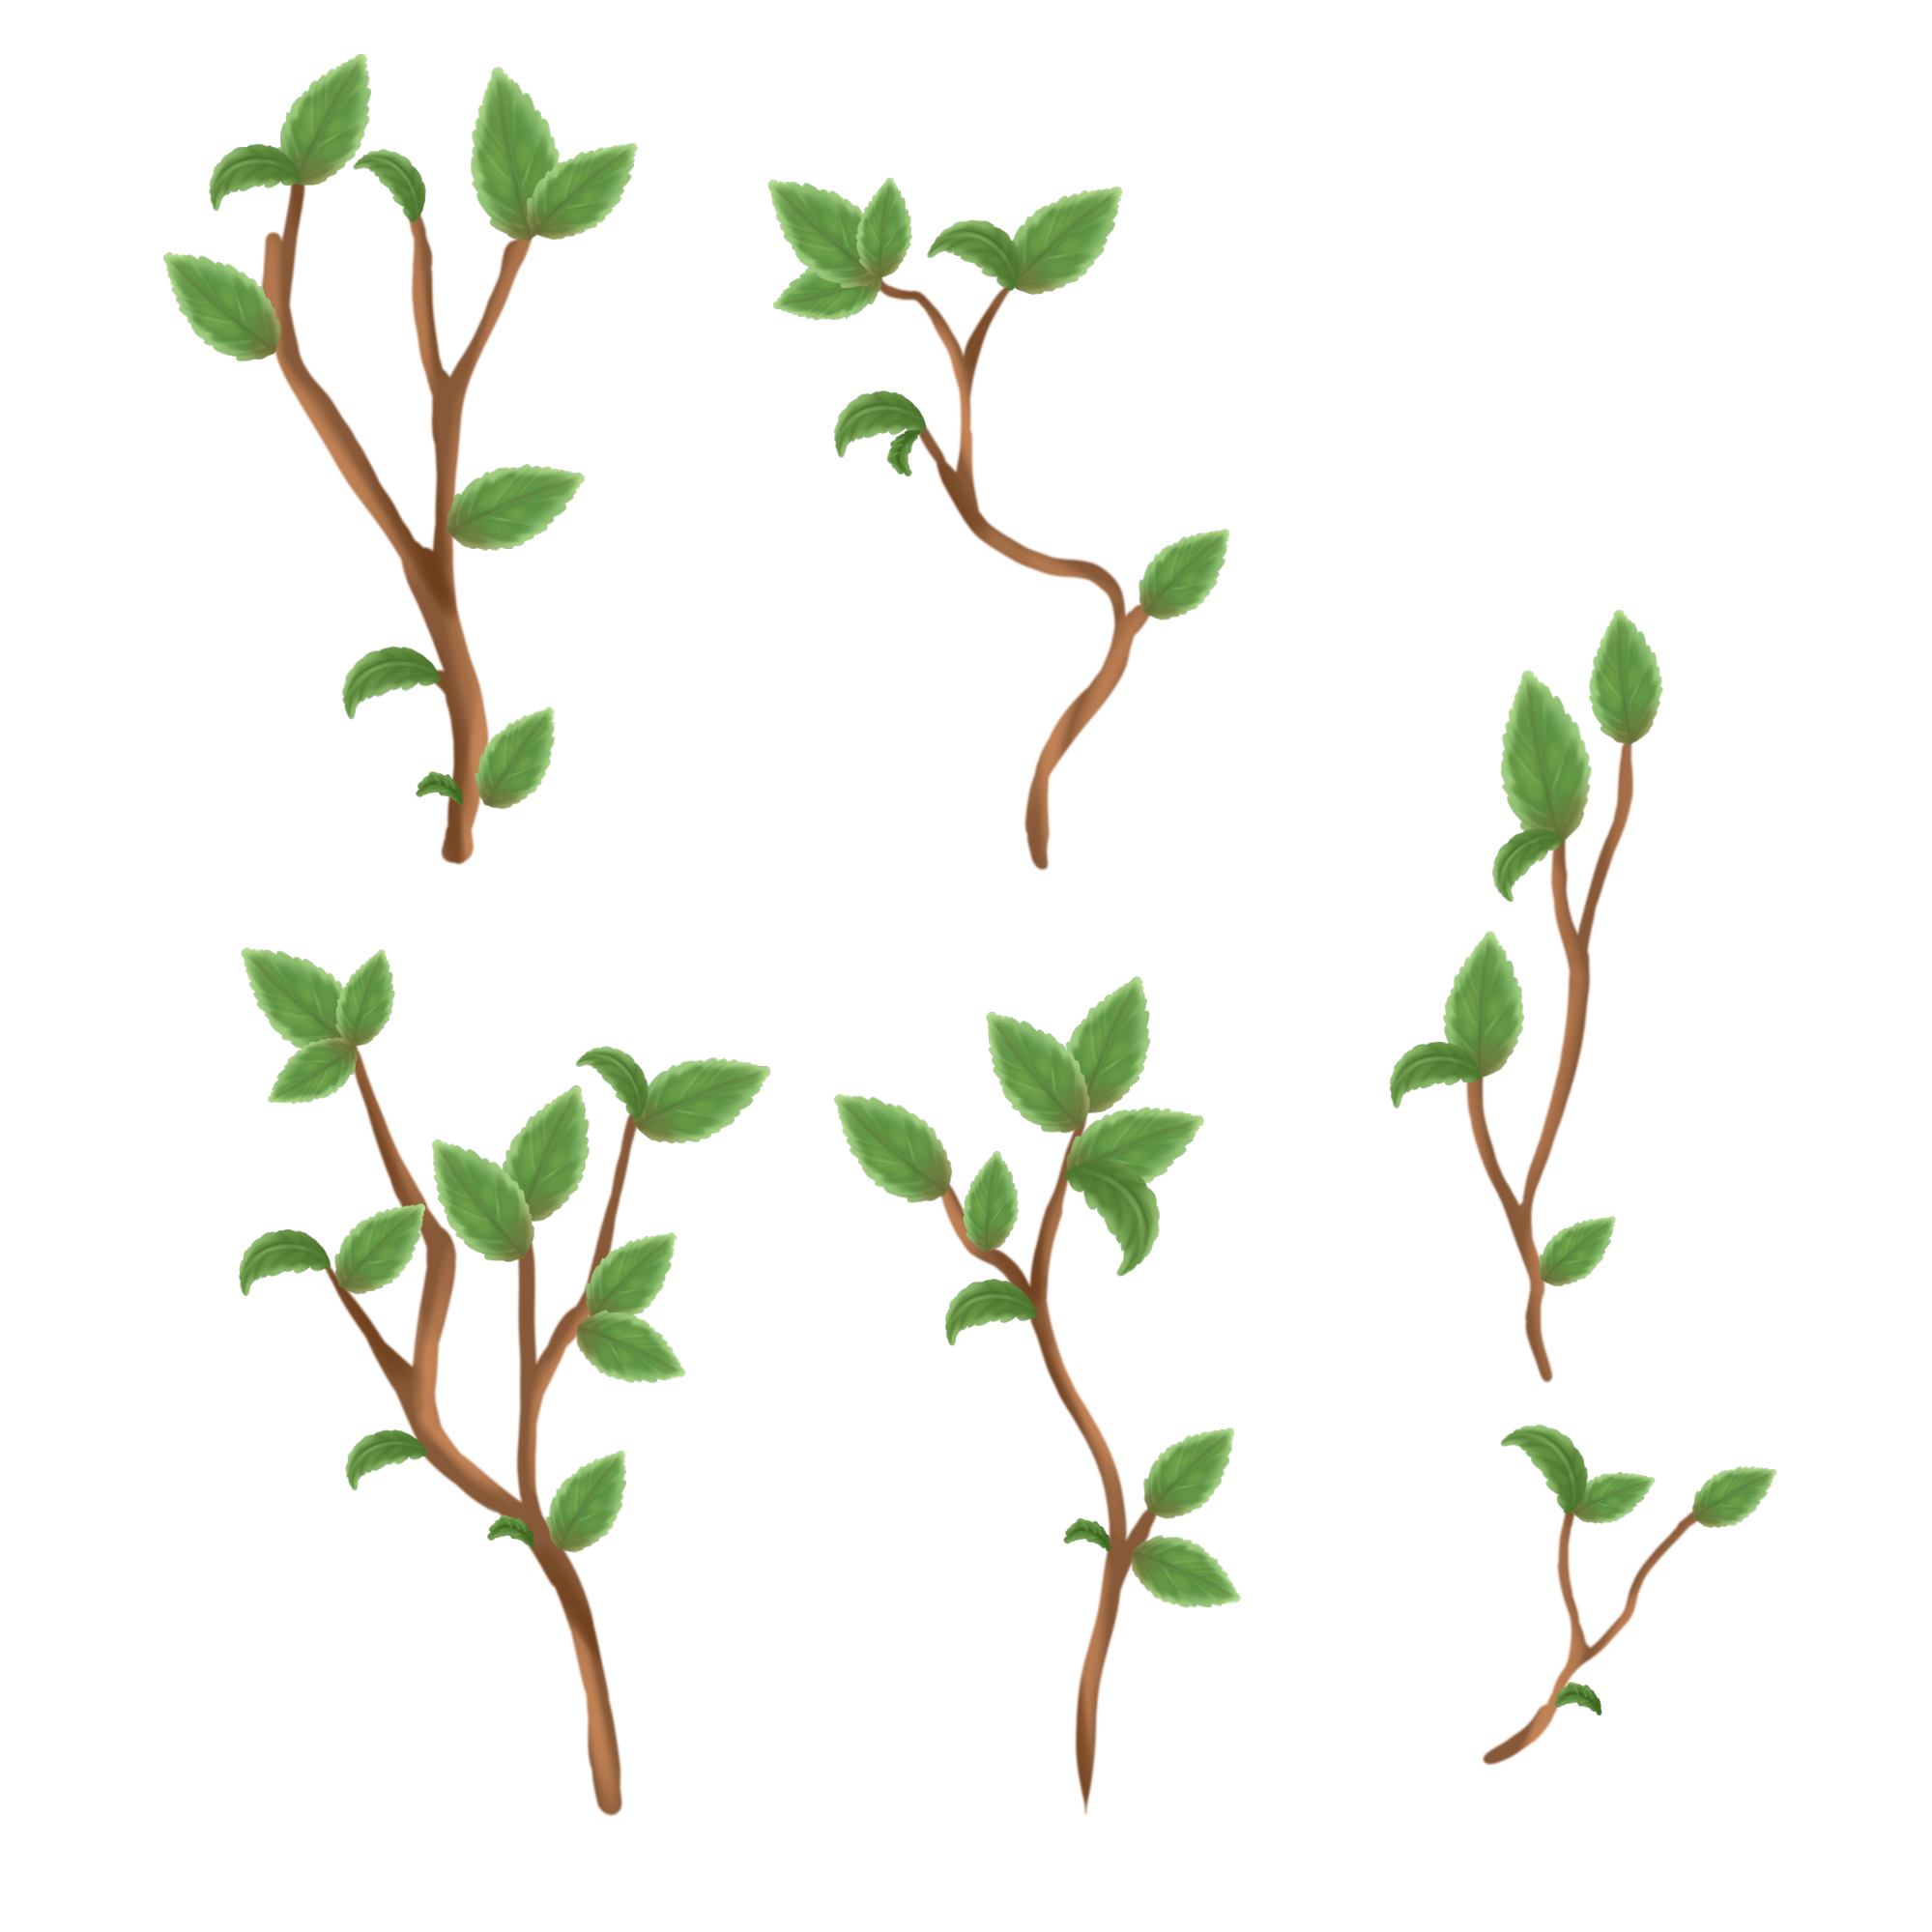
The leaves of the tree I did with Krita. I painted them with a transparent background, and exported to Blender. There I added planes and mapped them to match the branches, and I used the alpha channel to mask the transparency. As you can see, I made the leaves green, but in Blender I used the hue and saturation node to play with the colors.
Grooming
For the grooming, there are a lot of settings for different parts of the character.
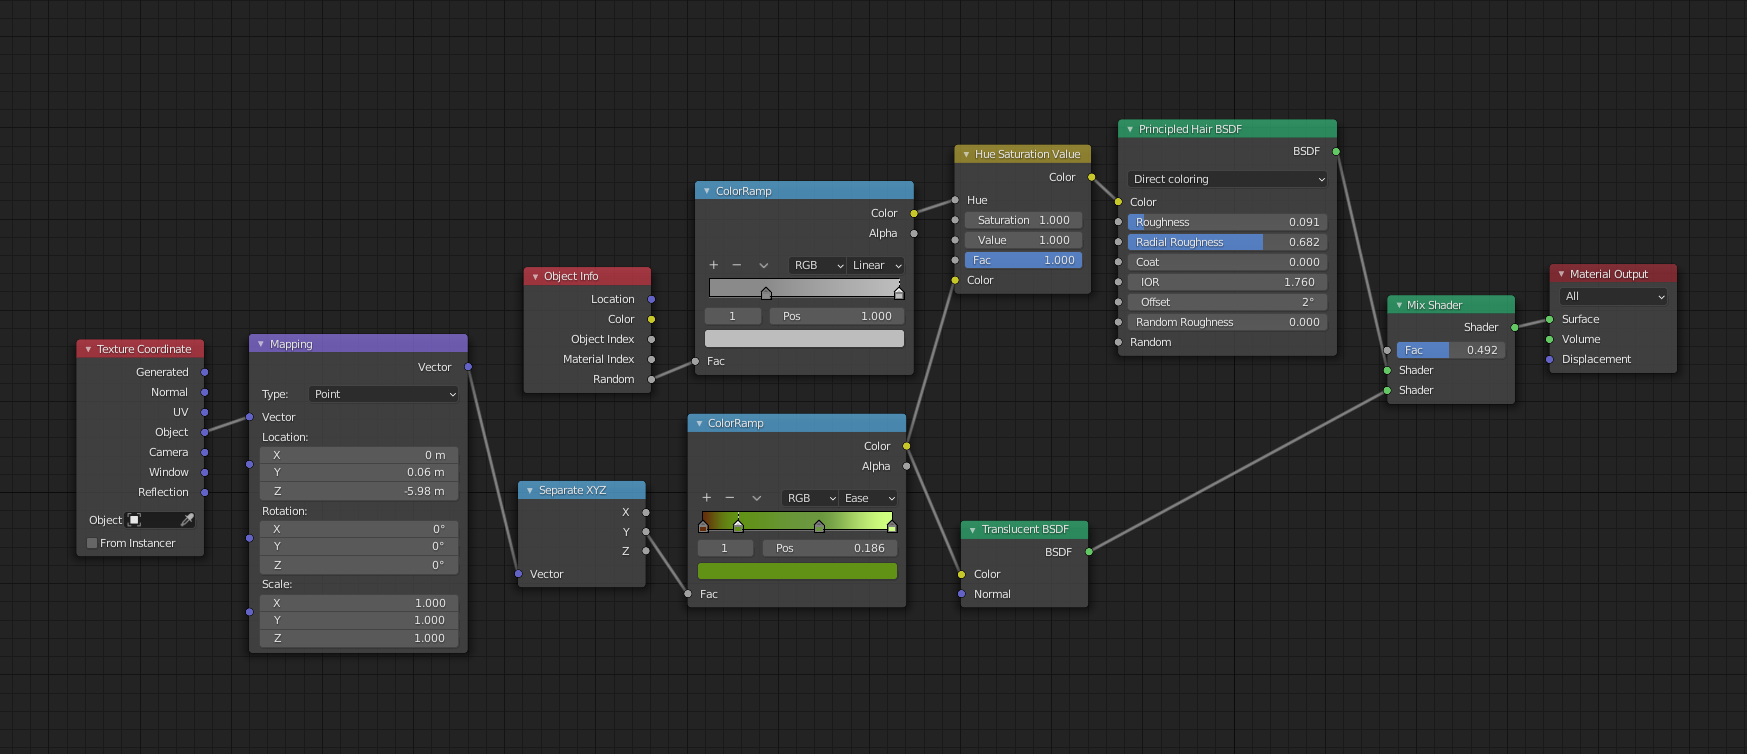
For the beard, I created the hair particle system and created just one particle. Then I tweaked the settings with the Children interpolation set to Simple until I got a good result. After the single hair strand was the way I liked, I delete it and started in Comb Mode to add the hair strands where I wanted them to be. In this case, I chose not to use a scalp and that worked very well. With the interpolation in Simple, I get stylized hair, which, I think, is better for these kinds of characters.
A video about hair that I like a lot is this one; it was made in Blender 2.79, but I think it is still useful.

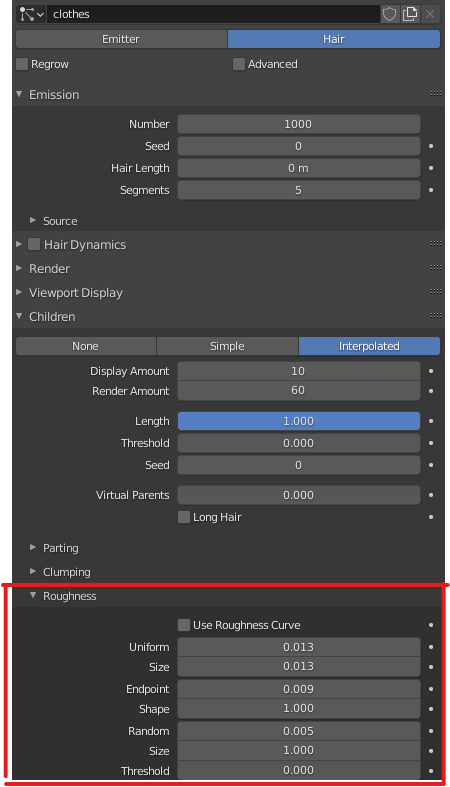
For the tiny hairs in the clothes I have set hair length to 0 and used Children > Interpolated Length to 1.0, which make the hairs disappear—but, in the Roughness settings, by increasing the Uniform and Random input values, the little hairs will reappear as fuzz. That approach worked very well here.
In this video, you learn more details about it.
The grass
I created the grass with a particle system with some collections supplying the objects. It is just these simple meshes with this node setup. I still have a lot to learn about creating nature in Blender. Fun fact: I had forgotten to make the grass with shade smooth turned on, but in the end, I liked the result. I think it gave the grass a stylized look.

Pose
To pose the character, I used different techniques. First, I put everything in place in pose mode, and then in sculpt mode I used the pose brush to rotate the arms and fingers. I also used edit mode, with the proportional editing feature enabled, to get smooth deformations, all with shape keys to make sure to preserve the T-pose of the character’s position.
I tried to place everything in this X-crossed guide line, and at the center of the scene.
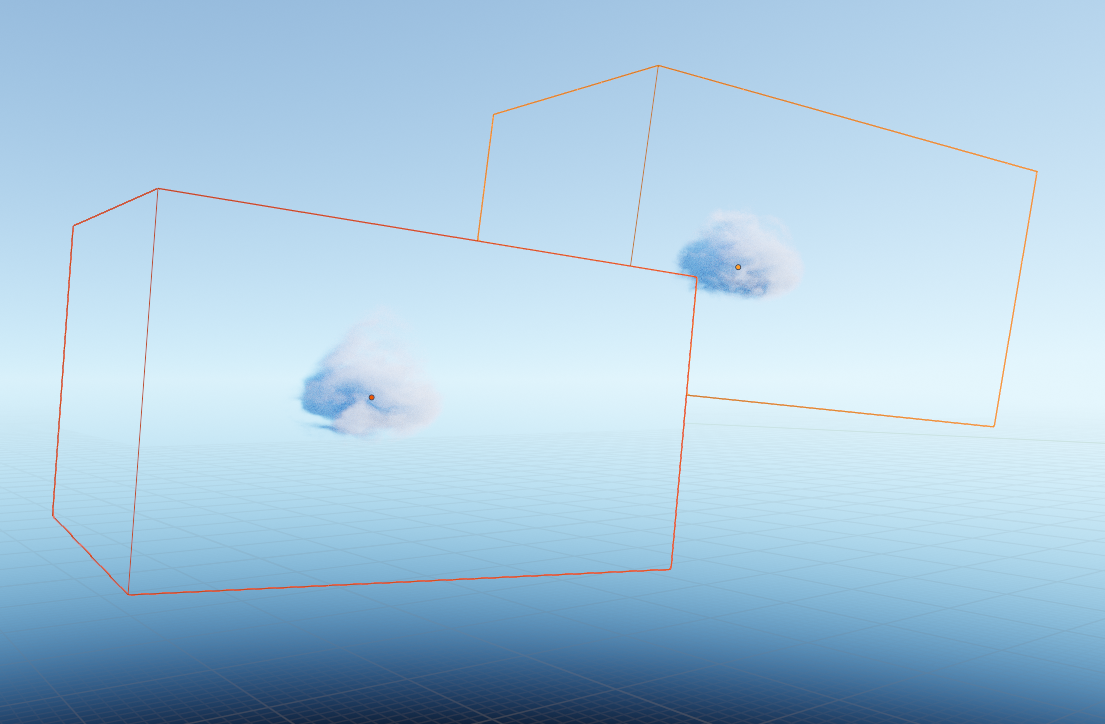
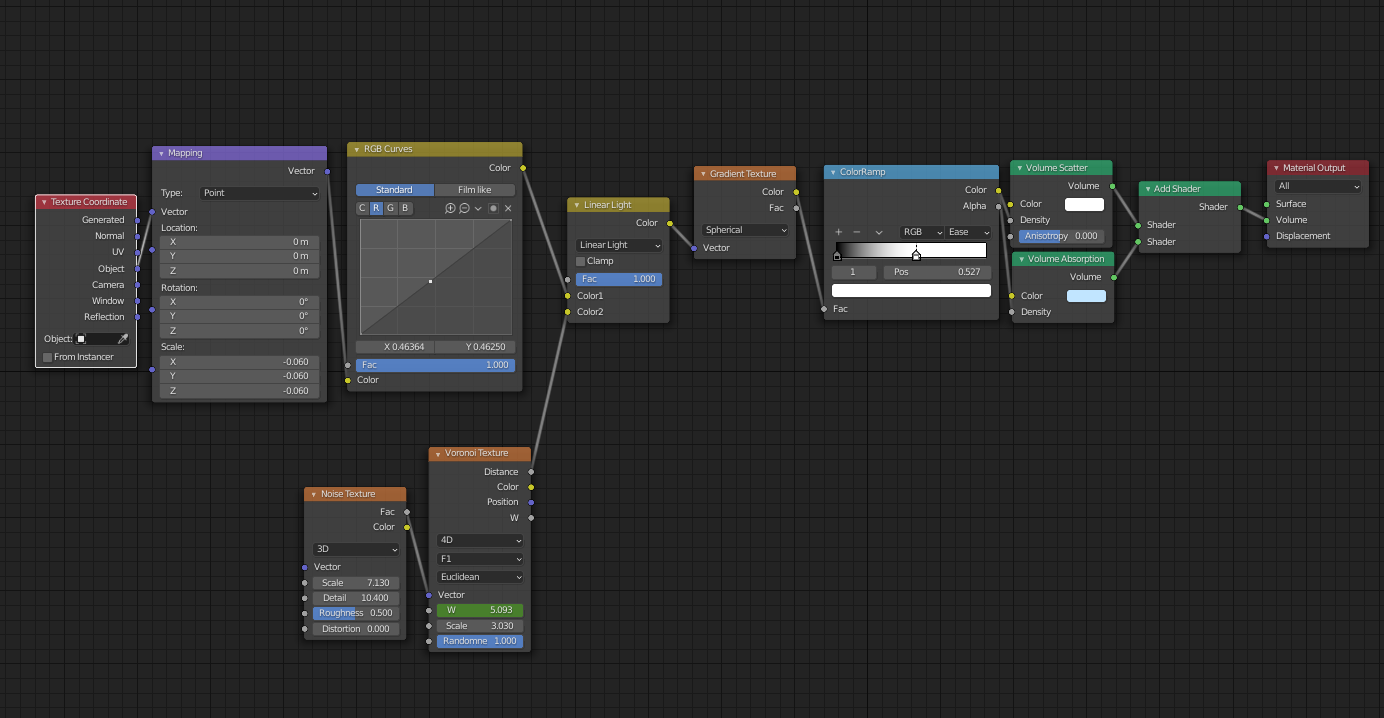
Lighting
The lights are just this:

I wanted to experiment with this new amazing node, so I found this to be the perfect time.
The Sky Texture node is plugged into the color of the background. This node gives me a lot of settings, so I played with it until I got the desired result.
So after that I had a really nice blue natural sky, but without clouds. Luckily, I had some volumetric procedural clouds on my hard drive that I had made using a tutorial on the internet and saved. They are very handy to have available whenever I want.
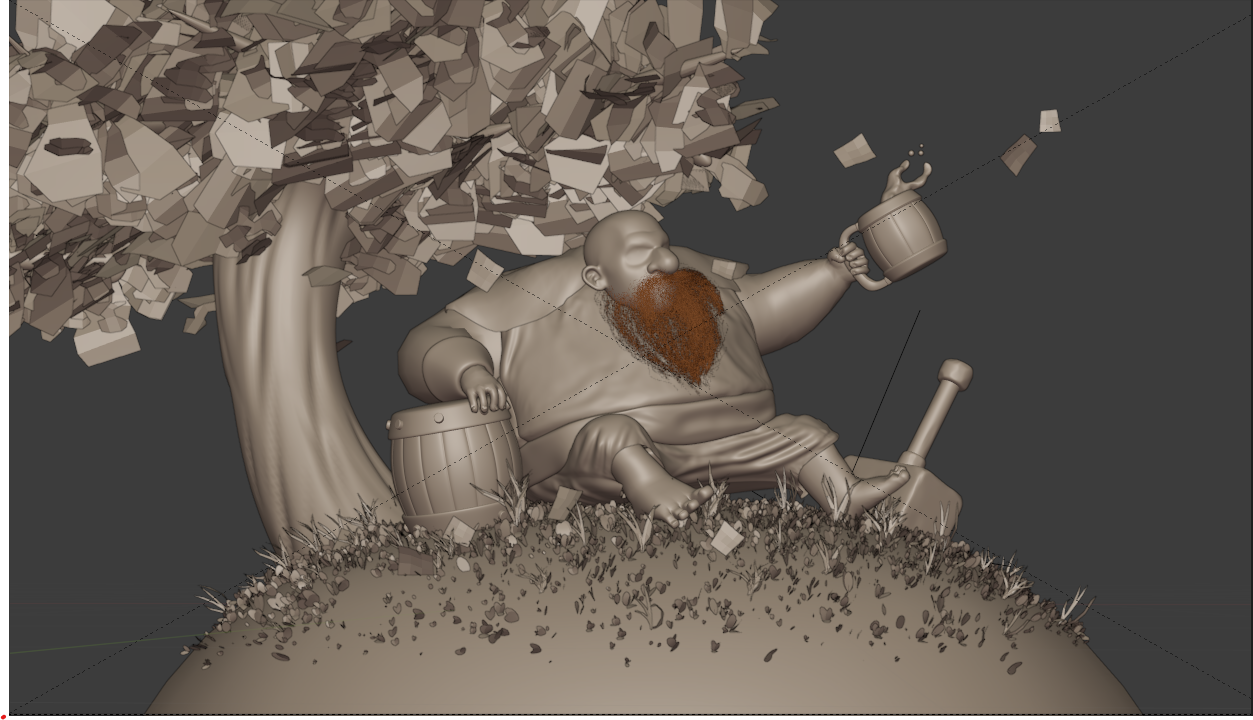
Render
Now, after a lot of tweaks, I had decided it was time to render. I did not get it right in the first shot but after a few more renders I got it done.

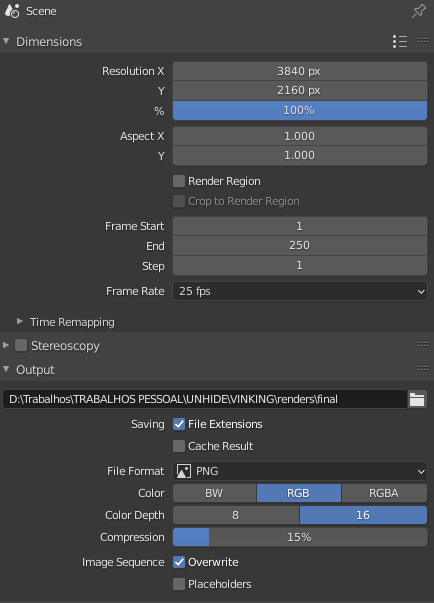
These are the main settings that I liked for the final render.
After the render, I took it into Photoshop to do color correction, a bit of paintover and that was all.
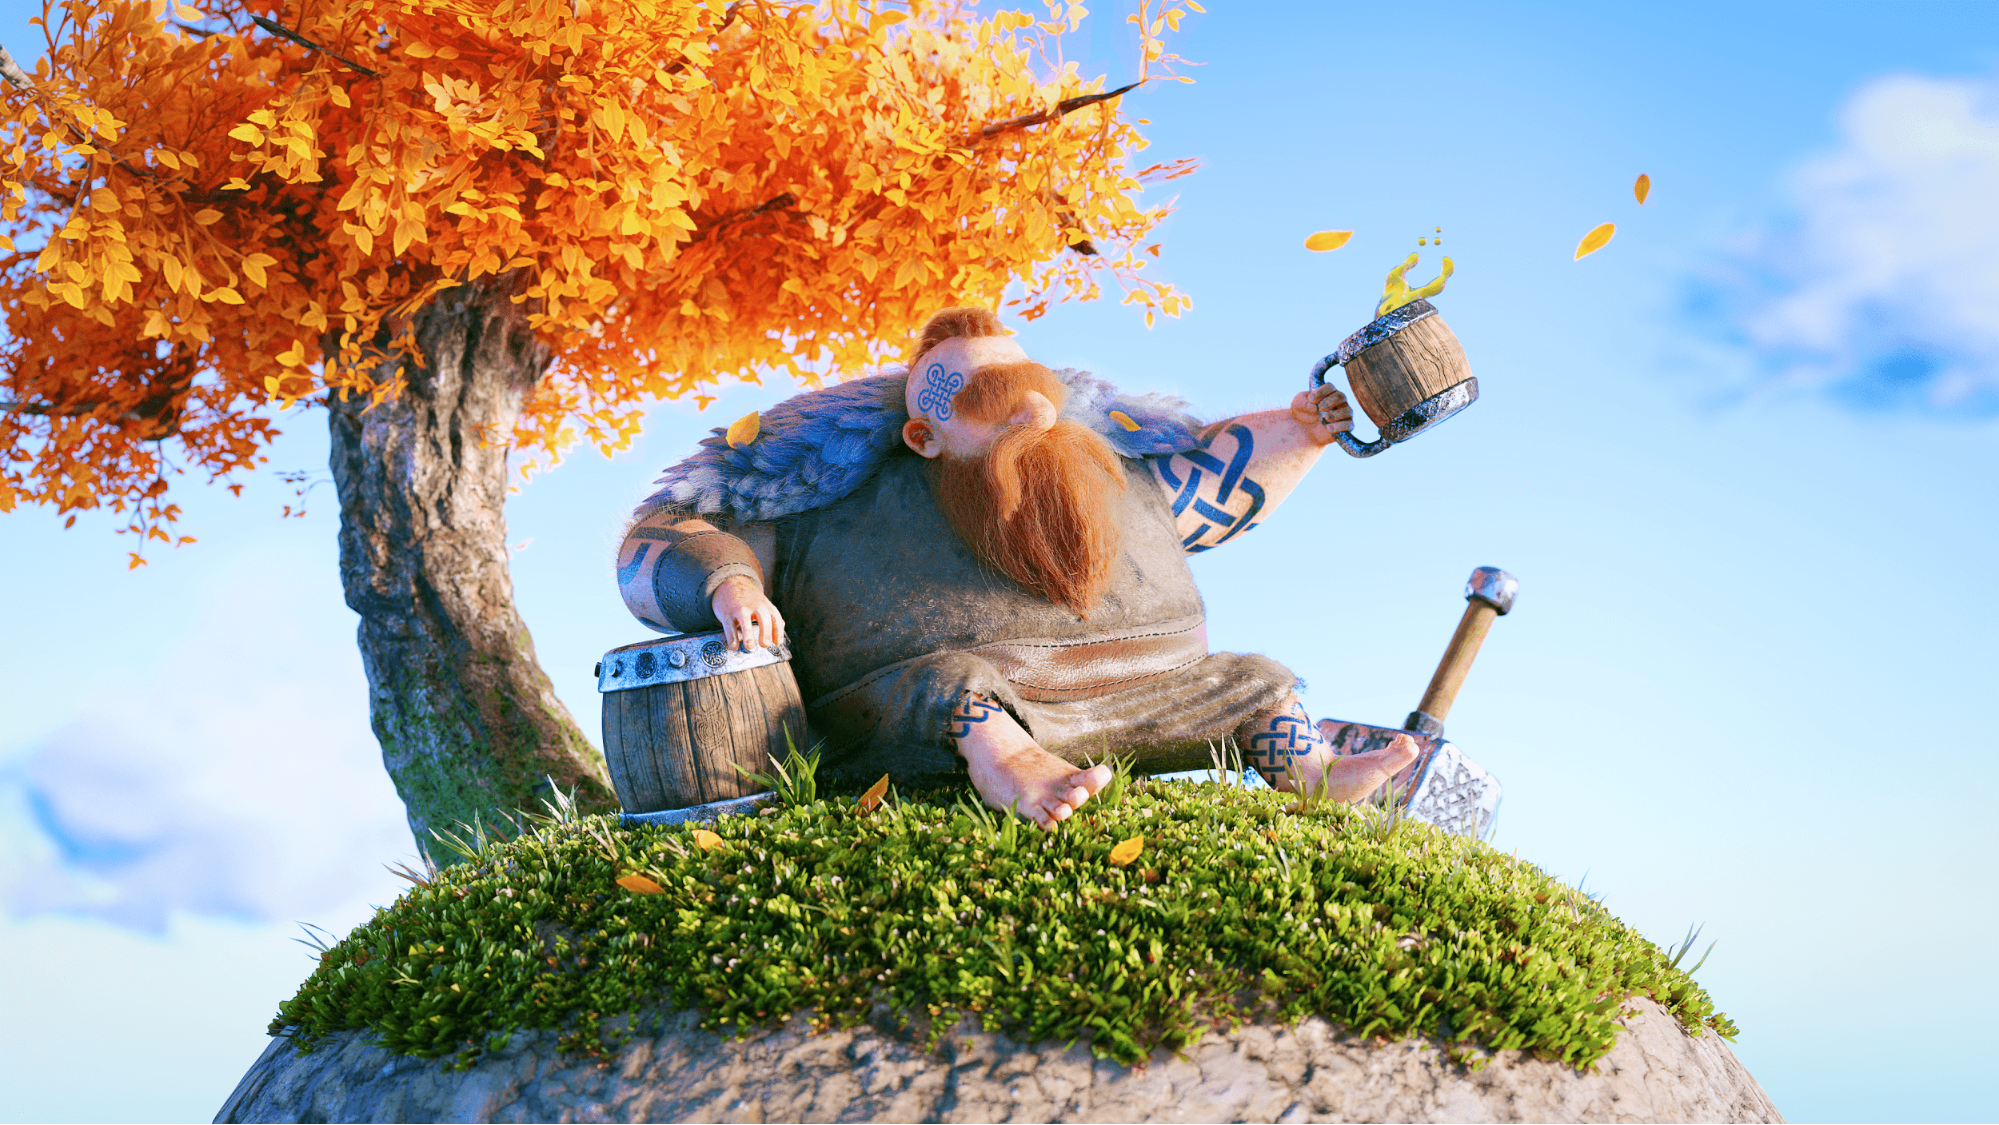
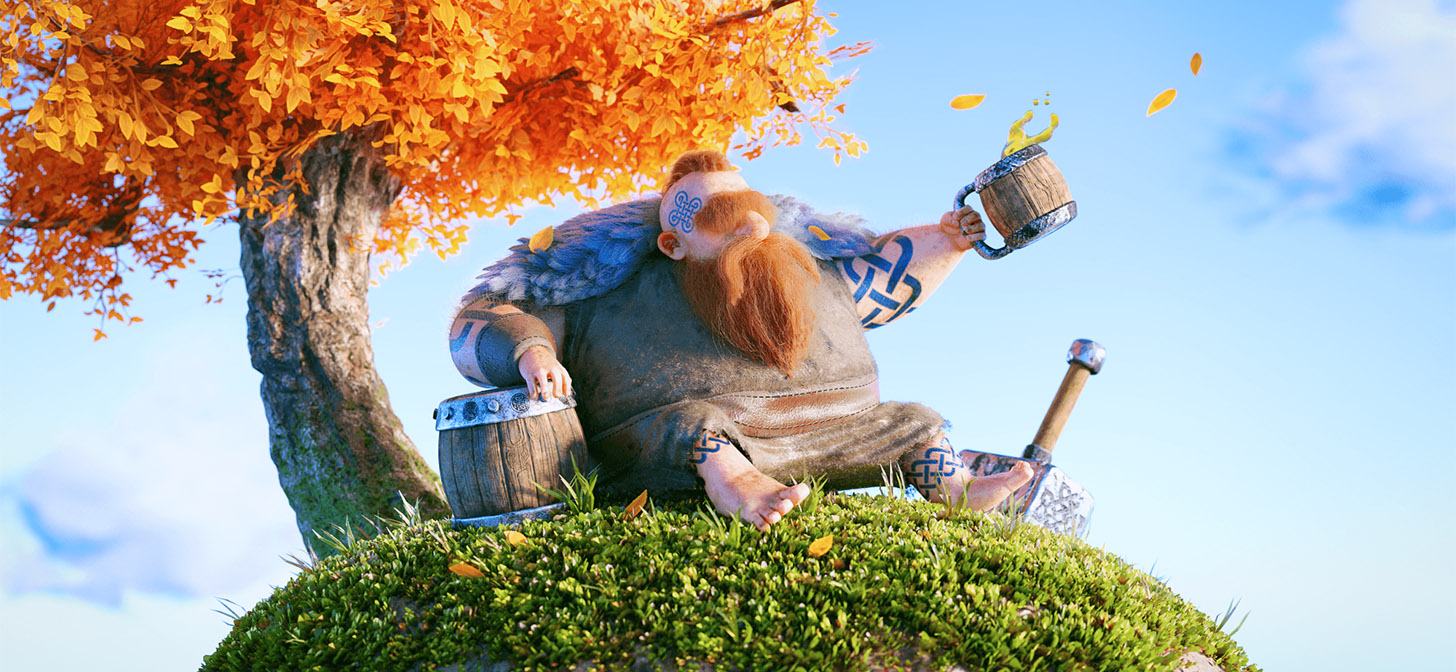
A fat Nordic Barbarian drinking his favorite drink, the hidromel, on his conquered land, after a sunrise that I have named Skall.
Here’s a short breakdown video:
https://www.youtube.com/watch?v=BIMZgVUK41E
Thanks so much.
If you have any questions about it, let me know, I’m happy to help.
If you want to follow me on my social media, the links are below.
About the Author
 Rafael Pereira Nogueira, 3D artist


Love it, nice color
Thanks man!
É de encher os olhos ver a construção dessa criação. Sensacional Rafa! Parabéns!
Opa! valew Lu, obrigadão!
To my classes was successful! kkkkkkk kkkkk Congratulations for the job!