

About me
Hi :D My name is Daniel D'souza from India. I am a 3D Generalist and have worked as a freelancer in the advertising field for the last 8 years. A year ago, in my free time, I decided to convert 2D designs and cartoons from different artists into 3D just for fun, because I enjoy modeling...it is, like, the best part of 3D.
To be honest, if it had not been for the COVID lockdown, I would have never been here, part of the Blender family. 👪 And thanks to Blender Guru for the tutorials—they really helped a lot. I have gotten the hang of Blender but still have a long way to go. It started with a 🍩 in June 2020 and later I ended up making Yzma the Cat. 😂
This is just a basic setup and very easy for anyone to do. And with Blender using the GPU, things are much faster in real-time.

Learn more on qarnot.com.
Concept
I happen to be a 90s kid and I really enjoy seeing the old movies, like this one and so many others. So, after watching the movie Emperor's New Groove for the first time in ages, I remember the 🙀 cat and it was one of my all-time favorite shots. So I had to try to make that frame in 3D and, since I had just started using Blender, it was good practice for me.
If you want movie recommendations, here are just a few movies you should see:
- Emperor's New Groove
- The Road to El Dorado
- Prince of Egypt, etc.
You get the idea. 😅
Modeling
For the modeling process, I used this video on YouTube by Flycat to get a good idea of the shape in 3D. I also took some images from the movie and Funko Pop to help me out for the pose. The first image is just reference images.
I always prefer old school modeling methods—slicing faces and extruding them—to give me more control over the topology. And also because my PC can't handle sculpting.
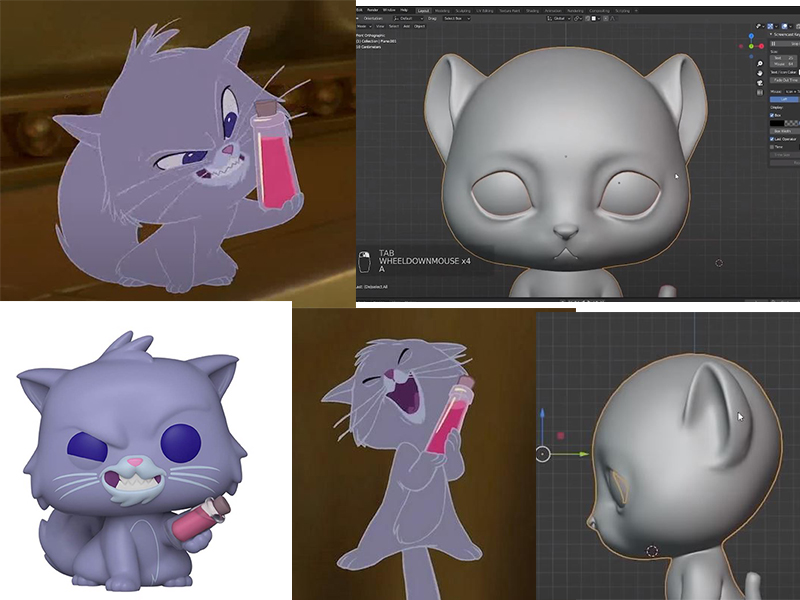
Reference images


Texturing and materials
Since I am relatively new to Blender, I didn't do much shading. Most of what I have used is the default materials with a bevel node plugged into the normal to give a feeling of softness in the gaps and edges. I only made a texture map for the mouth and used a displacement map to get a bit of height. And for the eye, I changed the texture from a flat color to get some details.

Lights

For lighting, I used a 3-point light system with one light on the left and another on the right. Because Blender doesn't have the ability to link lights yet, and to avoid the floor getting too bright, I used an edge light and a back light. I really hope that in the future we get this option. And if this is already possible, please do let me know because I can't seem to find it anywhere or locate documentation on how to do it in Cycles.
Oh yeah, I forgot I added a small plane inside the liquid to give it a glowy look.
The eyes were changed later as I had made a mistake in the light preview.
Rendering and post-production
I rendered only a static image and did color grading in Adobe Lightroom. It is very easy to use with the difference filter and Cc control, and the best part is, it’s free.
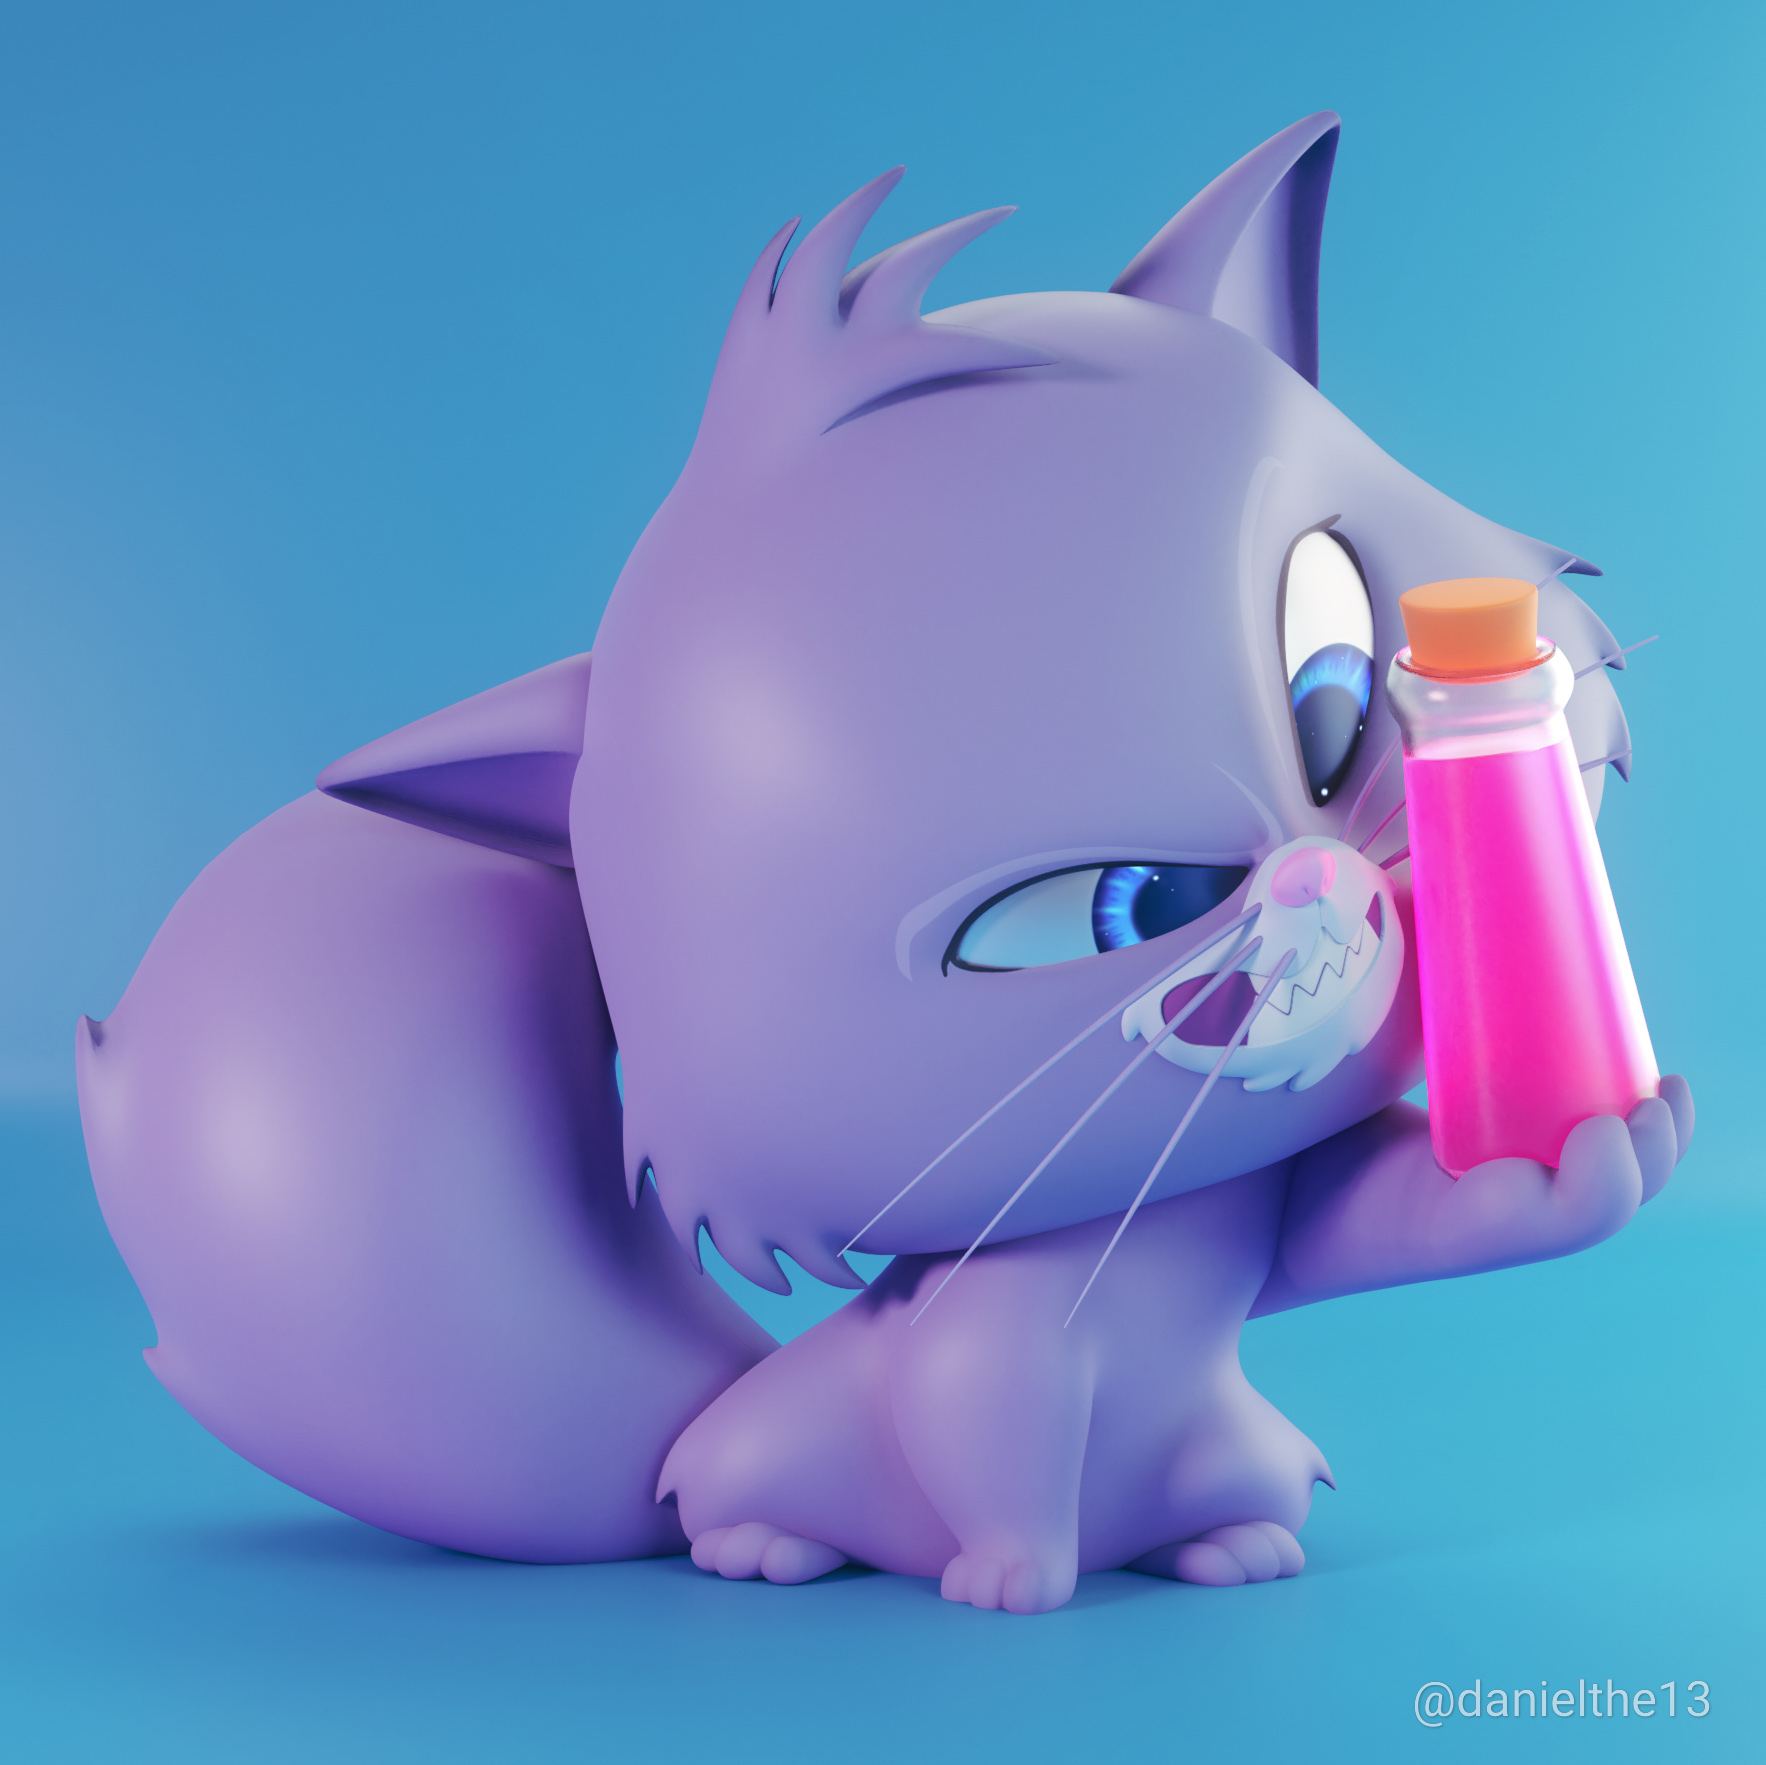
Final image
You can also see the full post on Instagram with the video of Yzma’s evil laugh. 😂 That started the whole idea.
I’m sorry if there weren’t enough technical notes. It has been only 6 months since I started using Blender and I am not so good with words.
But I still have a long way to go. And a lot of improvement to be done. I am open to any suggestions and tips.
Thanks
About the Author
 Daniel D'souza, 3D generalist
3 Comments
Great job. Keep going. I hope see you soon.
Awesome work!
I'm a 90 kid too, so many great characters there! However, I only saw the "emperor's new groove" from these three you suggested.
Welcome to Blender. Great character, love it.