
About me
Hello Blender Community, my name is Adam Zorian Radziszewski, and I am a self-taught 3D artist who is working in the archviz industry. I came from Poland but am currently living in The Netherlands, where I provide freelancing services. I started to use Blender about 4 years ago after spending a year using SketchUp. In my opinion, Blender is a really nice software but Cycles as a render engine is really hard to master; that’s why, almost every time, I use external engines such as Corona, V-Ray, and, currently, Octane. This year, I’ve made a few projects using Cycles, and it has many advantages, especially in the field of integration with Blender, but in the end, I am almost never satisfied with the output from this engine.
I was always interested in constructing houses but I have to admit that my studies in this area weren't satisfying. I am a construction engineer, who always wanted to create not to make calculations. The 3D world gave me the opportunity to build something that exists only on a piece of paper, in my head, or in the mind of an architect.

Learn more on qarnot.com.
The project
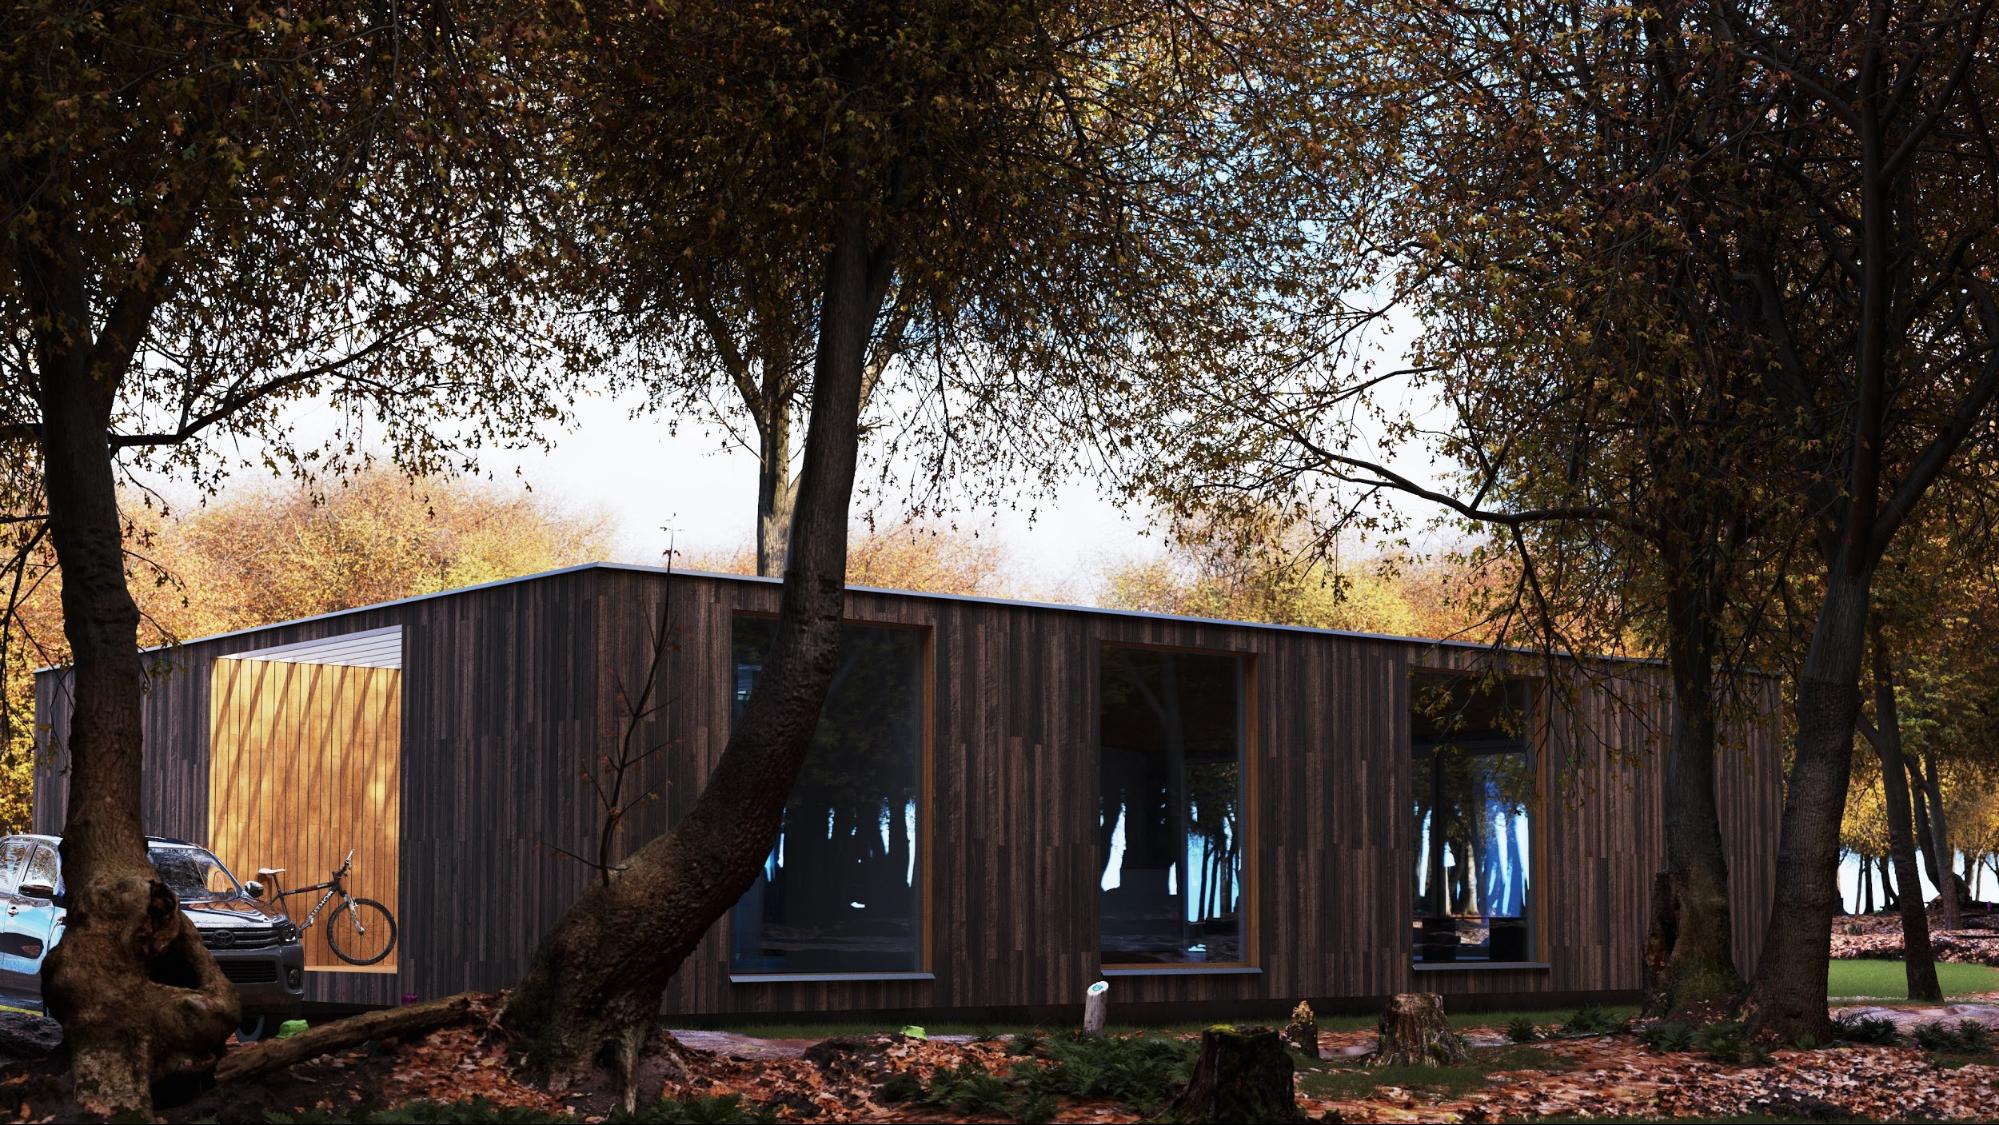
I wanted to create an autumn scene, where I could use my models that I created a year ago, after visiting one of The Netherlands’ forests. There I took plenty of photos that could be used in a photogrammetry application, in this case, Meshroom.
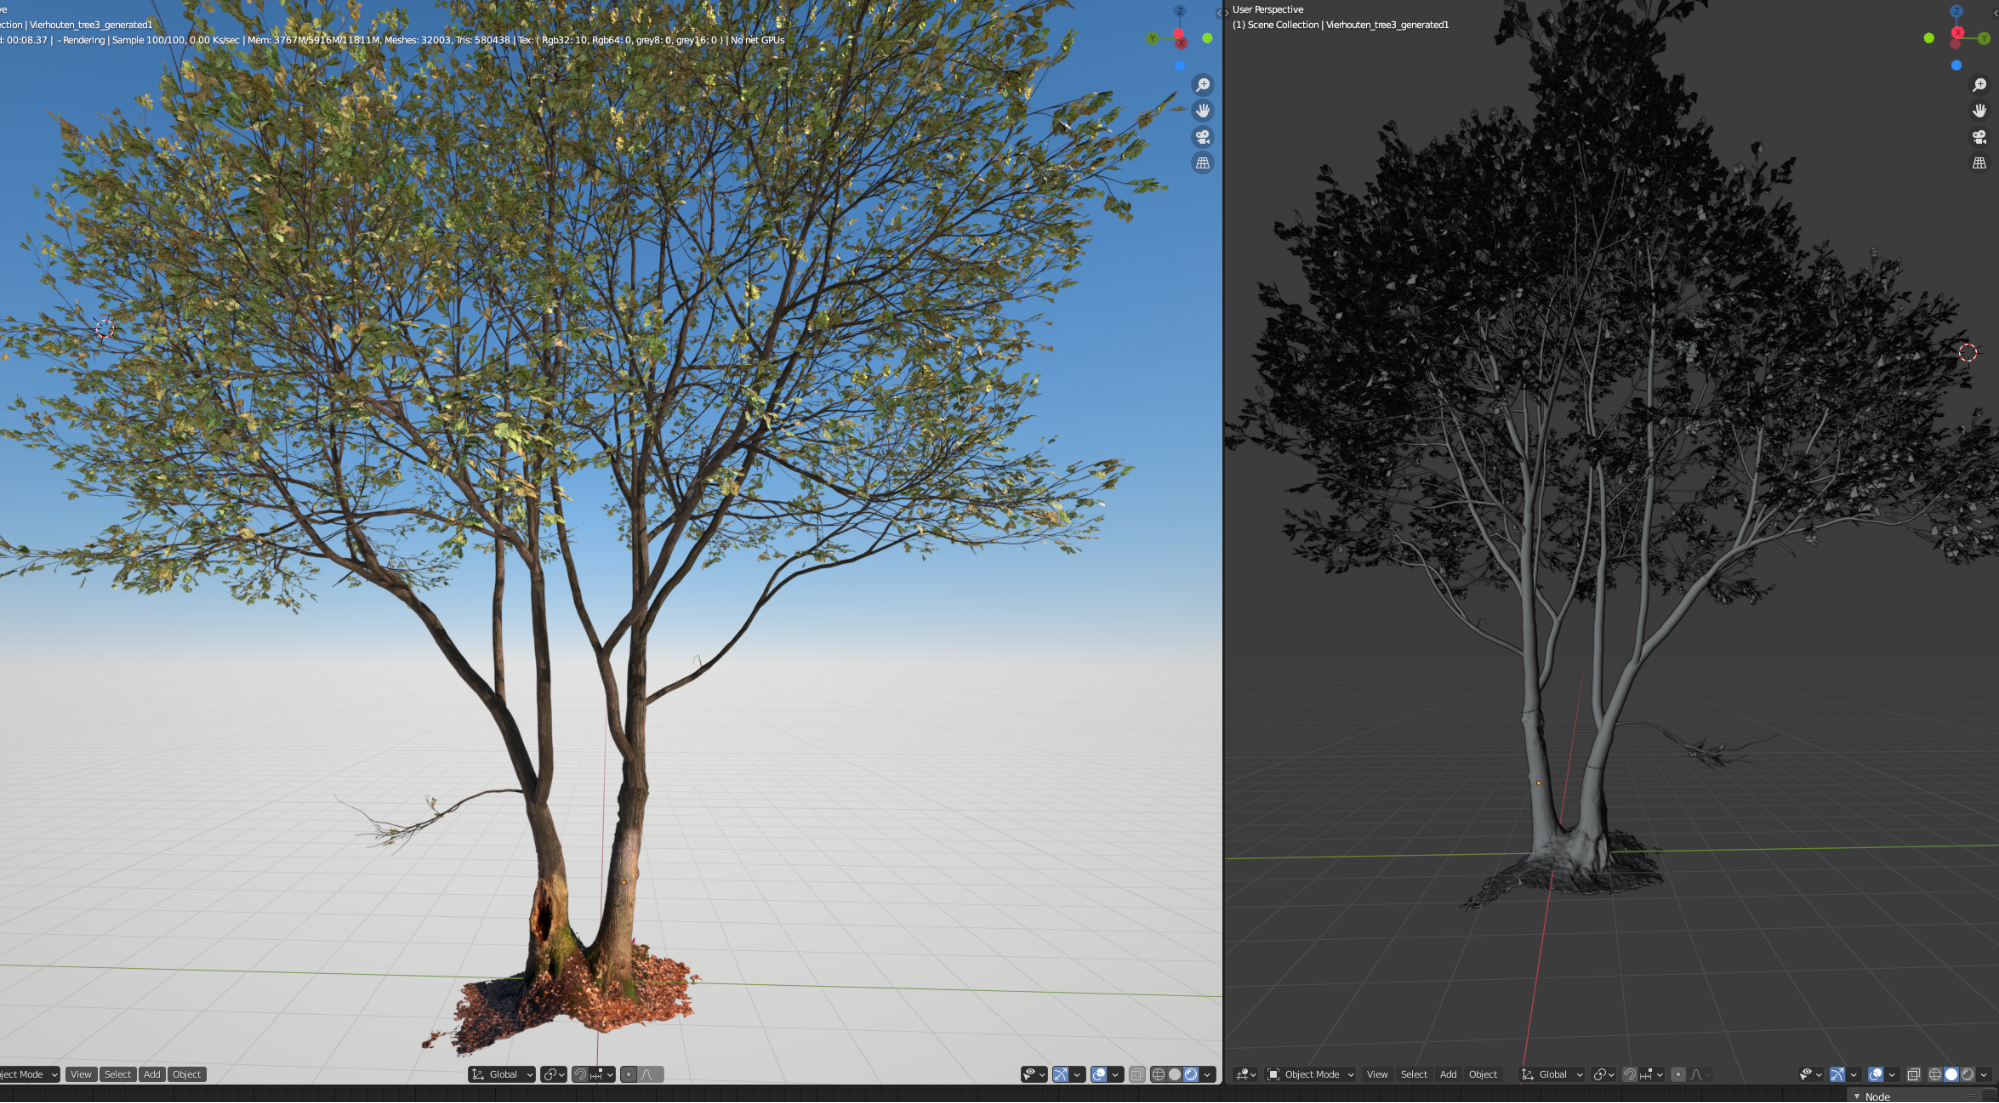
I was never happy with the trees that I bought from various sites, so I decided to make them myself. To create them, I used Meshroom, Instant Meshes for retopology, and Blender for baking into more friendly mid-poly models. For generating the tree output, first I used SpeedTree but eventually finished with the Grove 3D add-on for Blender, which gave me more control of the particle settings. The first tests of the autumn scene were slightly different from the final output that I had this year and looked like this:
This year I decided to start from scratch on a model that I had already made for a client for a Cycles-based project made at the beginning of the year. The whole model of the house is based on PDF files and was modeled using modifiers, first with Cycles materials, then re-shaded for Octane. For example, the wall siding looks like this:
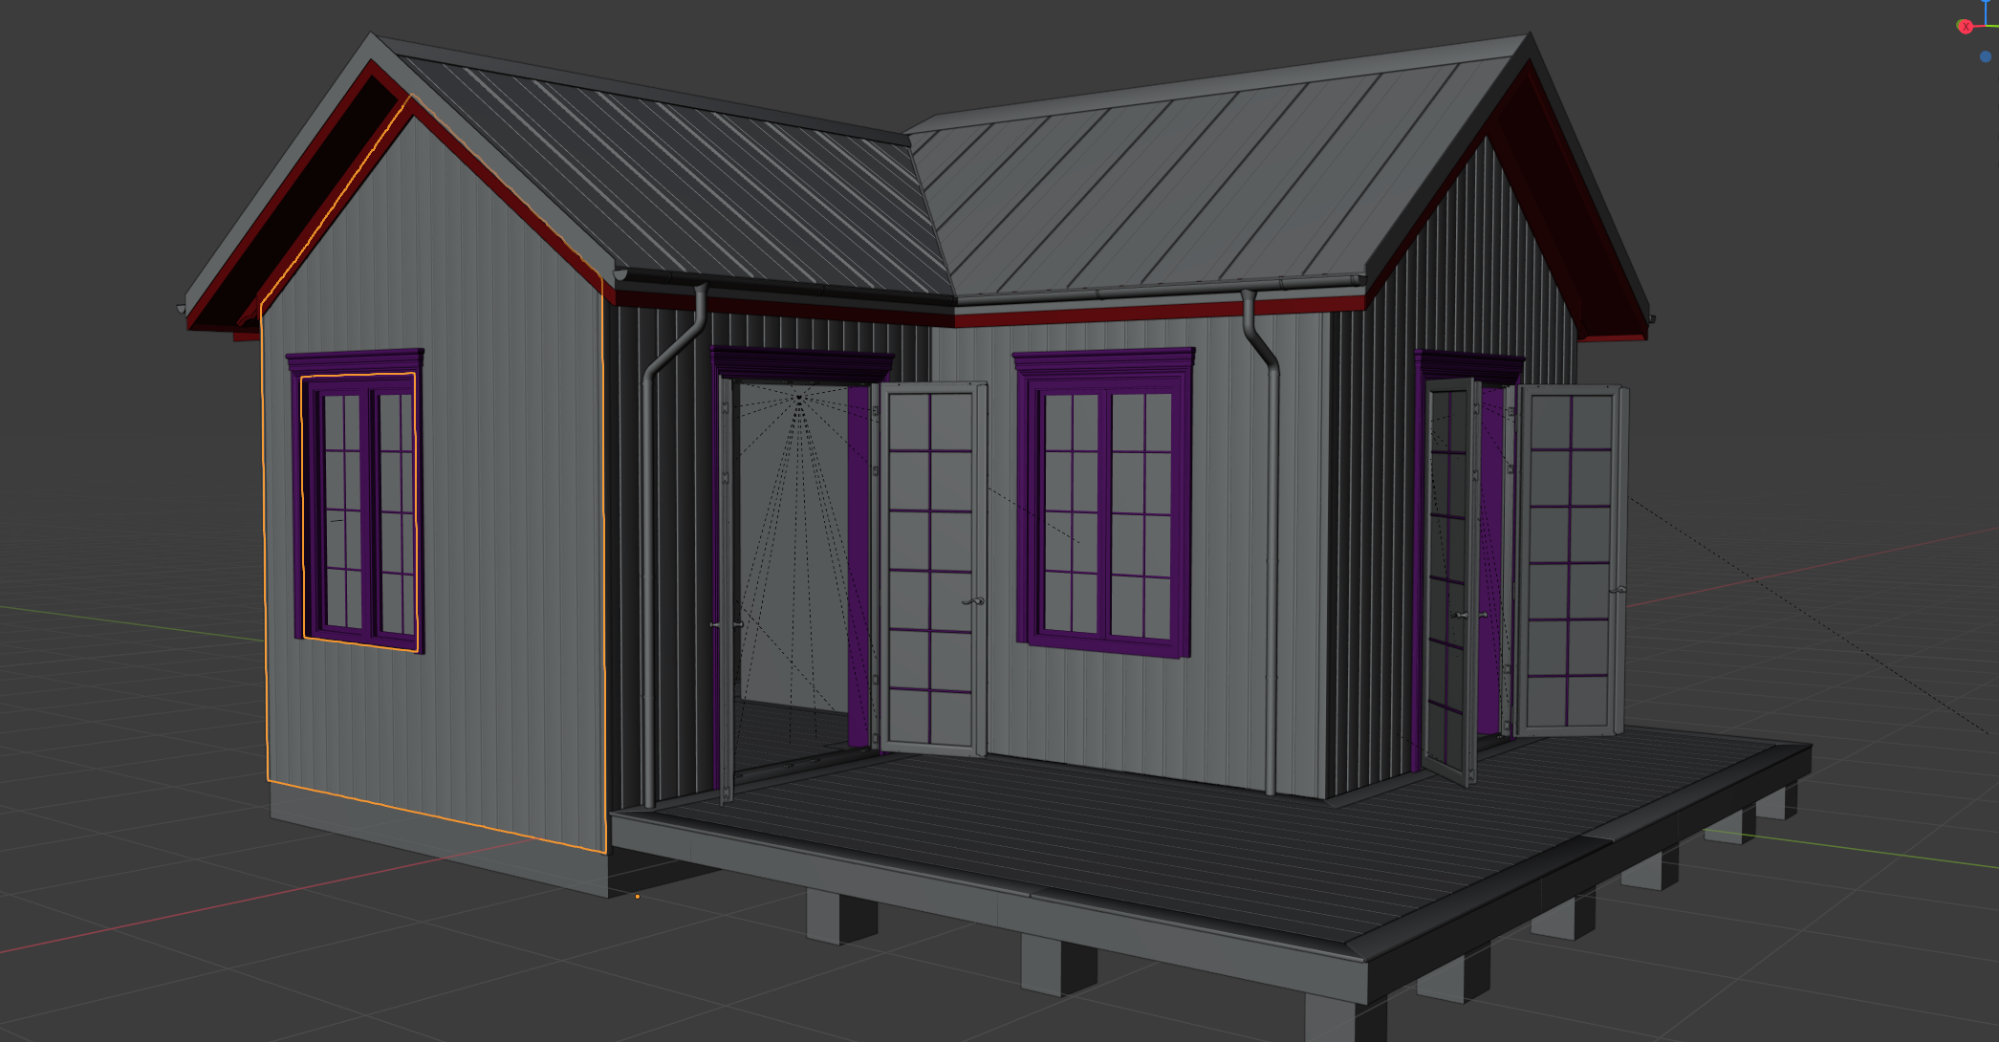
And in edit mode:

The same for the other parts:


Trees used in this project
I am really fascinated by how trees grow and almost every time I see an interesting tree, I make a photoscan of it (weather permitting). The rules are simple: the tree has to be dry and it should be overcast weather, without any hard shadows from the sun.
Nowadays, with everyone keeping a nice camera in their pocket, there is no reason for everyone not to try to make their own photoscanned models.
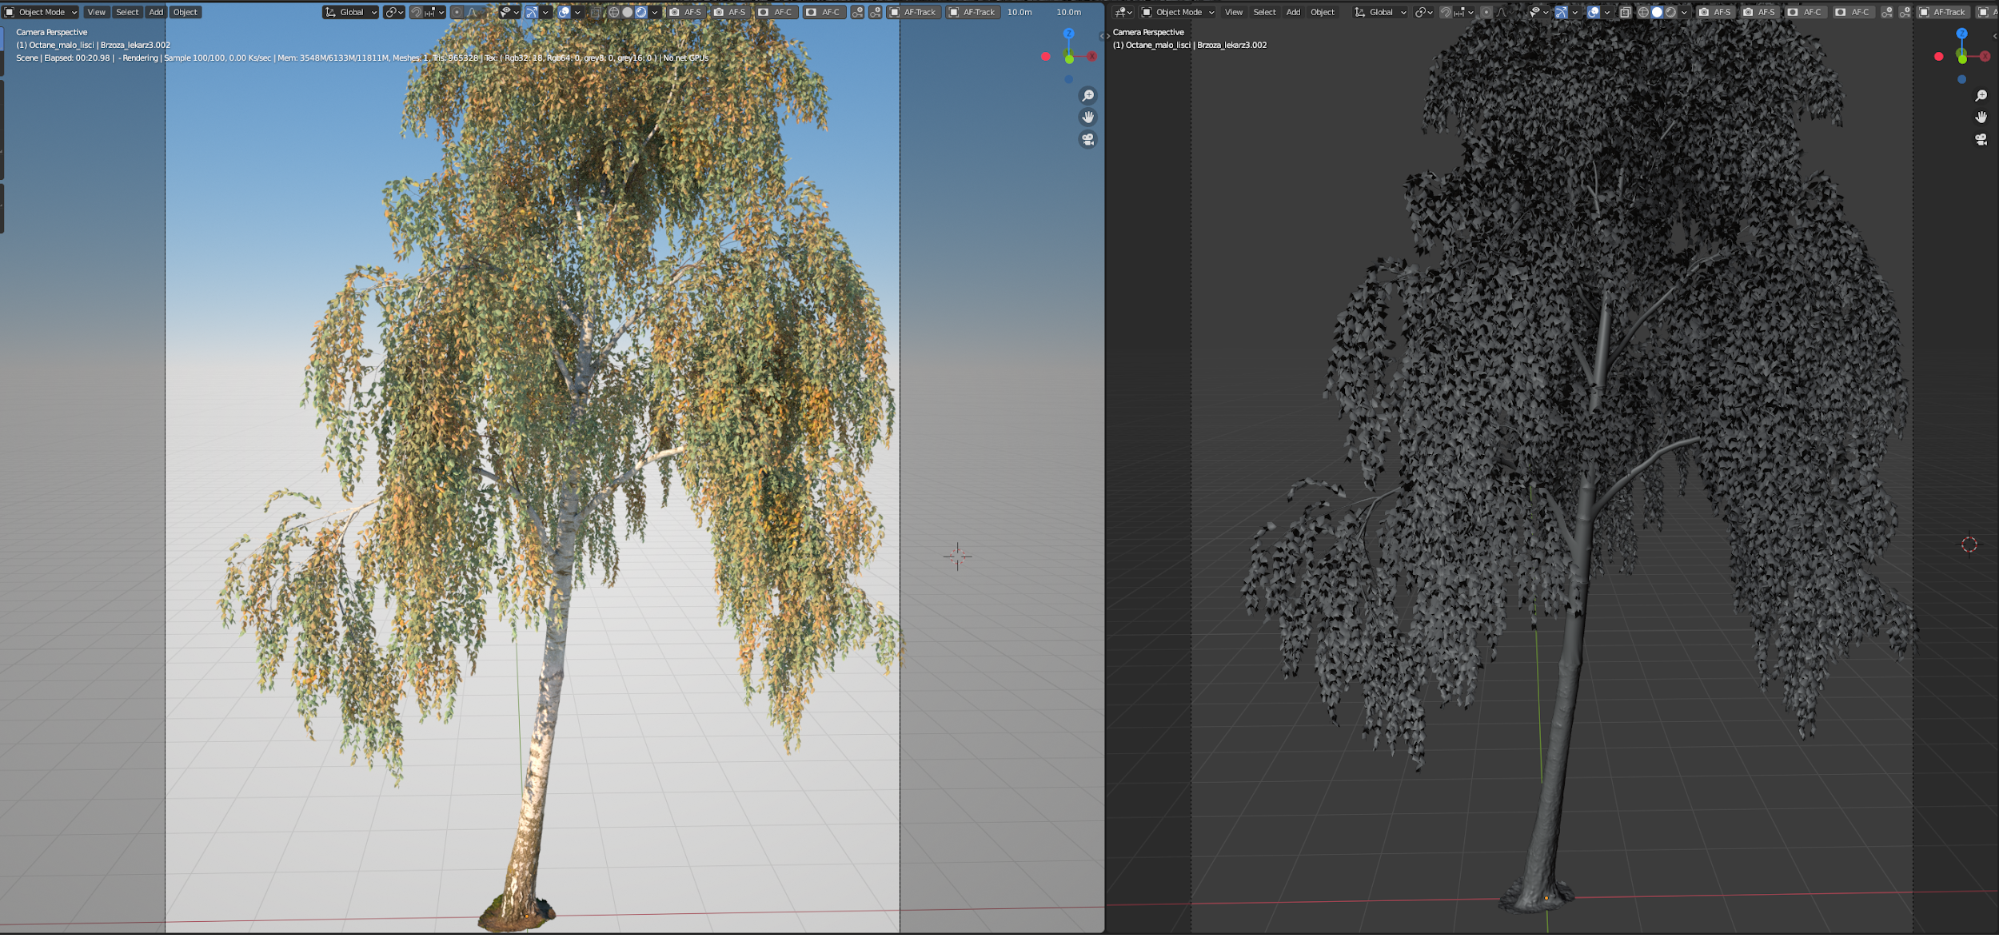
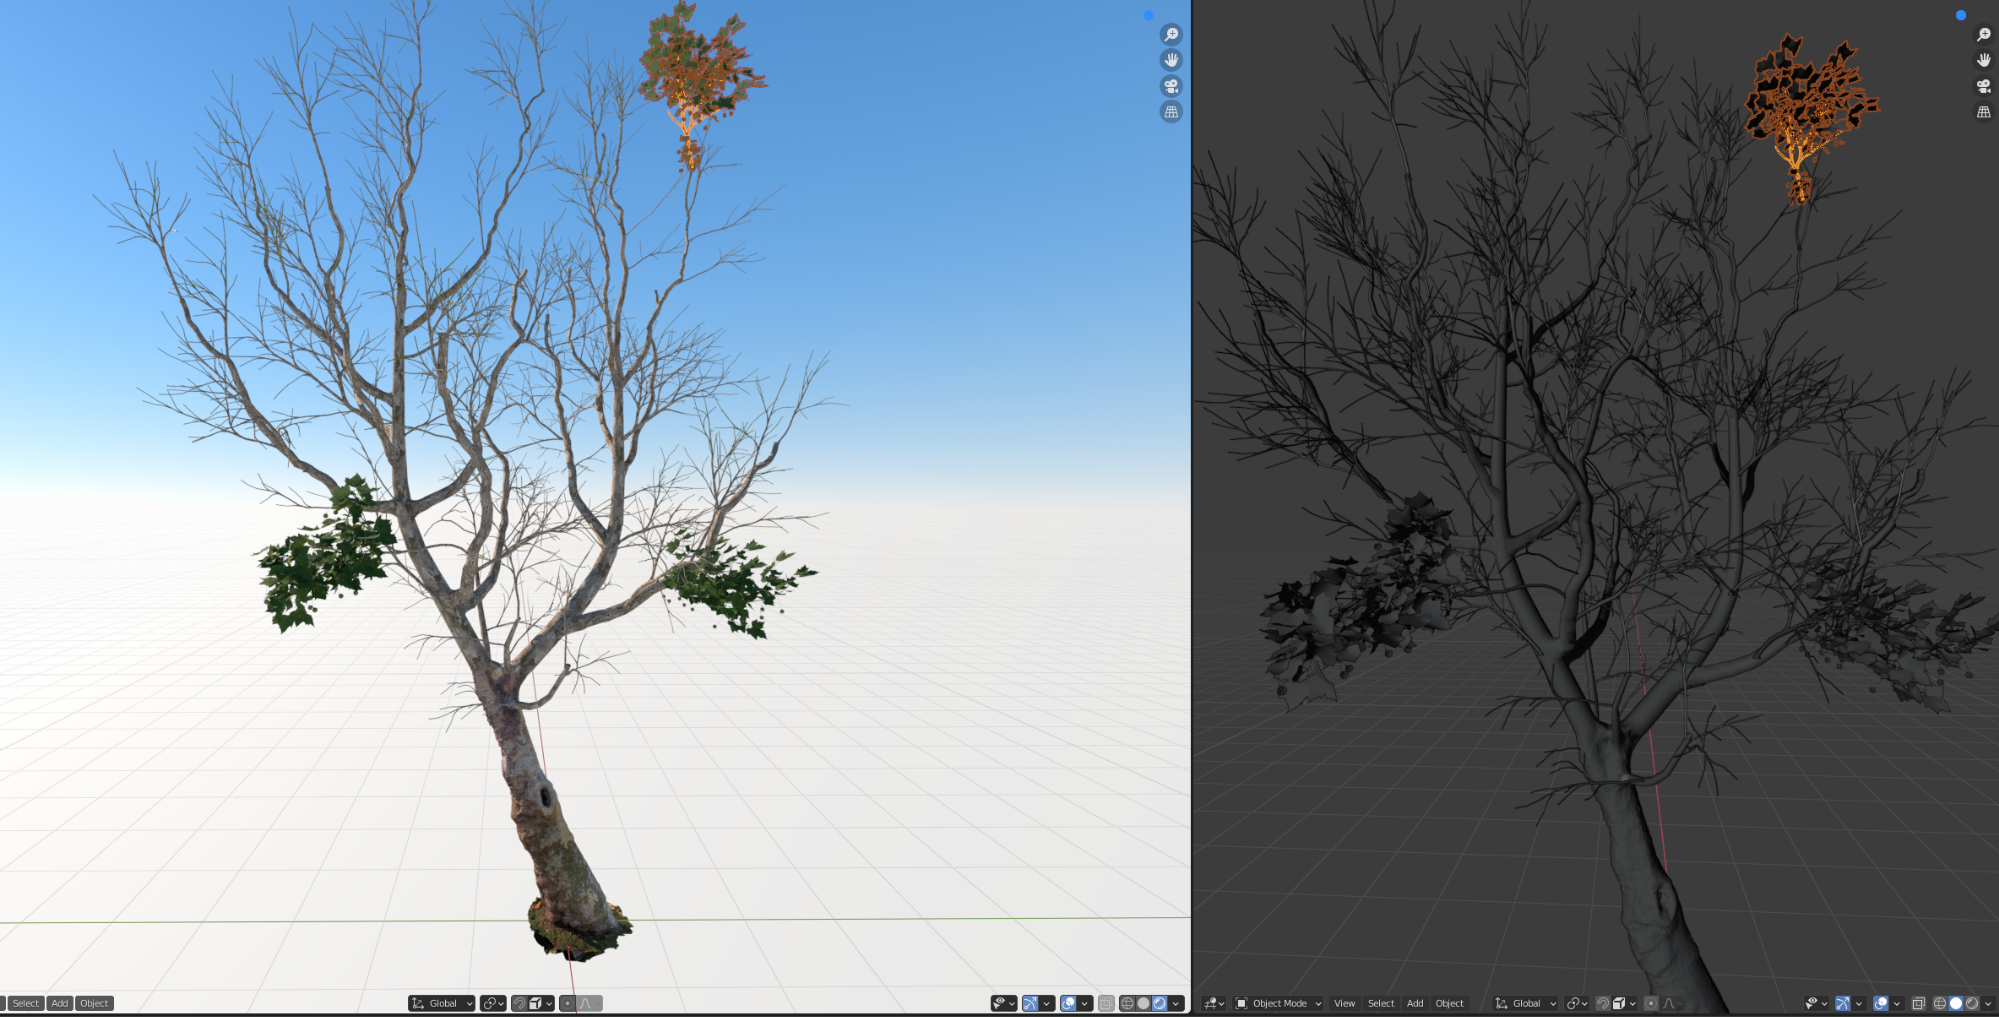
These trees that are on the scene were made more than one year ago, when there was no option in SpeedTree to grow from photoscanned trunks, so I ended up using The Grove addon for Blender. Now, SpeedTree includes this option in the software but I am not a big fan of SpeedTree outputs, which are not flexible enough in later production stages. The best outputs that can be achieved in Blender require mixing photoscanned trunks with SpeedTree branches (one or two levels) and then making smaller branches with The Grove. That way you can work with particle settings for the twigs instead of having high poly meshes. And here I will show you a few outputs that I made using various techniques:
Output made using SpeedTree:
Output made using The Grove 3D:
Output made mixing two techniques:
Constructing the scene
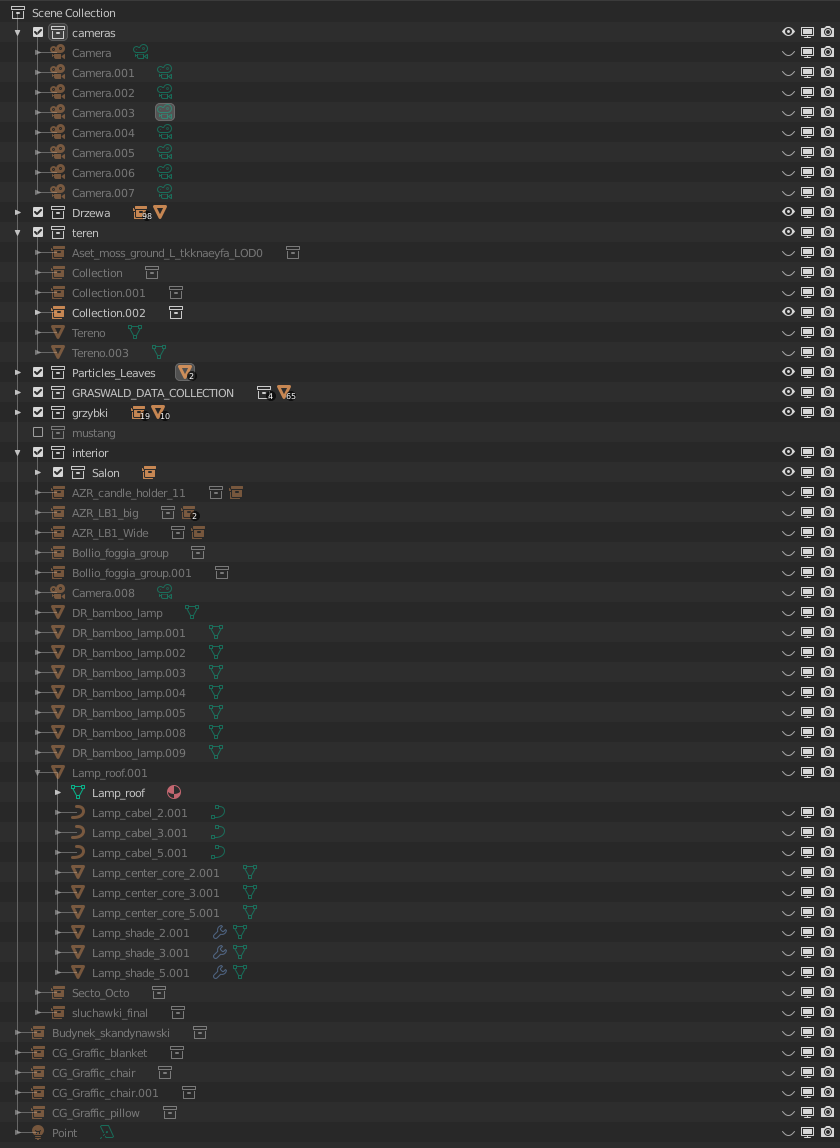
For me, the most important feature of Blender is linking. It allows me to keep the scene clean and easy to navigate. Four years ago, when I was working on an average scene with a lot of high poly models, it sometimes took two minutes to move one model. Then I decided to use linking instead of keeping everything in one .blend file. In this scene, almost everything is linked from my own asset library. And I have to mention that I really like how the Blender developers managed linking using Windows file explorer. When you have two monitor devices, you can easily link something using drag-and-drop.
The problem with linking models, however, starts when you have a huge scene with a lot of models. Then, opening this kind of scene takes some time. I think that is based on RAM speed, but I could be wrong. Maybe someone will give me an answer to that?
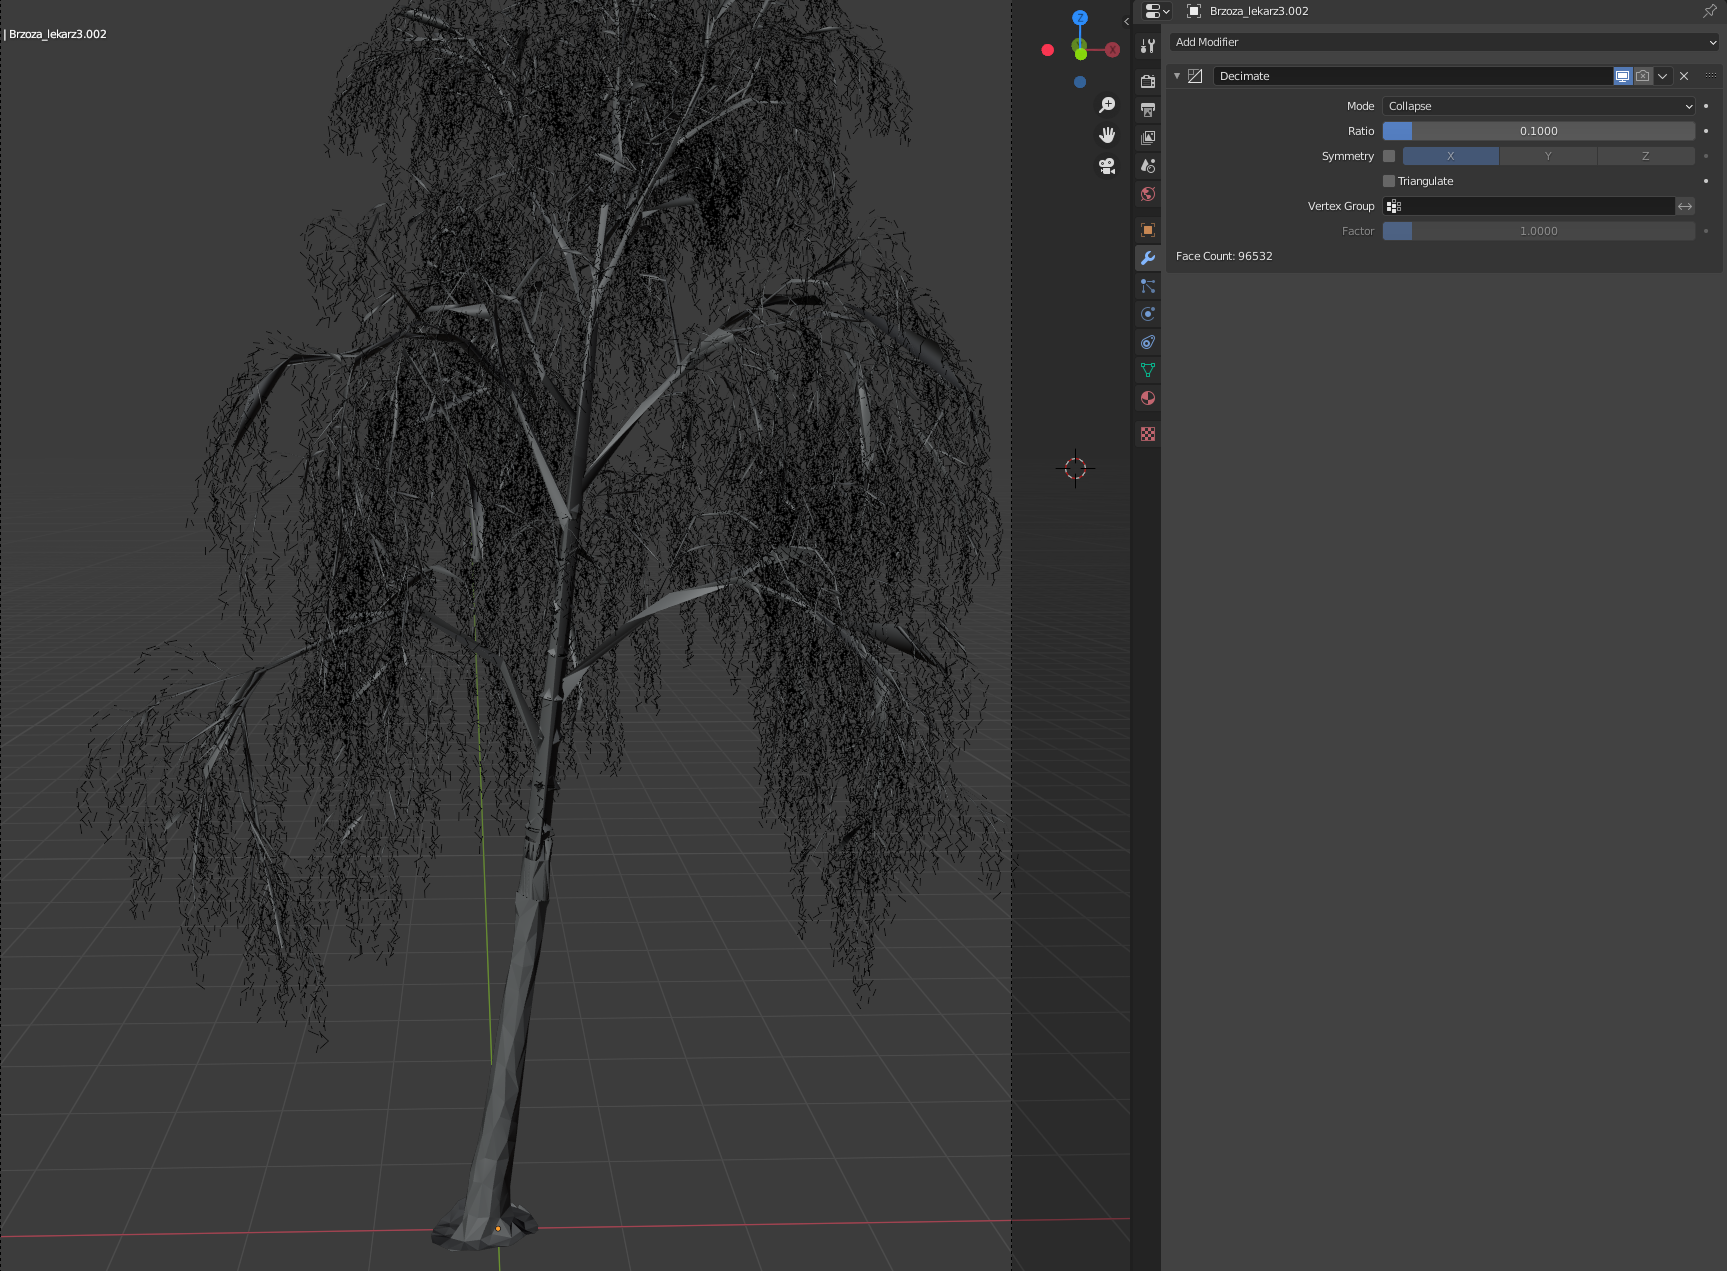
The linked models/collections in my projects are using the Decimate modifier, which is set only for viewport. That allows me to work on projects with a lot of models without any problems with the Viewport. Also, the preview render in the viewport works faster this way and for setting the lighting it is unnecessary to have high poly models everywhere. I used this technique when I was working in Corona with Blender and now I am using it with Cycles/Octane projects.
Coming back to my scene, except for the linked models there are only a few editable models: ground, meshes for the particle settings, and imported Graswald assets. And that's all.
I keep a separate model for Particle settings because it has to cover my editable ground and linked models from my asset library, in this case, models provided by Megascans. This approach allows me to paint particles on the meshes that cannot be covered by default.
Particle settings were painted according to the camera view, and only for this specific shot. After finishing one shot, I moved to the next and, using the same vertex groups, I painted everything from scratch.

To cover a few meshes with another mesh, I used proportional editing and snap-to-face with Project to Individual Elements turned on. After this operation, I make a few adjustments using the Sculpt tool and am then ready to weight paint the particle settings.


As many artists as there are, that's how many ways there are to populate particles. Most of the time, I use weight painting. I wish that Blender developers would help to speed this process a little because painting on dense models can be really painful. I saw sculpt masking and started to wonder if this method could be used to create weight paints. If yes, that could be awesome.
For the other surfaces, such as the car, bushes, and house, I created one set of particle settings for the leaf meshes and one for debris and populated them the same way I did the ground mesh.

Lighting
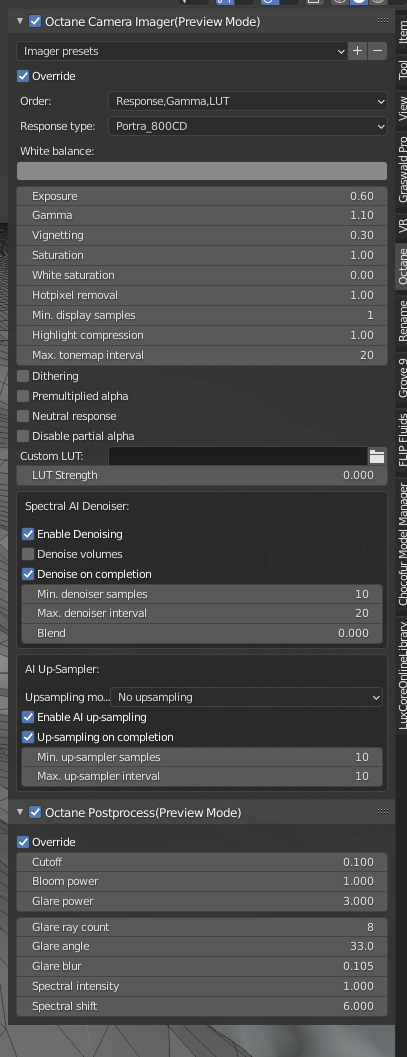
Nothing fancy here—I did not use any special techniques to light the scene. Most of my scenes are made using Sun/Sky techniques. This time I decided to use HDR lighting, and for these shots, I used a 3D collective map for full sun and Noemotion blue sky for night shots. I also made one shot using an HDRI Haven map, but ultimately it didn't fit the look that I was going for. If you are working with Octane, you have to keep in mind that you need to change image gamma to 1.0, because by default it is always 2.2.

Post-production
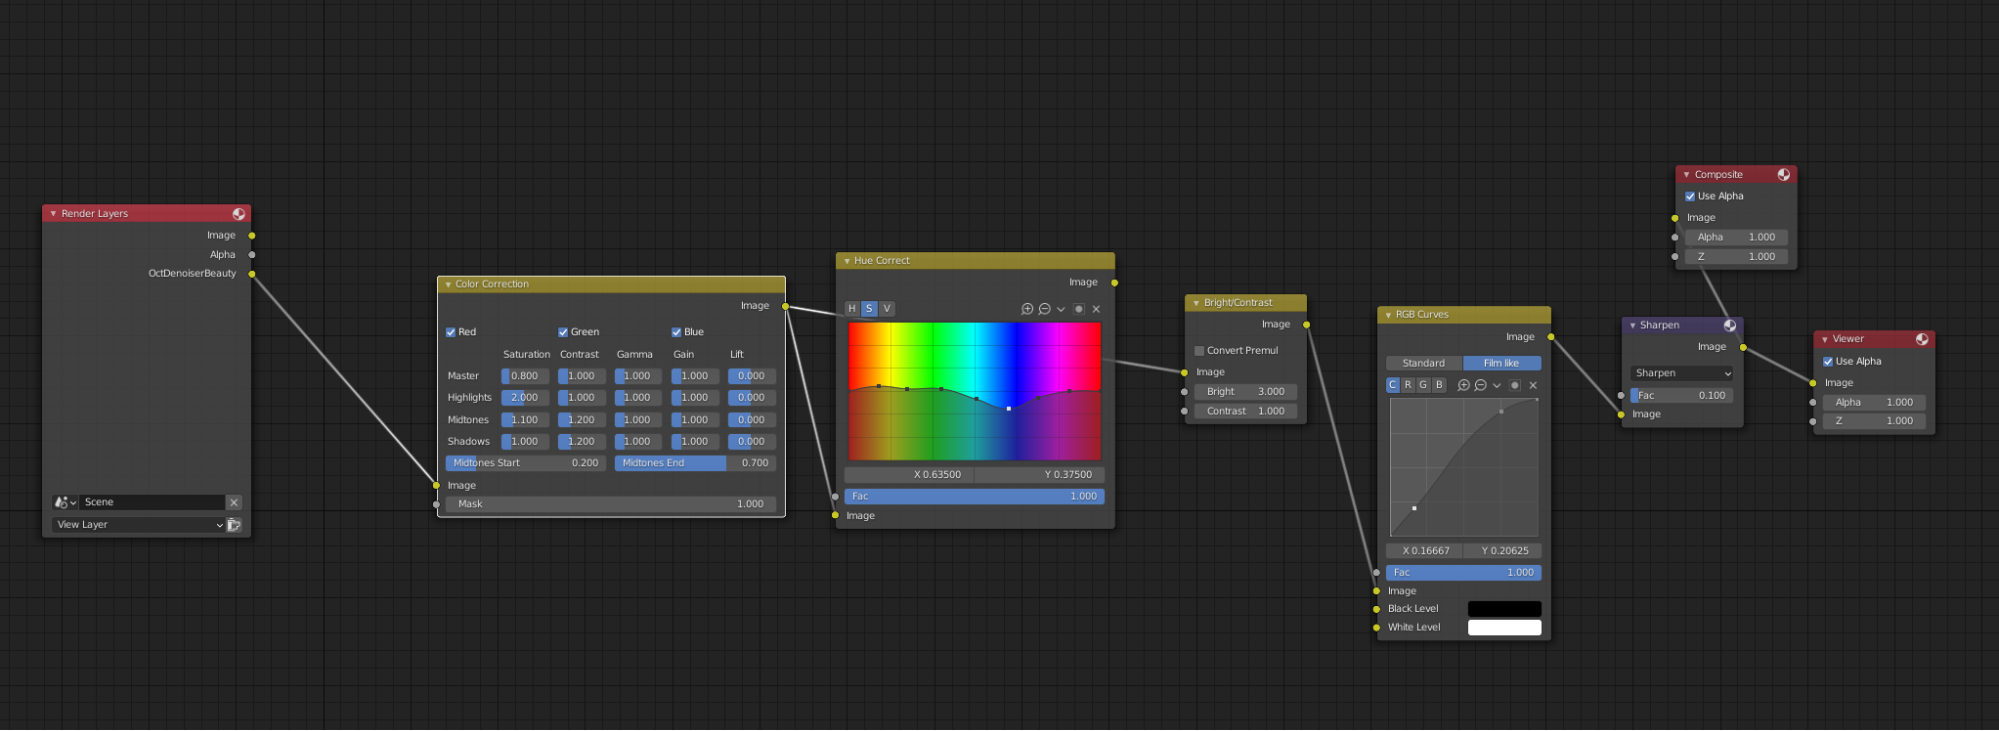
I really loved frame buffers from V-Ray/Corona which allow you to make adjustments while the render is working. Octane has got its own color management, which works a little bit better than Cycles color management, and for many projects, I turn Blender color management off and use only that provided by Otoy. It isn't as powerful as V-Ray/Corona, but still, in my opinion, gives better results than Cycles. For the color correction, I used the Blender compositor, which works fine with Octane render. Besides that, I didn't use any additional software to manipulate these images.
Cycles Color Manager:

Octane color manager:
Post-production in compositor:
Final Renders


About the Author
 Adam Zorian Radziszewski, Freelancer and owner of AZR Studio, a one-person company specializing in Archviz.
2 Comments
Nice work. Keep going.
Thanks! I'm glad that you like it :)