
jimillustrator writes:
You can add a removable hat to a character with a rig using a combination of non-deform bones, bone constraints, drivers and custom properties. It’s a completely modular system that can be added to an armature without affecting any of the bones used to animate the character itself.
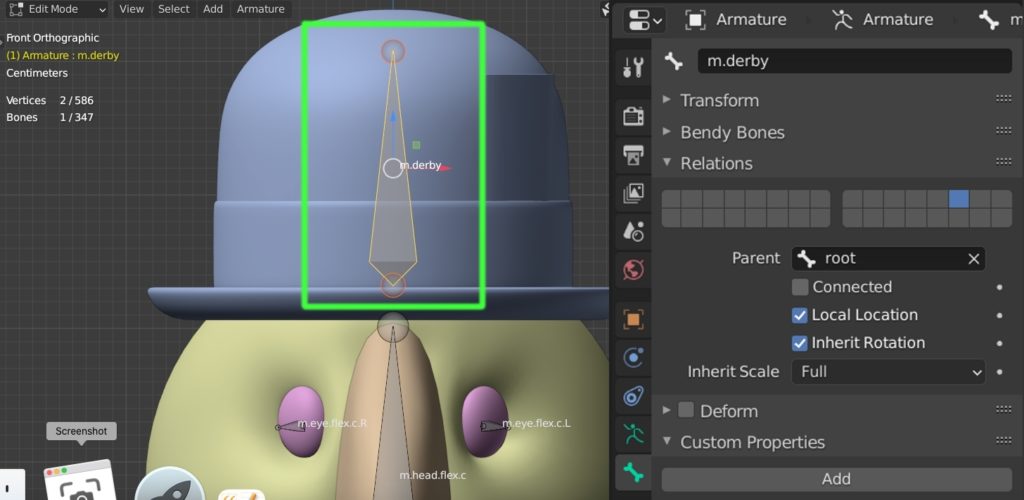
1) I added a new non-deform bone to my character’s armature for the hat and parented the hat to it (using Bone as the Parent Type—the hat doesn’t need any deforms) The hat bone itself is parented to the root bone of the character so it can move independently. I named the bone “m.derby” (the m denoting a mechanical bone) and moved it to my mechanical bone layer.
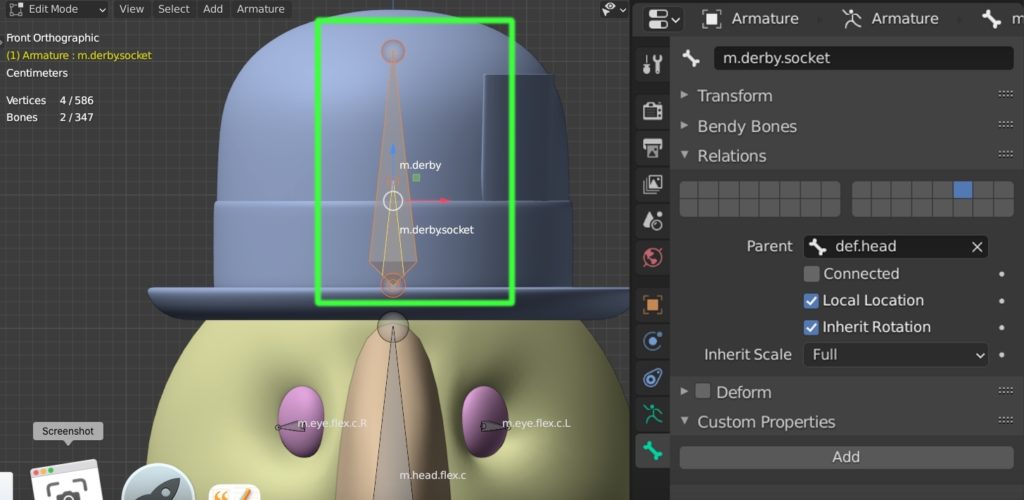
2) I extruded a new non-deform bone from the same location as the m.derby bone and parented it to my character’s head bone. I named the new bone “m.derby.socket” and put it on the mechanical bone layer. This bone will be used to force the hat to follow the head through bone constraints.
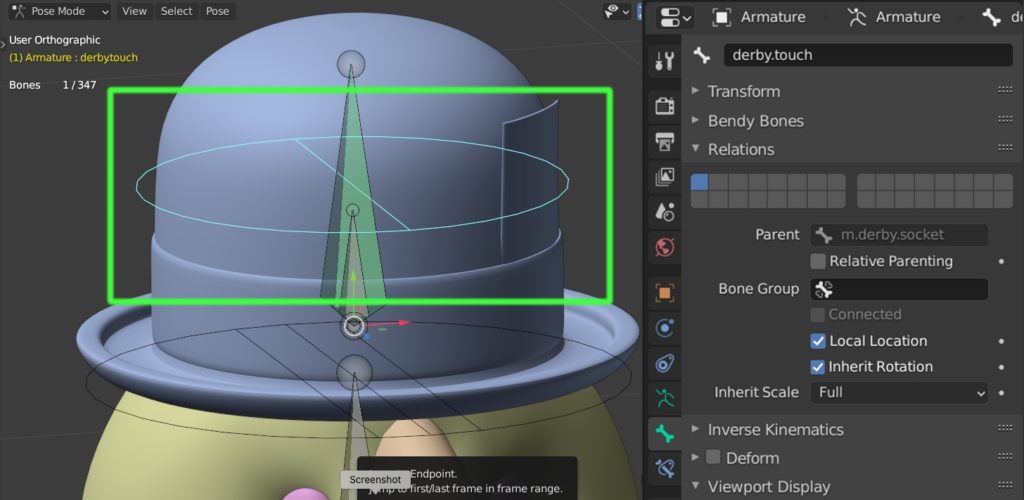
3) I duplicated the m.derby bone and named it "derby.touch", putting it on my touch bone layer. I parented this bone to the m.derby.socket bone (Adding the custom bone shape makes it easier to work with bones in the same location as well as make them more intuitive to animate with!)
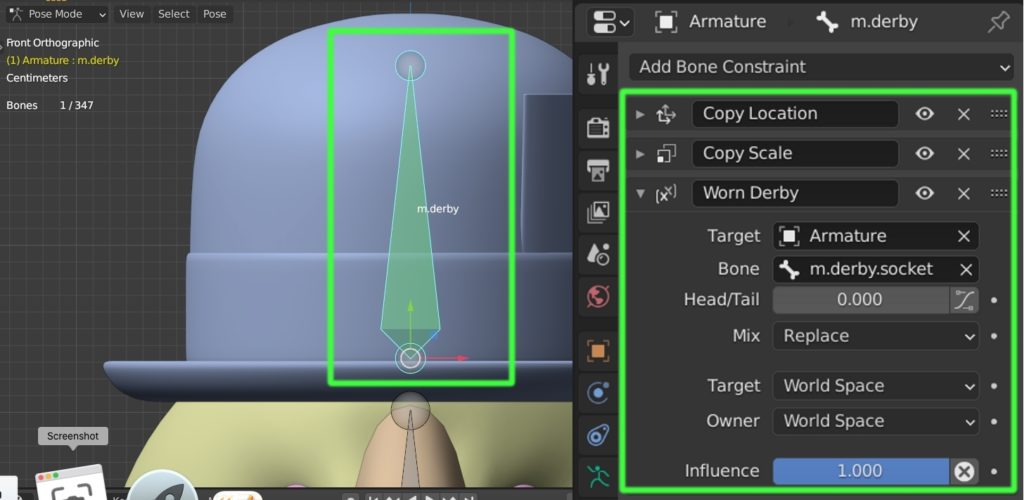
4) On the original m.derby bone, I added Copy Location, Copy Scale and Copy Transforms constraints (that stacking order is important!) with the m.derby.socket bone as the Target. I renamed the Copy Transforms constraint "Worn Derby" to differentiate it from the second Copy Transforms constraint I'll be adding in the next step.
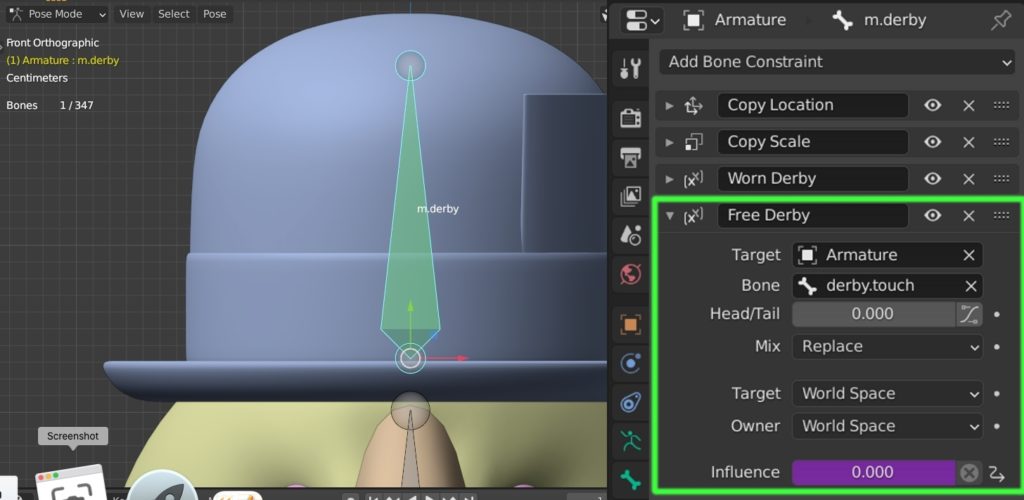
5) I added a second Copy Transforms constraint to the m.derby bone, this time using the derby.touch bone as the Target. I renamed this constraint "Free Derby" and added a New Driver to it by right-clicking its Influence.
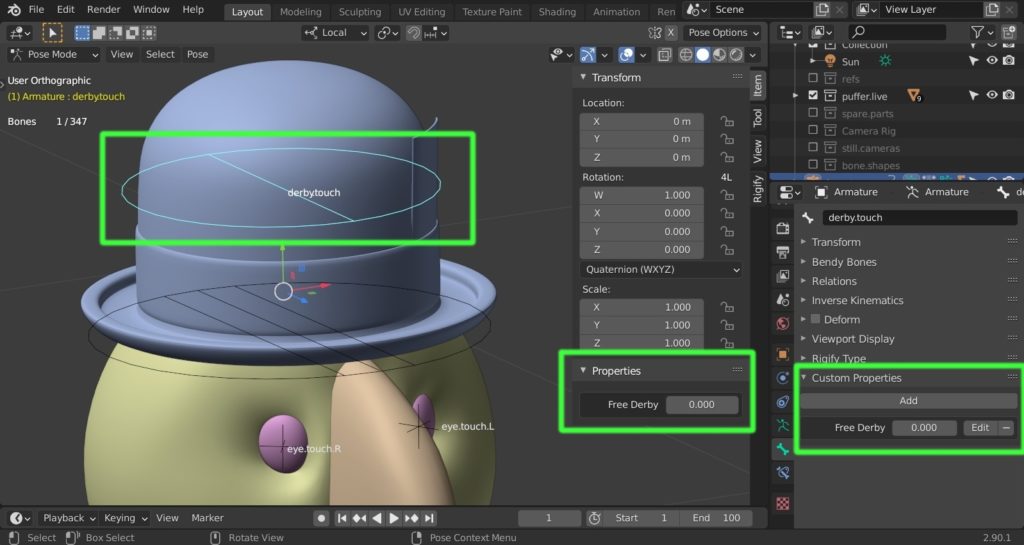
6) On the derby.touch bone, I created a Custom Property and called it "Free Derby", copying the Data Path by right-clicking in the custom property's field in the Item Menu.
7) I selected the original m.derby bone and selected the driver in the Drivers Editor, changing the Type to Averaged Value, the variable type to Single Property with the Armature as the target and pasted the data path in the Path field, then Updated Dependencies.
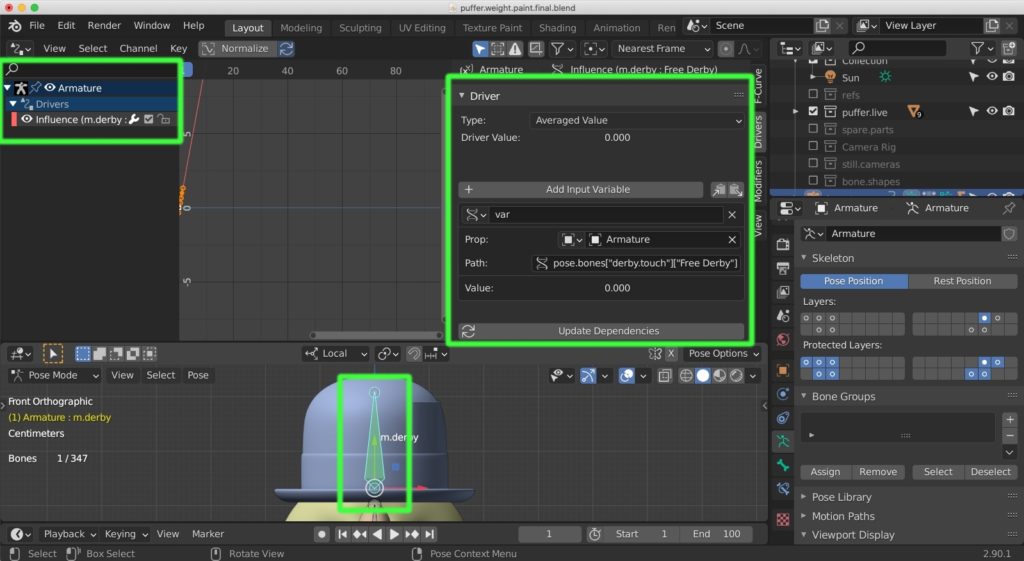
8) The Free Derby Custom Property on the derby.touch bone can now be used to control the derby moving with the head or independently. Setting it to zero will force the hat to follow the head. Setting it to 1 will force the hat to move with the derby.touch bone.


2 Comments
nice trick, also you can use the child of constraint for that purpose....
Great suggestion! I'm so used to doing it this way I never used the child of constraint. Thanks for the info!