
About me
Hello, I’m Ibrahim Topal. I was born in Austria and moved in 2013 to Turkey and have lived here since then. I’m a self-taught graphic designer for over 13 years and work full time in an advertising agency here in Turkey. I always had an interest in CGI and tried to implement 3D into my 2D work. The first 3D program I used was Maxon Cinema 4D, and the fact that you can create anything in 3D was mind-blowing to me, so it quickly became my number one shortcut on my desktop. I tried to model and render everything I saw, and, working in the advertising industry, making product visualizations was something I always liked to do.
In 2017, I moved to another workplace, where I no longer had access to a C4D license, so I had to use a free program, and I downloaded Blender 2.78. I started to learn the UI, watched a ton of tutorials (thanks to Blender Guru), and basically tried to achieve the same level of knowledge as I had with C4D. Being able to get immediate render feedback and working with nodes was new and refreshing. With time and Blender getting better and better, at some point, it replaced C4D in almost every aspect for me.
Learn more on qarnot.com.
About “Snickers”
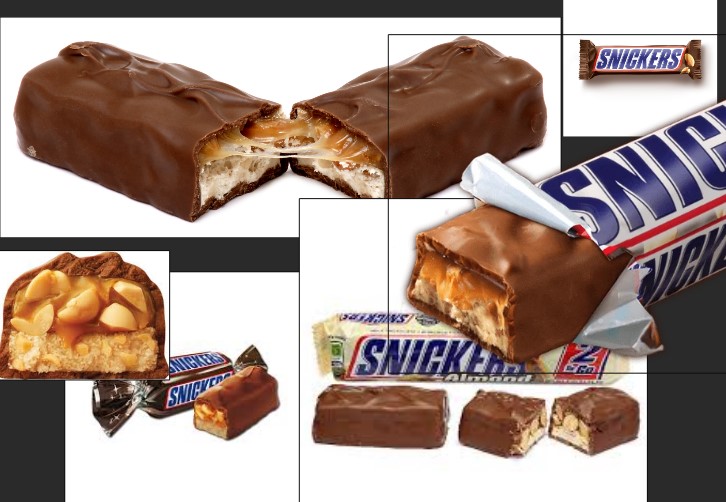
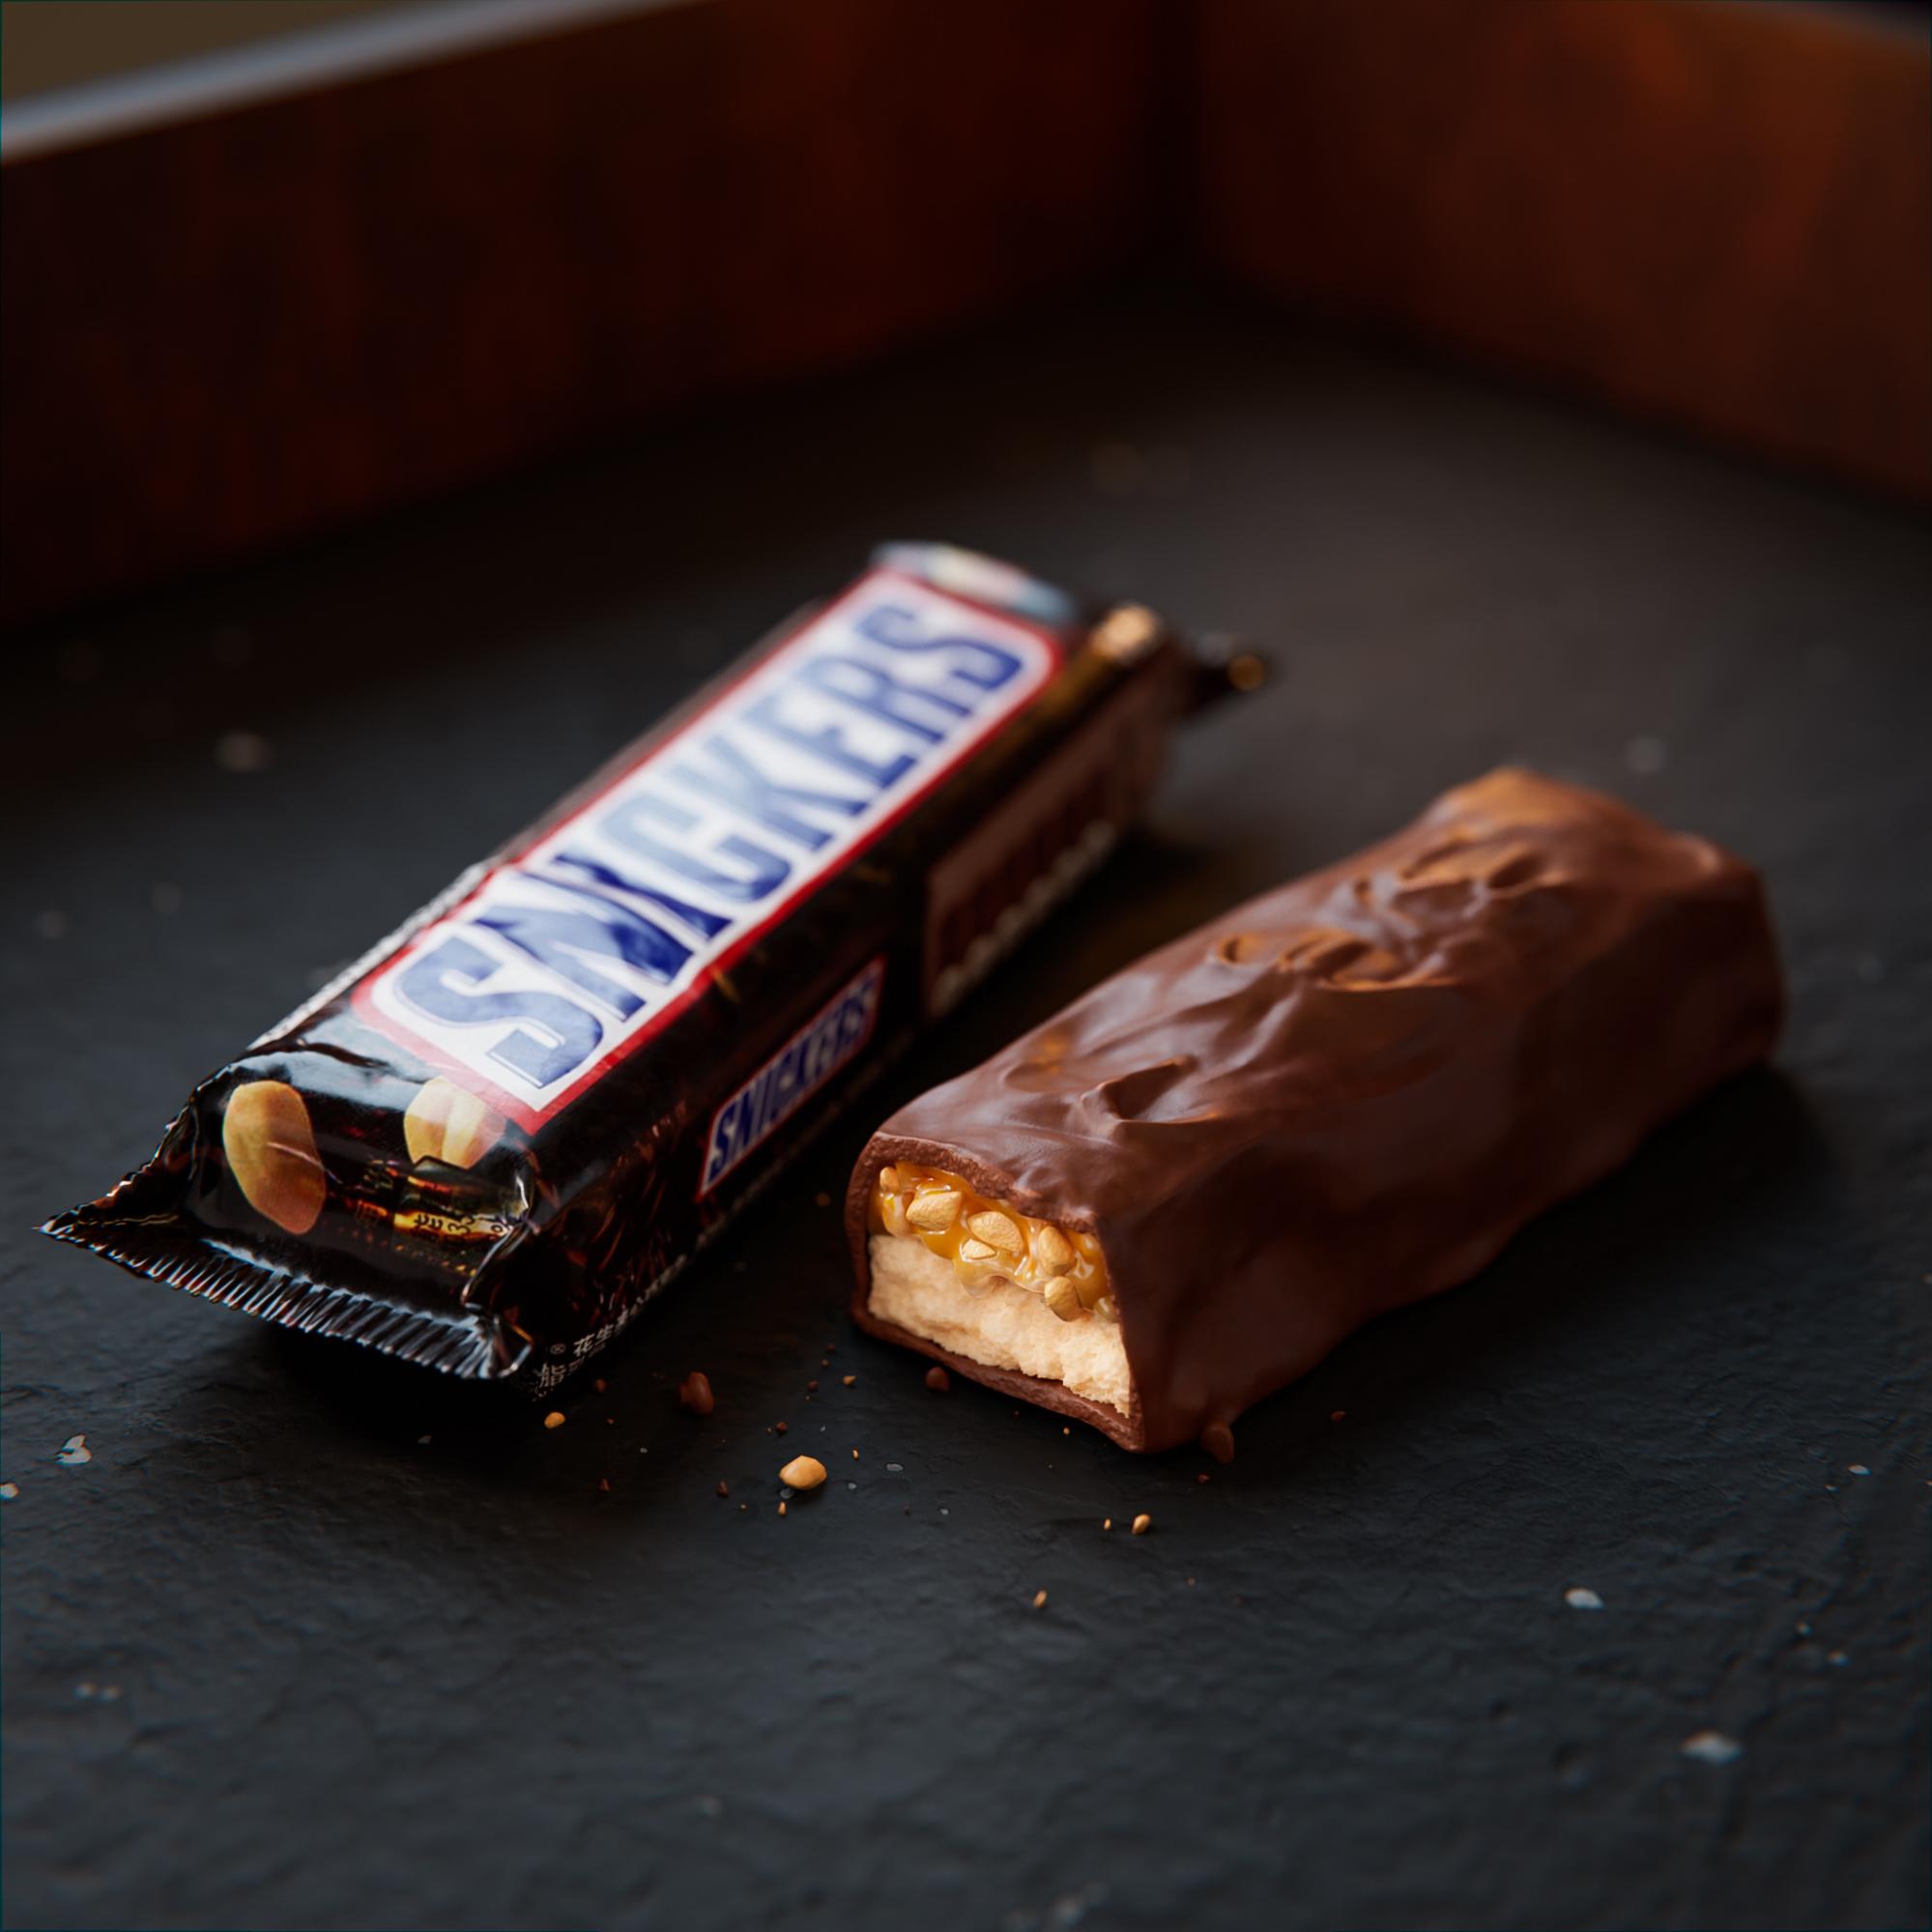
I always had a thing for rendering food and trying to make it look realistic. I wanted to create a sort of unofficial ad for Snickers; making it look appetizing and realistic were the key goals. I do a lot of exercises to learn more and master every part of the CG workflow and "sculpt mode" was one of the Blender modes that I hardly ever switched into. So I wanted to change that.
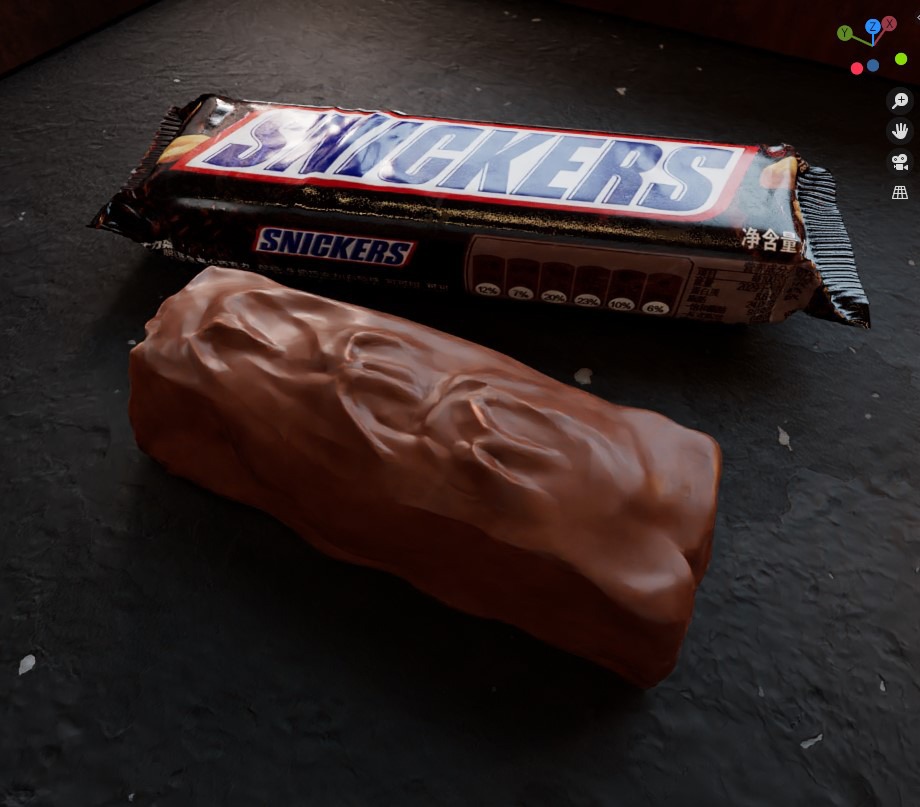
I collected some reference images and started to block out the shapes with simple topology.
Before adding the details and modifying the shapes further, I did the UV unwrap part to prevent any distortions later. I added a multires modifier and used various sculpt brushes to add details like the chocolate pattern on top and the folds on the packaging.
Sculpt details
I cut out the inner part of the bar to make it hollow but left the border. I selected its vertices, made a vertex group, and used it to feed in the newly added displace modifier, so it only affected the border. For the displace modifier I used some random noise settings.
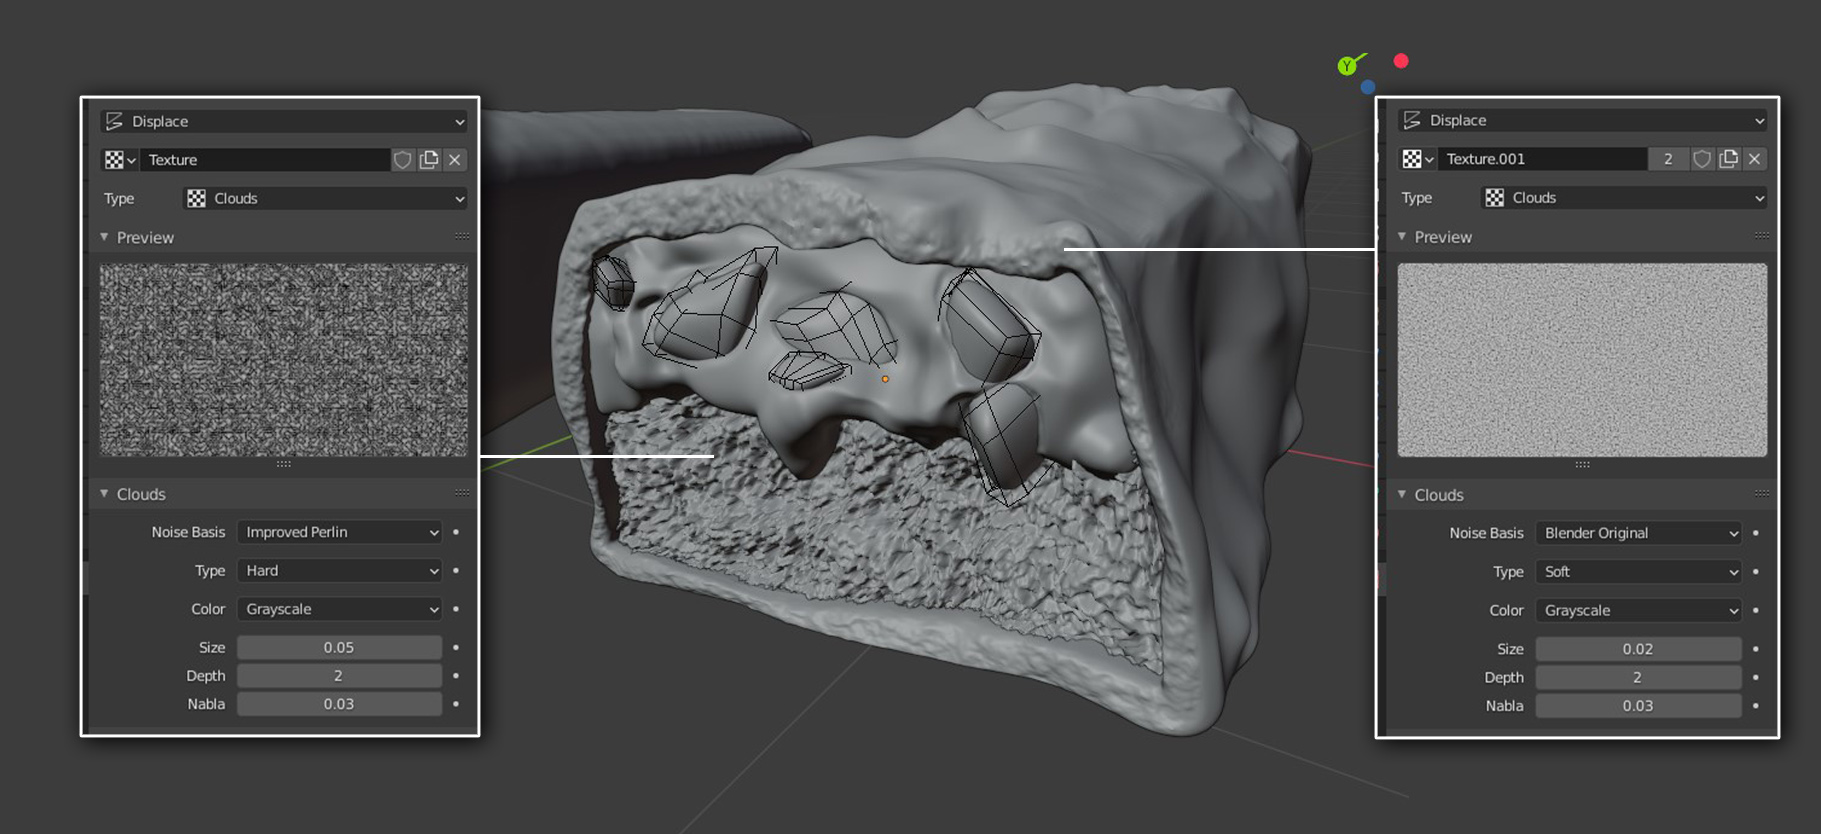
For the "cream" part, I modified a simple subdivided plane and added a displace modifier as well. Then I added a second plane to be the caramel above, where I used sculpt brushes (mostly grab and snake hook brushes) to make it look like caramel.
I modeled a few simple shapes to act like peanuts and positioned them. With the "Blob" brush I defined the edges to make the peanuts blend better with the caramel mesh.
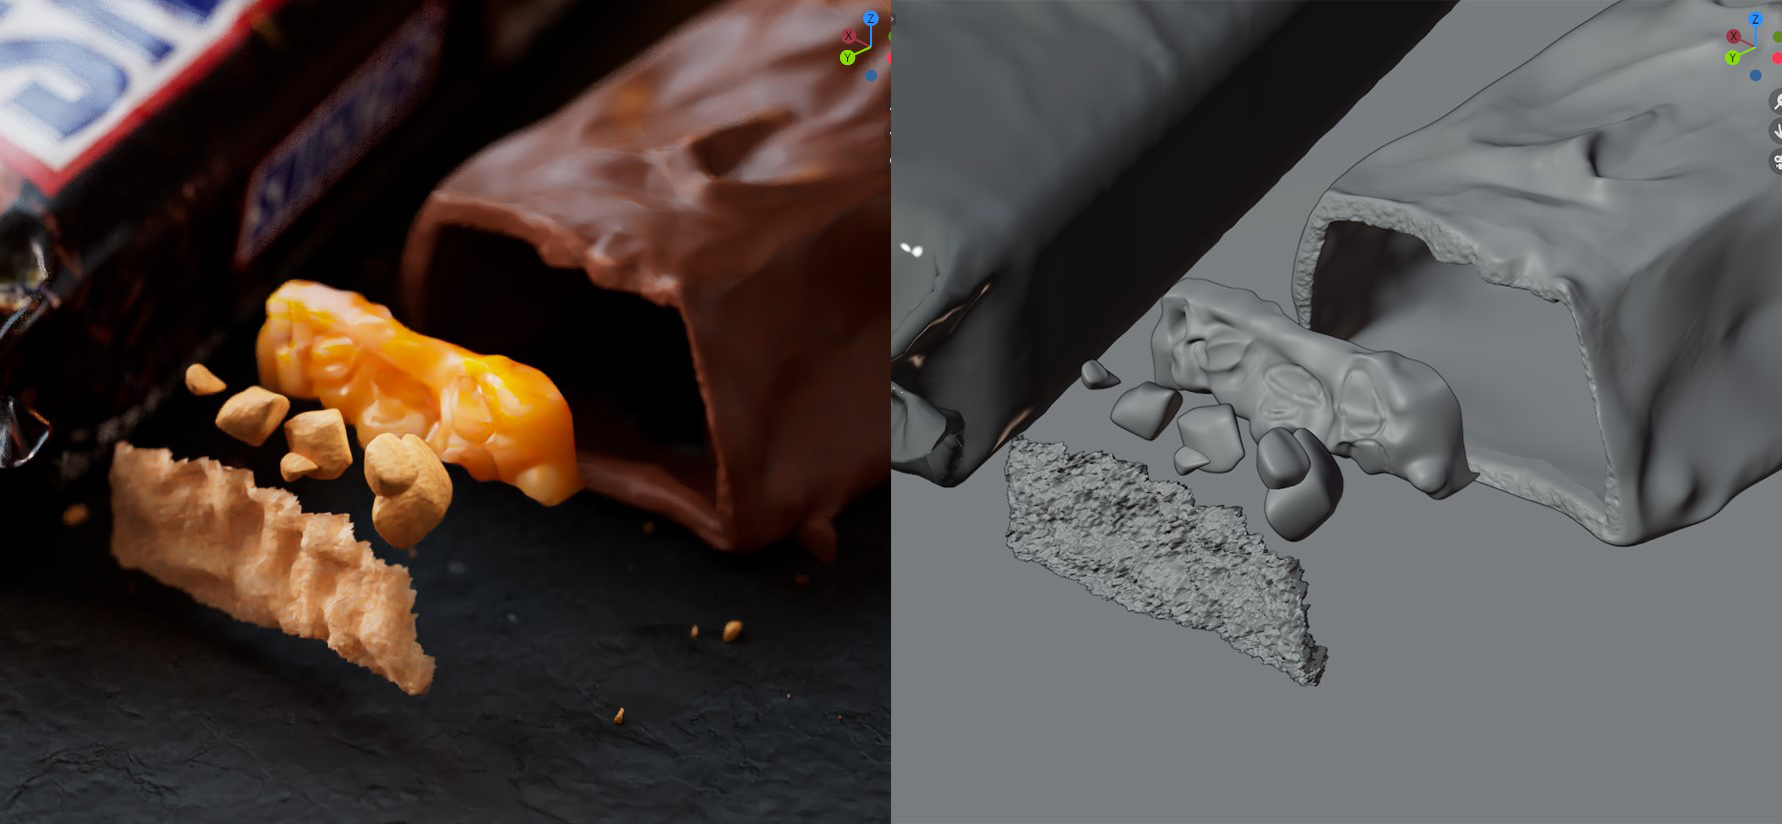
After I was done with the bar, I added a plane underneath and used a particle system to make the crumbs, which were a few different sized shapes. Vertex painting helped to limit the crumbs only to areas I wanted. I also added a lattice object to make the final adjustments to the overall bar shape.
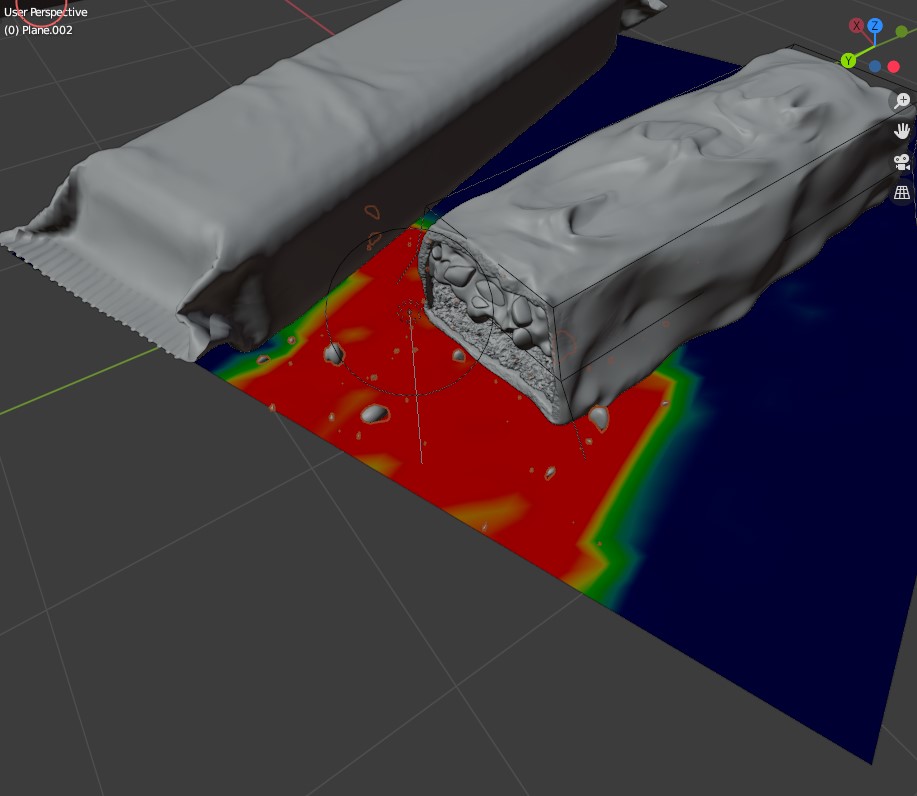
Particle system weight map
The texturing part was relatively easy, as I had prepared the UV maps beforehand. I found a Snickers packaging image (laid out flat) on the internet and added a roughness texture to make it look a bit more realistic.
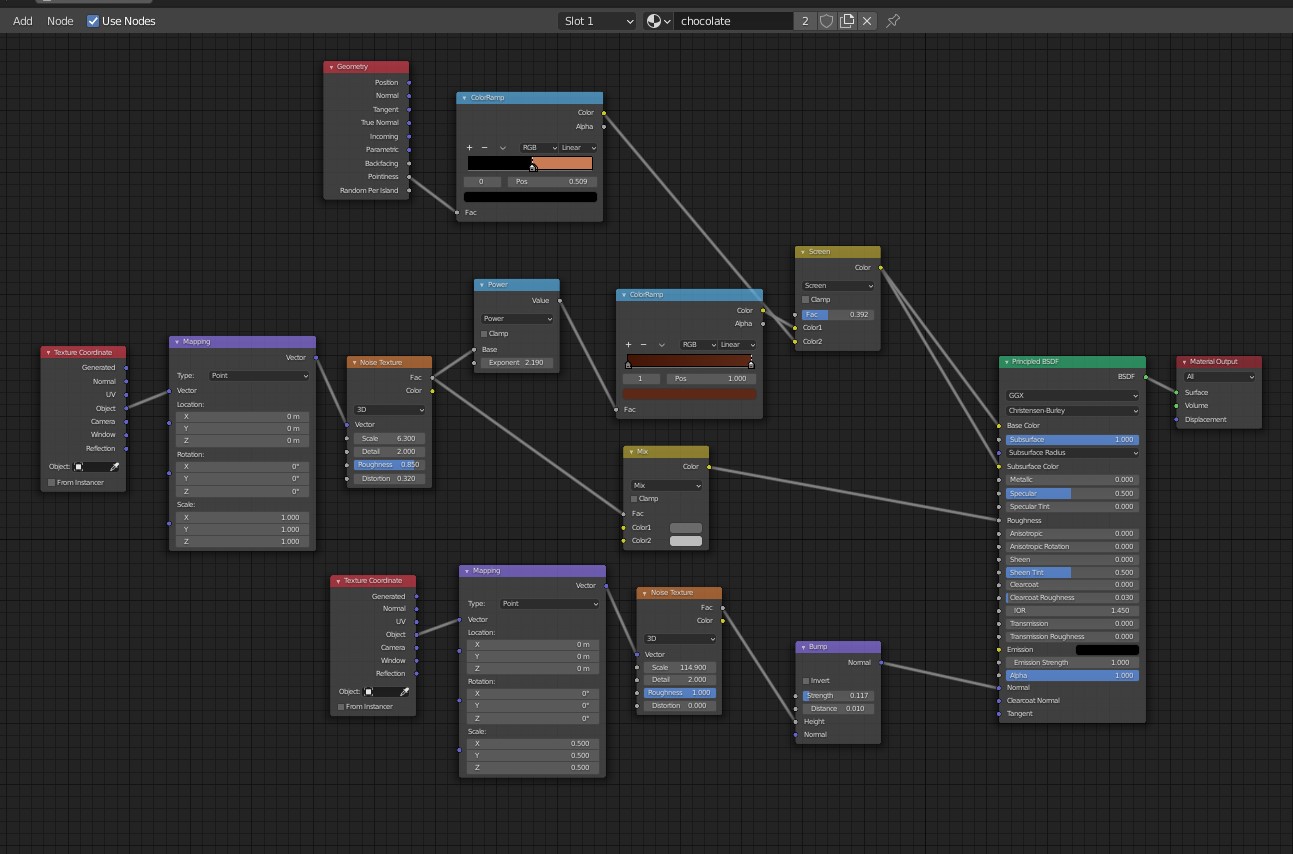
For the bar itself, I made the materials procedurally with color gradients and noises, and also enabled Subsurface Scattering.

I also added a “pointiness” node to the chocolate material color to make the edges a bit lighter and add more variation.
After I was finished with both assets, I modeled a simple scene around it to complete the composition. For lighting, I used an HDRI in combination with an area light. I added 2 basic planes, which acted as reflectors, to lighten up the sides a bit. Finally, I finished the lighting setup by adding 2 small point lights to emphasize the details and give the scene a warmer feeling.

For the camera settings, I used a focal length of 80mm and a rather shallow depth of field. I made two renders, one of them with the ACES workflow, which, in my opinion, helped a lot to keep the colors vibrant and minimized the post-processing part with Photoshop, where I only added a vignette and highlighted some parts a bit.

I had great fun creating the render and I hope you like it and learn something, too! Thank you for reading!
About the Author
 Ibrahim Topal, full Time Graphic Designer and Freelance CG Artist
4 Comments
Great work, thanks for sharing your experience.
Lovely image and great look at its creation. Thanks.
Great article! I love seeing how simple a great looking scene can actually be when the curtain is pulled back.
Perfectly done! The realism is stunning and also the sculpt work, that is a totally obscure topic for me. Now I'm hungry!