Behind the Scenes: The Forester
Hello! I am Omar Faruq Tawsif from Chittagong, Bangladesh, an undergraduate student in the Department of Mechanical Engineering. And yes, you got it right! I am also a hobbyist 3D artist.
I accidentally stumbled across Blender while searching on Google for free painting software as a kid. But alas! I gave up after a week. Back then I wasn’t clever enough to understand what it was all about.
However, I continued my journey with Blender again around 2-3 years ago. No more mistakes this time! I have spent a lot of time on YouTube and with online documentation to learn the way of 3D in Blender. Since I was doing it in my free time as a hobby, getting any formal training in it was out of consideration. Generous YouTubers such as Blender Guru, YansSculpts, CG Geek, FlyCat, and many more were more than enough to help me grasp the basics. I also learned a lot by reading the Blender manual and by troubleshooting problems that arose in each project.
[sponsor id=’qarnot’]
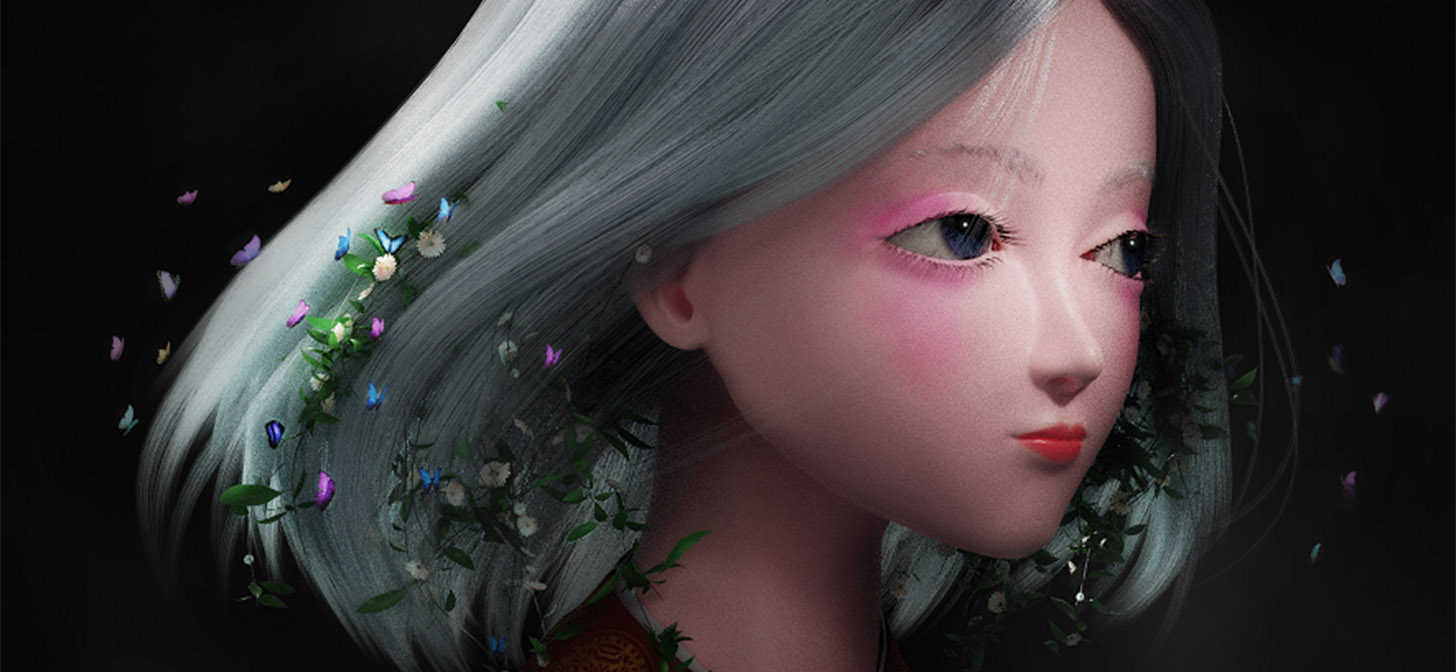
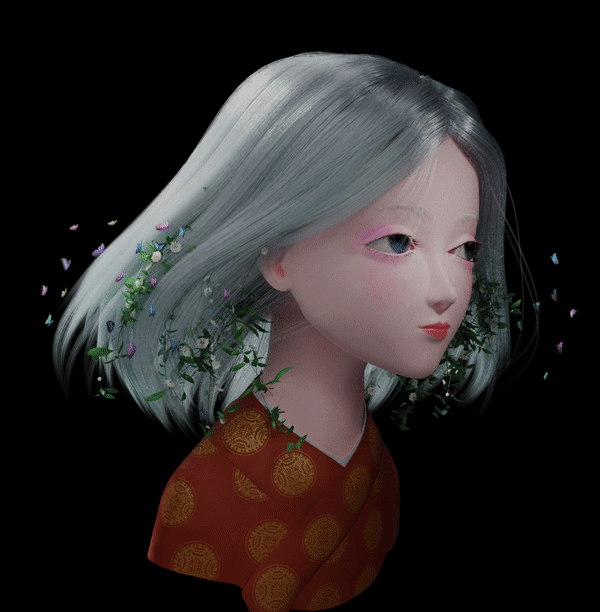
Inspirations behind this project
I like to roam around on Pinterest, ArtStation, and some other sites about character concept arts to find interesting and simple artwork. This time, I was attracted to Miho Hirano’s artworks. I especially loved the way she entangles nature with her characters. My goal was not to reconstruct a particular work of hers in 3D. In fact, my works often deviate far from the original concept art. I only try to reconstruct the mood of them. For instance, my character was much younger than Hirano’s (I hope I am not the only one who thinks it is indeed a young girl!).
Process
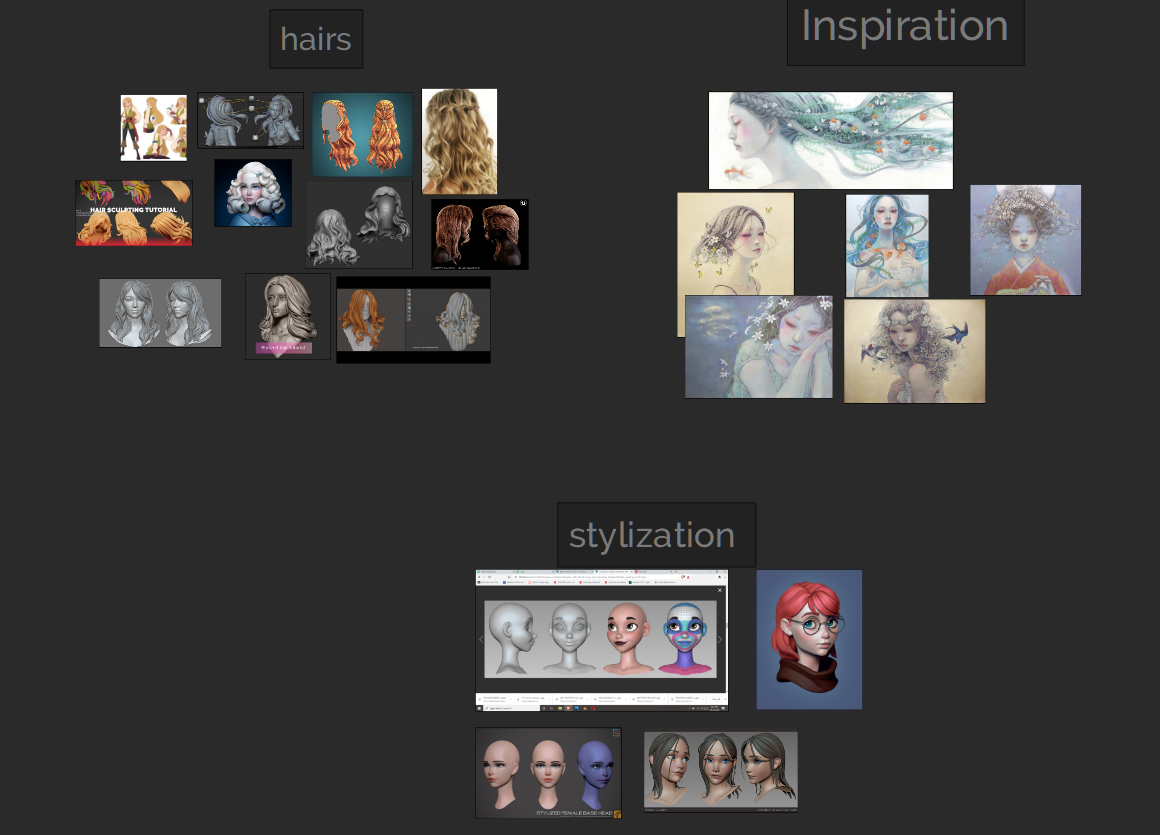
My first step to any project is setting up all the references in PureRef, another bestie of mine besides Blender.
Modeling
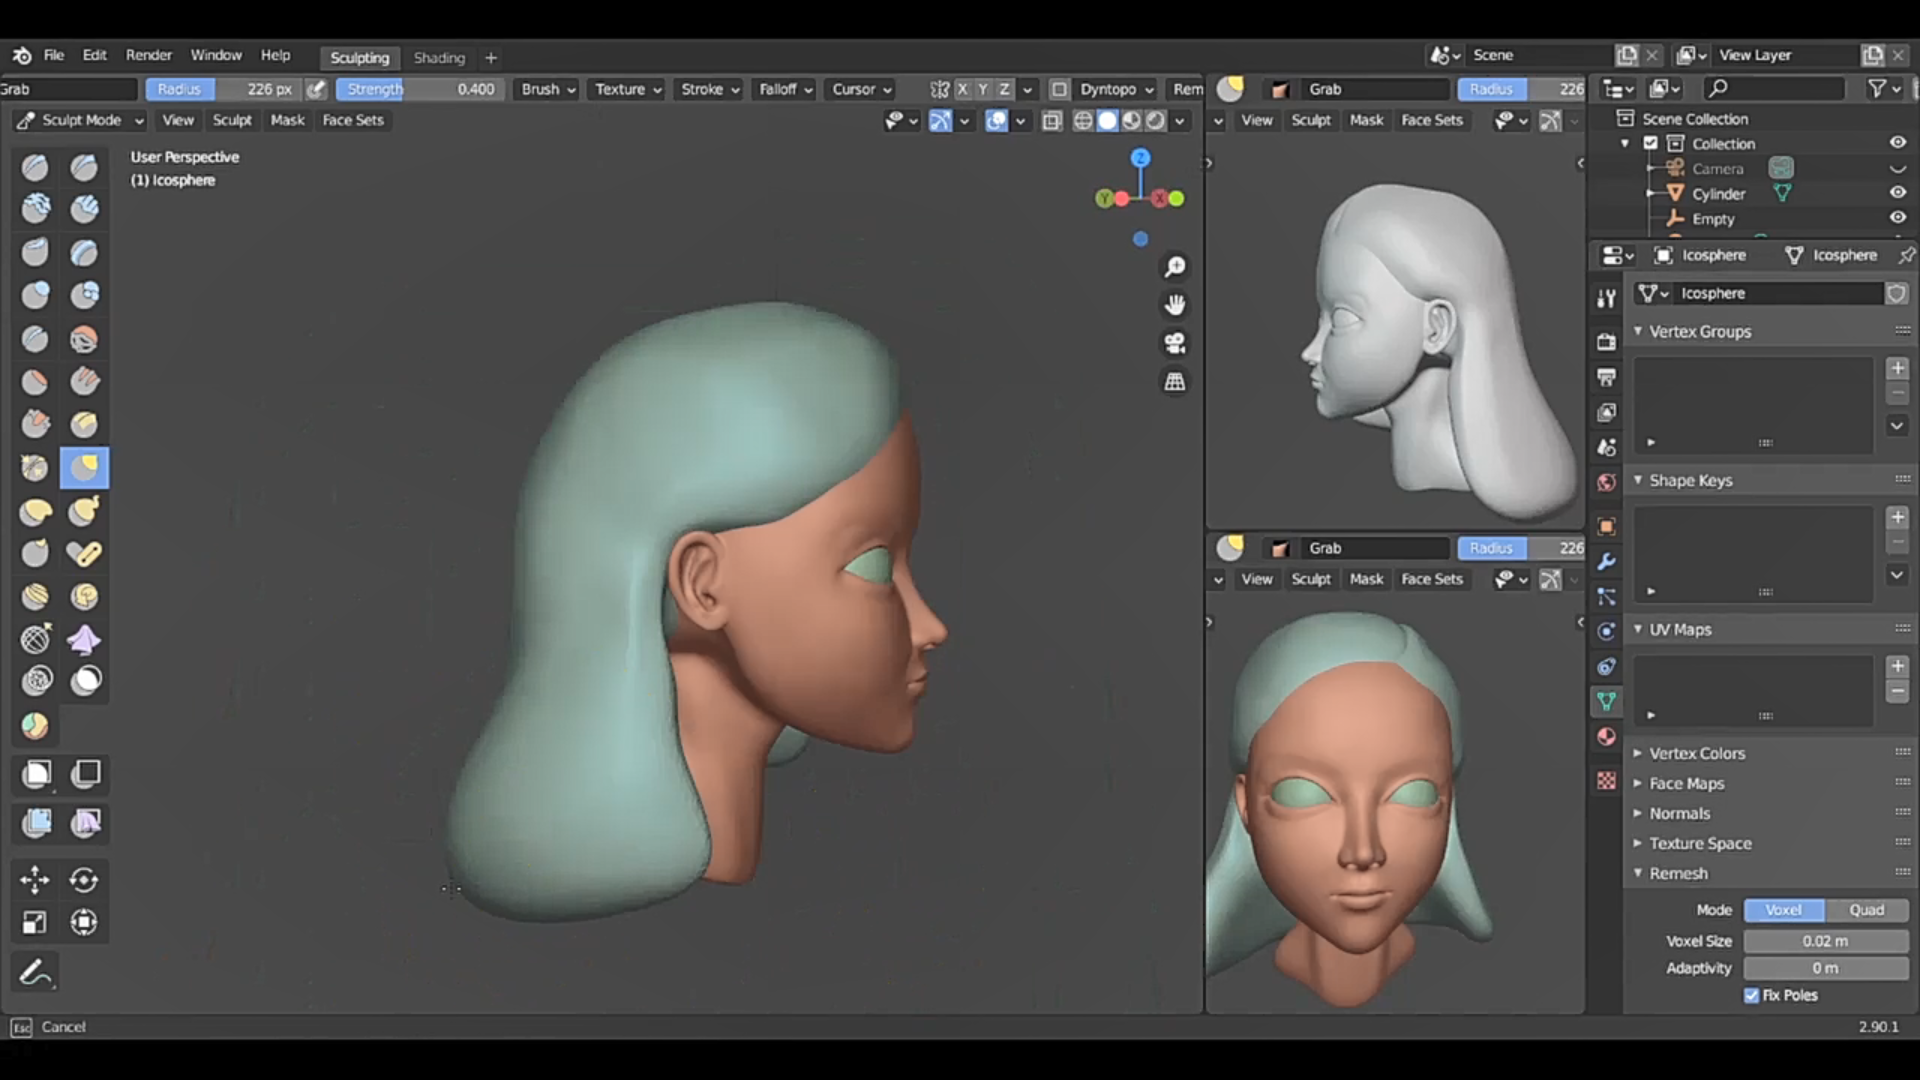
It was my quickest project ever. Since my goal was to make something quickly, I didn’t go into in-depth modeling. I quickly blocked out the general shape and sculpted the facial features in minimal form. I tried to give it a stylized look, though it probably became a little unnoticeable since I ended up texturing it somewhat realistically in the end.
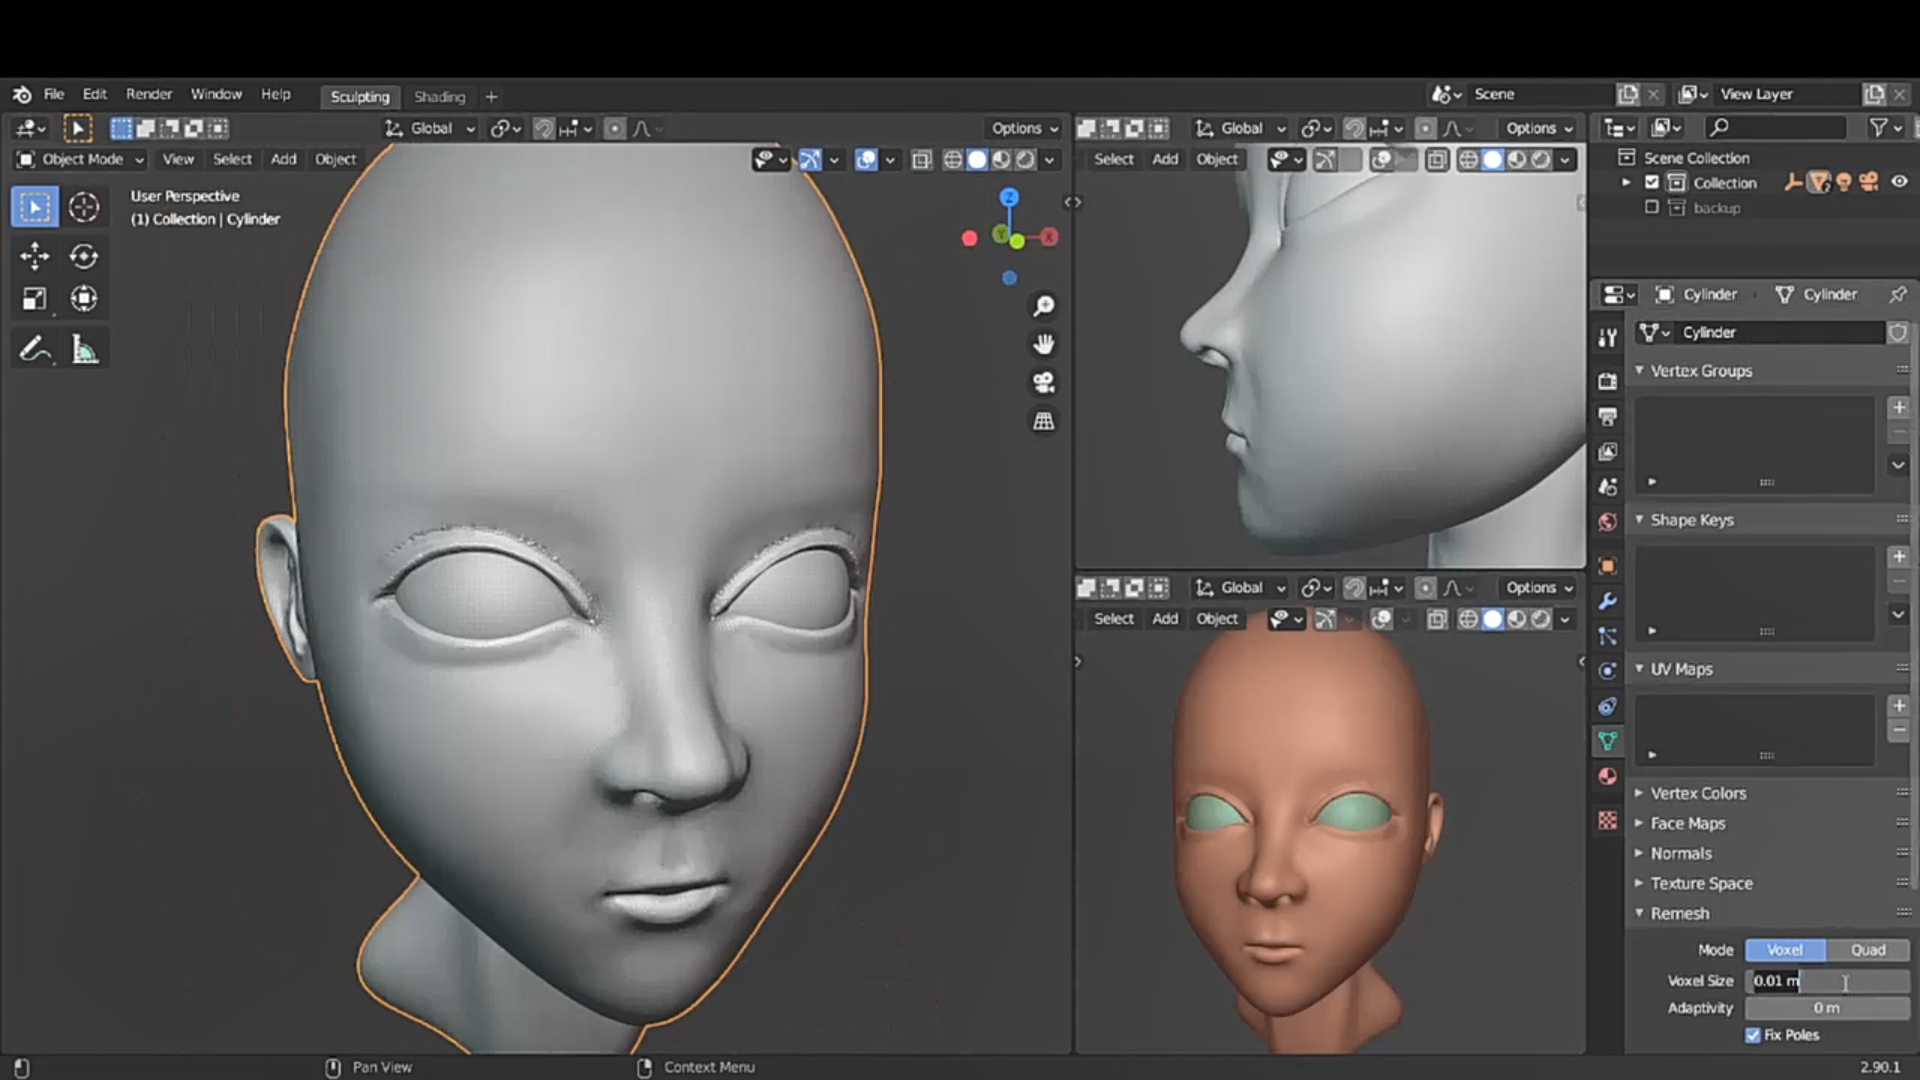
As you can see, I divided the workspace to make sure the sculpting was going in the right direction.
Even though I barely used sculpted hair in the final render, I prefer to prepare a version with sculpted hair since it helps me to visualize my final goal better.
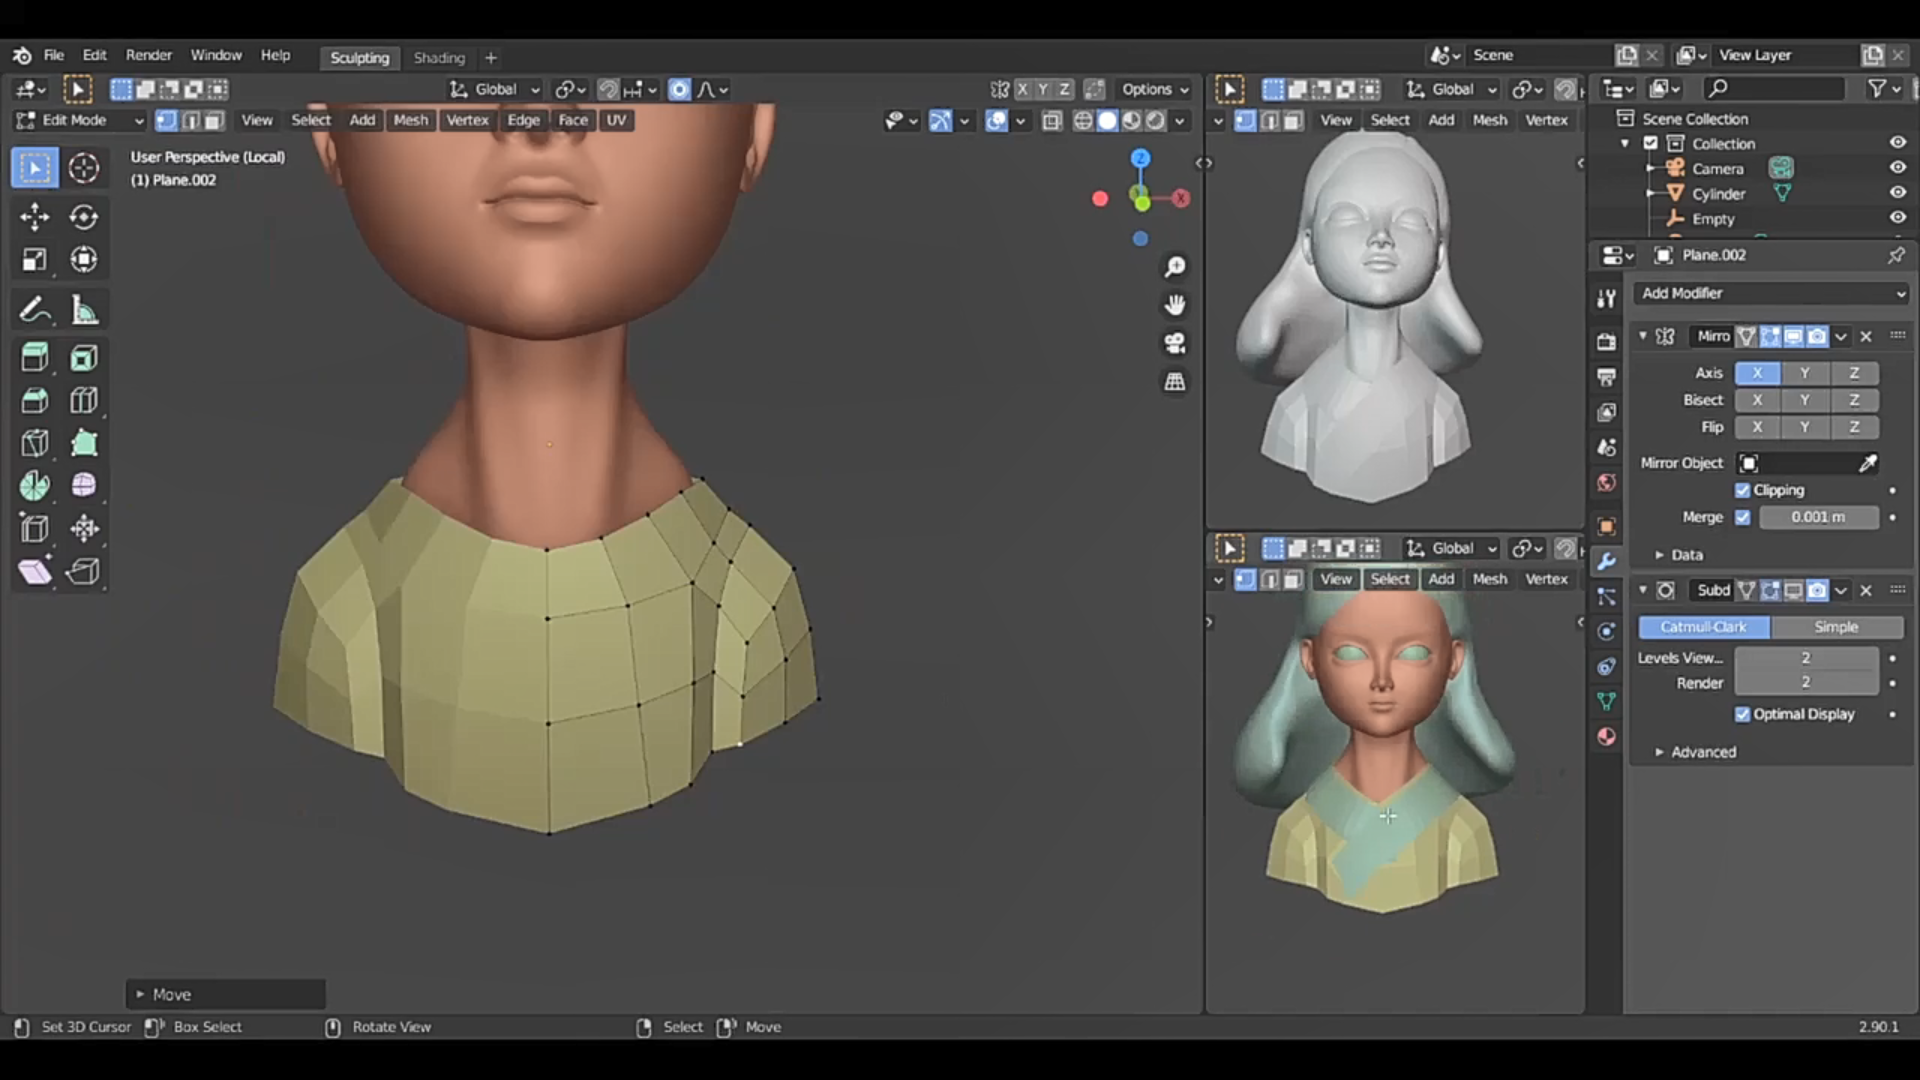
For the clothes, I did some simple mesh modeling.
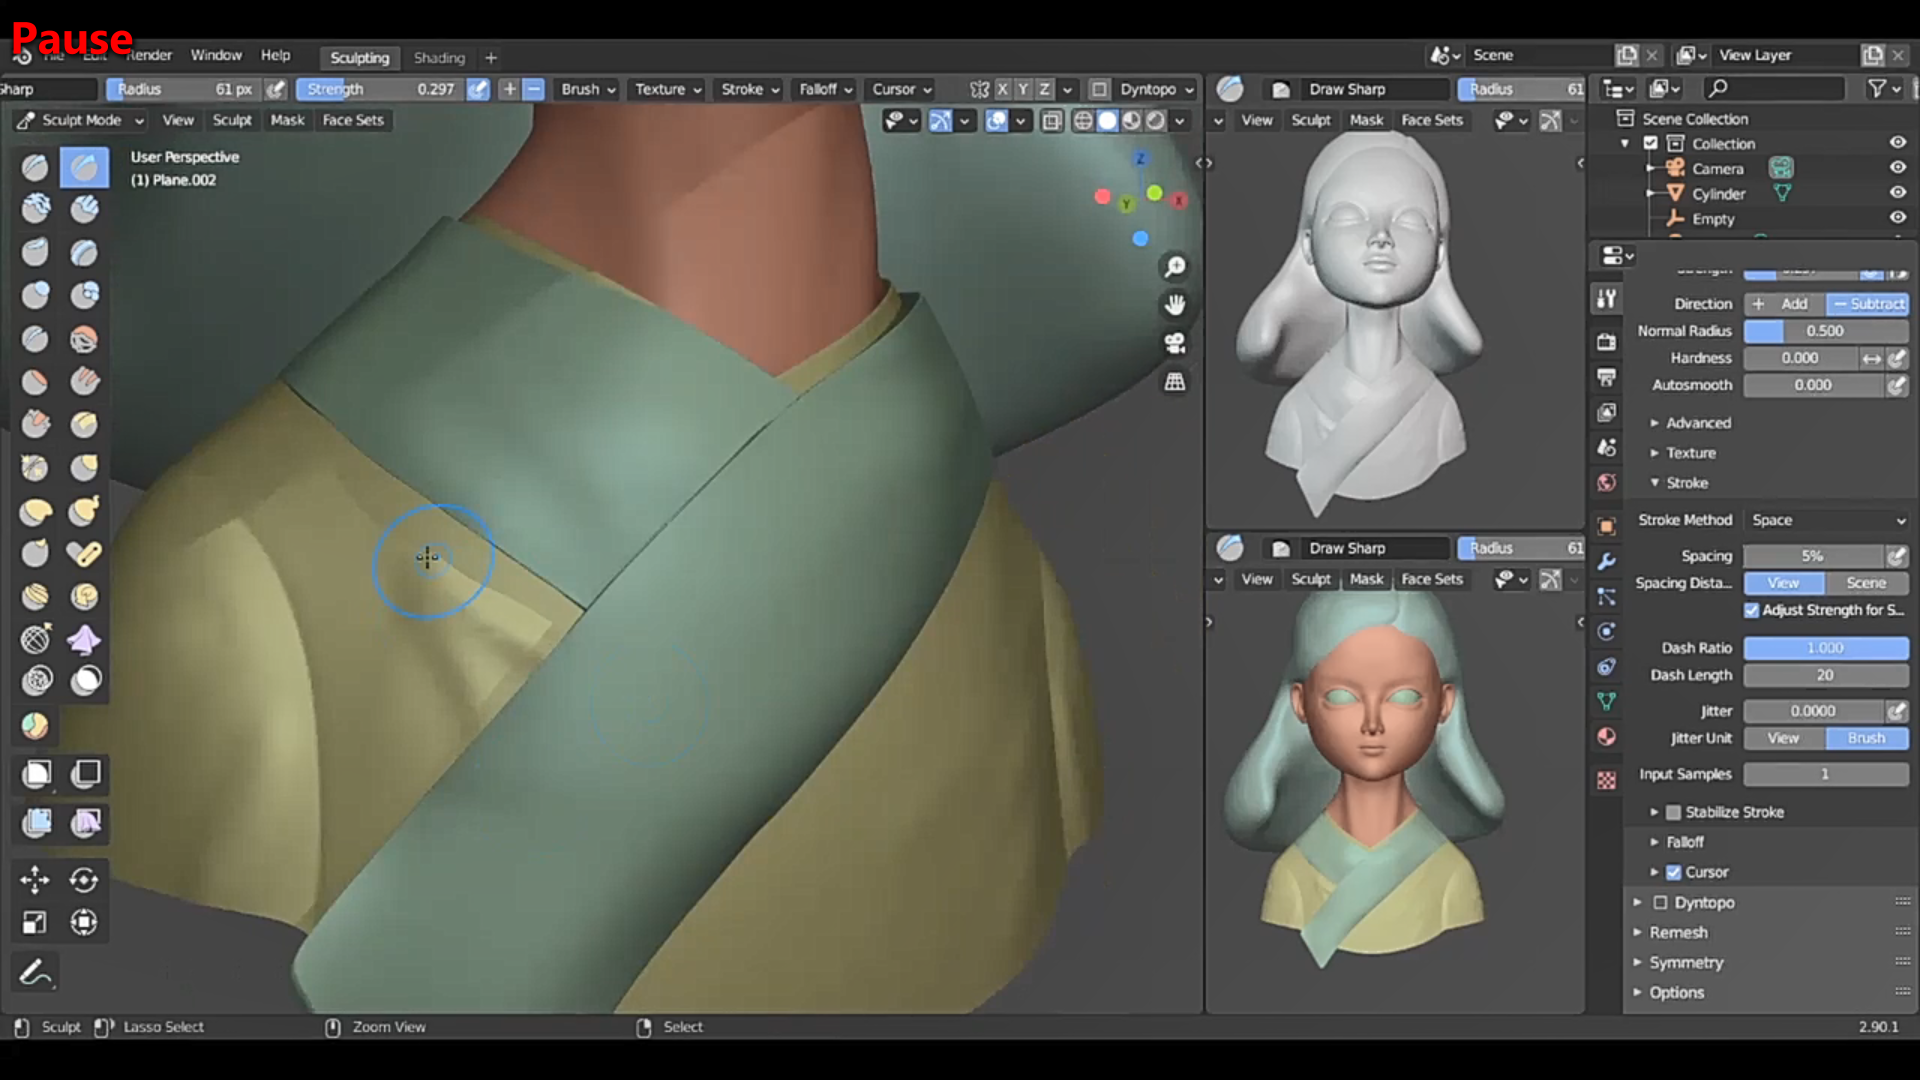
Then I added more details, such as creases, on the clothes using a multiresolution modifier. I find this method convenient since it makes the baking process feel easier to me.
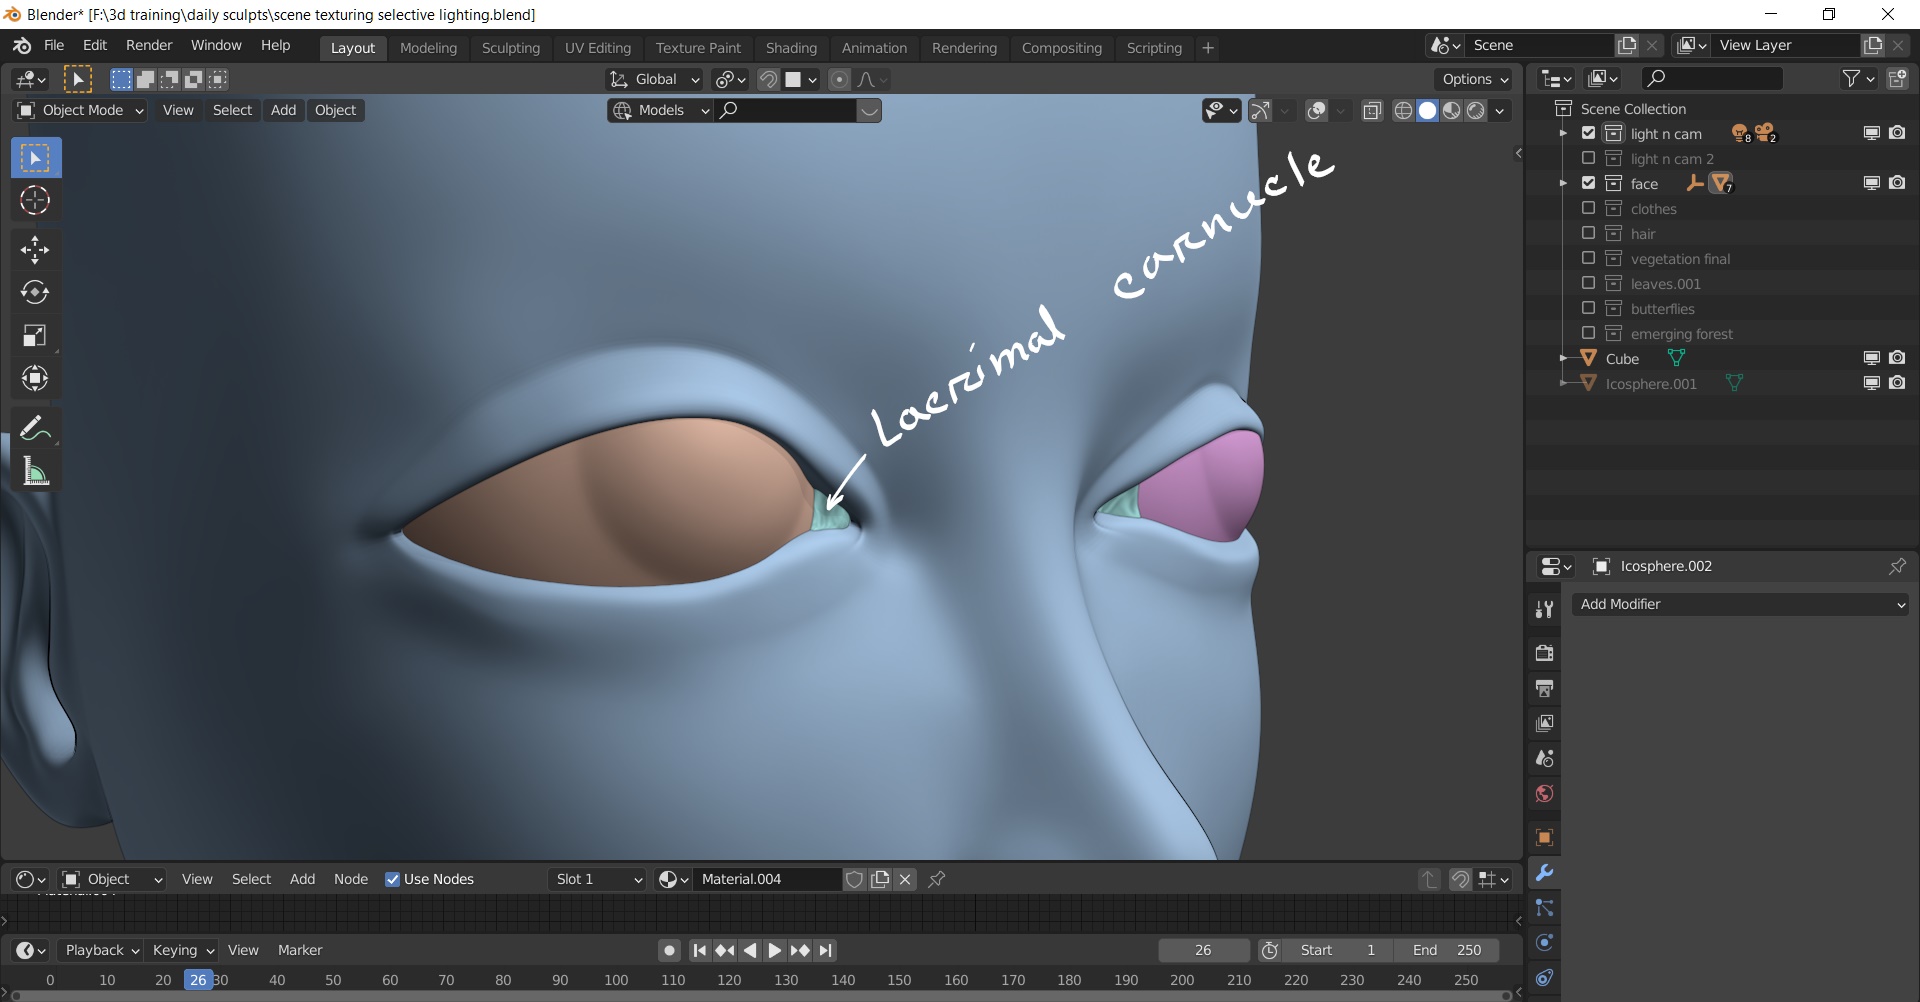
I used premade eyes from previous projects to make my life just a bit easier.
Also, I tried to fill the corners of the eyes with something similar to the fleshy region called the caruncle.
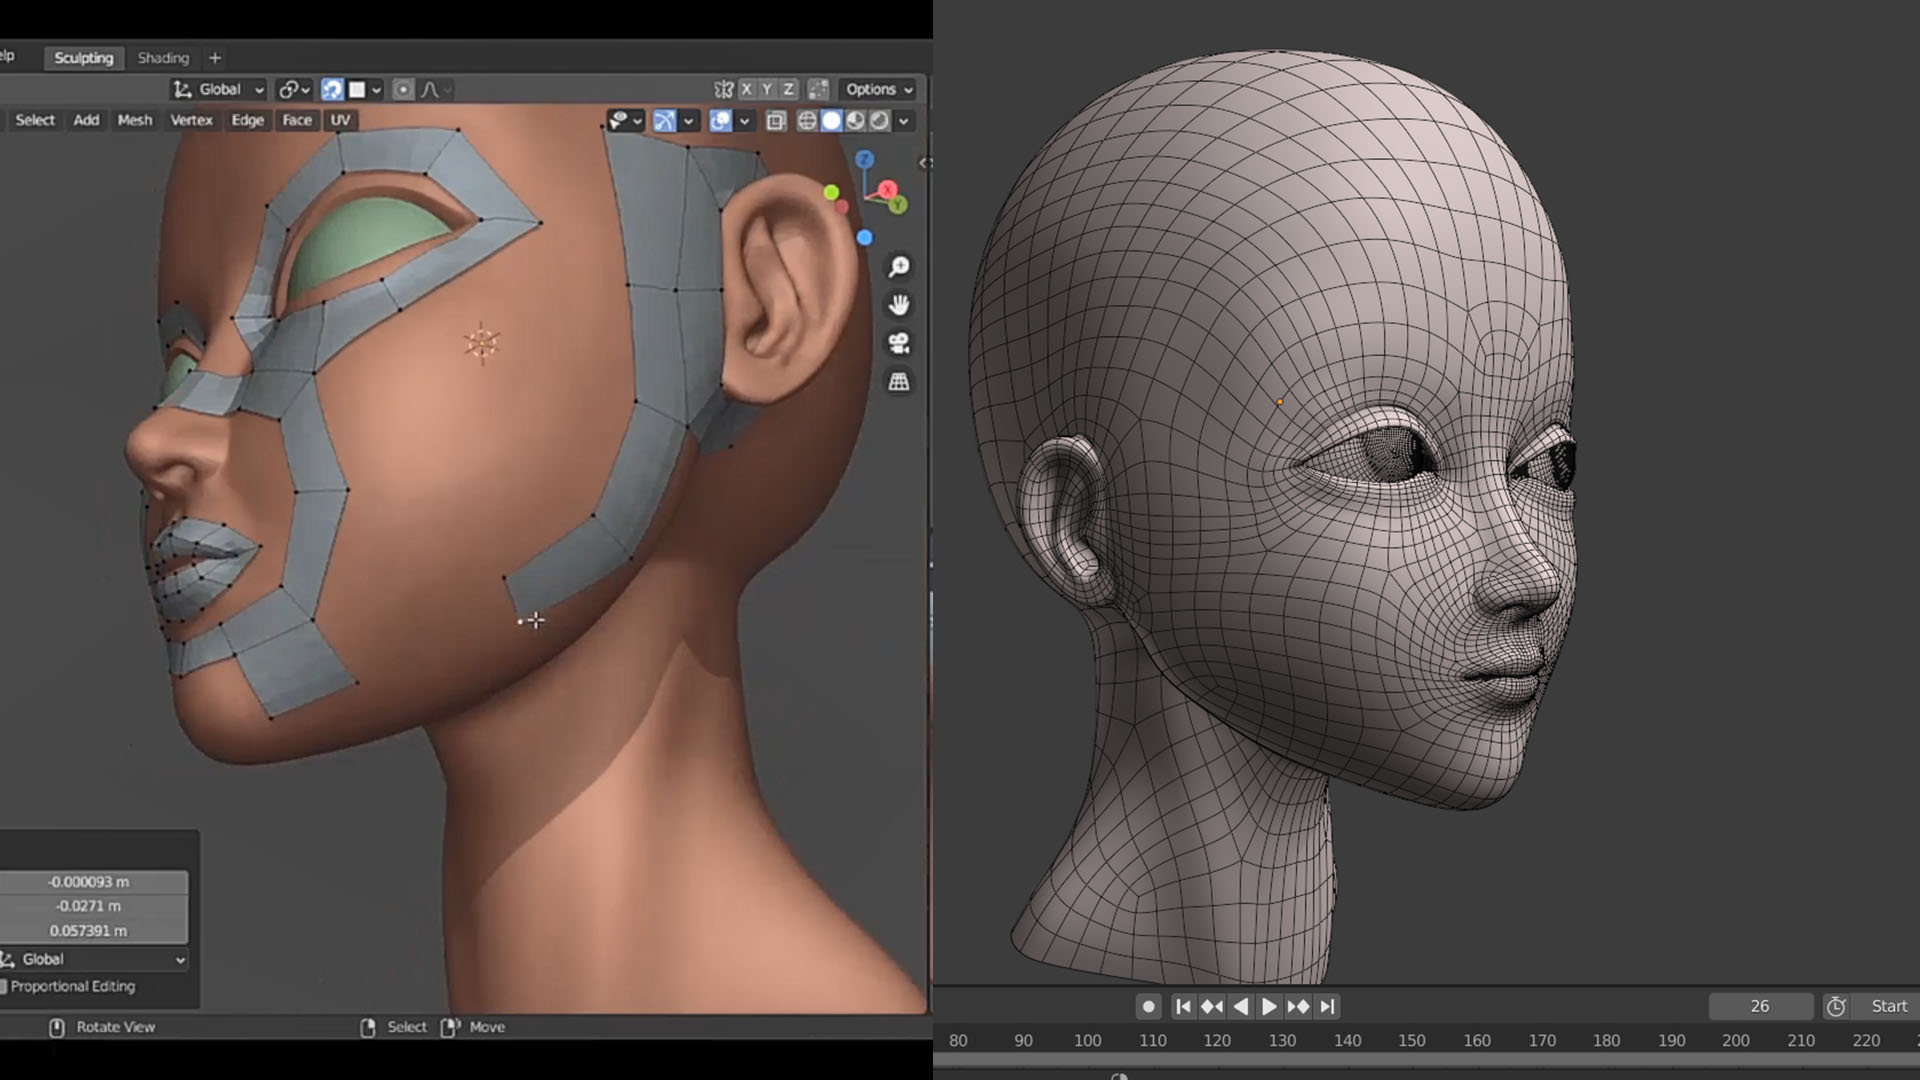
Then I retopologized the head using guidelines from Danny Mac’s 3D work. I really love his neat workflow, by the way. I used snapping to faces and shrink-wrap modifier in my retopo settings. Also, I adjusted the faces from time to time in sculpt mode while turning on wireframe in the overlays.
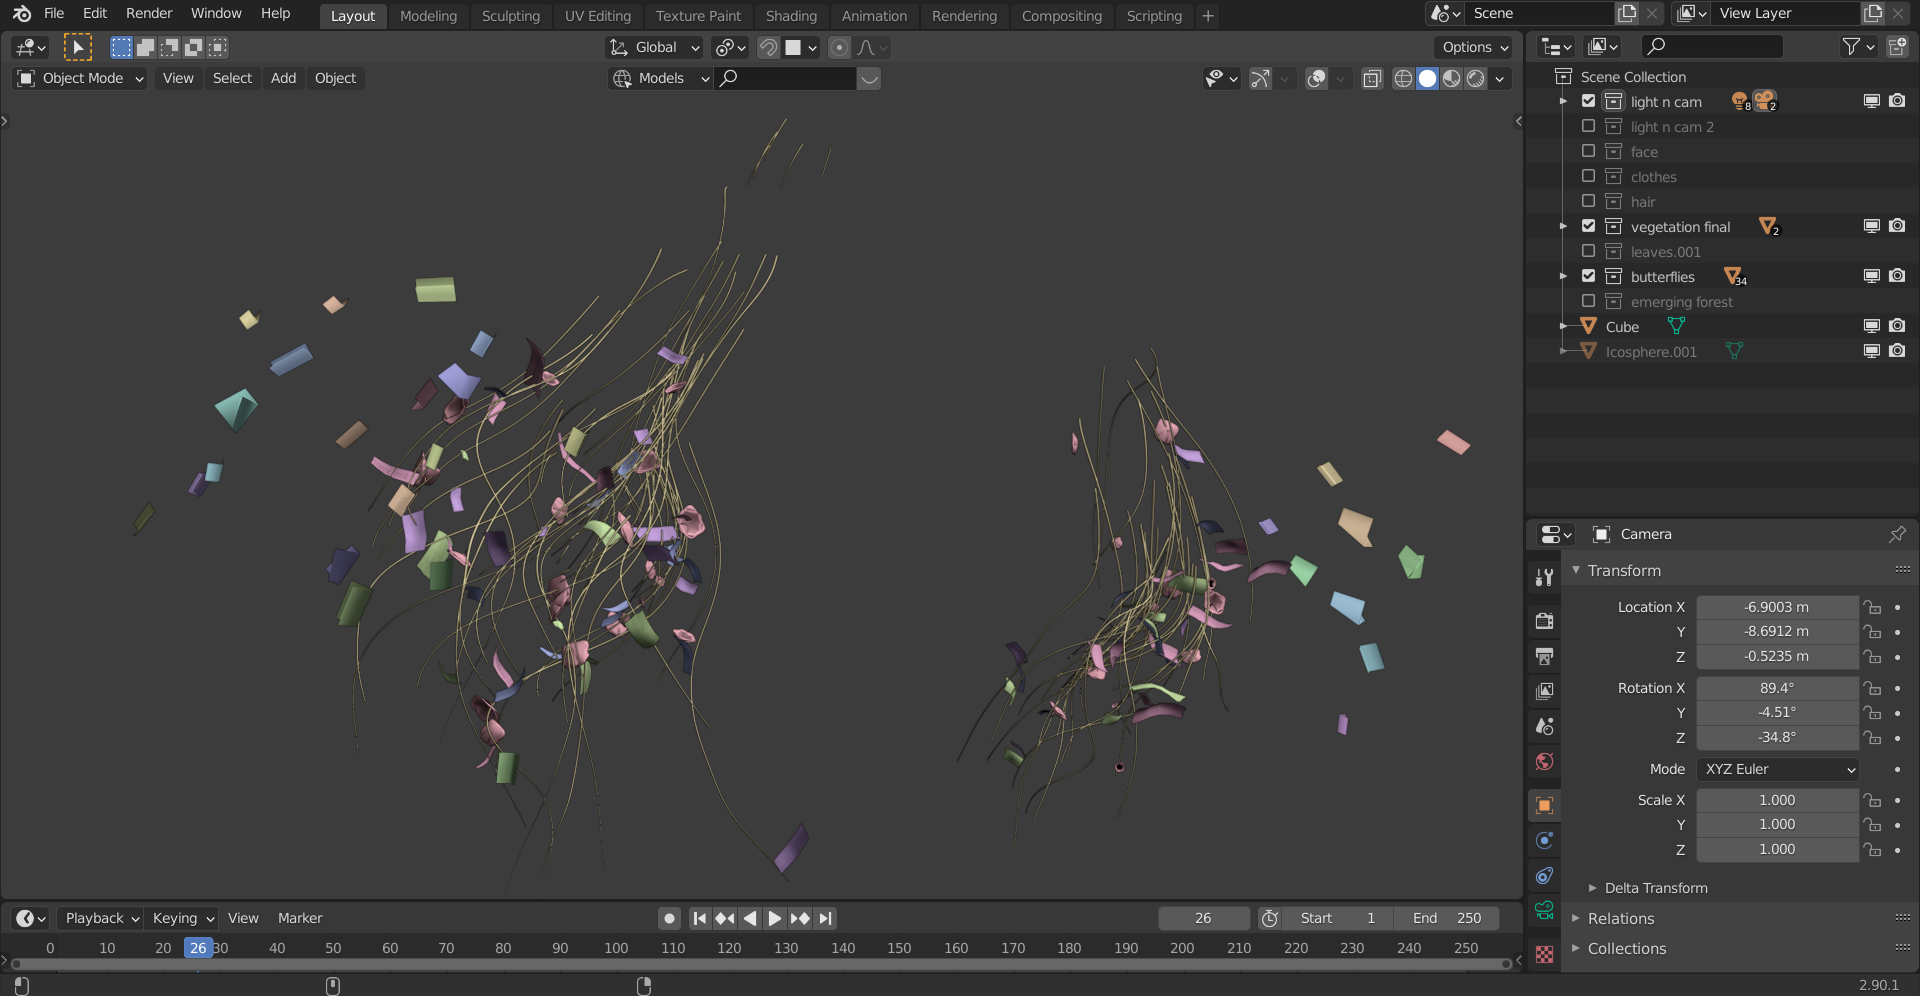
Here, I used Ivy Gen to create vegetation. I smoothed the bunches in edit mode and imported images of leaves and flowers as planes, then placed them using a particle system. I needed to make some adjustments to them so that they appeared and were oriented correctly in the particle system. The butterflies were made using a similar method.
That is pretty much everything for the modeling process.
Hair grooming
In my opinion, Blender’s particle system is somewhat overpowered and I am always amazed at its versatility—though I admit this is the only particle system I have ever used and one.
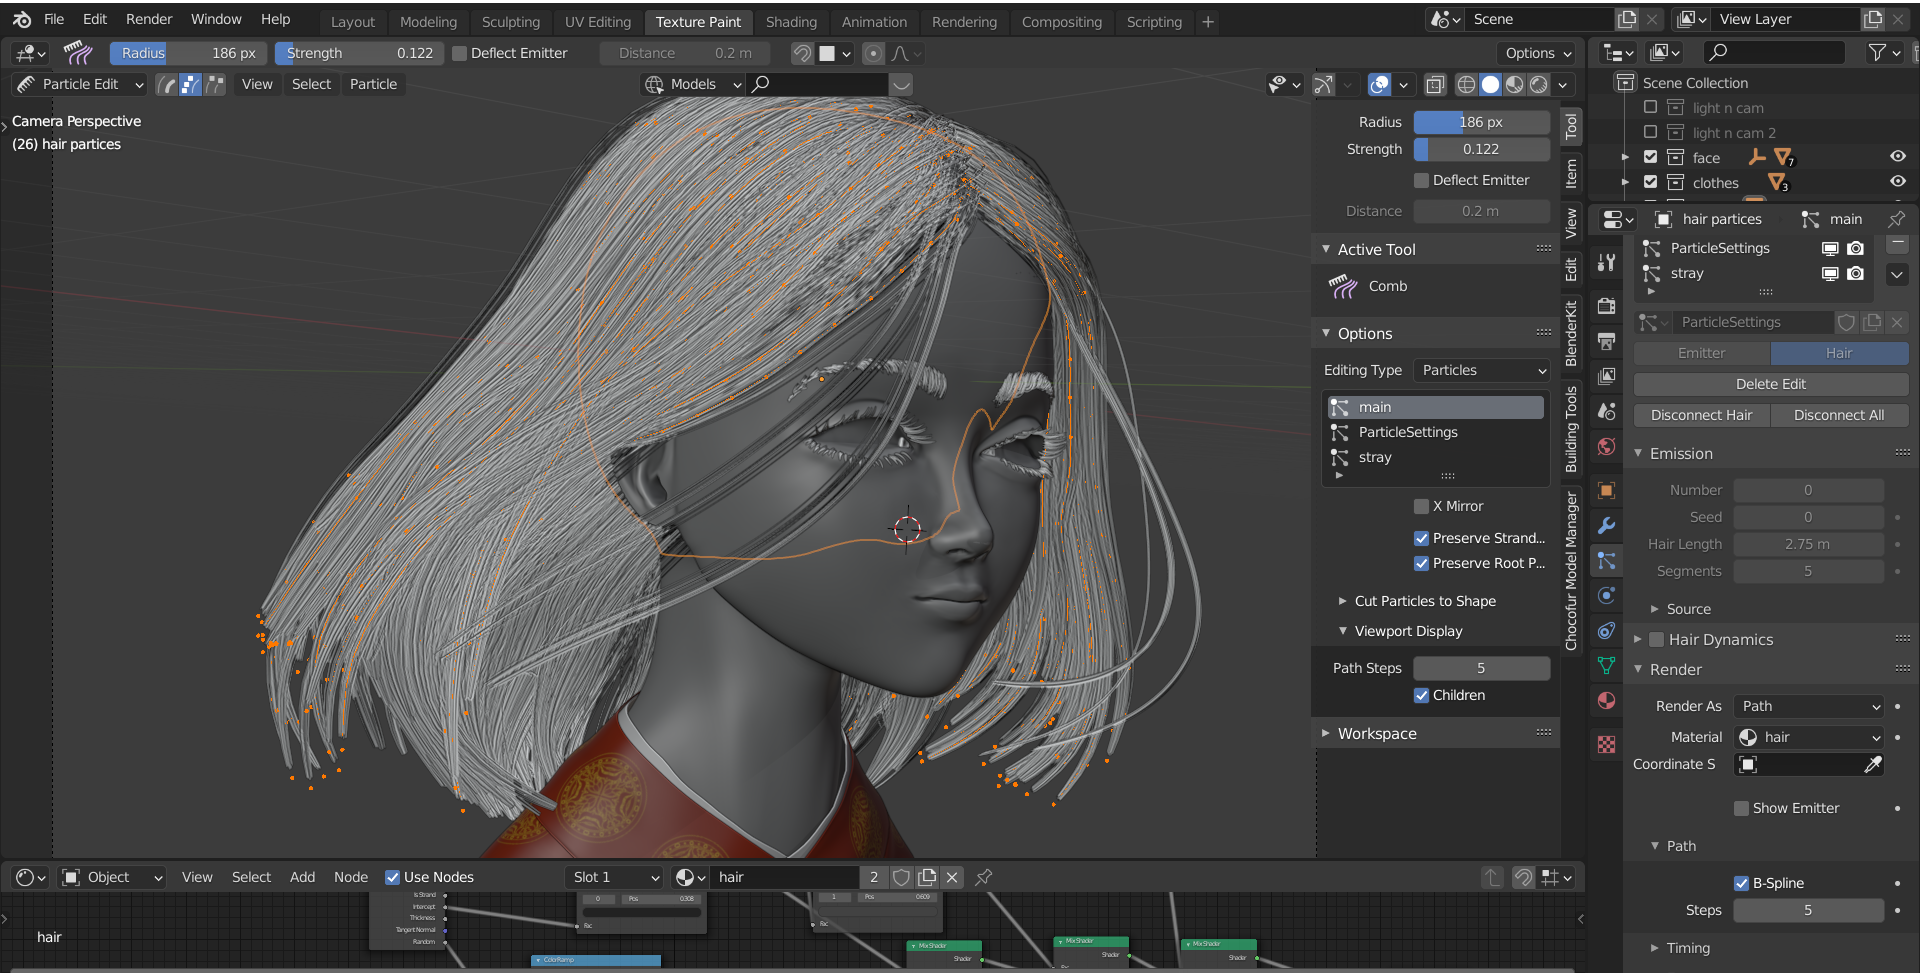
During hair grooming, I turned on children. Only 5 were enough to give me an idea of how the hair would eventually look. In my earlier days, I used to switch back and forth to object mode from particle edit to see how it is looking. Hilarious, right? I also kept the path steps to a high number. 5 was enough. I rendered the hair using B-spline mode for getting smoother results. There were some shading issues in the overly bent areas but I managed to fix them by setting curve subdivision to zero from render properties.
I tried to give the hair a flowy look, which made the work appear more dynamic. I used another particle system for stray hairs.
Texturing and material creation
Most of the texturing was done inside Blender. I used Substance Painter for texturing the apparel only.
I like to texture the skin in real-time in the viewport after setting up a basic skin shader. I spent most of my efforts on making a nice bump map for the skin. To see the bumps clearly, I keep SSS at zero. A quick tip: always keep bump strength in the bump node at a maximum value of 1 and adjust the distance only. I used some skin pores alphas to create the pores on the skin.

One of my favorite features of Blender is vertex painting. It saves lots of time. Instead of texture painting SSS maps, roughness maps, etc. I simply go to vertex paint mode and create them from here most of the time.
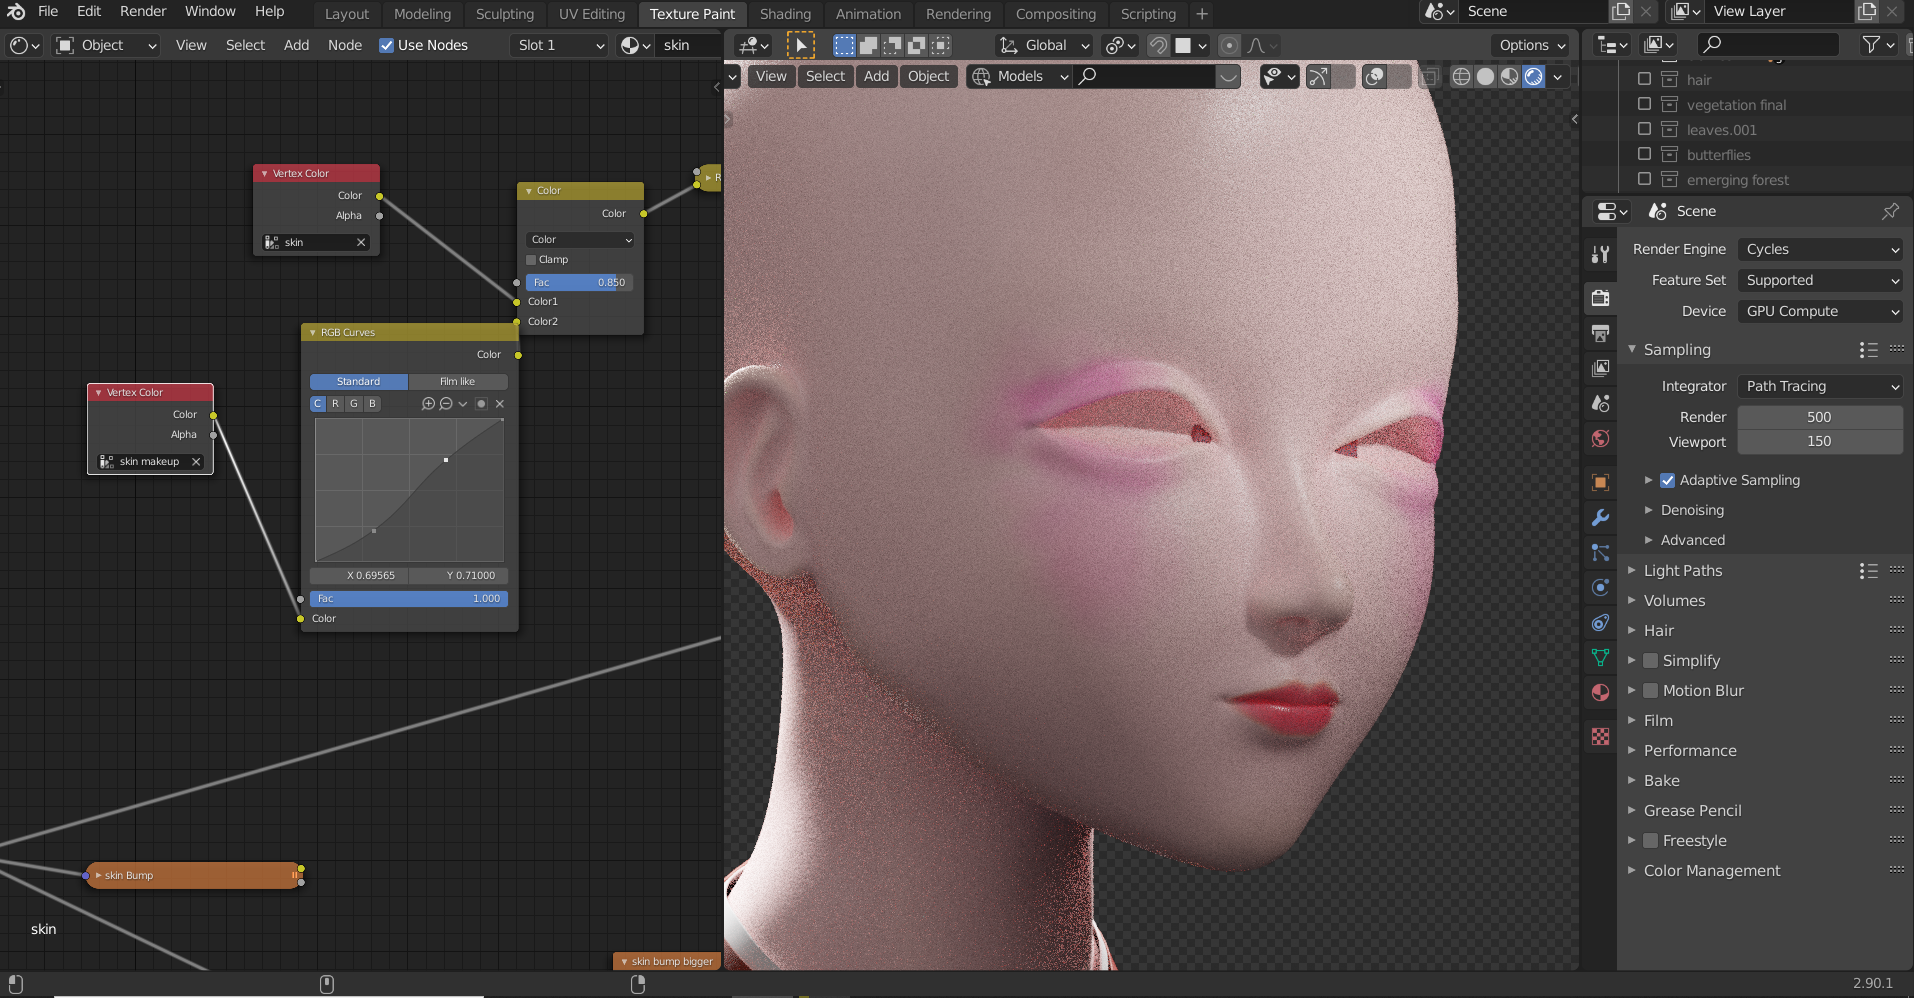
For the skin color, I mixed two vertex color nodes—one for the general skin color and another for makeup. I played with the RGB curves a little to adjust them even more.
For the hair material, I relied heavily on hair info nodes.

The materials for butterflies, leaves, and flowers were created in a similar way. The key is to use a translucent shader so that the rim lights can penetrate through the objects. Applying a glow layer during post-processing inside Photoshop helped to get a fresher look on the vegetation.
Lighting
I find it worthwhile to spend a good amount of time in lighting. I don’t even mind if I end up testing different lighting settings for days! But this project was rather simple. I used a lamp with an IES texture for the key light, some fill lights, and a rim light. And, of course, I threw in an HDRI from HDRI Haven too. I tried to do selective lighting for the hairs and it was an epic failure! Anyway, I moved on.

Usually, I study lighting by switching to false color mode from color management, which generates a heat map.
I also play around with different render passes from viewport shading settings. It feels like a good way to study lighting, though I am not completely sure.
A clay render showing the contribution of different lights:
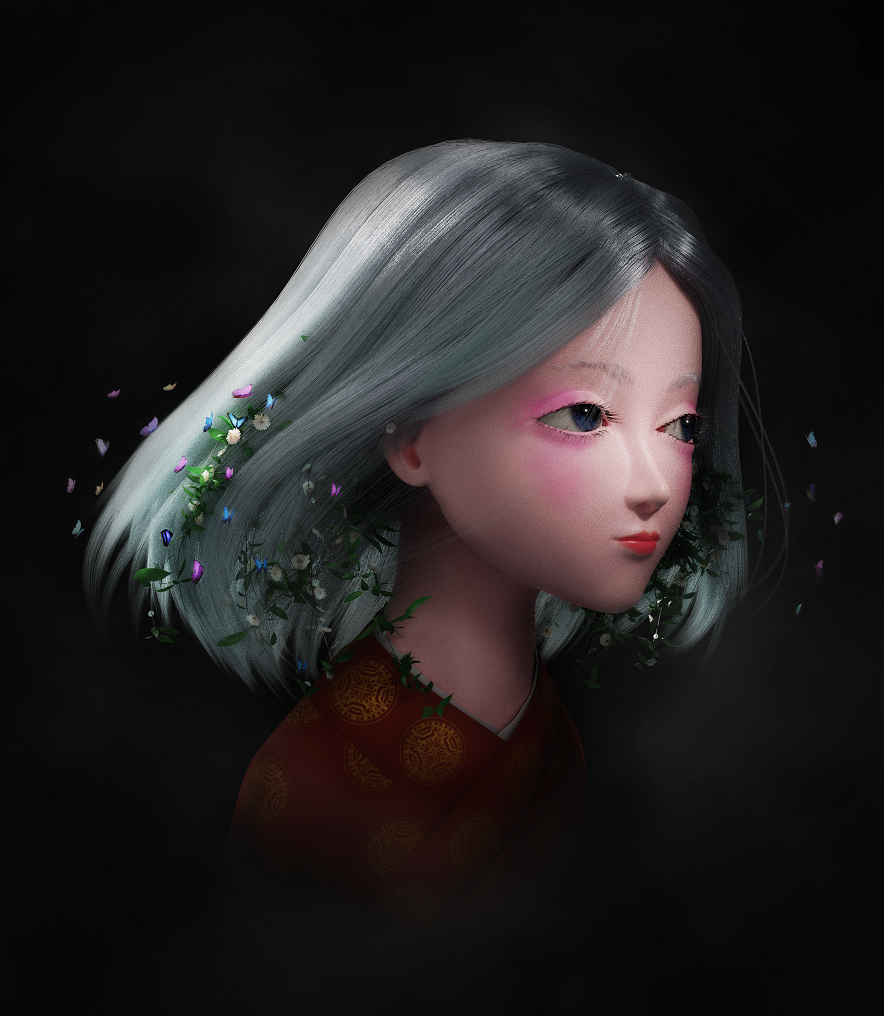
Finalizing the scene
I rendered the scene from several angles and, for the final render, I chose the one that gave a sense of motion the most. I kept it noisy to get a grainy surface texture and post-processed it in Photoshop with some basic techniques. I also added some foggy atmosphere.
Thank you so much for hanging on till the end! Have a great day.
About the Author
 Omar Faruq Tawsif, An art enthusiast and hobbyist 3D artist. Loves traditional drawing and sketching as well.


