Behind the Scenes: Medieval House
About
Hello, my name is Nishant Neeraj Agnihotri and I’m a 3D artist from India. I started my journey as a 3D artist in 2015 but I began working with Blender in 2018. Since then I have never wanted to use any other digital content creation software. I generally use Blender for all of my 3D tasks. Since I started using Blender and joined the Blender community, I have learned so many new things about CGI that I did not know before.
Since 2018, with Blender, I have been learning many things at rapid force. It’s an enormous amount of data that I needed to learn, implement, experience, and understand. I have also done Civil Engineering, which sometimes helps me to understand technical and complex stuff easily. Having a technical background is always a nice thing.
Beginning in April 2020, I have been quite busy learning game development with Unity, including programming with C# language. As I said, I am learning many things alongside Blender. Game development is the final destination that I want to reach.
[sponsor id=’qarnot’]
Inspiration
Well, one day I was working on a gameplay demo with coding and Unity for practice. I was thinking about some specific logic to add into the script. And suddenly I looked out of my window. Someone in my neighbourhood has a hut-shaped-roof style home and sunlight was just really making it more perfect—red roof tiles, a real deep blue sky, and that warmth of sunlight. It kinda held my breath for a moment, like it was a perfect moment.
At that very moment, I decided to create a low poly stylised medieval house with that same feeling. But I had to finish game development before that. So I waited like 4 months before creating the art.
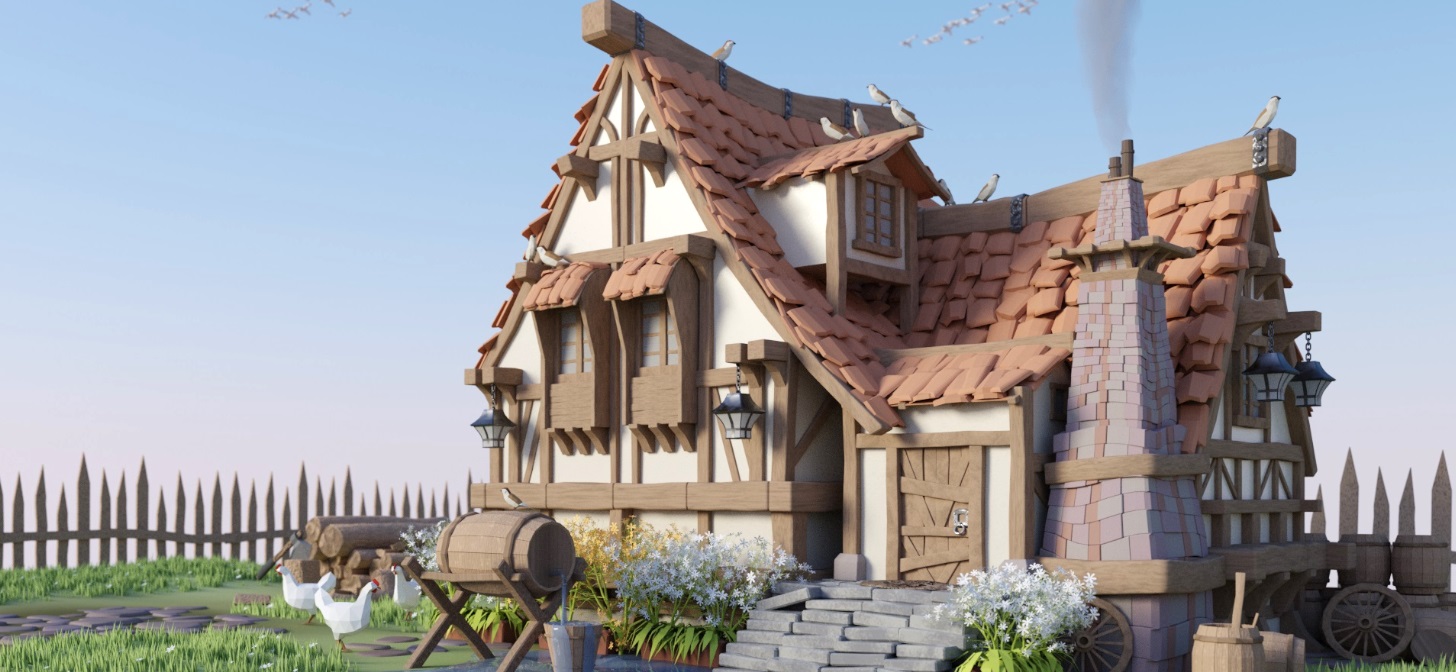
All the previous artworks, renders and models that I had done were also done at great speed because there was so much left to learn and I was in a hurry. However, by the end of September 2020 I had learned code, created a couple of gameplay demos, and finished the beginning stages of gamedev. Right after that, I started working on medieval houses. This time I was free, no rush, no speed-learning at a rapid pace. I took all the time I needed to create a beautiful low poly stylised medieval house. So I decided to create three medieval houses in a series—two low poly stylised artworks and one realistic medieval house, which I just recently finished.
You can check the links to all three artworks in the “Links” section below.
Since childhood, my life has always been in touch with village life in India, so I am pretty aware of what village life, living in the mountains, and a farmer’s life is like. It’s not an easy life but it is a pretty interesting, fresh, and hardworking one. This knowledge was an advantage when working on this medieval house project.
Modeling
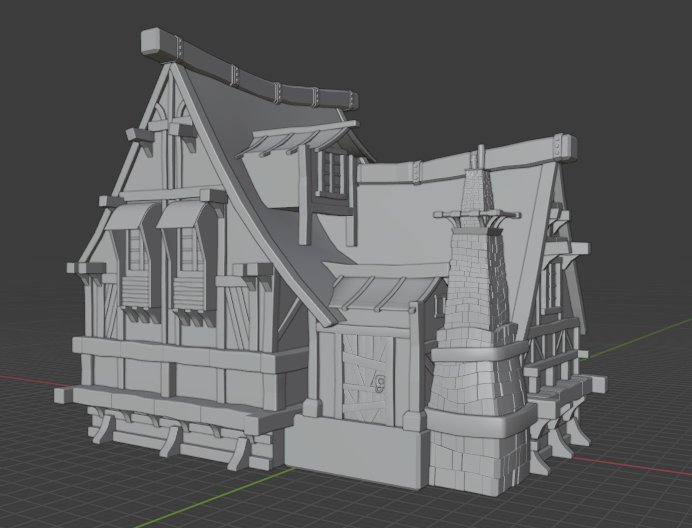
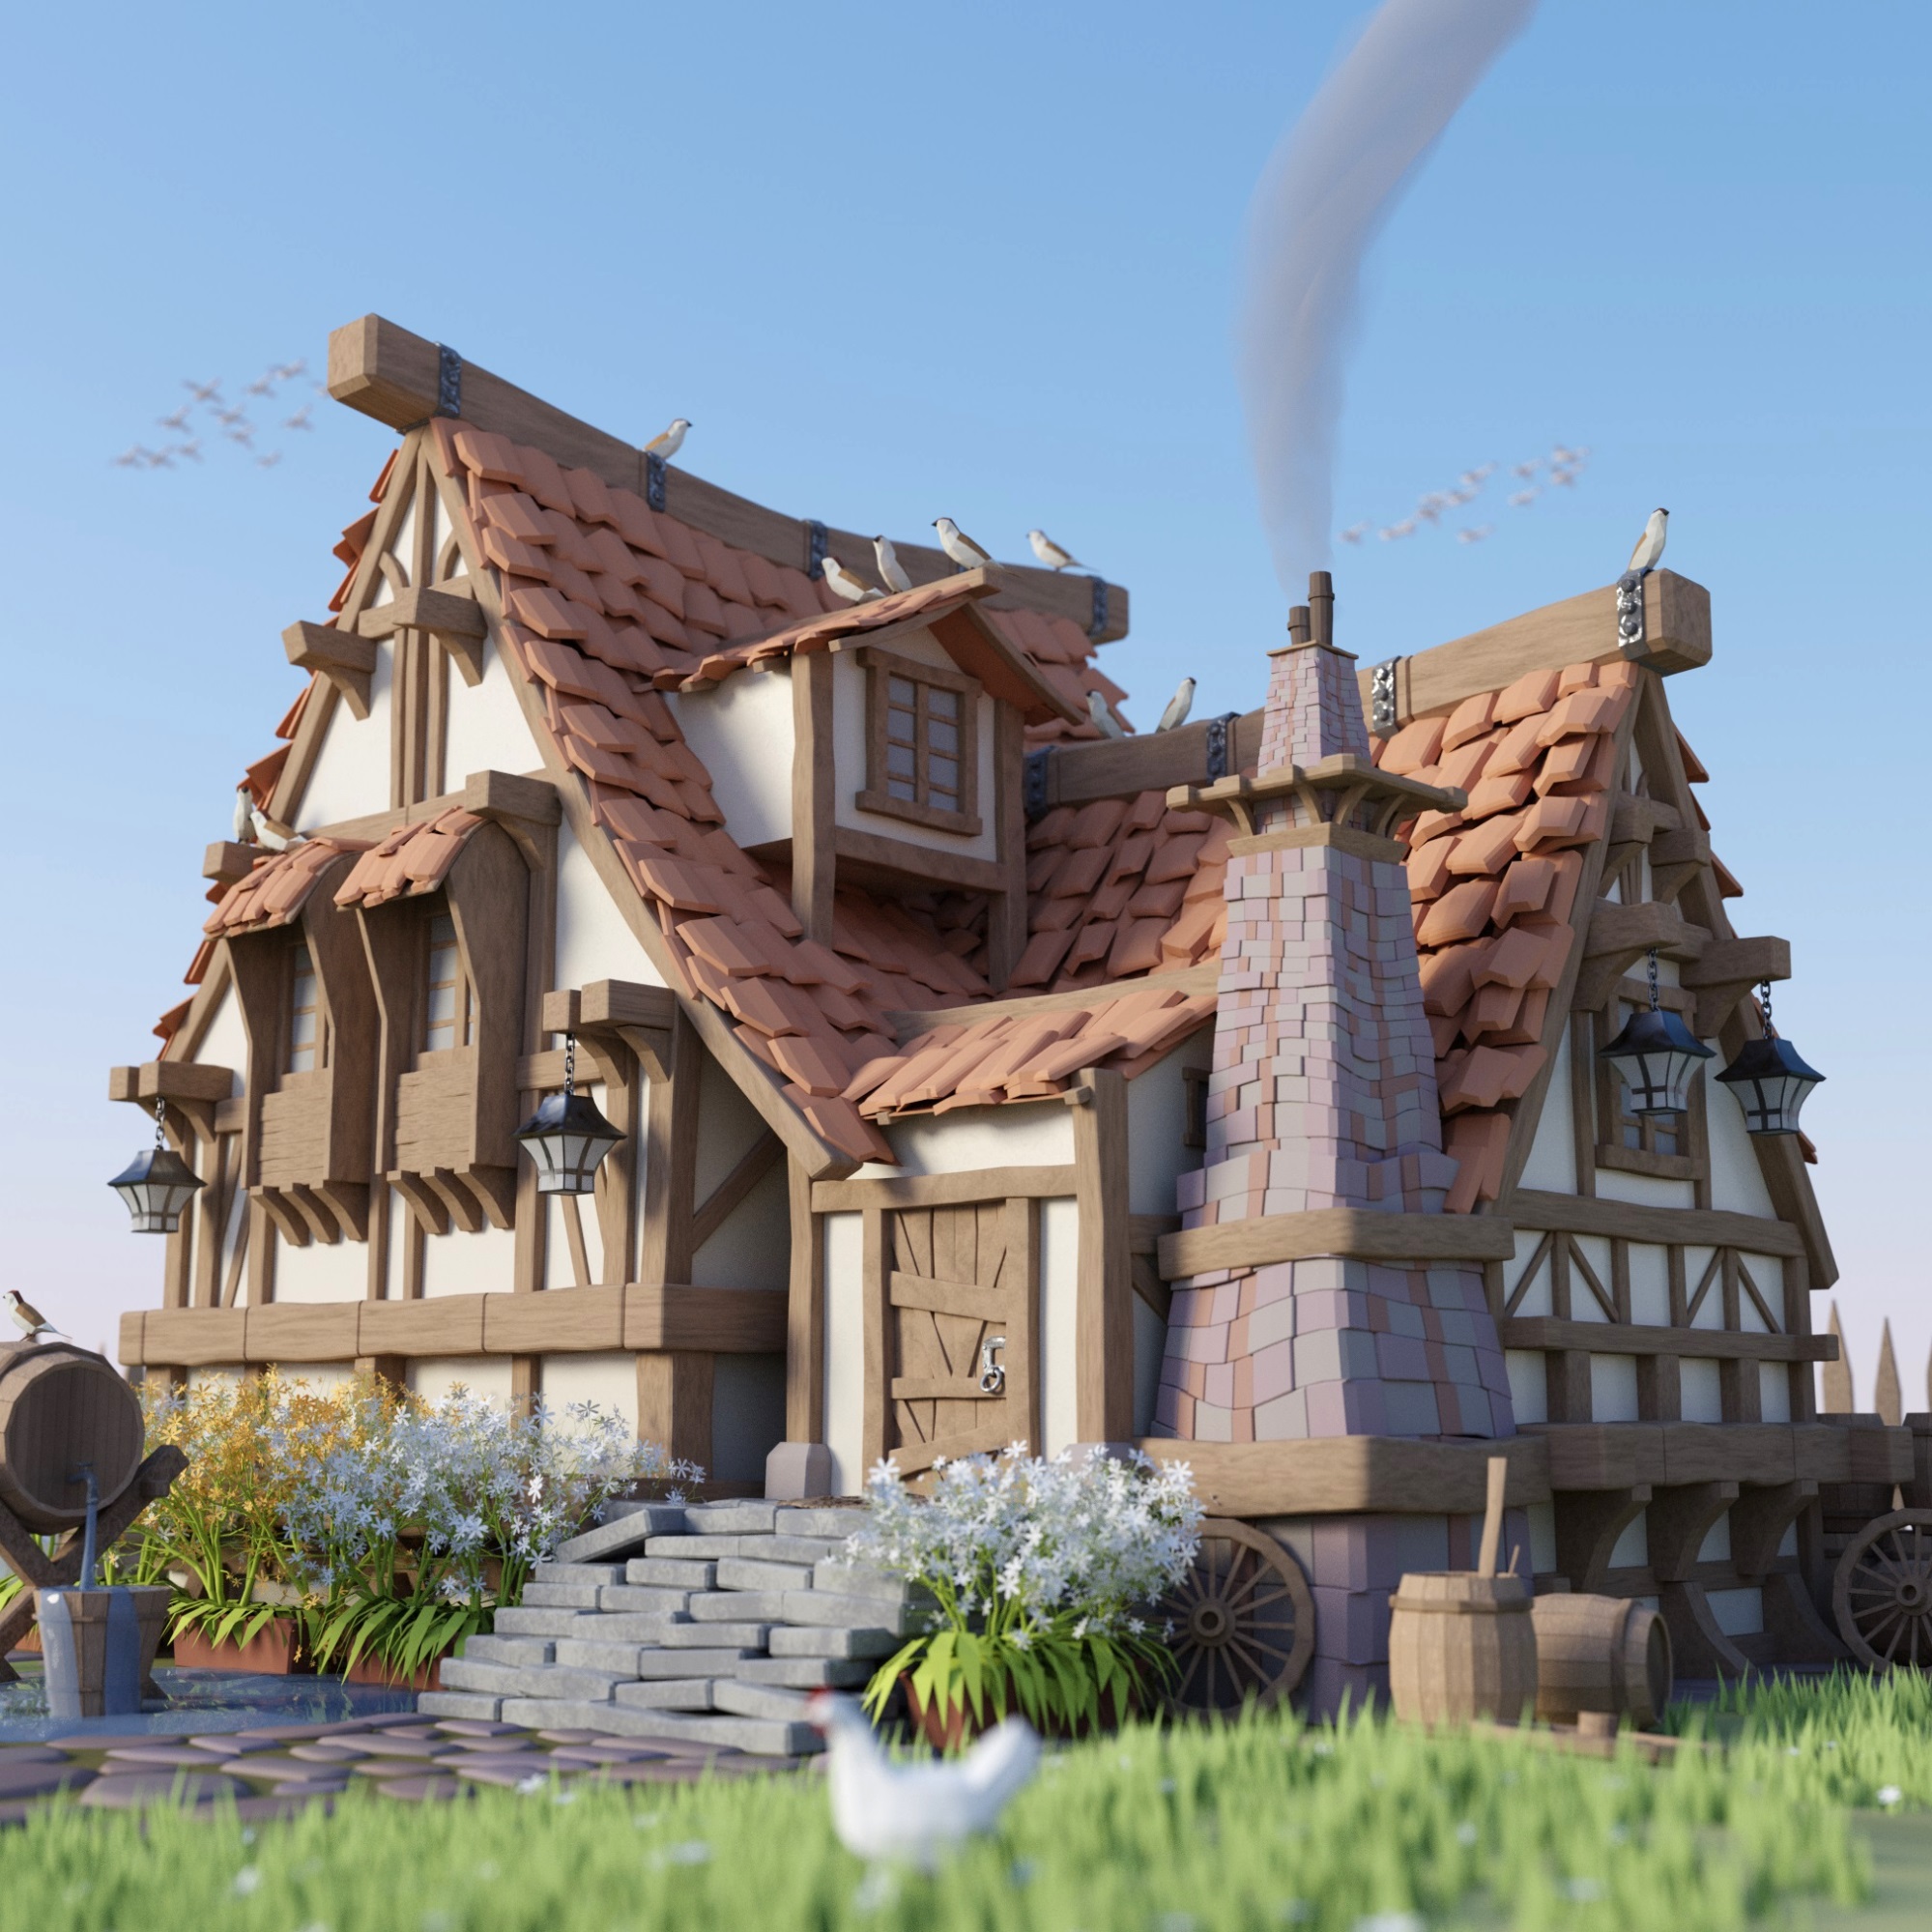
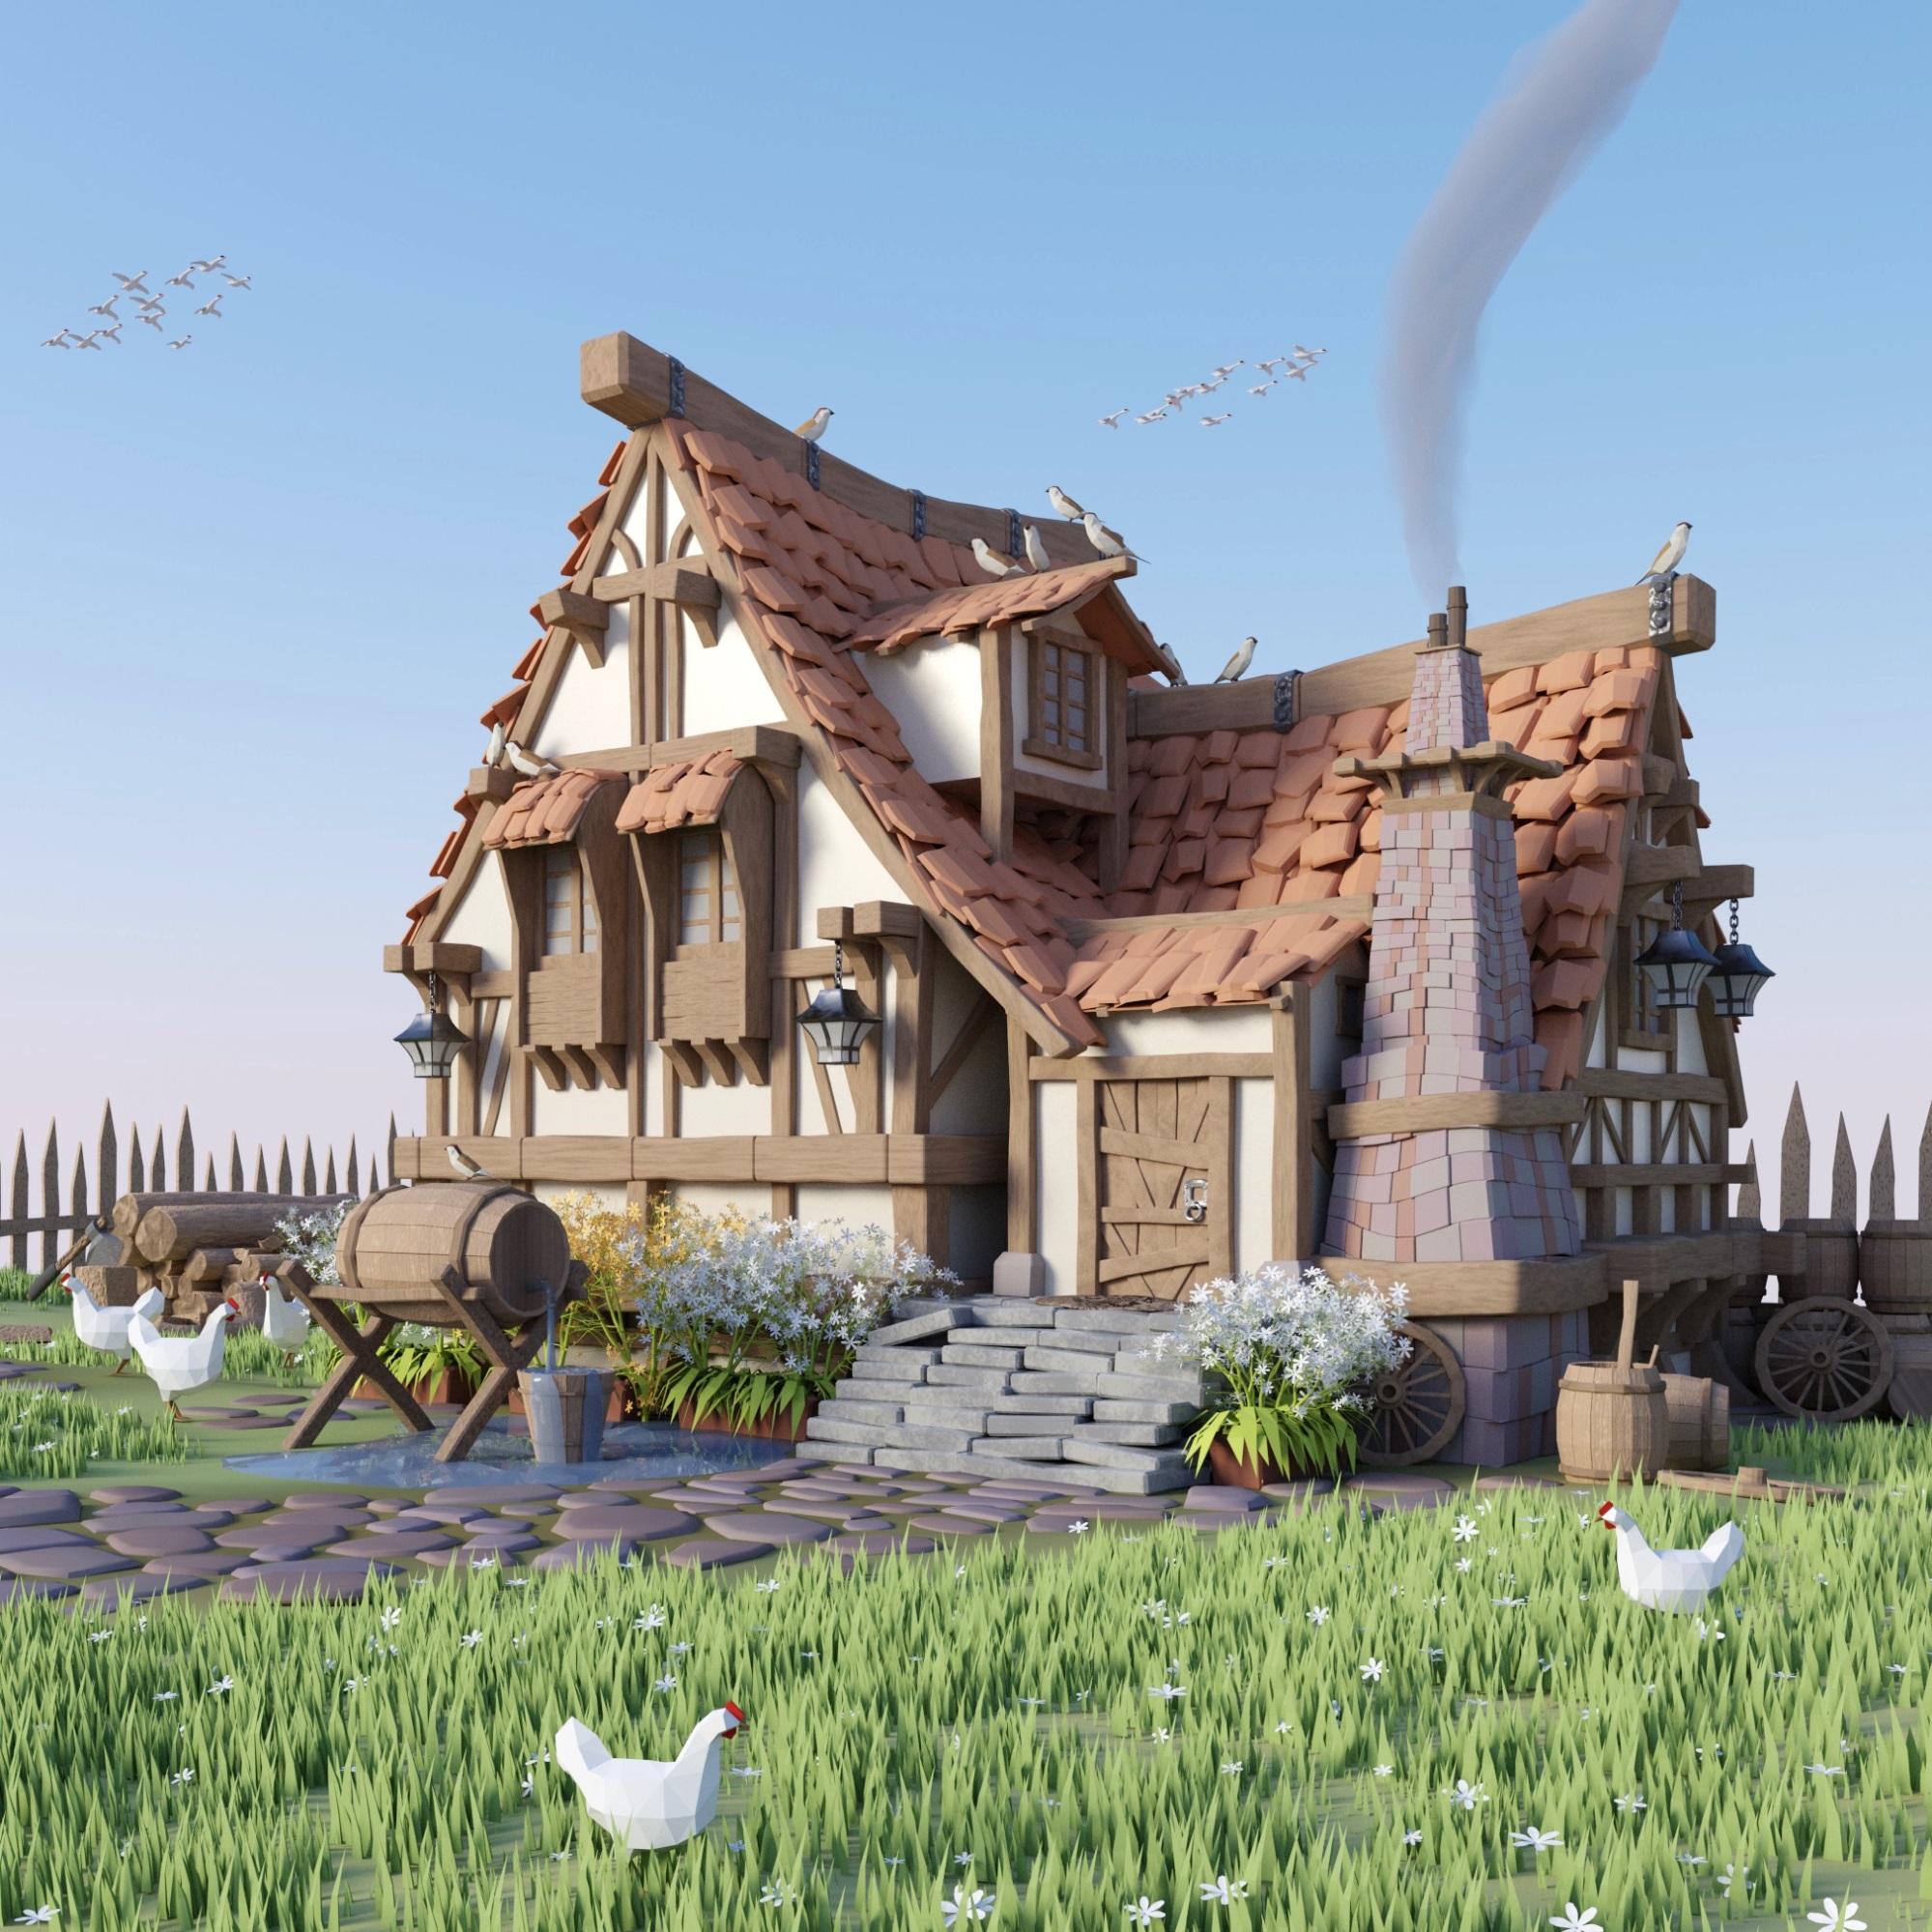
I started from a medieval house. Although I already had the vision in my mind, I still did a little bit of research about medieval stuff. I gathered around 100–120 image references in PureRef and got down to modelling work.
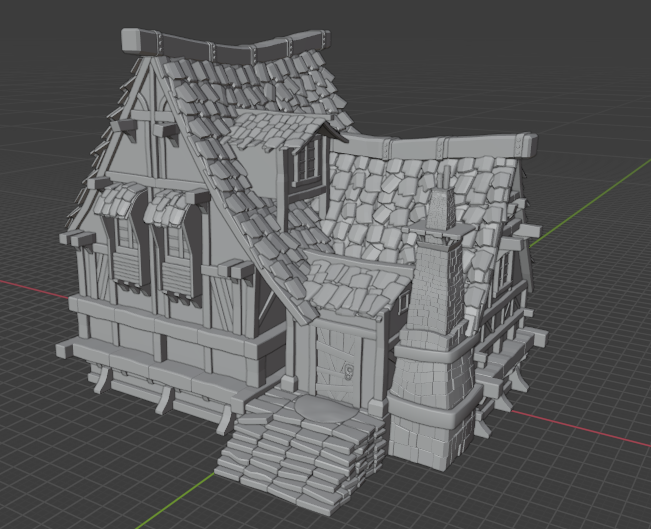
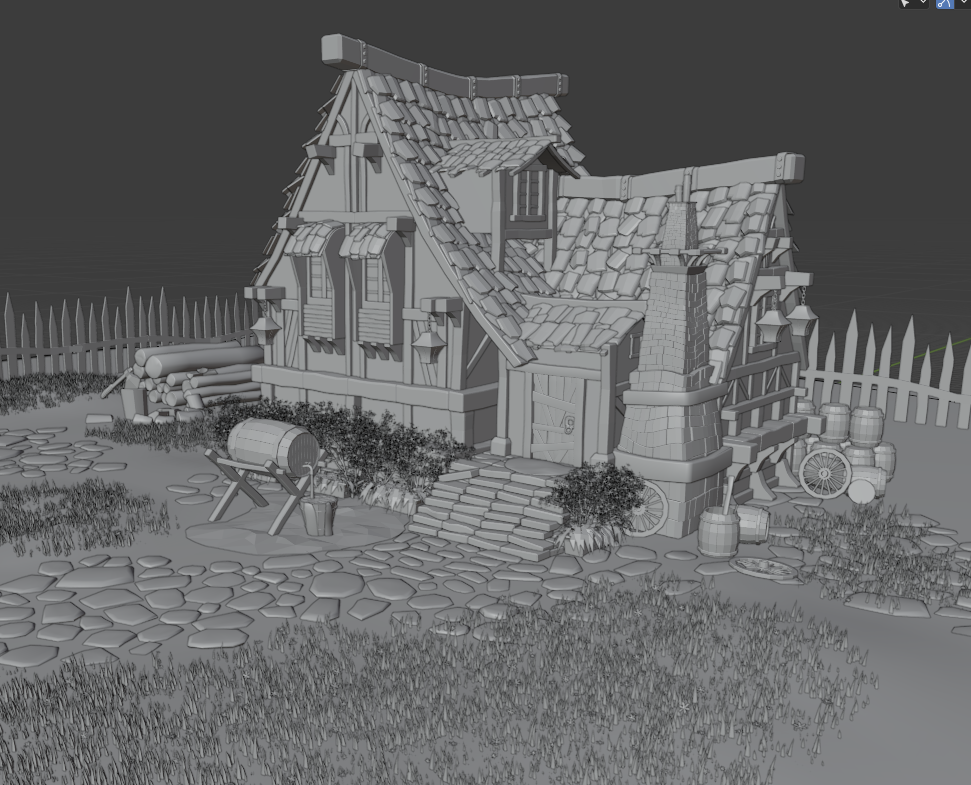
I started with the basic house structure. First, I blocked out the main walls and the ridge of the roof.
Then I started working on roof tiles. Tiles needed to be in separate pieces. First, I created those tiles and then placed them very wisely with Lattice.

Roof tiles on all roofs:
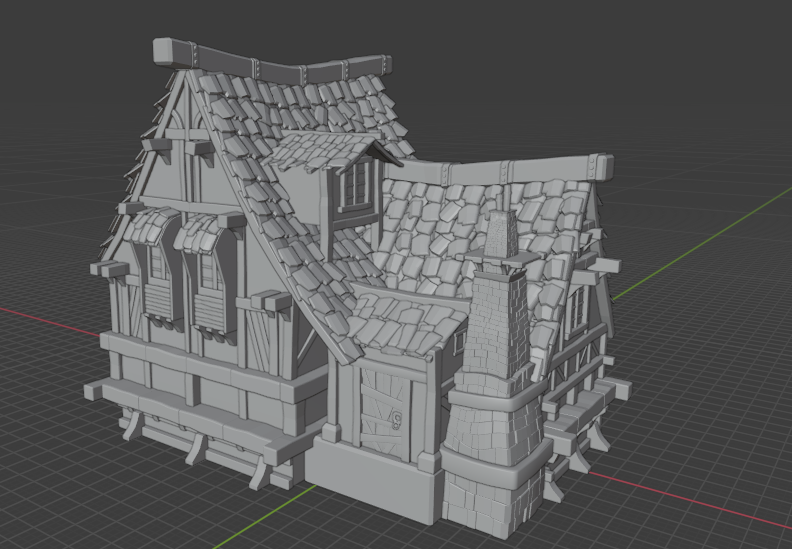
Then I stylised the look of the chimney a little bit. It really looked and felt great with the overall style of the house.
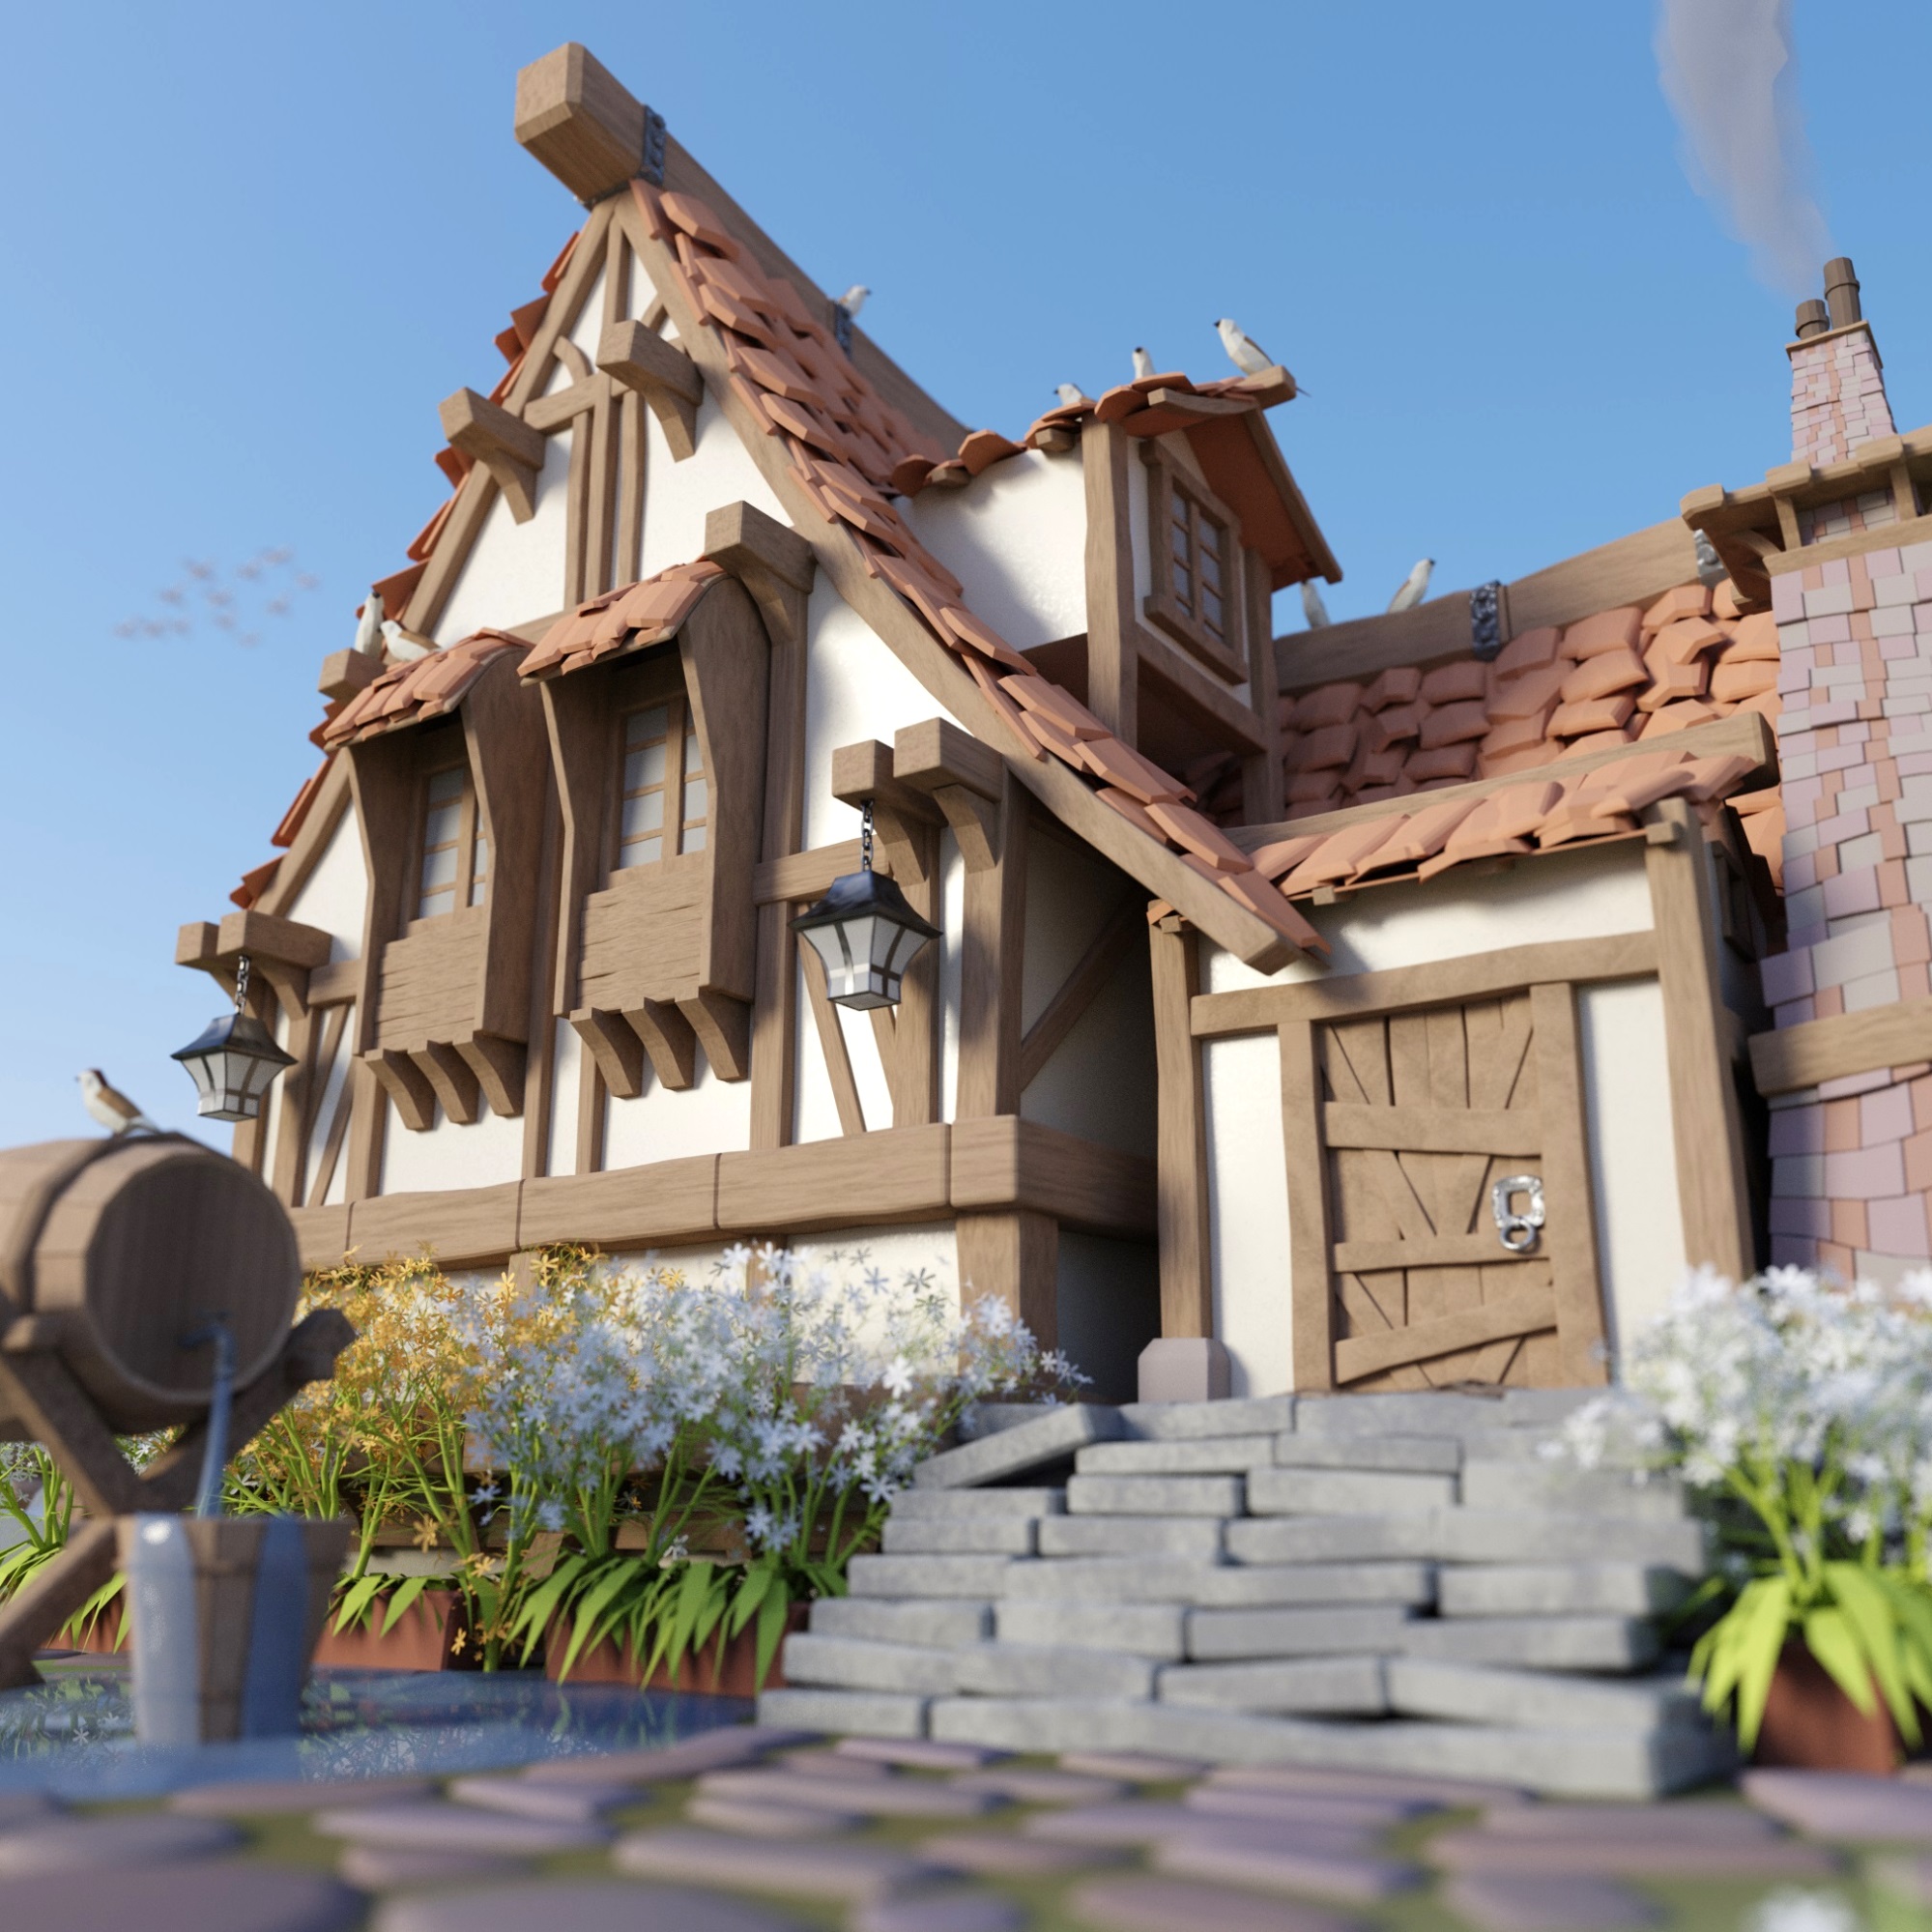
Next came the stairs. The look, placement, and texture of the stairs played a very crucial role in making or breaking the composition of the scene. I placed all pieces of the stairs very randomly. It was necessary to give a manual touch to every piece to place it better. That’s where I learned that low poly might be low on mesh but still requires lots of work—but I loved to work and enjoyed every moment.
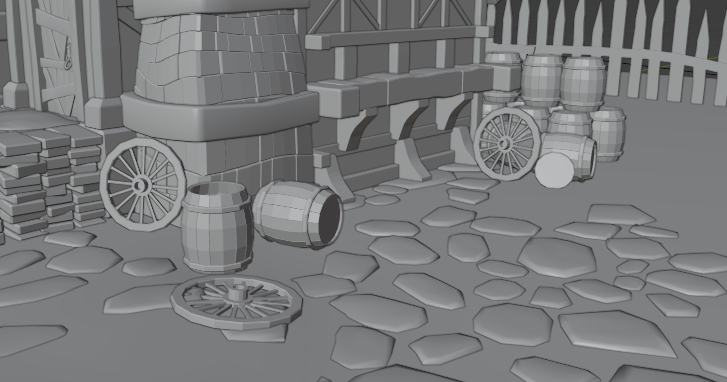
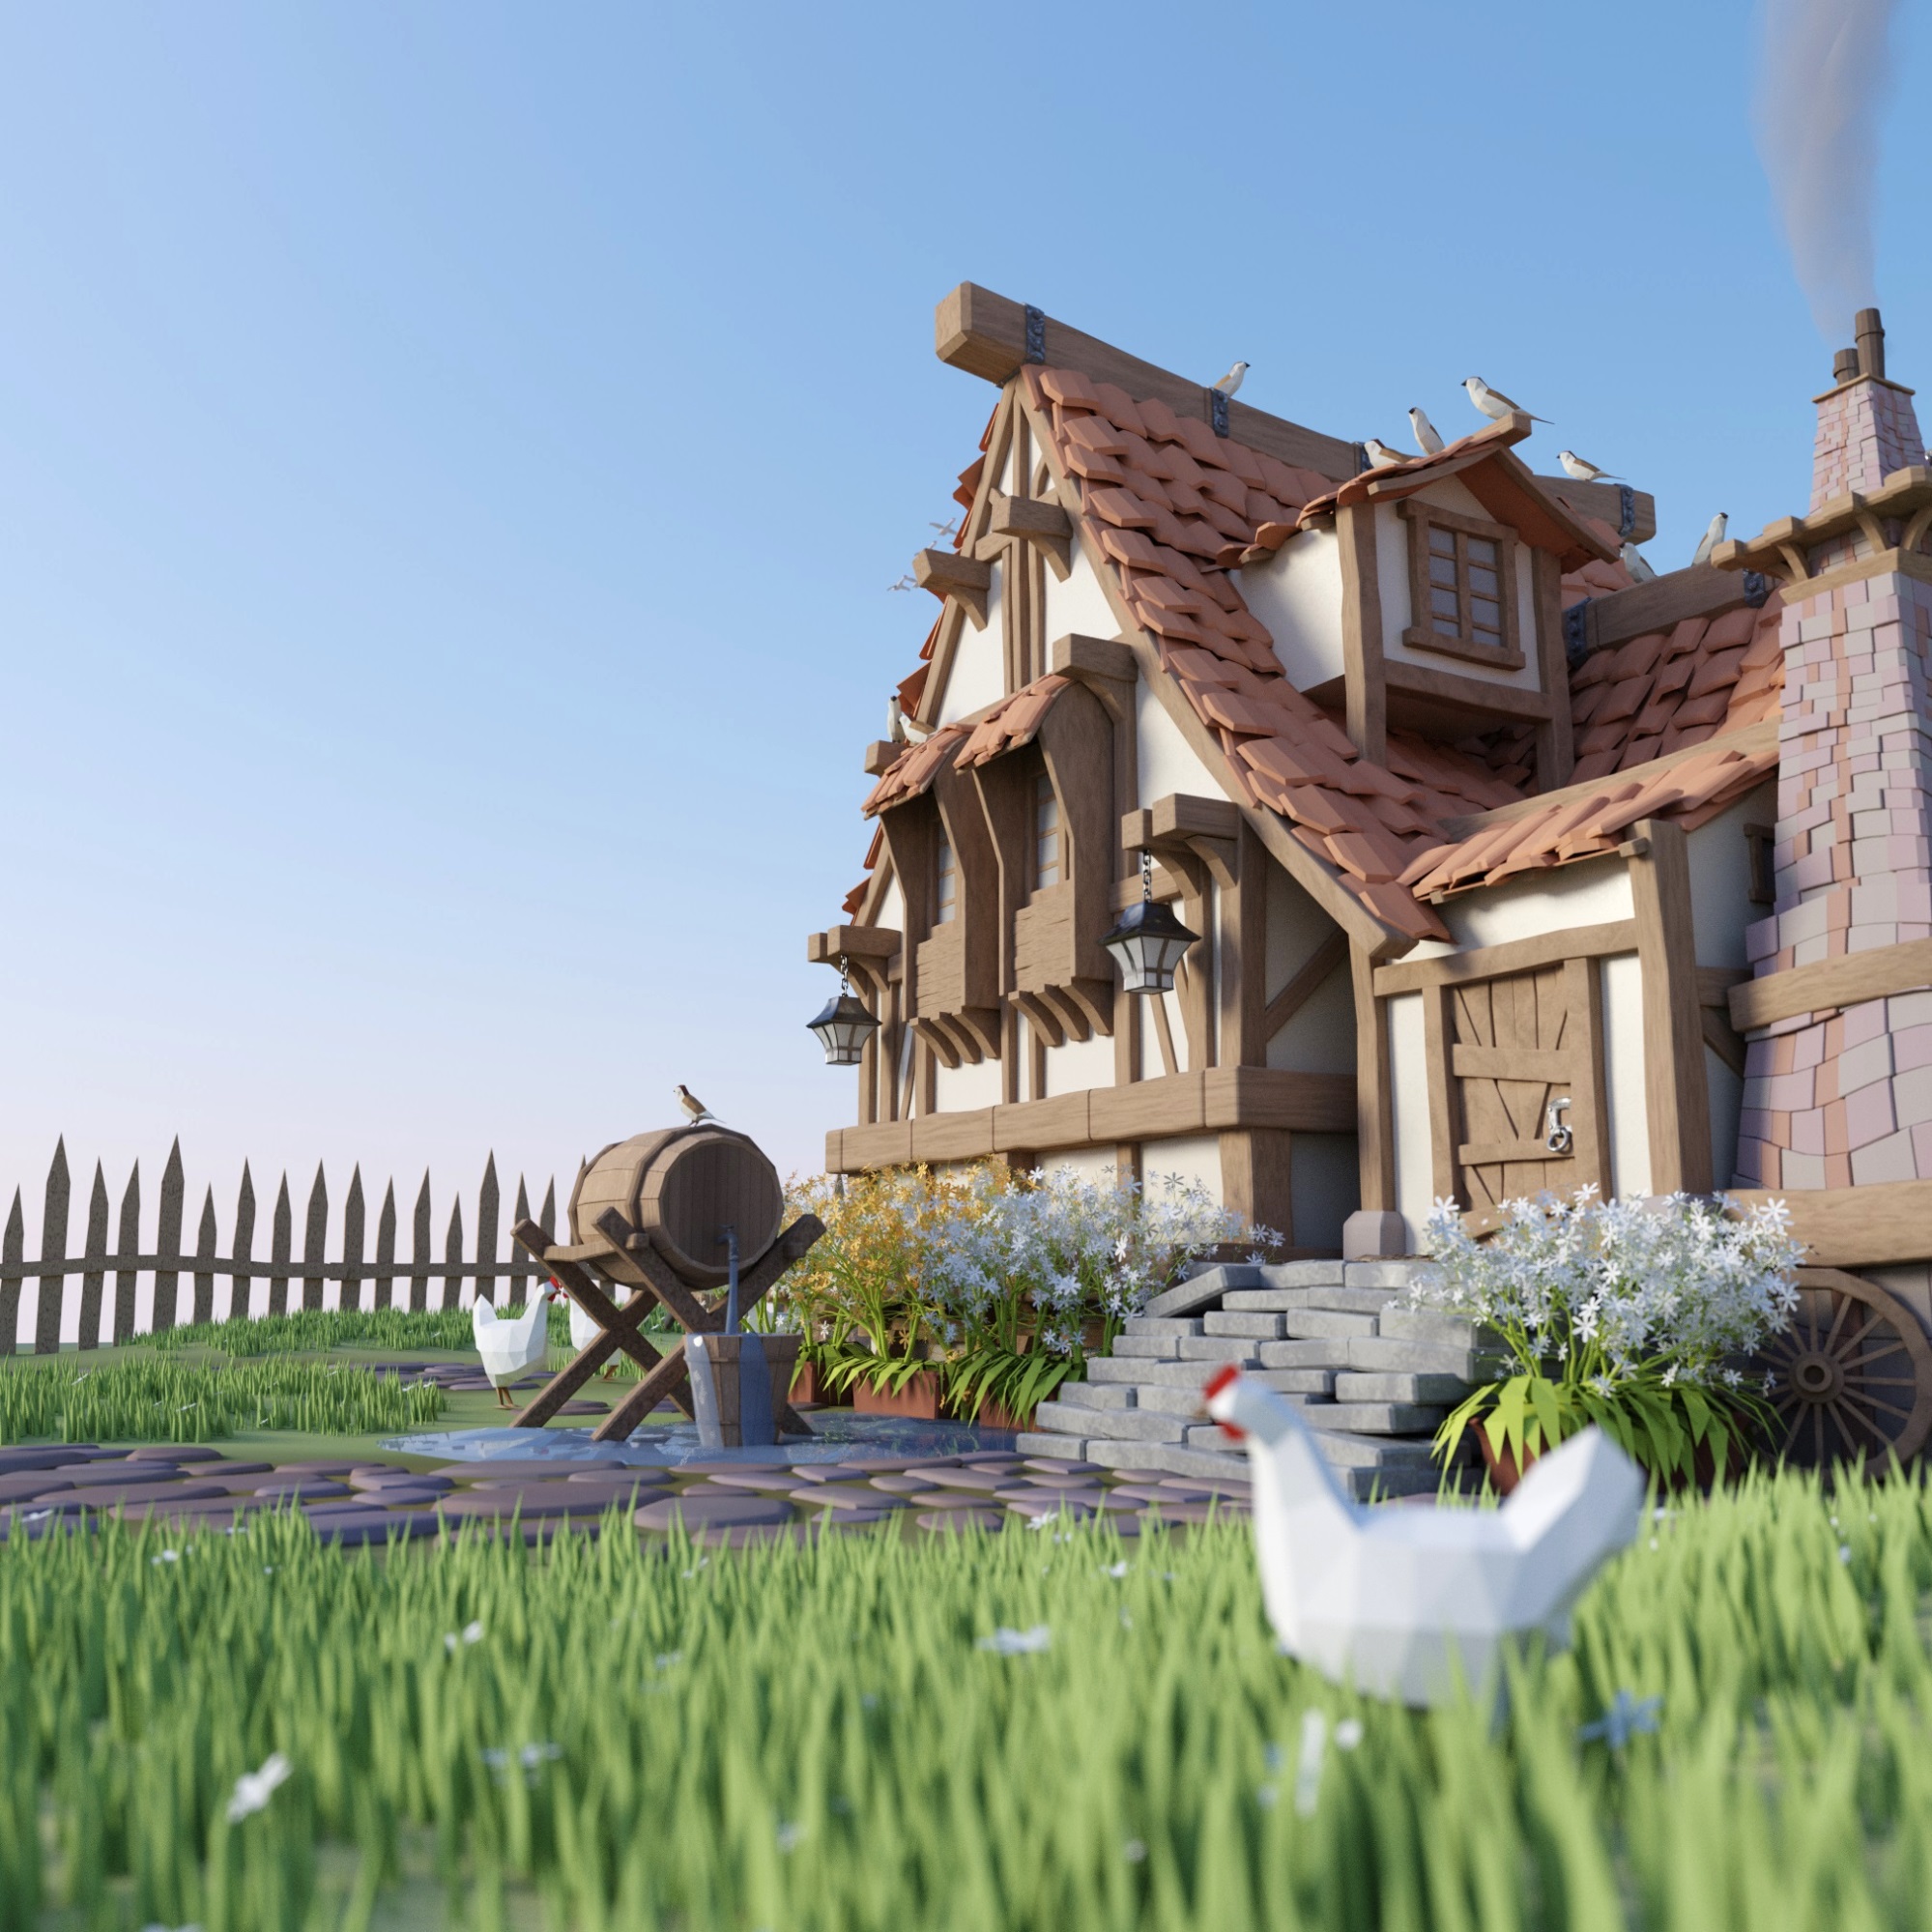
Now it was time to add the ground and surrounding stuff to fill the scene. I created and added stones on the ground, placing them very carefully to keep nature’s randomness at its finest.

Placement of stones really mattered a lot. This literally made the scene feel the way it feels. It kinda provided a direction and delineation for the house’s front.
Right after setting up the ground with stones, I simply added a pointy and sharp-edged fence to create a visual boundary limitation for the house’s background.

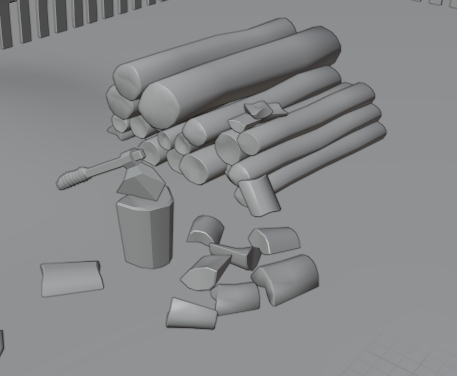
Right after that, I just started piling up the important filler stuff of the scene. The placement of everything came from my own mind and heart—what felt good and perfectly placed according to instinct. Like a natural skill for placing stuff. These items would also either break the scene or make it.

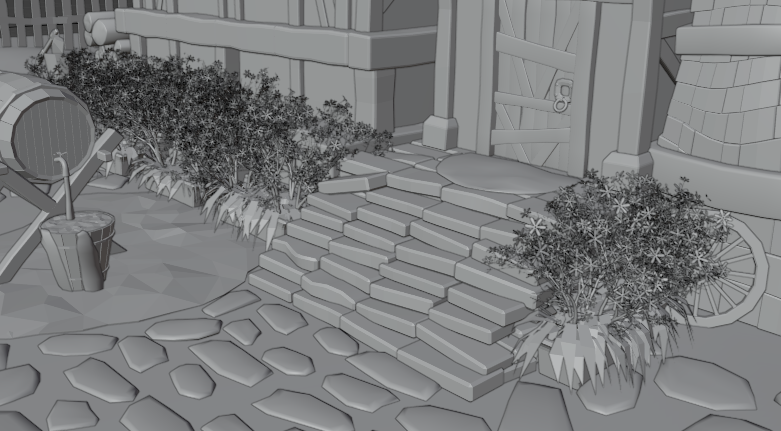
I also added grass and flowers all over the ground around the house to attain a fresh morning feel.
But something felt odd, hmm… what exactly..?? Life was missing. So I added a couple of low poly birds.
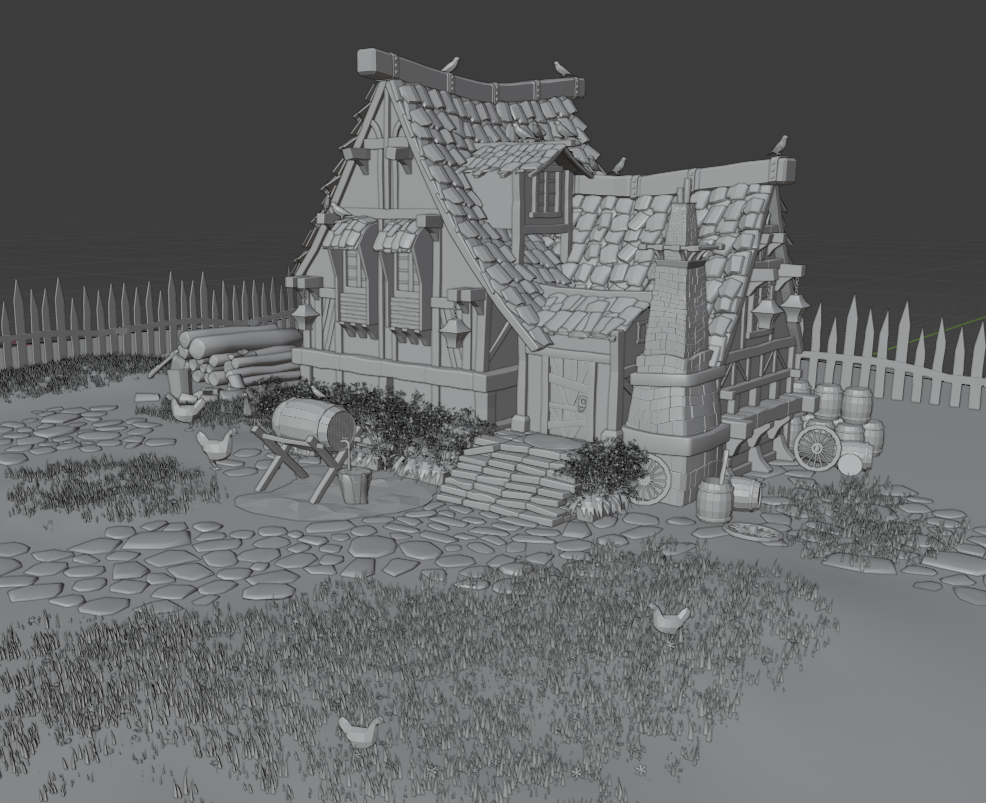
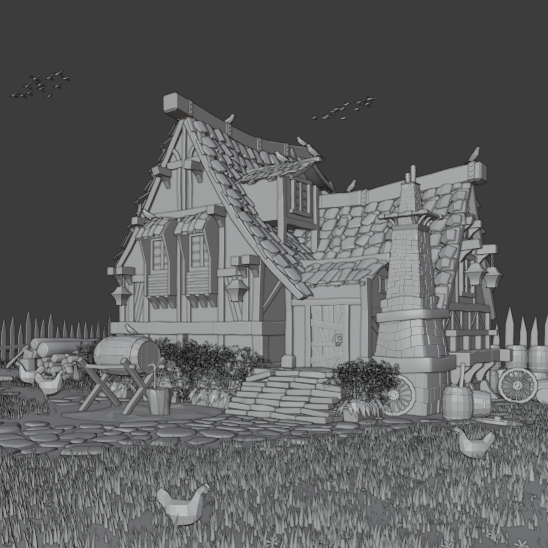
Finally, I set the camera angle with all the models:
Texturing
Texturing the low poly scene was very simple. I simply used a principled shader with base color. The wood texture is procedural and was created with simple noise.
However, the ground texture was not that easy to conceptualize and implement. I spent two days specifically on the ground to make it look extremely perfect. It really took quite an effort to get it done with texture painting because it was my first low poly scene ever:
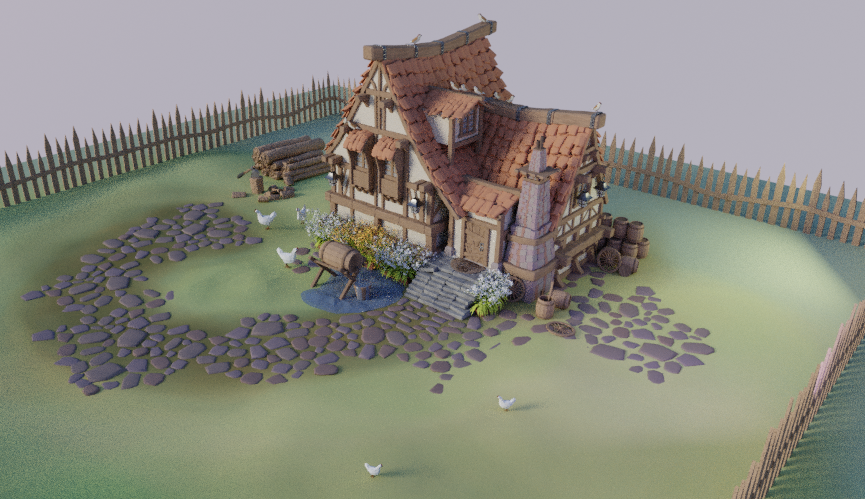
Having something in mind is one thing but making it a reality is another thing altogether. So I finally created the ground texture just exactly as I wanted. I really enjoyed the process.
Lighting
The lighting is pretty simple when you see the render. I used a simple sun light with morning’s fresh light horizon angle.
Final Renders
The final rendering was done in the Cycles rendering engine with 600 samples.
For Night renders I used 1400 samples. Adaptive sampling mode is a lifesaver.
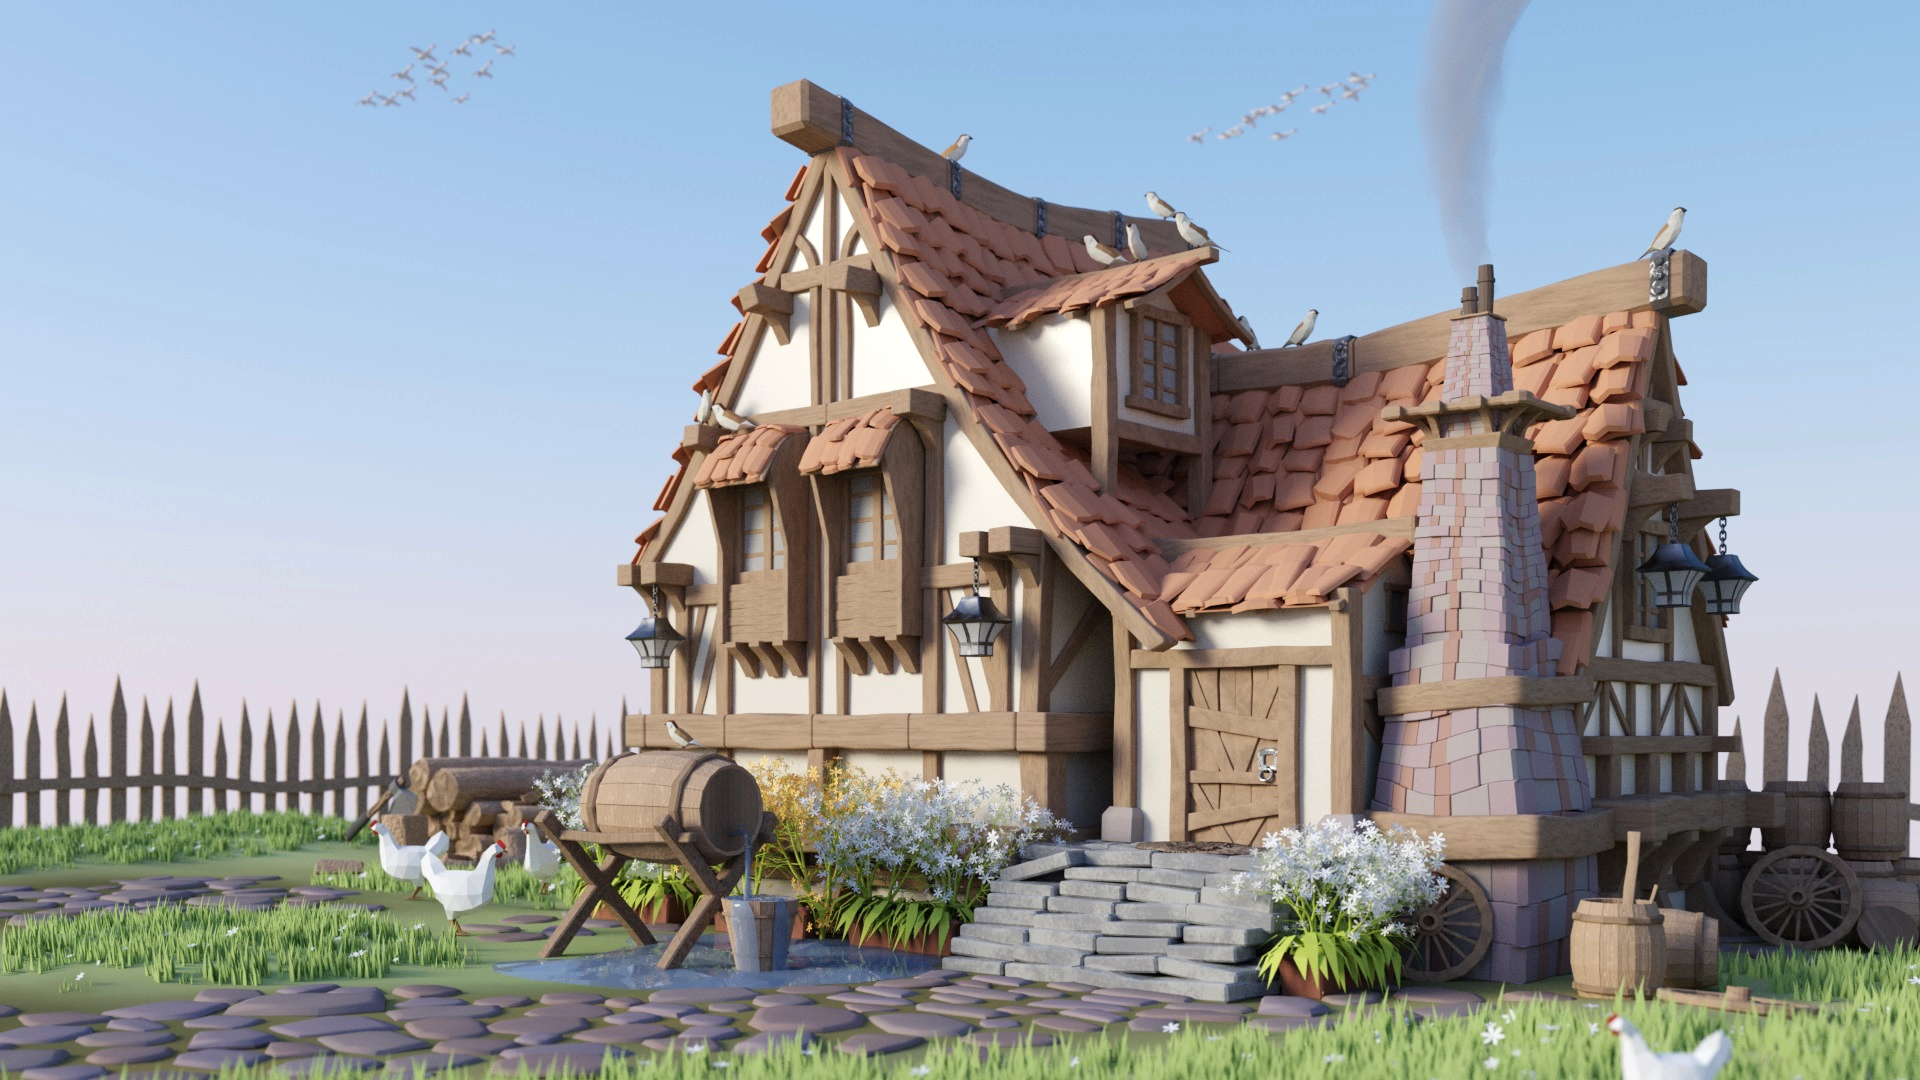
Daylight:
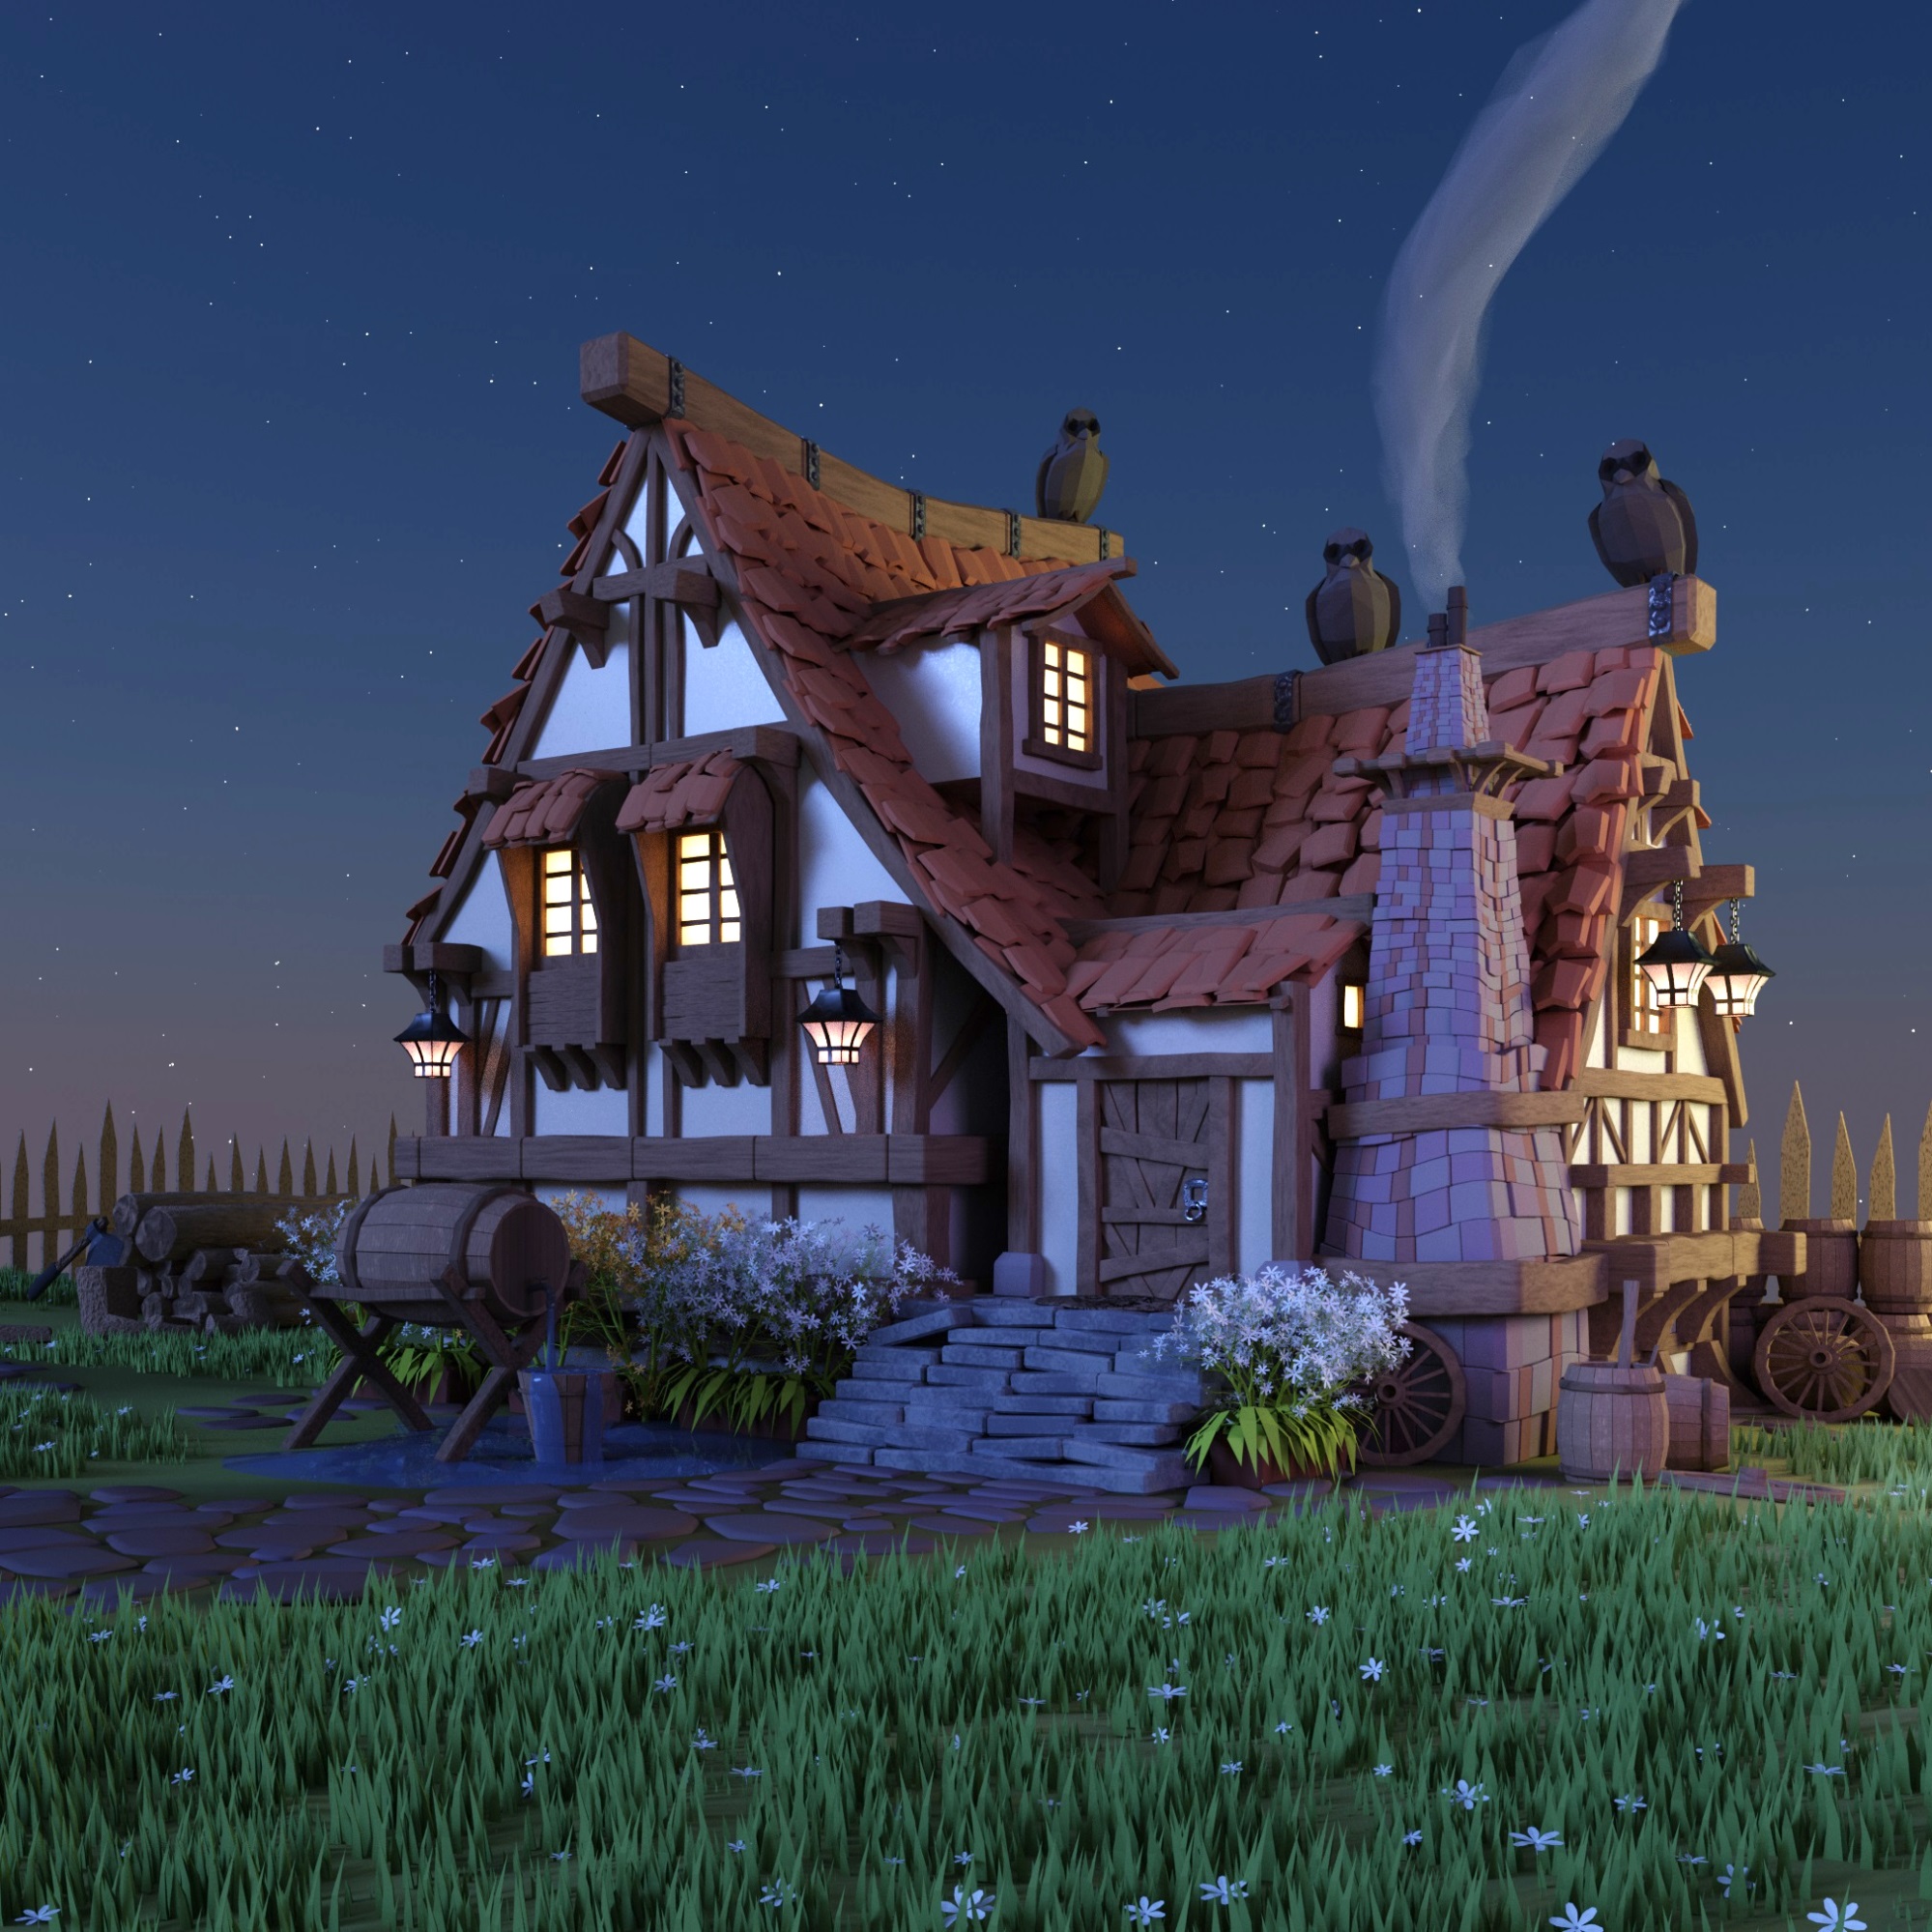
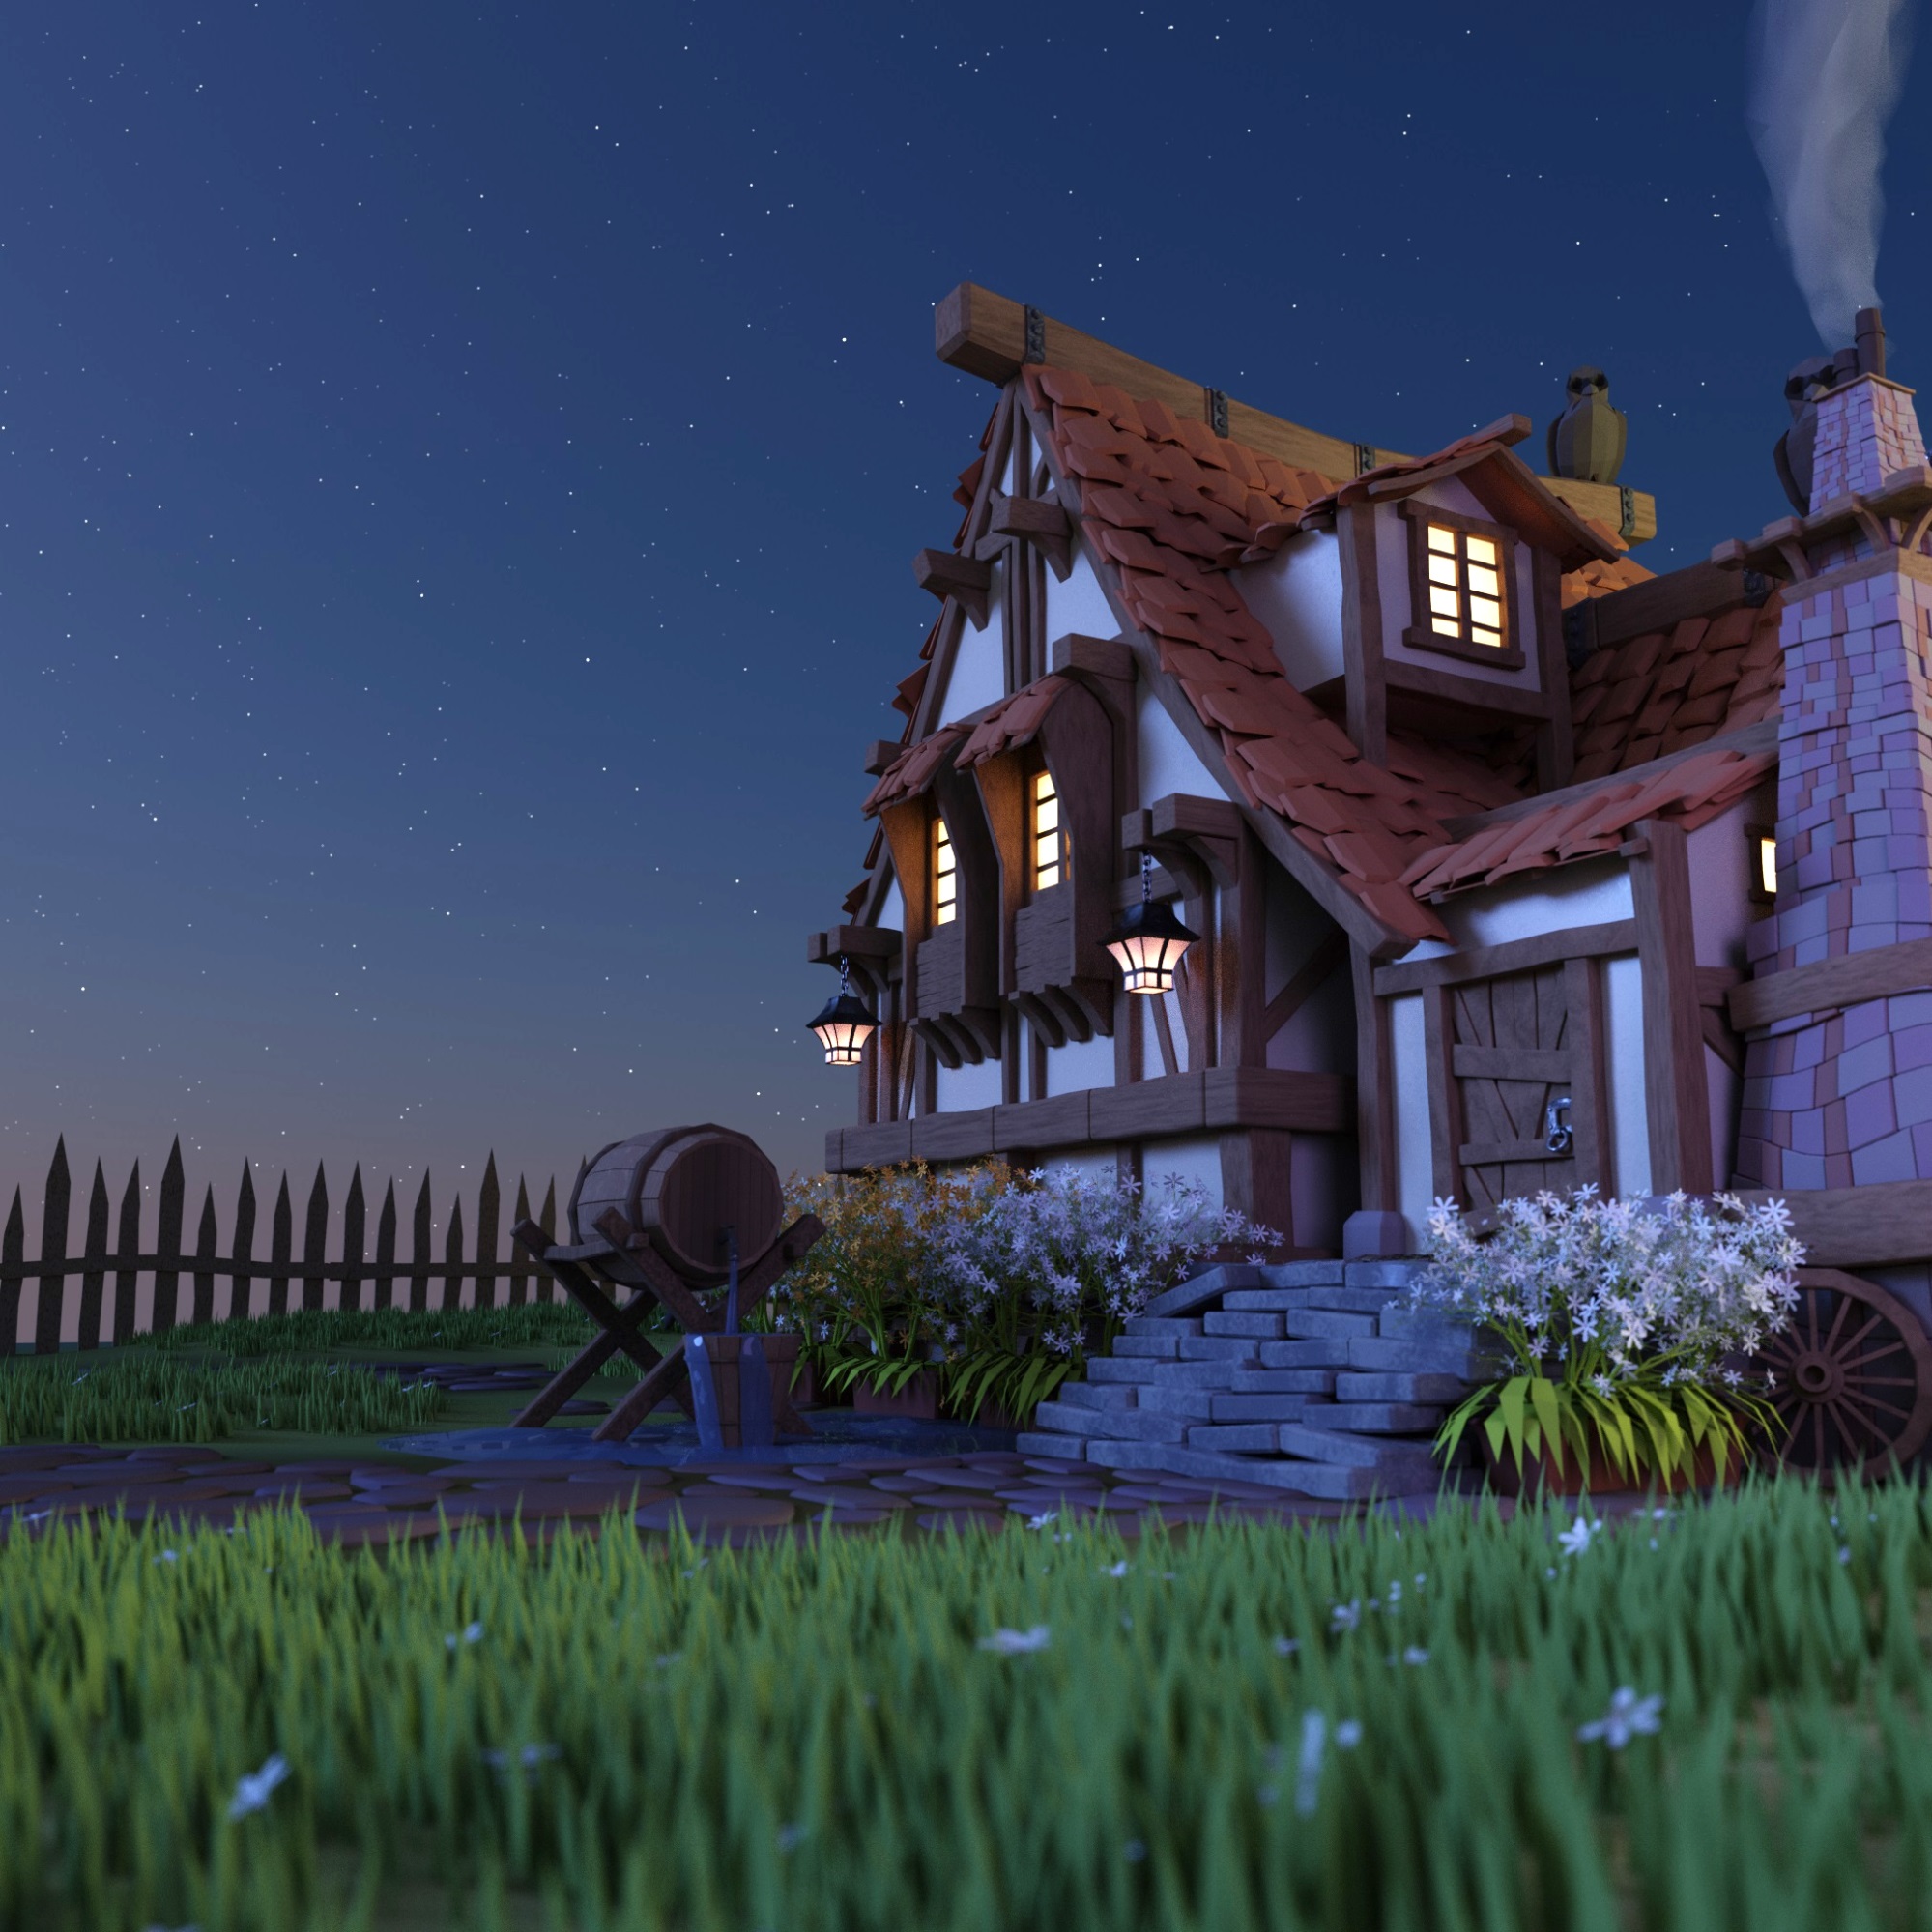
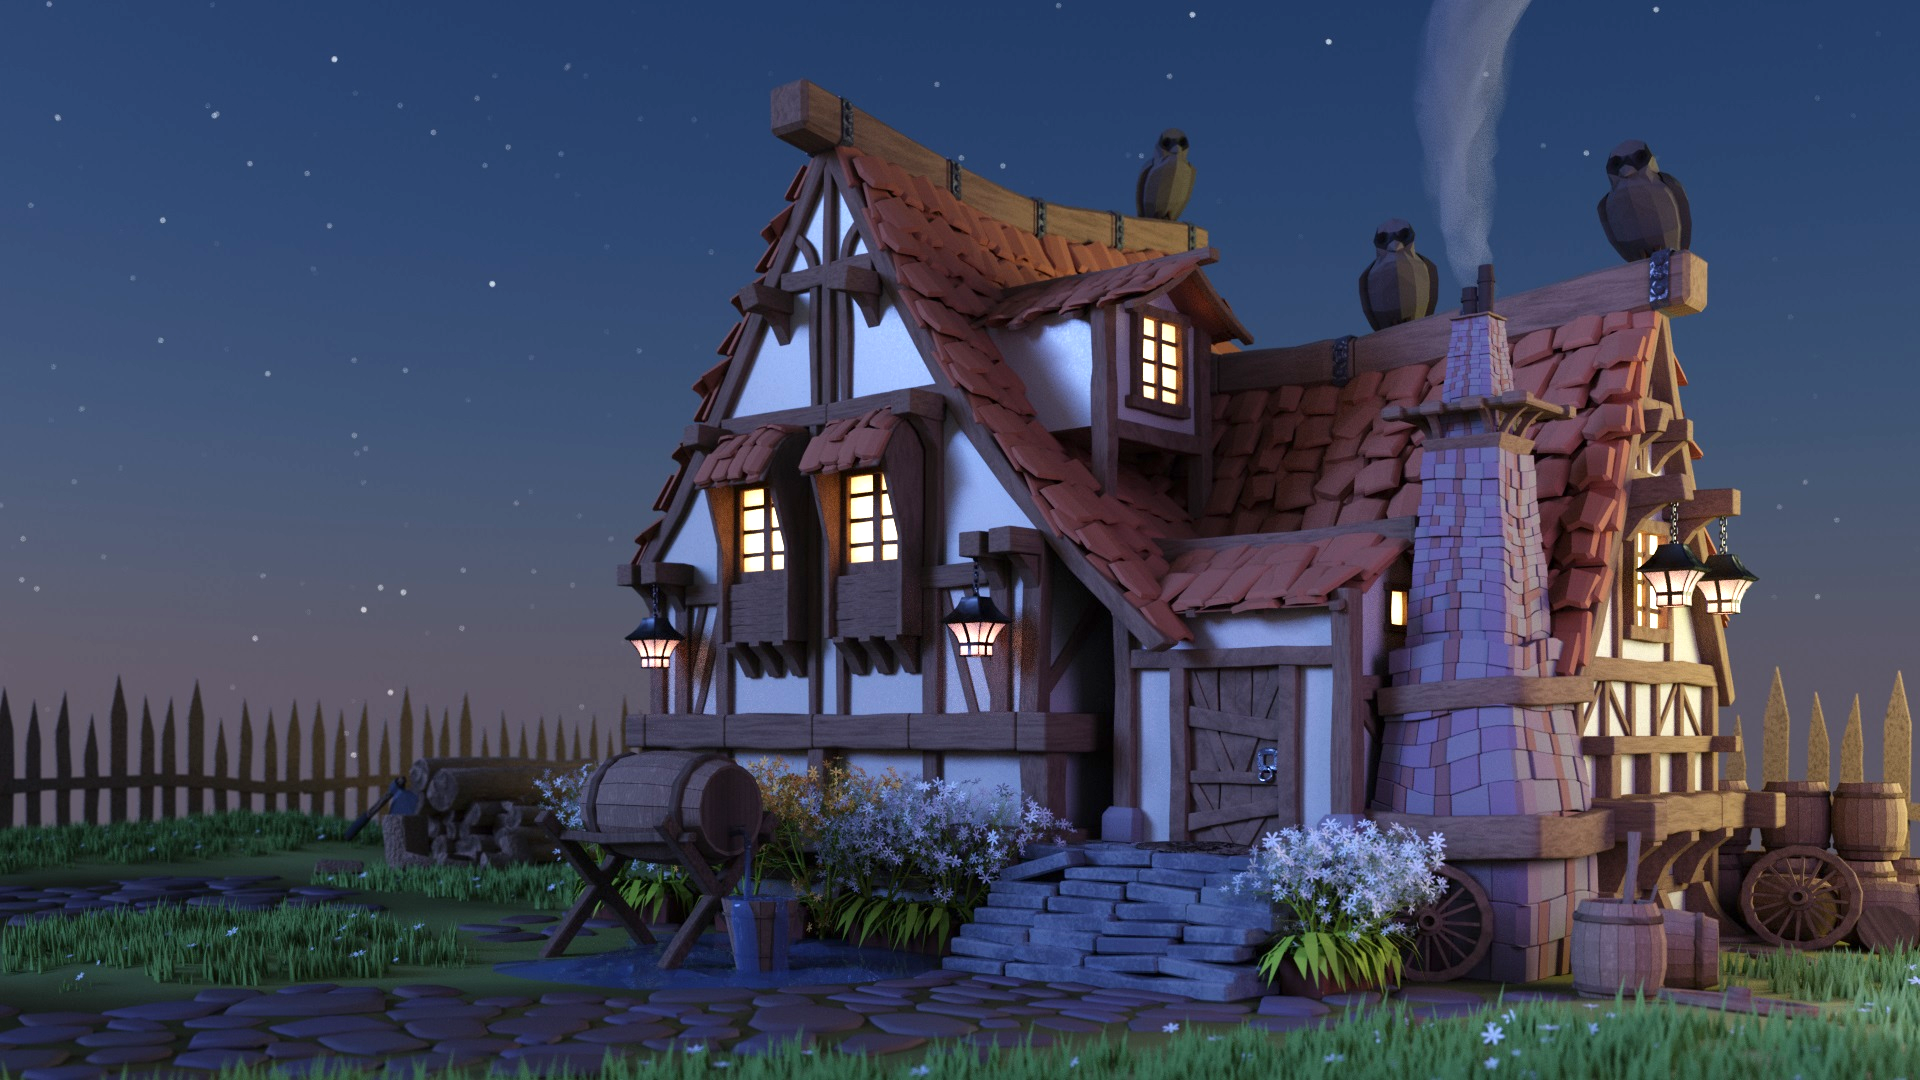
Night Renders:

I worked on a second project of a similar house in which I added more stuff to the scene and made it more upgraded than this one.
The third project is a realistic medieval house. You can follow those projects links below.
I will be really glad if my story really helps you in any way.
Thank you for reading
About the Author
 Nishant Neeraj Agnihotri, 3D Artist


Now this is a premium, well made project and this article is a perfect match for it! :) Nicely explained! Thank you very much! Great work!