

About
I’m a Brazilian; I worked as a CG artist in the advertising industry for 10 years in Brazil. The majority of things that I know I learned by myself, but I had some good training at ICS (Innovation Creative Space) in São Paulo. I always loved organic themes such as human anatomy and creatures, even though, as a generalist, I have to do different kinds of tasks.

Learn more on qarnot.com.
Design, References
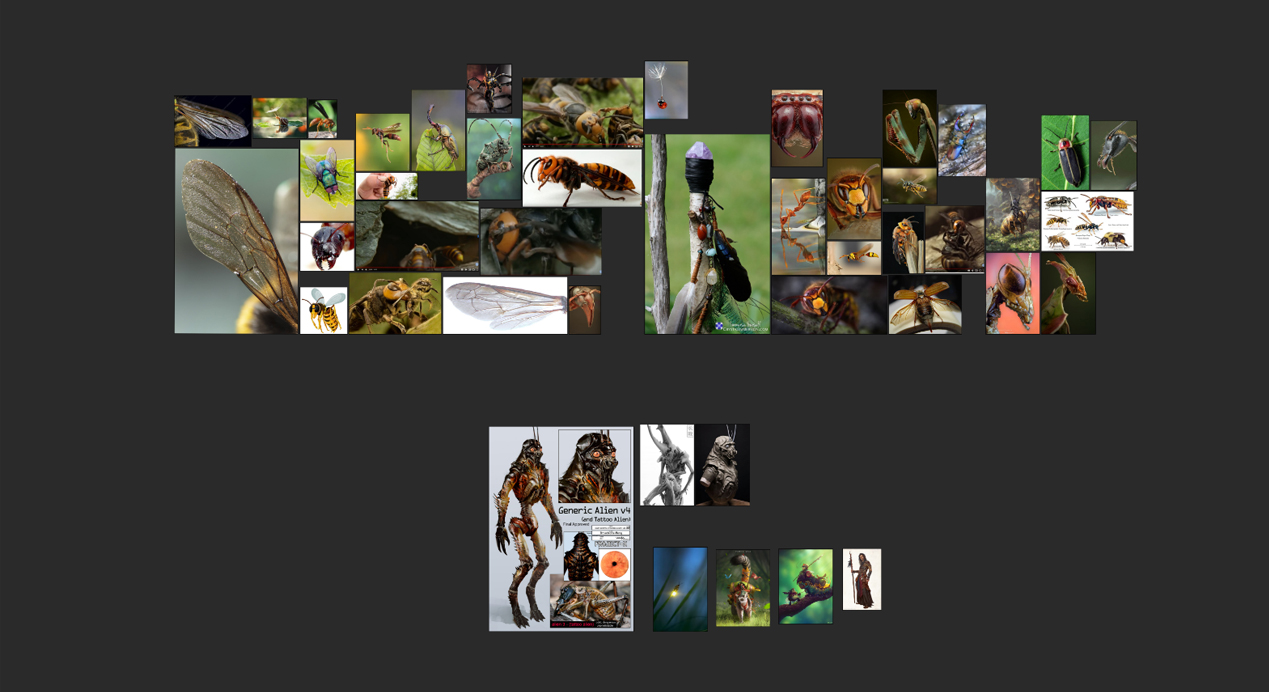
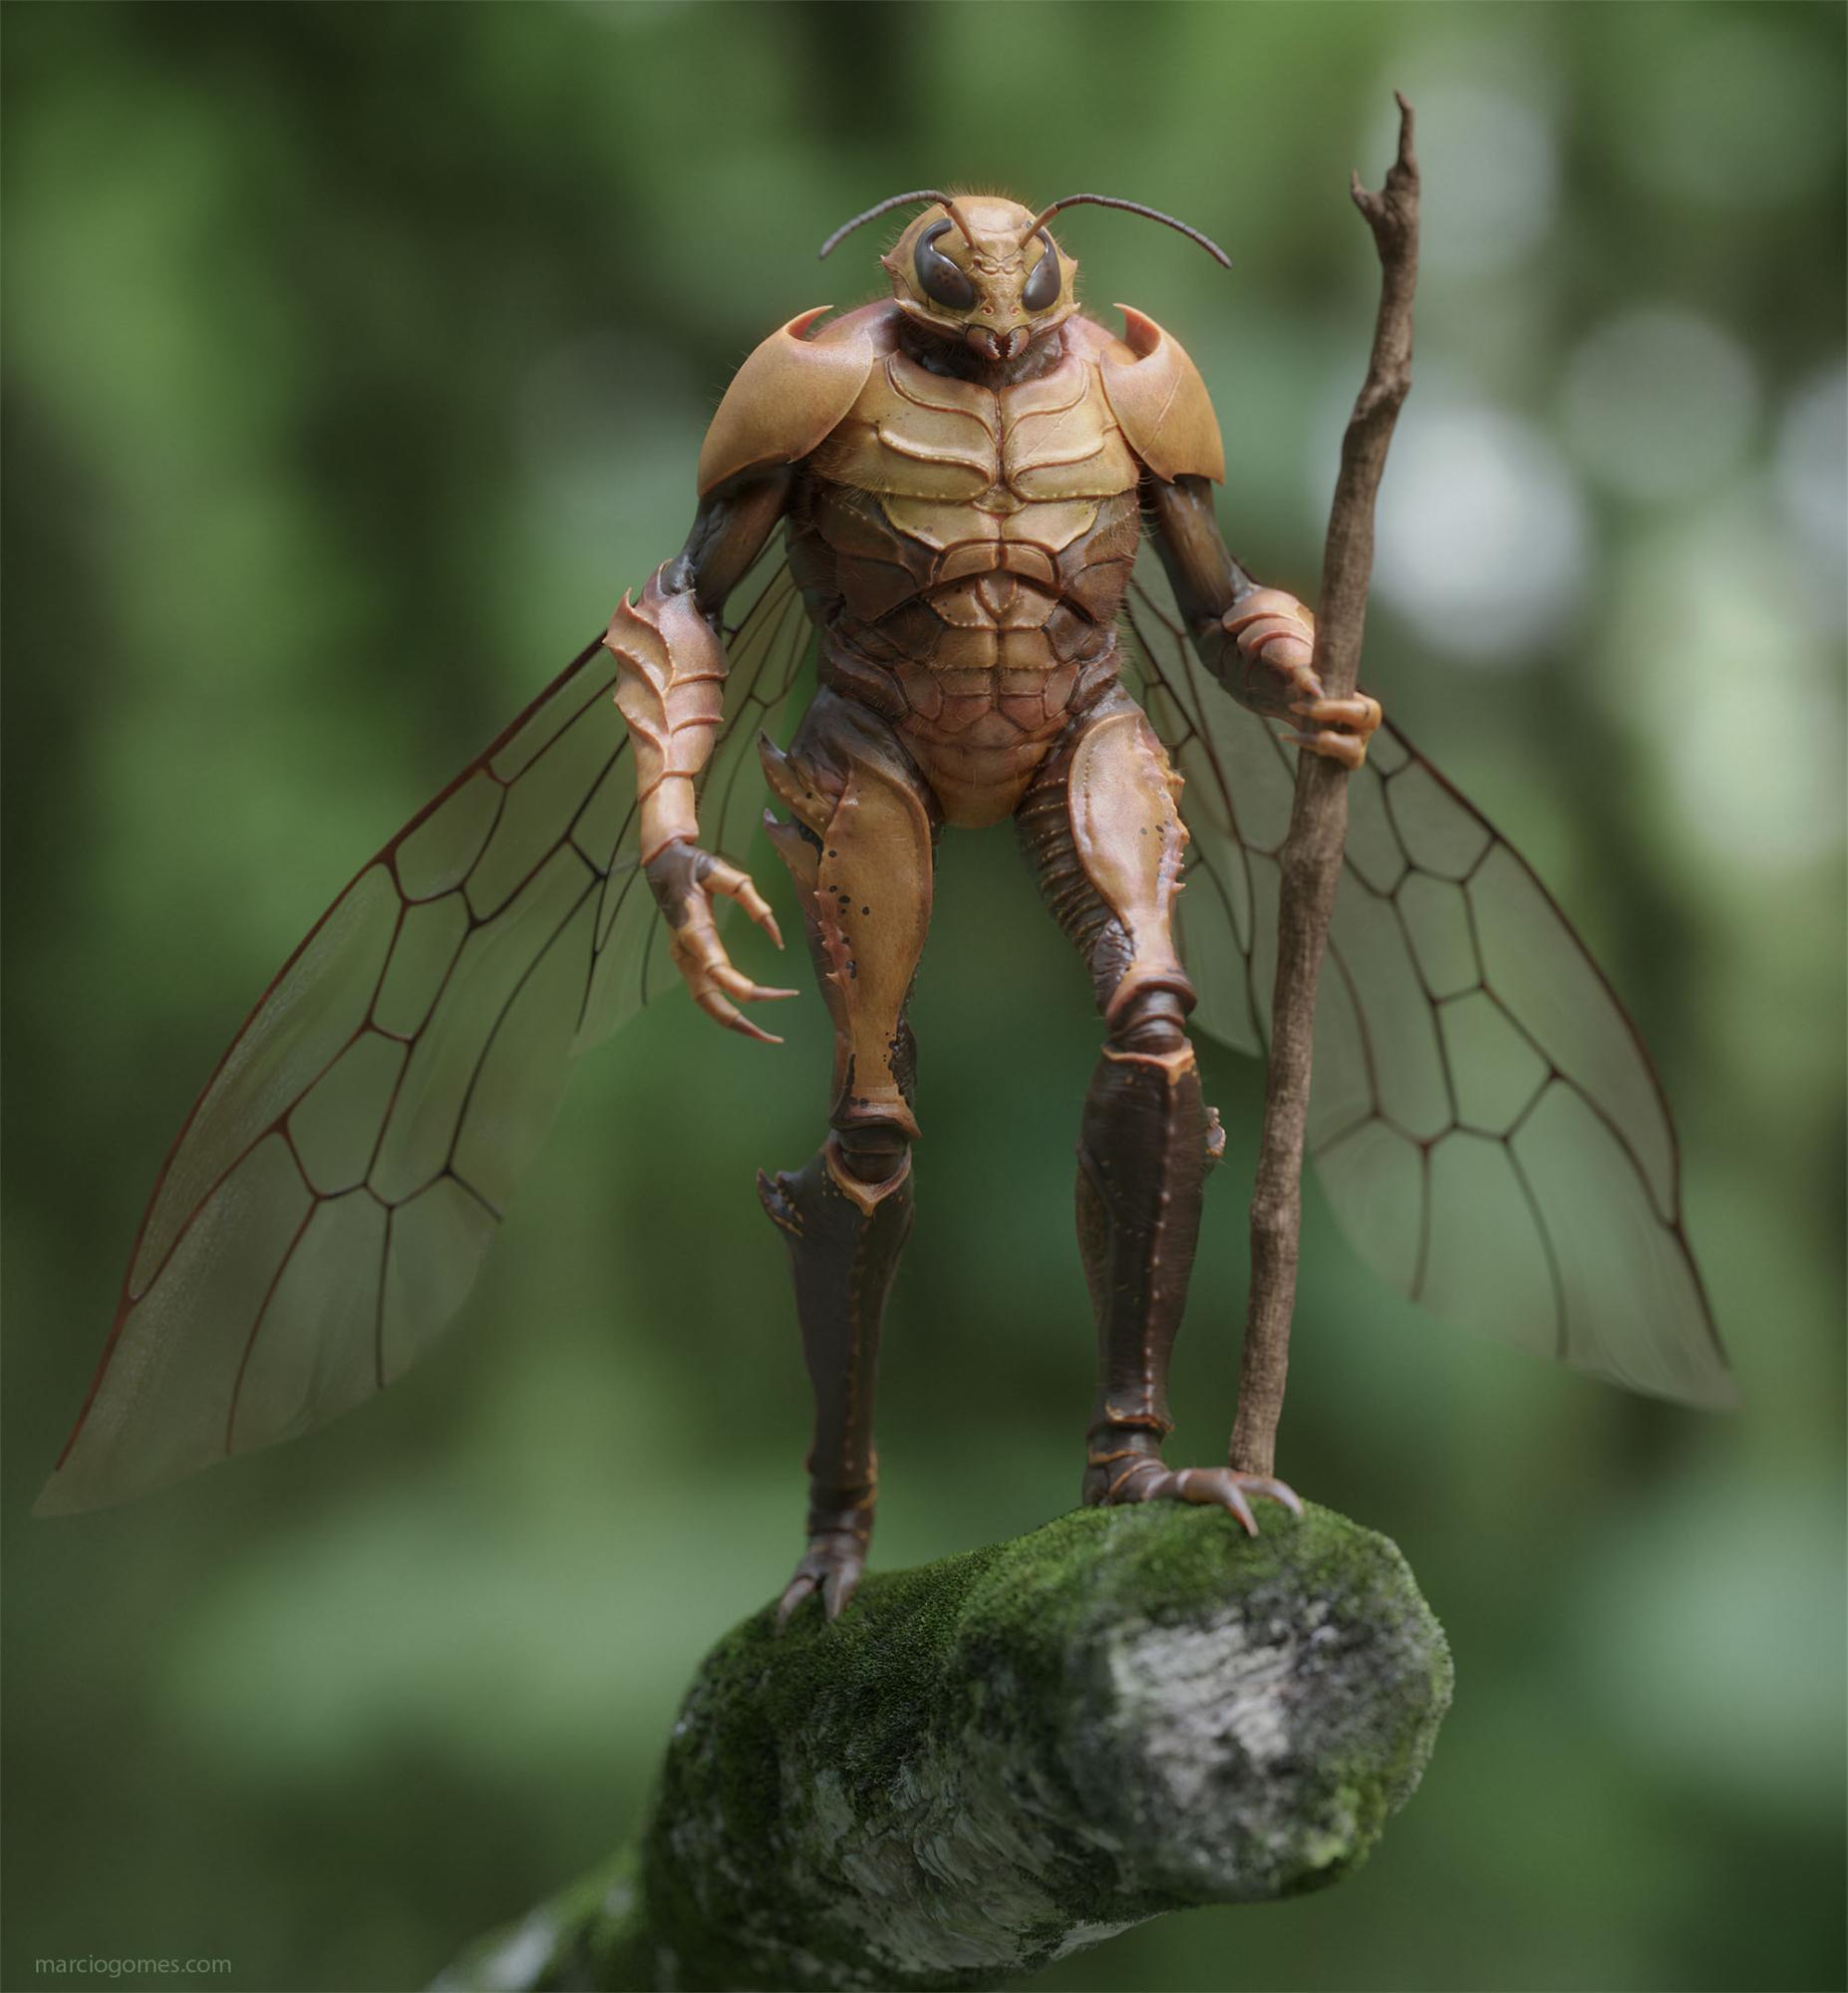
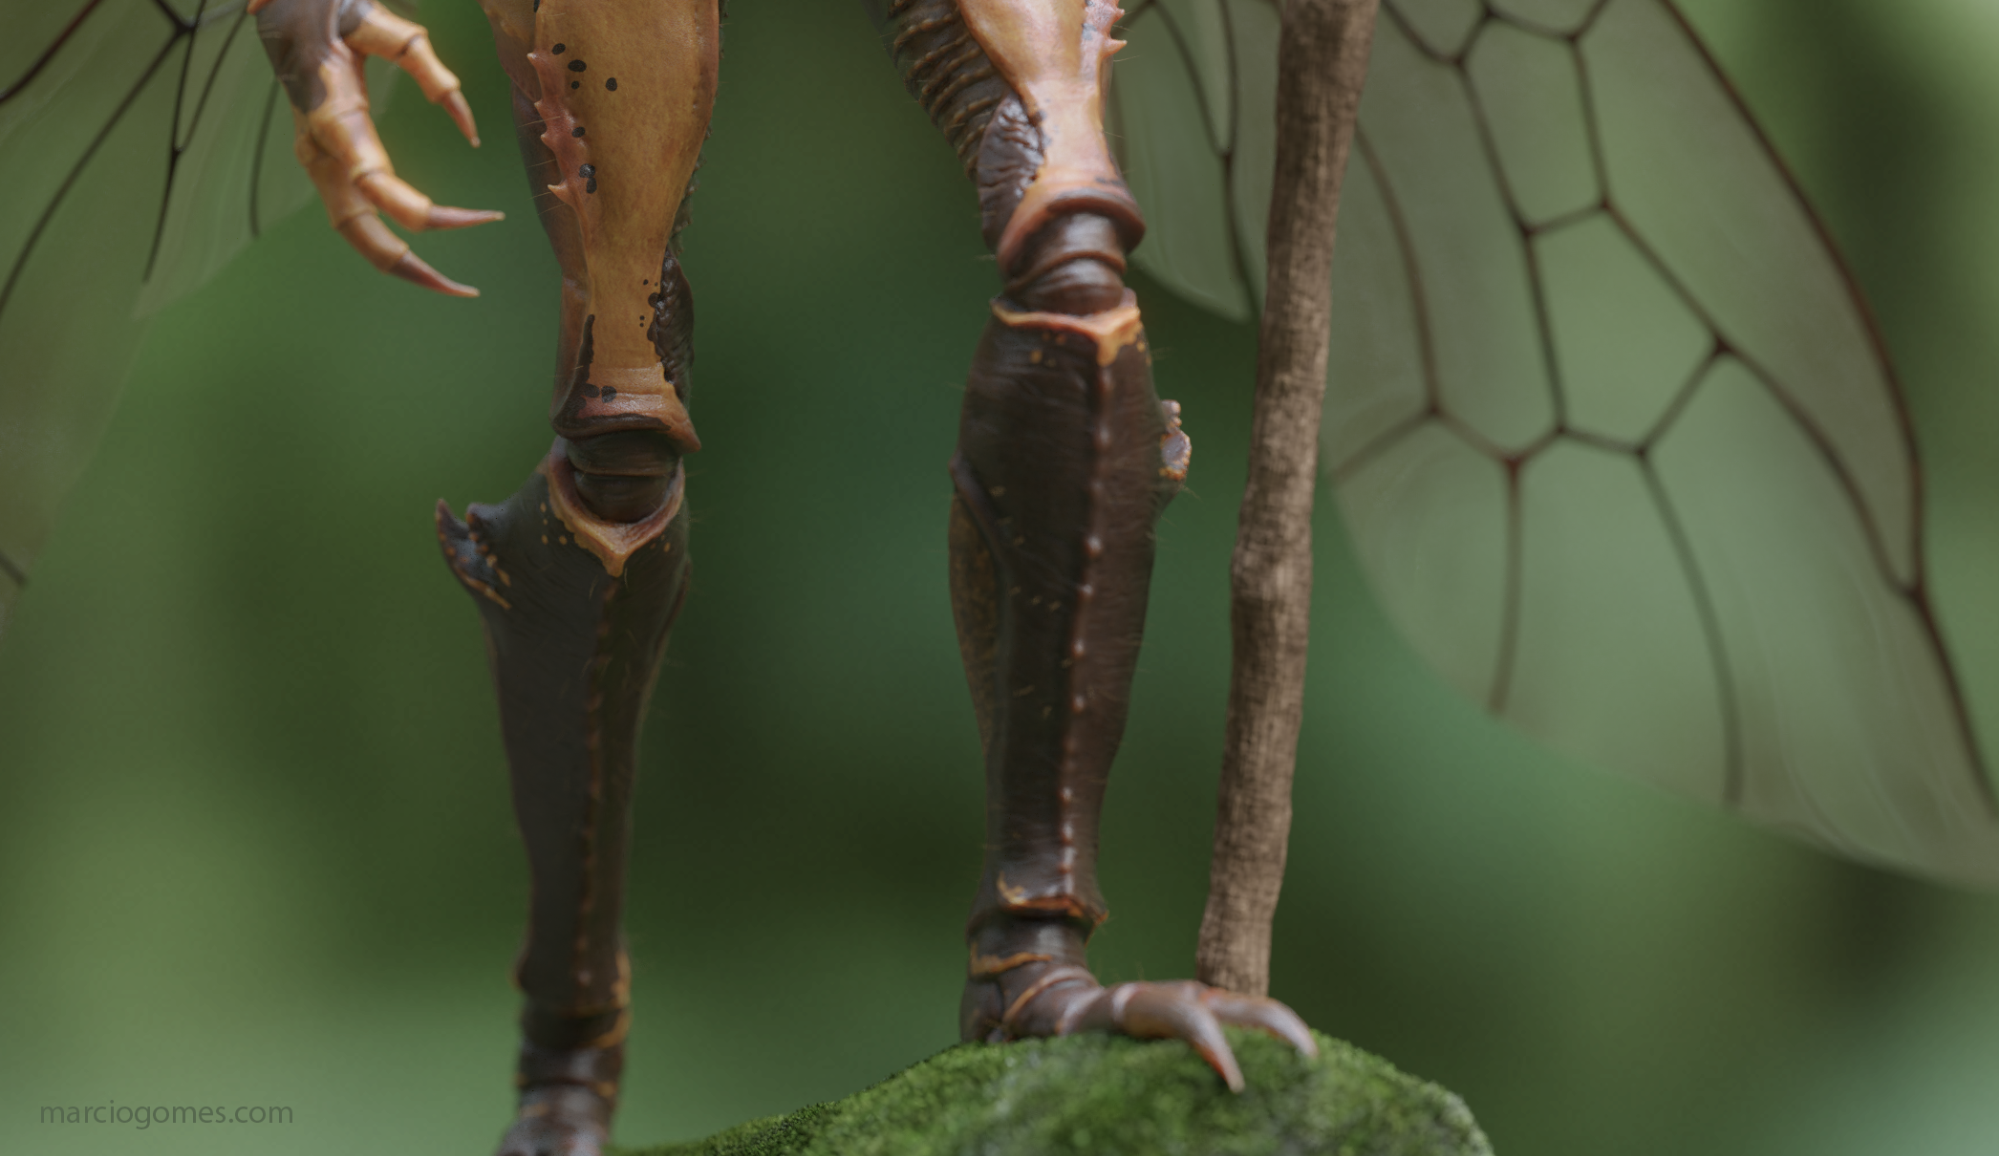
To design the wasp, I collected many insect references that I liked. Those micro-details provided me with information such as: how the surface is, color variance, texture, and how I needed to set my camera to give me the sensation of something tiny as a wasp. PureRef is a really cool software for organizing references.
Tools
- Blender - Look dev and lighting (Cycles render)
- ZBrush - Modeling the entire wasp
- Substance - Texture
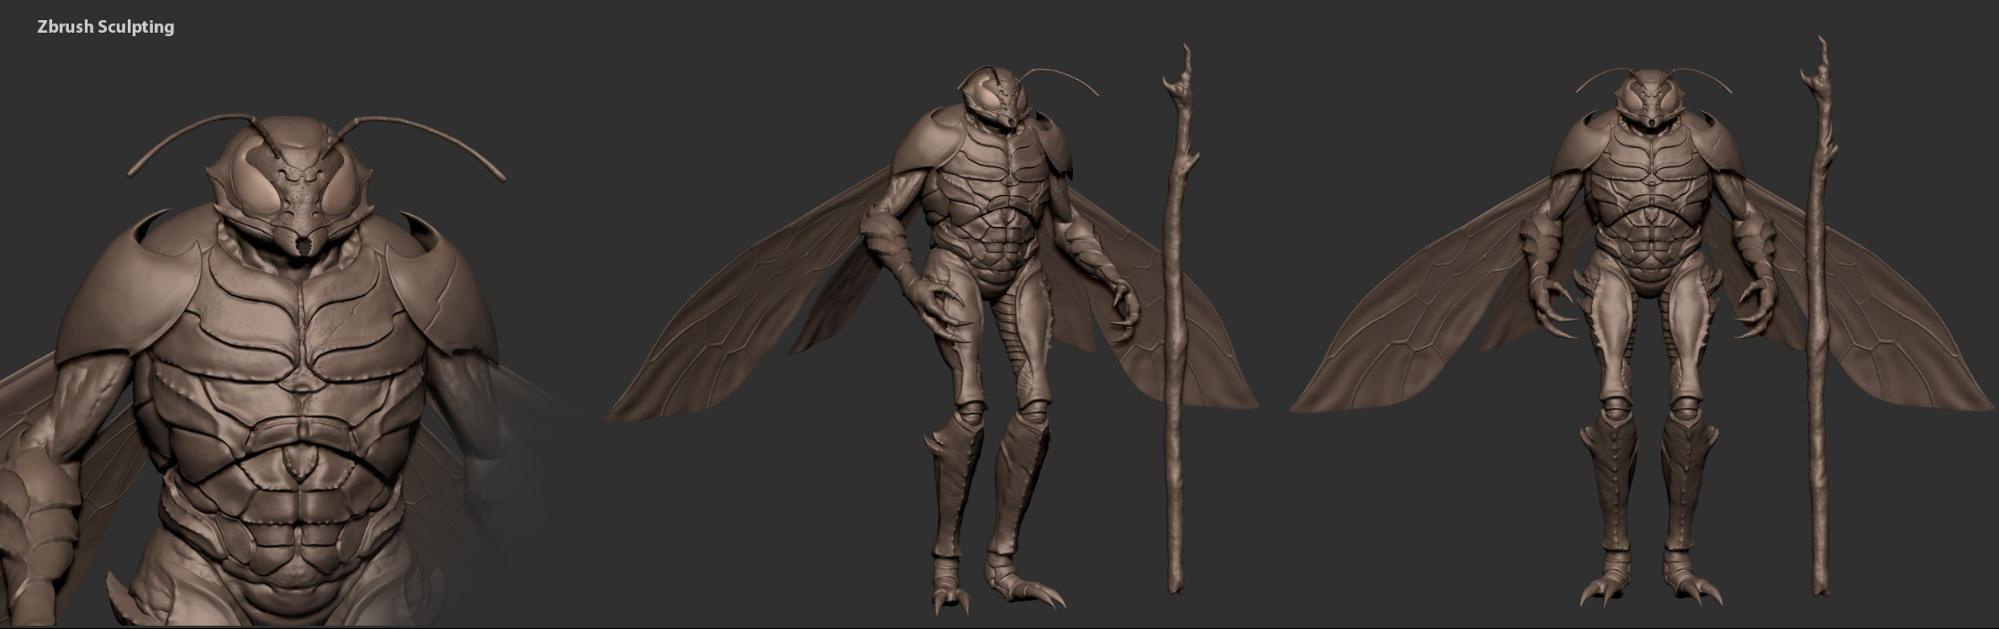
Modeling
I started the model from scratch. First, I used Dynamesh, second, I made some polygroups and split them to have separated tools, which made it easier to work on secondary shapes and details.
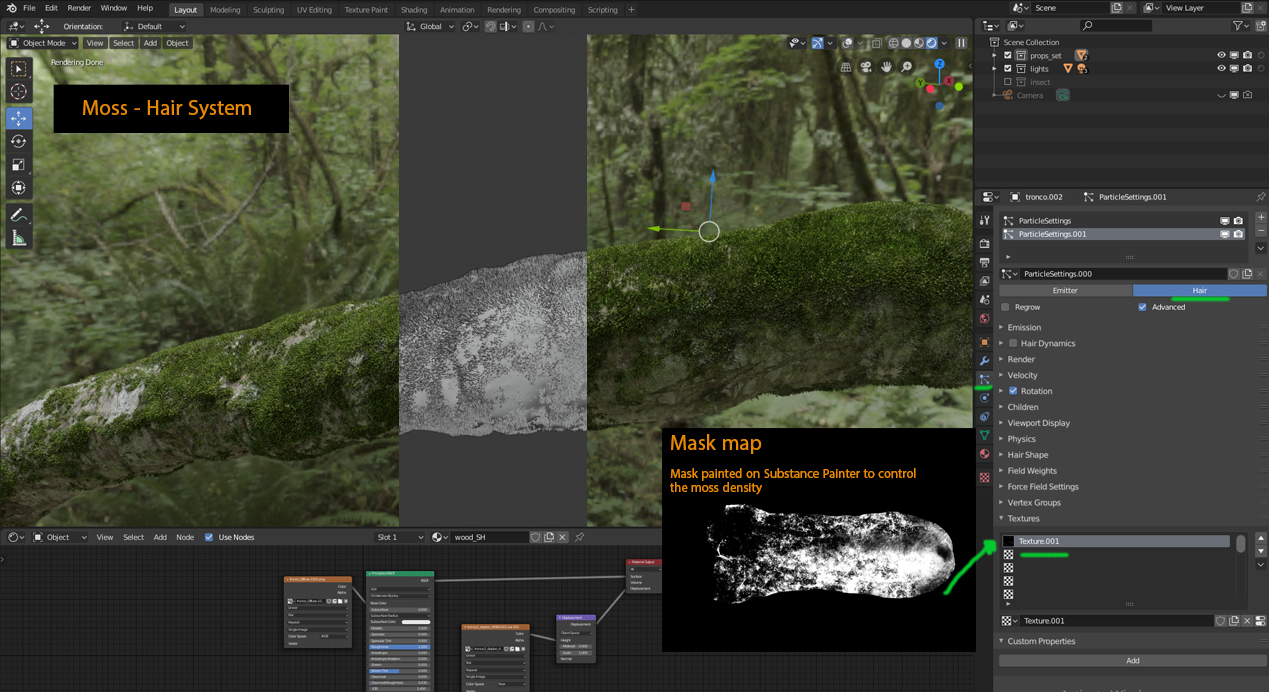
Moss
A few years ago, I made a tree with moss for a project, I just used the same approach to make it using Blender but this time made it a little bit more realistic, combined with a good displacement map and color texture on the tree branch. The most important tool in creating this asset was the Hair system to make the moss. In the image below, you can see a mask texture that I used to control the hair density.
Texture
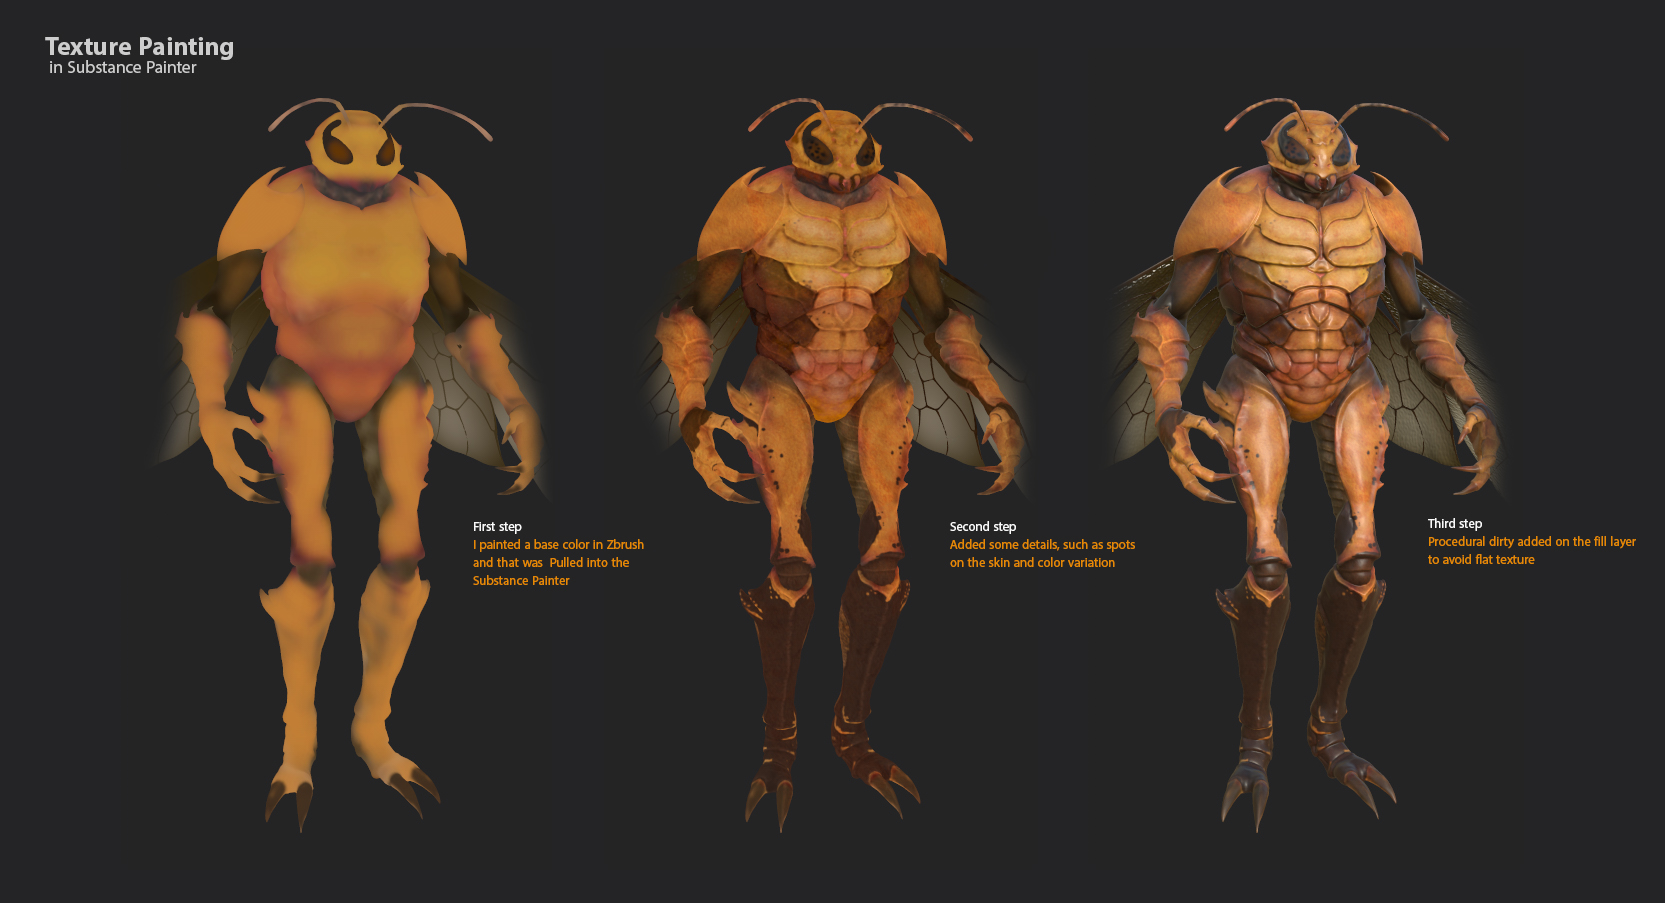
For the organic skin, I always start with a base, just as with a traditional painting process. It’s important to add many texture layers to avoid a flat texture, but the base is the most important part in this process, especially for making some decisions at the beginning of the project.
Lighting
Now, it is time to illuminate the scene. Before starting, it’s important to decide on a lighting concept. In this case, I wanted a natural light; all I needed to do was to add three light sources, one reflector to bounce the light and the HDR. I downloaded the HDR from HDRI Haven.

HDR in the Blender viewport rendering:
Final image:
Close up:

About the Author
 Marcio Gomes, 3D Artist at Tangent Animation
3 Comments
Thanks for sharing, you did a great job on this, I remember spotting this somewhere a while back, maybe the ba forums. Anyways, my only criticism would be the eyes, something about it doesn't seem quite right, it looks more like a mask or something, but that could be just me. The details, lighting and character design are excellent none the less.
Wow, so amazing!
This is such a brilliant work! I just had to say that. All the best! :)