
Behind the Scenes: Scifi Spaceship Orbiting Around Earth

About me
Hello there! My name is Alexander Bombelli (aka Scalix) and I am a 22-year-old German student in technical engineering.
I have been using Blender as a hobby for probably the last ten years, mostly creating automotive models and every now and then a replica for some famous movie studio intros. And although up until now I’ve never really done 3D stuff professionally, I can definitely say that Blender changed my life and gave me a space to express myself creatively.
At school, I was part of a student group that used Blender for some small (but back then really big-feeling) animation projects. It was there where I came across Christian and some more great people with whom I’ve been having a lot of fun doing Blender animations and amateur film projects every now and then.
Last autumn, Chris was starting to plan on doing a 45-minute-long sci-fi/action/post-apocalyptic adventure movie called ‘Beyond the Blue’. Let’s just say he didn’t really have to convince me to take part in it, and here we are.
[sponsor id=’qarnot’]
The story
The film’s story is about friendship and finding one’s courage. Earth is a dying planet. The air quality has been getting worse to a point where some regions have become uninhabitable. Additionally, the organization RISC is terrorizing the people, trying to subjugate them. Most of Earth’s population has already left the planet with the help of the organization RISE, in hope of finding a new home. Kenny is holding onto his homeland and still lives on Earth. He’s chaotic and lazy, but also lovable. He is a great florist and managed to grow a plant that could save the earth by producing enough fresh air, but RISC finds out and evicts him from his home. Jessy is a good old friend of Kenny’s and together they start a long journey to save the planet from a dangerous conspiracy.
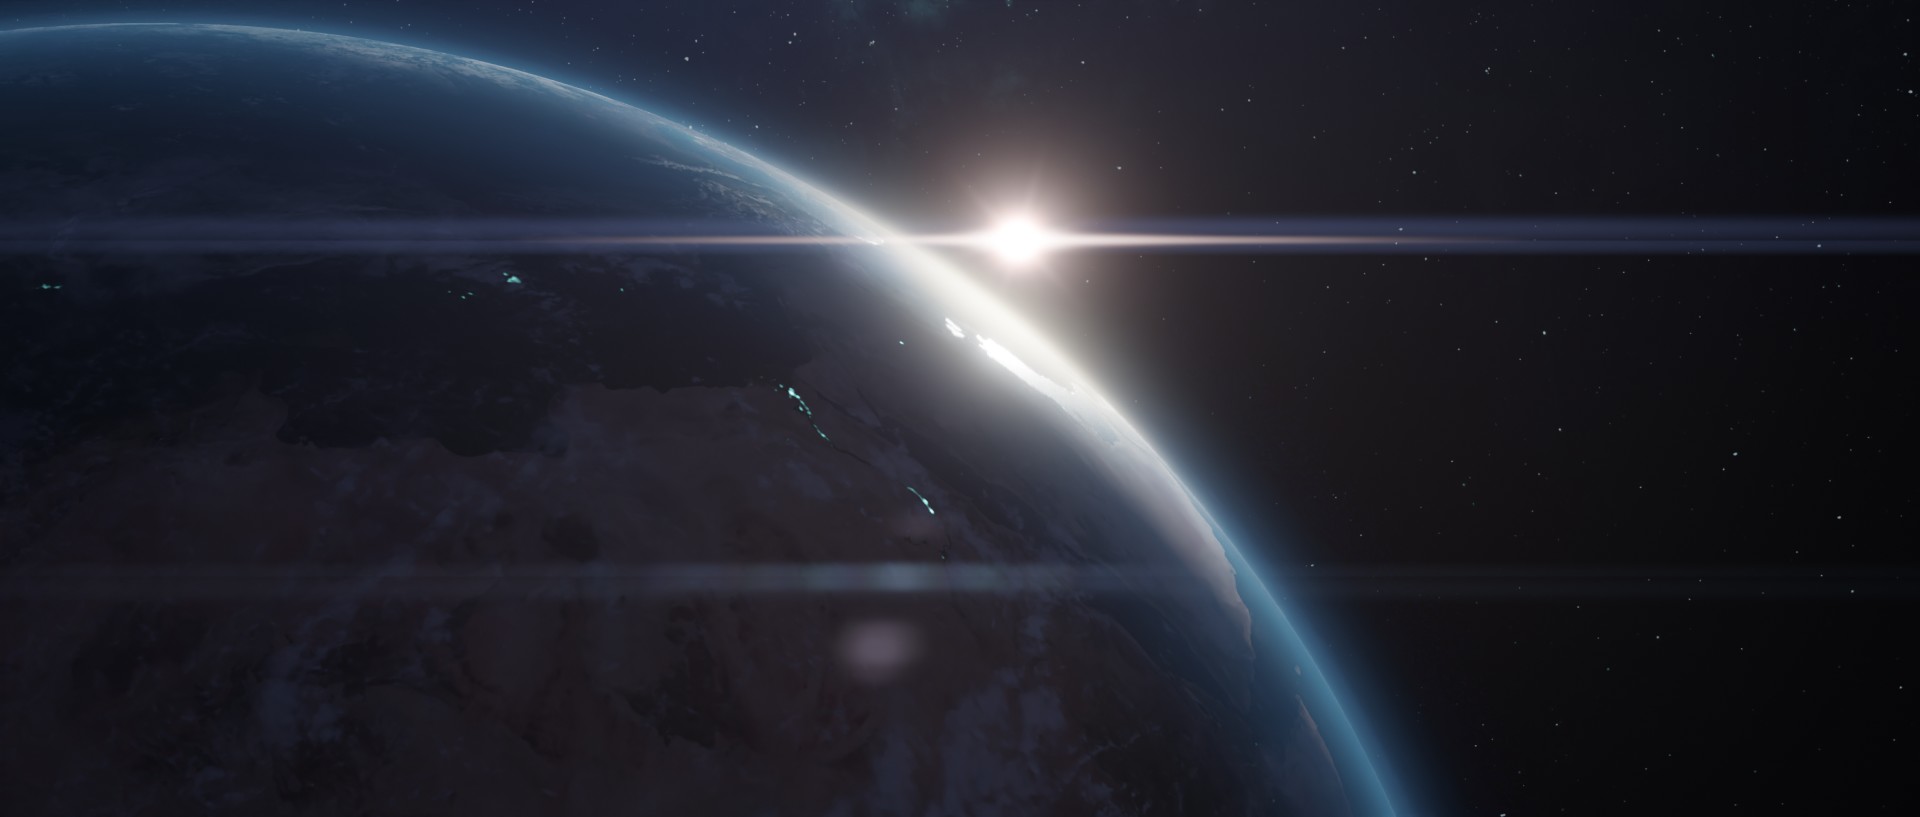
The movie is mostly live-action, but there are a lot of visual effects shots, with some fully CG shots, like this one.
What you can see here is the movie’s first few seconds, of which I will be mostly discussing the first shot. It shows one of RISE’s space ships that people use to flee from Earth in the hope of finding a better life somewhere else. It’s the last sunrise they see before the arch leaves its orbit and heads out into the vastness of space.
Chris and I have both been working on the shot and we divided the work between us: Chris began to sketch out the shot composition as well as the camera position and movement and started modelling the spaceship while I was already doing some details that we could later drop in. Then I did most of the compositing and refined the look of the earth.
The shot was entirely done in Blender, with no other software involved.
The spaceship
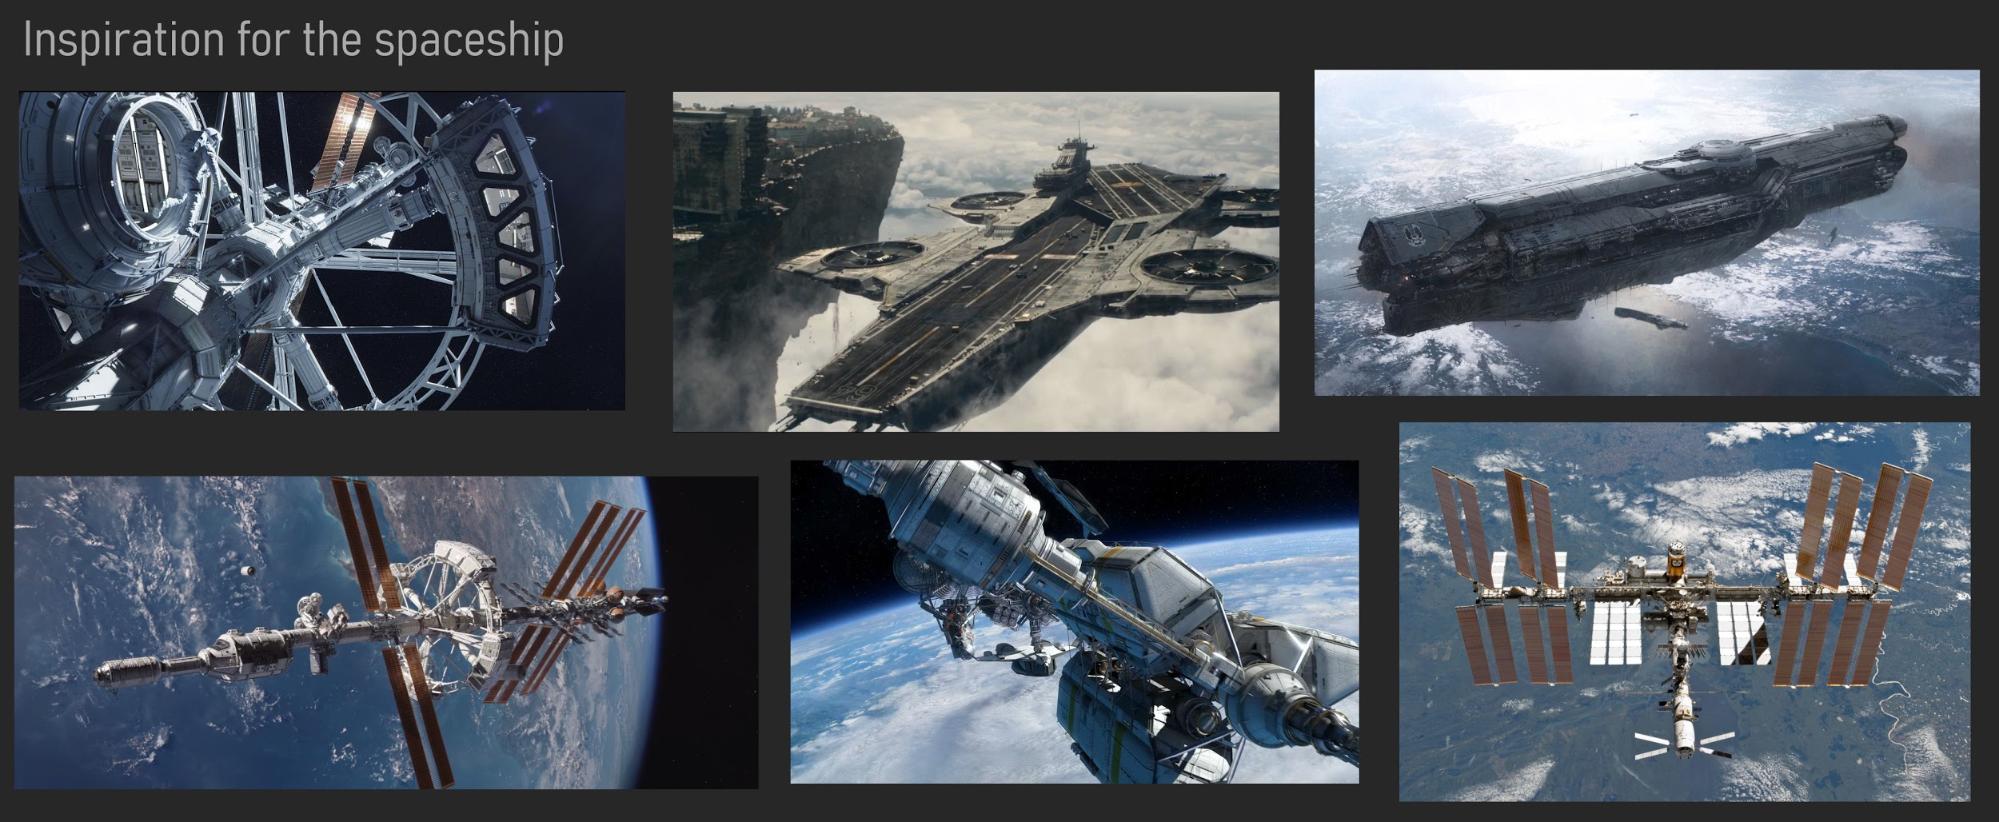
We wanted the spaceship to look like it was an evolution of current real-life spacecrafts, with a sci-fi edge to it. We took inspiration from the Interstellar Vehicle Venture Star from Avatar, the UNSC Infinity from Halo, and the ISS:
Chris started with the spaceship, sketching out a few different ideas:
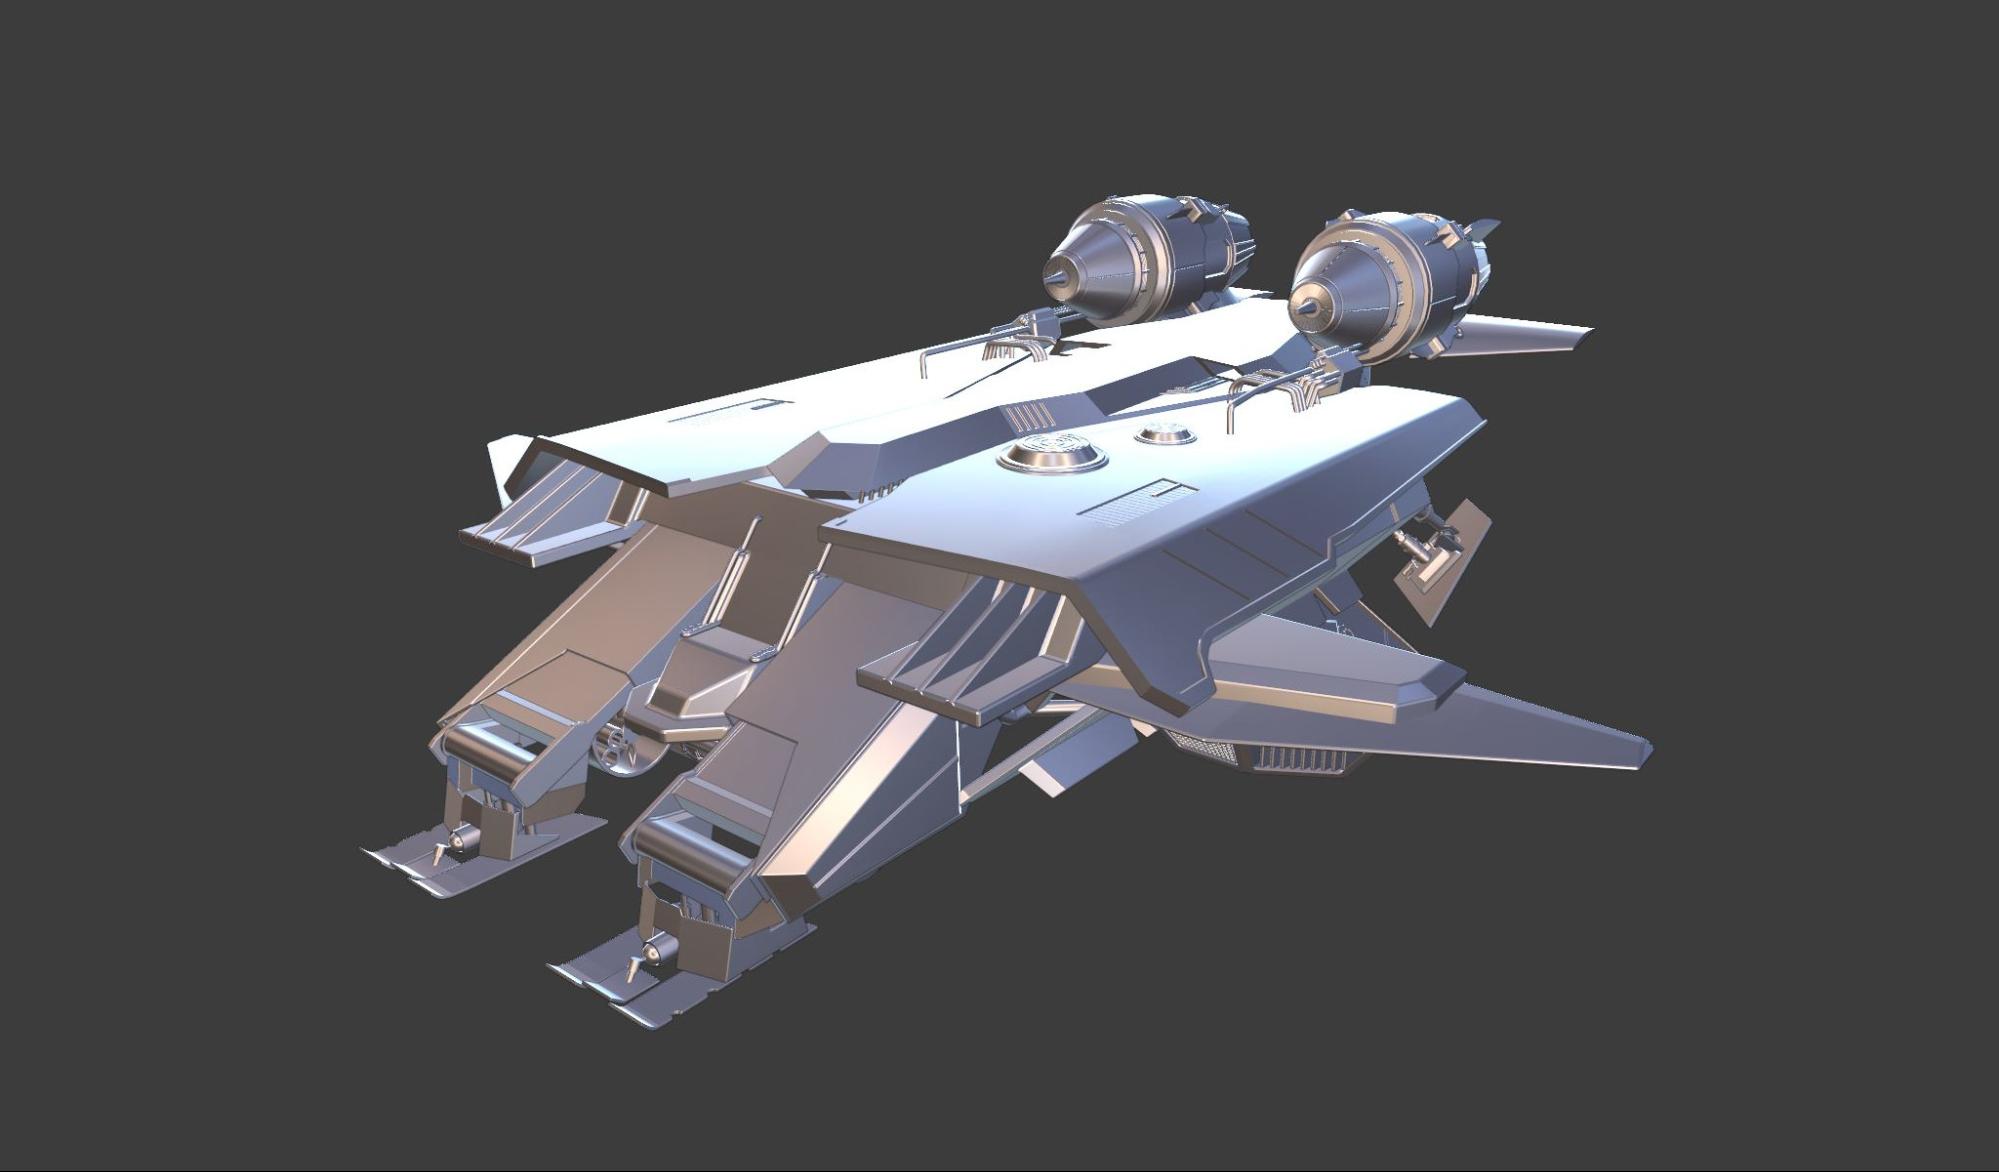
The look we settled on started off looking a little bit like an aircraft carrier but then evolved into something a little more grounded.

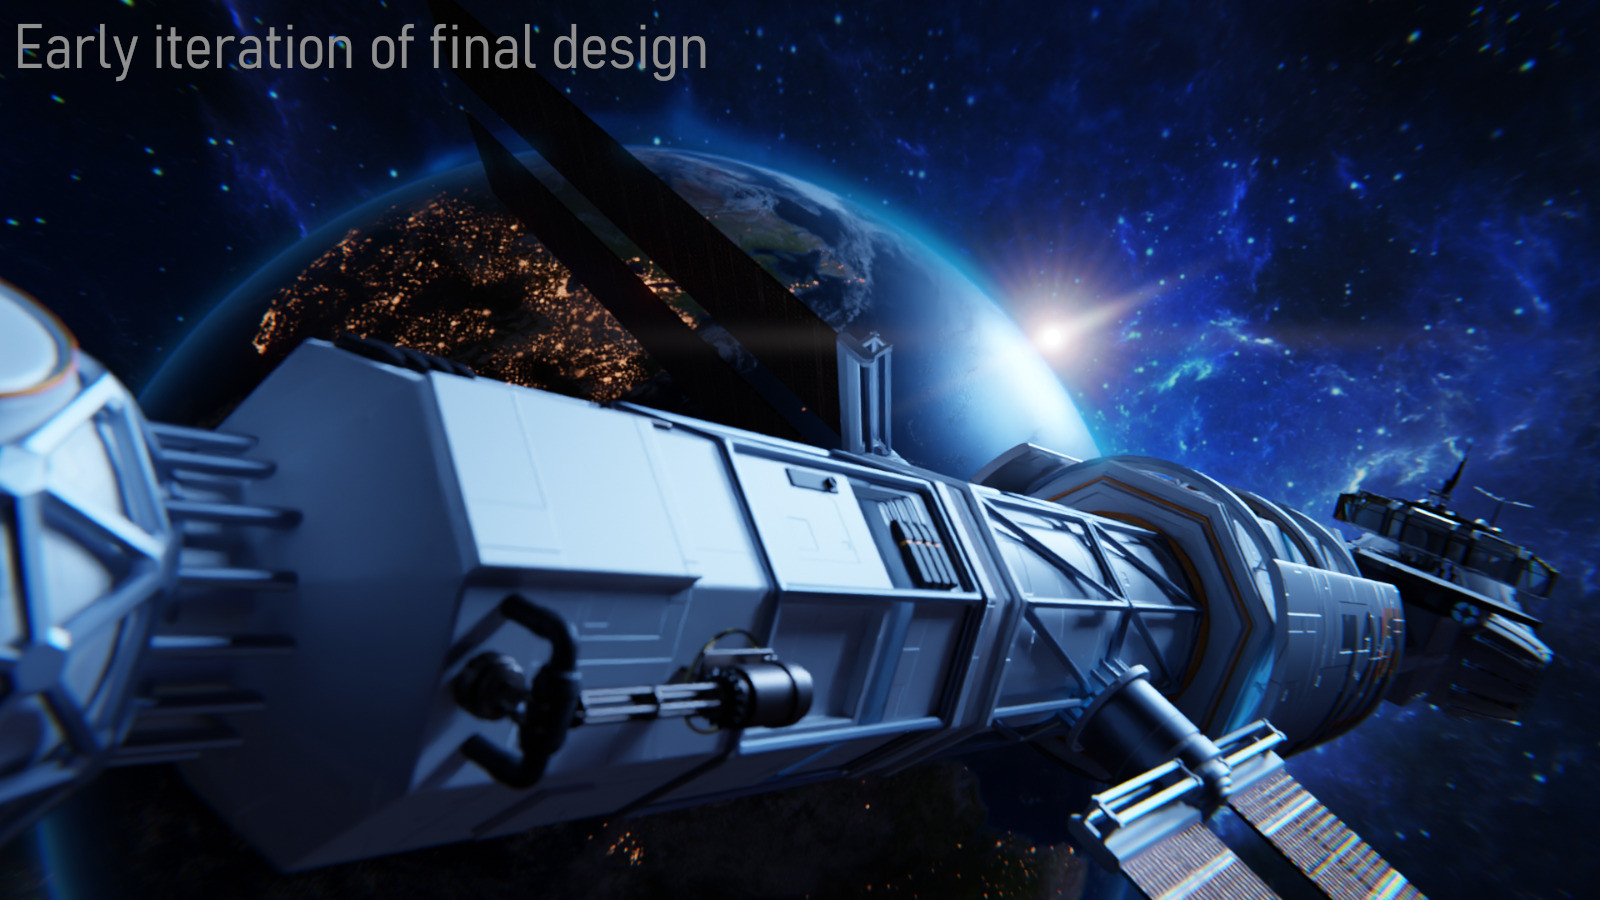
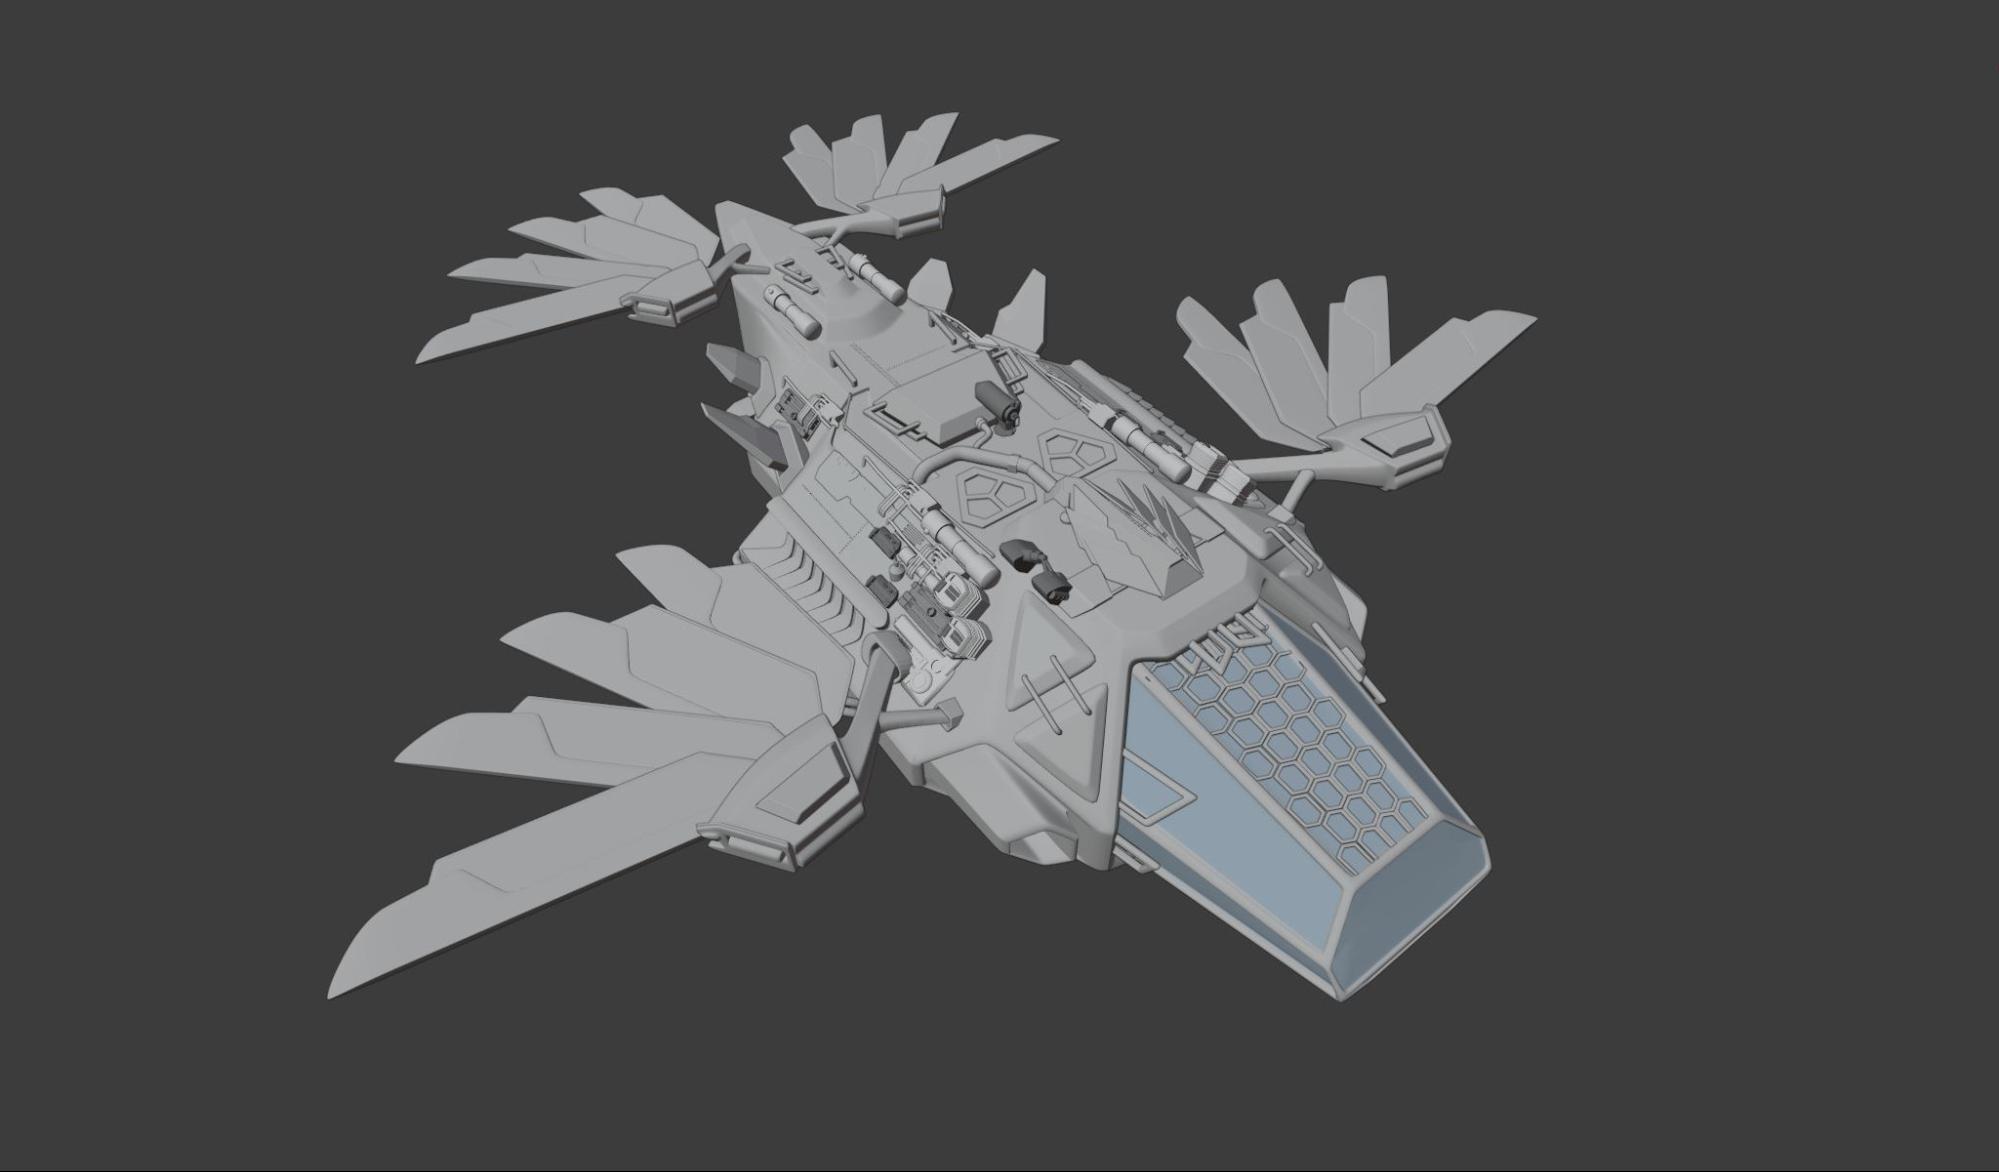
The rings on which the carriers for the solar panels are running were greatly influenced by the Hermes Spacecraft from The Martian. The materials contribute a lot to the look of the spaceship—mostly white surfaces, gold foil, and the orange solar panels give it a realistic look while the blue lights, the big windows, and the big engines bring it into the future. There are also a lot of wires going on, which make the model look less clean and more believable.

For the spaceship not to look too flat, we gave it some motion: the ship itself rotates a bit, while the solar panels running on the carriers that I mentioned before stay stationary, always positioning themselves to get the most light from the sun. Because the sun just started to rise over the horizon, they also unfold in the very first shot.
In the title shot a little later in the movie, the spaceship is fully visible, with the engines emitting some fire:

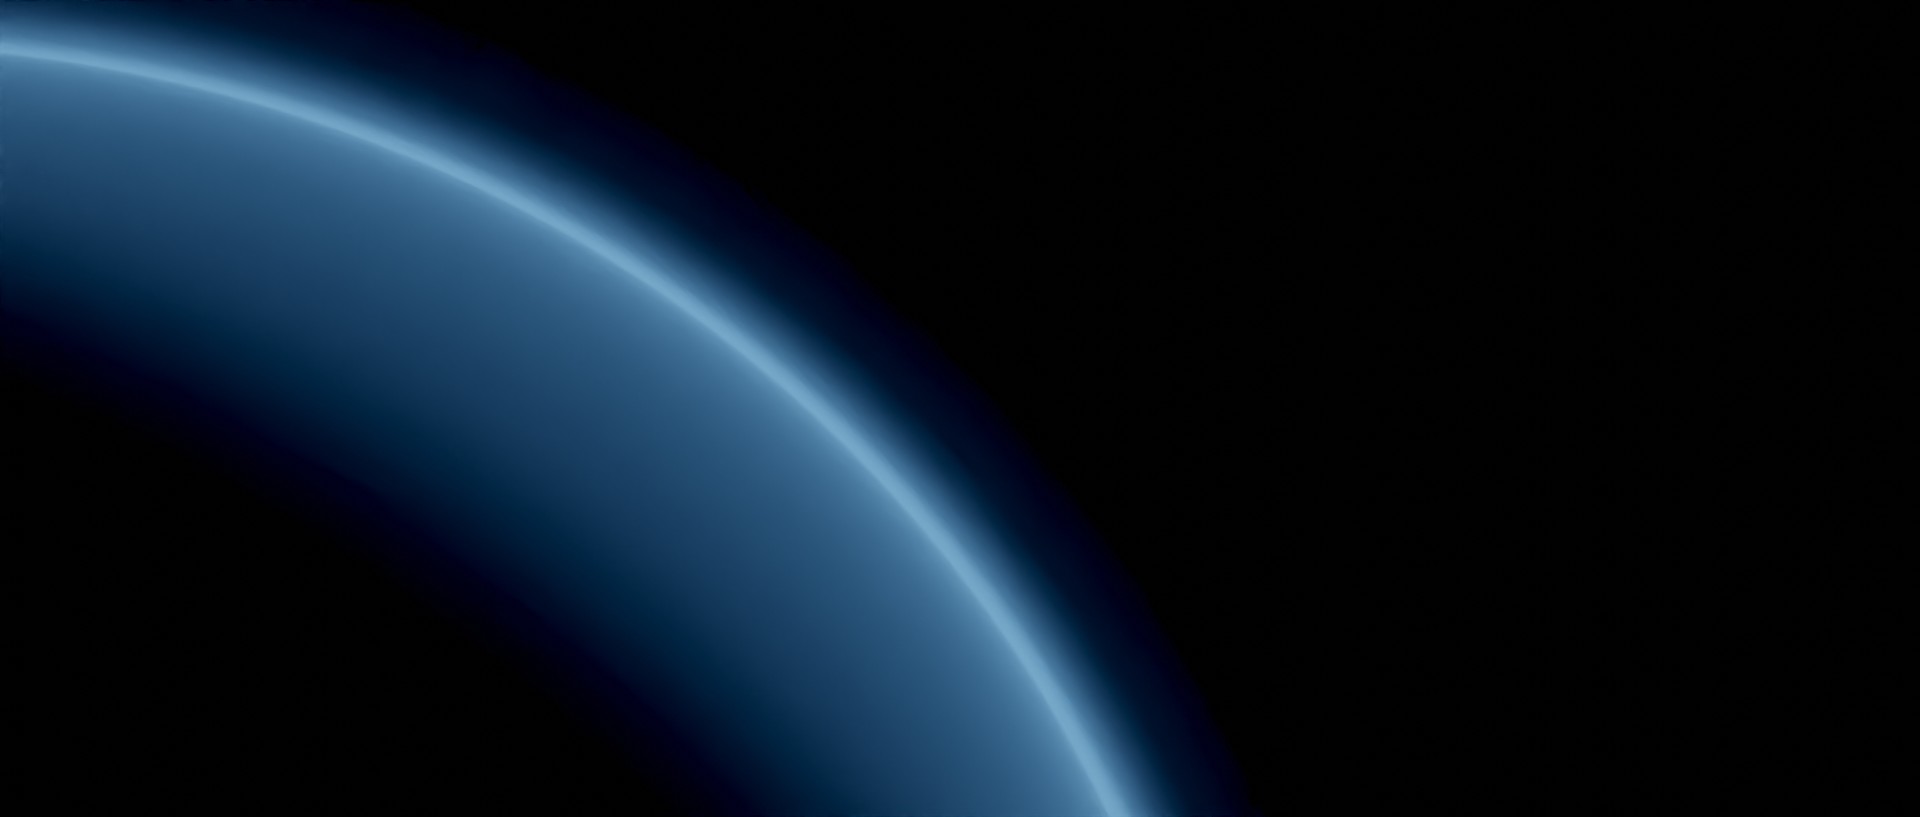
The earth
The earth changed quite a lot during the creation of this shot. At first, we were going for a very stylized look, but then decided to go a lot more realistic. I already had some experience in creating cinematic earths for animation, so I already knew what to look out for.
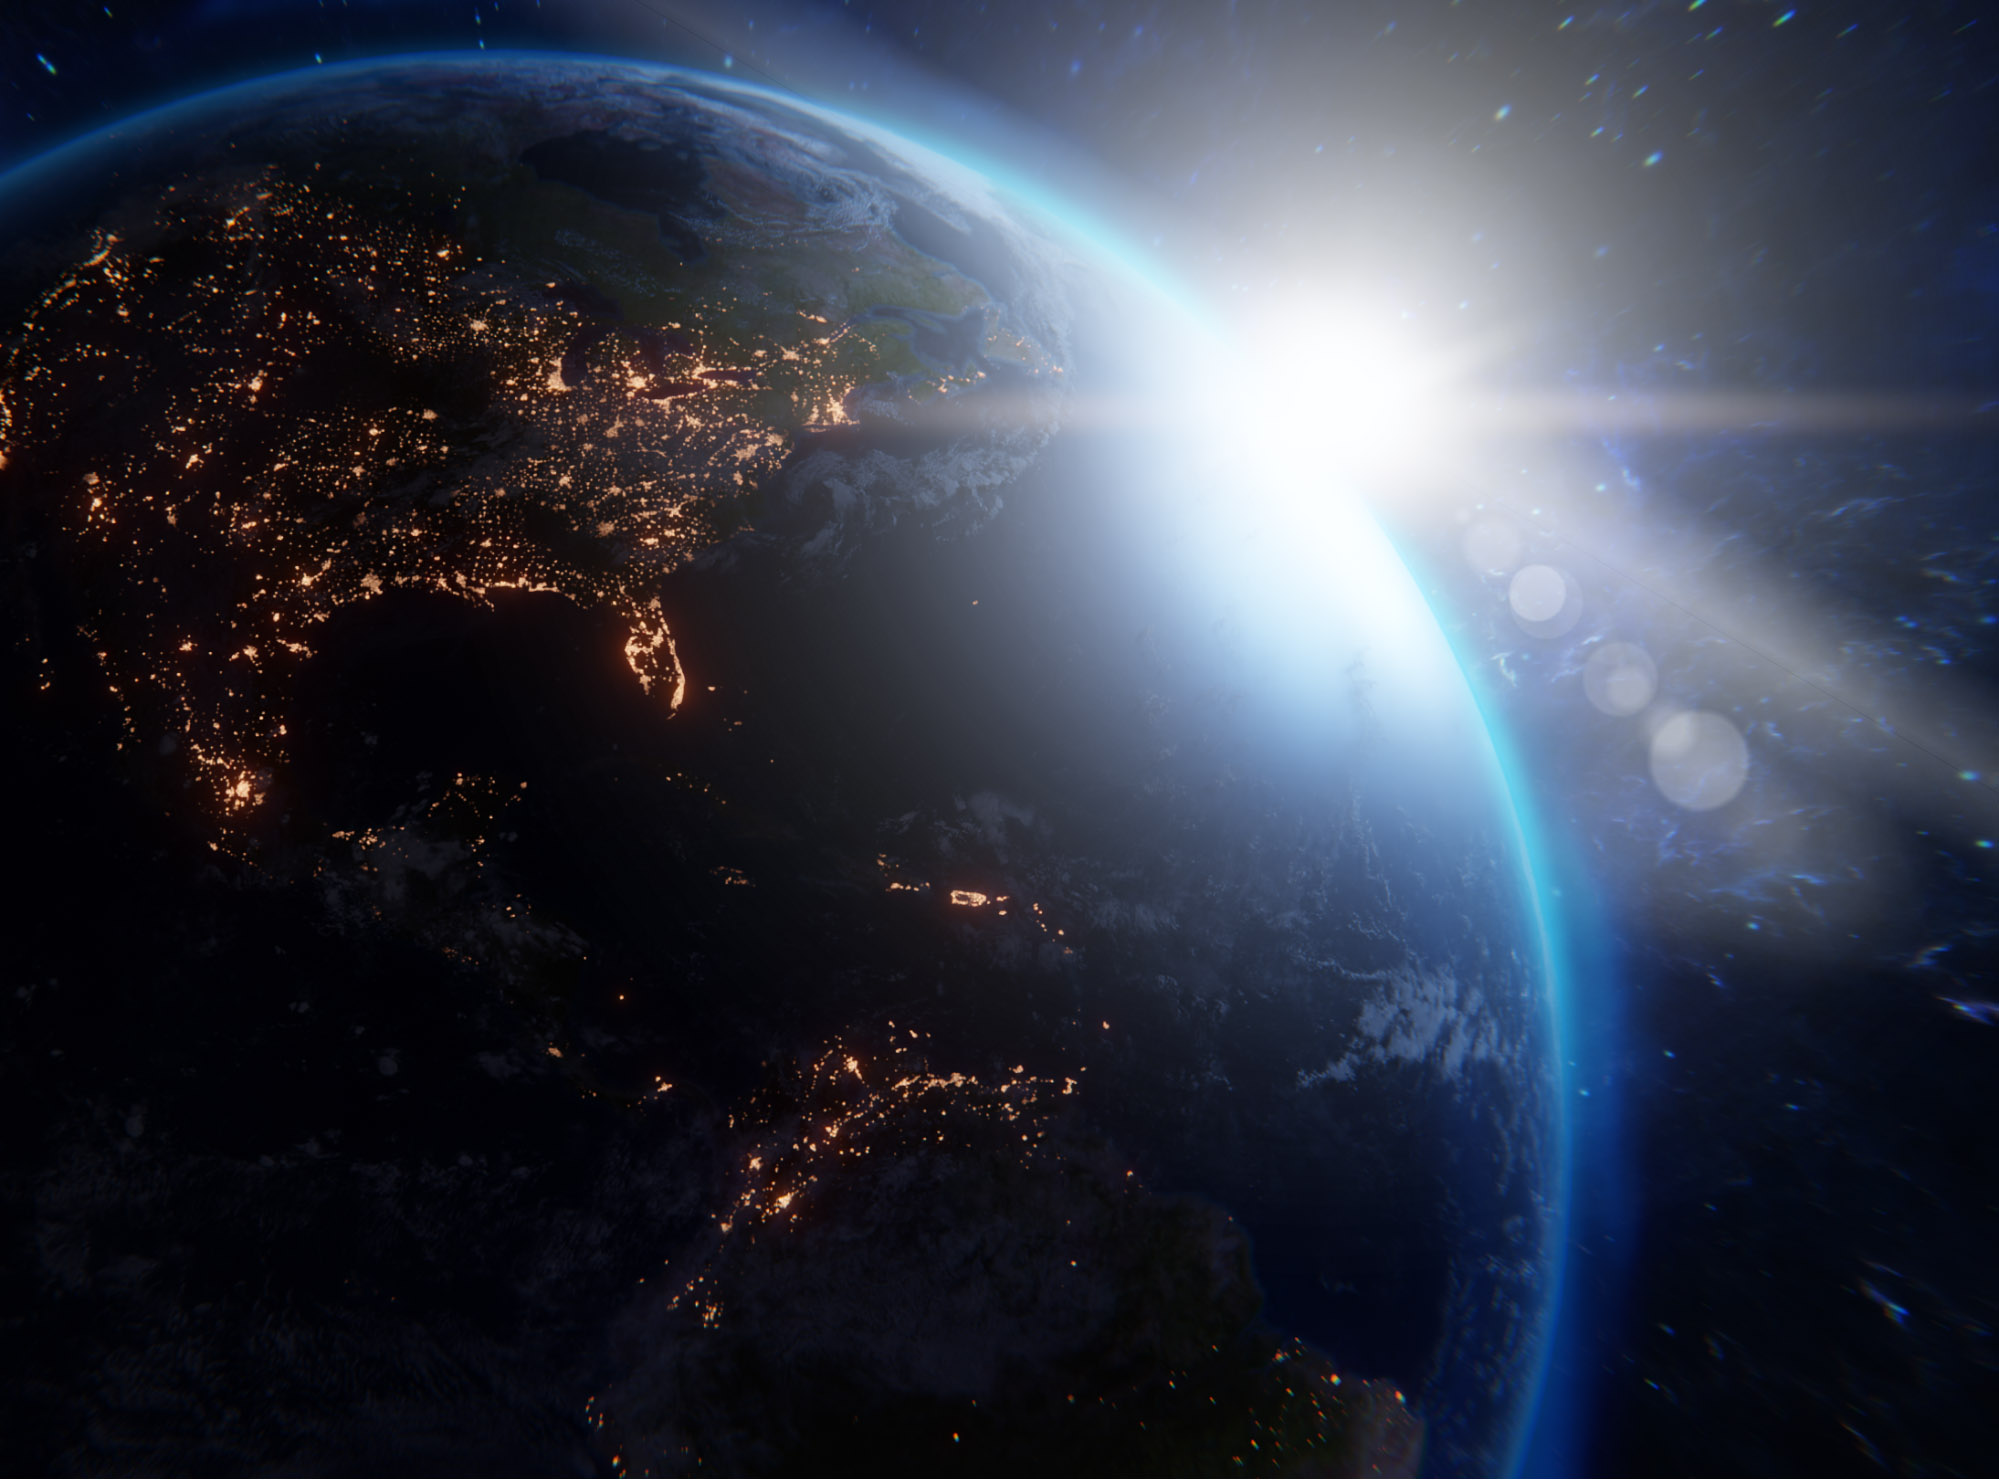
The textures we used are from the NASA visible earth gallery, and we only modified the map for the night illumination so that it doesn’t show as many cities. This creates the effect that there aren’t many people left on earth and adds to the realism of the shot.
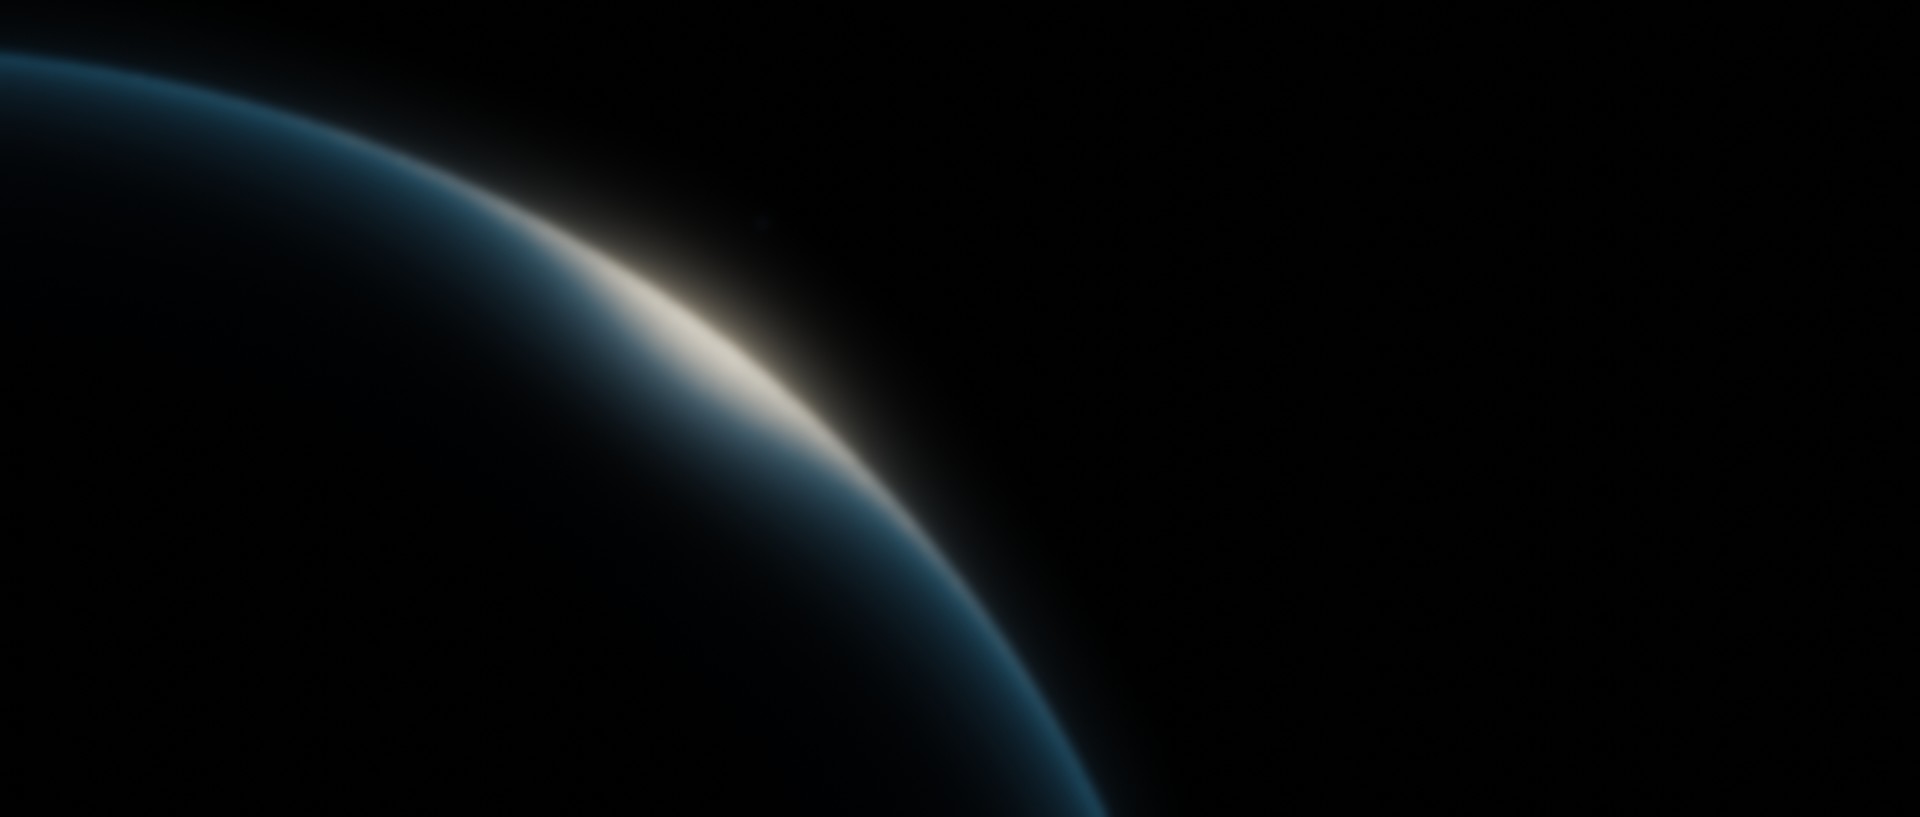
The atmosphere was created with a volume that I controlled via a spherical gradient node with its origin in earth’s centre. Colour ramps make it possible to find just the right gradient so that the mist looks believable. The shot is somewhat stylized, so I toned down the atmospheric effect compared to real life pictures of earth’s atmosphere.
Additionally, I created some more effects with a few different render layers that have different versions of the earth that use shaders making use of fresnel nodes. This approach allowed me to add multiple glow effects around the atmosphere by blurring and overlaying the render layers in composition. The effects are mostly subtle, but the bright white-yellow shine under the sun in the atmosphere was created this way. I created it to make the air look “dirty” with particles that scatter other parts of the sunlight than the blue that is being scattered by the air.
And, for a cool looking, if also unrealistic, effect, I sped up time and had the sun slowly rise behind the earth, making the earth’s shadow move visibly. The angle of the sun light that actually lights the earth has a completely different angle to the visible sun object or the light source that lights the space ship. I’m not really a fan of cheating physics, but I believe the effect here is both great-looking and convincing.
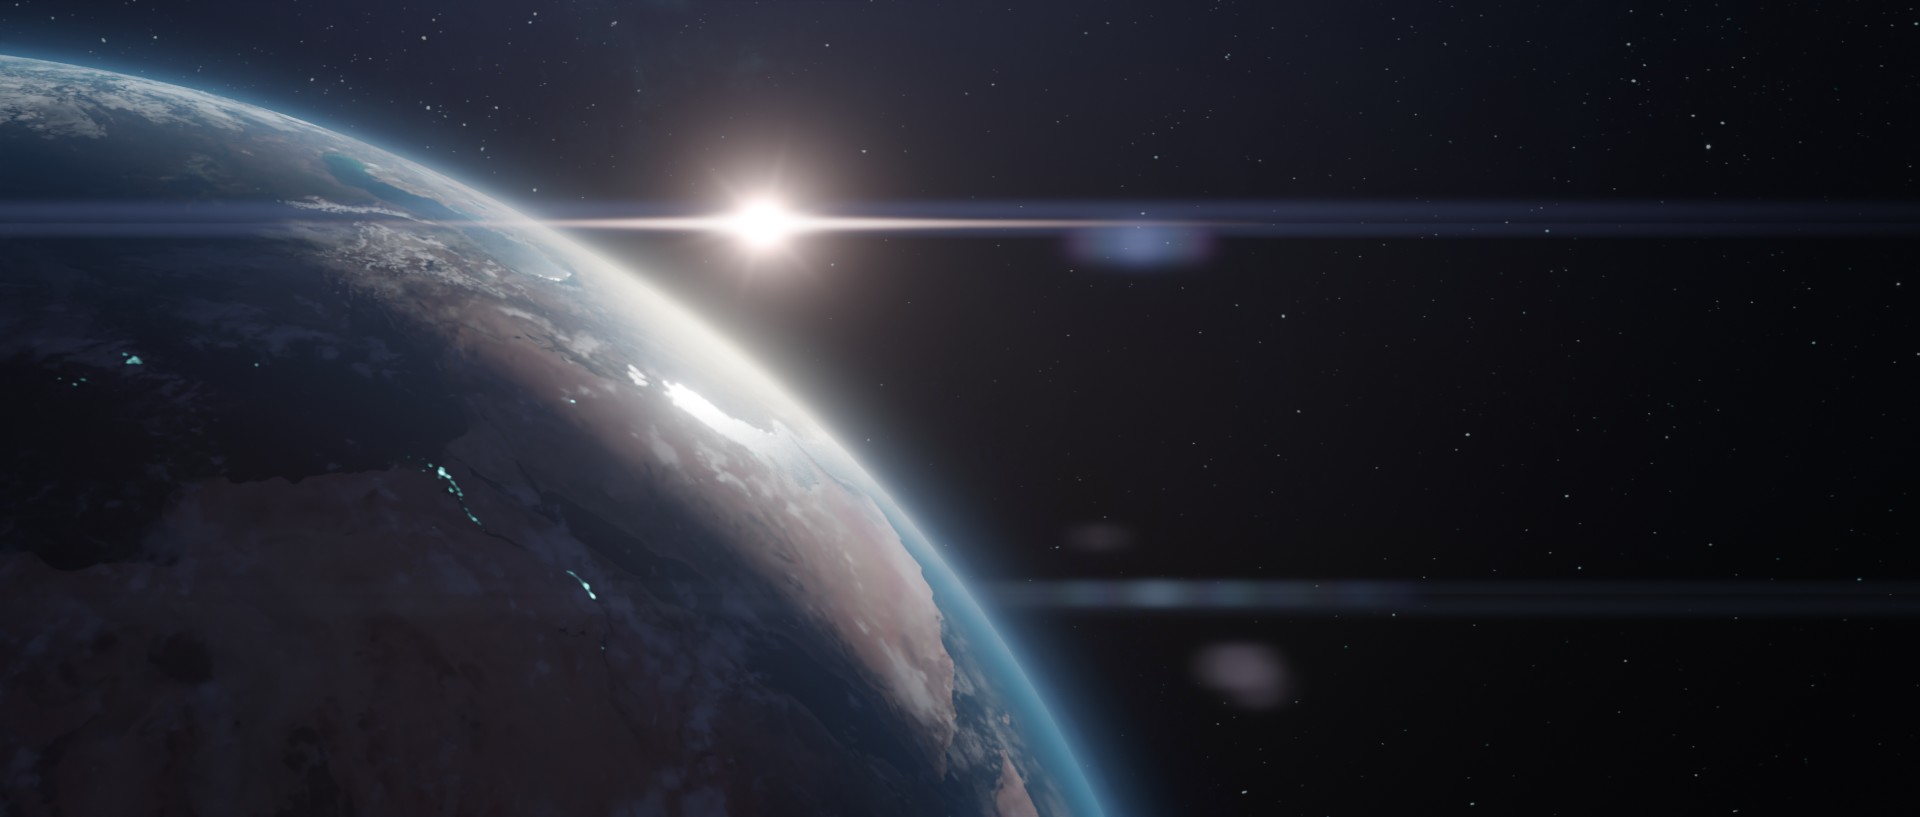
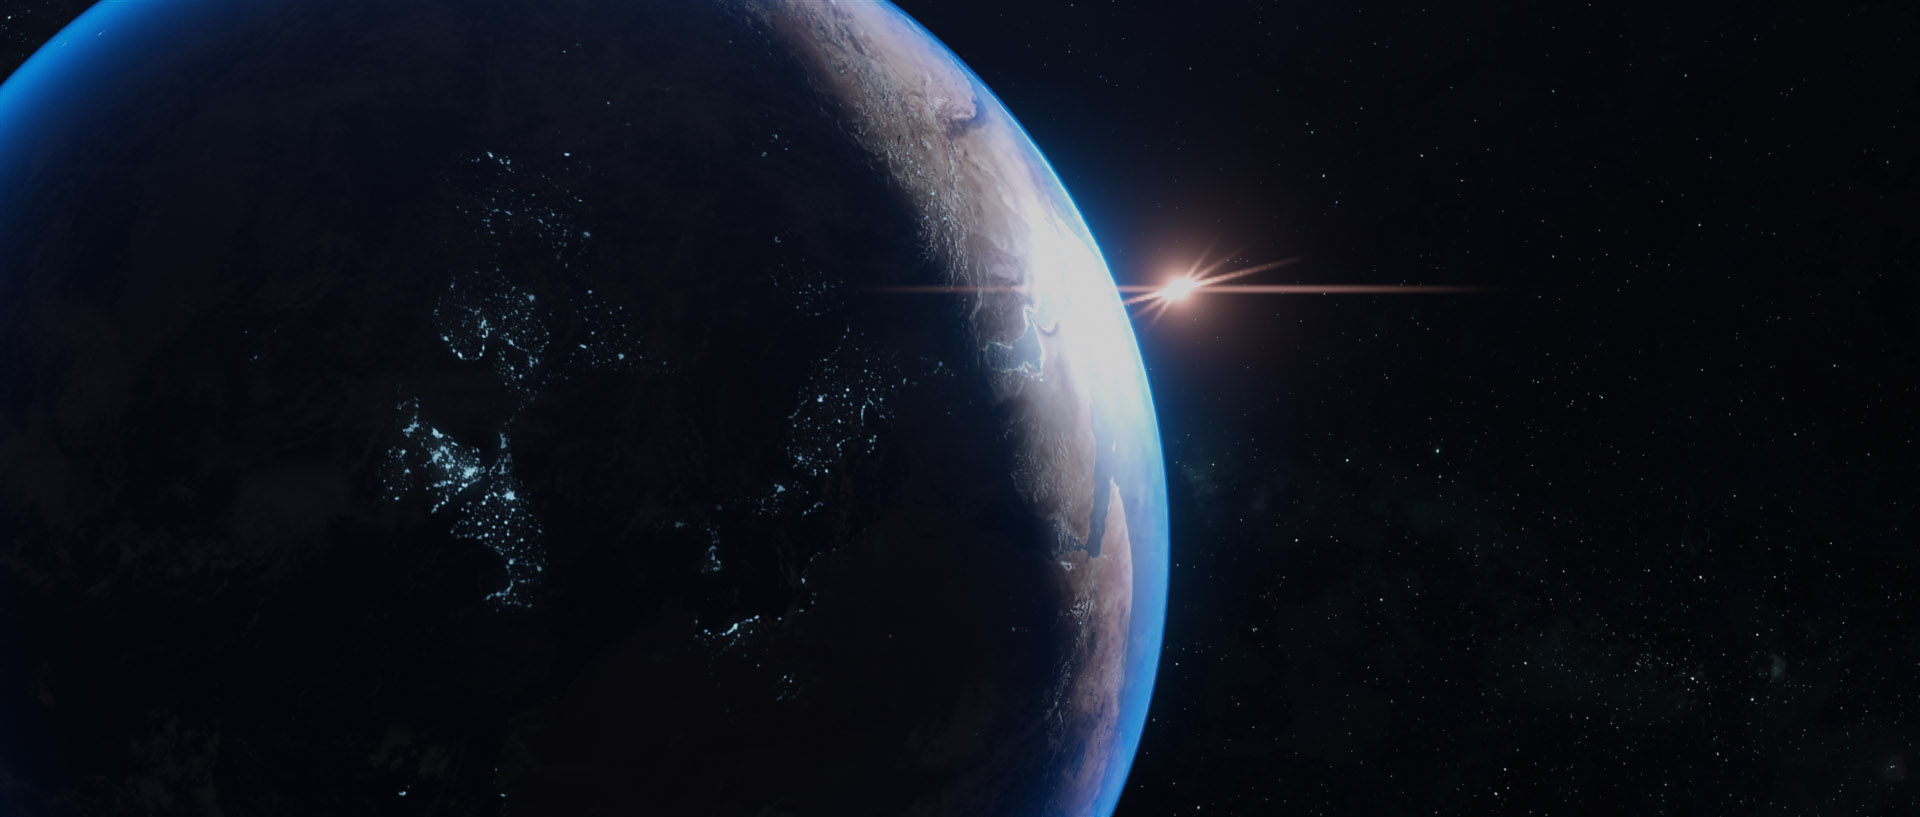
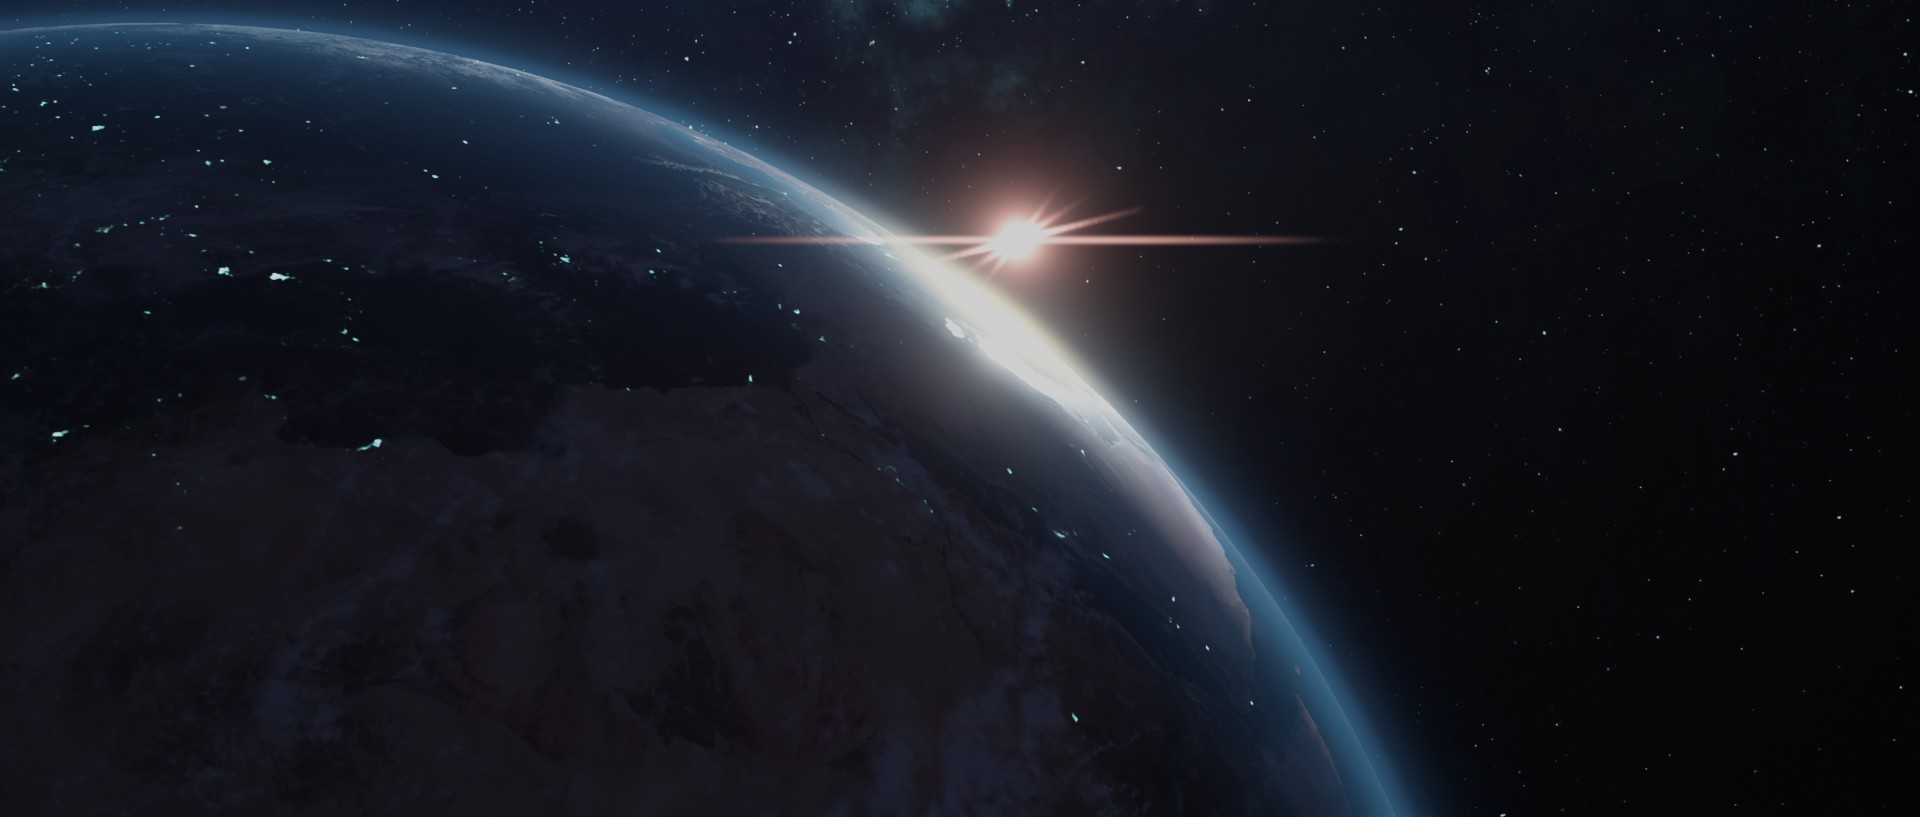
The sun and lens flares
The sun effects consist of a few different parts: the sun glow itself, the streaks, the outer flare that illuminates nearly the entire image and the lens flare. Everything has been created in Blender internally. The glows are created with various blur and glow effects on top of an emitting circle that is being rendered in the scene. The streaks around the sun and the bright horizontal streak are created using a smaller emitting sphere as a basis. It moves with the background to give the effect of the spaceship actually orbiting earth.
The anamorphic lens flare was a creative choice as it gives the scene a futuristic vibe. It is entirely procedural and was created using many of the available effects in the compositor.

Optimization
So here is a topic that I feel is only seldom discussed on 3D forums: optimization. For still renders, optimization doesn’t really matter that much—if an image takes a few hours to render in its full resolution that really isn’t much of a problem, especially because test renders don’t necessarily need the final image quality. For animations though, there are several more things to consider for rendering:
- Just the first four shots of the movie have 950 frames in total, which by itself puts this in an entirely different league than just one still.
- Cycles has made great leaps in performance, especially considering the denoiser and support for OptiX—the latter can cut the render time in half on many occasions. I do have a ray-tracing graphics card, but we modeled the spaceship without OptiX in mind and created a lot of shaders with ambient occlusion nodes that are not yet supported by OptiX. And the denoiser also has its flaws when it comes to animation. Firstly, as noise changes from frame to frame, the denoiser will always interpret the image in a slightly different way, thus resulting in a very different image. This would not matter that much for a still, but in animations it creates all sorts of flickering effects. Also, as this animation is going to be in a movie, it has to be at 24fps and with a shutter speed of 0.5. This creates some considerable motion blur that the denoiser isn’t very good at interpreting, again leading to flickering. All these problems can only be solved with a high sample count and resulting very long render times.
- Not every element on the image needs to be rendered at the full quality. For example, the layers that the atmosphere consists of only need about 64-128 samples for the volumetric shader and not more than 24 for the other two respectively, as they are being heavily blurred and processed in the compositor. The earth only needs 64 samples to be noise-free and have a steady image after denoising, while the spaceship needs at least 512 samples, but somewhere around 2048 to get a somewhat good result. That is perhaps the biggest reason why dividing the scene into different render layers is a great idea, even without considering the benefits in compositing.
- Chris and I did a test on whether it would make sense to render the image at a higher resolution and scale it down to get a better image result. So we tried to render an image from another project with double the resolution and only one quarter the sample count. The effect was a much less noisy image with only a little drop in performance, so that’s what we’re planning to do for the final render. For this method, though, the compositing tree has to be changed to adapt to both resolutions and that can be some tedious work.

As yet, the animation is not fully done and we’ll be rendering the final version once the other shots are fully laid out and we are confident there’s nothing more to change. This particular image demonstrates the quality we are hoping to have in the final animation, once it has been rendered out fully.
We hope to finish the project next Spring. There are still a few scenes left to be filmed, but I really hope the current ‘situation’ will have improved by then and that we can finish the movie in time. During the winter, Chris and I will already tackle the effects for the scenes we do have and we’ll be posting shots of the movie in the BlenderArtists forum.
Thank you so much for visiting my little insight into our project. I really hope there’s one or another idea here for you to take away or be inspired by.
And thanks to the BlenderNation team for featuring us!
About the Author
 Alexander Bombelli, passionate Blender user and movie enthusiast


Really good work. The real feel is there. To me it just lack a small amount of texture in the spaceship’s plates. It’s a tiny little too smooth.
Amazing! keep it on