Behind the Scenes: Rocko’s Modern Life
Introduction
Hi! My name is Lucas and I’m a 3D character artist from Mar del Plata, Argentina. Although I have a 3D generalist background, my main interest is in developing appealing characters for animation and video games.
I first approached Blender a long time ago, in 2007, and haven’t stopped using it ever since. It got me my first full-time job as a 3D artist six years ago and it’s still my software of choice. Nowadays I work in one of the leading mobile video game companies in Argentina, as lead 3D artist.
[sponsor id=’qarnot’]
Concept
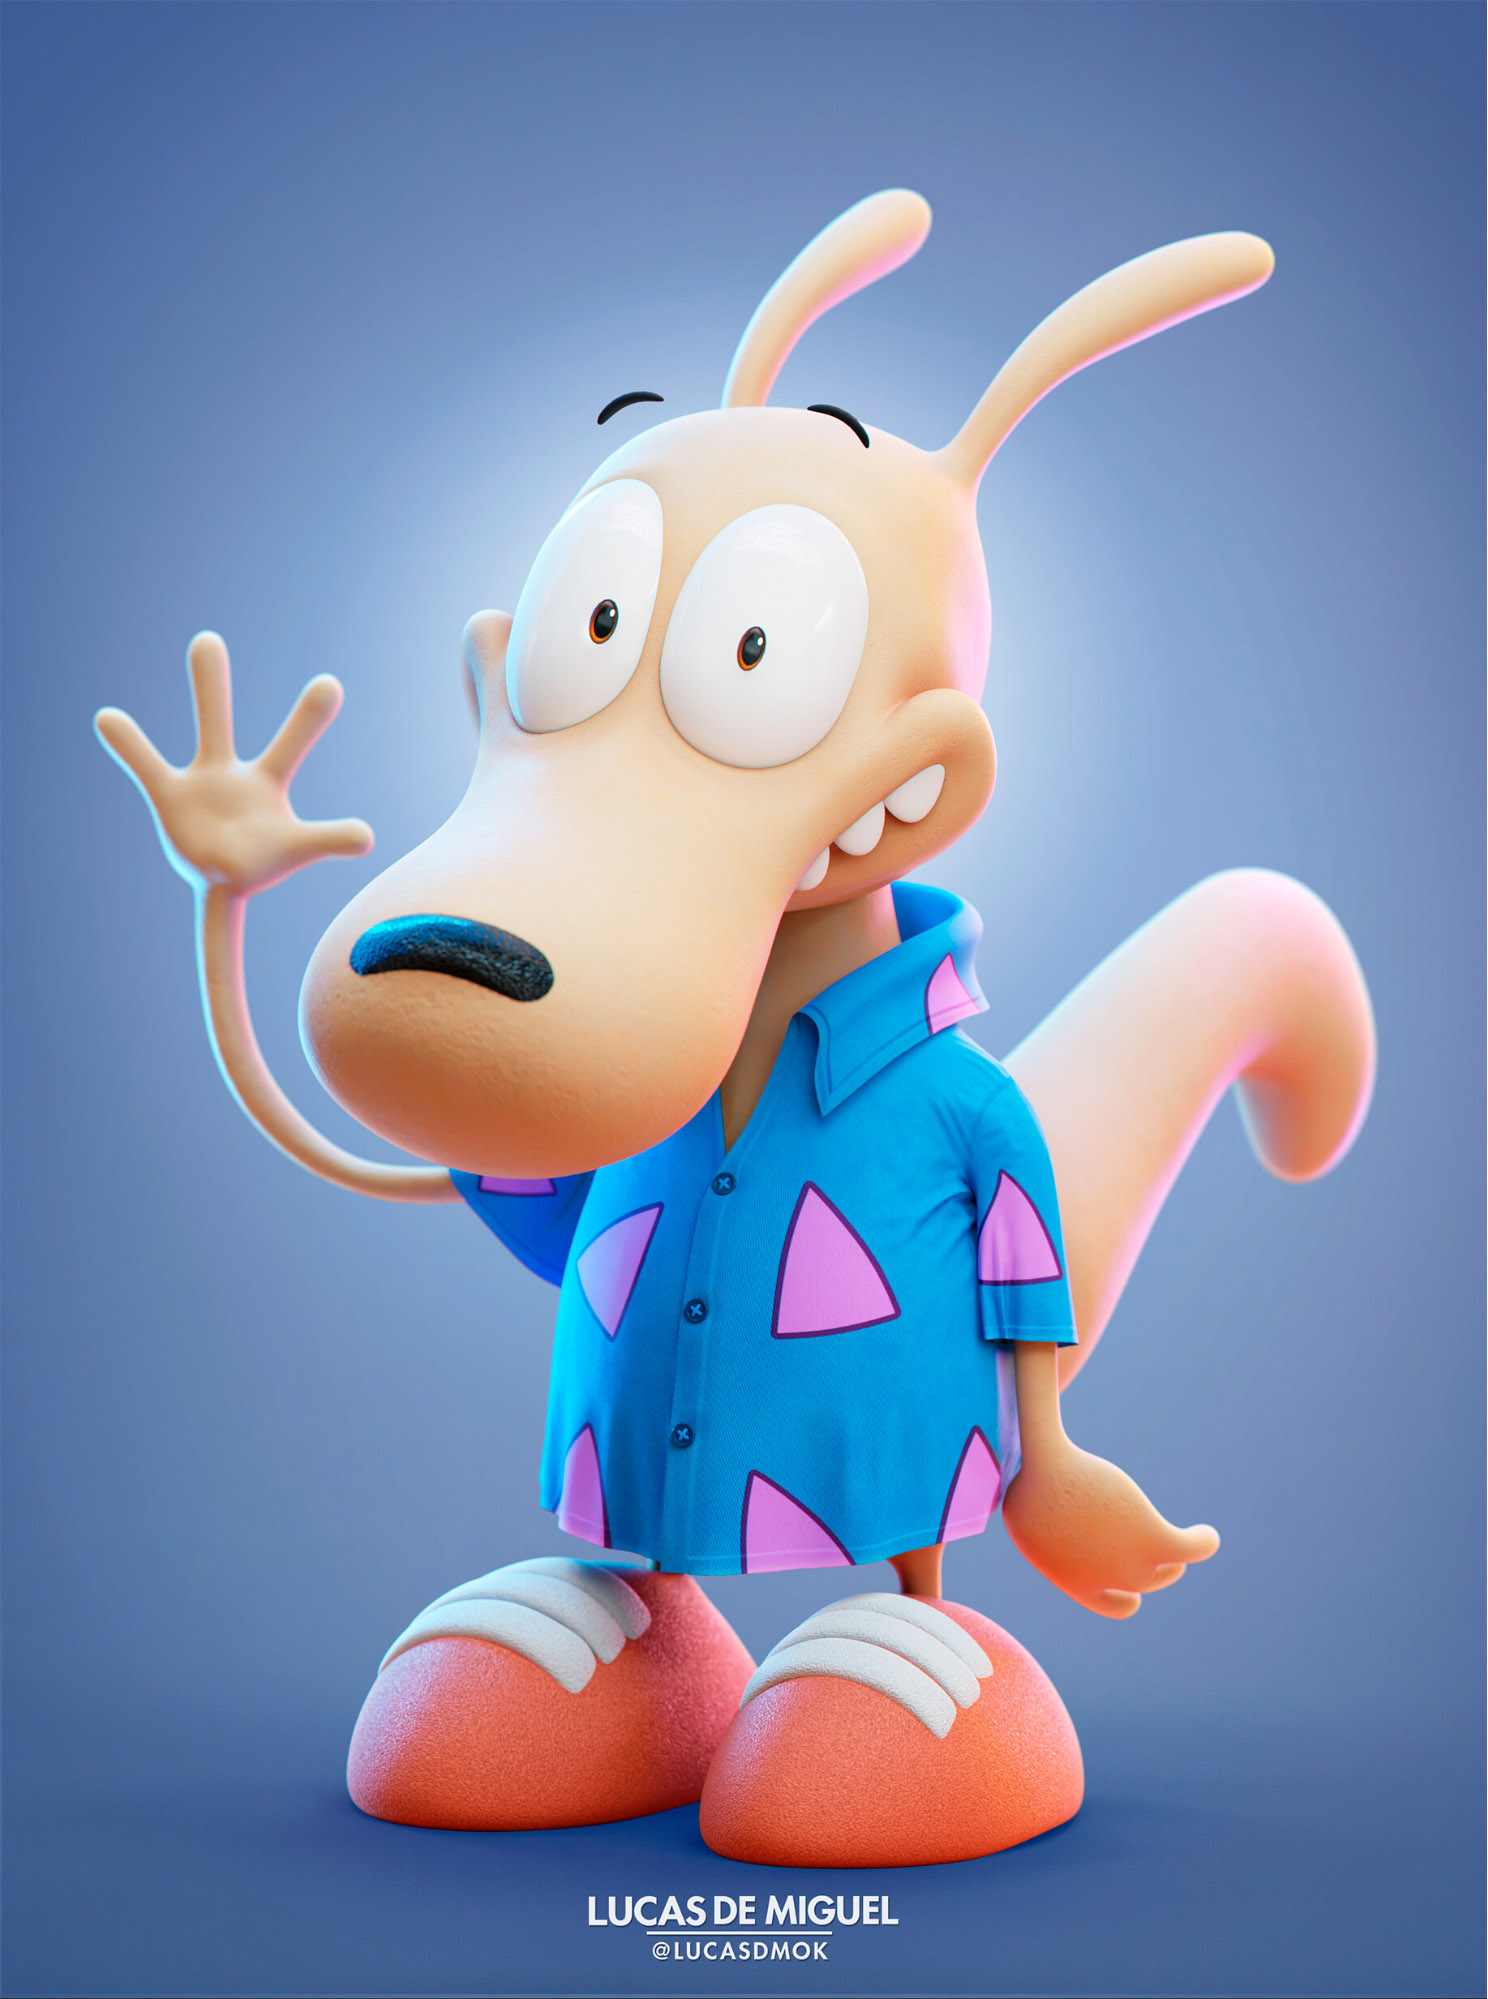
I’ve been wanting to model one of my favourite cartoon characters for a long time. Rocko’s style and its particular kind of humor has always appealed to me. In addition to the emotional value generated by nostalgia, he was a widely popular character who, unlike many others, had not yet seen a 3D version as far as I knew. Using PureRef, I put together a small reference board with images from both the original cartoon and some stylized 3d characters I liked. My desire was to achieve a modern cartoon look, without losing the feel of the original character.
Modeling
The first step was to define the proportions. Since I wanted to highlight the volumes that make up the body, I decided to start with a series of spheres and cylinders, which I stretched and deformed at will until I found a base mesh that looked just right.
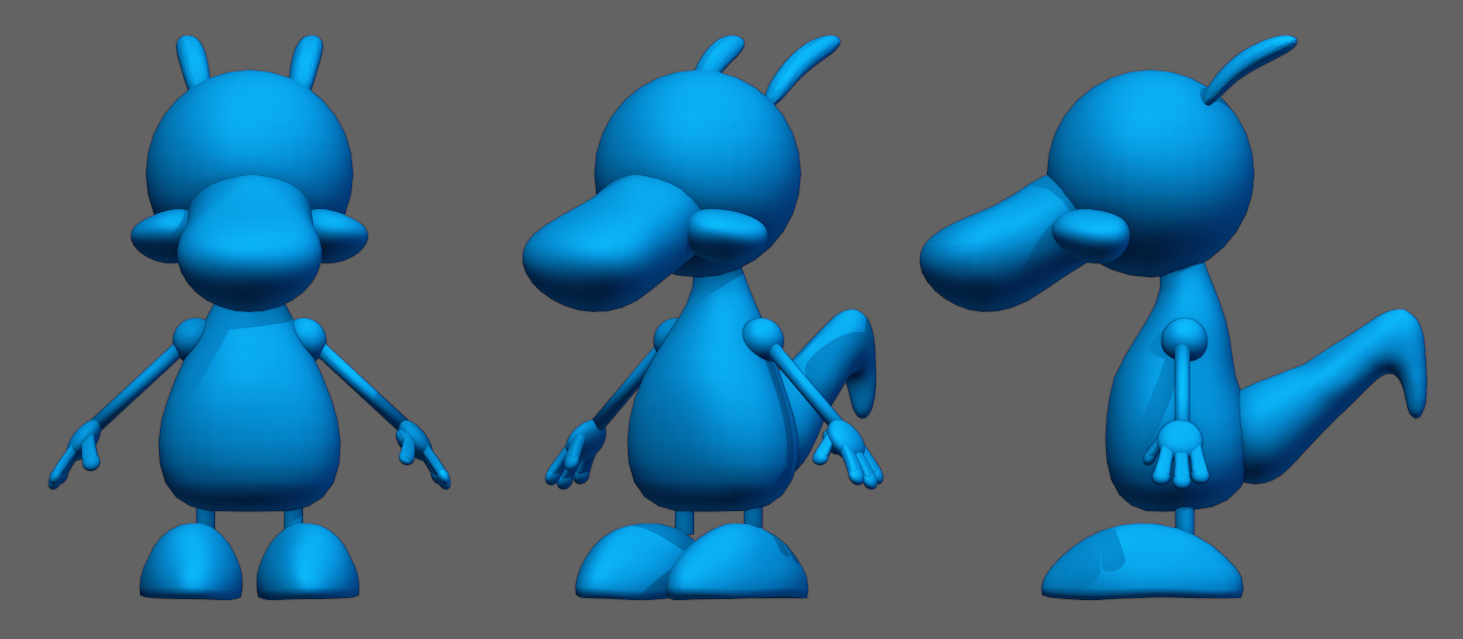
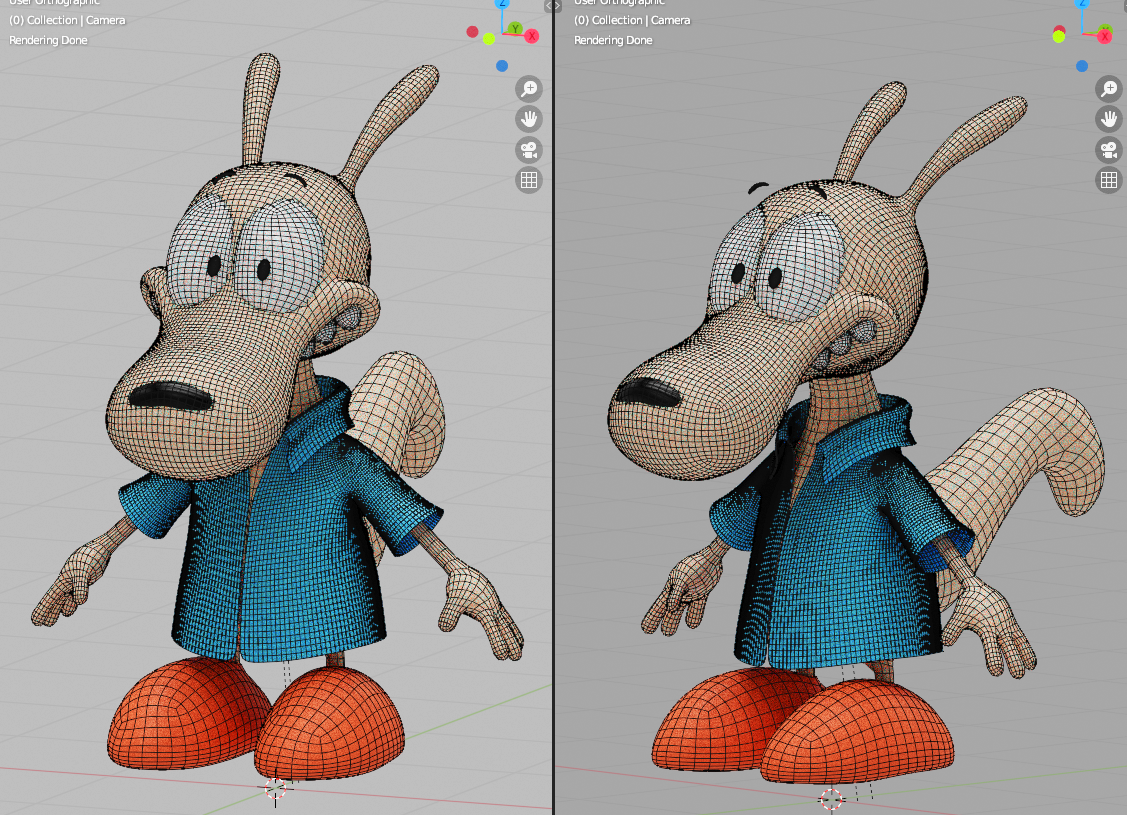
The next step was to combine all the meshes made up the body using the Remesh toolset to Voxel. That gave me a good base for sculpting. Once I had the general shapes well defined, I retopologized the model using Quadriflow remesh, although I also retopo’d some parts of the face by hand. Then, I UV unwrapped the body and shirt.
I posed both the base character and the shirt in Sculpt mode and used a Multires modifier set to 2 on the body to sculpt the details further and define the shapes a little bit better. Once I was satisfied with the result, I applied the base geometry in the Multires modifier.
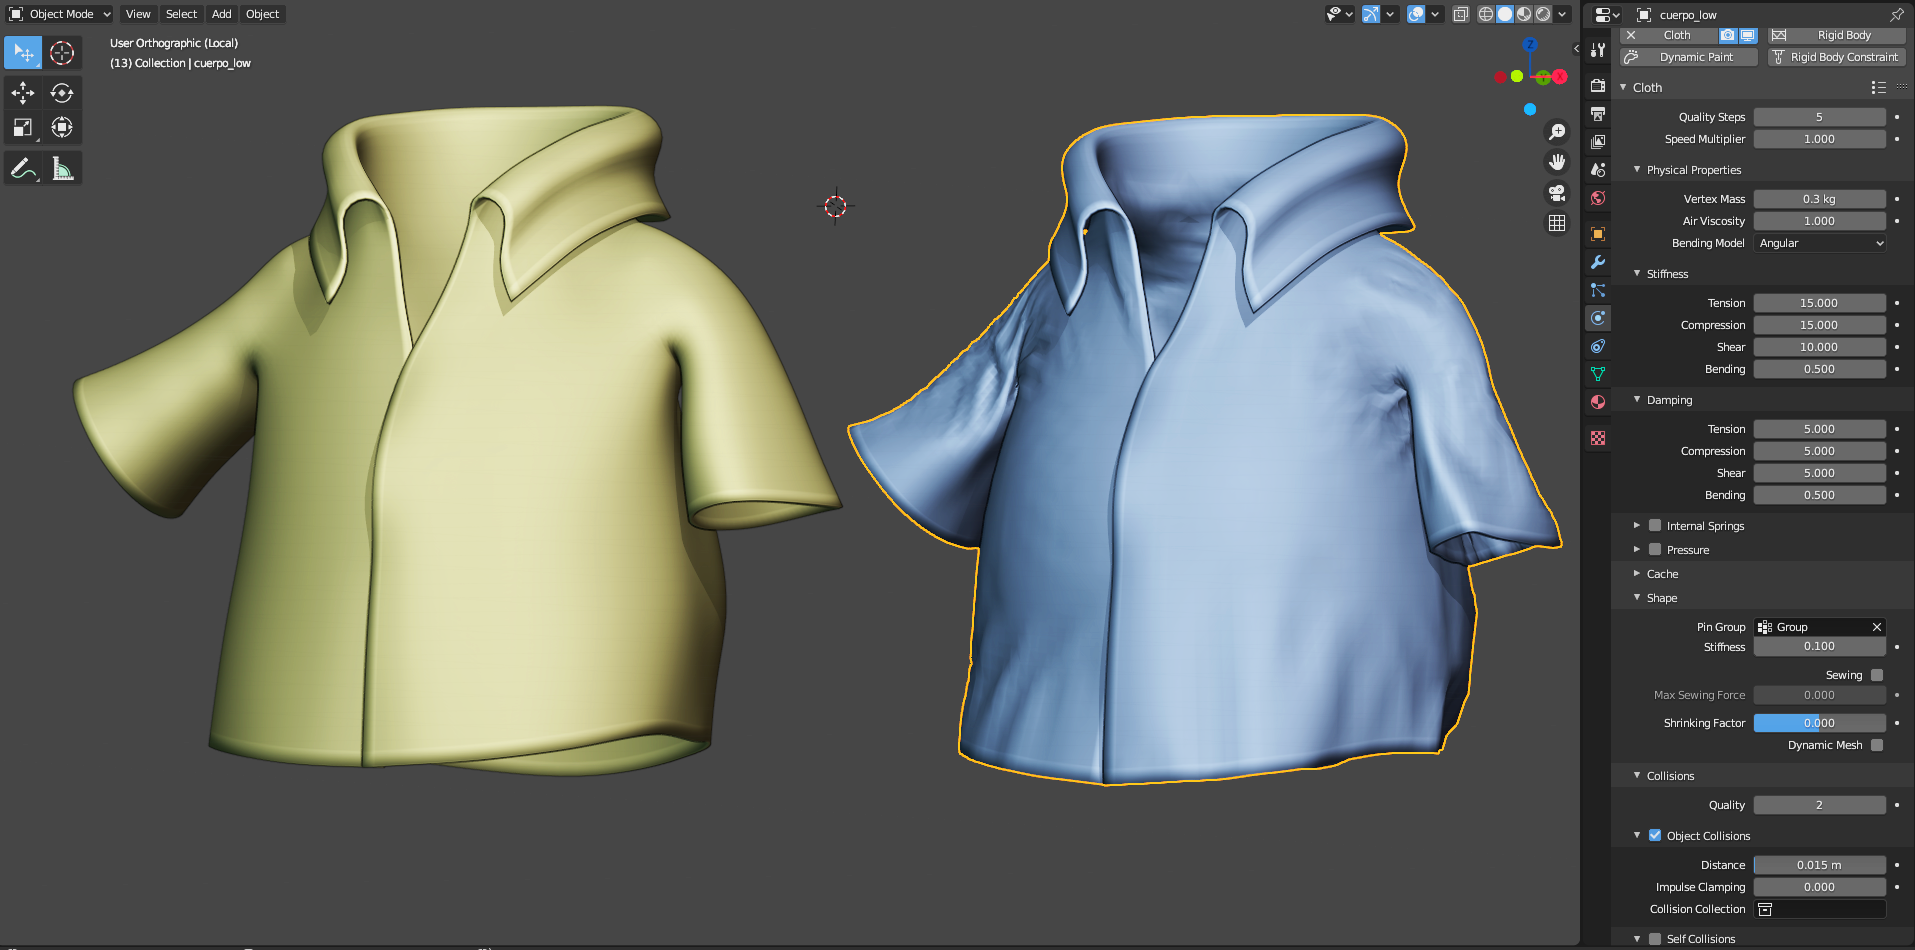
Cloth
For the shirt, I ran a quick cloth simulation, using the body mesh as a collider, with the following settings.
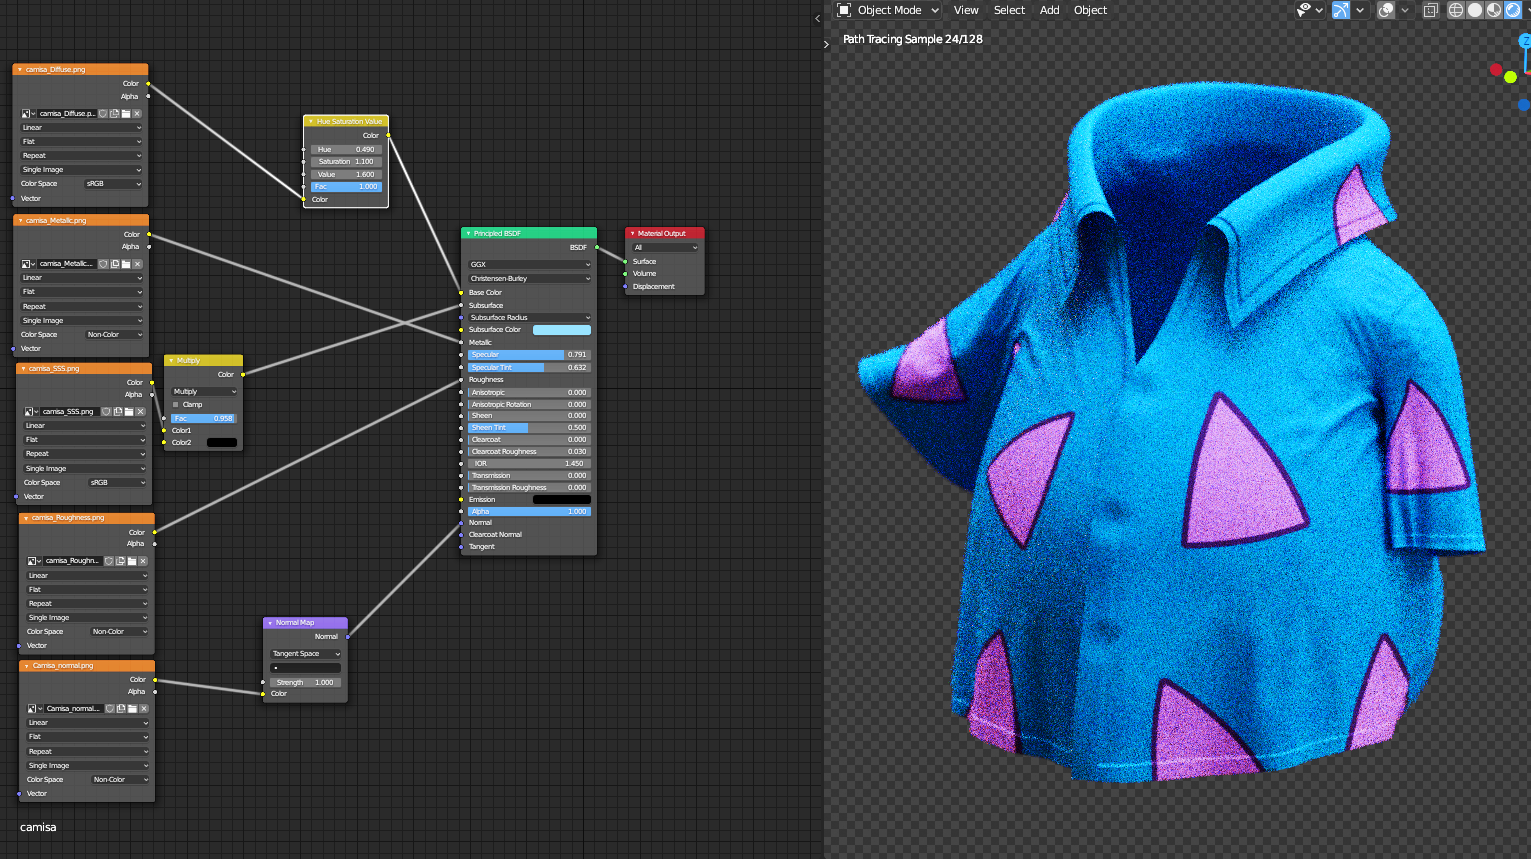
Texturing
With all the UV’s already prepared in Blender, I decided to start texturing/shading. As I do in most of my projects, I chose Substance Painter to do the job, since the smart masks and materials make it easier to achieve really good quality results in a short amount of time. For most of the pieces, the workflow consisted of using a smart material as a base, then modifying its color, applying color gradients in some areas to reinforce the lights or shadows, adding noise in both the color and roughness channels, and adding some smart or hand-painted masks to enhance the look. Once I was happy with the results, I exported all the maps (diffuse, metallic, subsurface scattering, roughness, normal and ambient occlusion) and loaded them in their respective slots on a principled shader. I made a material for the body and a different one for the shirt.
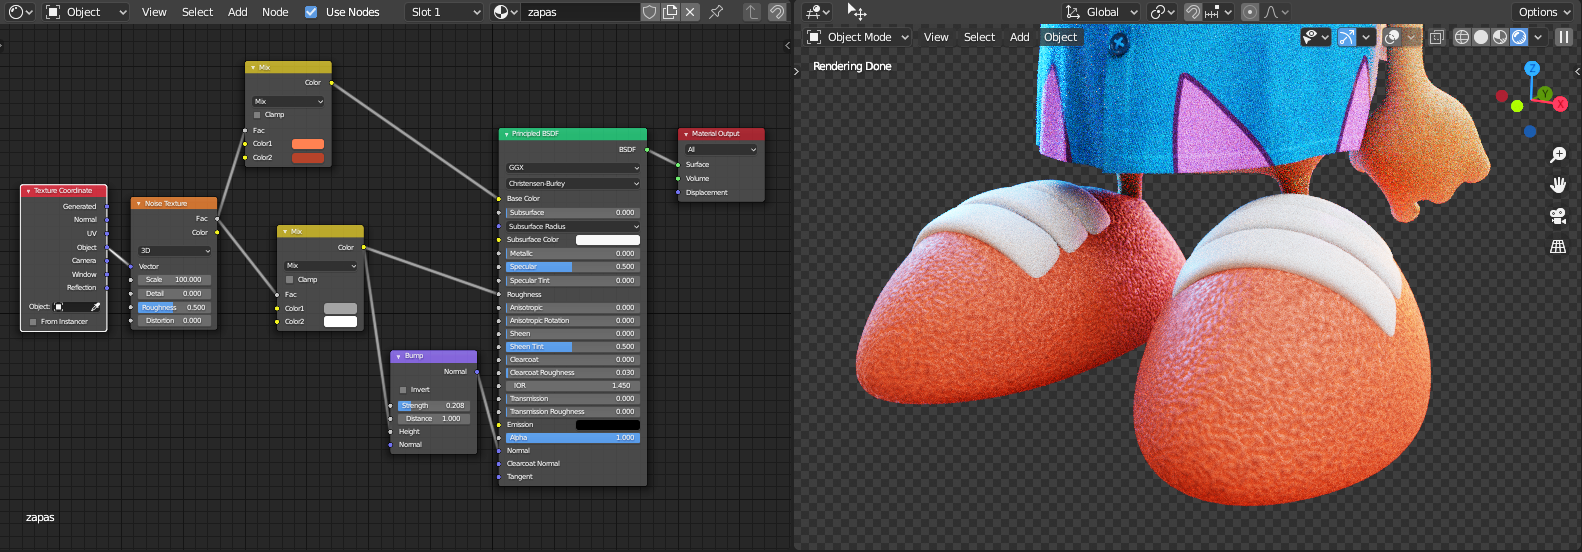
Secondary elements
The eyes, eyebrows, teeth, shirt buttons, and shoelaces were all poly modeled in Blender and added after the texturing was done. All of those materials, with the exception of the iris, were just principled shaders set to a color with a little bit of procedural noise added—nothing fancy.
Lighting and rendering
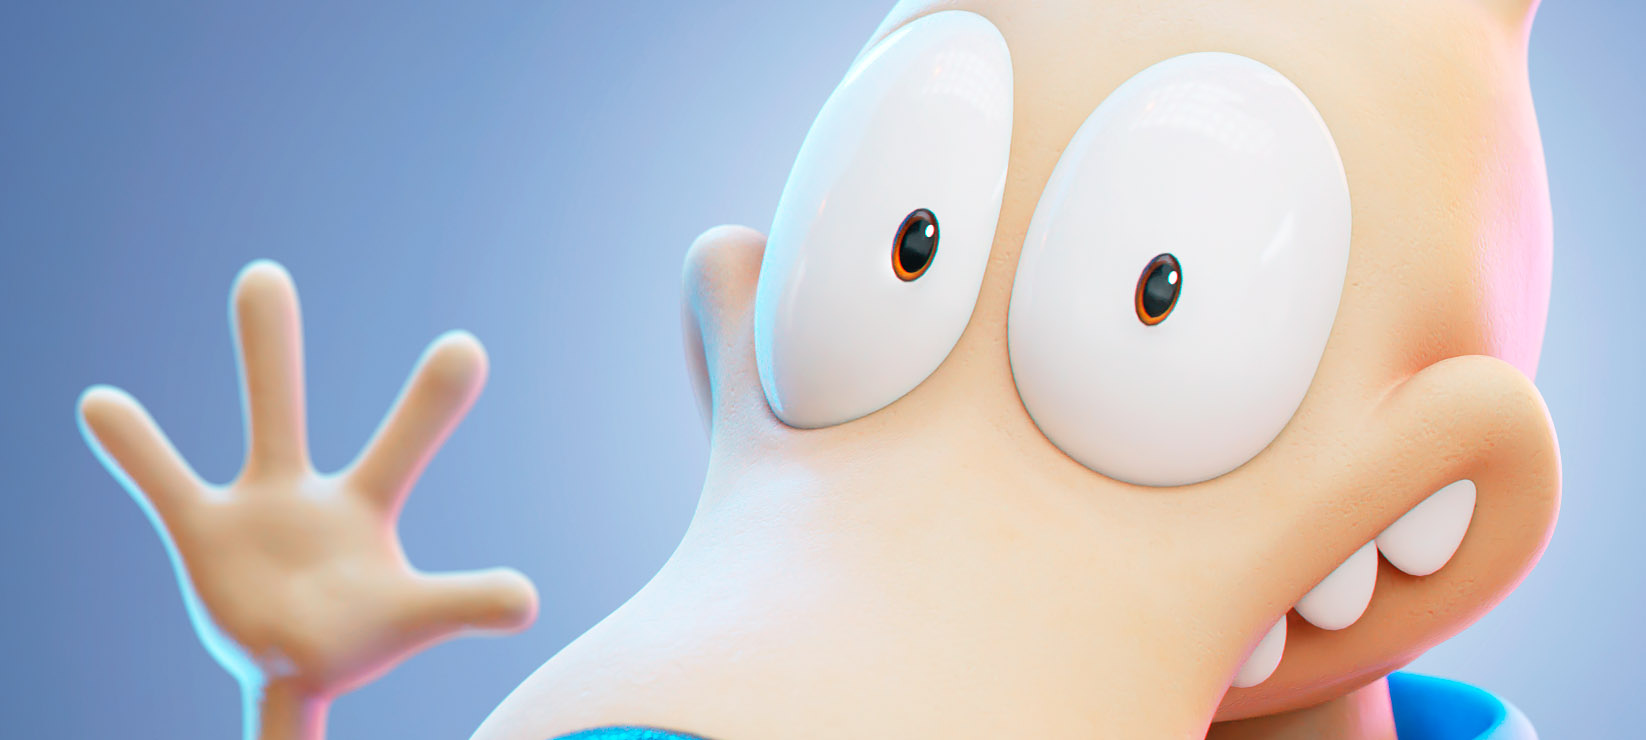
Lighting is always the part I enjoy the most. I find it fascinating how much you can visually modify what a character communicates, just by changing the lighting. I used an HDRI from Hdri Haven and set it to a low value to set the mood. Then I added a white plane as a key light in front of the character, a gray plane on the floor to cast some light bounces, and a series of cyan and pink planes as rim lights to make it look more appealing.
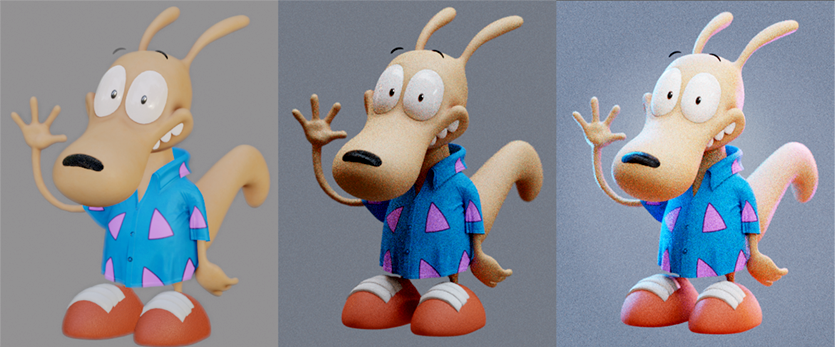
Compositing
I added a light blue background with a lamp pointed towards the center of it, to make the character pop a little more. I activated the depth of field on the camera to give it a more realistic look, and set the F-Stop to a low value (about 2.0) to achieve a nice amount of blur on everything but the face. I rendered it at twice the final resolution, using the denoiser node. In Photoshop, I did a little retouch to fix some minor issues, gave it a general color adjustment, and added a little bit of color aberration. That’s all!
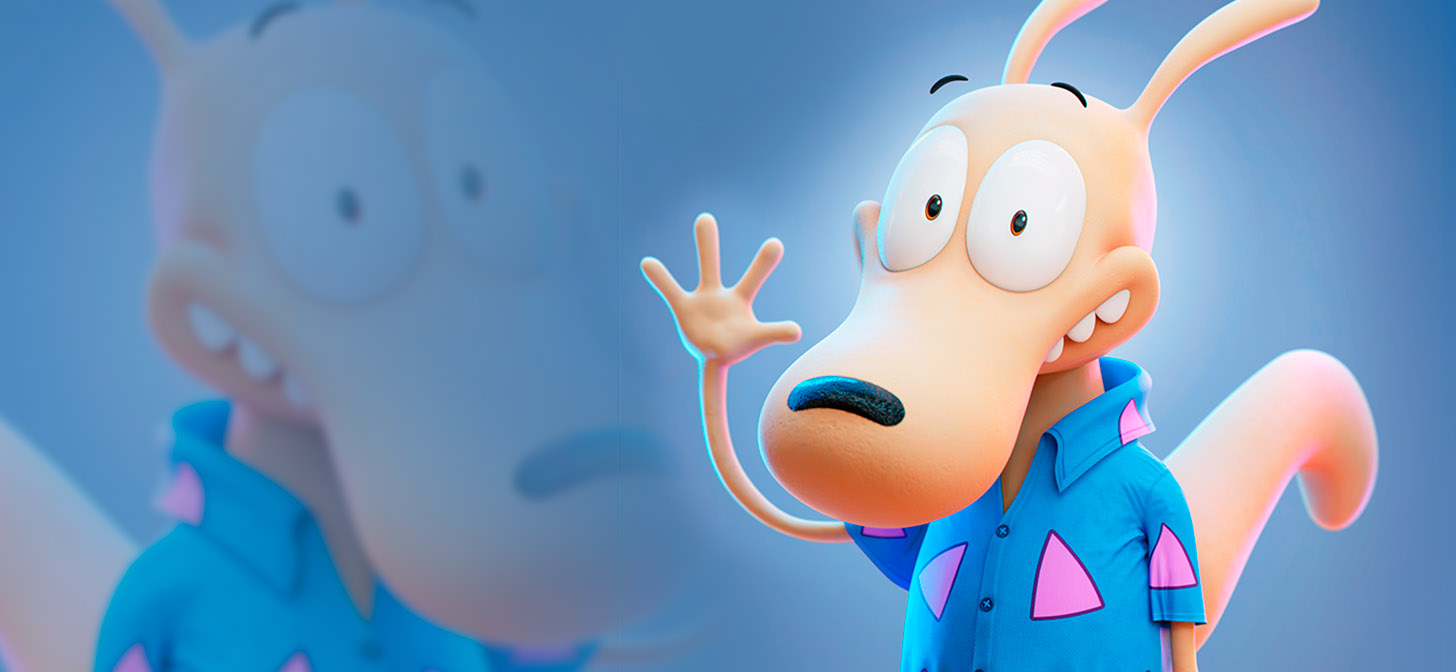
Final image
You can also see the full post on ArtStation.
Tools
- Blender 2.83
- Substance Painter
- Adobe Photoshop
About the Author
 Lucas De Miguel, 3D Character Artist


I miss Rocko. Great job on this.
Thank you! You can check a little animation I made with it on my Ig account here: http://www.instagram.com/lucasdmok
This is really awesome yo I love and miss this show!
Brilliant! Thanks for the breakdown!