Behind the Scenes: Watercolor Samurai

About Me
My name is Adam Pereira, and I am from the state of Massachusetts in the United States of America. I teach history and social studies at the high school level and work on 3D modeling and animation in my spare time. I have been using Blender 3D for roughly 12 years now, since I was a freshman in high school (I started on version 2.49). However, I only really became serious about 3D art within the past 4 years or so. I have no real training in 3D art, and I learned how to use Blender by watching thousands of tutorials and through trial and error. I have recently branched out from still images to animation work.
[sponsor id=’qarnot’]
Concept
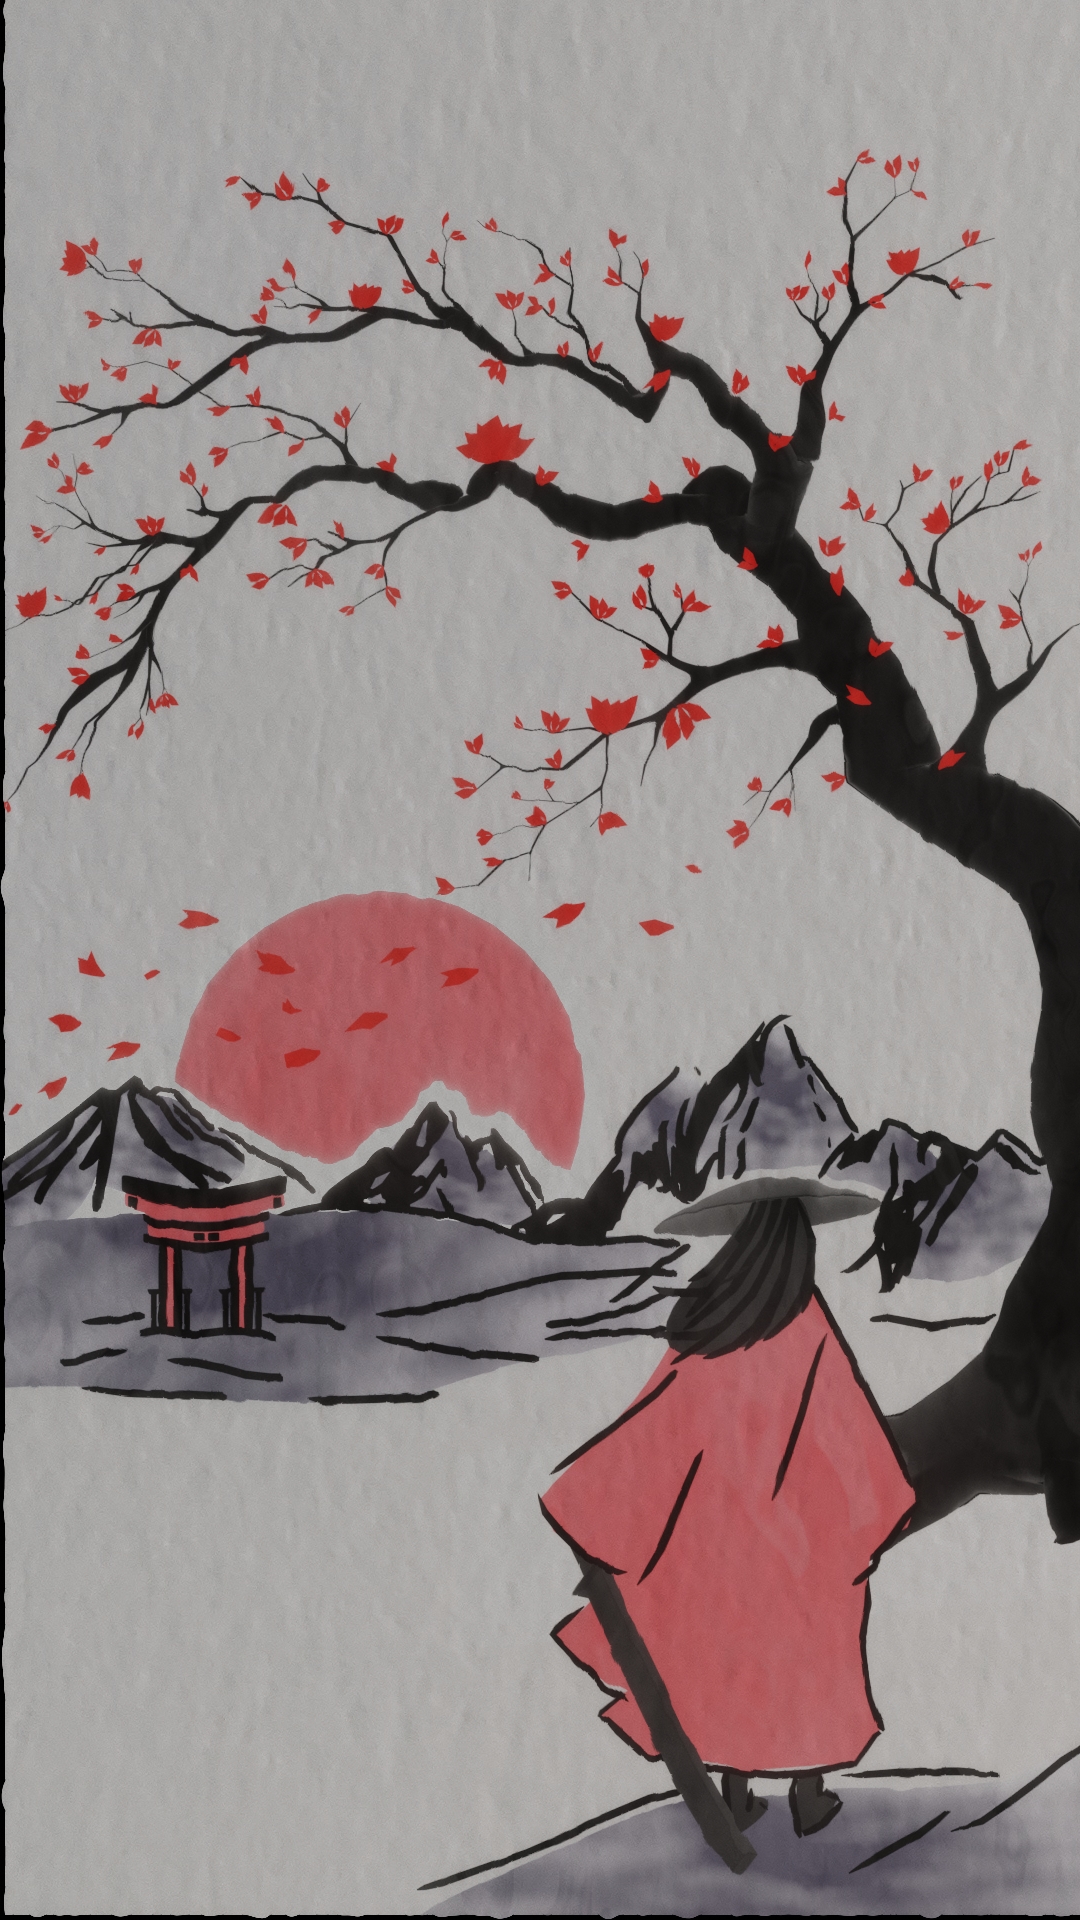
This piece, in particular, was inspired by the topic for one of the CG Boost competitions: Samurai. When I saw the topic, I immediately thought of the idea of creating a watercolor painting using compositing in Blender’s Eevee rendering engine. But first, I needed to create some conceptual art.
I started off by searching through hundreds of reference images in order to see how watercolor paint works and looks in different styles. I am terrible at painting in watercolor, so a traditional piece of concept art would not do. I instead used the watercolor tool in Autodesk Sketchbook on my phone. This, in my opinion, was the easiest way to get a result that I really liked for my concept art. The watercolor effect in this app isn’t perfect, but it was good enough to help me visualize how I wanted to compose my image.

Modeling in Blender
Once I had achieved a concept art that I could work with, I opened up Blender. For this particular image, I used Blender 2.8. The modeling was pretty straightforward in this image. Most of the image is composed of 2D models (the sun, the mountains, the gate). I also used extruded planes for the black ‘ink’ lines in the image. The material on these is a disconnected node. That’s important for later when we move to compositing.
The tree was modeled using the skinning and subdivision modifiers, then extruding a single vertex out and controlling the thickness with “Ctrl-A”. I wanted to make sure that there were lots of little branches on this model, which is why I found this to be the easiest way to achieve this result.
The rest of the objects required very basic 3D modeling. For this particular image, I knew that the models did not need to look good from all angles, so I based the modeling process off of the camera’s perspective only, and the reference image.

Materials
The second most important part of achieving the watercolor effect in this image is the materials. As mentioned before, the ink lines were achieved by having an empty node system. This was done so that it wasn’t affected by any of the lighting in the scene. The black tree is the only other object in the scene that does not have an emission shader on it. The tree has a diffuse shader attached so that there is some variation in its shading. The rest of the objects in the image have emission shaders with different colors attached. The mountains in the background also have noise textures plugged into the emission shader to give some variation in color.

Compositing
If the materials were the second most important part of the watercolor effect, then compositing is THE most important part of this effect. The best part about it is that it is 100% procedural. The only part that is not procedural in the node tree is the image texture that was plugged into the last Multiply node. For that I just took a picture of a blank piece of watercolor paper and stuck it in, to give it a real paper look. This could also be achieved with some noise textures.
The rest of the nodes were used to control the ‘bleed’ effect of the paint, color variation, and image displacement. The textures used to achieve this are all procedural. Some are cloud textures, noise textures, and magic textures; also, the textures labeled 1 in the node tree are Musgrave textures. The values on the textures, multiply nodes, and mix nodes are all trial and error. If you ever want to use this effect, you may need to play around with these values until you land on a result that you are satisfied with. The RGB Curve node in the middle of the node tree can also be altered for some really cool color variation. I just used this node to give the colors a little more pop, but you can play around with the curves to give your image some really cool color variation and detail.
Here is the node tree:

Final Result
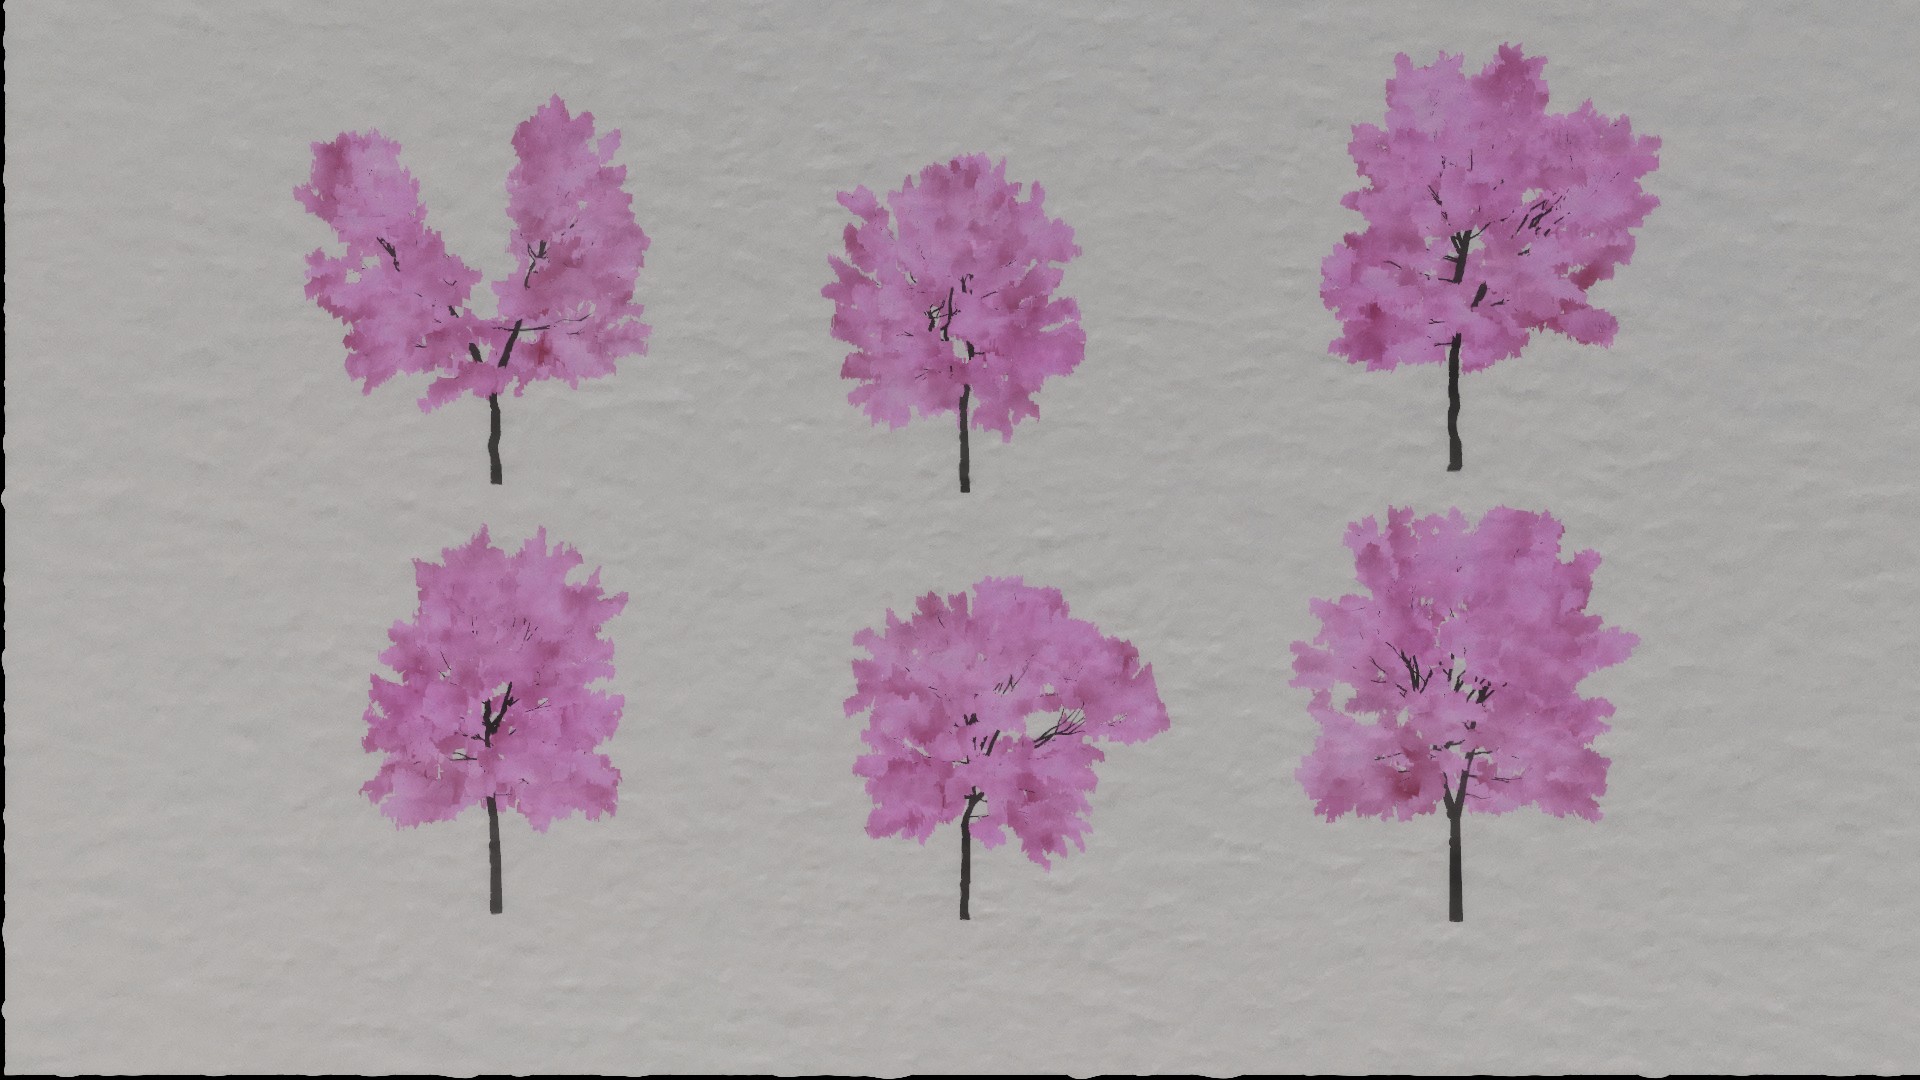
The node tree is a combination of a handful of tutorials that I watched in order to achieve this effect, and the result is really fun to play around with. I have since started to use this effect with some other samurai rigged characters that I have made in order to achieve a watercolor-anime style animation. For these, the ink lines were done by adding a solidify modifier set with negative thickness and backface culling enabled in the shader settings. Here is the result for this effect, which I think is a little better and a little more versatile:
These animations used the same node setup, but I simply animated some variation between every frame, to give the illusion that each frame is a different painting. This could be done by adding and animating rotation nodes to the textures in the node tree, or by simply animating the values of the textures.
About the Author
 Adam Pereira, Blender user since 2009.


