About me
Hi! I am Kunal Bhoge from India. I am 24 and have a bachelor's degree in architecture. Currently, I work as a 3D Artist at Madmax Visual Design Lab, India; we work specifically in architecture visualization using Lumion and SketchUp but were recently introduced to Blender so as to improve and upgrade our visuals.
I am new to Blender and I am still learning and exploring it. I am learning the most from Blender Guru, Chocofur, and other tutorials on YouTube. As of now, I am aware of most of the fundamentals and tricks in Blender to get a good quality visual.
So, to practice I work on some conceptual projects just to learn and try to make different materials, lighting, and create different moods.
I am not much into 3D modeling and I am a bit lazy to do it. Instead, I enjoy working on materials, texture, lighting, and mood of the output.

Learn more on qarnot.com.
The Cabin
My initial idea was to make a cabin space that was a bit minimal as compared to general cabins, which have a lot of heavy decor.
The initial references were used to establish the mood that I was expecting.


Modelling
I found a model of a cabin with interior on a SketchUp market. I didn't work much on the modelling part, but rather on changing some minor details of it. The initial model didn't have proper proportions for the roof battens, etc.
General detailing
So after importing into the SketchUp, the first step was to organise the scene. It took some time but was essential. Then I modelled a batten and repeated it using an array modifier. Then, for the flooring, I used a floor generator addon to create battens.
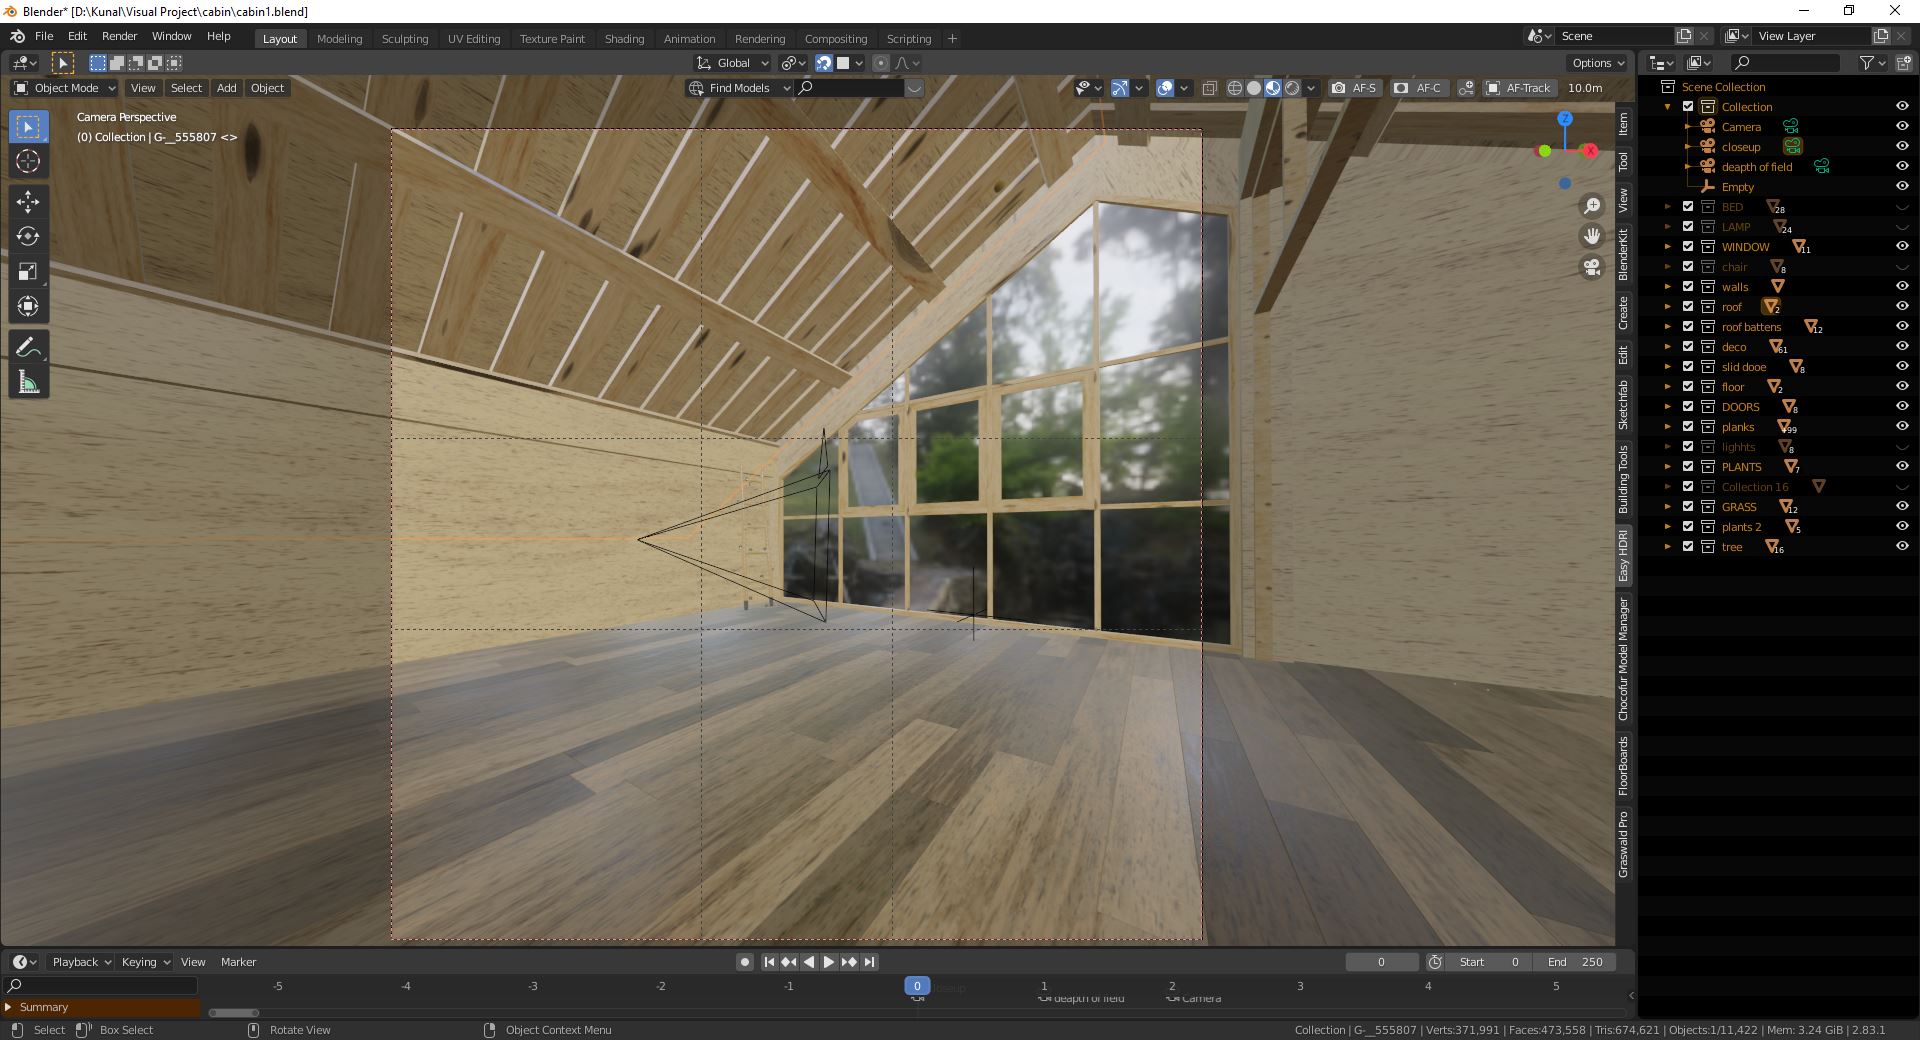
As the 3D model was already composed pretty well, it wasn’t necessary for me to work much on the furniture composition.
To create the carpet, I added a plane and gave it around 25 subdivisions and thickness using the solidify modifier. To make it look a bit more natural, I used a displace modifier with Cloud as a texture.


Then for the rest of the furniture, I used it as it was and just had to UV unwrap the pieces properly and also work a bit on the texture and color of the fabric.
For the area outside the window, to make the horizon a bit natural-looking, I modeled grass strands and arrayed them using a particle system; the same goes for other plants. The tree was generated using the M tree generator addon. It's quite useful for quick tree modelling but not as useful if the trees are at a close distance in the render.
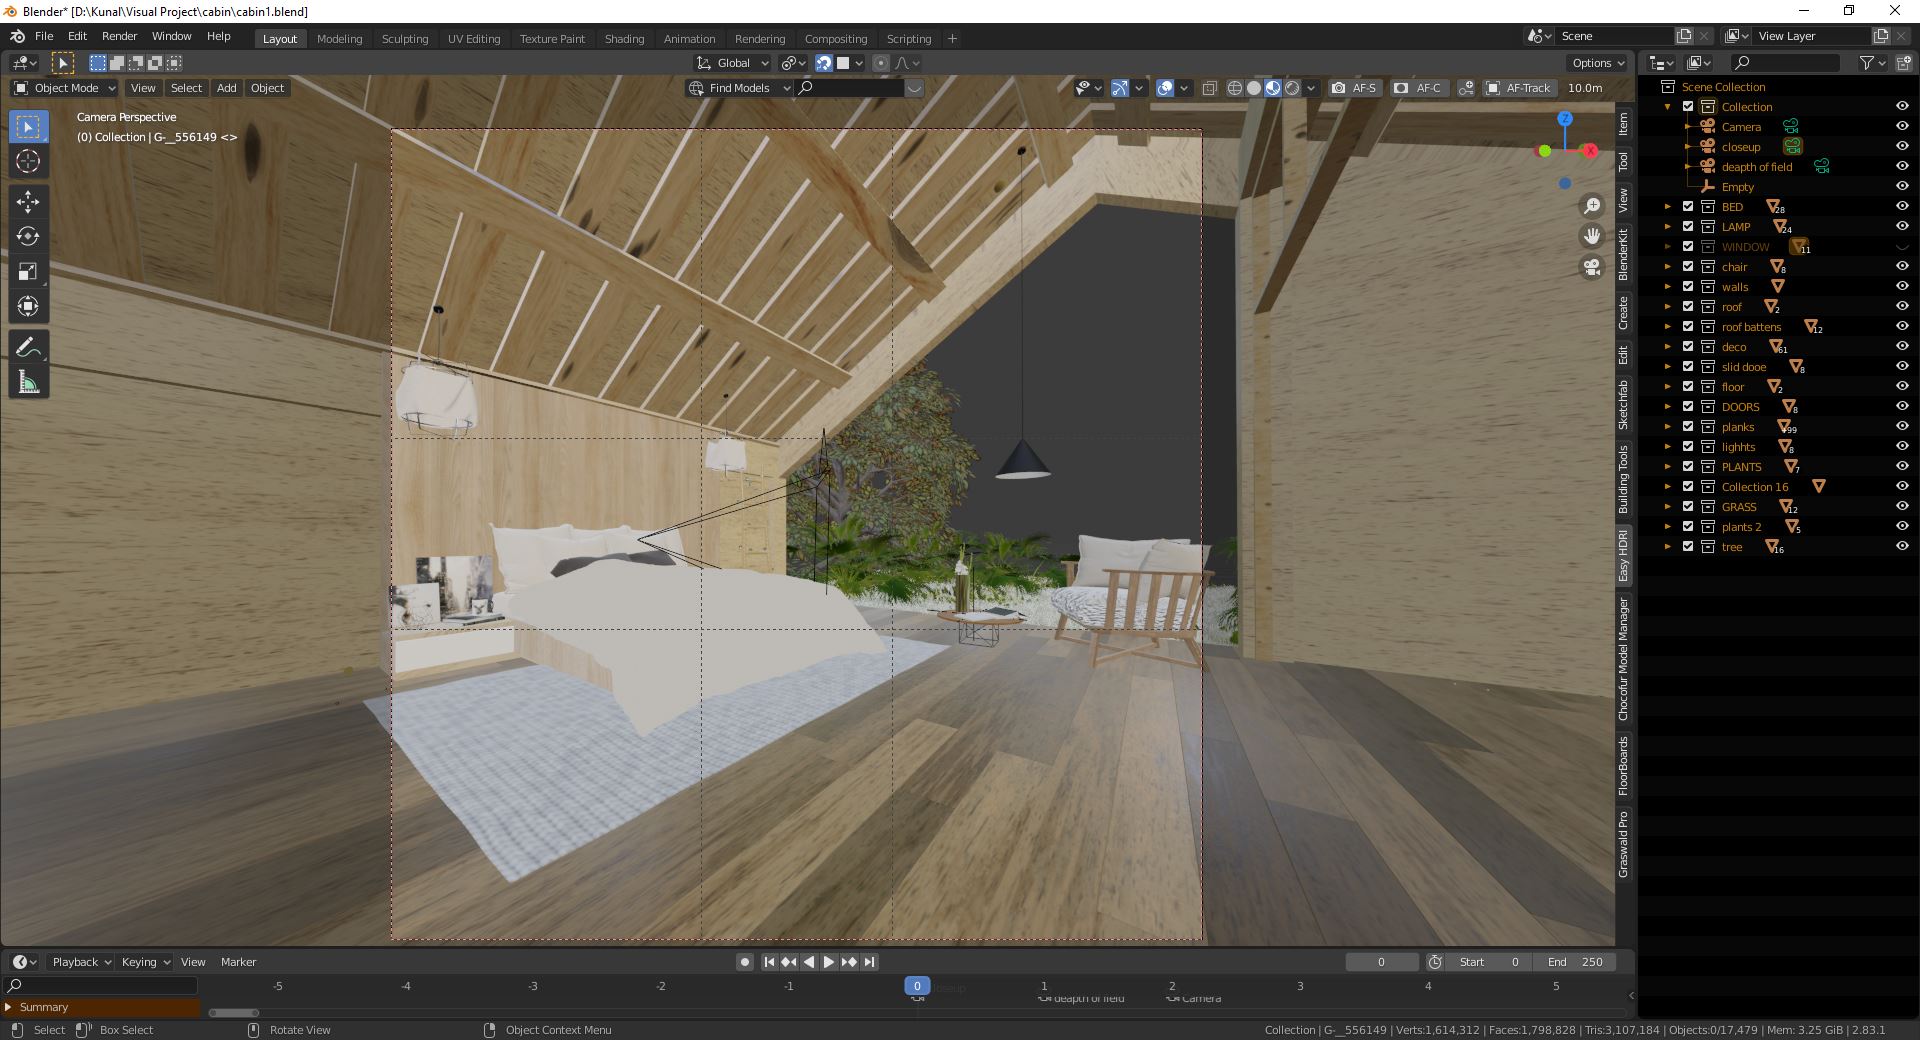
For the outdoor environment, I used weight painting and used it as density in the particle system.


Materials
Then came the material part of the process—I have a lot to learn about how the node system works. A major part of the model was made with very simple geometry and so it was easy to UV unwrap it. But certain areas required me to manually mark seams, which made me lazy; I ended up using Smart UV unwrap and it mostly worked.
For the wood material on flooring, backing, and battens I found it easy and efficient to make maps out of the same Diffuse/Color map using the separate RGB node and then connect them to a color ramp node for adjustments. I used this technique to generate roughness, specular (sometimes), and bump maps.


For wooden battens I wanted each batten to look different from the others. Hence, I added a hue saturation to the diffuse map, added an object info node, and connected the random (from object info node) to the factor of the hue saturation; this approach gave each of the battens a different value.
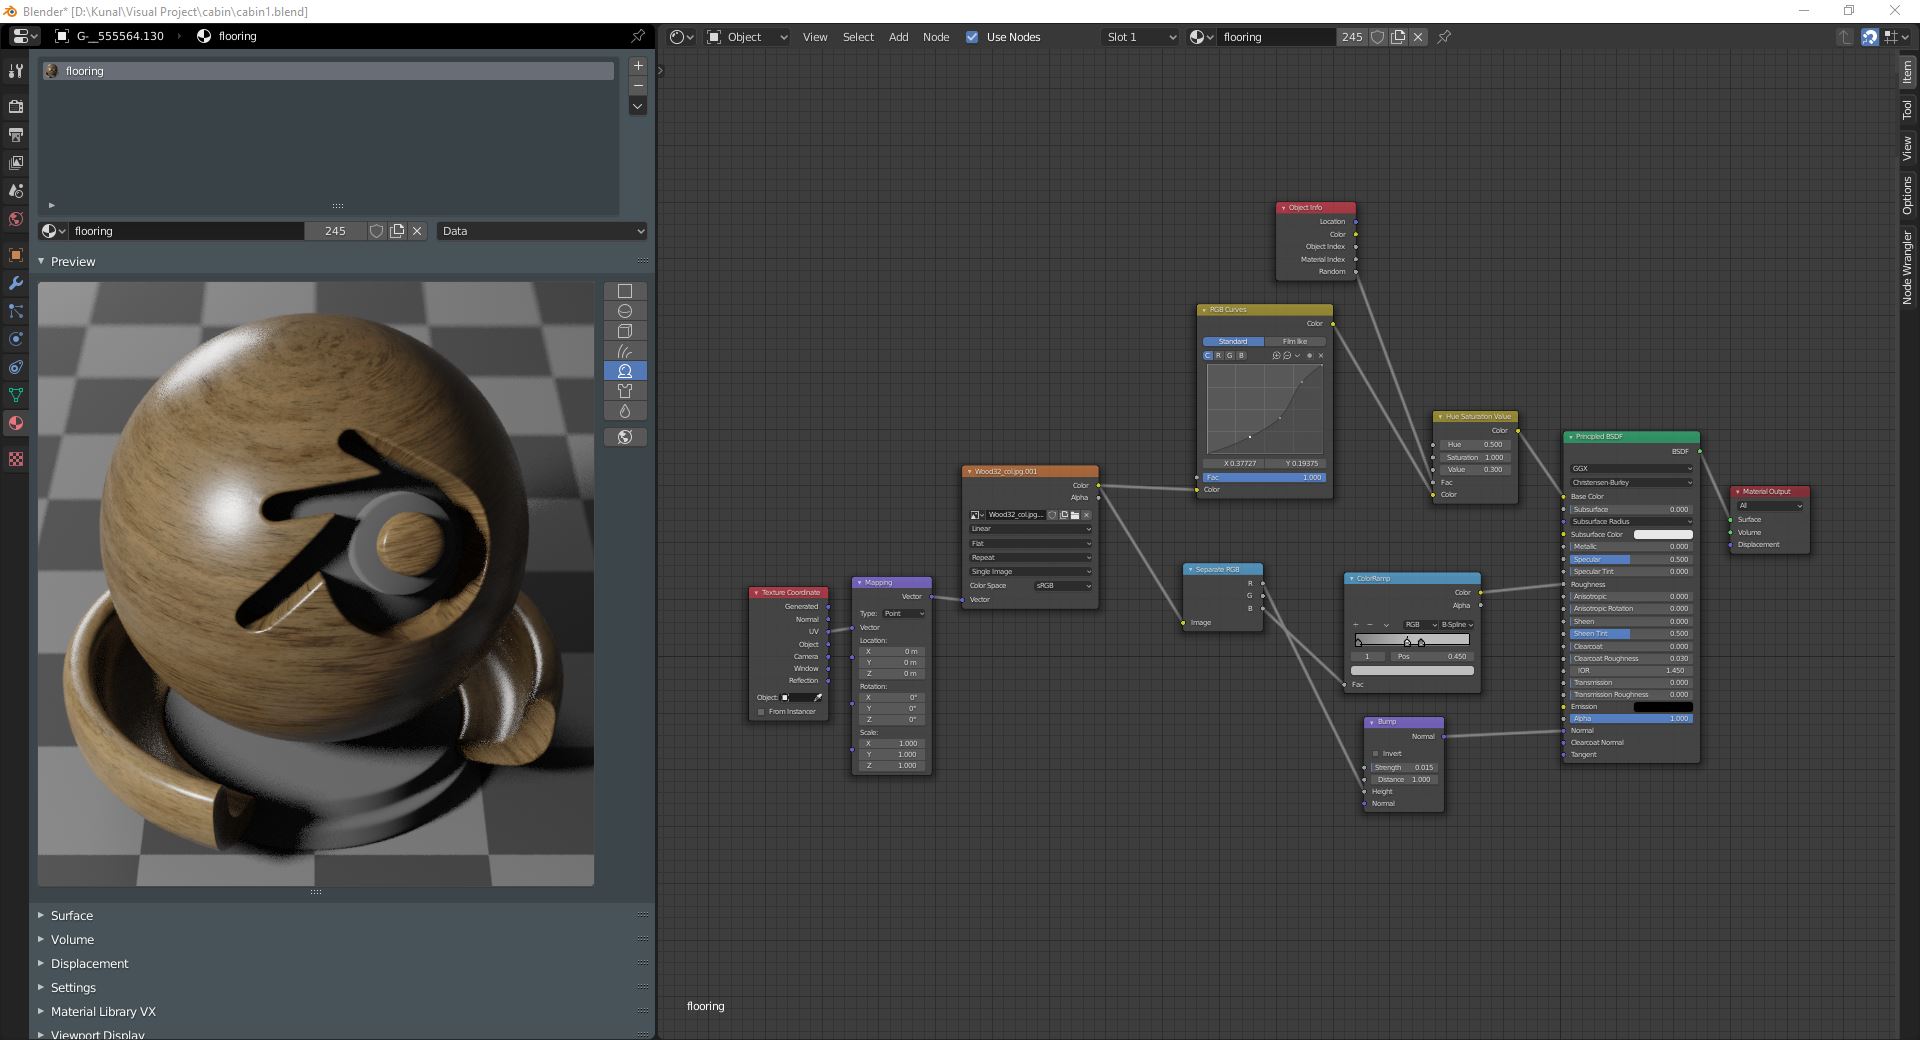
Wooden floor shader
Wooden flooring Shader: Each wooden panel has its own individual hue/saturation level, making it appear more natural.
And for the glass, I made a general glass shader setup.
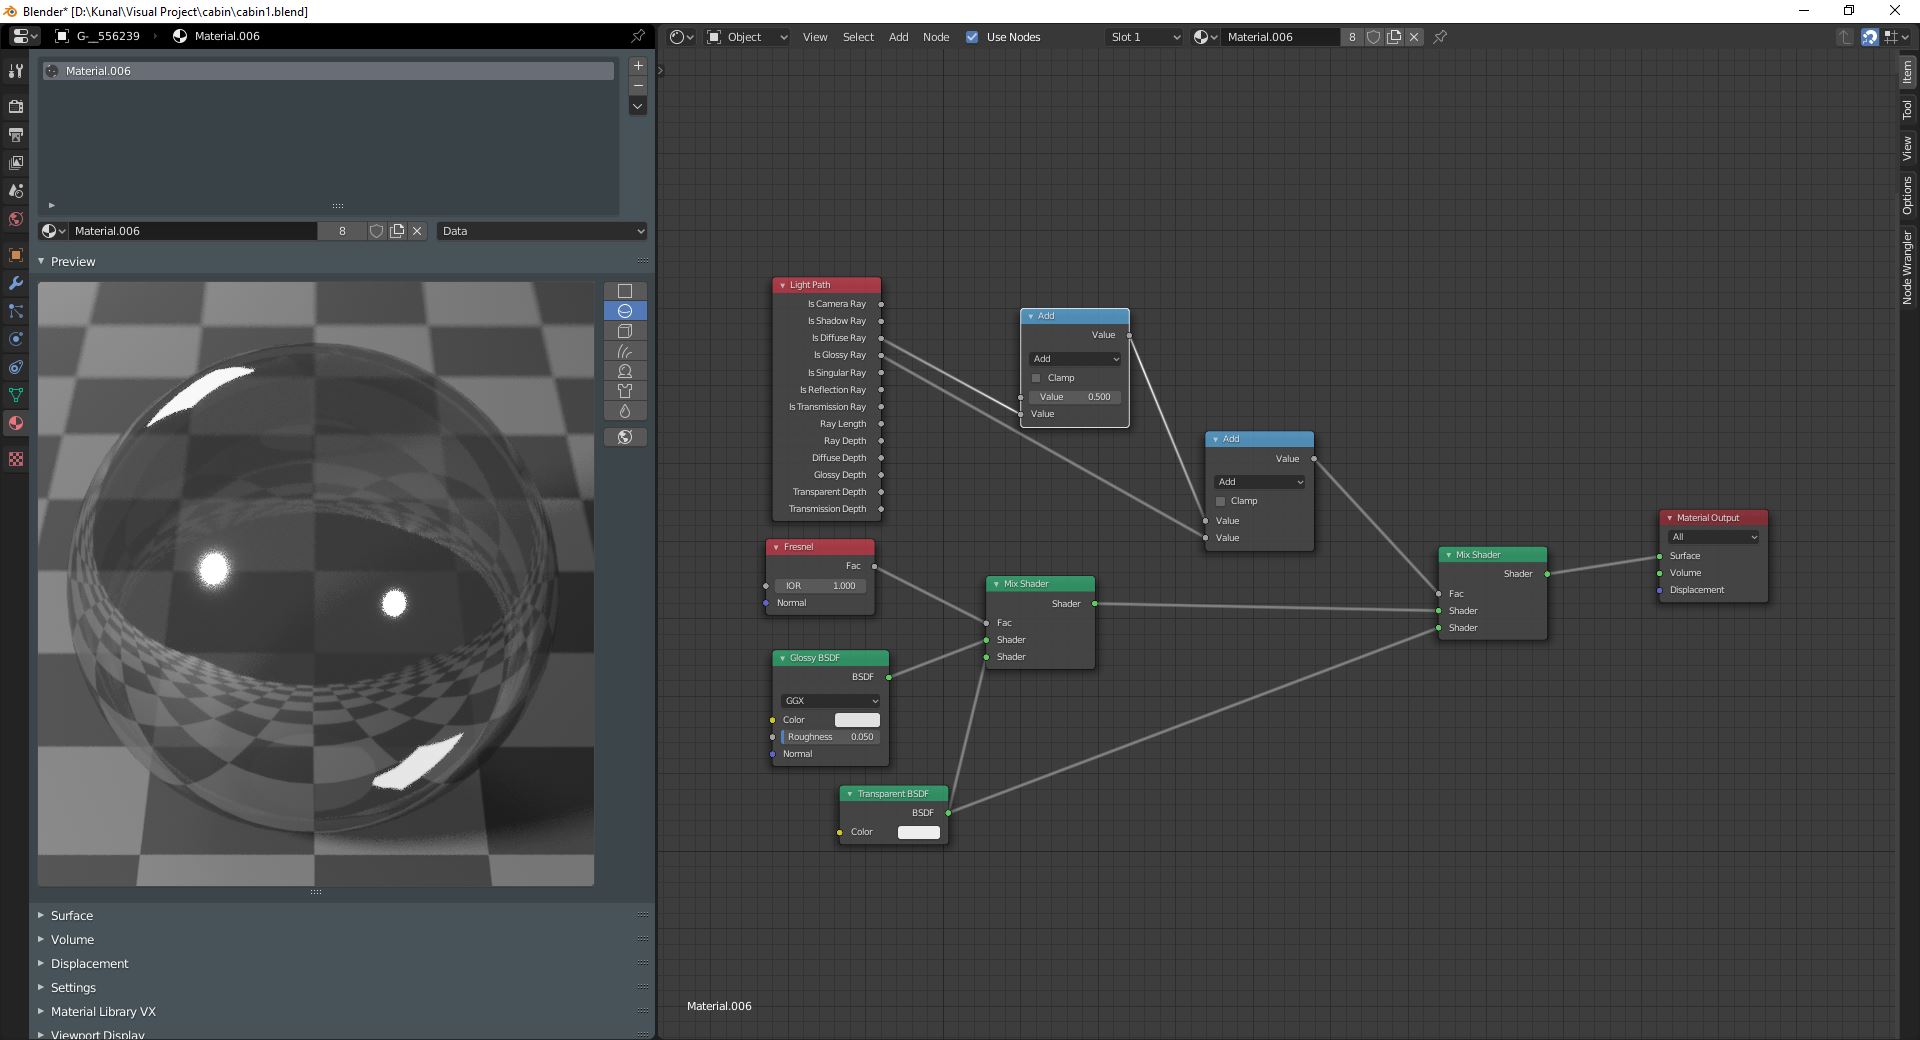
Glass Shader
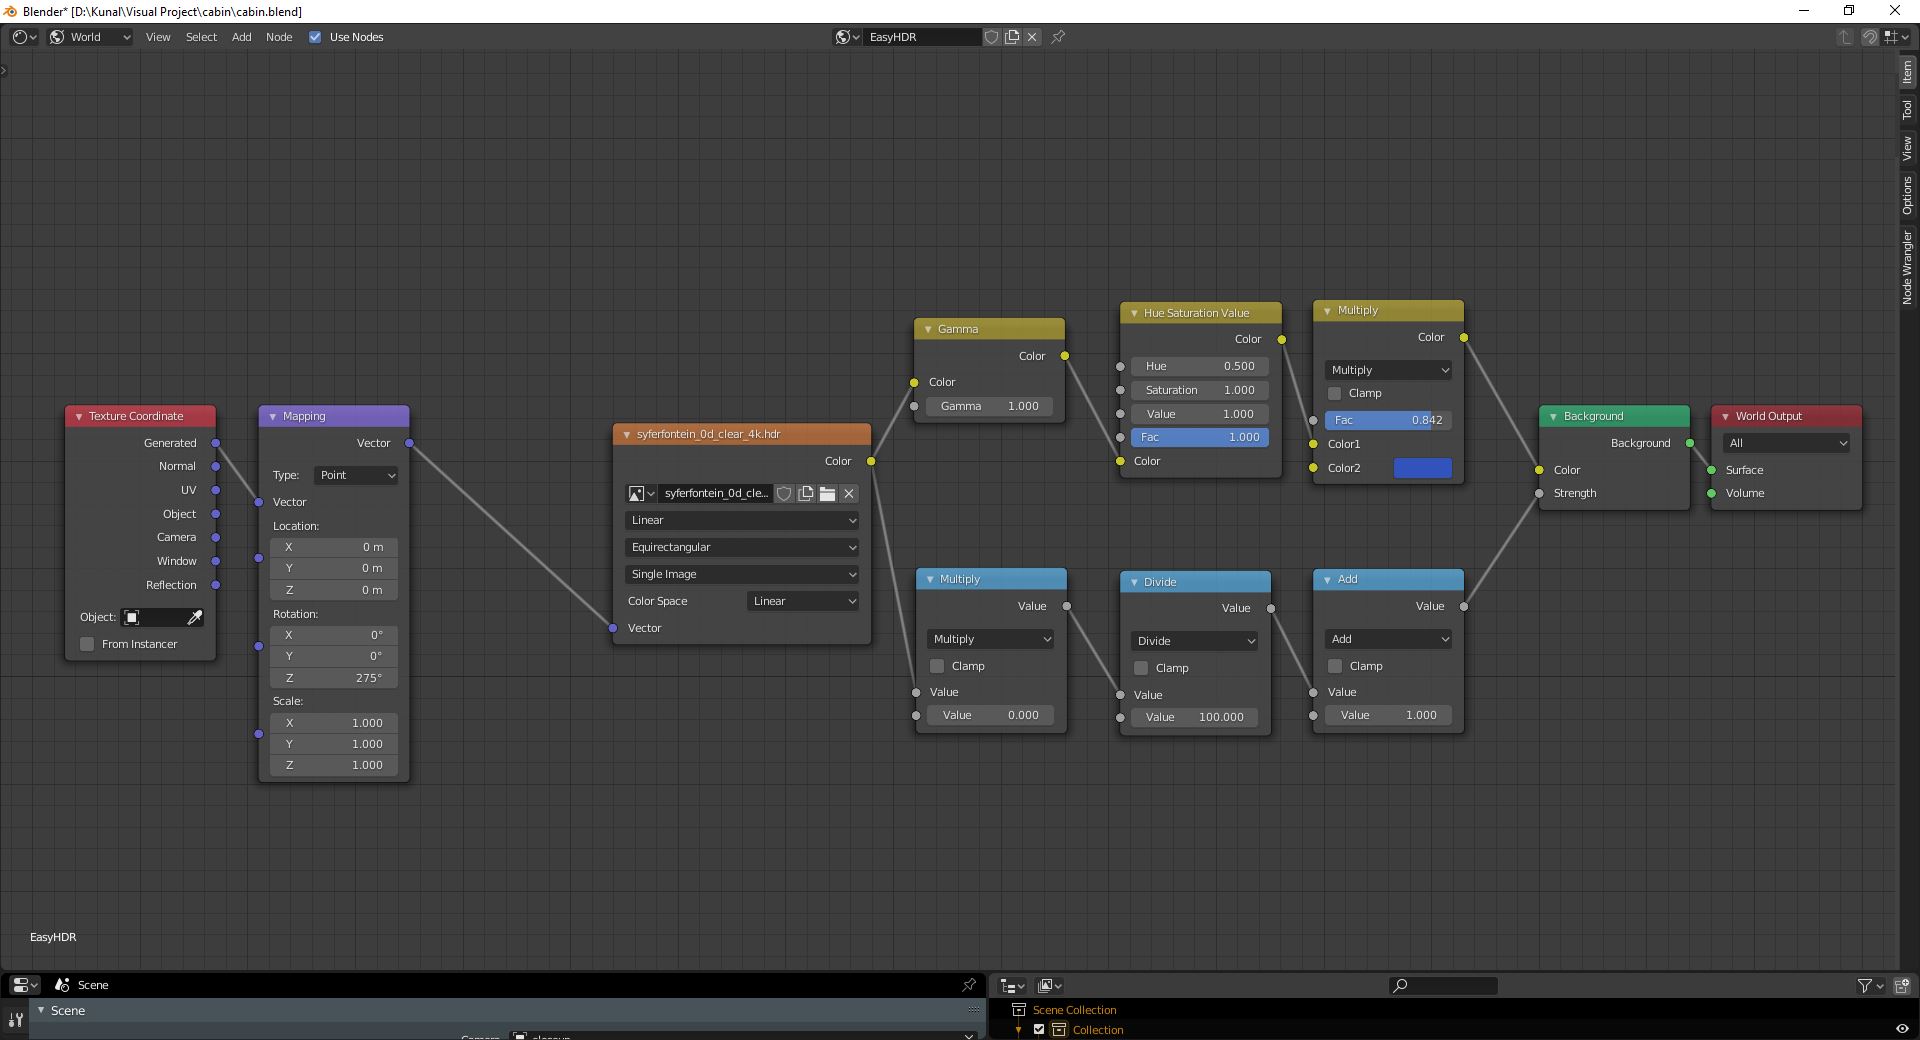
Lighting
Then came the lighting part. I already had a lighting reference but I wanted to try some more. For the HDRI setup, I used the EASY HDRI addon, which makes the HDRI setup rather easy, and tried different lighting moods. The mood that I wanted to create was warm, cozy, and a bit dreamy. While testing different HDRI maps I found one that was of a sunset; I reduced the sky brightness, added a mix RGB node to the HDRI map, and added a shade of blue to give an overall blue light while the interior light would give a warm ambient light.
Test Renders


These are some of the test renders to test different moods.
Final Renders


I thank the BlenderNation team.
You can check our other work on our Instagram
About the Author
 Kunal Bhoge, Architect and a 3D artist at MadMax Visual Design lab. Based in India.
7 Comments
This looks really nice , i especially like the daytime one because of the shadows it's giving into the scene which makes it look so real
thank you :)
i think the scale of the Carpet and the wood floor looks too big for the scene though
I think the architect is really blessed and I hope he gets due credit for the brilliant job he does.
great!
thank you
Man your image is so peaceful and cozy, I would love to live there !!
Amazing work