
Behind the Scenes: Amber Bust
About
Hi, I’m Rose, I’m an 18-year-old German artist with a love for 2D and 3D character art.
I’ve been drawing and painting all my life and started learning Blender at the very end of 2017.
[sponsor id=’qarnot’]
Inspiration
I made this model just after finishing with Smaugust 2020, during which I made daily dragons for a month. I really wanted to stretch my sculpting muscles and make a human character. So I decided to go with Amber. She’s a character I’ve drawn a few times in the past but never quite gotten right and really wanted to experiment with.
It was also an opportunity to experiment with curly hair and a strong facial expression, two things I don’t find in stylized character sculps very often.

The style for the model is inspired by Disney, as well as some artists I follow like Nazar Noschenko, Danny Mac, and Julien Kaspar.
The entire character is sculpted, painted, and rendered in Blender. I made a timelapse of the entire process here:
Sculpting
I start my sculpt with separate objects for different parts of the model (head, neck, torso, ears, and later hair) and use the snake hook, clay strips, crease, and smooth brushes to block out the basic shapes, occasionally remeshing to add more resolution for sharp edges and creases to create the shapes of the face and facial features. Once the general shapes of the face are in place, I add the eyeballs as separate objects and start adding smaller details like lips and eyelids. At this point, the planes and lines are very exaggerated.

For the hair, I turn on dynamic topology, which allows the longer shapes and curls to be easily pulled out and shaped with the snake hook tool.
At this point, I decided to have her smile. I use the snake hook brush to pull up the corners of the mouth and her eyes, and shape out the cheeks with the clay strips and crease brush.
From there I start detailing, using primarily the crease and smooth brush to sharpen and soften shapes. As I add smaller details, I remesh to increase the resolution.
Eyebrows, eyelashes, piercings, teeth, and the top are modeled as separate objects with Solidify modifiers, which I later apply to add more detail.
For the hair, I use the clay strips brush to block out the strands and then use the crease brush to add sharper edges to create the stylized look I’m going for. The short hair on the side is made using the mask extract tool.

Painting
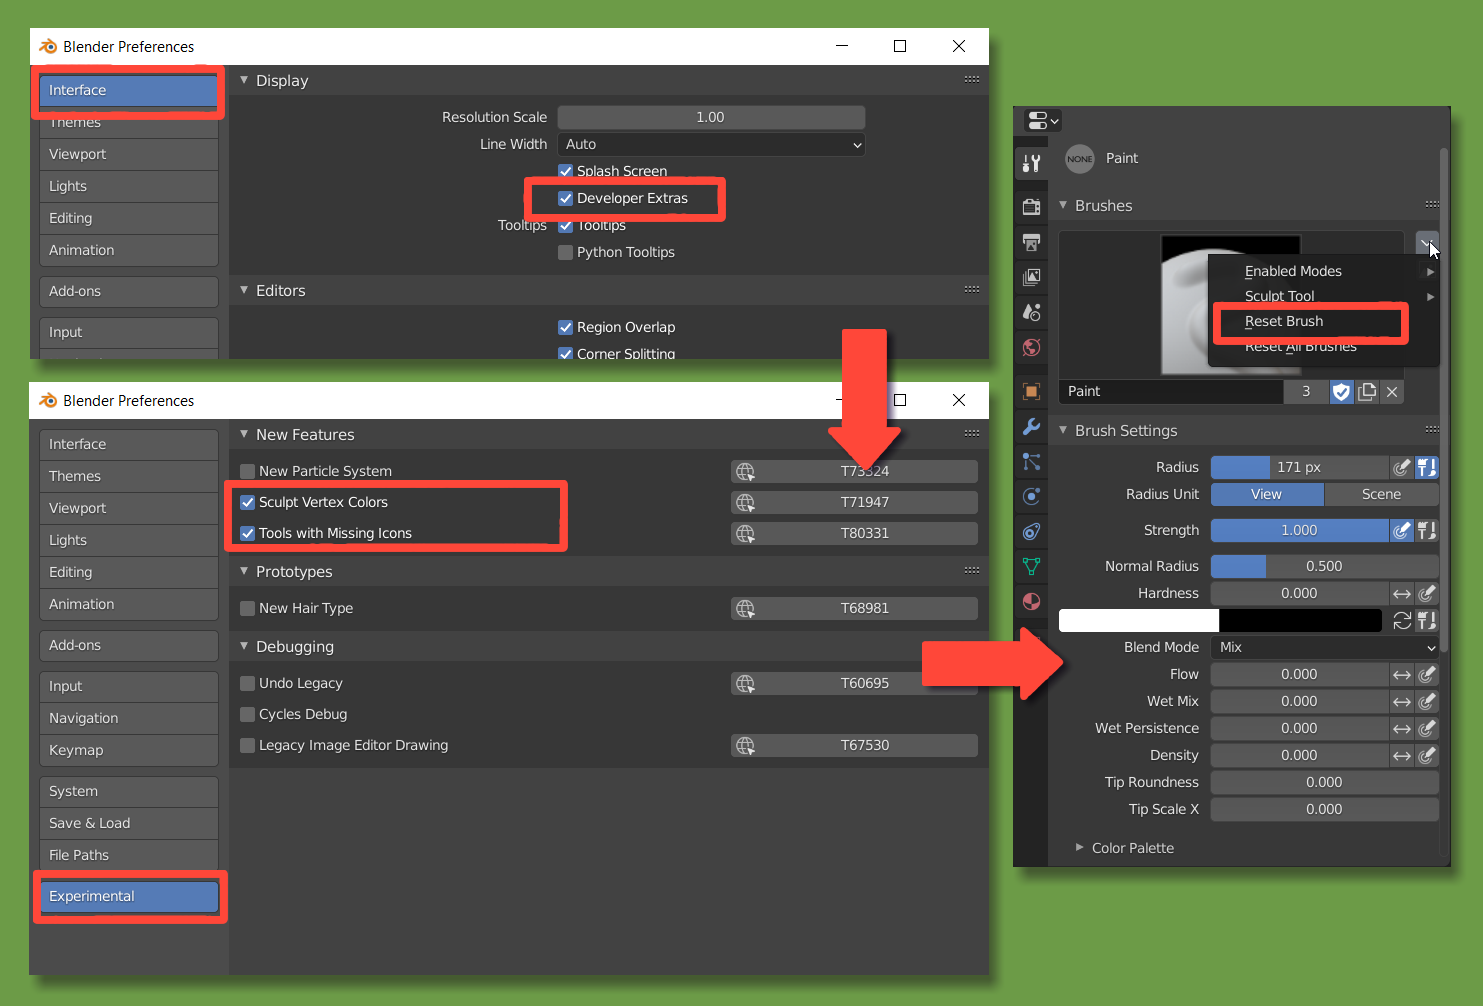
The sculpt is painted entirely using the new Sculpt mode vertex paint features. They are currently a bit hidden in the 2.91 alpha.
To access them, turn on developer options in preferences and activate “sculpt vertex colors” and “tools with missing icons” in the experimental tab.
The tools will then show up in sculpt mode. You might have to reset the brushes to make them work.
Now onto the painting itself:
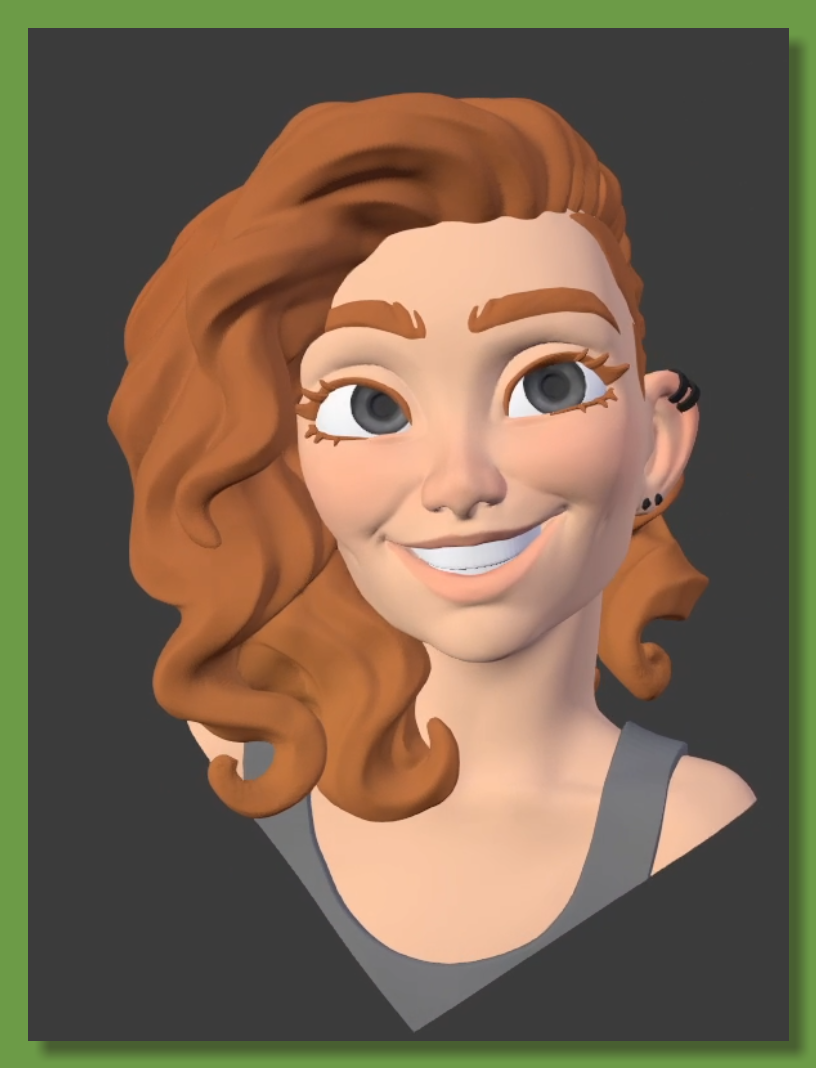
Face
I start by adding flat colors, then add some red to the cheeks and nose.
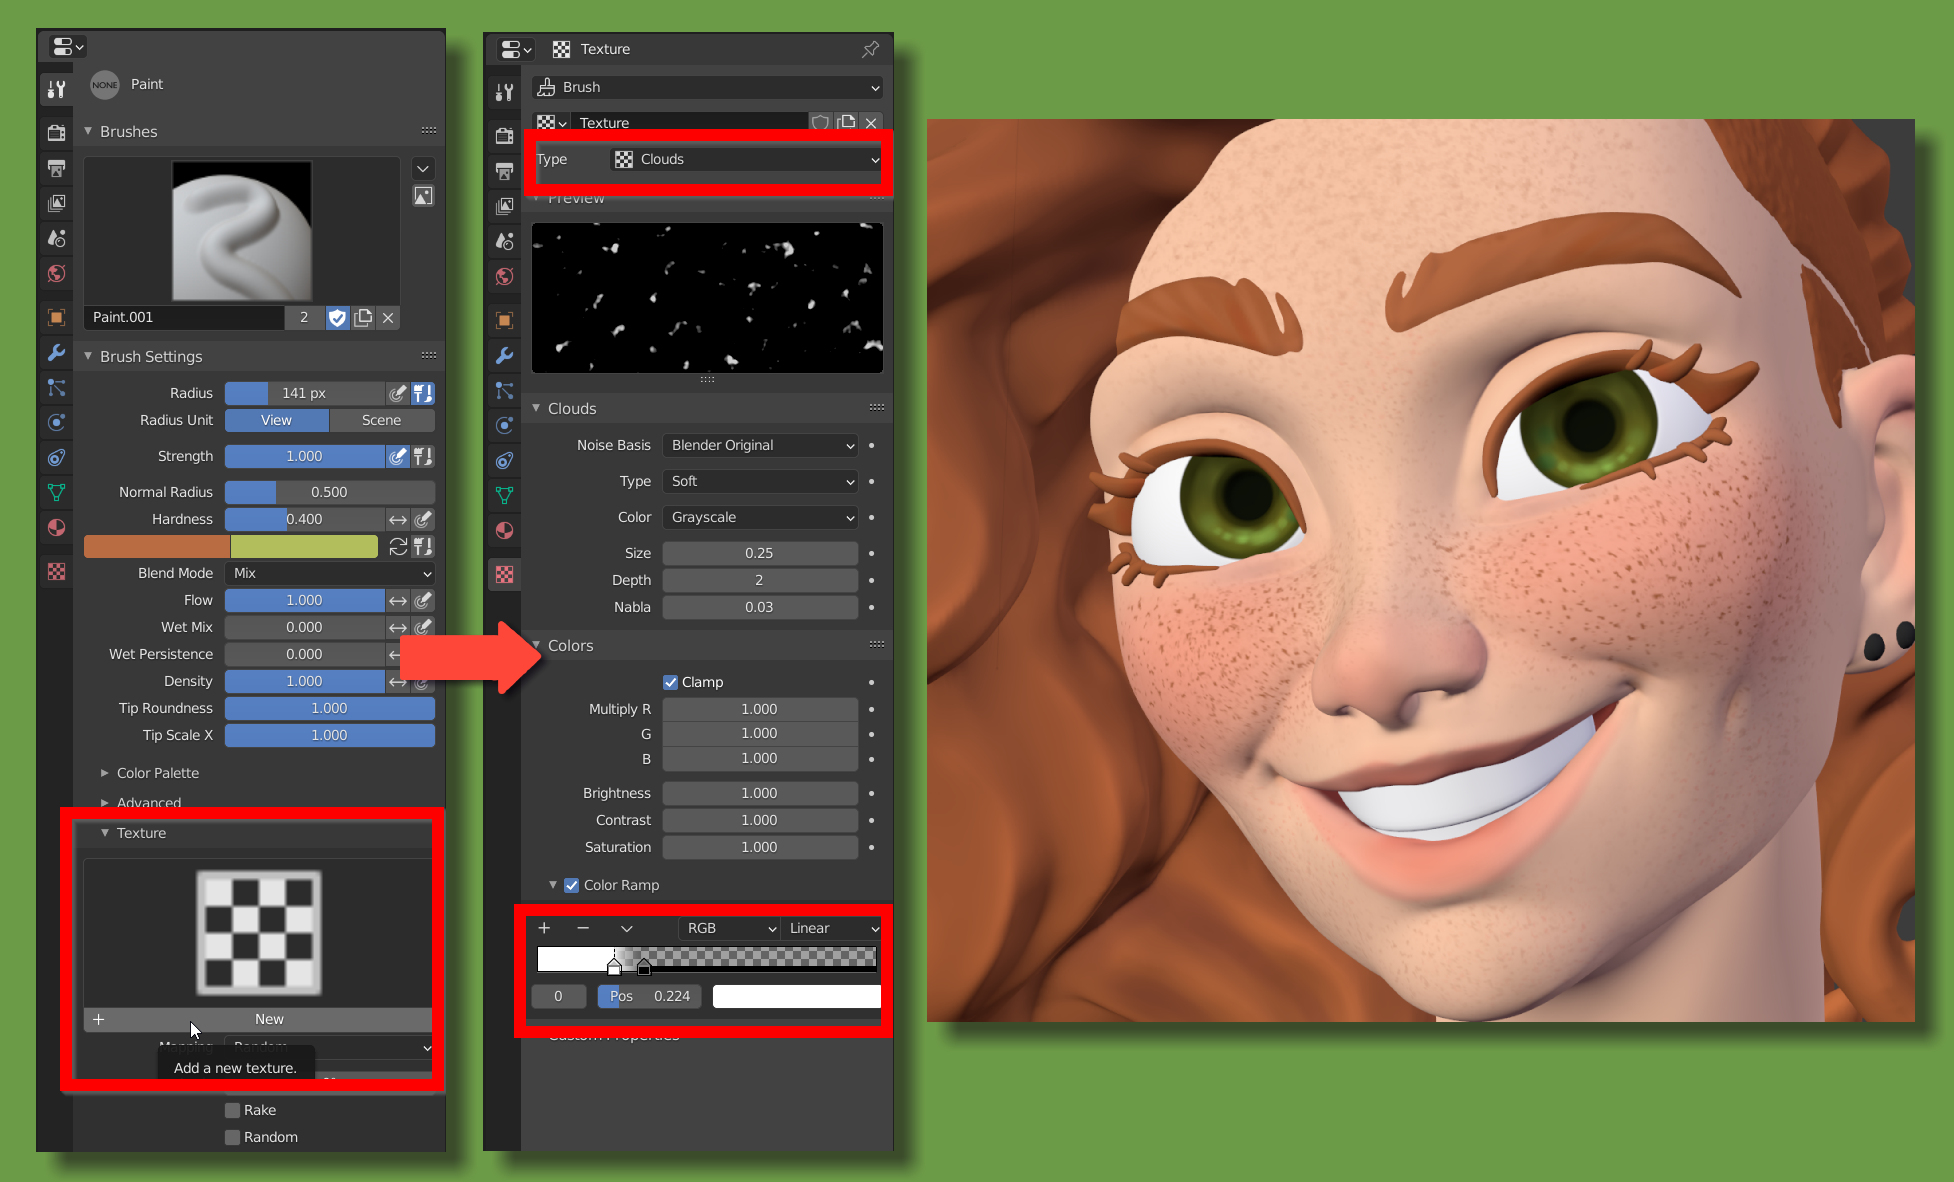
Freckles
For the freckles, I add a cloud texture to the paintbrush.
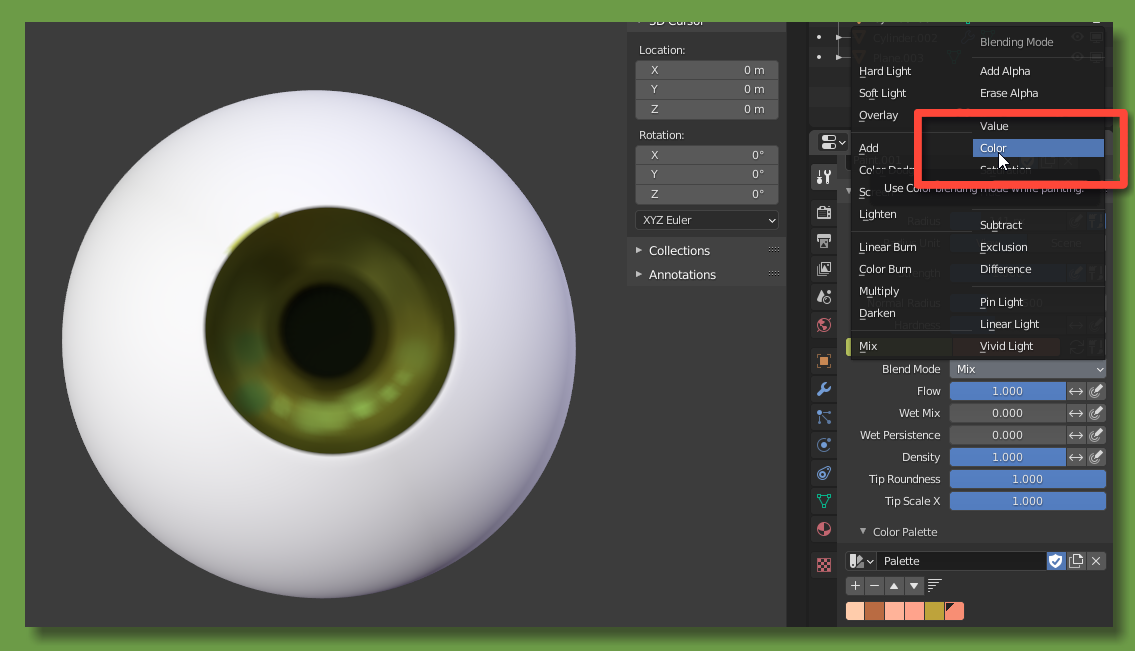
Eyes
I already painted the eyes in grayscale because it helps me get a better feel of the face. Rather than start over with color I just set the blend mode to Color and add green, then switch back to Mix for some highlights.
Hair
To highlight the edges of the hair I use the dirty mask and color filters.
1. Go to mask > Dirty Mask (you might have to click it twice to get the mask right).

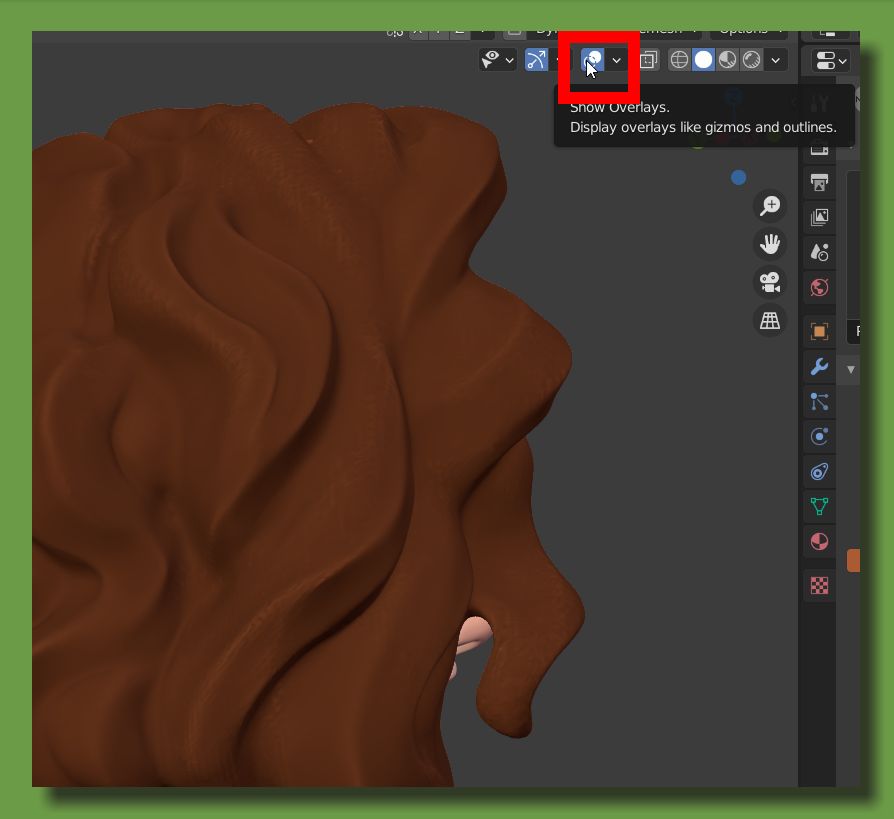
2.Turn off overlays to make the mask invisible temporarily.
3.Use the color filter set to Value to highlight the edges based on the mask.
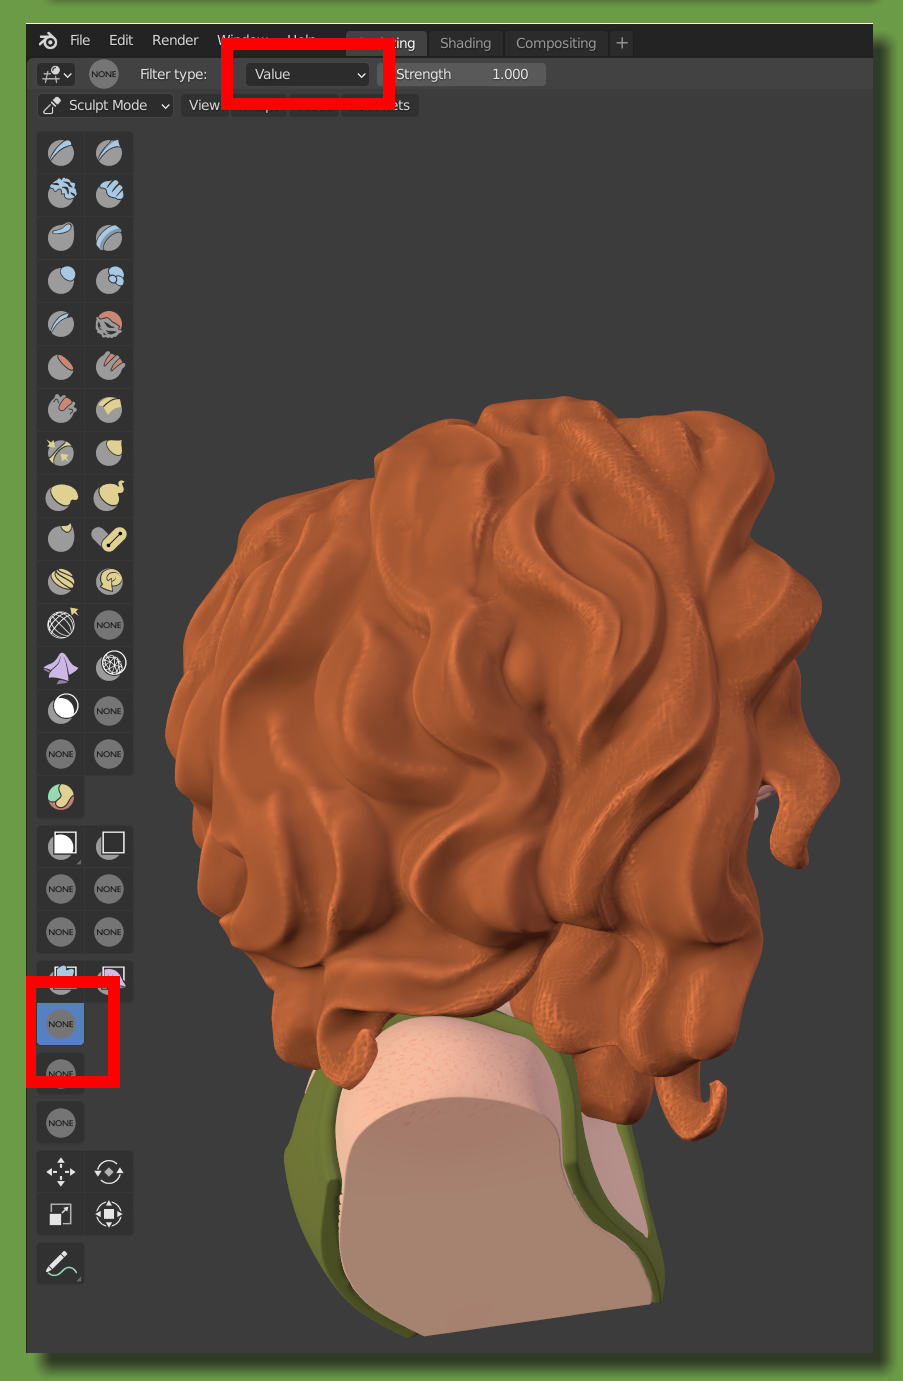
4.Then clear the mask with Alt+M and set the color filter to smooth to smooth out the highlights. (Don’t forget to turn the overlays back on.)

Lighting and render
The lights are just a basic 3 point lighting setup, with an HDRI for the fill light, a point light for the key light and 2 sun lights for backlight. The background is a simple black plane with a gradient texture.
The material is just a principled BSDF with the vertex color as color, high roughness, and a little bit of SSS.
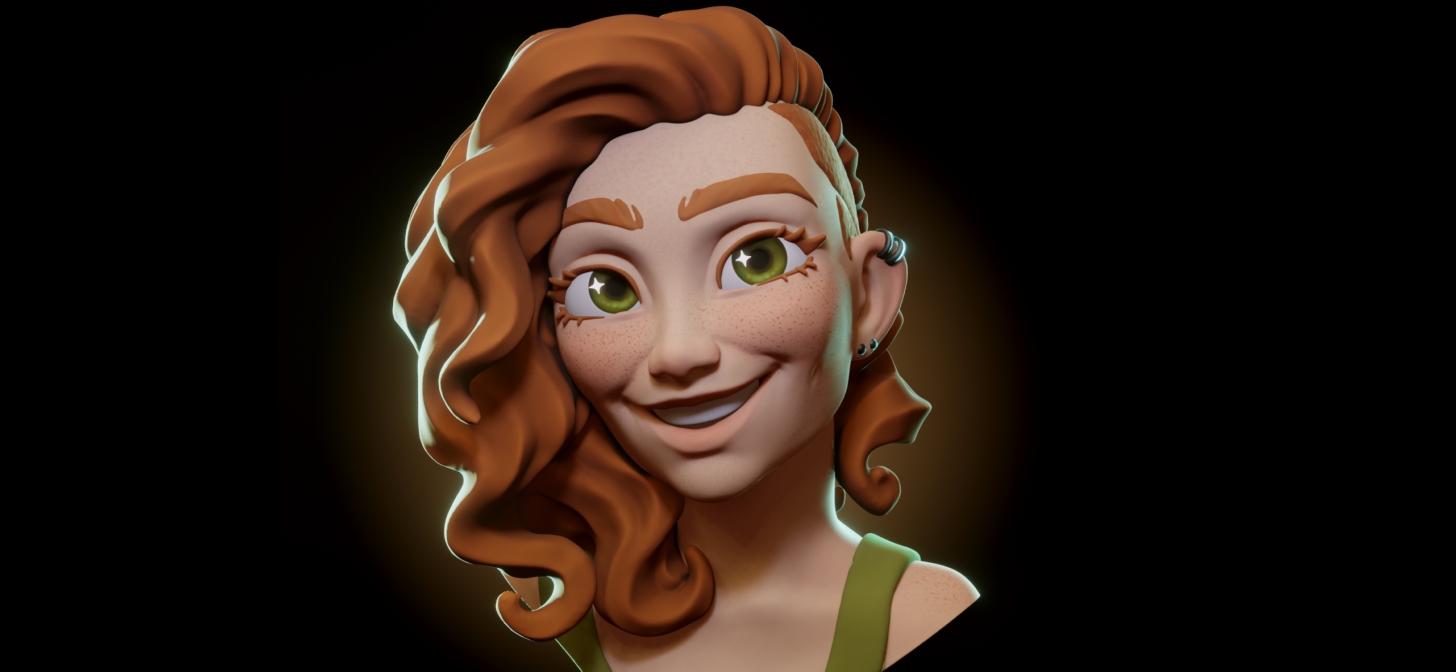
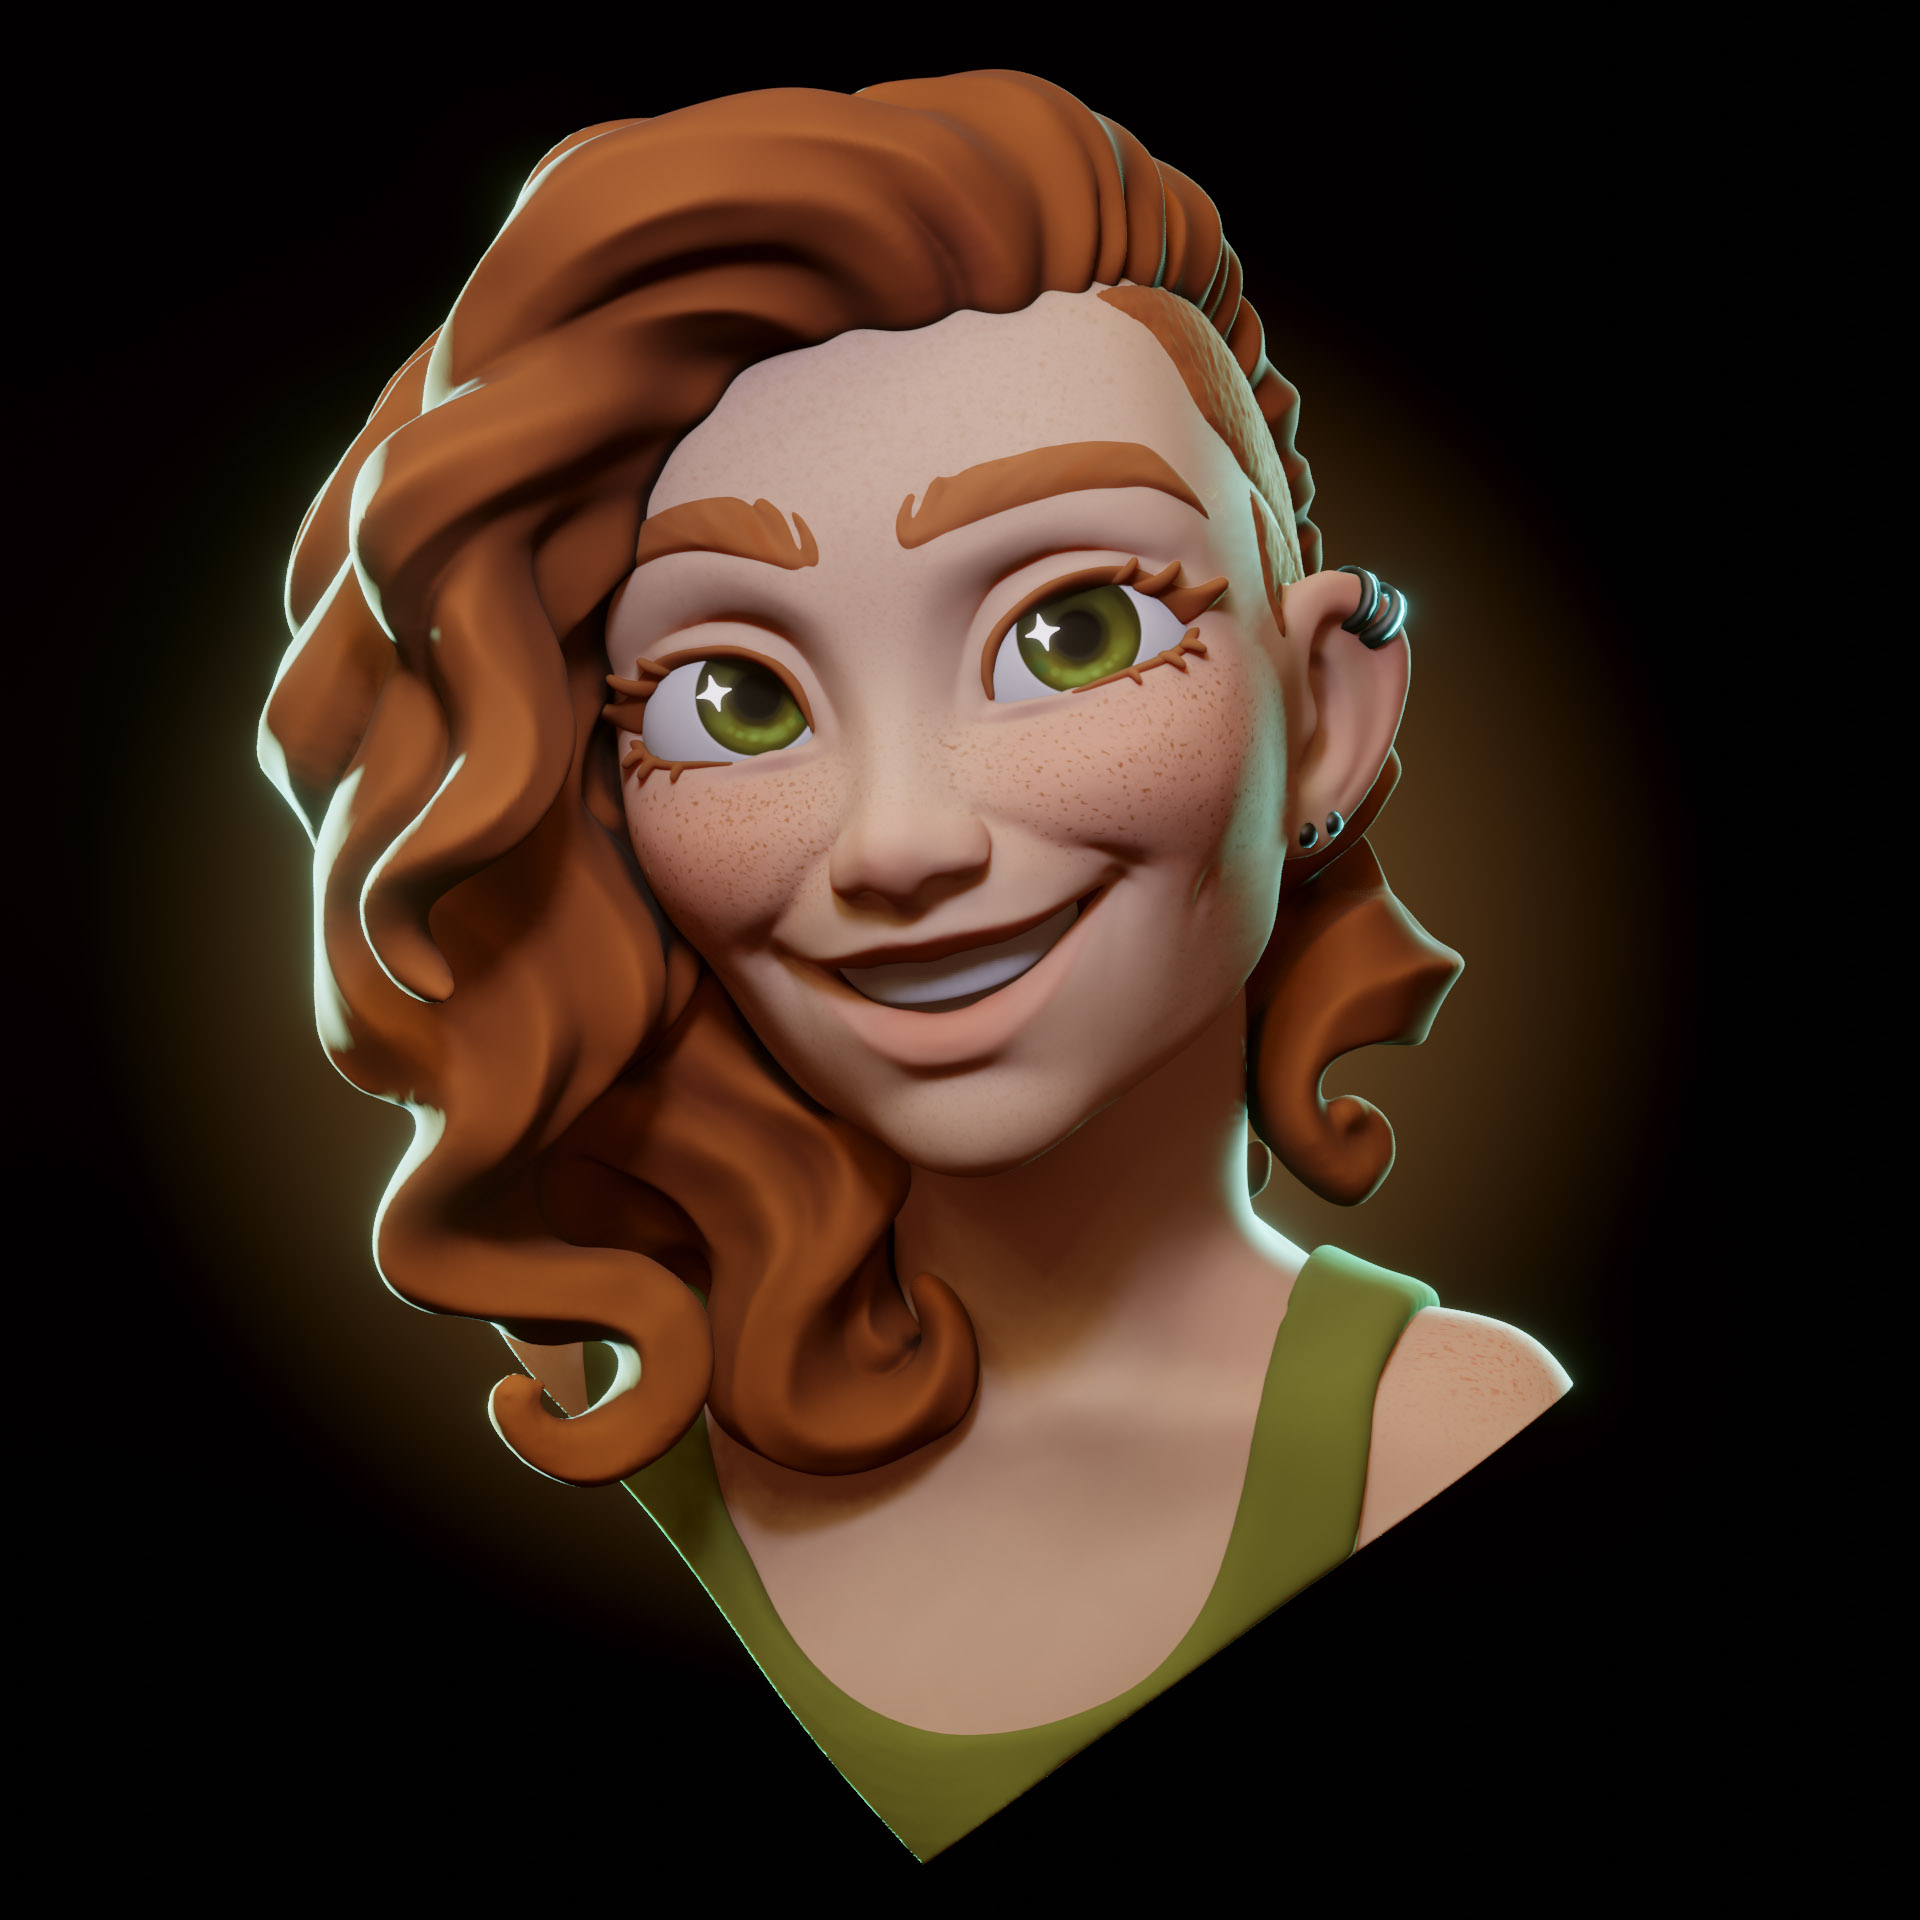
And as a finishing touch, I model little emissive stars for the eyes, which add a bit more character than real reflections, and they work well with the overall stylization.
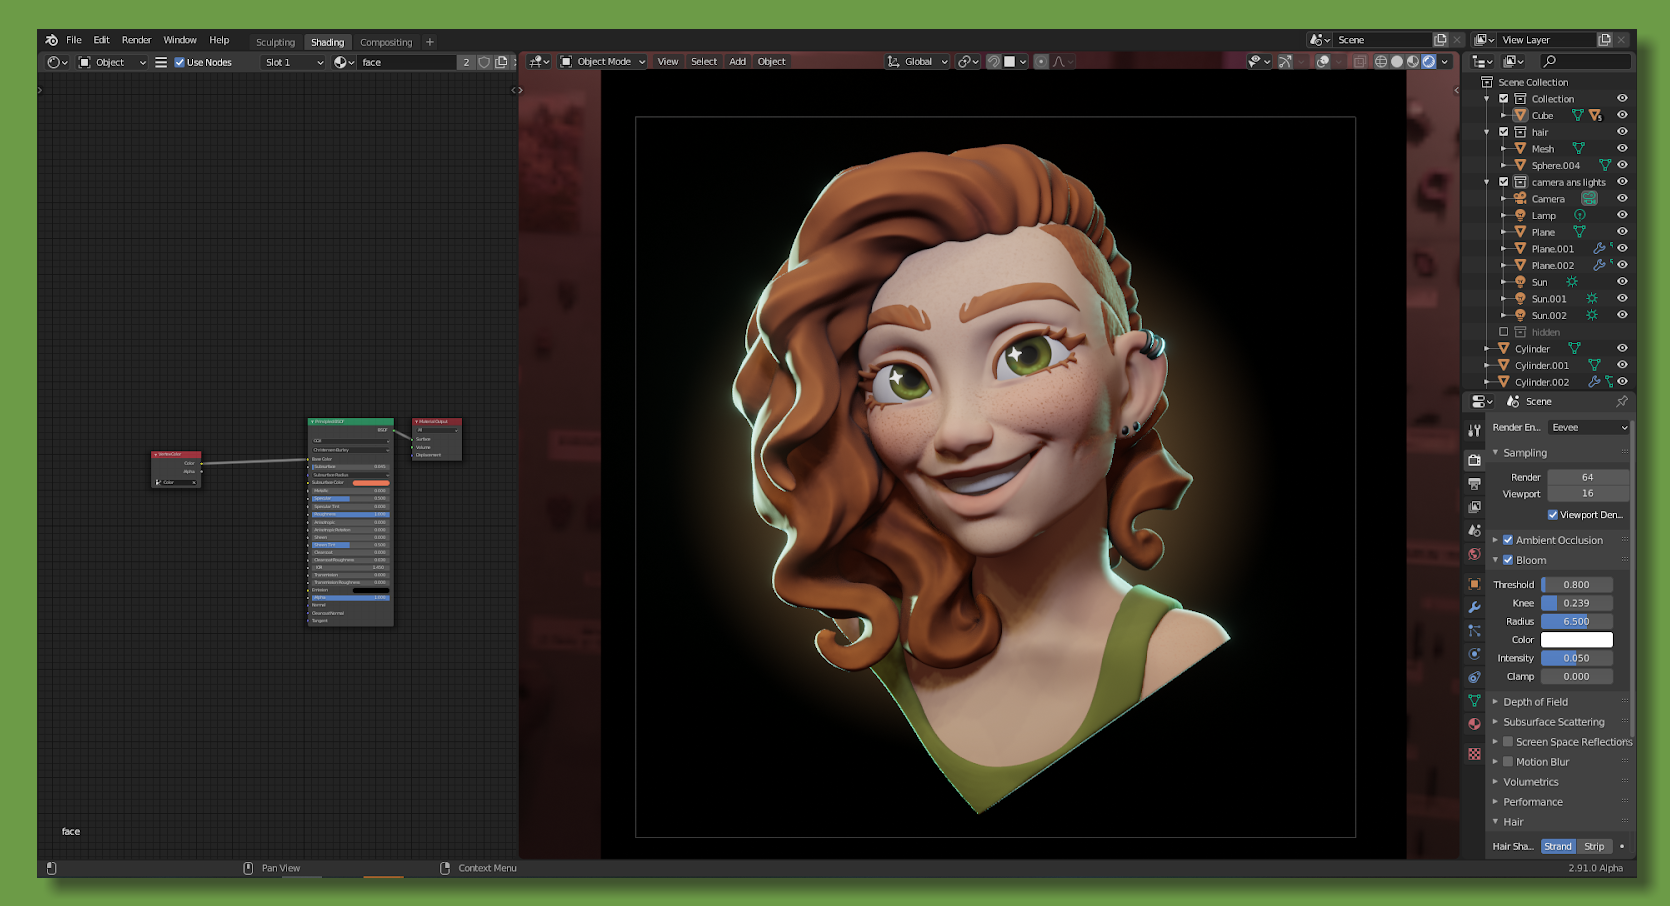
All the rendering was done in EEVEE.
And here’s the finished bust:
About the Author
 RoseRedTiger, I make art stuff


